EXT. FOREST - NIGHT
A simple enough slug line, and fairly common, but amongst the most challenging for a cinematographer. In this article I’ll break down into five manageable steps my process of lighting woodlands at night.
1. Set up the moon.
 Forests typically have no artificial illumination, except perhaps practical torches carried by the cast. This means that the DP will primarily be simulating moonlight.
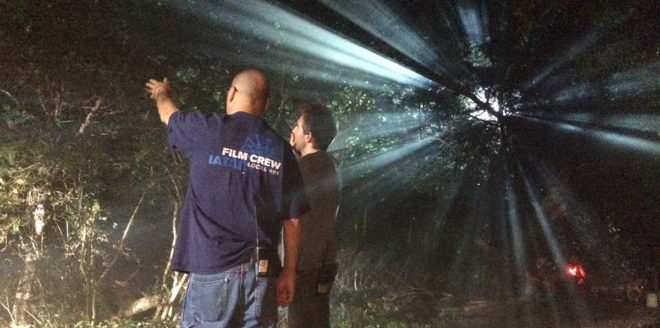
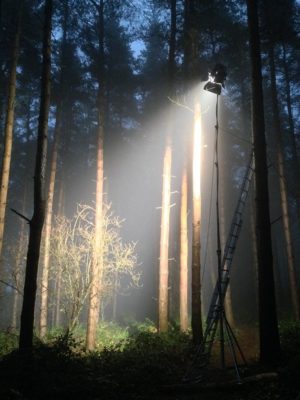
Your “moon” should usually be the largest HMI that your production can afford, as high up and far away as you can get it. (If your production can’t afford an HMI, I would advise against attempting night exteriors in a forest.) Ideally this would be a 12K or 18K on a cherry-picker, but in low-budget land you’re more likely to be dealing with a 2.5K on a triple wind-up stand.
Why is height important? Firstly, it’s more realistic. Real moonlight rarely comes from 15ft off the ground! Secondly, it’s hard to keep the lamp out of shot when you’re shooting towards it. A stand might seem quite tall when you’re right next to it, but as soon as you put it far away, it comes into shot quite easily. If you can use the terrain to give your HMI extra height, or acquire scaffolding or some other means of safely raising your light up, you’ll save yourself a lot of headaches.
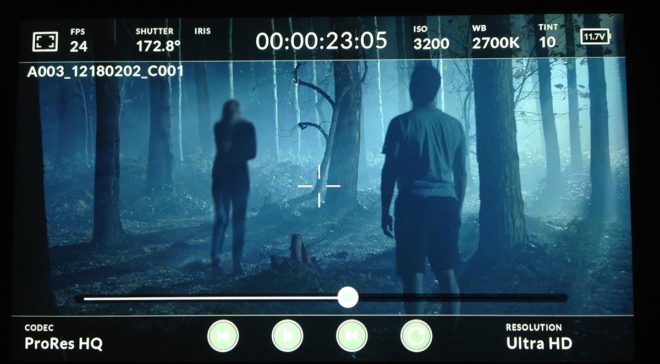
The size of the HMI is of course going to determine how large an area you can light to a sufficient exposure to record a noise-free image. Using a good low-light camera is going to help you out here. I shot a couple of recent forest night scenes on a Blackmagic Pocket Cinema Camera, which has dual native ISOs, the higher being 3200. Combined with a Speedbooster, this camera required only 1 or 2 foot-candles of illuminance, meaning that our 2.5K HMI could be a good 150 feet away from the action. (See also: “How Big a Light do I Need?”)
2. Plan for the reverse.
A fake moon looks great as a backlight, but what happens when it comes time to shoot the reverse? Often the schedule is too tight to move the HMI all the way around to the other side, particularly if it’s rigged up high, so you may need to embrace it as frontlight.
Frontlight is generally flat and undesirable, but it can be interesting when it’s broken up with shadows, and that’s exactly what the trees of a forest will do. Sometimes the pattern of light and dark is so strong and camouflaging that it can be hard to pick out your subject until they move. One day I intend to try this effect in a horror film as a way of concealing a monster.
One thing to look out for with frontlight is unwanted shadows, i.e. those of the camera and boom. Again, the higher up your HMI is, the less of an issue this will be.
If you can afford it, a second HMI set up in the opposite direction is an ideal way to maintain backlight; just pan one off and strike up the other. I’ve known directors to complain that this breaks continuity, but arguably it does the opposite. Frontlight and backlight look very different, especially when smoke is involved (and I’ll come to that in a minute). Isn’t it smoother to intercut two backlit shots than a backlit one and frontlit one? Ultimately it’s a matter of opinion.
3. Consider Ground lights.
One thing I’ve been experimenting with lately is ground lights. For this you need a forest that has at least a little undulation in its terrain. You set up lights directly on the ground, pointed towards camera but hidden from it behind mounds or ridges in the deep background.
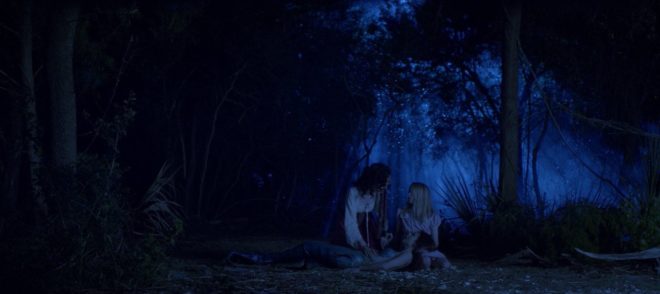
I once tried this with an HMI and it just looked weird, like there was a rave going on in the next field, but with soft lights it is much more effective. Try fluorescent tubes, long LED panels or even rows of festoon lights. When smoke catches them they create a beautiful glow in the background. Use a warm colour to suggest urban lighting in the distance, or leave it cold and it will pass unquestioned as ambience.
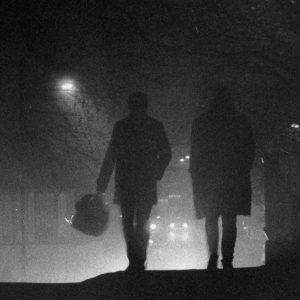
Put your cast in front of this ground glow and you will get some lovely silhouettes. Very effective silhouettes can also be captured in front of smoky shafts of hard light from your “moon”.
4. Fill in the faces.
All of the above looks great, but sooner or later the director is going to want to see the actors’ faces. Such is the cross a DP must bear.
On one recent project I relied on practical torches – sometimes bounced back to the cast with silver reflectors – or a soft LED ball on a boom pole, following the cast around.
Big-budget movies often rig some kind of soft toplight over the entire area they’re shooting in, but this requires a lot of prep time and money, and I expect it’s quite vulnerable to wind.
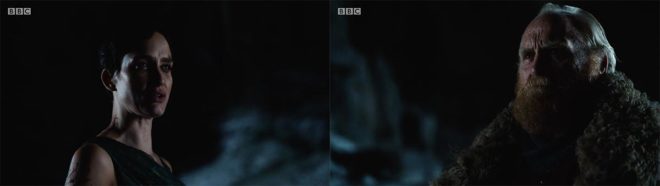
A recipe that I use a lot for all kinds of night exteriors is a hard backlight and a soft sidelight, both from the same side of camera. You don’t question where the sidelight is coming from when it’s from the same general direction as the “moon” backlight. In a forest you just have to be careful not to end up with very hot, bright trees near the sidelight, so have flags and nets at the ready.
5. Don’t forget the Smoke.
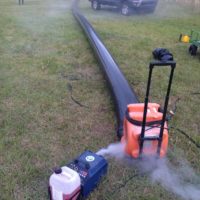
Finally, as I’ve already hinted, smoke is very important for a cinematic forest scene. The best options are a gas-powered smoke gun called an Artem or a “Tube of Death”. This latter is a plastic tube connected to a fan and an electric smoke machine. The fan forces smoke into the tube and out of little holes along its length, creating an even spread of smoke.
All smoke is highly suspectible to changes in the wind. An Artem is easier to pick up and move around when the wind changes, and it doesn’t require a power supply, but you will lose time waiting for it to heat up and for the smoke and gas canisters to be changed. Whichever one you pick though, the smoke will add a tremendous amount of depth and texture to the image.
Overall, nighttime forest work scenes may be challenging, but they offer some of the greatest opportunities for moody and creative lighting. Just don’t forget your thermals and your waterproofs!