On a pick-up shoot a couple of months back I found myself in the position of needing to mould the natural light without any equipment whatsoever. The sun was shining brightly with no clouds in sight, and we needed to shoot a close-up that would match an existing overcast wide shot. Fortunately there was a B&M just around the corner. Unfortunately no-one took any pictures of the ridiculous set-up that ensued, hence the comedy illustration.
Here’s how to do it:
Get yourself round to B&M. (Other depressing discount stores are available.)
The sheet is going to be your “silk”. First of all, cut the elastic corners to make it easier to wrangle.
Assign Unfortunate Crewmember #1 to hold up the sheet so that it casts a shadow on the talent. It will soften the direct sunlight falling on the them, but there will probably still be darker shadows on their face than you want, so…
Unroll a couple of feet of the foil. This is going to be your bounce card.
Assign Unfortunate Crewmember #2 to stand on the shade side of the talent and use the foil to reflect some direct sunlight into that side their face.
Hope that this is not the day the photographer from the local paper visits the set.
Whatever position you occupy on a film crew, you are always a storyteller. Everyone is working to build and enhance the narrative and emotional threads which will engage the audience.
Cinematography is certainly no exception, and on the recent shoot for Dave Cave’s dark fantasy Girl and a Scar, my task was to take the lighting of an interior location on a journey which mirrored that of the titular Girl (Ileana Cardy), starting from a place of heightened realism, building to a crescendo of crazy and then finally returning to normality. It was a great visual script, describing candelight, daylight seeping in through cracks in boarded-up windows, wind and lightning, so there was plenty to get my creative juices flowing.
Copyright 2013 One For All Productions and Yellow Fever Films
Above is the wide shot from the opening scene. I’ve used a classic cool/warm colour contrast between the moonlight and the candlelight. The windows of the house were supposed to be boarded up, so the barn doors of the 650W tungsten fresnel (gelled with full CTB) off camera right are fairly narrow to create the streak of light on the back wall. A second blue-gelled 650W fresnel is behind the frosted door on the left, providing a bit of depth and suggesting another window or hole in the roof.
The candlelight is provided by an orange-gelled 300W fresnel hidden behind the corner of the fireplace to the left of screen. The difficulty with candlelight is always matching the angle the light should be coming from, and in particular hiding the shadow of the candle itself, which in reality would not exist. We solved the problem in this instance by splattering dark wax over the shadow on the top of the cabinet. A dimmer was used to flicker the 300W appropriately.
Copyright 2013 One For All Productions and Yellow Fever Films
Above is the third interior scene, and one of my favourite shots in the film. To kick up the stylisation a notch I’ve used flags to make the streak of light on the back wall a little harder-edged.
This shot is a good example of how effective side lighting can be. There are no light sources on the camera side of the subject at all; it’s all coming on from the side and slightly behind, leaving the camera side of her in darkness. We call this dark side of a subject the “down side”, and it’s always more interesting to have this side be the one facing camera.
Copyright 2013 One For All Productions and Yellow Fever Films
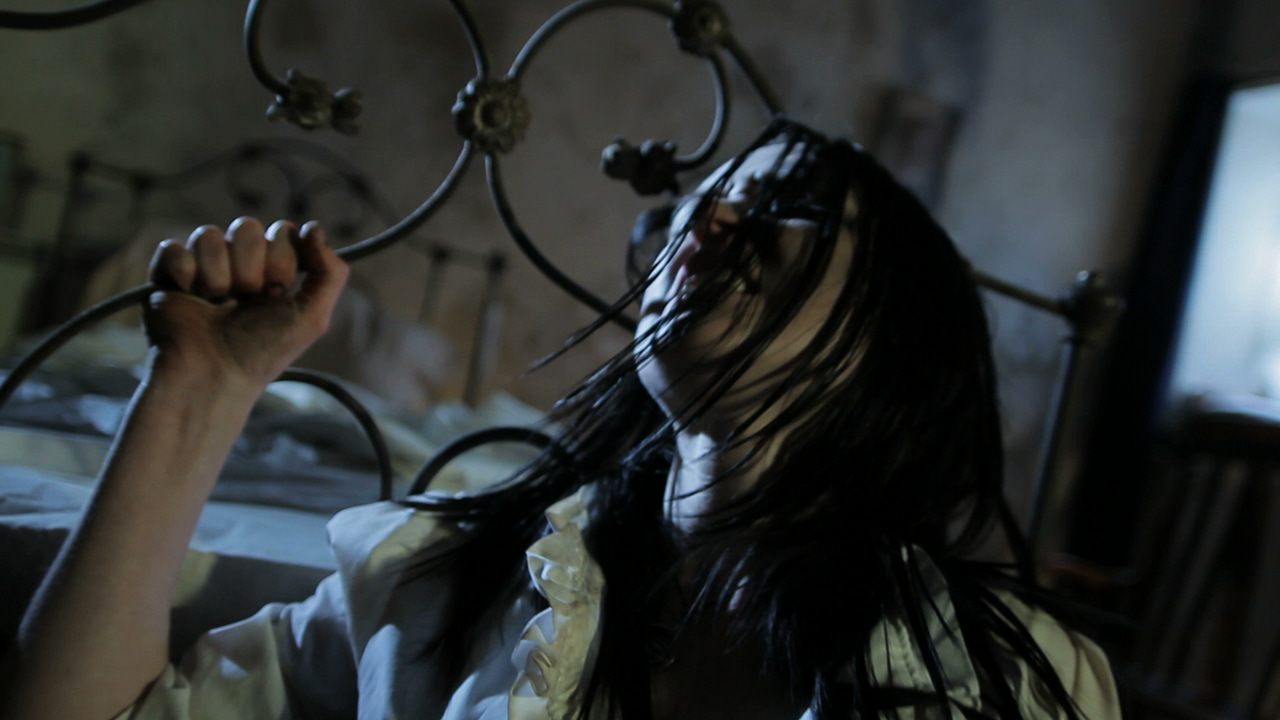
Above is the scene which represents the height of weirdness in the story. There are two things I’ve done to make the lighting more stylised. Firstly I’ve introduced some green light, motivated by an off-screen doorway. This combines with the make-up and a fantastic performance from the actress to enhance the character’s sickness. Secondly I’ve adjusted the blue-gelled 650W fresnel that was behind the frosted door in the first scene. It’s no longer bouncing off the wall in that back room – instead it’s pointed directly at the talent with the door now open. This creates a strong, steely backlight. Combined with a dutched handheld camera, the overall effect is suitably unsettling.
Copyright 2013 One For All Productions and Yellow Fever Films
The scene ends with the curtains of the room’s main window opening to bathe the Girl in light as she comes out of the other side of her dark journey. To enhance the natural light that would come in when the curtains were opened, I bounced a fresnel off the ceiling and ran it through a dimmer board so it could be faded up as the curtains parted. Another 650W was placed outside the window, positioned exactly behind the talent’s head to give her a halo of light and create lens flares when she moved her head to reveal the light. (The lamp itself can’t be made out on camera because it’s so bright.)
So that’s an example of how cinematography can serve narrative and character. How have you used light to tell the story?