Behind-the-Scenes Shooting Tips

Regular readers may (but probably won’t) remember that almost a year ago I interviewed indie filmmaker Kate Madison as part of a documentary I planned to make under the working title of “Living in a Fantasy World”. I should have realised that shooting a doc about people trying to make incredibly ambitious fantasy films on shoestring budgets was going to be a long, slow process, but I didn’t think it would be eleven months before I did my next bit of filming.
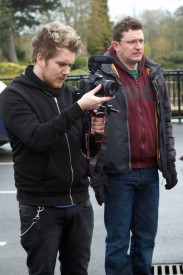
Brett Chapman shoots B roll on Stop/Eject as Hadrian Cawthorne looks on. Photo: Paul Bednall

Yesterday I went up to Manchester to document the first day of shooting on Dan Rowbottom’s Dark Crystal-esque fantasy adventure Raven Waiting. In due course I will be sharing some of this footage with you, but today I want to share my thoughts on behind-the-scenes, or “B roll”, filming. Here are my top tips:

  1. Pace yourself. It’s tempting to film non-stop in the morning, generating far more shots of people unpacking equipment than the editor will ever need, and to neglect things later in the day. Try to cover the whole day evenly.
  2. Don’t get in the way and don’t film people if they ask you not to, but don’t be afraid to record the difficult conversations when things start to go pear-shaped.
  3. Like anyone crewing, remember your on-set etiquette. Say “crossing” when you pass in front of the A camera, and when it’s rolling stay silent, don’t cast shadows and don’t distract the talent.
  4. Remember that although you have a job to do, so does the main unit and theirs is much more important. Help them if they need it.
  5. Think about what people have said or might say in the interviews and capture appropriate shots for the editor to paste over these.
  6. If you can’t find a good angle to shoot from, don’t bother. There will be plenty of opportunities later in the day.
  7. Unless something particularly interesting is happening, ten seconds is long enough to hold a shot for. Don’t shoot long conversations unless you’re miking them properly; they won’t be useable.
  8. Pack fast lenses, f1.8 at least. Film sets are incredibly dark away from the lit area.
  9. Remember to cover the action away from the set – hair, make-up and wardrobe.
  10. Here are some shots you definitely shouldn’t go home without: the clapperboard clapping; the director calling “cut” and “action”; a cutaway of the camera being operated; the director pointing/looking thoughtfully at the monitor/giving an actor notes or otherwise demonstrably directing; actors preparing or mucking around between takes; an establishing shot of the location.
Behind-the-Scenes Shooting Tips

Converting 24P Cine Mode Footage to 25fps

This is a pretty esoteric post, I’ll warn you now.

Some of the Stop/Eject behind-the-scenes footage was shot on a Canon camcorder set to “24P Cinema Mode”. It took me ages to figure out how to convert this material to 25 frames per second without the motion becoming very jerky. So I’m going to set down how I eventually did it, in case it can help any other poor souls in the same situation. I was working on an iMac with Lion and FCP Studio 7.

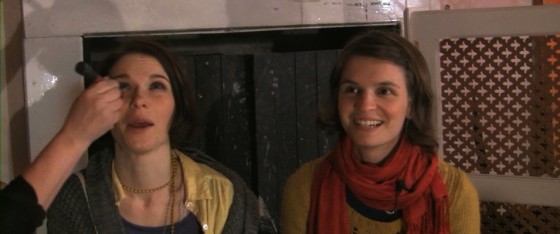
The 24P footage I converted includes a dual interview with Kate (Georgina Sherrington) and Copy-Kate (Katie Lake).
The 24P footage I converted includes a dual interview with Kate (Georgina Sherrington) and Copy-Kate (Katie Lake), shot by Laura Iles and Kurt Baker.

What is 24P Cinema Mode? It’s aimed at American users, and emulates how “real” movies look when they’re broadcast on US TV. Real movies are shot at 24fps and telecined to 30fps (actually 29.97fps, but we’ll say 30 for simplicity’s sake) which is the standard frame-rate of American TVs, DVD players and so on. 24P Cinema Mode captures 24 frames per second and converts them, as the camera is recording, to 30fps. It essentially does this by duplicating every fifth frame and using interlacing to smooth out the motion. This is known as 2:3 pulldown. More expensive cameras embed metadata in their 2:3 pulldown footage so that software like Final Cut Pro can automatically restore it to genuine 24fps, but the material I was working with had no such metadata. I believe it was shot on a Canon Vixia HF10 or similar.

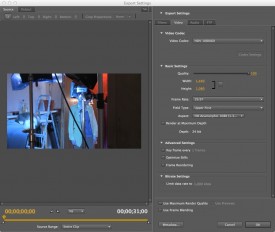
Step 1: Converting to 1080i60 Quicktimes using Adobe Media Encoder

The other problem I had with the footage in question was its format: AVCHD (identified by a .MTS file extension), which Macs don’t really like. Final Cut Pro will convert them via the Log and Transfer window, but only if they’re on an SD card or a disc image of an SD card. But I’d been given the footage on a data DVD, and copying it to an SD card did not fool Final Cut. After much trawling of the magical interweb and trying various free applications that didn’t work very well, I discovered that Adobe Media Encoder accepts MTS files. (If you don’t have the Adobe suite, you can buy an application called VoltaicHD that will apparently do the job.)

So here are the three transcoding stages I went through to convert the material into editable 1080P25:

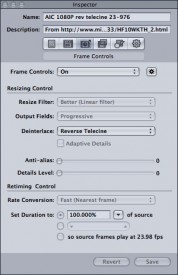
Step 2: reversing the telecine effect using Compressor
  1. I used Adobe Media Encoder to convert the source files to Quicktimes. I chose the HDV 1080i60 codec and retained the interlacing, field order (upper first), frame size (1440×1080 anamorphic) and frame rate (29.97fps) of the original material.
  2. I followed the method on this web page using Apple Compressor. In a nutshell, you take an existing preset – say one of the ProRes ones, if that’s the format you like to edit footage in – and alter two things: the frame rate, found by clicking the video Settings button in the Encoder tab, and the deinterlace option, found in the Frame Controls tab. Set the former to 23.976 and the latter to Reverse Telecine (after first enabling the Frame Controls by clicking the small gear next to the on/off pulldown menu, and selecting On from said menu). At this stage you can also resize the image to true HD, 1920×1080. The resulting video file should be genuine 24fps with no interlacing.
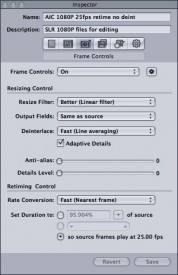
  3. Next bring your 24fps file back into Compressor and drop another preset onto it. Again, use ProRes or whatever your codec of choice is, but this time make sure the frame rate is set to 25fps, deinterlace is NOT set to Reverse Telecine and, at the bottom of the Frame Controls tab, where it says “Set Duration to”, click the last radio button, “so source frames play at 25.00 fps”. What this does is to speed up your video about 4% so that it runs at 25fps. This is the smoothest way to convert 24fps to 25fps, and the speed difference will not be noticeable on playback. In fact, whenever you watch a movie on UK TV it is sped up like this.
Step 3: retiming to 25fps with Compressor

If you’re in any doubt as to whether it’s worked, step through the video frame by frame in Final Cut and see if there are any duplicated, skipped or interlaced frames.

Of course, after all this transcoding, the image quality will have suffered a bit, but at least the motion should be smooth. Has anyone out there found a better method of doing this? I’d love to hear from you if so. Alternatively, if you want any more details on the steps above, just leave a comment and I’ll be happy to share them.

The moral of the story is, if you’re in the UK, don’t use 24P Cine Mode. Just like shooting 24fps on celluloid, it unnecessarily complicates post-production. Stick to 25fps and everything will come up smelling of roses.

Converting 24P Cine Mode Footage to 25fps

Easy Come, Easy Go

Here’s another one from the archives. This is a silly little short I made in 2003 as an entry to a ninety second film competition run as part of Borderlines Film Festival‘s inaugural year.

The prize was £1,000 and I didn’t want to have to share that with anyone if I won, so I used copyright-free music and did everything else myself. (Although the Calf Vader puppet was actually made by my friend Matt several years earlier as part of a Magic Roundabout spoof featuring Darth Vadertrude. I did not tell him.)

Hereford being a small place, there were very few entries to the competition. Three were selected for screening at the festival: Calf Vader, one by my friend Johnny Cartwright (who borrowed my camera to shoot it on) and one by my friend Rick Goldsmith. Like I said, small place.

Rick won. He decided to use the £1,000 to buy a new computer, which he ordered from eBay. He sent the money. The seller never sent the computer. Easy come, easy go.

Easy Come, Easy Go

The Power of Post

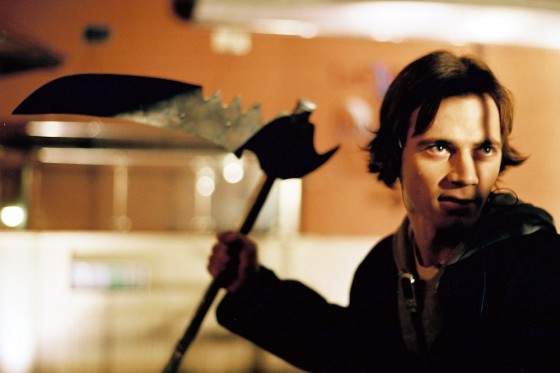
Ray Bullock Jnr. as Joe
Ray Bullock Jnr. as Joe, preparing to fight the marauding demon

As we search for an editor for Stop/Eject, here’s a demonstration of the power an editor wields.

A few weeks before the premiere of Soul Searcher, my fantasy-action feature about a trainee Grim Reaper, I showed the film to my flatmates of the time. One comment concerned a scene in which the trainee reaper, Joe (Ray Bullock Jnr.), fights a demon (Shane Styen) while drunken revellers cheer him on.

As scripted, the scene covers only the start of the fight – enough to show how cocky Joe has become in his new role. (On the day of shooting we decided to extend the scene to show Joe killing the demon, but after a couple of shots Shane injured himself, forcing us to revert to the shorter version.) My flatmate wanted to see Joe kill the demon, and I decided he was right.

I certainly wasn’t going to do a reshoot at that stage in the game, but nonetheless I was able to alter the scene to have the demon die. I did it in three steps, and these conveniently illustrate the three prongs of attack you can use in post-production to change and improve your story.

  1. Re-purpose existing footage. The demon knocks Joe’s scythe from his hand early in the scene, so my first challenge was to get the hero his blade back so he could strike the fatal blow. Fortunately I had left the camera running while shooting a series of takes of Joe’s scythe hitting the ground. Therefore I had also caught the scythe being picked up on camera. This was never intended to be used, but it worked a treat.
  2. Visual effects. I’m no fan of digital fixes, but there’s no denying they can get you out of a tight spot. The existing cut of the scene had a shot of Joe walking up to the demon, but now I needed to put the scythe into his hand, so I cut out the scythe from a freeze-frame of another shot and motion-tracked it to Joe’s movements.
  3. Sound. This is the most commonly-used tool for changing things in post. Any time in a movie that a line of exposition is delivered without the speaker’s mouth being clearly seen, chances are that it’s Additional Dialogue Recording (ADR). It’s far easier to get the actor into a recording studio to perform a new line than to go back to a location or a long-struck set and reshoot. But in this case all I needed to do was put in some slicing, crunching sounds and a grunt, which I ran over a handy shot of the drunken revellers.

Here is the original scene followed by the bits I changed and then the final version:

Remember that with great power comes great responsibility. I’ve heard of actors who’ve found themselves edited into scenes they’d never shot. If you’ve substantially changed the character with your tinkerings, or placed an actor into a sensitive or controversial scene, be sure to discuss it with them just as you would have done beforehand if it had been shot conventionally. The same goes for the writer if you’ve made a big change to their script.

Some might look at all this as cheating, and I confess I have mixed feelings about it myself. I believe in getting things right in-camera, but the reality is that all films are prototypes, and you’re often well into post-production – at least – before you really figure out what the best way is to make this particular movie.

The Power of Post

Fire and Ashes

Last week I looked at some watery lighting created for one of the fantasy scenes in Sophie’s short, Ashes. Today let’s look at another of the film’s fantasy scenes and another element: fire.

Sophie wanted a 1940s Hollywood look to this romantic scene set in a room full of candles. Shane Hurlbut recently posted a great blog about building an artificial firelight source, but given the size and layout of the room I didn’t feel this was going to work for us. When I lit the Wasteland trailer last autumn I used domestic 100W clip-lights to represent candlelight, and this is what I chose to go for again.

Sarah Lamesch and Adam Lannon in the "Hollywood" scene
Sarah Lamesch and Adam Lannon in the “Hollywood” scene

There are about half a dozen 100W bulbs hidden on the floor behind the bed, and another half dozen on a boom arm out the top of frame, again behind the actors. There are no other light sources but the candles themselves. To give a little bit of movement to the light, my righthand man Col is wobbling a reflector just off camera. More movement would have been nice – some dimmers perhaps, or someone lying behind the bed wiggling the bulbs a bit – but given that it was a closed set I felt it was better to keep things simple.

Col tapes the tights to a filter tray

I was so focused on the lighting of this scene that it was only the day before the shoot that I realised the key to the forties look was going to be diffusion. By this point it was too late to add any Promist filters to our package, so I consulted Shane’s blogs on diffusion for other methods of softening the image. AD Chris was subsequently dispatched to buy some tights.

In an ideal world you get hold of some very fine silk stockings and tape a piece to the back of your lens. We were stuck with bog-standard 15 denier, and the design of the EF-S lens mount makes it impossible to put anything over the rear element, so it had to go on the front. Col stretched the piece of fabric across one of my Pro-aim shoulder rig’s 4×4″ filter trays. Putting the tights on the front rather than the back makes the effect much less subtle, but fortunately Sophie really liked it. You can see it in action on the still above, but I’ll leave you with a side-by-side comparison from a quick test we did on lead actress Sarah Lamesch:

Sarah Lamesch with (right) and without (left) the stocking filter
Fire and Ashes

Inside the Director’s Folder

A camera operator needs batteries, lenses, cards, filters. A wardrobe supervisor has racks of costumes. A sound recordist carries a dead cat on a stick. But a director needs only his folder. Like Her Majesty’s handbag, the contents of this hallowed portfolio have forever been a mystery. Until now.

Here’s what I kept in my Stop/Eject folder while shooting the film:

To-do list
To-do list

The first thing I see on opening the folder is a to-do list. These are all things that need doing the day before the shoot begins, including things that I need to pack in the van for the journey up to Derbyshire.

Budget
Budget

A copy of the production budget comes next, with highlighted figures like catering and travel being the ones that are still available to spend.

Schedule
Schedule

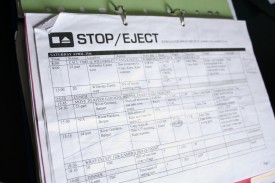
Next up is the schedule, one of several documents I can satisfyingly cross parts off as the shoot progresses. You can download the schedule here.

Contacts
Contacts

A list of contact details for the cast, crew, locations and people we’re borrowing props and equipment from.

Script
Script

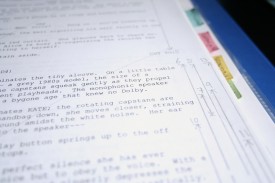
Then we come to the script. The fact that it’s this far back in the folder tells you how many other things a director who is also co-producing and has no AD has on his mind. Ideally the script and the storyboards would be the only things in my folder. You can see that I’ve drawn tram lines. Normally a script supervisor does this during shooting to indicate which part of the scene a shot covers, but I’ve drawn them in advance to remind me which part of the scene I want each shot to cover.

Storyboards
Storyboards

The largest section of my folder is the storyboards. The ones with the pink highlights are shots I felt would make good production photos, the idea being that we would switch the camera to stills mode after the take and snap a few – but we usually forgot.

Lighting plans
Lighting plans

Next are the lighting plans for each location. I covered these in detail in my lighting breakdown posts.

Artwork
Artwork

Sophie’s concept art is next. Not much use by the time you’re in production, since it’s all been built and dressed already, but nice to look at.

Expenses forms
Expenses forms

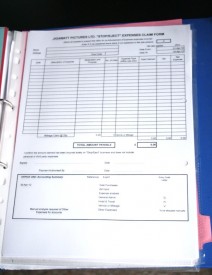
Then comes a wallet of expenses forms for the cast and crew to fill in. This is based on a template from Terry Cartwright’s DIY Accounting package.

Insurance policy
Insurance policy

Finally, I carry a copy of the public and employer’s liability insurance documents in case any location owners ask to see it.

Inside the Director’s Folder

Water and Ashes

The opening frame of the big track and dolly shot

Earlier this week I DPed Sophie Black’s short film, Ashes. The script contained three fantasy scenes which were really fun to light because they didn’t have to be in any way realistic. All the scenes took place in the same bedroom, so here was a great opportunity to light the same space in three completely different and pretty whacky ways (plus in a more down-to-earth way for the “real world” scenes).

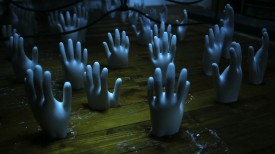
In lighting the fantasy scenes I drew inspiration from techniques covered in some of the blogs I listed in my top five last week. Sophie’s vision for one fantasy scene was of the lead character, played by Sarah Lamesch, on a bed adrift on a sea of hands. The hands were moulded in plaster and spread all over the floor, and it was my job to create the impression of water through lighting. So I turned to The Underwater Realm’s website, recalling a video blog they posted last year when their DP Eve Hazelton began testing lighting techniques for dry-for-wet photography (around six minutes in).

The silver wrapping paper on the ceiling

Big thanks to Realm Pictures for posting this blog. Although Eve ultimately rejected the technique in favour of something more realistic, it was perfect for Ashes. I had Sophie buy several rolls of silver wrapping paper, which we pinned loosely to the ceiling. I placed a 1.2K Arri Daylight Compact on the floor in the corner, pointed up at the paper. As we rolled, Sophie aimed a desk fan at the paper to create rippling, watery reflections.

I knew I wanted to do something special with Sarah’s incredibly striking eyes in this scene, to complement the make-up. I started off by having Colin rig a DIY lamp above her, surrounded by black wrap and card with only a slit of light coming through to highlight her eyes. Unfortunately I discovered that the light from DIY lamps just isn’t focused enough for this kind of effect, so I abandoned it.

Instead I created Sarah’s eye-light using a string of white Christmas lights taped to a piece of black card. This was inspired by Galadriel’s eye-light in The Lord of the Rings – a reference Sophie gave me. As it turns out, I think the starry reflections you see in Sarah’s eyes here are more from the silver paper than the fairy lights.

Sarah Lamesch
Sarah Lamesch as Sarah

This scene was also interesting from a grip point of view. We’d borrowed a jib, which we mounted on my dolly so that we could boom up from the hands on the floor, over the footboard and track to Sarah’s face. This was a real team effort. Colin handled the dolly and jib movement, while first assistant director Chris Newman operated the camera to begin with. As soon as the camera had cleared the footboard I jumped up onto the bed and took over from Chris for the rest of the shot.

In my next couple of posts I’ll look at the other fantasy scenes and we’ll see how Shane Hurlbut’s blog and a Lana Del Rey video inspired the cinematography in those.

Water and Ashes

Window Smash VFX Breakdown

Here’s one from the archives. This is one of the featurettes from The Beacon‘s long-forgotten DVD in which I break down a crude but effective VFX shot.

Compositing elements shot against black in my living room was an MO I heavily expanded on when I made my next feature, Soul Searcher, and you can see the extensive break-downs for that film by renting or buying the deluxe package below.

Window Smash VFX Breakdown