Writing a Shot List

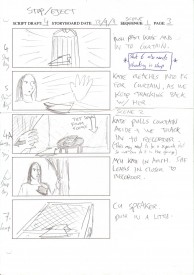
Some of my rough storyboards for Stop/Eject

How does a filmmaker decide what angles to shoot from? Speaking for myself, it’s a hard process to analyse, as many of the decisions are made without much conscious thought. Often I just sit down and imagine the scene playing out in my head. Since childhood I’ve been pretending to be a camera – closing one eye and moving my head to mimick a crane shot, for example, as I pushed my Lego car along – so in imagining the scene I automatically create shots and edits in my head. Then it’s just a case of writing them down, or sketching them as storyboards. I suspect that some of the time – perhaps a lot of the time – I’m subconciously recalling similar scenes in other films I’ve seen and copying their shots.

Sometimes it does require more thought to choose between a number of options. It’s about picking the angle, the lens, the movement that has the right feel for that moment of the story. “If I push in on a short lens, it will feel more dramatic and intimate, but maybe a cool, detached look would be better, using a long lens and remaining static… What do I want the audience to feel?”

Throughout my career, I’ve always shot-listed or storyboarded in a linear fashion – “I’ll be on this shot, then I’ll cut to this one, then this one, then back to the first one, then to the second one which has now dollied in closer, etc….” It made perfect sense to me, because that’s how the film would ultimately appear to the viewer. Knowing the order in which angles would be seen, I could choose to transition between two angles with a camera move, rather than a cut. I could be sure that I wasn’t wasting time on set shooting extraneous material.

But of course, this linear approach to shot planning lacked flexibility. If the action changed on set when blocking it with the actors, I often struggled to integrate this into my plans. And if I needed to change the sequence in the edit, it was often challenging to make the shots work in a different order, because I hadn’t covered the whole scene from a particular angle, or I’d built in a camera move which was now redundant.
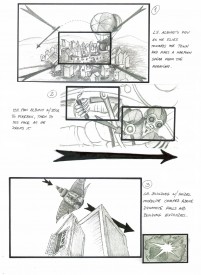
Storyboards by Luis Gayol for The Dark Side of the Earh

Other directors plan their shots more in terms of coverage. They might do this via a floorplan showing the camera positions. They’re making sure that, across the sum total of their camera angles, all of the action can be seen clearly and with the appropriate tightness or wideness of framing. They’ve not decided where each angle will be used, only that these are angles they will probably need somewhere in the edit. They’re giving themselves options.

I used to think of giving yourself options as a weakness in a director. Surely you should know now what you want, rather than figuring it out in post? But as I’ve come to realise, particularly in my experience of working with a separate editor for the first time on Stop/Eject, until you’re away from the baggage of the shoot and you’re actually putting the stuff together, you simply can’t know for sure what the best way to edit it is going to be. You can’t predict every nuance of a performance in preproduction, you can’t predict exactly where the pace may flag and need tightening, and you can’t predict which shots or pieces of action will be unsuccessful due to problems on the day with the execution.

So in writing the shot list for A Cautionary Tale last week, I’ve tried to lean much more towards the coverage style of planning. Inevitably the result is a halfway house, or more optimistically perhaps a hybrid, between the linear and coverage styles. I look forward to seeing what impact this has on the editing process.

Continuing this theme, in my next blog post I’ll break down how I chose the shots for a sequence in Stop/Eject, and look at how those decisions ramified in production and post.
Writing a Shot List

Seven Considerations for Night Shooting

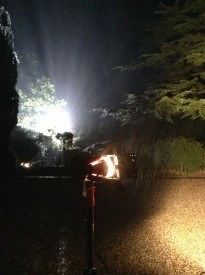
Il pleut dans la nuit. Ce n'est pas jolie.
Il pleut dans la nuit. Ce n’est pas jolie.

As a cinematographer, the idea of shooting at night, working from a blank canvas, can be very appealing. As a director or producer comparing your schedule to the limited hours of daylight we have at this time of year, it can also seem tempting to shift things to after dark. By all means do so; it will probably look great on screen, but do consider the following things first…

  1. Let’s not beat about the bush: it’s unpleasant. Human beings are not built to work in the dark. It’s usually cold and when it rains as well it’s one of the most depressing experiences you can have on a set. If you shoot at night, morale will suffer.
  2. It’s slow. People don’t work as fast at night, because they’re tired and cold and they can’t see what they’re doing very well. Also everything has to be lit, which is very time-consuming. Expect to get about half as much done as you would during the day.
  3. Location owners may not like it. Most premises will be closed at night, which usually makes it easier to film there, but the location owners will need to find a member of staff willing to stay up all night and keep an eye on the place. Could be expensive.
  4. Power can be an issue. You’ll be using lots of lights, and homes and businesses you might normally run power from will not be so readily accessible after hours. You’re probably in generator territory, which means hire costs, transportation issues, refuelling, annoying trip-outs even though you’re drawing a full kilowatt less than the generator’s alleged maximum load… and of course nightmares for the sound department.
  5. Other logistical things which are straightforward in the daytime can prove difficult at night, like catering and access to toilet facilities. Crews need a lot of hearty, hot food to  get them through the night, but who’s going to cook it or warm it up at 2 o’clock in the morning? Hot beverages should also be in plentiful supply.
  6. Many buildings have some kind of external lighting than comes on at night, either on a timer or motion-activated. The DP is unlikely to want that on, so the locations department must ensure access to the switches.
  7. Generally locations will be quieter at night, but beware of drunken revellers, street-cleaning machines and automatic systems that kick in in the middle of the night.

On A Cautionary Tale ,we have a script that is set entirely in daylight, but in order to fit it all into three days of shooting, some of it will almost certainly have to be done after dark. The most important question must always be: is it right for the story? In our case, with the film’s supernatural undertones, I think darkness can only add to the atmosphere.

Seven Considerations for Night Shooting

How to Soften Harsh Sunlight with Tinfoil and a Bedsheet

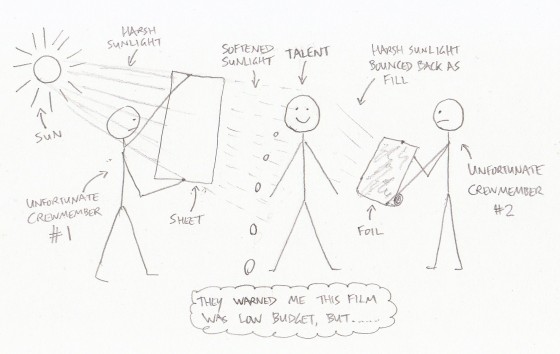
On a pick-up shoot a couple of months back I found myself in the position of needing to mould the natural light without any equipment whatsoever. The sun was shining brightly with no clouds in sight, and we needed to shoot a close-up that would match an existing overcast wide shot. Fortunately there was a B&M just around the corner. Unfortunately no-one took any pictures of the ridiculous set-up that ensued, hence the comedy illustration.

Here’s how to do it:

  1. Get yourself round to B&M. (Other depressing discount stores are available.)
  2. Purchase a white bedsheet (£3.99) and a roll of foil (79p).
  3. The sheet is going to be your “silk”. First of all, cut the elastic corners to make it easier to wrangle.
  4. Assign Unfortunate Crewmember #1 to hold up the sheet so that it casts a shadow on the talent. It will soften the direct sunlight falling on the them, but there will probably still be darker shadows on their face than you want, so…
  5. Unroll a couple of feet of the foil. This is going to be your bounce card.
  6. Assign Unfortunate Crewmember #2 to stand on the shade side of the talent and use the foil to reflect some direct sunlight into that side their face.
  7. Hope that this is not the day the photographer from the local paper visits the set.

Even if you’re not matching to overcast shots, this softening of harsh sunlight is usually desirable to some degree when shooting CUs. Click here for more on moulding natural light.

How to Soften Harsh Sunlight with Tinfoil and a Bedsheet

A Cautionary Tale: Newstead Abbey Recce

At the weekend I travelled up to Nottingham for a Cautionary Tale recce with producer Sophia Ramcharan, writer Steve Deery and production designer Amy Nicholson. (I am directing.) We visited Newstead Abbey, a historic house that was once home to Lord Byron – a fitting setting for a film about authors, especially since I had earlier decided that the lead character’s idol would be Mary Shelley, a friend of Byron’s. The staff and local council had been extremely helpful and had already hosted an initial recce by Sophia and her assistant.

We were looking for a gothic cottage overlooking a lake. The abbey’s grounds contain two cottages and two lakes. Unfortunately neither cottage overlooks either lake. The offices overlook one of the lakes, but only from the first and second floors, ruling out any lights or cameras pointing into the room from outside, which I felt were critical to the look and storyline.

The gatekeeper's cottage
Steve and Amy chat outside the gatekeeper’s cottage

We viewed the gatekeeper’s cottage, a beautiful little gothic edifice that has been abandoned inside for many years. A number of problems were immediately obvious. Firstly, a busy main road was a stone’s throw away, threatening the aural illusion of a period setting. Secondly, vehicles entering the grounds (which are open to the public) pass immediately outside the cottage. Thirdly, none of the rooms were particularly big. Fourthly, the least small of the rooms looked out on the tarmac drive and a speed limit sign, with trees beyond.

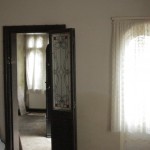
Stained glass in the interior doors is a nice feature of the gatekeeper's cottage.
Stained glass in the interior doors is a nice feature of the gatekeeper’s cottage.

On the plus side, the architecture was everything I had hoped for both inside and out, with stained glass in the interior doors, and vaulted windows. Its abandonment also meant that potentially we could modify it however we wanted without inconveniencing anyone.

Next we viewed the rose gardener’s cottage on the opposite side of the grounds. This is larger and also abandoned inside, to the extent that the first floor has been declared unsafe. The living room presents a blank slate, but didn’t capture my imagination or Amy’s the way the gatehouse had.

The surroundings are also problematic. They are clearly a formal garden on a country estate, whereas our fictional cottage is supposed to be isolated. Speaking of isolation, the gardener’s cottage is in a very quiet location, but its lack of a functioning mains supply means a noisy generator would have to be employed to run the lights.

The larger lake
The larger lake

We moved on to look at the lakes. The smaller one initally seemed more appropriate, but unlike its larger counterpart it lacks for a suitably dramatic point at which to stage the film’s climax. I began to realise that characters could be seen leaving the gatekeeper’s cottage and disappearing into the trees opposite it, before emerging from the (entirely different) trees next to the lake. Such is the cheated geography often required in filmmaking.

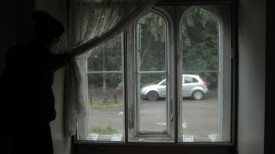
Room with a view... but not a very good one.
Room with a view… but not a very good one.

We returned to the gatehouse, now analysing it in much more detail. Could the drive be framed out? Was it possible to shoot the house from amongst the trees without seeing the park gates? Could the speed limit sign be temporarily removed? Could the necessary interior action be staged in the relatively confined space? What was the widest shot I could get in there with my widest lense? Could the radiators be removed or would they have to be covered? What about the seventies fireplace? How much of the kitchen – which we wanted to avoid dressing – would be seen when the door was open?

Having answered as many of these questions as we could, we departed for a production meeting. Later, Amy and I agreed how the interior would be laid out. Then, on the train home, I drafted a shotlist, which for me is the ultimate test of whether  a location will work. The results are reassuring, but nevertheless we have given ourselves a week to find alternatives to Newstead Abbey, in case there is an even better location out there somewhere.

A Cautionary Tale: Newstead Abbey Recce

Ten Questions to Ask on a Recce (Location Scout)

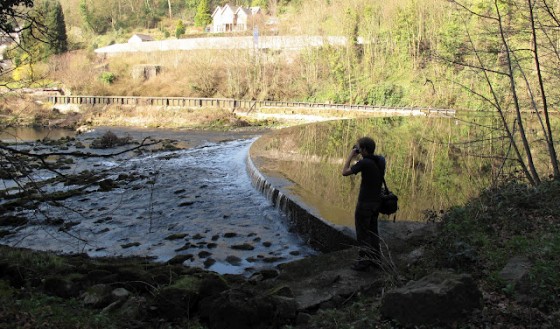
Scouting a weir for Stop/Eject. We didn't count on heavy rains turning it into a raging torrent though.  Photo: Sophie Black
Scouting a weir for Stop/Eject. We didn’t count on heavy rains turning it into a raging torrent though. Photo: Sophie Black

Tomorrow I’m off to Nottingham to recce for A Cautionary Tale, so I thought now would be a good time to list the questions that a filmmaker and their team should be asking when they check out a location.

  1. Is the mains supply beefy enough for your lighting package? Check the fuse box to see how many circuits there are for sockets and what amperage each is fused at.
  2. Can you access the land outside the windows to set up lights shining in?
  3. If you intend to use a smoke machine or hazer, can any smoke alarms be disabled?
  4. Is it noisy? Just because it isn’t noisy when you scout, it doesn’t mean it won’t be when you shoot. Might that road be busier the day you shoot? Are there any matches scheduled for that playing field next door? Will people be trampling around in the room upstairs? Is there a market, festival or other occasional event on? Is it on a flight path? Can any humming electrical devices be turned off? Some modern buildings have their aircon controlled remotely from other sites.
  5. How might weather affect the location? For example: river levels change; fields can flood; mud can make moving equipment difficult; attractive green grass can turn yellow in a drought. Don’t forget to consider tides if you’re on the coast.
  6. To what extent can you modify the location? Can you screw into or paint the walls? For a period piece – are there anachronisms? Can they be removed or covered?
  7. If outdoors, is there a toilet that everyone can use? What about somewhere to get warm at lunchtime?
  8. Is there space for a green room and HMUW (Hair, Make-Up and Wardrobe)? If not, is a separate base camp required and where will that be?
  9. Is there sufficient parking?
  10. Is the owner willing to sign a location release? If not, this may come back to bite you, particularly if you’re entering your film into Virgin Media Shorts or selling it to a distributor. Get them to sign before you start filming; you don’t want them to pull out when you’ve shot two of the four scenes set there.

Can you think of anything I’ve missed?

UPDATE: Leslie Lowes adds:

  • Is there mobile phone coverage? Which networks?
Ten Questions to Ask on a Recce (Location Scout)

Crowd-funding Stop/Eject

This featurette relates the ups and downs of the two crowd-funding campaigns run for my short fantasy-drama Stop/Eject. Producer Sophie Black and I discuss the various methods we used to solicit donations, from the mundane (Facebook posts) to the surreal (threatening the lives of innocent pets). We also talk about the kinds of people who contributed, the rewards we offered, and the emotional rollercoaster of an all-or-nothing campaign.

If you want to know more, read my blog entries evaluating the first and second campaigns.

Crowd-funding Stop/Eject

Plan for Cannes

A Cannes photo I did not take.

Considering a trip to the Cannes Film Festival this year? Well, now is the time to start planning and booking. Here are links to the most useful Cannes-related blogs I’ve posted over the last few years.

First up, if you’re thinking about entering your movie into Cannes’ Short Film Corner, this guest blog by Sophie Black explains exactly what you can expect to get from your entry fee and how you can make the best use of your time at the festival.

There are some things you don’t want to leave home without – read Packing for Cannes to find out the essentials.

Attending Cannes can be expensive if you’re not careful. Have a look at a breakdown of my Cannes spending in 2011, and check out Five Tips for Doing Cannes on a Budget for hints and tricks to conserve your cash on the Côte d’Azur.

Things I’ve Learnt in Cannes and Things I Learnt (Again) from Cannes 2013 lay out some of the important truths about the film industry that my trips to Cannes have hammered home to me.

If you want to find out how Sophie and I got on at the festival last year, watch our 2013 video blogs.

To get a sense of the madness of my very first trip to the festival as I attempted to sell my indie feature Soul Searcher, read my 2005 Cannes blog.

And finally, not particularly useful but quite amusing, here is the account of my travel woes on my way to Cannes in 2010.

Plan for Cannes

Five Simple But Effective Camera Tricks

Today I’m running down the five simplest yet most effective camera tricks I’ve used in my films. These are all techniques that have been used on the biggest Hollywood productions as well.

1. Looming Hollywood Sign (The Beacon)

Building Moon's forced perspective corridor
Building Moon’s forced perspective corridor

In amongst all the terrible CGI, The Beacon did feature the odd moment of low-tech triumph. As a damaged helicopter dives towards the Hollywood hills, the famous sign is reflected in the sunglasses of the injured pilot, played by my friend and fellow filmmaker Rick Goldsmith. The letters were actually 2″ high cardboard cut-outs stuck to a black piece of card, and Rick himself is holding it at arm’s length and moving it slowly towards his face.

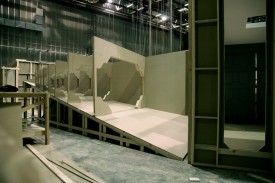
This is a type of forced perspective shot, which I covered in my previous post. Die Hard 2’s airport control tower set was surrounded by a forced perspective miniature of the runways, complete with model planes, and more recently Duncan Jones and his team used the technique to create an endless corridor of clone drawers in Moon.

Colin Smith readies the watering can for Jonny Lewis's close-up, while Chris Mayall steadies the ladder.
Colin Smith readies the watering can for Jonny Lewis’s close-up, while Chris Mayall steadies the ladder. Photo: Simon Ball

2. Rain Fight Close-ups (Soul Searcher)

While most of this fight sequence was shot under the downpour created by an industrial hosepipe fired into the air, this wasn’t available when extra close-ups were required later. Instead a watering can was used.

It’s not uncommon for close-ups in a scene to be achieved much more simply than their corresponding wide shots. NASA allowed Bruce Willis and Ben Affleck to be filmed in their training tank for Michael Bay’s Armageddon, but CUs of the other actors had to be shot dry-for-wet with a fishtank in front of the lens and someone blowing bubbles through it.

3. The Wooden Swordsman Catches His Sword (The Dark Side of the Earth)

Getting the puppet to genuinely catch his sword was likely to require a prohibitive number of takes. (We were shooting on 35mm short ends.) So instead we ran the action in reverse, ending with with the sword being pulled up out of the puppet’s hand. When the film is run backwards, he appears to be catching it.

Backwards shots have been used throughout the history of cinema for all kinds of reasons. Examples can be seen in the Face Hugger sequence in Aliens (the creature’s leaps are actually falls in reverse) and in John Carpenter’s The Thing (tentacles grabbing their victims). At the climax of Back to the Future Part III, the insurers refused to allow Michael J. Fox to sit in the DeLorean while it was pushed by the train, in case it crushed him, so instead the train pulled the car backwards and the film was reversed.

4. Distortion of Tape and Time (Stop/Eject)

A classic Who extermination

At a crucial point in this fantasy-drama about a tape recorder that can stop and rewind time, I needed to show the tape getting worn out and images of the past distorting. I combined two techniques to create a distorted image of Dan (Oliver Park) without any manipulation in post. One was lens whacking, whereby the lens is detached from the camera and held in front of it, moving it around slightly to distort the focal plane. (See this episode of Indy Mogul and this article by Philip Bloom for more on lens whacking.) The other was to shake the camera (and lens) rapidly, to deliberately enhance the rolling shutter “jello” effect which DSLRs suffer from.

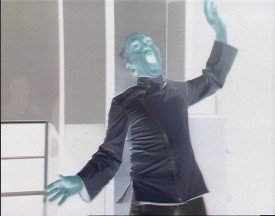
Flaws in camera technology can often lead to interesting effects if used appropriately. Let’s not forget that lens flares, which many filmmakers love the look of, are actually side-effects of the optics which lens manufacturers have worked for decades to try to reduce or eliminate. And in the early days of Doctor Who, the crew realised that greatly over-exposing their Marconi TV cameras caused the image to become a negative, and they put this effect to use on the victims of Dalek extermination.

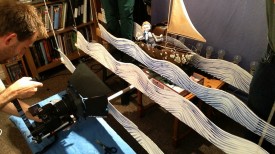
Shooting The One That Got Away. A row of 100W bulbs can be seen on the right.

5. Sunset (The One That Got Away)

A painted sunset would have been in keeping with the style of this puppet fairy tale, but it was quicker and more effective to peek an ordinary 100W tungsten bulb above the background waves. Click here for a complete breakdown of the lighting in The One That Got Away.

Using an artificial light to represent the sun is extremely common in cinematography, but showing that lamp in shot is less common. For another example, see the opening Arctic sequence of Captain America: The First Avenger, in which a large HMI stands in for a low sun at the back of the mist-shrouded set.

Click here for my rundown of the top five low-tech effects in Hollywood blockbusters.

Five Simple But Effective Camera Tricks

Forced Perspective

The Ark
The Ark

The other day I watched a 1966 Doctor Who story called The Ark. It’s easy to look at a TV show that old and laugh at the stilted acting, rubber monsters and crude effects. But given the archaic and draconian conditions the series was made under back then, I can only admire the creativity displayed by the director and his team in visualising a script which was scarcely less demanding than a contemporary Who story.

Studio floor plan from the very first episode of Doctor Who, showing camera positions (coloured circles)

In the sixties, each Doctor Who episode was recorded virtually as live on a Friday evening, following a week of rehearsals. BBC rules strictly limited the number of times the crew could stop taping during the 90 minute recording session, which was to produce a 22 minute episode. Five cameras would glide around the tightly-packed sets in a carefully choroegraphed dance, with the vision mixer cutting between them in real-time as per the director’s shooting script. (Interesting side note: some of Terminator 2 was shot in a very similar fashion to maximise the number of angles captured in a day.) It’s no wonder that fluffed lines and camera wobbles occasionally marred the show, as there was rarely time for re-takes.

But what’s really hard for anyone with a basic knowledge of visual effects to get their head around today is that, until the Jon Pertwee era began in 1970, there was no chromakey (a.ka. blue- or green-screening) in Doctor Who. Just think about that for a moment: you have to make a science fiction programme without any electronic means of merging two images together, simple dissolves excepted.

Setting up a foreground miniature for a later Who story, Inferno (1970)

So the pioneers behind those early years of Doctor Who had to be particularly creative when when they wanted to combine miniatures with live action. One of the ways they did this in The Ark was through forced perspective.

Forced perspective is an optical illusion, a trick of scale. We’ve all seen holiday photos where a friend or relative appears to be holding up the Eiffel Tower or the Leaning Tower of Pisa. The exact same technique can be used to put miniature spaceships into a full-scale live action scene.

In these frames from The Ark, two miniature landing craft are lowered into the background before the camera pans to a full-size craft in the foreground:

The camera pans from a miniature descending in the background to a full-scale craft in the foreground.

And in these later frames, another miniature craft is placed much closer to the camera than the Monoid (a.k.a. a man in a rubber suit). The miniature craft takes off, pulled up on a wire I presume – a feat which time, money and safety would have rendered impossible with the full-size prop:

The camera pulls focus from a foreground miniature taking off to an actor in the background. A greater depth of field would have made the shot more convincing, but  the principle is sound.
The camera pulls focus from a foreground miniature taking off to an actor in the background. A greater depth of field would have made the shot more convincing, but the principle is sound.

Of course, Doctor Who was not by any means the first show to use forced perspective, nor was it the last. This nineties documentary provides a fascinating look at the forced perspective work in the Christopher Guest remake of Attack of the 50 Ft. Woman, and other films…

And Peter Jackson famously re-invented forced perspective cinematography for the Lord of the Rings trilogy, when his VFX team figured out a way to maintain the illusion during camera moves, by sliding one of the actors around on a motion control platform…

So remember to consider all your options, even the oldest tricks in the book, when you’re planning the VFX for your next movie.

Forced Perspective