Converting Blackmagic Raw Footage to ProRes with After Effects

My 4K Blackmagic Production Camera
Blackmagic Production Camera

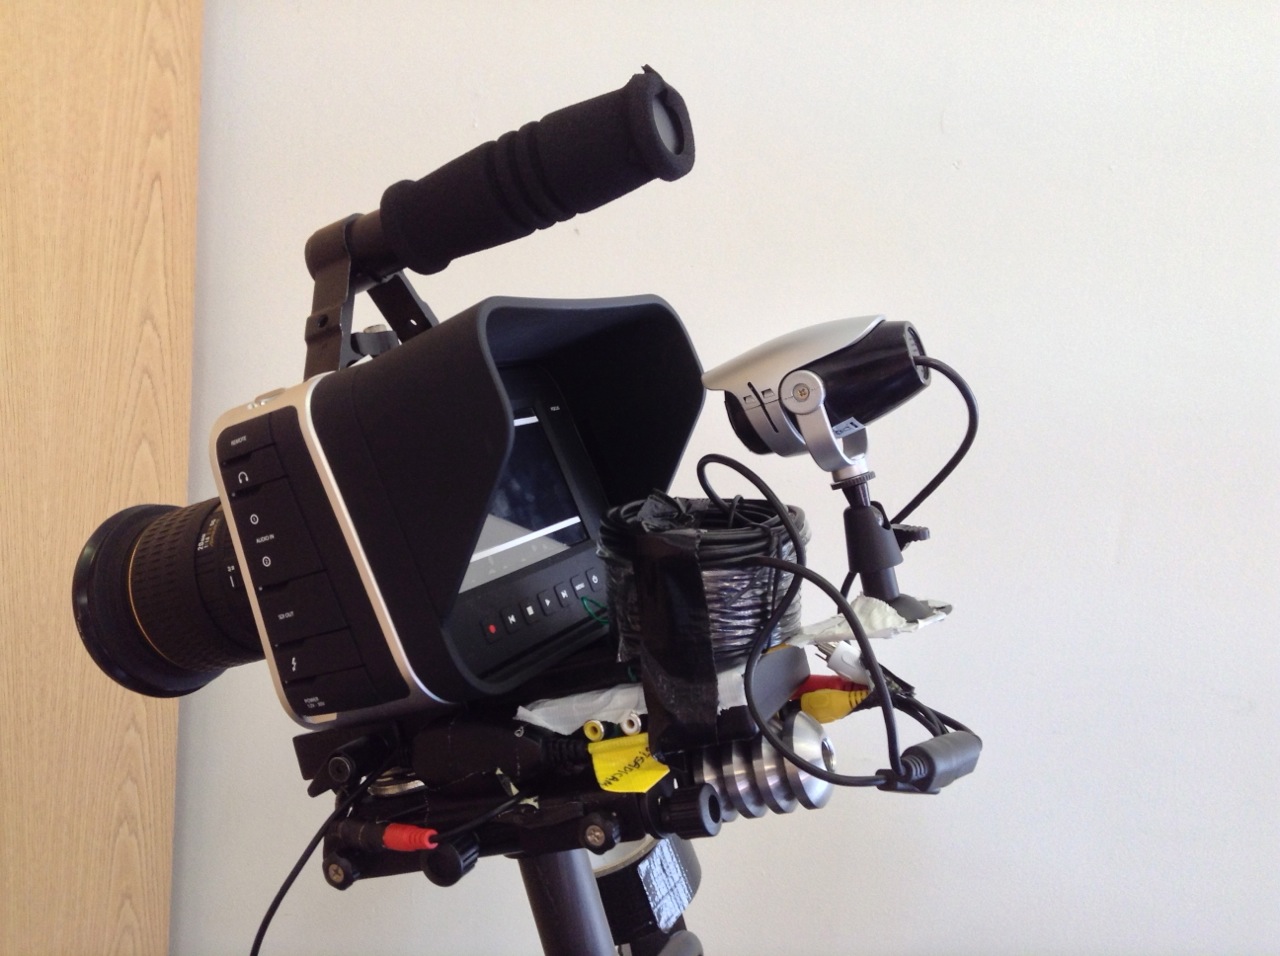
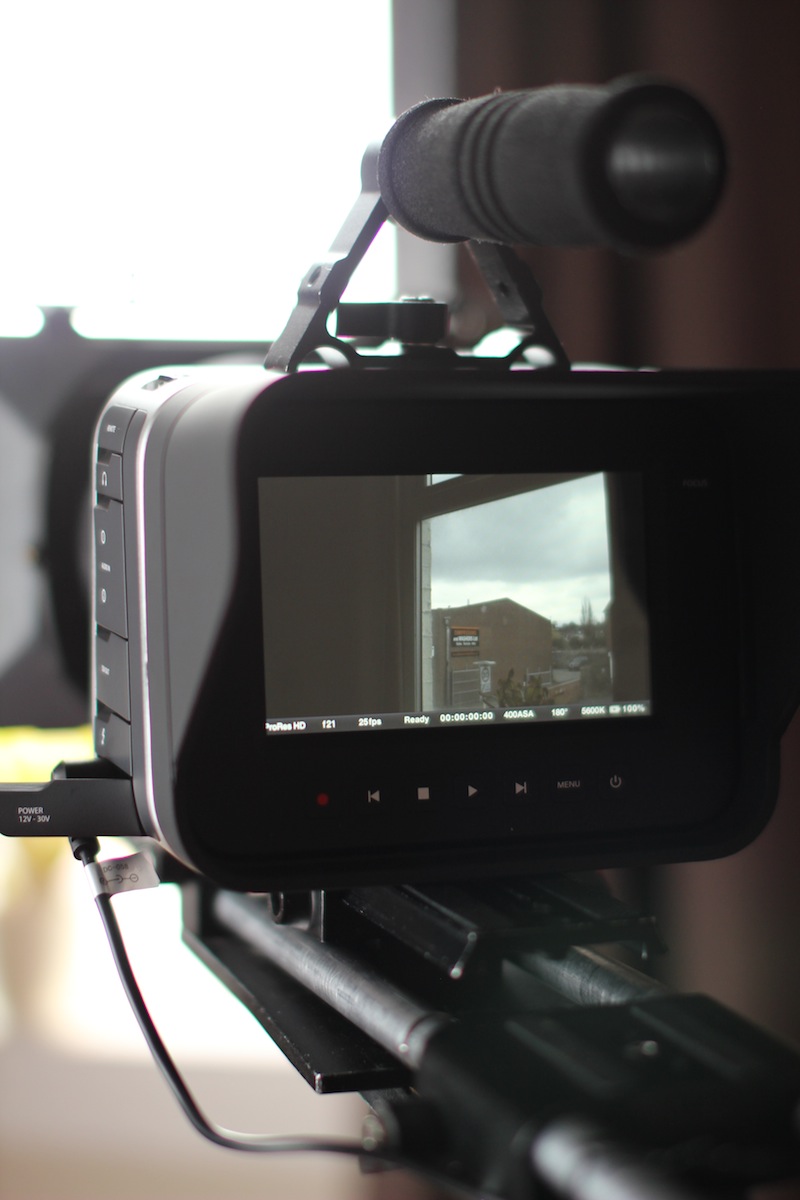
One of the big benefits of the Blackmagic cameras is their ability to shoot raw – lossless Cinema DNG files that capture an incredible range of detail. But encoding those files into a useable format for editing can be tricky, especially if your computer won’t run the processor-intensive DaVinci Resolve which ships with the camera.

You can usually turn to the Adobe Creative Suite when faced with intractable transcoding problems, and sure enough After Effects provides one solution for raw to ProRes conversion.

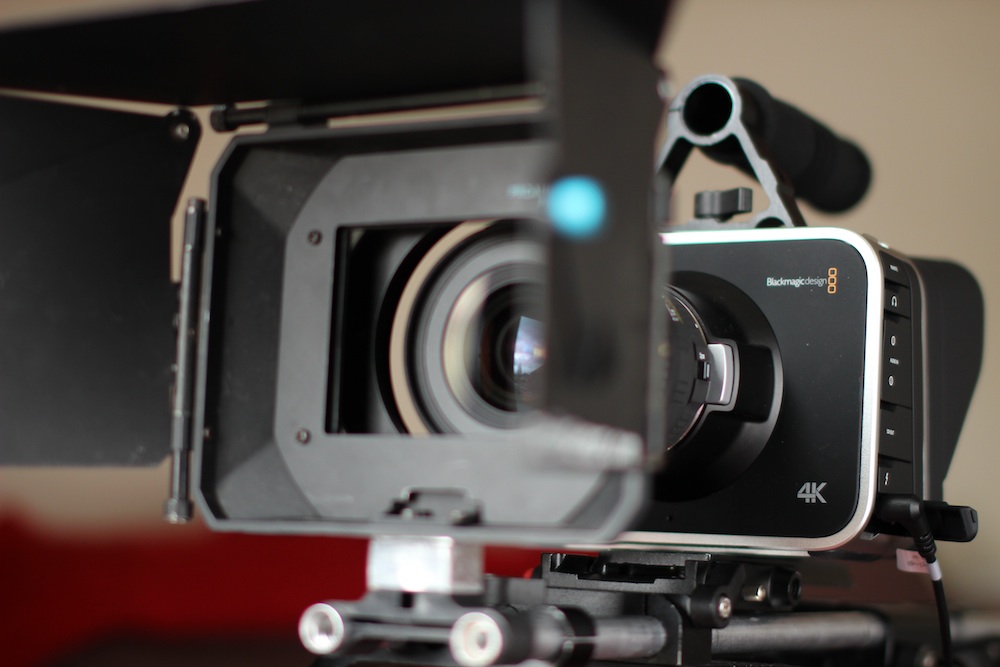
I’ll take you through it, step by step.  Let’s assume you’ve been shooting on a Blackmagic Cinema Camera and you have some 2.5K raw shots which you want to drop into your edit timeline alongside 1080P ProRes 422HQ material.

1. In After Effects’ launch window, select New Composition. A dialogue box will appear in which you can spec up your project. For this example, we’re going to choose the standard HDTV resolution of 1920×1080. It’s critical that you get your frame rate right, or your audio won’t sync. Click OK once you’ve set everything to your liking.

step1

2. Now go to the File menu and select Import > File. Navigate to the raw material on your hard drive. The BMCC creates a folder for each raw clip, containing the individual Cinema DNG frames and a WAV audio file. Select the first DNG file in the folder and ensure that Camera Raw Sequence is ticked, then click OK.

step2

3. You’ll then have the chance to do a basic grade on the shot – though with only the first frame to judge it by.

step3

4. Use Import > File again to import the WAV audio file.

step4

5. Your project bin should now contain the DNG sequence – shown as a single item – along with the WAV audio and the composition. Drag the DNG sequence into the main viewer window. Because the BMCC’s raw mode records at a resolution of 2.5K and you set your composition to 1080P, the image will appear cropped.

step5

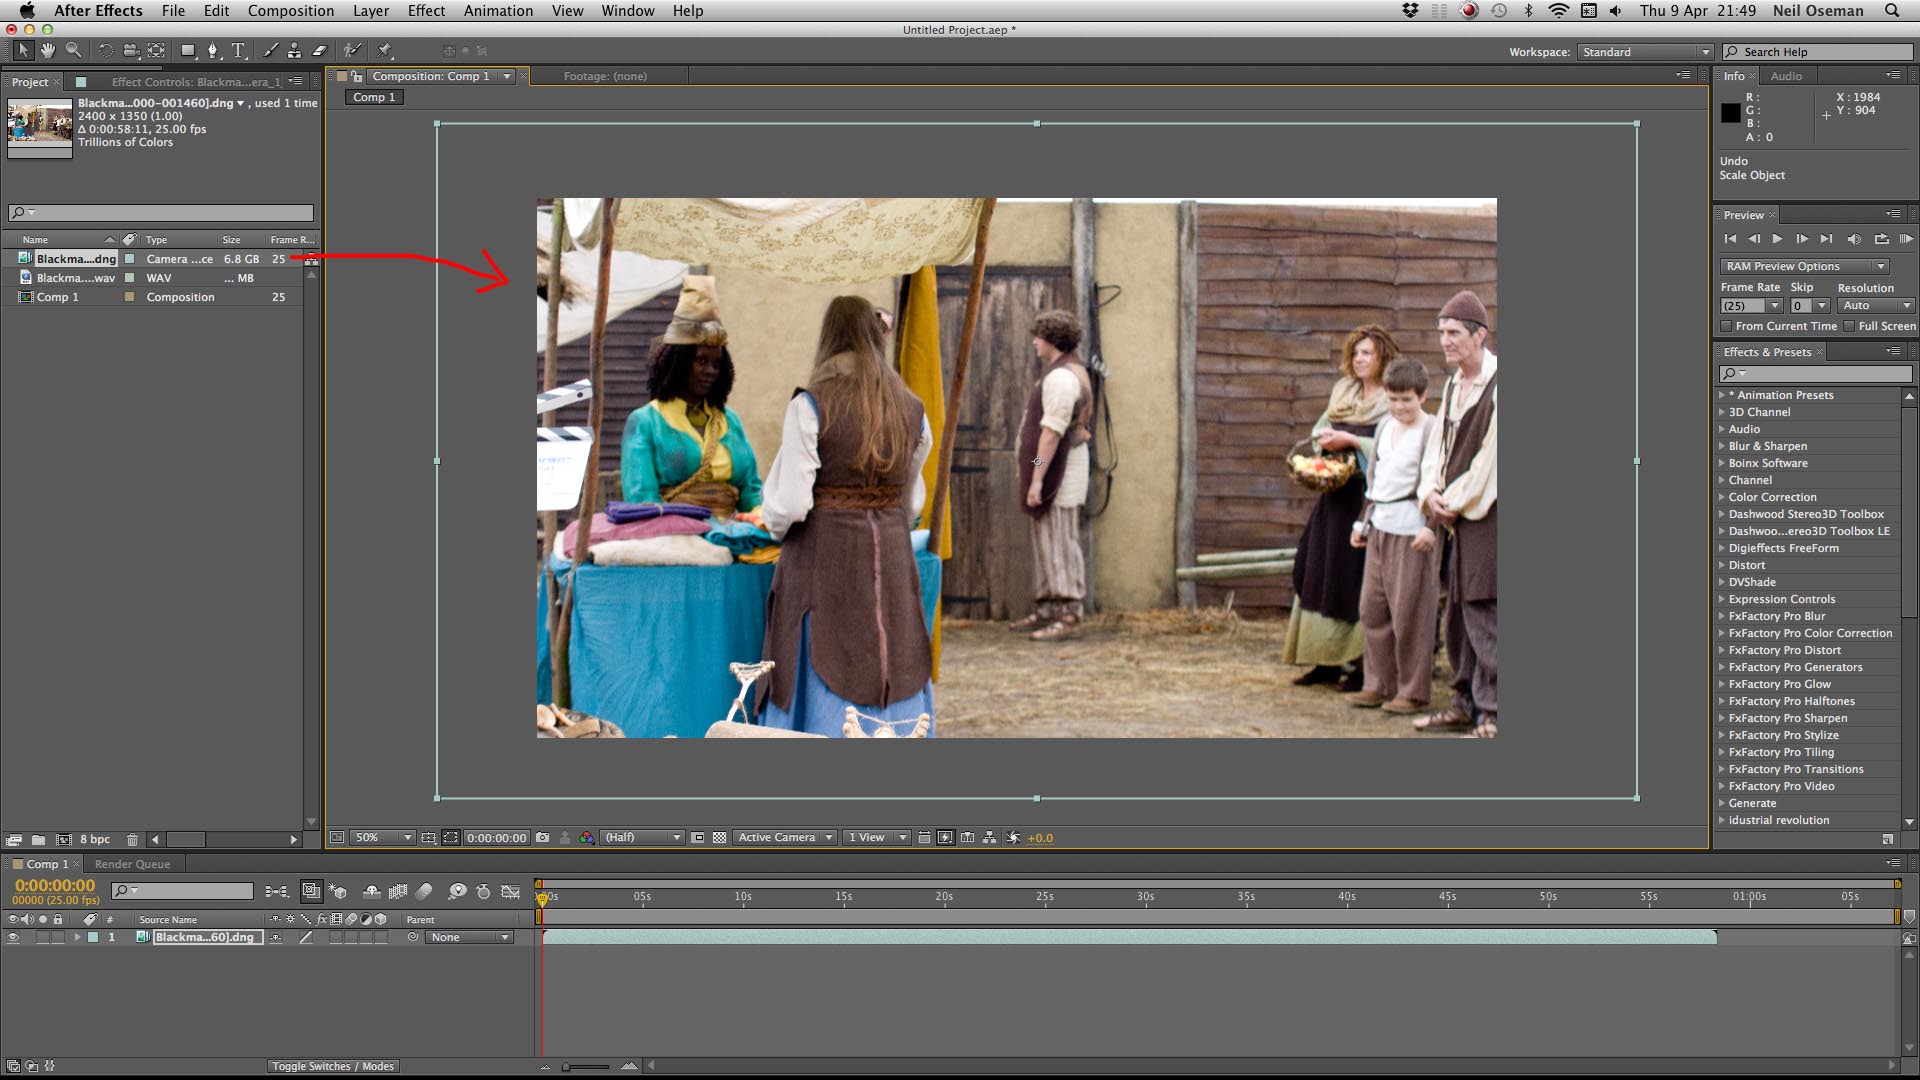
6. If necessary, zoom out (using the drop-down menu in the bottom left of the Composition window) so you can see the wireframe of the 2.5K image. Then click and drag the bottom right corner of that wireframe to shrink the image until it fits into the 1080P frame. Hold down shift while dragging to maintain the aspect ratio.

step6

7. Drag the WAV audio onto the timeline, taking care to align it precisely with the video.

step7

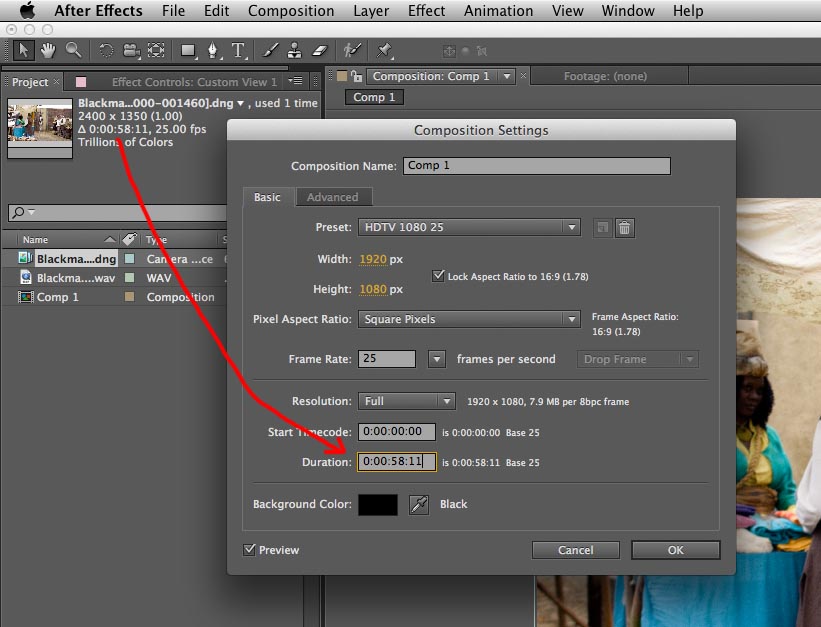
8. Go to Composition Settings in the Composition menu and alter the duration of the composition to match the duration of the clip (which you can see by clicking the DNG sequence in the project bin).

step8

9. Go to the Composition menu again and select Add to Render Queue. The composition timeline will give way to the Render Queue tab.

step9

10. Next to the words Output Module in the Render Queue, you’ll see a clickable Lossless setting (yellow and underlined). Click this to open the Output Module Settings.

step10

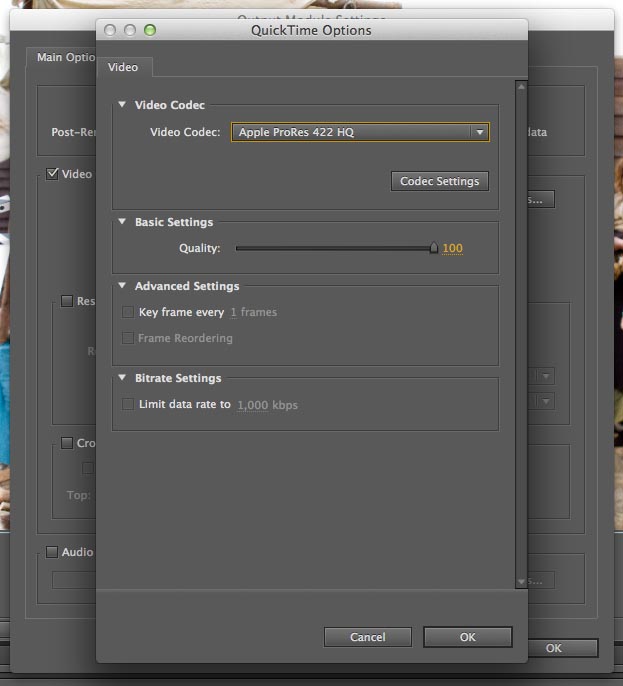
11. In the Video Output section, click on Format Options… We’re going to pick ProRes 422 HQ, to match with the non-raw shots we hypothetically filmed. Click OK to close the Format Options.

step11

12. You should now be back in Output Module Settings. Before clicking OK to close this, be sure to tick the Audio Output box to make sure you don’t end up with a mute clip. You should not need to change the default output settings of 48kHz 16-bit stereo PCM.

step12

13. In the Render Queue tab, next to the words Output to you’ll see a clickable filename – the default is Comp1.mov. Click on this to bring up a file selector and choose where to save your ProRes file.

step13

14. Click Render (top far right of the Render Queue tab). Now just sit back and wait for your computer to crunch the numbers.

step14

I’ve never used After Effects before, so there are probably ways to streamline this process which I’m unaware of. Can anyone out there suggest any improvements to this workflow? Is it possible to automate a batch?

Converting Blackmagic Raw Footage to ProRes with After Effects

The Steadicam, the Blackmagic and the Troublesome Converters

I spent last week in rural Sussex DPing Ted Duran’s 30 minute action-comedy, The Gong Fu Connection. It was a great shoot with a real community atmosphere, excellent food and beautiful weather. I’ve just been looking through the rushes and I’m blown away by the amazing images that my Blackmagic Production Camera has produced. They are very filmic with an incredible amount of detail, even though we only shot in 1080P.

Colin operates the Canon C300 on his Steadicam Pilot
Colin Smith operates the Canon C300 on his Steadicam Pilot

Not everything went to plan though. The aim was to capture the fights using fluid Steadicam photography, and since I hadn’t used a Blackmagic with Colin’s Steadicam Pilot before, he and I met up the weekend before to test the set-up.

The chief difficulty was that the rig’s built-in monitor accepts only a composite video input, while the Blackmagic outputs only an SDI signal. I searched online for a portable SDI to composite converter, but no such thing seemed to exist. I already had an SDI to HDMI converter, so the obvious solution was to buy an HDMI to composite converter. But the more links a chain has, the more opportunity for weakness.

I made the purchase and Colin sorted out power adapters so that both converters could run off the same battery as the Steadicam monitor. We tested it at my flat and it worked perfectly.

Flash-forward a week and we’re on set preparing the Steadicam for The Gong Fu Connection’s first martial arts sequence. All we’re getting on the Steadicam’s monitor are colour bars, which are output by the HDMI to composite converter when it’s receiving no input signal. The other converter, the SDI to HDMI one, has packed up.

Without a working monitor on the bottom of the rig, Colin can’t watch his step and frame the shot at the same time. The Steadicam is essentially useless.

There is a Canon C300 on set, being used for behind-the-scenes shooting. Although Ted and I are both keen to shoot the main film exclusively on the Blackmagic, to avoid severely disrupting the schedule we decide to shoot the day’s Steadicam material on the C300. (The C300 has SDI, HDMI and composite outputs. Blackmagic Design take note.)

DO NOT BUY THIS CONVERTER.

At lunchtime I get on the wifi and see if I can order a replacement SDI to HDMI converter. The only one that can be delivered the next day (a Sunday) is the same model as the one that packed up. Having little choice, I order it. Amazingly it is indeed delivered on the Sunday. Nice one, Amazon.

Unfortunately it doesn’t work. I was at least hoping for the paltry month of service I got from the previous one. But no, this one is dead on arrival.

By a process of elimination we check that the converter is indeed the piece at fault. We swap cables and cameras and the results are the same.

We continue to shoot the Steadicam material on the C300.

But I have one last desperate idea to get the Blackmagic working on the rig.

The CCTV camera set up to film the Blackmagic's screen
The CCTV camera, set up to film the Blackmagic’s screen

On Monday morning I send our driver, Lucky, to the nearest Maplin. I’ve given him instructions to buy a small CCTV camera. When he gets back with it I have Colin attach it to the rig behind the Blackmagic, filming the Blackmagic’s screen. The CCTV camera outputs a composite signal directly to the Steadicam’s monitor.

Incredibly, this works. But it does mean enclosing the Blackmagic and the CCTV camera in black wrap to eliminate reflections on the former’s screen. Which means we can’t get to the iris controls, and we’re relying on the distances marked on the lens barrel to focus. And to make matters worse, the Steadicam Pilot can’t take the weight of a V-lock battery, so the Blackmagic must run off its short-lived internal battery. Between takes we have to plug it into a handheld V-lock to top up the charge.

After capturing two or three successful set-ups with this ludicrous rig, we decide it’s slowing us down too much. I finally abandon all hope of using the Blackmagic on the Steadicam.

For those interested in how the C300 and Blackmagic stack up against each other, the Canon has a sharper, more video look compared with the Blackmagic’s filmic images. The Canon also has more compression artefacts due to its lower bitrate. But they seem to cut together alright once graded.

The lack of an HDMI output on the Blackmagic has been the one thing that’s really caused me problems since buying the camera. I’d be tempted to go for a Kinefinity mod if it wasn’t so expensive…

Of course, the camera is still incredible value for money. Personally I think the only competitors in terms of image quality are the Reds. (The Alexa and film are in a whole other league.) But it is strange that Blackmagic Design claim to have built the camera for people working in the low budget world, but apparently didn’t consider that such people rarely have access to SDI monitors.

Stay tuned for more on The Gong Fu Connection shoot. There is still time to contribute to the project’s crowdfunding campaign over at Indiegogo.

The Steadicam, the Blackmagic and the Troublesome Converters

Forever Alone: Day Three

On the left, a real streetlight. On the right, a 650W Arrilite with Urban Sodium gel.

Saturday night saw the third and final day of production on Forever Alone. If you haven’t already, check out my blogs on day one and two of this sci-fi short by Jordan Morris. (I’ve gone back and added some frame grabs into the day two post.)

This time around, our lighting kit had grown just slightly with the addition of a 650W Arrilite. Without this it would have been near impossible to light the nighttime alley scenes that were scheduled. The alley in question was in a suburban area, conveniently adjacent to the producer’s house and thus a power source.

I knew going into this shoot that I would have to embrace the sodium vapour streetlamps. In the past I’ve always avoided or flagged them, because that grungy orange look gives away that you don’t have the budget to swap out the bulbs like they do in Hollywood. American film and TV nights are always steely blue; British film and TV nights are usually seedy orange. With only one flag and one C-stand in our kit, however, I had no choice.

The orange backlight on Faith (Haruka Abe) and the fence, although apparently from the streetlamp in the background, is actually from an Arrilite 650 out of frame right, gelled with Urban Sodium. A daylight-balanced LED panel, also out of frame right but closer to camera, keys Faith. A second panel hidden behind the end of the fence lights the van and the rest of the deep background.
The orange backlight on Faith (Haruka Abe) and the fence, although apparently from the streetlamp in the background, is actually from an Arrilite 650 out of frame right, gelled with Urban Sodium. A daylight-balanced LED panel, also out of frame right but closer to camera, keys Faith. A second panel hidden behind the end of the fence lights the white van and the grass in the background.

Fortunately there were no streetlamps close enough to spill light onto our character, Faith (Haruka Abe) – they were only creating pools of light in the background, which helped add depth. I used one in particular to motivate a strong backlight, in reality generated by the Arrilite, gelled of course with Urban Sodium (Lee no. 652).

For colour contrast, an LED panel set to 5,600K threw in a little “moonlight” from the side. The second panel, also set to daylight, was positioned to light the deep background. It was so handy, as I raced to rig our final set-up before wrap, to be able to slap a V-lock battery on one of these panels and move it across the street in seconds.

When Other Faith appears on the scene, she’s keyed by a Dedo covered with tough-spun diffuser and the characteristic Medium Blue/Green gel. My favourite shot of the night was her close-up:

Haruka Abe as Other Faith. Image courtesy of Jordan Morris

Emulating the beautiful contrasty look of the TV show Fringe, I eliminated all fill light to put one side of her face in crisp, black shadow. An LED panel backlights her hair, while the Urban Sodium-gelled Arrilite rakes across the fence in the background.

Eliminating the fill was unexpectedly difficult – a downside of using a sensitive camera. The slightest bit of bounce would contaminate the blacks, as did a faux period streetlamp in the adjacent garden. It’s hard to figure out where unwanted light is coming from when it’s so dim that your naked eye can barely perceive it.

Forever Alone is now wrapped, and Jordan’s beginning the processes of editing and adding extensive visual effects. Personally I’ve learnt a lot about how far a camera be pushed, specifically the Blackmagic Cinema Camera. Many of the wide shots I’ve reviewed are under-exposed (partly due to our widest lens being relatively slow) but the raw data allows the exposure to be bumped up in post without them looking nasty.

What’s the most you’ve ever had to push a camera?

In this splitscreen shot, the two Faiths are backlit by the 650 - this time without a gel, while an LED panel gelled with Urban Sodium lights the background. A second LED panel, daylight balanced, keys the downside of First Faith (left), while a Dedo gelled with Medium Blue/Green keys the downside of Other Faith (right).
In this splitscreen shot, the two Faiths are backlit by the 650 – this time without a gel, while an LED panel gelled with Urban Sodium lights the background. A second LED panel, daylight balanced, keys the downside of First Faith (left), while a Dedo gelled with Medium Blue/Green keys the downside of Other Faith (right).
Forever Alone: Day Three

Forever Alone: Day Two

Stella Taylor as Charlotte in Forever Alone. Image courtesy of Jordan Morris

This is a continuation of my last post, a report from the set of Jordan Morris’s sci-fi short Forever Alone.

Black-wrapped ceiling light

Day two saw us shooting a big scene in the dining room. Since the location was only available to us during daylight hours, the windows had to be blacked out with bin bags. Ideally for night interiors, I would put an HMI outside to shine “moonlight” in through the windows, and perhaps use halogen floodlights to create depth and interest in the deep background. This can bother some directors, however, because it means leaving the curtains open – hardly realistic. I figured that if I could create an interesting night interior look on Forever Alone without the crux of open curtains and deep background, it would give me a lot of confidence in the future when working with those restrictions.

An LED panel hidden behind the wall that Charlotte (Stella Taylor) is leaning on supplements the ceiling light from a more flattering angle. A CTB-gelled Kinoflo Divalite provides the blue wash in the foreground.
An LED panel hidden behind the wall that Charlotte is leaning on supplements the ceiling light from a more flattering angle. A CTB-gelled Kinoflo Divalite provides the blue wash in the foreground. Image courtesy of Jordan Morris

I began by turning on the ceiling light, something I almost never do. I’m not a big fan of toplight, but it seemed appropriate given the interrogative nature of the scene, and I knew I could add bounced light off the table-top if the look was too harsh. Also, the shadow of the lightshade added some interest to the room’s blank white walls. I used the 60W tungsten bulb, and placed black-wrap across the top of the shade to prevent bounce off the ceiling from raising the ambient light level.

Cardboard barn doors. This kind of DIY solution is so much easier with sources that don't get hot.
Cardboard barn doors. This kind of DIY solution is so much easier with sources that don’t get hot.

I clamped the Dedo to the top of a mirror directly behind Faith, which allowed me to give her a dedicated backlight. I gelled this pink, foreshadowing her eyes glowing this colour at the end of the script.
Other Faith, a visual representation of the heroine’s darker side, was keyed by another dedicated source, this time gelled with Medium Blue/Green again. Ideally this source would have been a Dedo, to achieve fine control, but only an LED panel remained available. So to reduce the panel’s spill onto other characters, I fashioned makeshift barn doors out of a cardboard box.

To light the living room – visible in the background on reverses – I employed the Divalight. This was gelled blue to suggest moonlight and create some depth and separation – a proxy, I suppose, for those deep backgrounds I couldn’t have outside the windows.

Much has been made in recent years of the low-light sensitivity of modern digital cameras, and the attendant reduction in required lighting power. When competing with natural light, larger instruments are still necessary, but Forever Alone really helped me to see what can be achieved with minimal gear. This weekend I get to see how much I can push this in a night exterior scene, as we complete principal photography. Stay tuned.

Working from the foreground back, an LED panel to the right provides the key on Charlotte (centre), with fill supplied by the ceiling light. Faith (right) is keyed by a second panel, gelled with Medium Blue/Green. A Dedo provides backlight, while a blue-gelled Divalite illuminates the background. Image courtesy of Jordan Morris
Working from the foreground back, an LED panel to the right provides the key on Charlotte (centre), with fill supplied by the ceiling light. Other Faith (right) is keyed by a second panel, gelled with Medium Blue/Green. A Dedo provides backlight, while a blue-gelled Divalite illuminates the background. Image courtesy of Jordan Morris
Forever Alone: Day Two

Forever Alone: Day One

Haruka Abe as Faith in Forever Alone. She is side-lit by an LED panel and 3/4 backlit by a Dedo, while a Kinoflo Divalite illuminates the background. Image courtesy of Jordan Morris

When I was offered the role of DP on sci-fi short Forever Alone, I must confess that I had pause for thought. It was a student production, and the lighting package available from the university was much smaller than I’m used to. But I figured it would be a good challenge for me, to see if I could deliver a slick sci-fi look for a script set entirely at night, using only a handful of small instruments.

Creating darkness around the garage door meant making good use of the garage's random contents.
Creating darkness around the garage door meant making good use of the garage’s random contents.

The package consisted of a Dedo kit, a Kinoflo Divalite, two 12×12″ LED panels, a collapsible reflector, a single C-stand (with an arm but no knuckle) and one flag. And we quickly discovered that the Dedo kit contained only one in-tact bubble. On arriving at the house location, I checked out all the ceiling lights and, amongst the energy saver bulbs, found a single 60W tungsten globe. I immediately added that to my modest arsenal, along with my trusty £2 LED camping light which I’d brought along. Additionally, at my request, director Jordan Morris purchased a powerful LED torch for a key sequence. Dynamic practical lighting always looks good, and I thought it might help fill in any areas which our other sources couldn’t reach.

£2 LED camping light

We were shooting on the Blackmagic Cinema Camera with three Canon primes, the slowest of which was f2.8. Regular shots would be recorded in 1080P ProRes, while VFX plates would be captured in the 2.5K CinemaDNG Raw format. I feared I would be struggling to light to f2.8 without raising the camera’s ISO above its native 800, but in fact only one scene felt underexposed.

Interactive light, the low-tech way
Interactive light, the low-tech way: a 60W bulb on a stick

This scene took place in the garage, where the lead character, Faith, uses her superhuman abilities to generate a glowing light source above her head. To create the requisite interactive light, I borrowed the pendant fitting from the ceiling of the garage, removed the fluorescent bulb, put in the 60W tungsten globe and taped it to the end of a broomstick. I had chosen Medium Blue/Green as Faith’s “special powers” colour, but this is a very dark gel. With only a 60W bulb inside, even boomed above Faith’s head, it didn’t shed quite as much light as I wanted. Hopefully these shots, recorded in Raw, can be brought up in the VFX/grading process without too much noise creeping in.

Other sources used in the garage included the two LED panels, colour-balanced to 5600K so as to show up blue on the tungsten-balanced camera. These were positioned in the rafters at either end of the space and dimmed right down, to give a hint of backlight to scenes supposedly taking place in pitch blackness.

The garage’s ceiling light, turned on by the characters of Mitchell and Charlotte when they enter, was represented by our only functioning Dedo. I chose the Dedo for its focus; I didn’t want the room awash with light, just a pool of illumination that would still have shape and mysterious shadows.

Stella Taylor and Oliver Park, as Charlotte and Mitchell, are keyed here by a Dedo in the rafters. A foreground glow is created by an LED panel. Image courtesy of Jordan Morris

For several shots I used my LED camping light as a key, believe it or not, even going so far as to rig it on a stand for certain close-ups. The distances involved were small, so it was quite effective. In one shot (not the one pictured below) I bounced it off the floor AND covered it in tough-spun diffuser, to get an ultra-sublte eyelight.

Haruka Abe as Other Faith, keyed by an LED camping light (£1.50 from a charity shop). Image courtesy of Jordan Morris
Haruka Abe as Other Faith, keyed by the LED camping light shown above. Image courtesy of Jordan Morris

Stay tuned for my report from day two of the shoot.

Forever Alone: Day One

Blackmagic Production Camera Field Report

I was recently the cinematographer on Sophie Black’s Night Owls, my second shoot with my new Blackmagic Production Camera, and the first one to be shot in 4K. I’m loving the rich, detailed and organic images it’s producing. Click on this screen grab to see it at full 4K resolution and witness the crazy amount of detail the BMPC records…

Click on this screen grab to see it at full 4K resolution and witness the crazy amount of detail the BMPC records.
Jonny McPherson in Night Owls

Images from Night Owls courtesy of Triskelle Pictures, Stella Vision and Team Chameleon. Produced by Sophia Ramcharan and Lauren Parker. Starring Jonny McPherson and Holly Rushbrooke.

It’s been documented that the Blackmagics, in common with the early Red Ones, suffer from the CMOS sensor “black sun effect”. As the name suggests, this means that if you get the sun in shot, it’s so bright that it turns black on camera.

On Night Owls I discovered that this also happens with filaments in bulbs. This is unfortunate, since the film features a lot of practicals with bare bulbs.

The coil of the filament appears black on the BMPC's CMOS sensor
The coil of the filament appears purple on the BMPC’s CMOS sensor

The issue can be fixed in post – apparently Da Vinci Resolve’s tracker feature will do it, or failing that some Quickpainting in Shake would certainly get rid of it – but a firmware update from Blackmagic Design to address the issue in-camera would be very welcome. Since they’ve already issued a firmware fix for this problem on the Pocket Cinema Camera, I’m surprised they even started shipping the Production Camera without this fix.

And while we’re on the subject of firmware updates, how about an option to display 2.35:1 guides? Surely in this day and age I shouldn’t be having to do this…

Taping off the camera screen and monitor for a 2.35:1 aspect ratio
The HDMI convertor on the back of my shoulder rig, powered by the V-lock battery

Some issues with my accessories also became apparent during the shoot. Firstly, 2 x 120GB SSDs are not enough. They last about 21 minutes each at 4K. Since we were doing a lot of long takes, we occasionally found the shoot grinding to a halt because the second card card was full and the first card hadn’t finished copying to the DIT’s laptop. Yes, crazy as it sounds, it takes about three times longer to copy the contents of the card – by USB, at least –  than it does to record onto that card in the first place.

Secondly, I’ve purchased two different SDI to HDMI convertors from eBay – this one and this one – and I’ve found them both awful. They’re really designed for use in CCTV systems. The frame rate is jerky and the colours are so wildly inaccurate that I had to switch the monitor to black and white. It looks like I’ll have to buy an SDI monitor. If I can get one with 2.35:1 overlays, that will solve another of my problems at the same time.

So all of these problems can be fixed, either by investing in a little more kit, or by firmware updates which I hope Blackmagic Design will soon issue.

Finally, a word on the aftersales service: my camera turned out to have a faulty speaker; I sent it back and a week later a brand new one arrived. That’s pretty good service in my book.

Overall, I’m very happy that I bought the camera, and so is Sophie. The images look fantastic and I’m sure Night Owls will go far.

Jonny McPherson and Holly Rushbrooke in a screen grab from Night Owls
Blackmagic Production Camera Field Report

Blackmagic Production Camera 4K: Pros and Cons

My BMPC on a Pro-Aim shoulder rig

I recently bought a Blackmagic Production Camera, having twice found myself in the position where I was scrambling about trying to hire one at short notice. Blackmagic Design have since announced the Ursa and the Studio Camera, but for now even the Production Camera is still pretty hard to get hold of.

I haven’t yet used the camera enough to review it in any depth, but I thought this summary of its pros and cons might be useful to those out there considering their own purchase.

The BMPC has two advantages over its predecessor, the BMCC (Blackmagic Cinema Camera):

  • 4K resolution (or 3840×2160 to be precise) rather than 2.5K.
  • Global shutter rather than rolling shutter, so you don’t get any of that “jello” effect in handheld footage, quick pans, etc.

But the BMPC also has several disadvantages over its predecessor, namely:

  • Native ISO of 400, rather than 800, meaning it needs more light.
  • Twelve stops of dynamic range rather than thirteen.
  • Greater power consumption, though not as horrific as I’d been led to believe. My 6.9Ah battery goes dead about seven hours after call time.
  • ProRes is currently the only recording format. No DNxHD, no raw – though presumably that will come as a free firmware update at some point.
The screen is sharp but reflective.

The  BMPC shares many of its predecessor’s problems:

  • Highly reflective screen that is unuseable in daylight or any well-lit space, unless you put a cloth over your head like you’re using a Box Brownie.
  • Internal battery has a very short lifespan and isn’t removeable.
  • Utterly unergonomic form factor, but that’s true of many cameras nowadays. Even supposedly ergonomic ones like the Sony F3 and the Canon C300 are in reality too heavy to handhold for any length of time.
  • Terrible audio circuits, but again that’s par for the course.
  • For monitoring, SDI and Thunderbolt outputs only, no HDMI. (Though if you’re upgrading from a DSLR, any monitor output that doesn’t shut off the camera’s own screen is a bonus.)
  • Can’t shoot highspeed.

But it also shares many of the BMCC’s strengths:

  • Excellent value for money. (The BMPC is currently £2,300 inc VAT.)
  • Lovely organic image with relatively little moiréing and a logarithmic look for the most flexibility in the grade.
  • Comes with a free copy of DaVinci Resolve.
  • No need to transcode footage before editing.
  • Although reflective, the screen is sharp and good for focusing.
  • Simple, uncluttered menus.
  • EF lens mount, so if you’re upgrading from a Canon DSLR you can keep your old lenses.
  • Uses ordinary 2.5″ solid state drives to record onto, rather than proprietary media.
One of my V-lock batteries, mounted on the back of the rig in a vain attempt to make it balance.

The look of this camera’s images are definitely its greatest asset, and coupled with the affordable price tag, it’s hard to beat.

If you’re going to buy one, bear in mind that you’ll also need to buy:

  • SSDs – at least £70 each, depending on the speed and capacity you go for.
  • Docking station for the SSDs (at least £20), unless you want to open up your laptop every time you ingest footage.
  • Battery system – I paid £500 for two unbranded 6.9Ah V-lock batteries, a charger, a plate and a D-tap cable. (Thanks to Richard Roberts for his advice on this.)
  • Rig – even if you’re never going to shoot handheld, you’ll need something to keep the camera and battery together.
  • Either an electronic viewfinder, a monitor or a cloth to put over your head so you can see the built-in screen.
  • An HDMI converter (at least £25) if you don’t have access to an SDI monitor.

More on this camera coming soon.

Blackmagic Production Camera 4K: Pros and Cons

Black Magic Cinema Camera Review

Throughout September I got a crash-course introduction to the Blackmagic Cinema Camera as I used it to shoot Harriet Sams’ period action adventure web series The First Musketeer. The camera was kindly lent to us by our gaffer, Richard Roberts. Part-way through the shoot I recorded my initial thoughts on the camera in this video blog:

Here’s a summary of the key differences between the Blackmagic and a Canon DSLR.

Canon DSLR Blackmagic Cinema Camera
Rolling shutter (causes picture distortion during fast movement) Rolling shutter (though not as bad as DSLRs)
Pixels thrown away to achieve downscaling to 1080P video resolution, results in distracting moiré patterns on fabrics, bricks walls and other grid-like patterns Pixels smoothly downscaled from 2.5K to 1080P to eliminate moiré. Raw 2.5K recording also available
On-board screen shuts off when external monitor is connected On-board screen remains on when external monitor is connected
Some models have flip-out screens which can be adjusted to any viewing angle and easily converted into viewfinders with a cheap loupe attachment On-board screen is fixed and highly reflective so hard to see in all but the darkest of environments
Maximum frame rate: 60fps at 720P Maximum frame rate: 30fps at 1080P
50mm lens is equivalent to 50mm (5D) or 72mm (other models) full-frame lens 50mm lens is equivalent to 115mm full-frame lens
10-11 stops of dynamic range 13 stops of dynamic range
Recording format: highly compressed H.264, although Magic Lantern now allows for limited raw recording Recording format: uncompressed raw, ProRes or DNXHD
Battery life: about 2 hours from the 600D’s bundled battery in movie mode Battery life: about 1 hour from the non-removable internal battery
Weight: 570g (600D) Weight: 1,700g
Audio: stereo minijack input, no headphone socket Audio: dual quarter-inch jacks for input, headphone socket

Having now come to the end of the project, I stand by the key message of my video blog above: if you already own a DSLR, it’s not worth upgrading to a Blackmagic. You’d just be swapping one set of problems (rolling shutter, external monitoring difficulties, aliasing) for another (hard-to-see on-board screen, weight, large depth of field).

The BMCC rigged with a lock-it box for timecode sync with the audio recorder, on a Cinecity Pro-Aim shoulder mount

The depth of field was really the killer for me. Having shot on the 600D for three years I’m used to its lovely shallow depth of field. With the Blackmagic’s smaller 16mm sensor it was much harder to throw backgrounds of focus, particularly on wide shots. At times I felt like some of the material I was shooting looked a bit “TV” as a result.

The small sensor also creates new demands on your set of lenses; they all become more telephoto than they used to be. A 50mm lens used on a crop-chip DSLR like the 600D is equivalent to about an 72mm lens on a full-frame camera like the 5D Mark III or a traditional 35mm SLR. That same 50mm lens used on the Blackmagic is equivalent to 115mm! It was lucky that data wrangler Rob McKenzie was able to lend us his Tokina 11-16mm f2.8 otherwise we would not have been able to get useful wide shots in some of the more cramped locations.

As for the Blackmagic’s ability to shoot raw, it sounds great, but will you use it? I suggest the images you get in ProRes mode are good enough for anything bar a theatrical release, and are of a far more manageable data size. You still get the high dynamic range in ProRes mode (although it’s optional), and that takes a little getting used to for everyone. More than once the director asked me to make stuff moodier, more shadowy; the answer was it is shadowy, you just won’t be able to see it like that until it’s graded.

The colour saturation is also very low, again to give maximum flexibility in the grade, but it makes it very hard for the crew huddled around the monitor to get a sense of what the finished thing is going to look like. As a cinematographer I pride myself on delivering images that looked graded before they actually are, but I couldn’t do that with the Blackmagic. But maybe that’s just a different workflow I’d need to adapt to.

The biggest plus to the BMCC is the lovely organic images it produces, as a result of both the down-sampling from 2.5K and the high dynamic range. This was well suited to The First Musketeer’s period setting. However, I think next season I’ll be pushing for a Canon C300 to get back the depth of field.

I’ll leave you with a few frame grabs from The First Musketeer.

Note: I have amended this post as I originally stated, incorrectly, that the BMCC has a global shutter. The new 4K Blackmagic Production Camera does have a global shutter though.

Black Magic Cinema Camera Review