Making an Analogue Print

This is the latest in my series about analogue photography. Previously, I’ve covered the science behind film capture, and how to develop your own black-and-white film. Now we’ll proceed to the next step: taking your negative and producing a print from it. Along the way we’ll discover the analogue origins of Photoshop’s dodge and burn tools.


Contact printing

35mm contact sheet

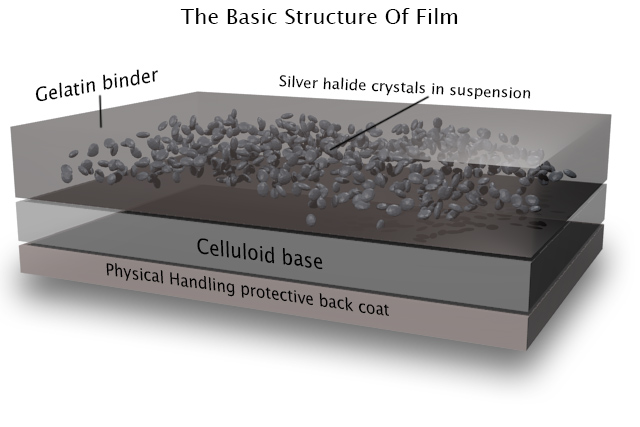
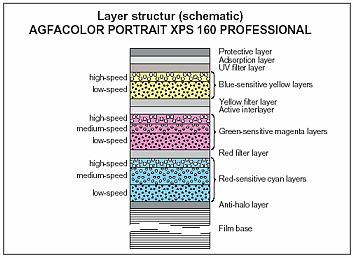
To briefly summarise my earlier posts, we’ve seen that photographic emulsion – with the exception of colour slide film – turns black when exposed to light, and remains transparent when not. This is how we end up with a negative, in which dark areas correspond to the highlights in the scene, and light areas correspond with the shadows.

The simplest way to make a positive print from a negative is contact-printing, so called because the negative is placed in direct contact with the photographic printing paper. This is typically done in a spring-loaded contact printing frame, the top of which is made of glass. You shine light through the glass, usually from an enlarger – see below – for a measured period of time, determined by trial and error. Where the negative is dark (highlights) the light can’t get through, and the photographic emulsion on the paper remains transparent, allowing the white paper base to show through. Where the negative is transparent (shadows) the light passes through, and the emulsion – once developed and fixed in the same way as the original film – turns black. Thus a positive image is produced.

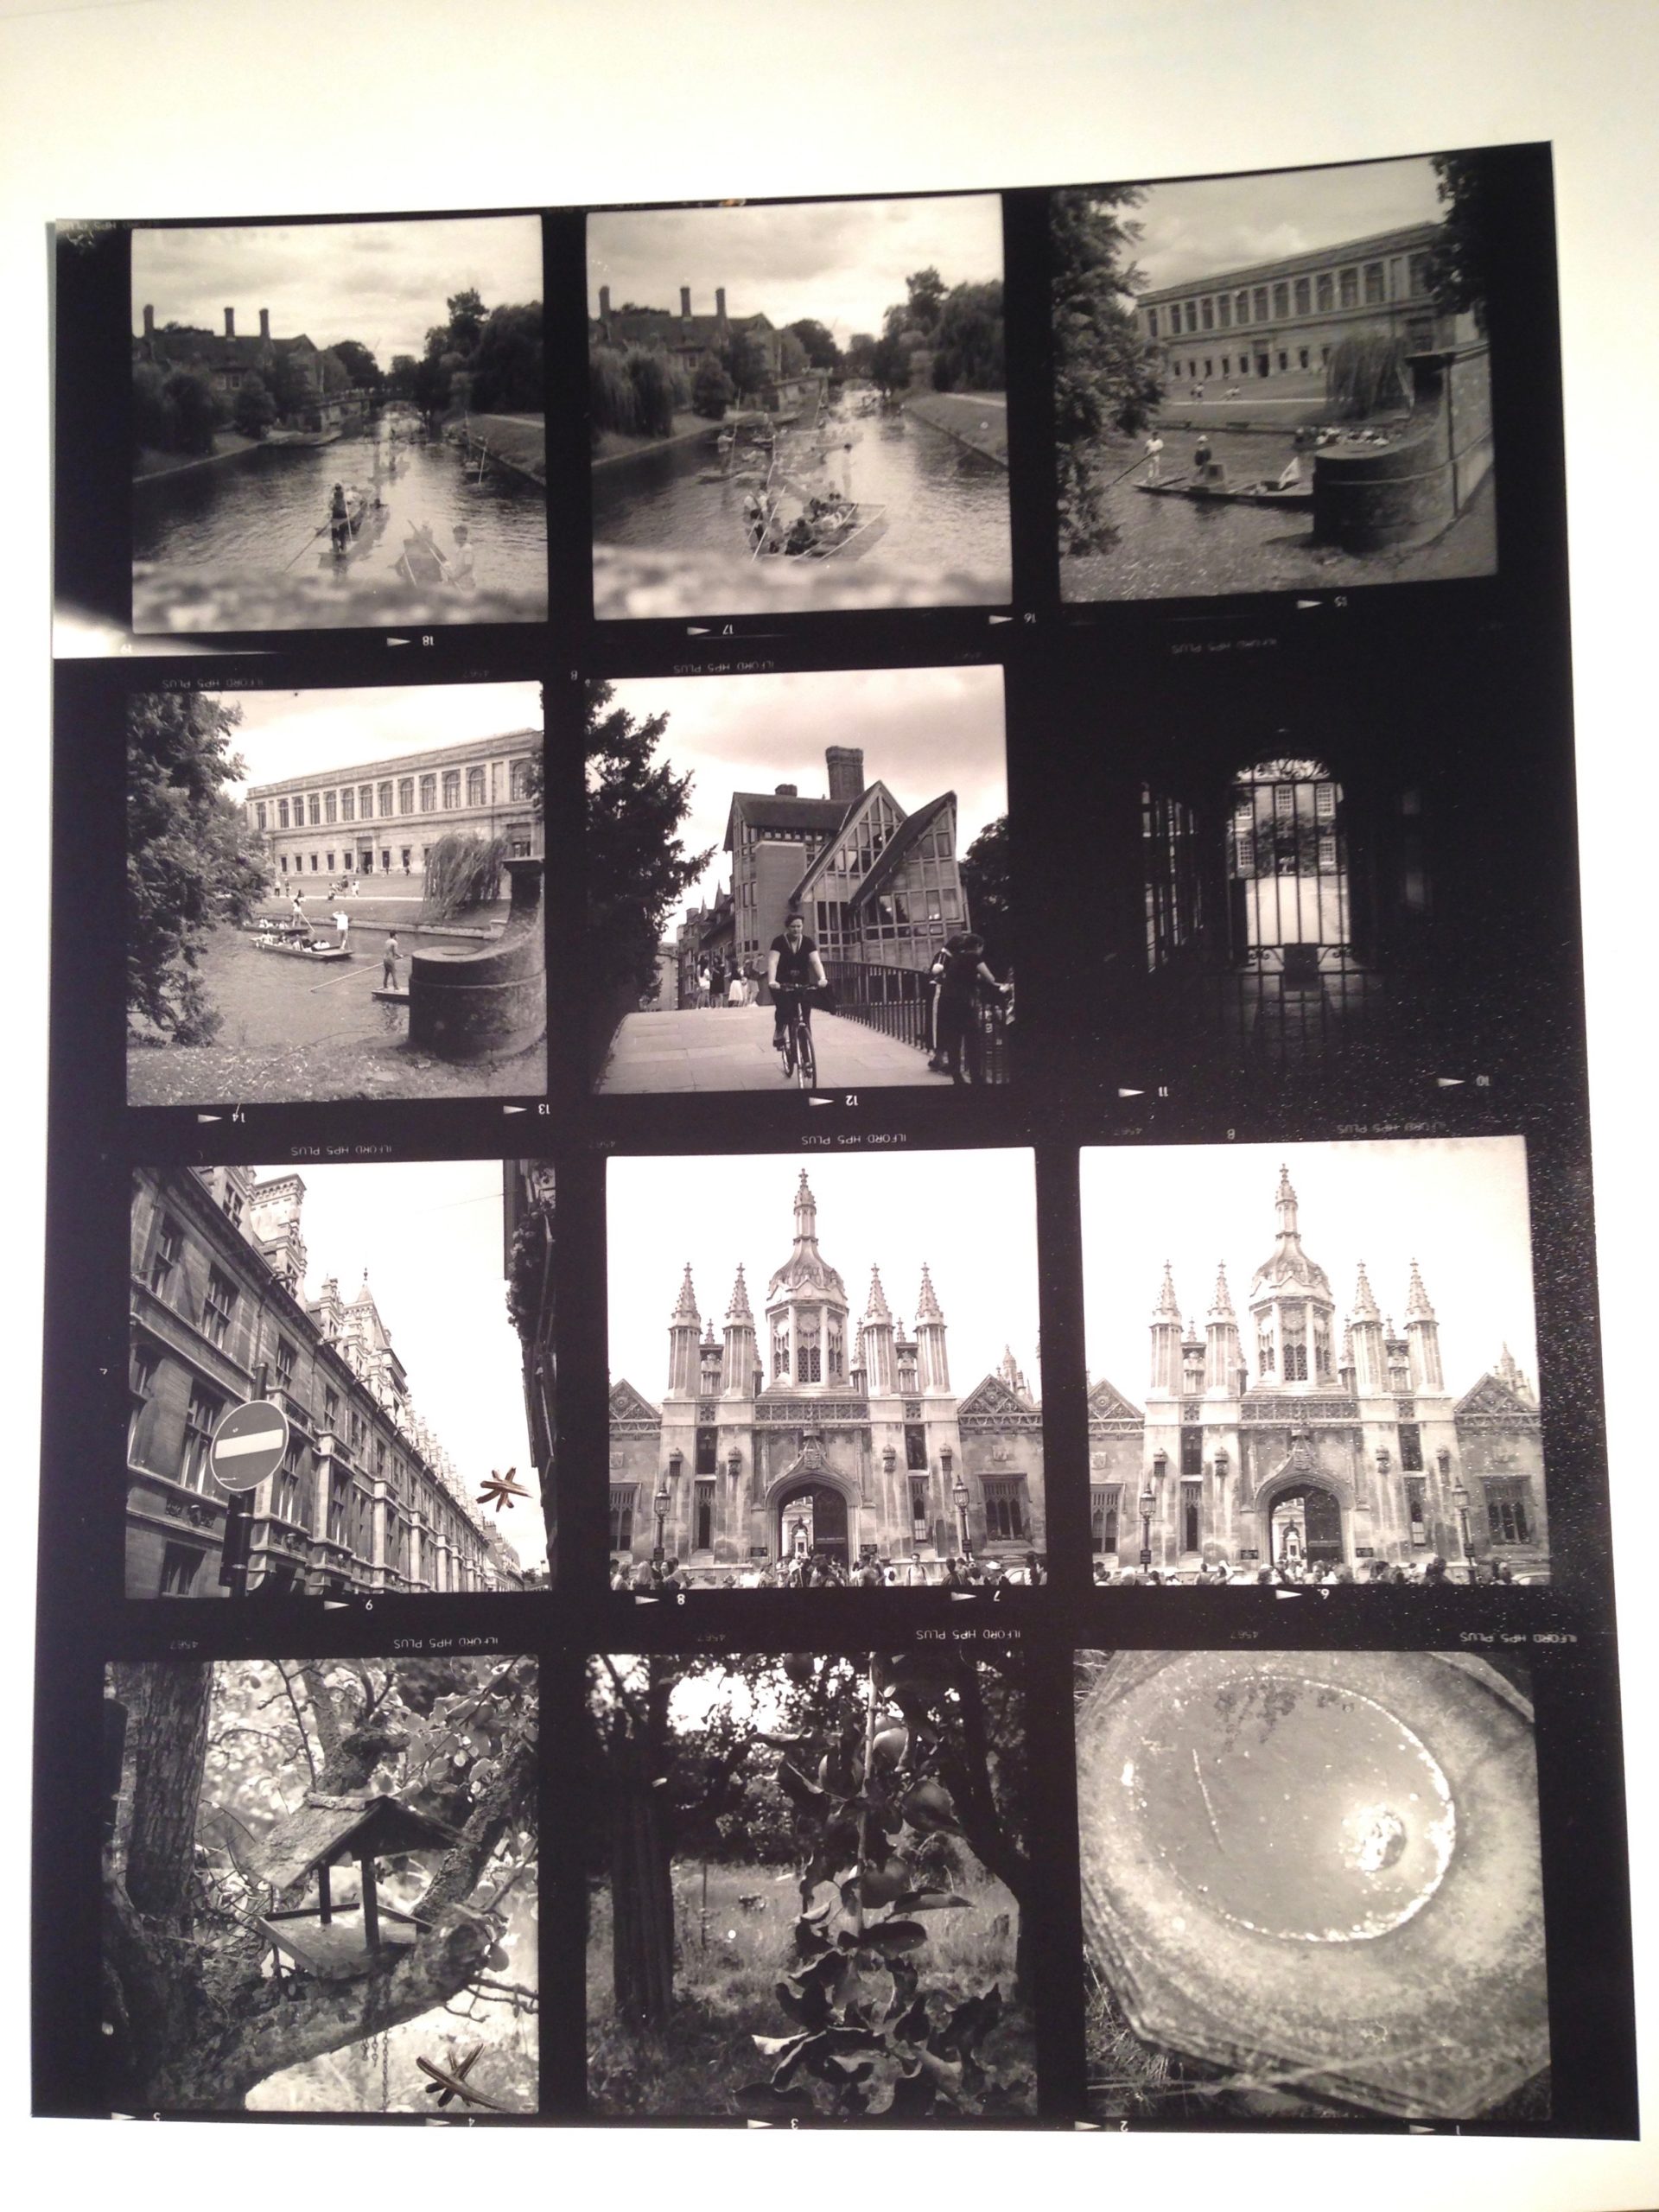
Normally you would contact-print multiple strips of negative at the same time, perhaps an entire roll of film’s worth, if your paper is large enough to fit them all. Then you can examine them through a loupe to decide which ones are worth enlarging. You have probably seen contact sheets, complete with circled images, stars and arrows indicating which frames the photographer or picture editor likes, where they might crop it, and which areas need doctoring. In fact, contact sheets are so aesthetically pleasing that it’s not uncommon these days for graphic designers to create fake digital ones.

The correct exposure time for a contact print can be found by exposing the whole sheet for, say, ten seconds, then covering a third of it with a piece of card, exposing it for another ten seconds, then covering that same third plus another third and exposing it for ten seconds more. Once developed, you can decide which exposure you like best, or try another set of timings.

120 contact sheet


Making an enlargement

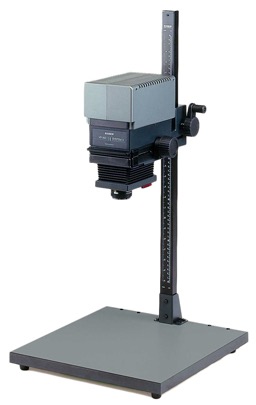
Contact prints are all well and good, but they’re always the same size as the camera negative, which usually isn’t big enough for a finished product, especially with 35mm. This is where an enlarger comes in.

An enlarger is essentially a projector mounted on a stand. You place the negative of your chosen image into a drawer called the negative carrier. Above this is a bulb, and below it is a lens. When the bulb is turned on, light shines through the negative, and the lens focuses the image (upside-down of course) onto the paper below. By adjusting the height of the enlarger’s stand, you can alter the size of the projected image.

Just like a camera lens, an enlarger’s lens has adjustable focus and aperture. You can scrutinise the projected image using a loupe; if you can see the grain of the film, you know that the image is sharply focused.

The aperture is marked in f-stops as you would expect, and just like when shooting, you can trade off the iris size against the exposure time. For example, a print exposed for 30 seconds at f/8 will have the same brightness as one exposed for 15 seconds at f/5.6. (Opening from f/8 to f/5.6 doubles the light, or increases exposure by one stop, while halving the time cuts the light back to its original value.)


Dodging and burning

As with contact-printing, the optimum exposure for an enlargement can be found by test-printing strips for different lengths of time. This brings us to dodging and burning, which are respectively methods of decreasing or increasing the exposure time of specific parts of the image.

Remember that the printing paper starts off bright white, and turns black with exposure, so to brighten part of the image you need to reduce its exposure. This can be achieved by placing anything opaque between the projector lens and the paper for part of the exposure time. Typically a circle of cardboard on a piece of wire is used; this is known as a dodger. That’s the “lollipop” you see in the Photoshop icon. It’s important to keep the dodger moving during the exposure, otherwise you’ll end up with a sharply-defined bright area (not to mention a visible line where the wire handle was) rather than something subtle.

I dodged the robin in this image, to help him stand out.

Let me just say that dodging is a joyful thing to do. It’s such a primitive-looking tool, but you feel like a child with a magic wand when you’re using it, and it can improve an image no end. It’s common practice today for digital colourists to power-window a face and increase its luminance to draw the eye to it; photographers have been doing this for decades and decades.

Burning is of couse the opposite of dodging, i.e. increasing the exposure time of part of the picture to make it darker. One common application is to bring back detail in a bright sky. To do this you would first of all expose the entire image in such a way that the land will look good. Then, before developing, you would use a piece of card to cover the land, and expose the sky for maybe five or ten seconds more. Again, you would keep the card in constant motion to blend the edges of the effect.

To burn a smaller area, you would cut a hole in a piece of card, or simply form your hands into a rough hole, as depicted in the Photoshop icon.


Requirements of a darkroom

The crucial thing which I haven’t yet mentioned is that all of the above needs to take place in near-darkness. Black-and-white photographic paper is less sensitive to the red end of the spectrum, so a dim red lamp known as a safe-light can be used to see what you’re doing. Anything brighter – even your phone’s screen – will fog your photographic paper as soon as you take it out of its lightproof box.

Once your print is exposed, you need to agitate it in a tray of diluted developer for a couple of minutes, then dip it in a tray of water, then place it in a tray of diluted fixer. Only then can you turn on the main lights, but you must still fix the image for five minutes, then leave it in running water for ten minutes before drying it. (This all assumes you’re using resin-coated paper.)

Because you need an enlarger, which is fairly bulky, and space for the trays of chemicals, and running water, all in a room that is one hundred per cent lightproof, printing is a difficult thing to do at home. Fortunately there are a number of darkrooms available for hire around the country, so why not search for a local one and give analogue printing a go?

Some enlargements from 35mm on 8×10″ paper


Making an Analogue Print

How to Process Black-and-White Film

A few weeks ago, I came very close to investing in an Ilford/Paterson Starter Kit so that I could process film at home. I have four exposed rolls of 35mm HP5+ sitting on my shelf, and I thought that developing them at home might be a nice way to kill a bit of lockdown time. However, I still wouldn’t be able to print them, due to the difficulties of creating a darkroom in my flat. And with lockdown now easing, it probably won’t be long until I can get to Holborn Studios and hire their darkroom as usual.

So in this article I’ll talk through the process of developing a roll of black-and-white 35mm, as I would do it in the Holborn darkoom. If you haven’t already, you might want to read my post about how film works first.


You will need


Loading the developing tank

Holborn Studios’ darkroom, run by Bill Ling, displays this handy reminder.

The first step is to transfer the exposed film from its cassette – which is of course light-proof – into the Paterson tank, which is designed to admit the developing chemicals but not light. This transfer must take place in complete darkness, to avoid fogging the film. I’ve always done this using a changing bag, which is a black bag with a double seal and elasticated arm-holes.

Start by putting the following items into the bag: the film cassette, scissors and the various components of the Paterson tank, including the spiral. It’s wise to put in an empty film canister too, in case something goes wrong, and if the tail of your film isn’t sticking out of the cassette then you’ll need a can opener as well.

Seal the bag, put your arms in, and pull all the film out of the cassette. It’s important NOT to remove your arms from the bag now, until the film is safely inside the closed tank, otherwise light can get in through the arm-holes and fog the film.

Use the scissors to cut the end of the film from the cassette, and to trim the tongue (narrower part) off the head of the film.

Paterson Universal Developing Tank components, clockwise from the white items: developing reels or spirals, tank, light-proof lid, waterproof cap, and agitator – which I never use. In the centre is the core.

Now we come to the most difficult part, the part which always has me sweating and swearing and regretting all my life choices: loading the film onto the spiral. I have practised this with dead film many times, but when I’m fumbling around in the dark of the changing bag it’s a hundred times harder.

It’s hard to describe loading the spiral verbally, but this blog post by Chris Waller is very clear and even includes pictures. (Chris recommends cutting a slight chamfer onto the leading corners of the film, which I shall certainly try next time, as well as using your thumbs to keep the film flat on its approach to the reel.)

If you’re working with 120 film, the loading process is very slightly different, and this video describes it well.

Once the spiral is loaded, you can thread it onto the core, place the core inside the tank, and then put the lid on. It is now safe to open the bag.


Developing

Developing time info displayed at Holborn Studios

Holborn Studios’ darkroom is stocked with a working solution of Kodak HC-110 developer, but if you don’t have this luxury, or you’re not using the Ilford Simplicity packs, then you’ll need to make up a working solution yourself by diluting the developer according to the manufacturer’s instructions. For HC-110 dilution B, which is what Holborn uses, it’s 1+31, i.e.one part concentrated developer to 31 parts water. The working solution has a limited shelf life, so again consult the manufacturer’s instructions.

Further dilution is required at the point of development, at a ratio of 1+7 in this case, but once more this may vary depending on the chemicals you choose. For one roll of 35mm, you need 37.5ml of the HC-110 dilution B, and 262.5ml of water for a total of 300ml.

The developing time depends on the type of film stock, the speed you rated it at, the type of developer and its dilution, and the temperature of the chemicals. Digital Truth has all the figures you need to find the right development time.

Agitating

I was taught to ensure my water is always at 20°C before mixing it with the developer, to keep the timing calculations a little simpler. At this temperature, a roll of Ilford HP5+ rated at its box speed of ISO 400 needs five minutes to develop in HC-110 dilution B. Ilford Delta, on the other hand, needs a whopping 14.5 minutes to process at its box speed of 3200.

Once your diluted developer is ready, pour it into the Paterson tank and put on the cap. It is now necessary to agitate the chemicals in order to distribute them evenly around the film. My technique is inversion, i.e. turning the tank upside-down and back again. Do this continuously for the first 30 seconds, then for 10 seconds every minute after that.

Inside the tank, your latent image is being transformed into an image proper, wherein every exposed silver halide crystal is now black metallic silver.


Fixing

Once the developing time is up, remove the cap from the tank, and pour away the developer immediately. At this point some people will say you need to use a stop bath to put a firm halt to the developing process, but I was taught simply to rinse the tank out with tap water and then proceed straight to fixing. This method has always worked fine for me.

After rinsing the tank, pour in enough fix solution (again prepared to the manufacturer’s instructions) to fill it completely. Put the cap back on, agitate it for 30 seconds, then leave it for ten minutes.

During this time, the fixer renders the film’s unexposed crystals inactive and water soluble. When the ten minutes is up, pour the fixer back into its container (it’s reuseable) and leave the tank under running water for a further ten minutes. This washes away the unused silver halide crystals, leaving only the exposed black silver corresponding with light areas of the scene, and just the transparent plastic base corresponding with the dark areas.

Squirt a little diluted washing-up liquid into the tank to prevent drying rings, then drain it. You can now open the tank and see your negative for the first time.


Drying

Remove the film from the developing spiral, taking care to only touch the ends and the edges. Squeegee the top part of the film, dry your hands, then squeegee the rest. This removes droplets which can otherwise mark the negative.

Now attach two hooks to the film, a light one at the top to hang it from, and a heavy one at the bottom to stop the film curling as it dries. Holborn Studios is equipped with a heated drying cabinet, but with patience you can hang a film to dry in any dust-free area.

When your film is dry, you can cut it into strips of six frames and insert them into a negative storage sheet.

You can now scan your negatives, or better still print them photo-chemically, as I’ll describe in a future post.

How to Process Black-and-White Film

How Film Works

Over the ten weeks of lockdown to date, I have accumulated four rolls of 35mm film to process. They may have to wait until it is safe for me to visit my usual darkroom in London, unless I decide to invest in the equipment to process film here at home. As this is something I’ve been seriously considering, I thought this would be a good time to remind myself of the science behind it all, by describing how film and the negative process work.


Black and White

The first thing to understand is that the terminology is full of lies. There is no celluloid involved in film – at least not any more – and there never has been any emulsion.

However, the word “film” itself is at least accurate; it is quite literally a strip of plastic backing coated with a film of chemicals, even if that plastic is not celluloid and those chemicals are not an emulsion. Celluloid (cellulose mononitrate) was phased out in the mid-twentieth century due to its rampant inflammability, and a variety of other flexible plastics have been used since.

As for “emulsion”, it is in fact a suspension of silver halide crystals in gelatine. The bigger the crystals, the grainier the film, but the more light-sensitive too. When the crystals are exposed to light, tiny specks of metallic silver are formed. This is known as the latent image. Even if we could somehow view the film at this stage without fogging it completely, we would see no visible image as yet.

For that we need to process the film, by bathing it in a chemical developer. Any sufficiently large specks of silver will react with the developer to turn the entire silver halide crystal into black metallic silver. Thus areas that were exposed to light turn black, while unlit areas remain transparent; we now have a negative image.

Before we can examine the negative, however, we must use a fixer to turn the unexposed silver halide crystals into a light-insensitive, water-soluble compound that we can wash away.

Now we can dry our negative. At this stage it can be scanned for digital manipulation, or printed photo-chemically. This latter process involves shining light through the negative onto a sheet of paper coated with more photographic emulsion, then processing and fixing that paper as with the film. (As the paper’s emulsion is not sensitive to the full spectrum of light, this procedure can be carried out under dim red illumination from a safe-light.) Crystals on the paper turn black when exposed to light – as they are through the transparent portions of the negative, which you will recall correspond to the shadows of the image – while unexposed crystals again remain transparent, allowing the white of the paper to show through. Thus the negative is inverted and a positive image results.


Colour

Things are a little more complicated with colour, as you might expect. I’ve never processed colour film myself, and I currently have no intention of trying!

The main difference is that the film itself contains multiple layers of emulsion, each sensitive to different parts of the spectrum, and separated by colour filters. When the film is developed, the by-products of the chemical reaction combine with colour couplers to create colour dyes.

An additional processing step is introduced between the development and the fixing: the bleach step. This converts the silver back to silver halide crystals which are then removed during fixing. The colour dyes remain, and it is these that form the image.

Many cinematographers will have heard of a process call bleach bypass, used on such movies as 1984 and Saving Private Ryan. You can probably guess now that this process means skipping or reducing the bleach step, so as to leave the metallic silver in the negative. We’ve seen that this metallic silver forms the entire image in black-and-white photography, so by leaving it in a colour negative you are effectively combining colour and black-and-white images in the same frame, resulting in low colour saturation and increased contrast.

“1984” (DP: Roger Deakins CBE, ASC, BSC)

Colour printing paper also contains colour couplers and is processed again with a bleach step. Because of its spectral sensitivity, colour papers must be printed and processed in complete darkness or under a very weak amber light.


Coming Up

In future posts I will cover the black-and-white processing and printing process from a much more practical standpoint, guiding you through it, step by step. I will also look at the creative possibilities of the enlargement process, and we’ll discover where the Photoshop “dodge” and “burn” tools had their origins. For those of you who aren’t Luddites, I’ll delve into how digital sensors capture and process images too!

How Film Works