“Annabel Lee”: Lighting the Arrival

Last week, Annabel Lee – a short I photographed at the end of 2018 – won its sixth and seventh cinematography awards, its festival run having been somewhat delayed by Covid. I’ve previously written a couple of posts around shooting specific parts of Annabel Lee – here’s one about a Steadicam shot with a raven, and another about the church scene – and today I want to dissect the clip above. The sequence sees our two young refugees, Annabel and E, arriving at the Devonshire cottage where they’ll await passage to France.

I was a last-minute replacement for another DP who had to pull out, so the crew, kit list and locations were all in place when I joined. Director Amy Coop had chosen to shoot on an Alexa Mini with Cooke anamorphic glass, and gaffer Bertil Mulvad and the previous DP had put together a package including a nine-light Maxi Brute, a couple of 2.5K HMIs and some LiteMats.

The Brute is serving as the moon in the exteriors, backlighting the (special effects) rain at least when we’re looking towards the driver. (If you’re not familiar with Maxi Brutes, they’re banks of 1K tungsten pars. Ours was gelled blue and rigged on a cherry-picker.) The topography of the location made it impossible to cheat the backlight around when we shot towards Annabel and E; rain doesn’t show up well unless it’s backlit, so this was quite frustrating.

We didn’t have any other sources going on except the period car’s tungsten headlights. It was very tricky to get the cast to hit the exact spots where the headlights would catch them while not shadowing themselves as they held out their hands with umbrellas or brooches.

Inside the cottage it’s a story point that the electricity doesn’t work, so until E lights the oil lamp we could only simulate moonlight and the headlights streaming in through the window. These latter were indeed a simulation, as we didn’t have the picture car at the time we shot inside. There was a whole sequence of bad luck that night when the camera van got stuck on the single-lane dirt track to the cottage, stranding certain crucial vehicles outside and sealing us all inside for three hours after wrap, until the RAC arrived and towed the camera van. So the “headlights” were a couple of tungsten fresnels, probably 650s, which were panned off and dimmed when the car supposedly departs. We also tried to dim them invisibly so that we could get more light on E as he comes in the door and avoid the Close Encounters look when the window comes into shot, but after a few takes of failing to make it undetectable we had to abandon the idea.

We also didn’t have the rain machine for the interiors, so as E opens the door you might briefly glimpse water being poured from an upstairs window by the art department, backlit by an LED panel. We put one of the HMIs outside a window that’s always off camera left to give us some “moonlight” in the room, create colour contrast with the tungsten headlights and the flame of the oil lamp, and ensure that we weren’t left in complete darkness when the “car” departs. Annabel looks right into it as she hugs E.

When the action moves upstairs, an HMI shines in through the window again. I remember it gave us real camera-shadow problems at the end of the scene, because Steadicam operator Rupert Peddle had to end with his back to that window and the talent in front of him (though the clip above cuts off before we get to that bit). The practical oil lamp does a lot of the work making this scene look great. I was sad that I had to put a little fill in the foreground to make E’s bruises at least a tiny bit visible; this was a LiteMat panel set to a very low intensity and bounced off the wall right of camera.

It’s worth mentioning the aspect ratio. My recollection is that I framed for 2.39:1, which is normal for anamorphic shooting. With the Alexa Mini in 4:3 mode, 2x anamorphic lenses produce an 8:3 or 2.66:1 image, which you would typically crop at the sides to 2.39 in post. When I arrived at the grade Annabel Lee was all in 2.66:1 and Amy wanted to keep it that way. I’m not generally a fan of changing aspect ratios in post because it ruins all the composition I worked hard to get right on set, but there’s no denying that this film looks beautiful in the super-wide ratio.

Finally, let me say a huge thank you to all the people who helped make the cinematography the award-winning success it has become, crucially drone operators Mighty Sky, underwater DP Ian Creed and colourist Caroline Morin. I’m sure the judges for these awards were swayed more by the beautiful aerial and aquatic work than the stuff I actually did!

“Annabel Lee”: Lighting the Arrival

6 Tips for Virtual Production

Part of the volume at ARRI Rental in Uxbridge, with the ceiling panel temporarily lowered

Virtual production technically covers a number of things, but what people normally mean by it is shooting on an LED volume. This is a stage where the walls are giant LED screens displaying real-time backgrounds for photographing the talent in front of. The background may be a simple 2D plate shot from a moving vehicle, for a scene inside a car, or a more elaborate set of plates shot with a 360° rig.

The most advanced set-ups do not use filmed backgrounds at all, but instead use 3D virtual environments rendered in real time by a gaming engine like Unreal. A motion-tracking system monitors the position of the camera within the volume and ensures that the proper perspective and parallax is displayed on the screens. Furthermore, the screens are bright enough that they provide most or all of the illumination needed on the talent in a very realistic way.

I have never done any virtual production myself, but earlier this year I was fortunate enough to interview some DPs who have, for British Cinematographer article. Here are some tips about VP shooting which I learnt from these pioneers.


1. Shoot large format

An ARRI Alexa Mini LF rigged with Mo-Sys for tracking its position within the volume

To prevent a moiré effect from the LED pixels, the screens need to be out of focus. Choosing an LF camera, with their shallower depth of field, makes this easier to accomplish. The Alexa Mini LF seems to be a popular choice, but the Sony Venice evidently works well too.


2. Keep your distance

To maintain the illusion, neither the talent nor the camera should get too close to the screens. A rule of thumb is that the minimum distance in metres should be no less than the pixel pitch of the screens. (The pixel pitch is the distance in millimetres between the centre of one pixel and the centre of the next.) So for a screen of 2.3mm pixel pitch, keep everything at least 2.3m away.


3. Tie it all together

Several DPs have found that the real foreground and the virtual background fit together more seamlessly if haze or a diffusion filter are used. This makes sense because both soften the image, blending light from nearby elements of the frame together. Other in-camera effects like rain (if the screens are rated weatherproof) and lens flares would also help.


4. Surround yourself

The back of ARRI’s main screen, composed of ROE LED panels

The most convincing LED volumes have screens surrounding the talent, perhaps 270° worth, and an overhead screen as well. Although typically only one of these screens will be of a high enough resolution to shoot towards, the others are important because they shed interactive light on the talent, making them really seem like they’re in the correct environment.


5. Match the lighting

If you need to supplement the light, use a colour meter to measure the ambience coming from the screens, then dial that temperature into an LED fixture. If you don’t have a colour meter you should conduct tests beforehand, as what matches to the eye may not necessarily match on camera.


6. Avoid fast camera moves

Behind the scenes at the ARRI volume, built in partnership with Creative Technology

It takes a huge amount of processing power to render a virtual background in real time, so there will always be a lag. The Mandalorian works around this by shooting in a very classical style (which fits the Star Wars universe perfectly), with dolly moves and jibs rather than a lot of handheld shots. The faster the camera moves, the more the delay in the background will be noticeable. For the same reason, high frame rates are not recommended, but as processing power increases, these restrictions will undoubtedly fall away.

6 Tips for Virtual Production

The Cinematography of “Chernobyl”

Like many of us, I’ve watched a lot of streaming shows this year. One of the best was Chernobyl, the HBO/Sky Atlantic mini-series about the nuclear power plant disaster of 1986, which I cheekily binged during a free trial of Now TV.

In July, Chernobyl deservedly scooped multiple honours at the Virgin Media British Academy Television (Craft) Awards. In addition to it claiming the Bafta for best mini-series, lead actor Jared Harris, director Johan Renck, director of photography Jakob Ihre, production designers Luke Hull and Claire Levinson-Gendler, costume designer Odile Dicks-Mireaux, editors Simon Smith and Jinx Godfrey, composer Hildur Gudnadóttir, and the sound team all took home the awards in their respective fiction categories.

I use the phrase “took home” figuratively, since no-one had left home in the first place. The craft awards ceremony was a surreal, socially-distanced affair, full of self-filmed, green-screened celebrities. Comedian Rachel Parris impersonated writer/actor Jessica Knappett, and the two mock-argued to present the award for Photography & Lighting: Fiction. Chernobyl’s DP Jakob Ihre, FSF gave his acceptance speech in black tie, despite being filmed on a phone in his living room. In it he thanked his second unit DP Jani-Petteri Passi as well as creator/writer Craig Mazin, one of the few principal players not to receive an award.

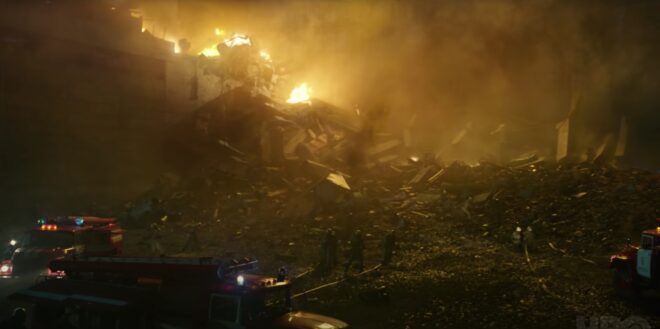
Mazin crafted a tense and utterly engrossing story across five hour-long instalments, a story all the more horrifying for its reality. Beginning with the suicide of Harris’ Valery Legasov on the second anniversary of the disaster, the series shifts back to 1986 and straight into the explosion of the No. 4 reactor at the Chernobyl Nuclear Power Plant in the Soviet Ukraine. Legasov, along with Brosi Shcherbina (Stellan Skarsgård) and the fictional, composite character Ulana Khomyuk (Emily Watson) struggle to contain the meltdown while simultaneously investigating its cause. Legions of men are sacrificed to the radiation, wading through coolant water in dark, labyrinthine tunnels to shut off valves, running across what remains of the plant’s rooftop to collect chunks of lethal graphite, and mining in sweltering temperatures beneath the core to install heat exchangers that will prevent another catastrophic explosion.

For Swedish-born NFTS (National Film and Television School) graduate Jakob Ihre, Chernobyl was a first foray into TV. His initial concept for the show’s cinematography was to reflect the machinery of the Soviet Union. He envisaged a heavy camera package representing the apparatus of the state, comprised of an Alexa Studio, with its mechanical shutter, plus anamorphic lenses. “After another two or three months of preproduction,” he told the Arri Channel, “we realised maybe that’s the wrong way to go, and we should actually focus on the characters, on the human beings, the real people who this series is about.”

Sensitivity and respect for the people and their terrible circumstances ultimately became the touchstone for both Ihre and his director. The pair conducted a blind test of ten different lens sets, and both independently selected Cooke Panchros. “We did a U-turn and of course we went for spherical lenses, which in some way are less obtrusive and more subtle,” said Ihre. For the same reason, he chose the Alexa Mini over its big brother. A smaller camera package like this is often selected when filmmakers wish to distract and overwhelm their cast as little as possible, and is believed by many to result in more authentic performances.

When it came to lighting, “We were inspired by the old Soviet murals, where you see the atom, which is often symbolised as a sun with its rays, and you see the workers standing next to that and working hand in hand with the so-called ‘friendly’ atom.” Accordingly, Ihre used light to represent gamma radiation, with characters growing brighter and over-exposed as they approach more dangerous areas.

Ihre thought of the disaster as damaging the fabric of the world, distorting reality. He strove to visualise this through dynamic lighting, with units on dimmers or fitted with remote-controlled shutters. He also allowed the level of atmos (smoke) in a scene to vary – normally a big no-no for continuity. The result is a series in which nothing feels safe or stable.

The DP shot through windows and glass partitions wherever possible, to further suggest a distorted world. Working with Hull and Levinson-Gendler, he tested numerous transparent plastics to find the right one for the curtains in the hospital scenes. In our current reality, filled with perspex partitions (and awards ceremonies shot on phones), such imagery of isolation is eerily prescient.

The subject of an invisible, society-changing killer may have become accidentally topical, but the series’ main theme was more deliberately so. “What is the cost of lies?” asks Legasov. “It’s not that we’ll mistake them for the truth. The real danger is that if we hear enough lies, then we no longer recognise the truth at all.” In our post-truth world, the disinformation, denial and delayed responses surrounding the Chernobyl disaster are uncomfortably familiar.

This article first appeared on RedShark News.

The Cinematography of “Chernobyl”

“Above the Clouds”: The Spoiler Blogs

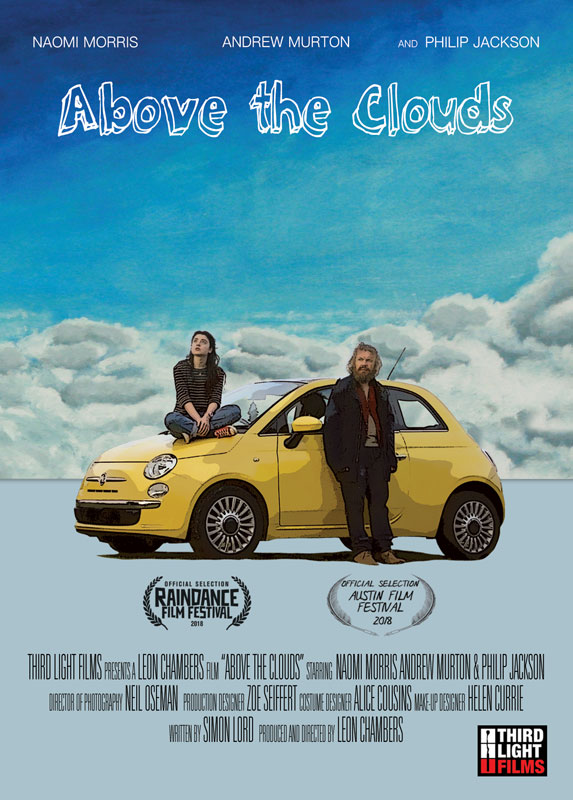
During 2016-2017 I blogged about the production of Above the Clouds, a comedy road movie which I shot for director Leon Chambers. It premiered at Raindance in 2018, closely followed by Austin Film Festival, where it won the audience award for Best Narrative Feature, the first of four gongs it would collect.

In two decades of filmmaking, Above the Clouds is easily in the top five productions I’m most proud of. Since this January it has been available on AmazoniTunesGoogle Play and other platforms, and I highly recommend you give it a watch. DO NOT continue reading this blog unless you have, because what follows are two blog entries that I held back due to spoilers.


DAY 14

(from Week 3)

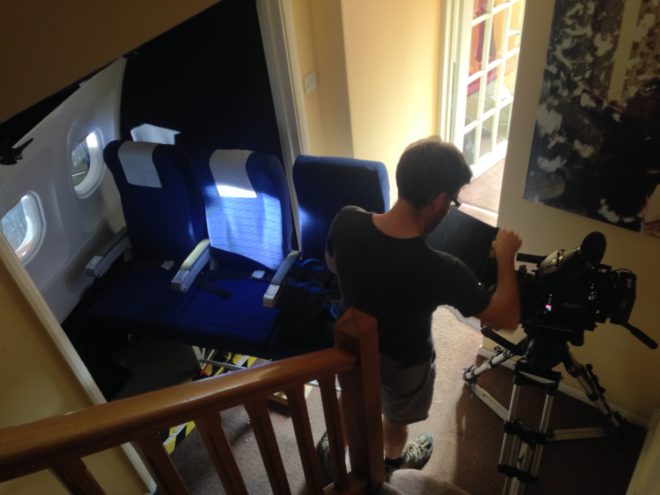
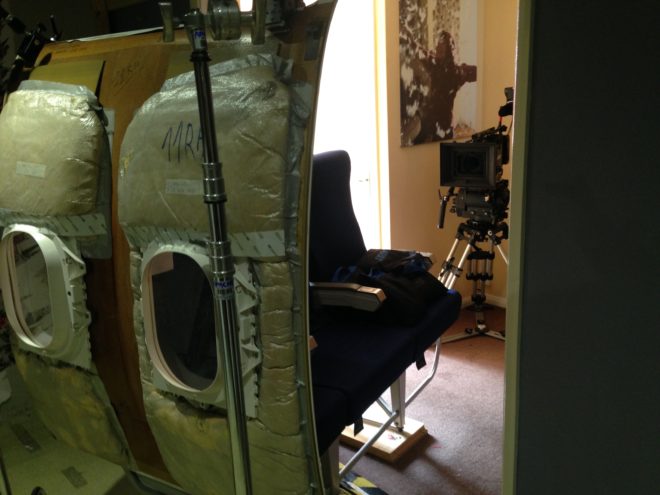
The script calls for Charlie to be seen sitting in the window seat of a plane as it rises quite literally above the clouds. This is another micro-set filmed in Leon’s living room, in fact half in the living room and half in the hall, to leave enough room for the lights beyond.

Although the view out of the window will be added in post, I need to simulate the lighting effect of bursting through the clouds. My plan involves a 1.2K HMI, and a 4×4 poly board held horizontally with a triple layer of 4×4 Opal sheets hanging from one edge.

We start with the HMI pointed straight into the window and the poly board held high up so that the Opal hangs in front of the lamp. As the plane supposedly rises through the cloud layer, Colin lowers the poly until it is below the level of the lamp, while Gary tilts the HMI down so its light skips off the poly (like sun skipping off the top of clouds) and bounces back up into the window. Gary then tilts the HMI back up to point straight into the window, to suggest further banking or climbing of the aircraft. This direct light is so hot that it bounces off the armrest of Charlie’s seat and gives a glow to her cheek which syncs perfectly with a smile she’s doing.


DAY 25

(from February 2017 pick-ups)

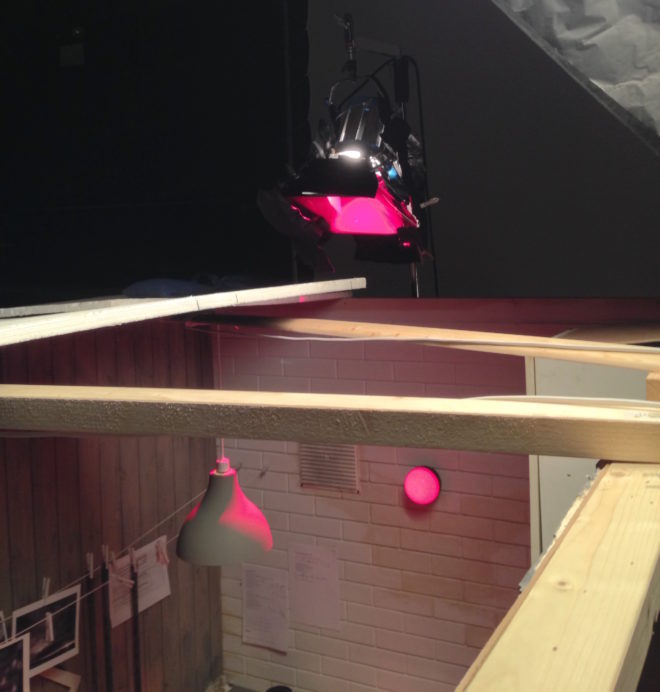
Today’s set is a dark room. A photographer’s dark room, that is. Not just a random dimly-lit room.

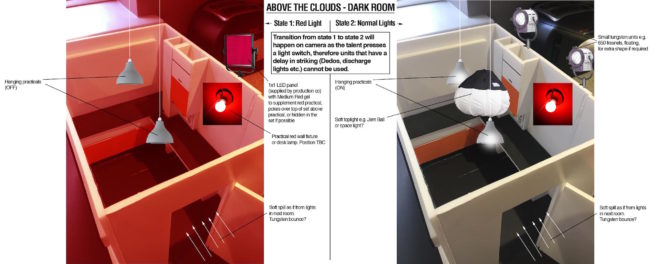
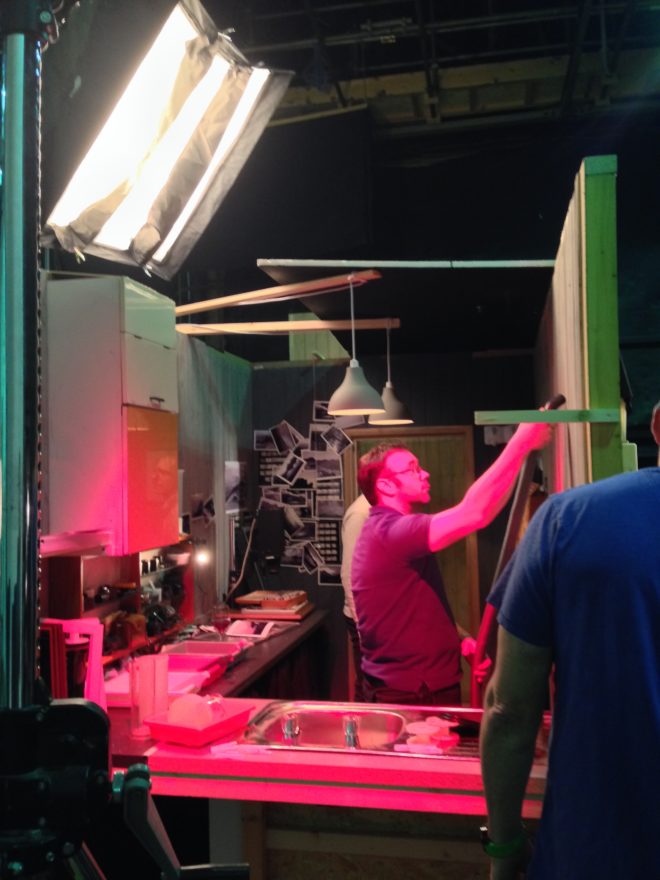
We begin with only the red safe-light in play. The wall-mounted practical has a 15W bulb, so it needs some serious help to illuminate the room. Micky rigs a 1K pup with Medium Red gel and fires it over the top of the set, above the practical. The effect is very convincing. Pure red light can make everything look out of focus on camera, which is why I chose the slightly magenta Medium Red gel, rather than the more realistic Primary Red. The colourist will be able to add some green/yellow to correct this.

During the scene, Naomi pulls a cord and the normal lights come on. These are two hanging practicals, fitted with dimmed 100W tungsten globes. In a very similar set-up to yesterday, we use a 2K with a chimera, poking over the set wall on the camera’s down-side, to enhance and soften the practicals’ light.

To read all the Above the Clouds blogs from the start, click here.

“Above the Clouds”: The Spoiler Blogs

Grading “Above the Clouds”

Recently work began on colour grading Above the Clouds, a comedy road movie I shot for director Leon Chambers. I’ve covered every day of shooting here on my blog, but the story wouldn’t be complete without an account of this crucial stage of postproduction.

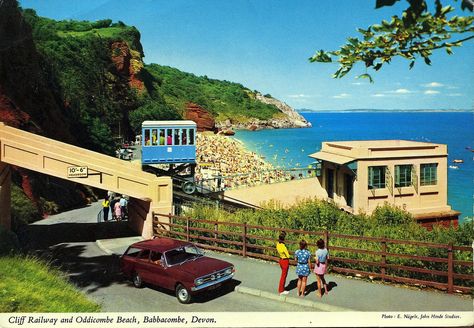
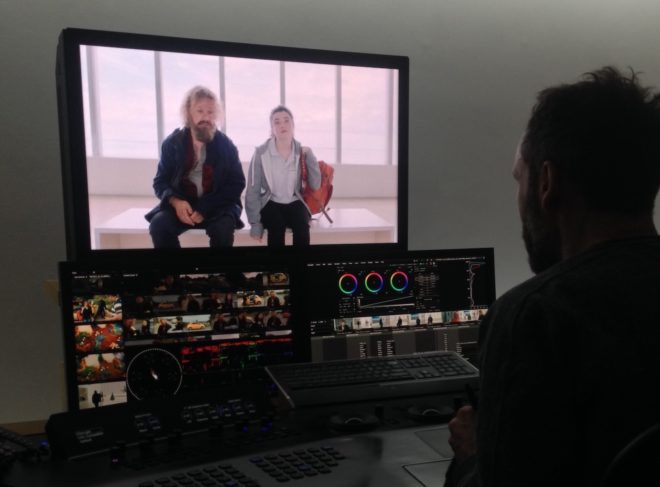
I must confess I didn’t give much thought to the grade during the shoot, monitoring in Rec.709 and not envisaging any particular “look”. So when Leon asked if I had any thoughts or references to pass on to colourist Duncan Russell, I had to put my thinking cap on. I came up with a few different ideas and met with Leon to discuss them. The one that clicked with his own thoughts was a super-saturated vintage postcard (above). He also liked how, in a frame grab I’d been playing about with, I had warmed up the yellow of the car – an important character in the movie!
Leon was keen to position Above the Clouds‘ visual tone somewhere between the grim reality  of a typical British drama and the high-key gloss of Hollywood comedies. Finding exactly the right spot on that wide spectrum was the challenge!

“Real but beautiful” was Duncan’s mantra when Leon and I sat down with him last week for a session in Freefolk’s Baselight One suite. He pointed to the John Lewis “Tiny Dancer” ad as a good touchstone for this approach.

We spent the day looking at the film’s key sequences. There was a shot of Charlie, Oz and the Yellow Peril (the car) outside the garage from week one which Duncan used to establish a look for the three characters. It’s commonplace nowadays to track faces and apply individual grades to them, making it possible to fine-tune skin-tones with digital precision. I’m pleased that Duncan embraced the existing contrast between Charlie’s pale, freckled innocence and Oz’s dirty, craggy world-weariness.

Above the Clouds was mainly shot on an Alexa Mini, in Log C ProRes 4444, so there was plenty of detail captured beyond the Rec.709 image that I was (mostly) monitoring. A simple example of this coming in useful is the torchlight charity shop scene, shot at the end of week two. At one point Leo reaches for something on a shelf and his arm moves right in front of his torch. Power-windowing Leo’s arm, Duncan was able to bring back the highlight detail, because it had all been captured in the Log C.

But just because all the detail is there, it doesn’t mean you can always use it. Take the gallery scenes, also shot in week two, at the Turner Contemporary in Margate. The location has large sea-view windows and white walls. Many of the key shots featured Oz and Charlie with their backs towards the windows. This is a classic contrasty situation, but I knew from checking the false colours in log mode that all the detail was being captured.

Duncan initially tried to retain all the exterior detail in the grade, by separating the highlights from the mid-tones and treating them differently. He succeeded, but it didn’t look real. It looked like Oz and Charlie were green-screened over a separate background. Our subconscious minds know that a daylight exterior cannot be only slightly brighter than an interior, so it appeared artificial. It was necessary to back off on the sky detail to keep it feeling real. (Had we been grading in HDR [High Dynamic Range], which may one day be the norm, we could theoretically have retained all the detail while still keeping it realistic. However, if what I’ve heard of HDR is correct, it may have been unpleasant for audiences to look at Charlie and Oz against the bright light of the window beyond.)

There were other technical challenges to deal with in the film as well. One was the infra-red problem we encountered with our ND filters during last autumn’s pick-ups, which meant that Duncan had to key out Oz’s apparently pink jacket and restore it to blue. Another was the mix of formats employed for the various pick-ups: in addition to the Alexa Mini, there was footage from an Arri Amira, a Blackmagic Micro Cinema Camera (BMMCC) and even a Canon 5D Mk III. Although the latter had an intentionally different look, the other three had to match as closely as possible.

A twilight scene set in a rural village contains perhaps the most disparate elements. Many shots were done day-for-dusk on the Alexa Mini in Scotland, at the end of week four. Additional angles were captured on the BMMCC in Kent a few months later, both day-for-dusk and dusk-for-dusk. This outdoor material continues directly into indoor scenes, shot on a set this February on the Amira. Having said all that, they didn’t match too badly at all, but some juggling was required to find a level of darkness that worked for the whole sequence while retaining consistency.

In other sequences, like the ones in Margate near the start of the film, a big continuity issue is the clouds. Given the film’s title, I always tried to frame in plenty of sky and retain detail in it, using graduated ND filters where necessary. Duncan was able to bring out, suppress or manipulate detail as needed, to maintain continuity with adjacent shots.

Consistency is important in a big-picture sense too. One of the last scenes we looked at was the interior of Leo’s house, from weeks two and three, for which Duncan hit upon a nice, painterly grade with a bit of mystery to it. The question is, does that jar with the rest of the movie, which is fairly light overall, and does it give the audience the right clues about the tone of the scene which will unfold? We may not know the answers until we watch the whole film through.

Duncan has plenty more work to do on Above the Clouds, but I’m confident it’s in very good hands. I will probably attend another session when it’s close to completion, so watch this space for that.

See all my Above the Clouds posts here, or visit the official website.

Grading “Above the Clouds”

“Above the Clouds”: Week 4

IMG_0725Day 18 / Tuesday

Yesterday some of the crew started the long drive up to Skye, but for a lucky few – me, MUA Helen and actors Naomi and Andy – our journey starts today with a flight from Luton to Inverness. From there it’s a two-and-a-half-hour drive across the Highlands to the Kyle of Kochalsh, where Gary is waiting for us with his motorhome and the crafty table all set up. Soon afterwards the vans arrive, and the Yellow Peril. From 4pm we are shooting on a little ferry, big enough to hold three or four cars, as it pootles back and forth, back and forth between Skye and the mainland. It is, I think, the most stunning location I have ever shot in. The mountains tower over us from either side of the water, which sparkles in the sun. Although the light turns cloudy pretty quickly, the scene looks epic. All I do is add the usual dashboard LEDs in the picture car, and some sky bounce from Celotex, and darken the skies a little with an ND grad.

IMG_0713

Day 19 / Wednesday

For some reason there’s no water at the cottage where many of us are staying, so it’s a slightly whiffy cast and crew that rocks up in another stunning location this morning. In common with the whole shoot to date, the weather – and therefore the light – is very changeable. We have to roll between the squalls that drift across the valley. An interesting continuity issue arises with the mountains in the background of shot: the light on them keeps changing as clouds move across them. The weather here really is something else; this morning we saw a rainbow so close and so low to the ground that it felt like we could have walked over and touched it.

IMG_0751In the afternoon we’re at yet another stunning location, a bench overlooking a bay. For once the light is fairly constant and sunny, which gives us lovely sparkles in the sea. Again I frame the master like the painting in the Turner, with the horizon bang on the vertical centre of frame: clouds above, landscape and characters below. When we flip around to shoot the singles, the light is hard on the actors’ faces, but frontal, which at least is the most flattering kind of hard light. And it fits well with the dialogue, which references it being sunny, so it wouldn’t make sense to put a diffusion frame up. All I do is have runner Jacob stand just out of frame with some poly, which lifts the shadows a little and makes sure we see into Naomi’s eyes when she looks away from the sun.


Day 20 / Thursday

IMG_0768Various small driving scenes to start with. Rupert and Max reconfigure the camera as per our test of week 2, and I climb into the Yellow Peril’s modest rear seat to capture the action. I black out the rear window to get a classic dark-to-light depth effect: underexposed backs of seats in the foreground, the actors (including Naomi’s reflection in the rear view mirror) correctly exposed in the midground, and the view through the windscreen slightly overexposed in the background.

We also shoot exterior up-and-pass shots of the car amidst the spectacular scenery, before crossing the Skye Bridge to record a scene in a mainland village. Here we’re shooting dusk-for-night, so I set the white balance to 3,200K and heavily grad the sky. For shots inside the car, I plaster multiple Litepads over the windscreen, gelled with half CTO. The intention was for these to represent the car’s courtesy light, but with a fair amount of daylight coming into the vehicle the effect is more subtle, serving only to warm up what would otherwise be very cold skin-tones at 3,200K.

IMG_0775On the final set-up, appropriately enough, a car with clouds painted on it happens to drive by. And with that, principal photography is wrapped. There is a fifth week to do at some point, perhaps September, when a certain critical role has been cast, but for now the shoot is over. Andy, Naomi, Helen and I will meander back to Inverness tomorrow, while the rest of the crew drive south. I’ve had a great time, and I look forward to seeing a rough cut and shooting the remaining scenes later in the year.

Keep up to date with Above the Clouds on the official Facebook page or Instagram account.

“Above the Clouds”: Week 4

“Above the Clouds”: Week 3

IMG_0572Day 12 / Sunday

A split day, starting with two scenes at two different petrol stations (one of them open!). It’s a sunny day and when the cast stand next to the Yellow Peril (the picture car) they are bathed in yellow bounce. We build on this by bouncing more light with the gold side of a Lasolite.

IMG_0590Next we have some interiors in a soup kitchen, which will intercut and contrast with the dining room scenes from day one. Whereas the dining room had perfect three point lighting with a Rembrandt key, I want the soup kitchen to look much less pleasant, so I use toplight, broken keys and cross-light to bring out the texture of the peeling walls.

Our last scene is a night exterior. A sodium vapour security light which we can’t turn off is already backlighting the set. Rather than fighting it, we beef it up using the 1.2K gelled with Urban Sodium. This forms half of a cross-backlighting set-up, paired with a 1×1 LED panel gelled with Quarter Plus Green. Another 1×1 gelled with Mustard Yellow provides a pool of light in the background, while the 4×4 Kino gelled wth full CTB supplies a tiny bit of ‘moonlight’ fill. I’ve never lit a scene with so many different colours, but it feels realistic because there are so many different kinds of streetlamps and security lights in our towns and cities these days.


Day 13 / Monday

IMG_0595In the pub all day. The scenes are meant to have an evening feel, so we black out the windows with thin weed-blocking material which lets a little light through, and close the curtains. On a tungsten white balance we get just a little blue glow coming through the curtains. The window in the door has no curtains, so we gel it with .9 ND and it looks convincingly dusky outside.

Fairly standard stuff today, lighting wise. Cross-backlighting for bar scenes, a bit of blue glow in the deep background from a kino to give depth and show up the smoke.

We echo the Turner scenes with a symmetrical shot of Andy and Naomi seated in front of the fireplace. For a soft, pleasing key we bounce fire both the Dedos into a poly board. A double CTO-gelled LED panel on the floor enhances the backlight from the fire, and the pub’s practicals do the rest.

One of the last close-ups we do has an alcove in the background. It bothers me that the brickwork in there is the same shade and tone as the foreground brickwork – we’re losing the dimensionality – so I have Colin run in with a bit of half CTB to cool down the sconce slightly and separate the alcove.


Day 14 / Tuesday

IMG_0612

IMG_0613More micro sets in Leon’s living room. One of them is a tiny under-the-stairs bathroom, which we light with a single bare bulb hanging down into the shots. Again the Alexa’s dynamic range allows me to hold all the highlights and shadows, even when Andy is inches from the bulb, and it looks completely authentic on camera.

For the first time I try gelling the Rosco Litepads to match the tungsten Dedos. It doesn’t work; the Litepads are noticeably greener. If I try that again I’ll need to spend some time to find the correct cocktail of minus green and CTO gels.


IMG_0633Day 15 / Wednesday

After one final micro set in Leon’s living room we move upstairs for some crucial scenes in the master bedroom. I light it with a 2.5K HMI coming in through the window, that being really the only option. I shape this with gels, diffusion and black-out on the window or the lamp-head itself. For example, when we do Naomi’s close-ups I stick two or three layers of opal to the middle section of the window. That way we keep the nice hot streaks on the background wall, but Naomi has a much softer light on her.

The only other sources are the two 6×2″ Litepads hidden in the wardrobe behind a key prop, dimmed right down so they just silhouette the prop very, very slightly. For the final bedroom scene I go purely with available light, since the sun is now shining in at a nice angle, hitting the bed and bouncing back up into Naomi’s face.

It’s our last day in Kent, and many of the crew will be returning home tonight and commuting for the rest of the week, so it feels like the end of an era. Nevertheless, we remain detached and professional. No-one kidnaps Naomi’s stuffed dog Rupert and messages a picture of him tied up and gagged with gaffer tape, and definitely no-one retaliates by kidnapping Colin’s dashboard Spider-pig.


Day 16 / Thursday

IMG_0642

We are at Longcross Studio & Test Track, an ex-MOD facility in Berkshire. We stage a traffic jam on a road originally built for tank trials. The 85mm lens gets more use than it has the whole shoot so far. The compression of perspective works perfectly for the scene, enhancing the feeling that the characters are hemmed in both physically and psychologically.

Most of the action takes place inside the car and is shot raking across the characters from a side window. To get the best shape to the natural light, we black out the sunroof and place negative fill on the window closest to camera, then bounce in extra light through the windscreen.

The rota polar sees extensive use again, although sometimes it reveals weird circular patterns in the car’s window glass.


IMG_0650Day 17 / Friday

Our second day at Longcross, and this time we’re using the main loop of track. It’s non-exclusive, so occasionally a prototype sports car zooms past us, or a stills photographer hanging out of the boot of an SUV.

Day-playing grip Darren has brought his universal mount which we use as a hostess tray, shooting in through the passenger or driver’s windows. (Leon is not a fan of bonnet-mounted shots.) The rig prevents us from closing the window, which necessitates minor rewrites, but the shots look great and allow us to cover large swathes of dialogue relatively quickly.

The picture car is towed on an A-frame by Andrew’s Landrover. Riding in the Landrover are Leon, Rupert and me, each with a monitor. Leon’s shows a clean picture, Rupert’s of course has focus assist, and I switch mine between clean and false colours so that I can monitor the exposure as we go around the track. Leon connects his mixer to the Landrover’s stereo so that we can all hear the dialogue. Communication back to the picture car is achieved via radio with Max, hiding on the back seat, popping out to slate and even reading in lines for a phone conversation.

IMG_0658Col rigs the two 6×2″ Litepads to the dashboard. They mitigate the sunroof’s toplight by filling in the shadows very slightly, but more importantly they put a sparkle in the actors’ eyes, which always helps the performances come across on camera. I take a light reading inside the Yellow Peril before each lap, but due to the number of trees around the track, light levels during the takes are about two stops below what I get in the car park when we’re prepping. Fortunately the cloud cover is fairly consistent today so there aren’t hot patches of sun to contend with.

Today wraps the English portion of principal photography for Above the Clouds, and we sadly say goodbye to Colin, Zoë, Alice and Andrew. It’s been a really fun team to work with, and it will be strange next week without them.

“Above the Clouds”: Week 3

“Above the Clouds”: Week 2

Day 7 / Monday

image
One of our biggest days, shooting several key scenes from the first act of the movie. We’re in the Turner Contemporary in Margate, and getting this location is a big coup for the production. On the flip side, the amount of material we have to get through in our nine hour day is only achievable if lighting is kept to an absolute minimum. I know from the photos that Leon has shown me that there is plenty of natural light from the floor-to-ceiling windows and bright white walls. I also know that with eight scenes on the day’s schedule, there isn’t time to rig the kind of extensive negative fill we used at the roadside cafe last week.

We start in the Turner’s cafe, where angles towards the windows look great with the beach and seafront in the background and the daylight wrapping softly from behind and one side. In the opposite direction the light is extremely flat, but there is no time to do anything but hand-bash a little negative fill, grin and bear it.

Upstairs in the gallery, the sea-view windows are so big and there is so much bounce off the walls that there is only about a single stop’s difference between looking towards the window and looking away from it. Nonetheless, we bring in poly and Celotex for the seaward shots to add a little shape and put nice reflections in the talent’s eyes.

Responding to the formality of the gallery setting, there is an unspoken agreement between Leon and I to shoot on sticks and compose centrally or symmetrically. I end the day feeling that we have captured some of the film’s most iconic images.


imageDay 8 / Tuesday

Back in Margate for seafront exteriors. The weather is lovely to start with, but gradually goes down hill as the day progresses. For the first scene we have light cloud, and we use the 8×8 full grid cloth as a bounce to fill in the shadows. For close-ups we add silver from Celotex or a Lasolite to give the talent extra radiance and a glint in their eyes. (See my post on Health Bounce for more on this.)

The influence of yesterday’s gallery scenes is still being felt on the compositions. In wide shots I try to use the horizon to divide the frame into two halves, like the diptych the characters were looking at in the Turner: one above the clouds (or more accurately OF the clouds), and one below. I use a graduated ND filter on most of the day’s wide shots. Even though the Alexa’s dynamic range means that grads are rarely necessary to retain the detail in skies, and they can be added in post, I prefer to get the look in camera, especially on a micro-budget project where time in the grading suite may be very precious.

The day ends with a dusk shot of Oz shuffling along the seafront, which we shoot in the window between the streetlights coming on and the daylight dropping off completely. I set the white balance to 3200K to emphasise the evening look. The colour and positions of the streetlights aren’t great, but there is a lot of production value in the backdrop of Margate, bathed in cool ambience and sprinkled with points of light.


imageDay 9 / Wednesday

Our first scene is on a layby overlooking an estuary. Again the weather starts off nice but deteriorates as the day goes on. By the time we get back to Leon’s for the next scene, the rain is getting noticeable enough that continuity with adjacent scenes is an issue. We decide to wrap for the day.

The camera team uses the time to re-build the Alexa Mini as small as possible and test different lenses inside the picture car for upcoming driving scenes. Our main angles will be from the back seat, looking diagonally forwards for three-quarter singles and straight ahead for a central shot over both driver and passenger’s shoulders to the windscreen. We find that the 24 and 32 work well for the former, and the 20 for the latter. We have a 14, because I knew space would be tight in the car, but it just looks like a Top Gear Go Pro shot.


imageDay 10 / Thursday

We’re in another tiny set in Leon’s living room. Production designer Zoë Seiffert has dressed it as a beautiful/hideous den of clashing patterns and colours, and practical lamps. First up is a day scene, newly added to the script, so as with the Travel Inn I fire in the 2.5K HMI, this time with the curtains open. That might seem like a ridiculous amount of light for a room only about 10ft square, but only a powerful source like that creates all the bounce and ambience that sun would. I make sure the direct beam only really hits the floor. For some shots I put a white sheet over the carpet to maximise the bounce off the floor.

For the night scenes Colin puts all the practicals on dimmers and I place one of Leon’s ETC Profiles outside the window with Urban Sodium gel. Although the curtains will be closed, they are thin enough to be backlit by this ‘streetlight’. The bulb is even visible through the curtains sometimes, but it totally passes as a streetlight. That’s the only source of light when the characters first enter in silhouette, before turning up the practicals.

imageTo beef up the practicals, we rig a couple of Dedos to the top of the set and direct one through sheets of Opal hung from the ceiling, as a key, and use the other as backlight with half CTO on it. We tweak them around shot by shot to follow the blocking. For a scene with more character conflict, I lose the backlight and go hard with the key.

Later we move to another location – conveniently the cottage neighbouring the one where most of us are staying – for a little doorstep night scene. Again I rake the 2.5K along the front of the building, through the full silent grid cloth. In the singles we beef up the existing exterior sconce with three tungsten globes wrapped in Opal. I would rather have used an 800 bounced off poly, for a softer texture, but our package is pretty lacking in tungsten units.

After wrapping we throw a surprise birthday party for Zoë. Colin lights the party with a remote-controlled colour-changing LED fixture and smoke.


imageDay 11 / Friday

We have two hours in a charity shop to set up (including blacking out windows), shoot two scenes, and tear down. Leon decides to shoot them both using only torchlight, and choreographs the cast to light each other throughout the scenes. We hide silver Lasolites and other bounces around the set to reflect the torchlight when it doesn’t make sense for the actors to point their torches where they’re needed. We smoke up the shop heavily to show up the beams.

To anchor the shots, so the pools of torchlight aren’t floating around in a black nothingness, I set two lamps in the background. One, a Divalite gelled with Urban Sodium, spills out of a changing room, and the other, a 1×1 LED panel gelled heavily blue to suggest a computer screen, glows out from behind the counter. As well as adding colour, and colour contrast, to the scene, the pools of light from these two lamps serve to silhouette the characters so you get a sense of where they are when the torch beams aren’t on them.

image

We move to a forest car park for the film’s only major night exterior. With our HMI package consisting of only a 2.5K and 1.2K, and no tungsten bigger than a Dedo, this was always going to be challenging. We place the 2.5K in the deep background, purely to light up the smoke and foliage behind the action. The action itself is lit by the 1.2K and two 1×1 LED panels, plus smaller panels taped to the dashboards of the vehicles in the scene.

To get it all done with the time and resources we have, a compromise must be made somewhere with the lighting. I decide that this compromise will be motivation of sources. Other than dashboard lights, there should really only be one source in this scene: the moon. If I had time, I would move the biggest source around to backlight every shot and then bounce it back as sidelight. Instead we leave the HMIs mostly where they are, and fly the 1×1 panels around to backlight or sidelight as needed. It makes no sense whatsoever, but it looks good.

“Above the Clouds”: Week 2

“Above the Clouds”: Week 1

Principal photography has begun on my latest feature, Above the Clouds, a comedy road movie written by Simon Lord and directed by Leon Chambers. The film stars Naomi Morris as Charlie, an 18-year-old learner driver who sets off on an epic road trip from Margate to Skye with a ‘gentleman of no fixed abode’ as her responsible adult.


imageDay 1 / Monday

It’s a very different shoot to my last one. With a five figure budget and a total crew of about ten or twelve, we’re lean and mean. About a quarter of that crew are working for me – 1st AC Rupert Peddle and 2nd AC Max Quinton, veterans of Heretiks, and my long-serving one-man lighting team, Colin Smith. We’re shooting on an Alexa Mini. Although it’s lovely how much lighter it is than the full-size model, it’s quite fiddly. It doesn’t help that the EVF is faulty, and while we wait for a replacement Max has to change many of the settings via a smartphone app. The lenses are Arri/Zeiss Ultra Primes, my first time with these, and I’m once again using a half Soft FX filter to take off the digital edge.

We start with a dining room scene. As many of the sets will be, it’s built in director Leon Chambers’ living room, so it’s not very big. We’re prepared for this though, and Leon has purchased several Rosco Litepads in 6″x2″, 4″x4″ and 12″x12″ sizes. We stick a 4×4 to the wall behind each character as hairlights, and rig the two 6x2s, at a perpendicular angle to each other, to a flag arm. Wrapped in unbleached muslin, they’re a pleasing key.

image

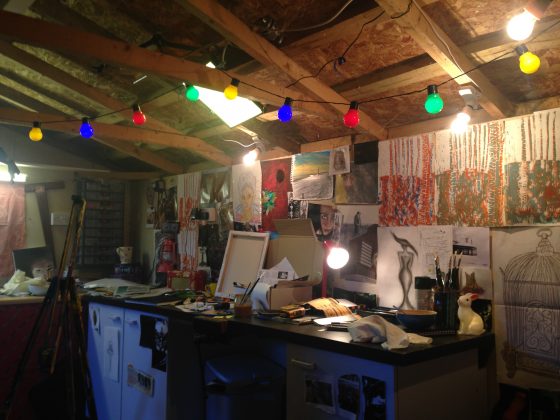
After lunch we move into the shed, dressed as a young artist’s studio, complete with coloured string lights. Colin and I add three tungsten bulbs as additional practicals, plus a couple of the Litepads amongst the rafters. Outside the window we place a 4×4 kino or 2.5K HMI depending on the time of day.


imageDay 2 / Tuesday

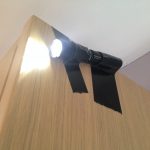
Today we’re in Leon’s kitchen primarily, but with several of the scenes spilling into the hall and porch. We put our two HMIs outside the windows and initially use an LED panel on top of a cabinet and my brand new torch gaffered to the side of a cabinet to augment these for a scene that is meant to have an evening feel. Then we move onto a proper daylight scene and those have to go, to ensure all the light seems to be coming in from outside. The other reason they have to go is that we are now doing an ambitious steadicam shot which moves from the kitchen to the hall and porch, then back into the kitchen, then back into the hall and porch as characters exit the house. To the two HMIs we add the 4×4 kinoflo shining down the stairs, augmenting the natural light coming down from the landing windows. Thanks to the Alexa’s large dynamic range, we are able to accomplish the shot without any clipping, even when the door opens and when the characters move through the darkest part of the hall. The rest of the day passes in variations on the theme. I quickly find that the window positions are limiting and a fair bit of head scratching to make the angles work goes on before we wrap.


Day 3 / Wednesday

Back in the kitchen, one of our first scenes involves heavy smoke as a story beat. I decide to go with purely natural light, so that it’s soft enough to illuminate the smoke evenly, rather than producing shafts or pools.

After lunch we shoot a dusk scene in broad (albeit overcast) daylight. I cool down the white balance to 4300K and use a .9 soft edge graduated ND, just edging into frame, to bring down the sky a little.

Later we move to a garage, a scenario in which all the light is coming from outside through the door. Although this looks flat when the camera is looking into the garage, I decide not to fight that. When we look the other way I use matt silver bounce and a 4×4 kino to fill in.


Day 4 / Thursday

image

We’re on location at a roadside cafe, and I agonised long last night about how much lighting gear we should take. We don’t have transpo or security so reducing the kit means a lot less hassle for us all, though generally I prefer to have everything to hand just in case. Ultimately I decided to keep it small – just LEDs, a 4×4 kino and then flags and bounce – knowing from location photos that there will be plenty of natural light.

In fact there’s too much. The photos failed to warn me of the skylights, which take a while to block with floppy flags and Easy Up walls clipped between them. Leon has set me up for success though by choosing to shoot the scene with the windows (and therefore the key light) in the background. Flagging the skylights and ambience allows the window light to wrap around the actors in a pleasing fashion, and makes for great modelling in the close-ups, with the window light hitting the talent’s down-sides. This natural light approach requires you to work with and respond to that natural light as well, and so I embrace the appropriate ‘broken key’ look that the sun position creates on male lead Andrew, a homeless man with a troubled past. (‘Broken key’ is a term Shane Hurlbut uses to describe a key light striking the talent not quite from the side, but slightly behind.)

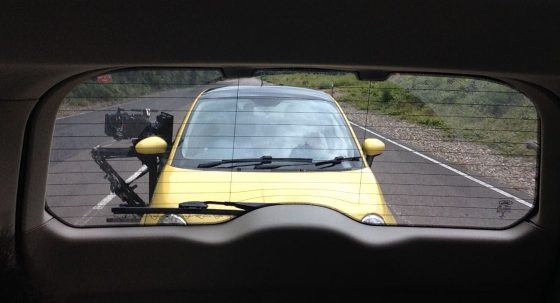
imageLater we shoot a scene in the Fiat 500 ‘Yellow Peril’ outside in the car park. I use a rota polar to find the perfect amount of reflection in the car windows, striking a balance between seeing some clouds (the film is called Above the Clouds after all) and seeing the characters inside.

Again the 4×4 kino proves the ideal source to bring up the light coming through the windscreen, due to its shape and softness. As shooting progresses, the sky darkens. A storm is coming. We drop the kino down to one tube, quartering the amount of key light and therefore allowing me to turn off the Alexa Mini’s internal .6 ND, bringing up the background by 2 stops and re-balancing the overall exposure. But after one more take the rain begins, and we have to wrap. Fortunately we seem to have everything we need in the can.


Day 5 / Friday

After watching the news in shock over breakfast, and wondering just how badly Brexit is going to screw the UK film and TV industry, we head to Leon’s for some more scenes in his living room studio. This time it’s dressed as a Travel Inn, and my lighting is motivated by the bedside practicals on the back wall. (Lighting from the back first – always a good plan.) We put a dedo above each practical and a divalite between those to give us something softer and little wrappy. The only other sources are a third practical and a Mustard Yellow gelled 1×1 LED panel outside the window, representing a streetlight. For a morning scene in the same set we put a 2.5K HMI outside the window and let the closed curtains diffuse it, with no other sources.

The set is then reconfigured into reception, and I employ a cross-backlighting set-up, with an added LED panel to represent the glow from a computer monitor.


imageDay 6 / Saturday

Today’s location is a tiny little mechanic’s garage in the middle of nowhere. Most of the scenes take place in the doorway, so we are at the mercy of the weather, which is incredibly changeable. Bright sunshine, cloud and heavy showers alternate throughout the day.

On the first set-up I ask to wait for cloud on at least one take because I can see from the sky that is going to be the easiest thing to match to as the day goes on. Balancing the light inside and outside the garage will also be easier in cloud, even though the Alexa’s incredible dynamic range can handle it in bright sun too.

Aside from the weather, the big challenge for me is making the shots looking into the garage have depth. The best depth is normally achieved by having the brightest area of the frame be the background, and the darkest area the foreground. Looking into the garage though, the opposite is true. But there are other ways of creating depth. One is to make pools of light with practicals, so I leave on the location’s suitably grungy fluorescents. Another is smoke, so we pump a little in and use a 2.5K HMI through a window and a 4×4 kino tucked around a corner to pick it up.

image

After dinner we have a very brief night scene to do. The blocking suggests raking the 2.5K across the front of the building which will also three-quarter-backlight the talent. Extensive experience of doing this in the past warns me that the angle of incidence could cause a massive reflection of the lamp in the shiny garage door, so I choose the lamp position carefully, and push it through an 8×8 frame of full silent grid cloth to mitigate any glare. Also this particular film seems to call for a ‘softly, softly’ approach to moonlight. It’s not fantasy, it’s contemporary comedy, so most of the time my night sources will be streetlights to keep it feeling realistic, but when I have to use moonlight as motivation I don’t want it to be hard and draw attention to itself.

The diffusion looks great, and the door is glare free, but I failed to consider the window. Fortunately Rupert spots a way to flag it. Saved by a great team!

All in all, a very productive day and a good week.

“Above the Clouds”: Week 1