One of the most important jobs of a director of photography is to help the viewer’s brain decode the image. Just as a sound mixer must get the cleanest possible dialogue and ensure that ambience, music and effects don’t distract from it or drown it out, so a cinematographer must ensure the eye is drawn to the character and not distracted by the surroundings.
Depth is a key part of creating this clarity. Christopher Nolan once said: “95 percent of our depth cues come from occlusion, resolution, color and so forth, so the idea of calling a 2-D movie a ’2-D movie’ is a little misleading.”
This week, on The Deaths of John Smith, I photographed a shot that used every trick in the book to create depth. Why? Because it was a one-shot scene, a flashback taken out of context, and the audience needed to “get it” quickly.
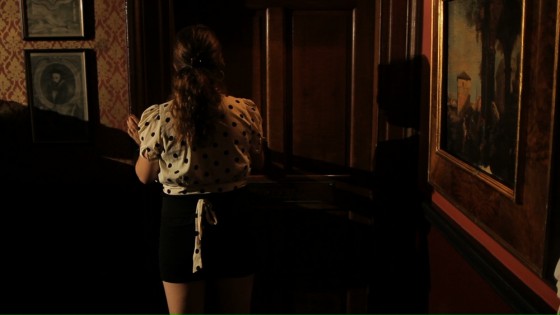
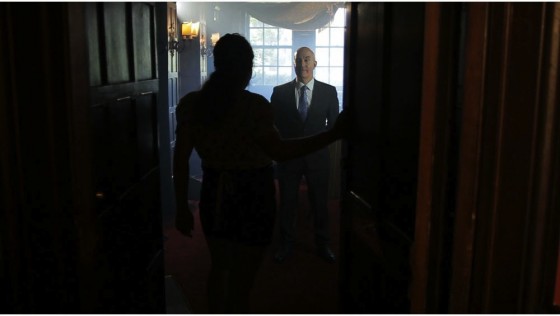
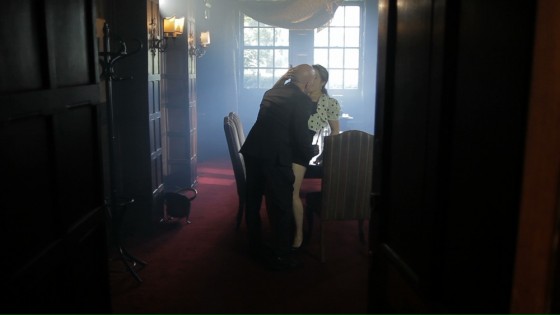
When I first set the camera up and we stood John (played by Roy Donoghue) in position, his dark suit melted into the dark wood panelling behind him, so there was clearly some work to do. Once lit, as you can see from these frame grabs, he stands out sharply.


 Kirsty Minchella-Storer (Sarah) and Roy Donoghue (John) in The Deaths of John Smith, directed by Roger Harding, copyright 2013 Two Hats Films
Let’s look at the depth cues going on here.
- DEPTH OF FIELD. Although I’m shooting at f1.8, on a 20mm lens nothing is massively out of focus, so that isn’t helping much.
- SMOKE. There is more smoke between the camera and a distant object than between the camera and a close object, and therefore smoke aids depth perception.
- CONTRAST. The foreground is darker than the background, helping the eye to distinguish between the various layers. In particular, the smoke picks up the light from the windows at the back of the room, creating a blue-white haze against which John’s dark suit stands out clearly, as does Sarah’s silhouette.
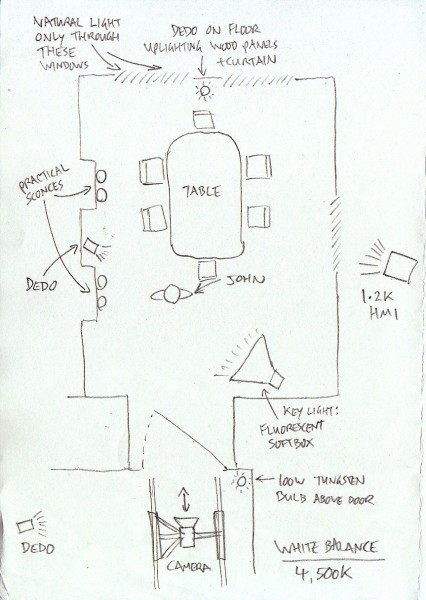
- COLOUR CONTRAST. The foreground is lit with warm orange, while the background is a cool blue, again enhancing the separation between the layers. (Imagine you’re standing on a hill and looking at another hill in the distance. That distant hill looks much bluer than the one you’re standing on, due to atmospheric haze. The smoke and colour contrast mimic this effect.) For most of this film I kept all the light sources within about 1,500K of each other, but in this scene I deliberately allowed more like 3,000K of difference between warm and cool sources to give the flashback a more stylised look.
- BACKLIGHT. John has a little edge-light on his righthand side, ostensibly from the wall sconces, but in reality from a hidden Dedo. This helps to cut him out from the background.
- FRAMING. The doorway frames the image, adding an extra layer of depth.
- PARALLAX. This is the optical phenomenon whereby, when you move your head (or a camera) things closer to you appear to move more than things further away. By dollying slightly into the room behind Sarah we create a dramatic parallax effect as the doorway grows on camera much more than John and the room behind him.
I’ll leave you with my (retrospective) lighting plan for this scene. Be sure to check out the film’s official website at www.thedeathsofjohnsmith.com
