Lighting without Movie Lights

After my last post ranting about the very limited usefulness of redheads, I was asked what the alternative is for cash-strapped DPs. There are plenty of cheap fluorescent photography-studio-type lighting kits available on eBay now, but they have their own problems. So can you light without any film lights at all? Yes, you can – and here are a few examples.

Check out my pieces to camera in the Stop/Eject funding pitch which follows the trailer in this video:

£2 LED camping light

I was so lazy when I filmed this that even though I was only two metres away from where I keep my Arrilites, I didn’t use them. There are three light sources in this shot:

  1. My key-light is an ordinary, bare, domestic 100W bulb (NOT an energy-saver) clipped to a proper light stand. I wish I’d put it a touch closer to camera and a touch higher so that my right eye was better lit.
  2. My backlight is an LED camping light (£2 from a charity shop) propped up on top of a bookcase out of the rear left of frame.
  3. Behind me is a thin brown curtain through which daylight can be seen. Since I’m shooting on a tungsten white balance preset, this and the camping light appear blue.
Total value of the kit I used to light this: less than £5
By the way, if you haven’t contributed to Stop/Eject please do so over at stopejectmovie.com. We need everyone’s help to reach our funding total and complete the film.

Shelf Stackers (2011, dir. Tom Wadlow) is a comedy set mainly in the aisles of a supermarket – in reality a set in a conference centre. Colin and I rigged half a dozen 500W DIY work-lights to the ceiling using the method I described in a July post, in a line running down the centre of the aisle, all of them facing towards camera to provide backlight throughout the set.

I’ll confess there were a couple of Arrilites poking over the tops of the shelves, but often we used something much lower-tech as our key-light: a dozen 100W bulbs rowed up on a long piece of timber – the Cyclotron, as we dubbed it. The intention was to emulate the long, thin source of a fluorescent tube without the associated cycling and colour balance issues.

The Ikea reading light used as my backlight in the shot below
My backlight in the shot below

And here’s another one of me where I was too lazy to break out the proper lights. This is my living room, and the existing ceiling light – an energy-saver bulb in a spherical white Ikea shade – is providing the key. I made sure I stood in a position where this would illuminate both my eye sockets. I’m backlit by another Ikea product – a goose-necked reading light clipped to a bookcase out of shot.

Remember you can get a digital download of the full video, “How to Make a Fantasy Action Movie for £28,000” by donating £10 to Stop/Eject.

Lighting by Ikea
Lighting by Ikea

I hope that’s given you some ideas. And if you’ve done a good, cheapo lighting set-up yourself, leave a comment or Facebook me; I’d love to hear about it.

Lighting without Movie Lights

Makeshift Lighting Grid

Keeping lights – especially their stands – out of shot can be a real challenge in some locations. If you’re filming in an office or other type of commercial building, you probably won’t be allowed to screw into the walls or ceilings – but there is another way to hang lamps.

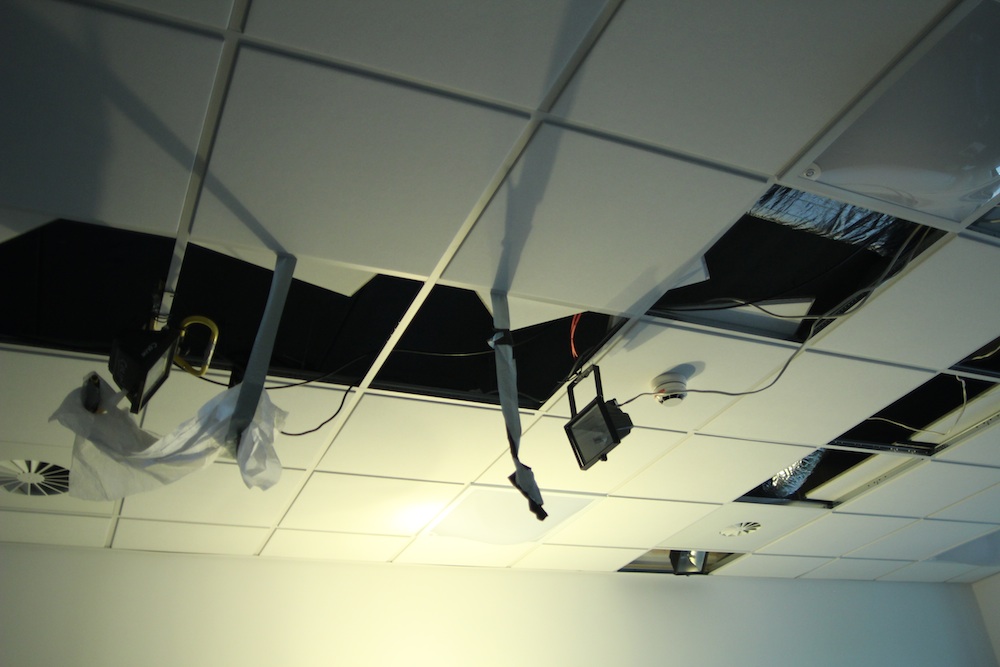
If your location has a false ceiling, the kind where polystyrene tiles sit on a metal grid, you can pop some of the tiles out and use heavy duty wire to attach lamps to the metal. I’ve done this on two shoots now, most recently Get It On for Catcher Media, where we had a tight schedule and the director wanted lots of roving handheld shots. Col very kindly lent us his DIY work-lights, which are ideal for this sort of thing because they’re not too heavy.

The ceiling of our Get It On location - a kitchen in the Performance Hub of Wolverhampton University
The ceiling of our Get It On location – a kitchen in the Performance Hub of Wolverhampton University

I’d advise you to run separate cables from each lamp to whatever point in the room is least likely to be seen on camera, and from there down to a power socket. Make sure you can unplug any given lamp without having to get up on a ladder, because that will slow down shooting.

When you wrap, just untie the wire, unplug the extensions, slide the tiles back into place and no-one will ever know you were there.

Diffuser and a flag (the latter just fell down) hang from gaffer tape between the lights
Makeshift Lighting Grid

Moulding Natural Light

Today I’m going to take a brief look at what you can do to shape natural light when you’re filming outside and you don’t have the budget for big HMIs or massive silks hanging from cranes.

Firstly, choose the right direction to shoot in. Work out where the sun is going to be at the time you need to film the scene and decide whether you want to shoot into the light, with your back to it or at an angle. There are iPhone apps that will tell you where the sun’s going to be if you’re too lazy to figure it out for yourself. Remember the sun moves left to right across the sky in the northern hemisphere.

Amateur photographers are often told not to shoot towards the sun. This is simply because amateurs will be using auto-exposure, which will close the iris right up as soon as the sun flares into the lens and leave you with a silhouette. As a professional, you’ll be setting your camera manually, so you can expose for the shadows and let the backlight from the sun blow out beautifully.

Here’s a shot from Stop/Eject where we made the most of this effect, and really lucked out with the reflections in the water:

All the evidence you need that shooting towards the sun is good.
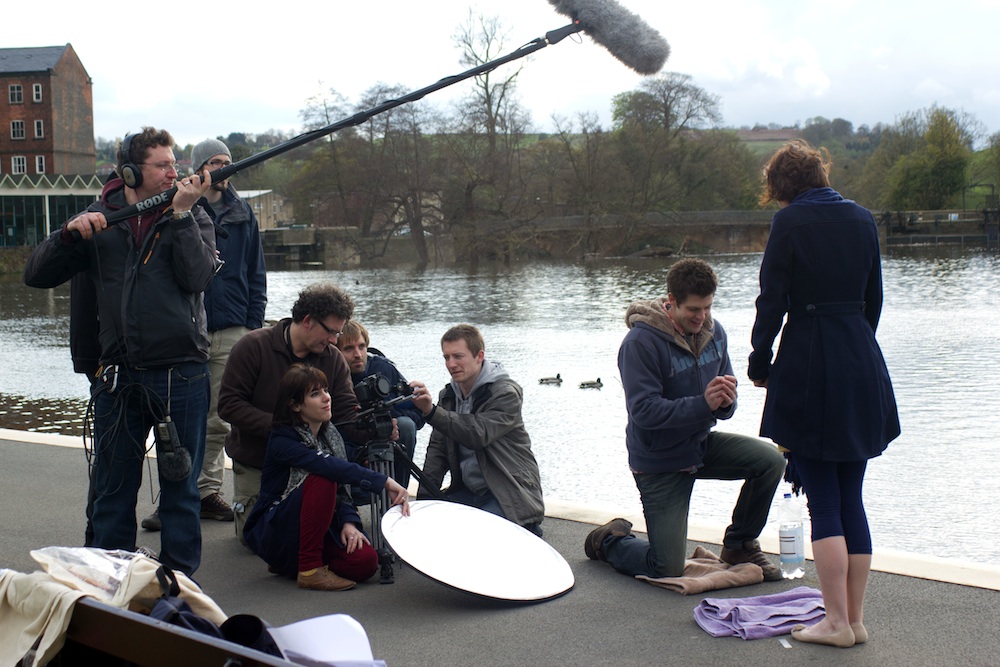
Using a reflector on the banks of the Derwent. Photo: Paul Bednall

Out the bottom of frame is a reflector, bouncing some of the sunlight back at the actors – and it’s being wiggled by a crew member to suggest it’s a watery reflection.

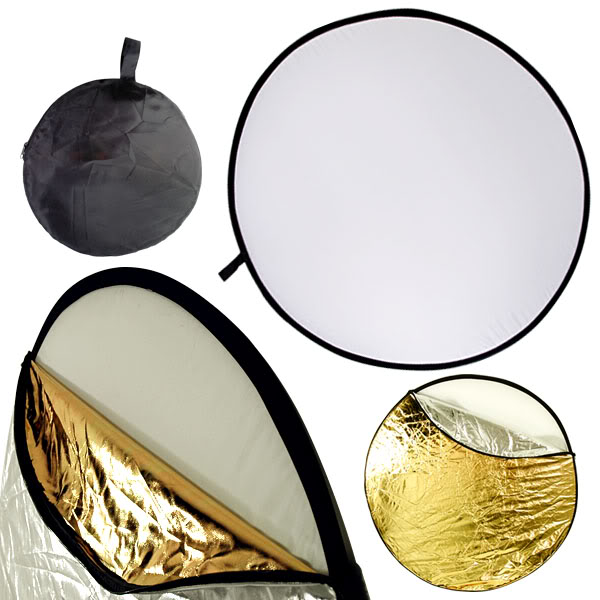
Collapsible reflector

If you don’t have a reflector you should drop what you’re doing and order one now off Amazon. They’re less than £10 and have a reversible zip-off cover giving the options of white, silver or gold surfaces to reflect off, or black to block light. If you remove the cover entirely you’re left with a translucent white disc which can be used to diffuse light, as we’ll see shortly.

If you choose to shoot with your back to the sun, you won’t be able to affect the light in your wide shots without big-budget gear, but you can transform your close-ups.

Let’s look at another example from Stop/Eject, before we did anything to the light:

Before
Before

Georgina Sherrington (“Kate”) is facing directly towards the sun, which is behind and above camera. As you can see, the light is incredibly harsh and the shadows are so dark that you can’t see her eyes; an effect that would only have got worse had I stopped down to prevent the highlights blowing out.

Two reflectors were required to sort this out. The first, with cover removed, was held over her head so that the sunlight hitting her face would have to pass through the translucent material and be diffused. (The diffusion is actually less significant than the amount of light the material blocks.) A second reflector was held out of the bottom of frame, bouncing sunlight back into the shadows on her face and putting a sparkle in her eyes.

After
After

A much nicer image.

If it’s a cloudy day – and let’s face it, this is the overwhelming likelihood here in the UK – the above techniques will still work, but much more subtly. If you have access to a power supply, try to set up a lamp to get some eye-sparkle and fill in your actors’ faces.

In 2008 I DPed a short set entirely in a forest: Into the Woods, directed by Matt Taabu. I knew that getting light into people’s eye sockets was going to be a major challenge, so I insisted on hiring a battery-powered 200W daylight par. We put a layer of tough-spun diffuser on this and the gaffer hand-held it for most shots, aiming it into the talent’s face. You can see the eye-sparkle it produced in this production still:

Branko Tomovic in Into the Woods (2008, dir. Matt Taabu). Photo: Alex Bender

So if you’re DPing a daylight exterior, don’t think that means you can rest on your laurels. It’s still up to you to create the right mood and make the talent look their best.

Moulding Natural Light