5 Tips for Shooting Water

As well as the general principles of cinematography like three-point lighting, short key and so on, there are specific principles that apply to certain situations only. Since these situations don’t always come up, it can take a little longer to develop a mental toolkit to get the best out of them. One such situation is shooting water – scenes by riversides, on beaches, beside swimming pools or in bathrooms. What are the tricks you can use to get the most cinematic look?


1. Use a circular polarising filter

4952a23d13929fe1903f601843a9ef4d
Without (left) and with (right) a polarising filter

A polarising filter cuts out all light waves except those travelling in a certain plane. Since reflections are usually only in a single plane, by rotating a circular polariser filter until you hit the right angle, you should be able to reduce the reflections you’re seeing. This can have an impact on how water appears on camera. On an overcast day, a CP will allow you to reduce the reflections of the grey sky, making the water look clearer and bluer.


2. Get sparkly

All the evidence you need that shooting towards the sun is good.
Shooting towards the sun provides both lovely backlight and sparkles on the river in this shot from Stop/Eject.

Water will always look prettier, particularly large bodies of it, if the sun is sparkling on it. How do you capture this on camera? Use the principle that the angle of incidence equals the angle of reflection, the same principle you use when positioning a bounce board. As with all day exteriors, shooting at the correct time of day is critical. You want the sun to bounce off the surface of the water and into your lens, which means being on the opposite side of the water to the sun, with the camera facing the sun. Use a top flag on your matte box (a.k.a. “top chop” or “eyebrow”) to prevent lens flare if you so wish.

img_1527


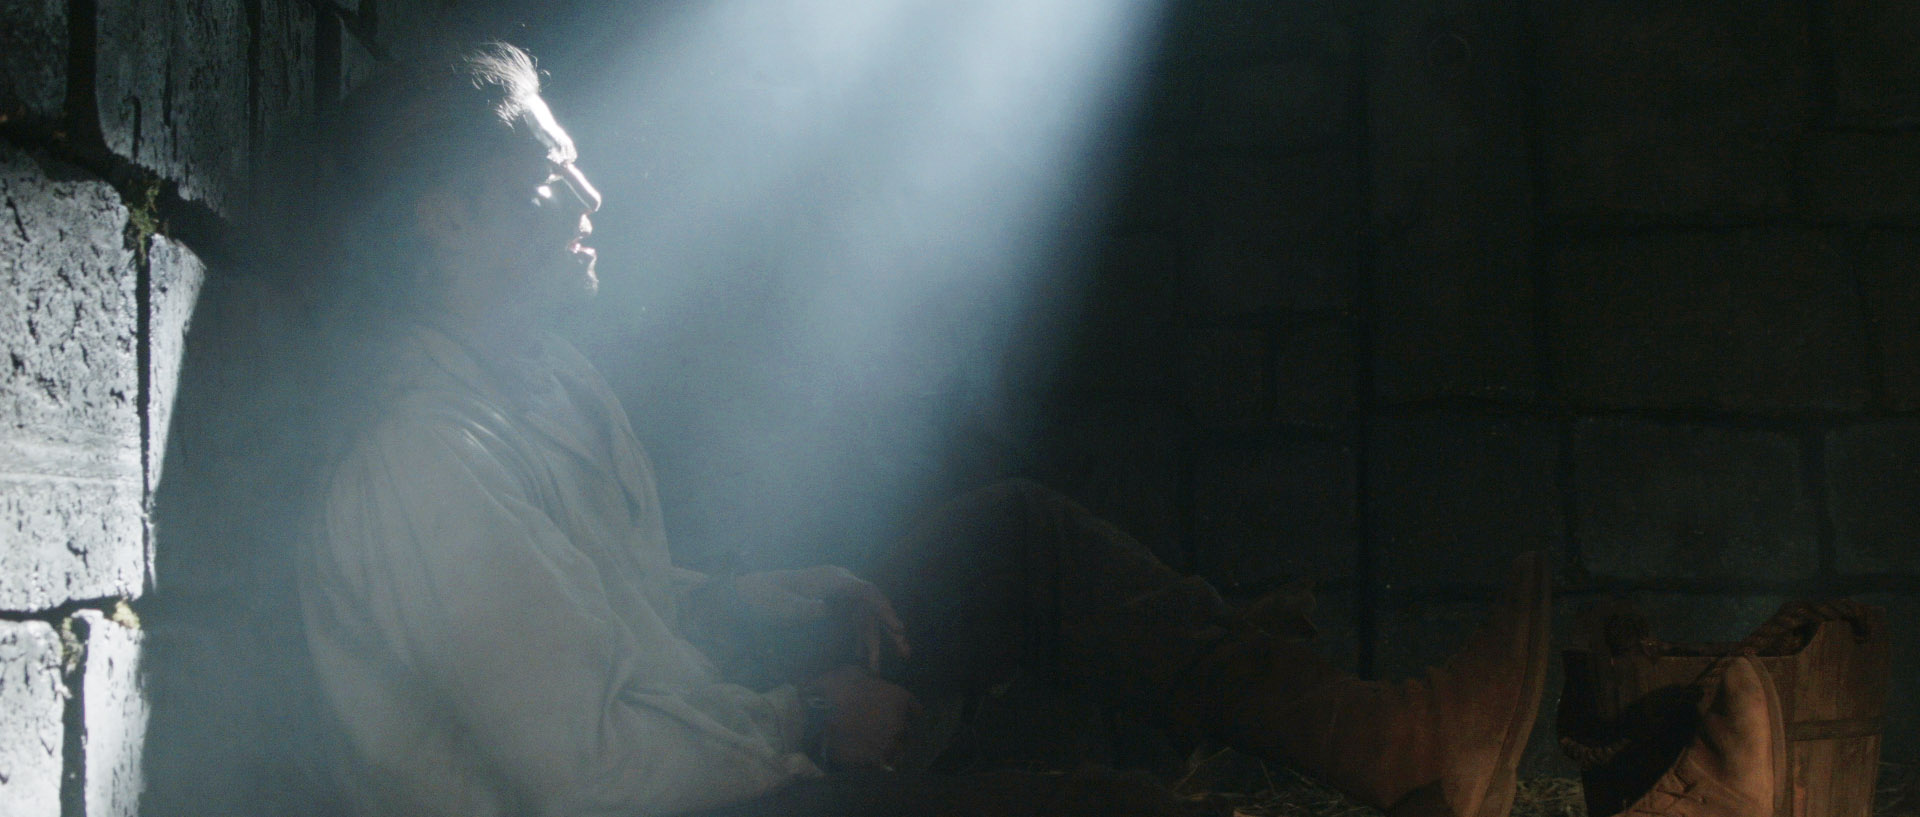
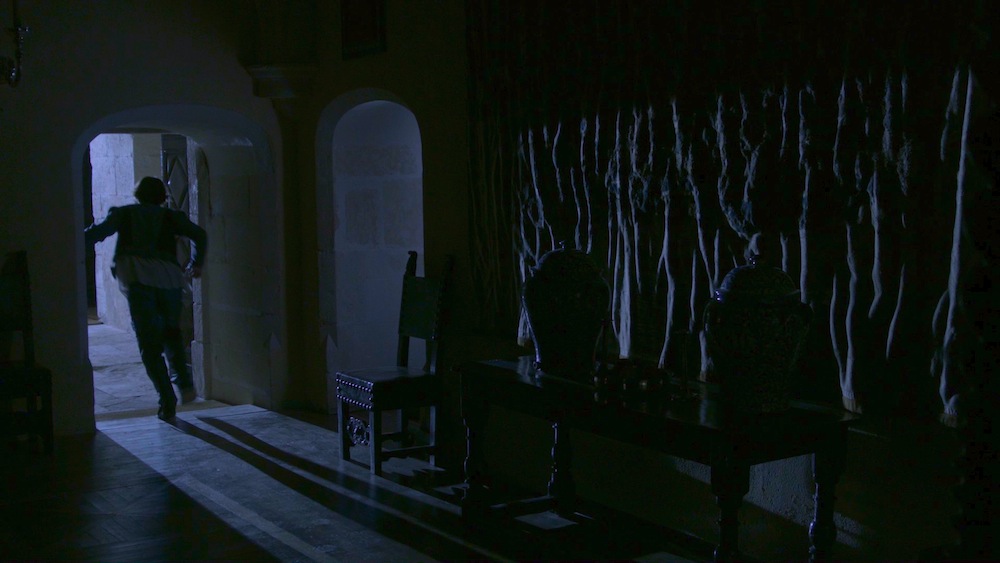
3. Get rippling light

Using a paddling pool and a par can to create a rippling light effect on The Little Mermaid. Note the black fabric as per tip 4 below.
Using a paddling pool and a par can to create a rippling light effect for close-ups on The Little Mermaid.  Note the black fabric as per tip 4 below. At the white end of the paddling pool you can see the stool where the talent sat.

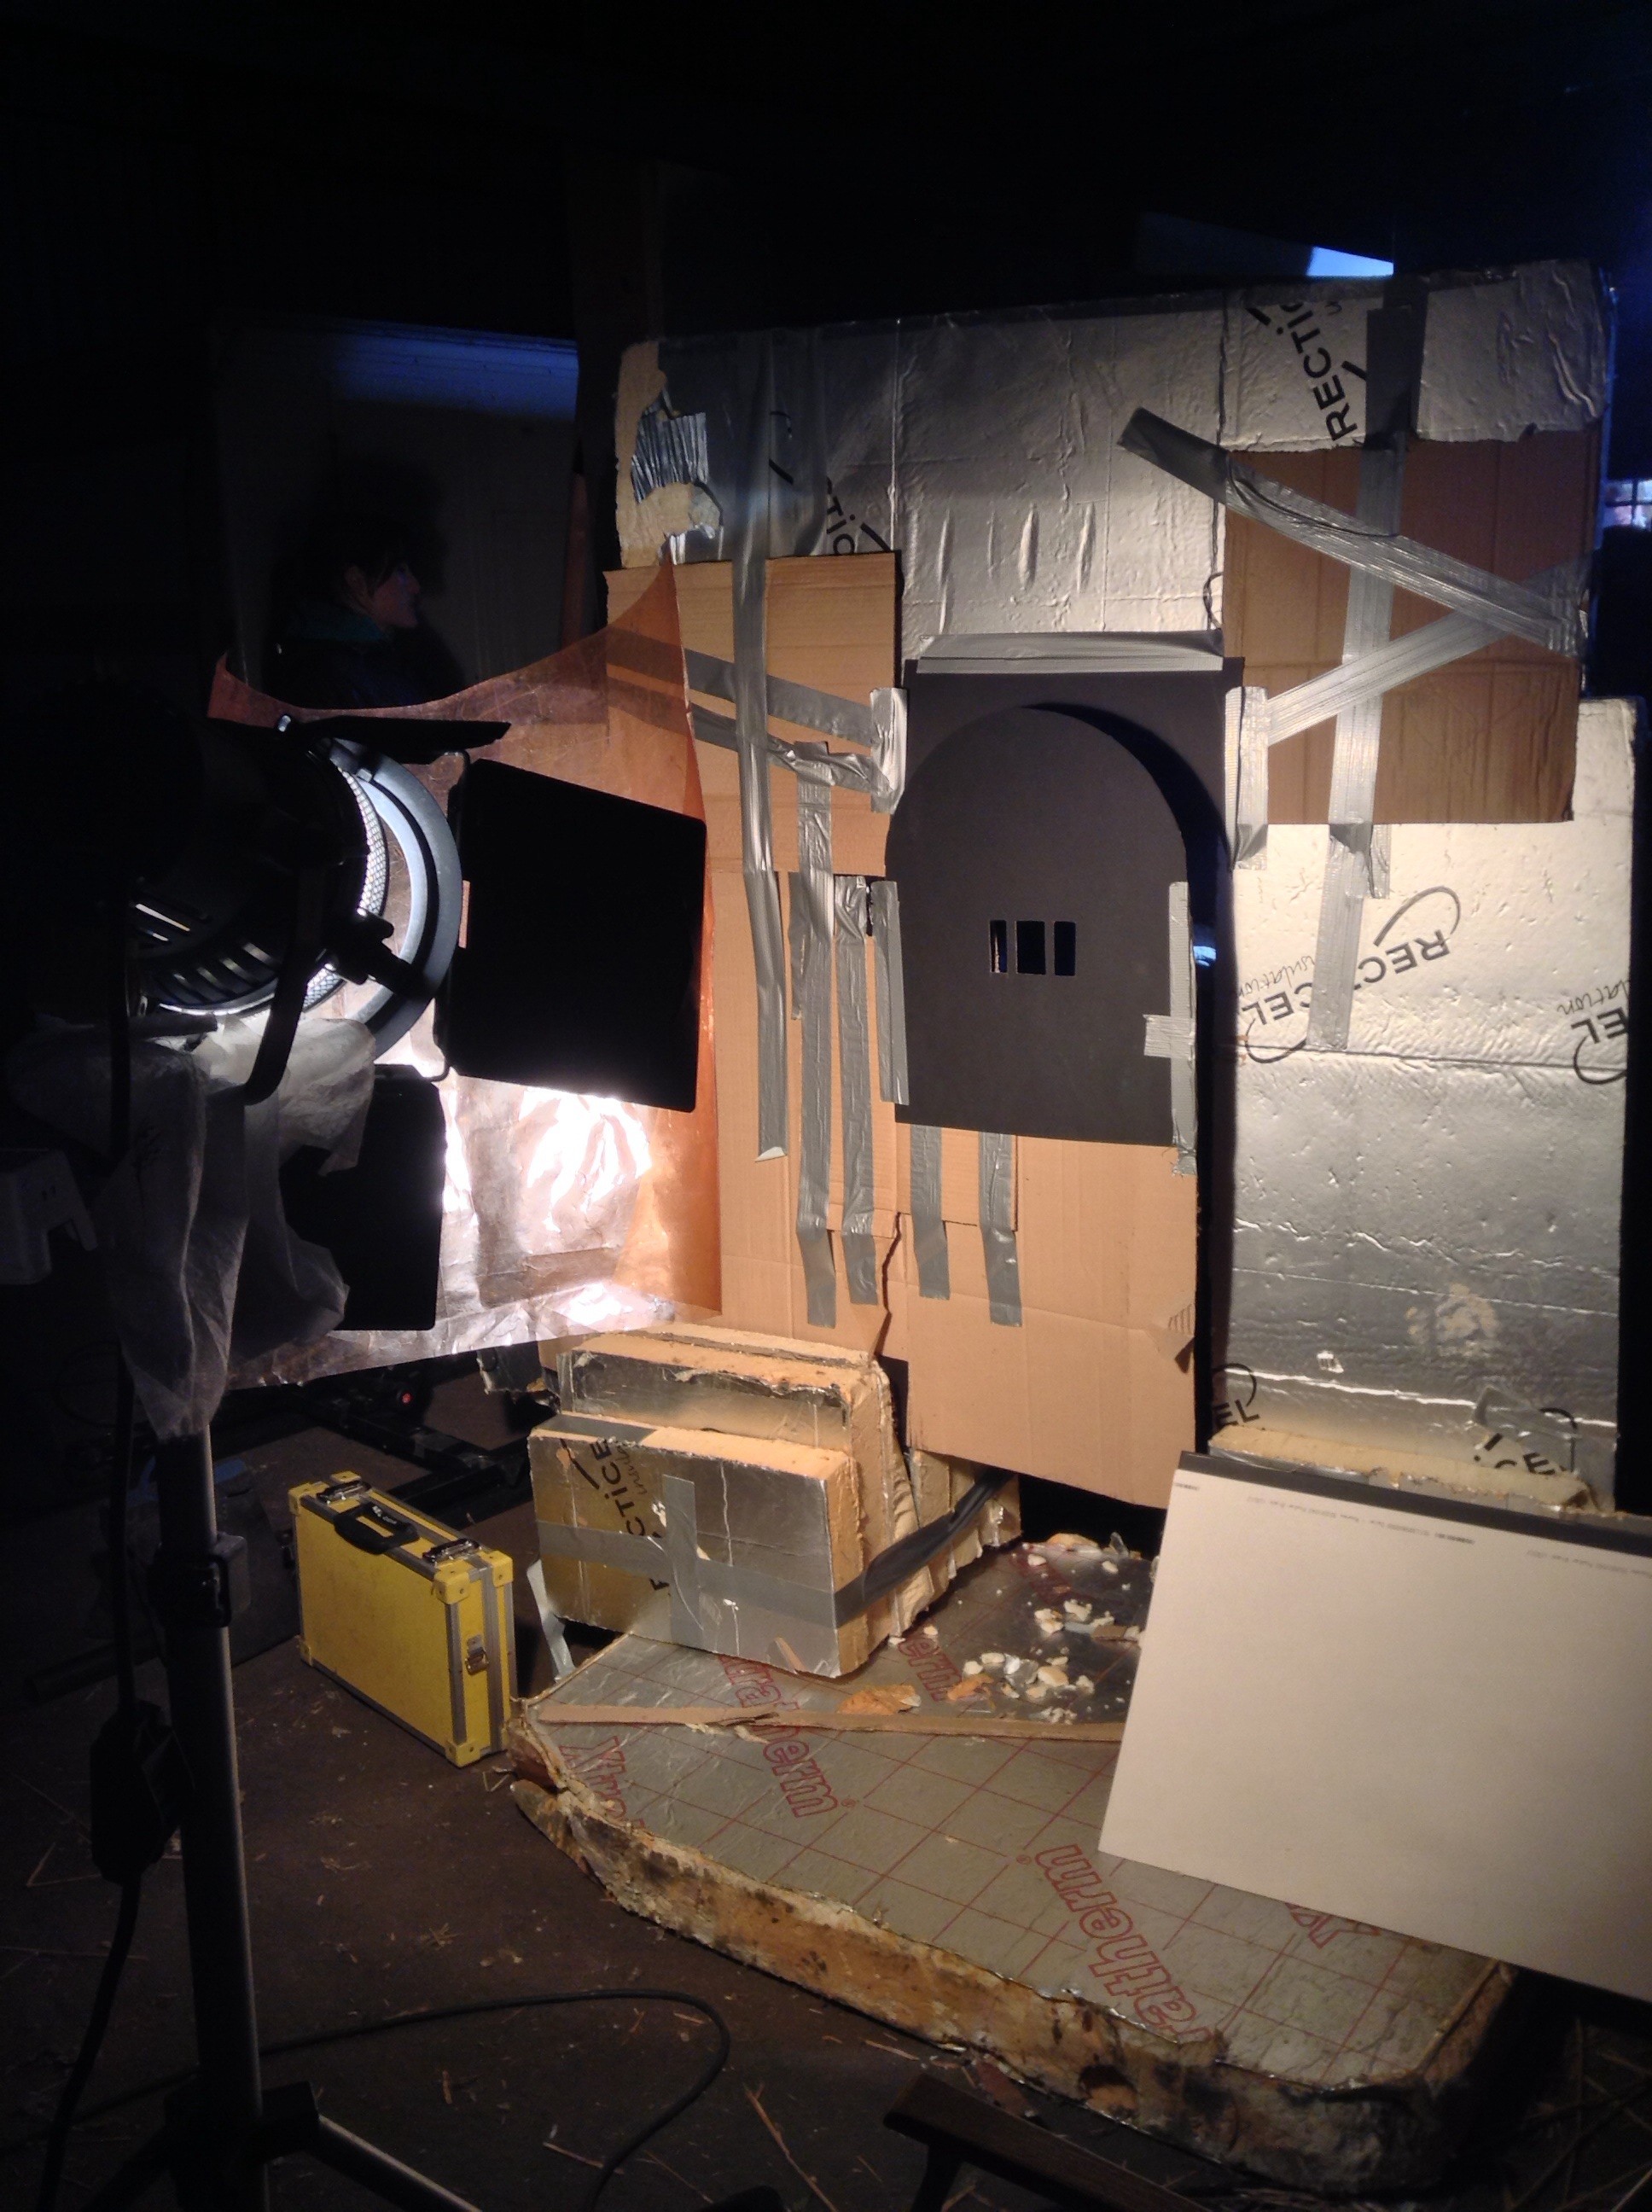
The same principle can be applied to capture rippling light effects on walls, faces, etc. This time you want the sun, or artificial light source, to bounce off the surface of the water and hit your subject. You can suggest an off-camera body of water when there is none by carefully positioning a fish tank, paddling pool or similar in relation to the light and your subject.


4. Kill the bottom bounce

img_1529

Beware that not all the light will bounce off the surface of the water. Some will pass through it, bounce off the bottom of the pool and then hit your subject. If the bottom of the pool isn’t a dark colour, this unmoving bounce light will overpower the rippling light coming off the surface. Lay duvetyne or other black fabric on the bottom of the pool so that the only bounce is from the surface.


5. Fake it

A grip standing by to fake rippling watery light on The Little Mermaid
Grip Sawyer Oubre standing by to fake rippling watery light on The Little Mermaid

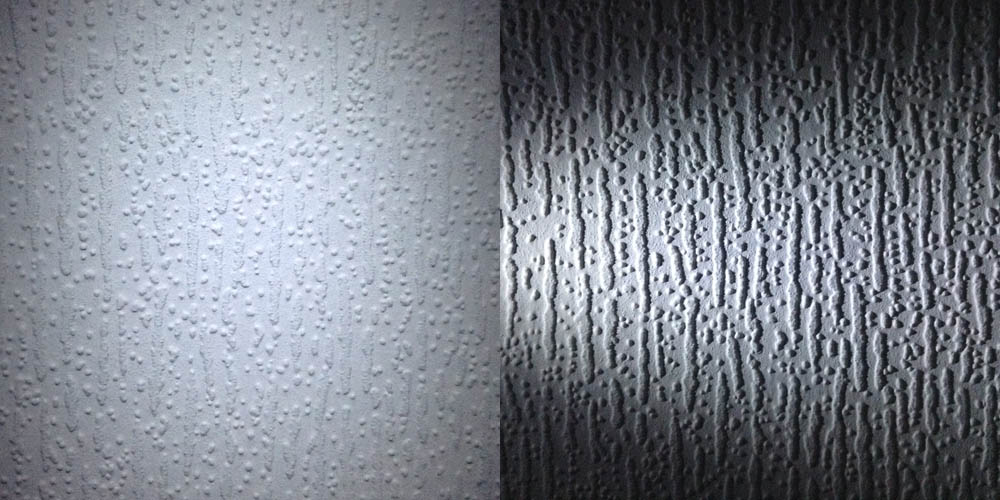
If you need to create a rippling light effect without using water, you can fake it with a sheet of blue gel on a frame in place of the water surface. Wobble the frame slightly (only slightly, or the sound department will start to yell at you) and the gel will ripple in the frame, creating a similar effect to water. Thanks to my key grip on The Little Mermaid, Jason Batey, for introducing me to this technique.

Another way to simulate watery light is to bounce a lamp off silver paper or fabric which is being rippled by a fan. More on this technique here.

What about shooting UNDER water? Just one tip for that: hire an underwater DP.

5 Tips for Shooting Water

5 Tips for Lighting a Green Screen

Green screen work is almost unavoidable for a modern cinematographer. In an age when even the most basic of corporates might use the technique, and big blockbusters might never leave the green screen stage, knowing how to light for it is essential. The following tips apply equally to blue screen work….

IMG_0837 1. Light the screen at key.

Or to put it another way, your screen should not be over- or under-exposed. If you use a light meter, you can hold it at various spots on the screen (taking care not to block any light with your body) and check that the reading always matches what the iris of your lens is set to. If your camera or monitor has a false colours option, you can use this to check the level and consistency of the exposure across the screen.

2. Use soft sources.

Bouncing tungsten lamps off polyboard is a cheap and effective way to spread soft light across a green screen. Typically you will want two sources, one to each side of the screen. They will need to be well flagged so that their light does not spill onto the subject.

On larger budgets, Kinoflo Image 85s or 87s are often used to illuminate green screens. They are 4ft 8-bank units which put out a large amount of soft light. Ask your hire company to supply them with spiked green tubes; designed especially for green screen work, these tubes help to increase the colour saturation of the screen. (Spiked blue tubes are also available.)

3. Control spill.

As far as possible, reflected green light from the screen should not fall on the subject. The main way to ensure this is to put as much distance as possible between the screen and the subject.

I learnt a great tip recently which also helps reduce spill: once the exact camera position is known, bring in 4×4 floppy flags slightly behind the subject, one either side, just out of frame.

IMG_31674. Avoid dark shadows.

Green spill will bleed most easily into the dark areas on your subject, especially if you’re shooting with a wide aperture. Clipped (or ‘crushed’) blacks are particularly undesirable. The solution is to use more fill light, even if this goes against the mood and contrast levels you’re using in non-VFX shots. If you use LUTs, you should consider creating a custom one for green screen work which pushes the contrast further to compensate for this flatter starting point. If not, you will have to work with the colourist in post to ensure that the shadows are restored to their usual levels once the VFX are complete.

5. Add tracking markers.

Camera movement against green screen isn’t the no-no that it used to be, with any VFX team worth their salt being able to deal with handheld shots, pans, tilts and push-ins. If there isn’t a VFX supervisor on set, you can help them out by taping crosses to a few points on the screen. There should always be at least one marker in shot throughout the camera move (more if it’s a multi-axis move), and they shouldn’t stay put behind any tricky edges (e.g. long hair) for long.

5 Tips for Lighting a Green Screen

Poor Man’s Process II

Back in 2013 I wrote a blog about Poor Man’s Process, a low-tech method of faking shots inside a supposedly moving car, using lighting gags and camera movement to sell the illusion. But Poor Man’s Process doesn’t have to be limited to cars.

While gaffering for DP Paul Dudbridge on By Any Name, we had to tackle a nighttime scene in which the hero flees through a forest. Rather than trying to get close-ups with any kind of tracking rig, Paul decided to use a technique apparently favoured on Lost, whereby the actor and camera are stationary, and lights and branches are moved around them to create the impression of movement.

It worked a treat, so when faced with a very similar scene on Ren, I shamelessly ripped Paul off. The actors weren’t sure; they felt pretty silly running on the spot, but we persevered. My lighting set-up used the 2.5K HMI, already rigged for earlier shots, as a side key, and an LED panel as three-quarter backlight. Branches were waved in front of both to throw shadows, and I shook the camera a lot.

Poor Man’s Process was required a second time on the series, in the very last scene, on the very last day of the shoot.

Sophie Skelton (Ren) and Duran Fulton Brown (Hunter) ride Tony the Phony Pony. Photo: Miriam Spring Davies

By this time we were one big happy family and we were all having far too much fun. Gaffer Squish was singing “One Day More” from Les Miserables, actor Duran was riding Tony The Phony Pony like a rodeo champ, candy was being freely imbibed and marshmallows were being toasted. The Poor Man’s shot seemed more like an extension of us all just larking about than anything else.

Ren and Hunter were required to ride off into the moonlight on a single horse, but the horse in question was quite jumpy and not safe for the actors to ride. Designer Chris and production assistant Claire knocked up the highly impressive phony pony, which was used extensively, but moving it fast enough for the final shot was out of the question.

Claire Finn prepares for some arboreal lighting action. Photos: Miriam Spring Davies
Claire Finn prepares for some arboreal lighting action.

So Tony remained stationary while Claire, her sister Alex and producer Michelle threw dignity to the wind and ran around with bits of trees.

I was using the 2.5K HMI as backlight, and a 1.2K HMI bounced off Celotex as a side key. Claire, I think, was on the 2.5K, jiggling a branch about to create some nice dynamism cutting up the hard backlight. Alex, if I recall rightly, was doing a windmill action with her branch in front of the Celotex. Michelle, meanwhile, stood ready with her branch until director Kate called “Tree!”, at which point Michelle would run past at full pelt and Sophie (Ren) would duck under the branch she was supposedly riding by.

You can see some behind-the-scenes footage in Lensing Ren episode 5.

Aided by smoke, a wind machine and the obligatory camera shake, the whole thing was quite effective. Less so the Epping Forest shots, which didn’t make the final cut. Somehow the running-on-the-spot was never quite convincing. Not enough choppy shadows, maybe?

My last project was a $4 million feature, but even that called for Poor Man’s in one instance. A small train carriage set piece had to appear to be moving as our heroes jumped onto it, so in front of each light we placed a ‘branch-a-loris’, a kind of man-powered windmill made from scaff tube and branches. Again lots of smoke, wind and camera shake were employed to sell the illusion.

I think Poor Man’s Process is one of my favourite techniques. It doesn’t always work, but if there’s enough movement in the camera and the lighting, and it’s cut in with genuine wide shots, it can often be extremely effective.

If you’ve enjoyed this post, please do me a little favour and vote for Ren: The Girl with the Mark in the Melbourne Web Fest Audience Award Poll (find us in the drama section). It only takes a moment!

Poor Man’s Process II

5 Tips for Perfect Shafts of Light

There’s nothing like a good shaft of light to add production value to your cinematography. But you can’t just shine a lamp through a window and expect to get Hollywood shafts. Here are the essential conditions you need:

1. You need focused light, i.e. a lamp with a lens. Source 4s work extremely well. HMI or tungsten fresnels will also do the job, and sometimes Dedos.

A Source 4 and Source 4 Junior firing beams through smoke
A Source 4
Source 4
HMI fresnel
HMI fresnel
Dedo, de-e-edo. Dedo come and me want go home.
Dedo

2. You need a smoke machine or hazer to volumise the light. A cheap one from Maplin will work, but as a general rule the cheaper the machine, the more its output will be wreaths of smoke rather than just thickening up the atmosphere. However, given time to disperse and some vigorous wafting with a flag or the clapperboard, any smoke will work.

ProSound GT-800 fog machine from Maplin
Phantom Pea Soup hazer

3. The smoke/haze needs to be backlit. The closer the light source is to being directly behind the smoke, the more the smoke will show up. So shoot towards windows.

These frames are the start and end positions of a tracking shot from Ren (with a top secret make-up effect!). Note how the shafts of light from the window are much more prominent when the camera is pointed more towards the light source.

www.rentheseries.com

4. A dark background will show up the smoke best. If you’re shooting in a house with white walls then you’re probably flogging a dead horse.

The dark prison walls here show up the shaft of light very nicely.

5. Keep other light sources away from the shaft. Competing lamps can muddy the shaft of light or maybe make it disappear altogether. Often I find that shafts of light work well as background interest, with the actors well in front of it, lit by other sources.

In this set-up for Ballet Pointe Shoes (dir. Gisela Pereira), I'm using the layers of scenery on the stage to separate layers. In the back layer there's a pair of cool, high Source 4s creating the crossed beams, while in the front layer warmer Dedos create shorter shafts of light.
In this set-up for Ballet Pointe Shoes (dir. Gisela Pereira), I’m using the layers of scenery on the stage to separate layers of lighting. In the back layer there’s a pair of cool, high Source 4s creating the crossed beams, while in the front layer warmer Dedos create shorter shafts of light.

Follow all these guidelines and you’ll get lovely shafts of light every time!

5 Tips for Perfect Shafts of Light

Lighting Techniques #7: Gobos and Shadows

Gobos are shapes that you fit onto a lamp in order to break up the light. If you’re using Source 4s you can get gobos especially for the purpose, which slot into the front of the lamp.

Gobos
Gobos
matthews_wood_cucoloris_3
A cucoloris

A cucoloris is a piece of wood or metal with vaguely leaf-life shapes cut into it. You would mount this on a C-stand or clamp of some kind. You can easily make your own cucoloris by punching holes in black-wrap or cardboard.

In fact you can create patterns of light and shadow by placing almost anything in front of a light, varying the distance from the source to make the pattern sharper or softer. Be careful to observe the minimum safe distances printed on the side of the lamphead though, or you might set fire to your shadow-maker.

Here are some examples of breaking up the light that I’ve tried over the years…

On more than one occasion I’ve taped up some of the PVC pipes which my dolly uses as tracks, to create the impression of vertical bars or pillars. In the below example the French windows (when closed) didn’t have enough bits of frame to break up the light sufficiently, so I had my spark tape a pipe to the window…

IMG_2464

I don’t have a picture, but I remember once on a horror feature sticking lots of blobs of gaffer tape to a window.

In this shot from Stop/Eject I blacked out the room’s real window and rigged a fold-up director’s chair in front of a 1K Arrilite to cast a window frame-like shadow…

The bedroom by sunlight

Look for things in the set that you can shine lights through, like this partition window….

Creating interesting shadows by using a partition window at the location.

or a fence…

ss2

or blinds…

IMG_2531

If you want the venetian blinds effect and you don’t have any, stick strips of gaffer tape to the window.

On Ren I built an openable and closable little door (complete with tiny barred window) for light to shine through, since the set didn’t have a door.

image

On the same show, the roof of Karn’s house became a giant gobo for the 2.5K HMI placed above and behind the set, creating these incredible God rays when smoke was added. The roof was made of interlocking branches and had been covered by sheets by the art department – presumably to block light – but I removed the sheets because I wanted this lighting effect…

image

Branches make great gobos. I often sneakily break one off a nearby tree and rig it to a C-stand to cast some summery shadows or break up a moonlight or streetlamp source that’s looking too bright and flat.

IMG_1029-1.JPG

If you’ve missed the other posts in my Lighting Techniques series so far, here are the links:

#1: Three Point Lighting

#2: Cross-backlighting

#3: The Window Wrap

#4: Health Bounce

#5: Smoke

#6: Cross-light

Lighting Techniques #7: Gobos and Shadows

Lighting Techniques #6: Cross-light

Cross-light is illumination which comes in from the side, raking across a surface. At this angle, every last bump and imperfection in a surface will cast a big shadow. Terrible for beauty lighting, but brilliant for emphasising textures.

The same wallpaper lit by front-light (left) and cross-light (right).

And emphasising textures is a key part of photographing period pieces, as I learnt on The First Musketeer. In this post I’ll highlight a few examples of this technique throughout the show. (The whole series is on YouTube now so you can enjoy all six action-packed episodes at your leisure.)

At 2:27 in episode 1, Lazare and Ghislain enter an inn. Most of the scene is lit very simply with two cross-lights. One is an open-face 800W tungsten lamp coming in through a doorway off camera right; this bring outs all the texture in the back wall. The other is a 2.5K HMI coming in through the beautiful purple-tinted window on camera left; this also brings out texture – in the men’s faces! Cross-lighting is well suited to these characters, who (I hope they won’t mind me saying) are grizzled old soldiers.

A 2.5 HMI comes in through the window at left, while an 800W open-face tungsten rakes in through a doorway just off frame right. A second 800 lights the hall in the background.

(At 8:20 in episode 1 you can see what can happen when you don’t cross-light. Part of the reason that the location here looks like a flat, painted set is that the lighting is all frontal.)

The first scene of episode 3, at 0:33, is one of my favourites for lighting. The angle on Ghislain and Porthos practicing is lit by just two Kinoflo Barflies hung from the ceiling at the back of shot. These backlight the characters while also cross-lighting (vertically rather than horizontally) the stonework nicely.

A 1.2K HMI outside the door cross-lights the stonework, while smoke volumizes this light, resulting in a very satisfying depth and texture. The only other light sources are two kinoflo Barflies hanging from polecats above the bench at the back of shot. This backlight is reflected back at the foreground characters by a sheet of silver foamcore beneath the camera.

In the reverse (above) a 1.2K HMI outside the door rakes across the wall. A little smoke adds additional texture, while the Barflies (now above Athos and Lazare) provide backlight again.

There’s a shot at 5:12 in episode 5 where, again, a 1.2K HMI outside the door rakes across a wall, showing up the folds in an old tapestry.

This scene is lit purely by a 1.2K HMI out in the corridor.

Finally, in the secret room, seen in episodes 4 and 6 (at 6:41), 100W bulbs hidden behind the candles cross-light the surrounding stonework.

The two candle stands in the background have 100W bulbs hidden behind them. 40W bulbs would have been more suitable, but unfortunately we didn't have any. The light supposedly cast by these candles actually comes from two dedos. The first is at ceiling height off frame left, aimed at the Duke de Luyne (Toby Lorde) on frame right. The second is hidden behind the duke's desk and lights the heroes on frame left
The two candle stands in the background have 100W bulbs hidden behind them. 40W bulbs would have been more suitable, but unfortunately we didn’t have any. The light supposedly cast by these candles actually comes from two dedos. The first is at ceiling height off frame left, aimed at the Duke de Luyne (Toby Lorde) on frame right. The second is hidden behind the duke’s desk and lights the heroes on frame left

The First Musketeer (C) 2014 First Musketeer Ltd. Written, directed & produced by Harriet Sams.

Lighting Techniques #6: Cross-light

5 Ways to Use LED Panels

LED technology is transforming the way cinematographers can light. Running off batteries and not getting hot are two of their biggest advantages over other sources, making them much more flexible. I tend to avoid keying with them, because even the most expensive brands don’t render skintones as accurately as incandescent sources, but there are many other uses they can be put to. Here are a few of my favourite.

1. Eye-light on overcast day exteriors

If it’s one of those dark days when reflectors just don’t seem to do anything, or you’re under the tree canopy of a forest, an LED panel can give you a bit of fill and eye-light.

An LED panel over camera provides fill in this shot from Ren © 2015 Mythica Entertainment
An LED panel over camera provides fill and eye-light in this shot from Ren © 2015 Mythica Entertainment

Visit rentheseries.com to learn more about Ren, or read my blog post about lighting the above scene.

2. Background spots on night exteriors

So you’ve spent a while lighting the master shot of your big night exterior scene, and everyone’s ready to shoot. Then you notice that there’s an area in the background of frame which looks dark and empty, and you’d love a bit of extra light in there. Just slap a battery on your LED panel and run over there with it. No need to run power cables!

The orange backlight on Faith (Haruka Abe) and the fence, although apparently from the streetlamp in the background, is actually from an Arrilite 650 out of frame right, gelled with Urban Sodium. A daylight-balanced LED panel, also out of frame right but closer to camera, keys Faith. A second panel hidden behind the end of the fence lights the van and the rest of the deep background.
An LED panel lights the van and grass in the background of this shot from Forever Alone (dir. Jordan Morris)

Read my blog post about lighting the above scene.

3. Off-screen TV set

An LED panel makes a good “TV” source because during the take your spark can mess with not only the brightness control but the colour balance as well, to suggest changing images on the screen.

An LED panel simulates an off-screen TV set in this frame from The Gong Fu Connection © 2015 Cannon Fist Pictures
An LED panel simulates an off-screen TV set in this frame from The Gong Fu Connection © 2015 Cannon Fist Pictures. The panel was gelled green to match reverse shots in which the TV screen is shown to be dominated by the green grass of a racecourse.

Browse the blog posts about my cinematography on The Gong Fu Connection.

4. Mobile fill

If you’re shooting a long scene with your talent on the move and you need to maintain a little fill when they’re between lamps, an LED panel is easy for your spark to hand bash as they walk with the actors.

Under the black bag is an LED panel to keep some consistency to the light on the actors as the car moves.
Under the black bag is an LED panel to keep some consistency to the light on the actors as the car moves, in a scene from The Gong Fu Connection (dir. Ted Duran)
In a scene from Synced (dir. Devon Avery), we tracked the actors from the back of a pick-up truck, using the LED panel above me as fill.

Read my blog post about the above scene from Synced.

5. Hidden sources

Because they don’t get hot, and you don’t need power cables to them, it’s easy to hide LED panels behind bits of furniture or set dressing, to give interesting pools of light or punch up practicals.

In this frame from Ren, Hunter's face is lit by a small LED reporter light hidden behind the bucket to suggest a reflection off the water.
In this frame from Ren, Hunter’s face is lit by a small LED reporter light hidden behind the bucket to suggest a reflection off the water.

Read my blog post about lighting the above scene from Ren.

What interesting uses have you found for LED panels?

5 Ways to Use LED Panels

How to Correct Cosmetic Issues with Lighting

Redheads draw 800W eachEvery cinematographer needs to make the cast look good. Here are some quick tips for minimising blemishes and undesirable physical attributes. To any readers who have been lit by me, please don’t get a complex! These techniques can also be used to make someone who’s already flawless look even more amazing. Conversely, if you have a bad guy, or a character who needs to look ill, or a prosthetic monster make-up, you might want to do the opposite of what I suggest below.

  • Thinning hair – Avoid toplight and strong backlight, which will show up the scalp under the hair.
  • Wrinkles, spots and scars – Avoid lighting that will throw shadows from these features, e.g. cross-light (meaning light from the side). Instead put the key light as close to the camera as possible. Ideally use a soft source. If you’re still seeing shadows, add more fill.
  • Double chins, bags under the eyes, general appearance of tiredness – Use Health Bounce – a reflector placed under the talent’s face to eliminate shadows cast from above.
  • Small or deep-set eyes – Again, use Health Bounce. It will help get light into the eye sockets and put a sparkle of reflection in the eyeballs.
  • Weak jawline – Use three-quarter backlight (a.k.a. “kicker”) to create a rim along the jawline on one side.
  • Shiny skin – This may be a make-up issue, but you can help by using bounced light. Kinoflos, though they are soft sources, are amongst the worst culprits for creating shine.
  • Big nose – Keep the key light close to the camera to minimise the shadow the nose casts.

To learn more about lighting, check out my post on key light angles and my series of lighting techniques.

How to Correct Cosmetic Issues with Lighting

Six Cinematic Uses for Fairy Lights

They’re everywhere at this time of year, twinkling away, but I carry a string of fairy lights with me on every shoot, whatever the season, because they can be useful in many ways. Here are a few:

1. Firstly and most obviously, they’re handy set dressing to tell the audience that it’s Christmas. Useful in a montage to help sell a passage of time, like in this shot from Stop/Eject:

StopEject013682

2. Fairy lights produce lovely bokeh in the background of a close-up, as in this scene from the Doctor Who TV Movie. Use a long lens and a wide aperture for the maximum effect.

vlcsnap-2013-02-06-10h48m38s142

3. In fact, you can use fairy lights to create a completely abstract background of out-of-focus lights, maybe as a backdrop for credits, titles or DVD menus.

stock-footage-bokeh-light-out-of-focus-fairy-lights

4. You can tape fairy lights to a polyboard and create a lovely soft light source as Eve Hazelton demonstrates in this video at 4:28.

eyelight

5. Fairy lights against a black background, underexposed, make an instant starfield backdrop as seen in Soul Searcher at 39:21. These were actually some of Hereford’s Christmas lights that the council had put up outside the window of my flat.

starfield

6. Similarly, fairy lights can represent distant city lights, as seen outside in the first shot of this trailer. (It was actually filmed in the daytime with makeshift black tenting around the window and the fairy lights within that.) For another example, check out the model shots of the train in Soul Searcher, above, like the one at 1:22:07. This behind-the-scenes photo of the miniature set shows the string of fairy lights that were used as “streetlights” between the model buildings.

TrainBG

Six Cinematic Uses for Fairy Lights

Candlelight

The First Musketeer – the period web series I DPed in France last September – is edging closer to completion. One of the biggest challenges of the shoot for me was simulating candlelight. Almost every scene had candles in it (albeit fake, yet very convincing, LED ones) and it was always a struggle to make them appear to be shedding authentic light.

A couple of years back I blogged about how I created candlelight for the Wasteland trailer, by hiding ordinary 100W tungsten bulbs behind the set-pieces the candles were standing on. I did this again on The First Musketeer, and it can be very effective.

The main tavern set was dotted with large barrels topped with candles, so it was quick and easy to gaffer-tape pendant fittings with 100W bulbs onto the backs of these barrels. (A piece of blackwrap was interposed to stop the bulbs singeing the barrels.) The advantage of a bare bulb over a fresnel or par fixture is that it sheds light in all directions, just like a candle. So when three people were stood around a barrel, as long as the two at the sides were cheated slightly back out of the barrel’s shadow, it lit them all up fairly convincingly.

A single 100W bulb hidden behind the barrel lights the three Huguenots in the background. A blue-gelled HMI provides backlight.
A single 100W bulb hidden behind the barrel lights the three Huguenots in the background. A blue-gelled HMI provides backlight, while two dedos off the sides of frame cross-light the foreground characters.
Dedo, de-e-edo. Dedo come and me want go home.
Dedo, de-e-edo. Dedo come and me want to go home.

This method doesn’t always work though, and it relies on the candle being sat on something a bulb can be hidden behind.

A dedo creates the pool of light around the background candle here.

Dedolights are great for creating circles of light to surround candles, and their built-in dimmers make it easy to flicker the light for added realism. But this method has serious drawbacks. Firstly, it lights the candle itself as well as the surroundings, often rendering the flame (or LEDs) almost invisible. Secondly, anyone passing between the dedo and the candle will pass through the beam of light, destroying the illusion. In an ideal world you would rig the dedo to the ceiling and set up a little thin flag to prevent the light hitting the candle itself, but in practice this would usually be difficult and time-consuming to set up.

More recently I’ve tackled the candelight problem again on Ren. The difference was that we were able to use real candles, often double-wicked for enhanced light output. Real candles take care of their own immediate pool of light, so then you only have to worry about beefing up the amount of lighting hitting the talent and the surrounding set.

Again, bare bulbs can be useful for this, but dedos are often best. It’s possible to cheat the dedo positions quite heavily and still get away with it, because they produce such a narrow, controllable beam of light.

The two candle stands in the background have 100W bulbs hidden behind them. 40W bulbs would have been more suitable, but unfortunately we didn't have any. The light supposedly cast by these candles actually comes from two dedos. The first is at ceiling height off frame left, aimed at the Duke de Luyne (Toby Lorde) on frame right. The second is hidden behind the duke's desk and lights the heroes on frame left
The two candle stands in the background have 100W bulbs hidden behind them. 40W bulbs would have been more suitable, but unfortunately we didn’t have any. The light supposedly cast by these candles actually comes from two dedos. The first is at ceiling height off frame left, aimed at the Duke de Luyne (Toby Lord) on frame right. The second is hidden behind the duke’s desk and lights the heroes on frame left.

What methods have you used to simulate candlelight? Comment on Facebook or tweet me – I’m intrigued to hear.

All images copyright 2014 The First Musketeer. Find out more about the series at www.firstmusketeer.com

Candlelight