Almost every film today has visual effects of some kind or another, be it compositing a phone screen for a couple of shots or adding a fleet of attacking spaceships and their laser blasts destroying distant CG buildings. Many smaller productions cannot afford to have a VFX supervisor on set, however, so a conscientious DP should be looking out for ways they can ensure the footage they capture is not going to cause complications or rack up extra costs down the line.
1. Interactive Light
VFX will often look a lot more convincing if they affect the lighting on the actors or set. This could be as simple as flashing a lamp for a gunshot that’s going to be added in post, or it could involve programming a dynamic lighting effect into a row of Astera tubes. Remember that it could be negative lighting; I once had to shoot day exterior scenes next to an alien spaceship that wasn’t really there, so I had the gaffer rig a wall of floppy flags to create its shadow.
Beware though: inaccurate interactive lighting – be it mistimed, the wrong colour or casting unrealistic shadows – is worse than none at all. I would always advise shooting a take without the interactive lighting, because even if you do it perfectly there is always the chance that the effect will be changed in post-production from what was agreed.
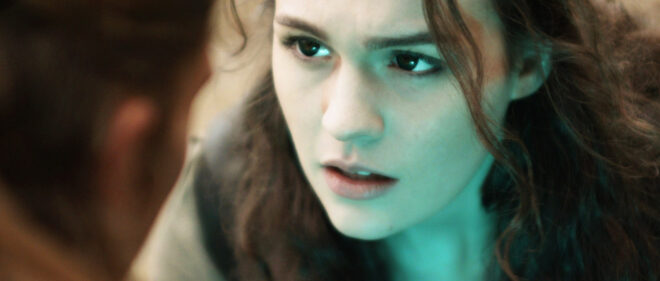
An unused take from “Ren: The Girl with the Mark” in which I used green interactive light to match the concept art of the VFX. The VFX colour was changed to gold in post and we were very glad we’d done a safety take without the light!
2. Tracking
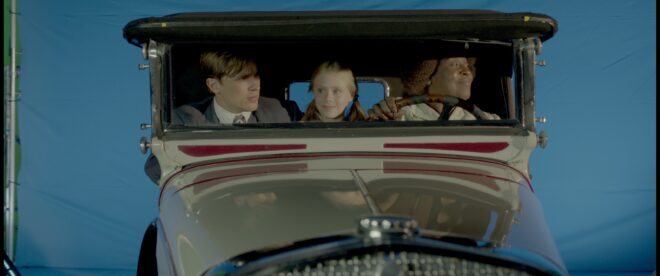
If you are doing a moving shot to which something will be added in post, consider adding some tracking crosses into the scene. Tracking software is really good now, but it doesn’t hurt to help it along, especially if you’re dealing with a fairly featureless surface like a blank TV screen, and definitely with green screens. A simple X made of white camera tape will do the job. Be careful not to cover up any detail that will make the X hard to paint out.
3. Recording Mode
If you are not generally shooting at the highest quality your camera permits, consider switching up to it for VFX shots at least. This means going to RAW if you were in, say, ProRes, or increasing the bit depth, and reducing the compression ratio. The cleaner the image, the easier you make life for the VFX team, particularly when it comes to pulling keys and motion tracking.
If you’re able to increase the resolution so that there is extra image outside the frame that will help VFX with any stabilisation, artificial image shake or adjustments of the camera move they need to make once the CG elements are in.
4. Camera Log
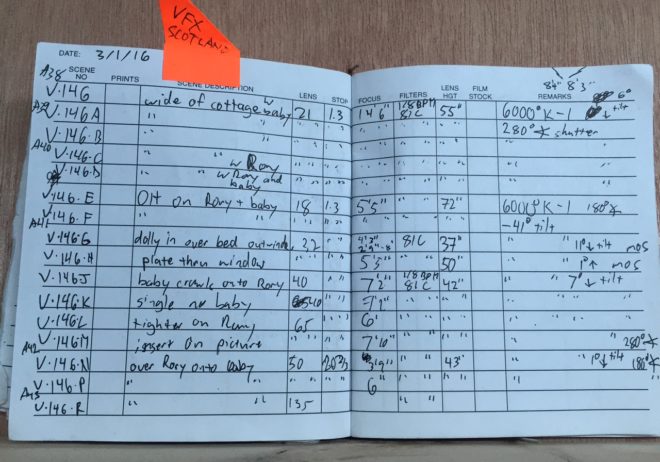
This camera log from “Rory’s Way” includes extra details because a baby had to be composited into some of the shots.
Accurate information about the lens and camera is important for the VFX department. Normally your 2nd AC will be recording focal length, T-stop, white balance, ISO, shutter angle and filtration, but for VFX shots a few extra things will be useful: lens height from the ground, tilt angle (use an inclinometer app) and at least a rough focal distance.
5. Green Screens
There are a whole host of things to look out for when you’re shooting on blue or green screens, but the main one is lighting. You should light the screen as evenly as possible, and to the same level as your key light. Once the camera position is set, a good tip is to bring in a couple of flags just out of the sides of frame to cut as much green spill as possible off the talent, so that the VFX team can pull a clean key.
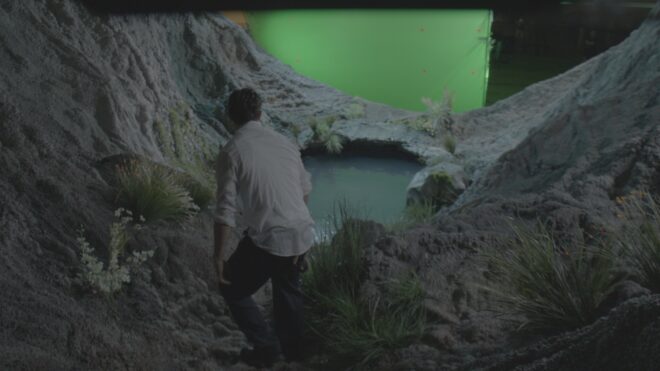
Note the tracking crosses on the green screen in this log frame from “The Little Mermaid”.
Virtual production has been on everyone’s lips in the film industry for a couple of years now, but like all new technology it didn’t just appear overnight. Let’s trace the incremental steps that brought us to the likes of The Mandalorian and beyond.
The major component of virtual production – shooting actors against a large LED screen displaying distant or non-existent locations – has its roots in the front- and rear-projection common throughout much of the 20th century. This involved a film projector throwing pre-recorded footage onto a screen behind the talent. It was used for driving scenes in countless movies from North by Northwest to Terminator 2: Judgment Day, though by the time of the latter most filmmakers preferred blue screen.
Cary Grant films the crop duster scene from “North by Northwest”
The problem with blue and green screens is that they reflect those colours onto the talent. If the screen is blue and the inserted background is clear sky that might be acceptable, but in most cases it requires careful lighting and post-production processing to eliminate the blue or green spill.
Wanting to replace these troublesome reflections with authentic ones, DP Emmanuel Lubezki, ASC, AMC conceived an “LED Box” for 2013’s Gravity. This was a 20’ cube made of LED screens displaying CG interiors of the spacecraft or Earth slowly rotating beneath the characters. “We were projecting light onto the actors’ faces that could have darkness on one side, light on another, a hot spot in the middle and different colours,” Lubezki told American Cinematographer. “It was always complex.” Gravity’s screens were of a low resolution by today’s standards, certainly not good enough to pass as real backgrounds on camera, so the full-quality CGI had to be rotoscoped in afterwards, but the lighting on the cast was authentic.
Sandra Bullock in “Gravity’s” LED box
Around the same time Netflix’s House of Cards was doing something similar for its driving scenes, surrounding the vehicle with chromakey green but rigging LED screens just out of frame. The screens showed pre-filmed background plates of streets moving past, which created realistic reflections in the car’s bodywork and nuanced, dynamic light on the actors’ faces.
Also released in 2013 was the post-apocalyptic sci-fi Oblivion. Many scenes took place in the Sky Tower, a glass-walled outpost above the clouds. The set was surrounded by 500×42’ of white muslin onto which cloud and sky plates shot from atop a volcano were front-projected. Usually, projected images are not bright enough to reflect useful light onto the foreground, but by layering up 21 projectors DP Claudio Miranda, ASC was able to achieve a T1.3-2.0 split at ISO 800. Unlike those of Gravity’s low-rez LED Box, the backgrounds were also good enough to not need replacing in post.
The set of “Oblivion” surrounded by front-projected sky backgrounds
It would take another few years for LED screens to reach that point.
By 2016 the technology was well established as a means of creating complex light sources. Deepwater Horizon, based on the true story of the Gulf of Mexico oil rig disaster, made use of a 42×24’ video wall comprising 252 LED panels. “Fire caused by burning oil is very red and has deep blacks,” DP Enrique Chediak, ASC explained to American Cinematographer, noting that propane fires generated by practical effects crews are more yellow. The solution was to light the cast with footage of genuine oil fires displayed on the LED screen.
Korean zombie movie Train to Busan used LED walls both for lighting and in-camera backgrounds zipping past the titular vehicle. Murder on the Orient Express would do the same the following year.
The hyperspace VFX displayed on a huge LED screen for “Rogue One”
Meanwhile, on the set of Rogue One, vehicles were travelling a little bit faster; a huge curved screen of WinVision Air panels (with a 9mm pixel pitch, again blocky by today’s standards) displayed a hyperspace effect around spacecraft, providing both interactive lighting and in-camera VFX so long as the screen was well out of focus. The DP was Greig Fraser, ACS, ASC, whose journey into virtual production was about to coincide with that of actor/director/producer Jon Favreau.
Favreau had used LED screens for interactive lighting on The Jungle Book, then for 2018’s The Lion King he employed a virtual camera system driven by the gaming engine Unity. When work began on The Mandalorian another gaming engine, Unreal, allowed a major breakthrough: real-time rendered, photo-realistic CG backgrounds. “It’s the closest thing to playing God that a DP can ever do,” Fraser remarked to British Cinematographer last year. “You can move the sun wherever you want.”
Since then we’ve seen LED volumes used prominently in productions like The Midnight Sky, The Batman and now Star Trek: Strange New Worlds, with many more using them for the odd scene here and there. Who knows what the next breakthrough might be?
With the runaway success of the first instalment, there was no way that Universal Pictures weren’t going to make another Back to the Future, with or without creators Bob Gale and Robert Zemeckis. So after confirming that Michael J. Fox and Christopher Lloyd were willing to reprise their roles as Marty McFly and Doc Emmett Brown, the producer and director got together to thrash out story ideas.
They knew from the fan mail which had been pouring in that they had to pick up the saga where they had left off: with Doc, Marty and his girlfriend Jennifer zooming into the future to do “something about your kids!” They soon hit upon the idea of an almanac of sport results being taken from 2015 into the past by Marty’s nemesis Biff Tannen (Thomas F. Wilson), resulting in a “Biff-horrific” alternate 1985 which Marty and Doc must undo by journeying into the past themselves.
Gale’s first draft of the sequel, written up while Zemeckis was away in England shooting Who Framed Roger Rabbit?, had Biff giving the almanac to his younger self in 1967. Marty would don bell-bottom trousers and love beads to blend into the hippy culture, meet his older siblings as very young children and his mother Lorraine as an anti-war protestor, and endanger his own existence again by preventing his parents going on the second honeymoon during which he was conceived.
Upon returning from England and reading the draft, Zemeckis had two main notes: add a fourth act set in the Wild West, and how about 1955 again instead of 1967? “We could actually do what the audience really, really wants, which is to go back and revisit the movie they just saw,” Zemeckis later explained. “That is the thing that excited me most, this idea of seeing the same movie from a different angle.”
Adding the Wild West act ballooned the script to over two-and-a-half hours with an estimated budget of $60 million, far more than Universal wanted to spend. So Gale revised the screenplay, expanding it further with a neat point in the middle where it could be split in half. As two films, each budgeted at $35 million but shot back-to-back over 11 months, the project was much more appealing to the studio. However, it was still a bold and unusual move for Universal to green-light two sequels simultaneously, something that it’s easy to forget in these days of long-form movie franchises planned out years in advance.
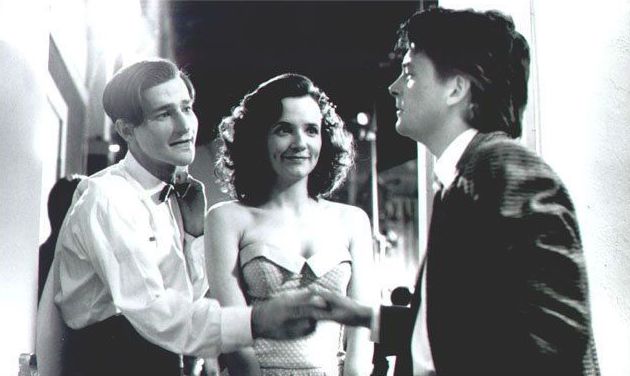
A sticking point was Crispin Glover. As Marty’s father George McFly he had been a difficult actor to work with on the first film, and now he was demanding more than a ten-fold pay increase to appear in the sequels. “Crispin… asked for the same money that Michael J. Fox was receiving, as well as script approval and director approval,” according to Gale. He gave Glover’s agent two weeks to come back with a more realistic offer, but it didn’t come. Glover would not be reprising his role.
Jeffrey Weissman in prosthetic make-up as George McFly
Gale accordingly made George dead in the Biff-horrific 1985, and Zemeckis employed several tricks to accomplish his other scenes. These included the reuse of footage from Part I, and hanging cheap replacement actor Jeffrey Weissman upside-down in a futuristic back brace throughout the 2015 scenes. Life casts of Glover’s face taken for the ageing effects in Part I were even used to produce prosthetic make-up appliances for Weissman so that he would resemble Glover more closely. “Oh, Crispin ain’t going to like this,” Fox reportedly remarked, and he was right. Glover would go on to successfully sue the production for using his likeness without permission, with the case triggering new Screen Actors Guild rules about likeness rights.
Make-up was a huge part of the second film, since all the main actors had to portray their characters at at least two different ages, and some played other members of the family too. A 3am start in the make-up chair was not unusual, the prosthetics became hot and uncomfortable during the long working days, and the chemicals used in their application and removal burnt the actors’ skin. “It was a true psychological challenge to retain enough concentration to approach the character correctly and maintain the performance,” said Wilson at the time.
Filming began in February 1989 with the ’55 scenes. To save time and money, only one side of the Hill Valley set – still standing on the Universal backlot – was dressed for this period. The company then shot on stage for a few weeks before returning to the backlot in March, by which time production designer Rick Carter and his team had transformed the set into a gangland nightmare to represent Biff-horrific 1985. In May the company revisited the Hill Valley set once more to record the 2015 scenes.
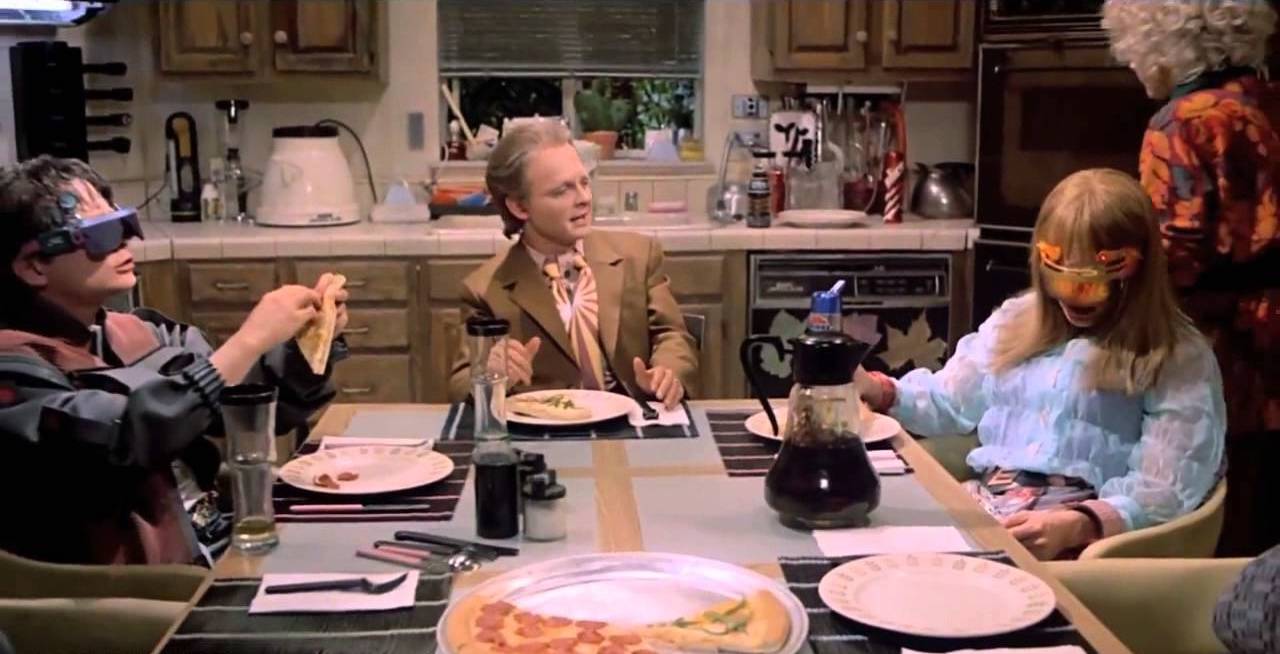
When the real 2015 rolled around, many were quick to compare the film’s vision of the future to reality, but Gale always knew that he would fail if he tried to make genuine predictions. “We decided that the only way to deal with it was to make it optimistic, and have a good time with it.” Microwave meals had begun to compete with home cooking in the ‘80s, so Gale invented a leap forward with the pizza-inflating food hydrator. Kids watched too much TV, so he envisaged a future in which this was taken to a ridiculous extreme, with Marty Jr. watching six channels simultaneously – not a million miles from today’s device-filled reality.
While the opening instalment of the trilogy had been relatively light on visual effects, Part II required everything from groundbreaking split-screens to flying cars and hoverboards. This last employed a range of techniques mostly involving Fox, Wilson and three other actors, plus five operators, hanging from cranes by wires. While every effort was made to hide these wires from camera – even to the extent of designing the set with a lot of camouflaging vertical lines – the film went down in VFX history as one of the first uses of digital wire removal.
But perhaps the most complex effect in the film was a seemingly innocuous dinner scene in which Marty, Marty Jr. and Marlene McFly all share a pizza. The complication was that all three roles were played by Michael J. Fox. To photograph the scene and numerous others in which cast members portrayed old and young versions of themselves, visual effects wizards Industrial Light & Magic developed a system called VistaGlide.
Based on the motion control rigs that had been used to shoot spaceships for Star Wars, the VistaGlide camera was mounted on a computer-controlled dolly. For the dinner scene, Fox was first filmed as old Marty by a human camera operator, with the VistaGlide recording its movements. Once Fox had switched to his Marty Jr. or Marlene costume and make-up, the rig could automatically repeat the camerawork while piping Fox’s earlier dialogue to a hidden earpiece so that he could speak to himself. Later the three elements were painstakingly and seamlessly assembled using hand-drawn masks and an analogue device called an optical printer.
The technically challenging Part II shoot came to an end on August 1st, 1989, as the team captured the last pieces of the rain-drenched scene in which Marty receives a 70-year-old letter telling him that Doc is living in the Old West. Four weeks later, the whole cast and crew were following Doc’s example as they began filming Part III.
In order to have open country visible beyond the edges of 1885’s Hill Valley, the filmmakers opted to leave the Universal backlot and build a set 350 miles north in Sonora, California. The town – which had appeared in classic westerns like High Noon and Pale Rider – was chosen for its extant railway line and its genuine 19th century steam locomotive which would form a pivotal part of the plot.
Joining the cast was Mary Steenburgen as Doc’s love interest Clara. Initially unsure about the role, she was persuaded to take it by her children who were fans of the original film. “I confess to having been infatuated with her, and I think it was mutual,” LLoyd later admitted of his co-star. Though the pair never got involved, Part III’s romantic subplot did provide the veteran of over 30 films with his first on-screen kiss.
By all accounts, an enjoyable time was had by the whole cast and crew in the fresh air and open spaces of Sonora. Fox, who had simultaneously been working on Family Ties during the first two films, finally had the time to relax between scenes, even leading fishing trips to a nearby lake.
The set acquired the nickname “Club Hill Valley” as a volleyball court, mini golf and shooting range were constructed. “We had a great caterer,” recalled director of photography Dean Cundey, “but everybody would rush their meal so that they could get off to spend the rest of their lunch hour in their favourite activity.”
There was one person who was not relaxed, however: Robert Zemeckis. Part II was due for release on November 20th, about halfway through the shoot for Part III. While filming the action-packed climax in which the steam train propels the DeLorean to 88mph, the director was simultaneously supervising the sound mix for the previous instalment. After wrapping at the railway line, Zemeckis would fly to Burbank and eat his dinner on the dubbing stage while giving the sound team notes. He’d then sleep at the Sheraton Universal and get up at 4:30am to fly back to Sonora.
The train sequence had plenty of other challenges. Multiple DeLoreans had been employed in the making of the trilogy so far, including a lightweight fibreglass version that was lifted on cables or hoisted on a forklift for Part II’s flying scenes, and two off-road versions housing Volkswagen racing engines for Part III’s desert work. Another was now outfitted with railway wheels by physical effects designer Michael Lantieri. “One of the scariest things to do was the DeLorean doing the wheelie in front of the train,” he noted in 2015. “We had cables and had it hooked to the front of the train… A big cylinder would raise the front of the car.”
The film’s insurance company was unhappy about the risks of putting Michael J. Fox inside a car that could potentially derail and be crushed by the train, so whenever it was not possible to use a stunt double the action was played out in reverse; the locomotive would pull the DeLorean, and the footage would subsequently be run backwards.
The makers of Mission: Impossible 7 recently drove a full-scale mock-up of a steam locomotive off an unfinished bridge, but Back to the Future’s team opted to accomplish a very similar stunt in miniature. A quarter-scale locomotive was constructed along with a matching DeLorean, and propelled to its doom at 20mph with six cameras covering the action. Marty, of course, has returned safely to 1985 moments earlier.
Part III wrapped on January 12th, 1990 and was released on May 25th, just six months after Part II. Although each instalment made less money than its predecessor, the trilogy as a whole grossed almost $1 billion around the world, about ten times its total production cost. The franchise spawned a theme park ride, an animated series, comics and most recently a West End musical.
But what about Part IV? Thomas F. Wilson is a stand-up comedian as well as an actor, and on YouTube you can find a track of his called “Biff’s Questions Song” which humorously answers the most common queries he gets from fans. The penultimate chorus reveals all: “Do you all hang out together? No we don’t / How’s Crispin Glover? Never talk to him / Back to the Future IV? Not happening / Stop asking me the question!”
Spaceman from Pluto is a 1985 sci-fi comedy starring Eric Stoltz and Christopher Lloyd. Lloyd plays Professor Brown, an eccentric scientist with a pet chimp, who builds a time machine out of an old fridge. Stoltz portrays a teenage video pirate, Marty McFly, who is accidentally sent back to the 1950s in the machine. After almost wiping himself from existence by endangering his parents’ first meeting, Marty returns to his own time using the power generated by an atomic bomb test in the Nevada desert.
Fortunately this movie was released in some alternate version of history. In our timeline it went through a number of changes in writing and production to become the blockbuster classic Back to the Future.
For co-writer and producer Bob Gale it all started when he came across his father’s highschool yearbook and realised that, had he and his father been peers, they would never have been friends. Spotting the comedy potential in the concept of a teenager going to school with his parents, Gale sat down with co-writer and director Robert Zemeckis to develop a script.
The pair knew they needed a time machine and decided that it would be created by a backyard inventor rather than some government organisation. “I can’t really put my finger on when I stumbled on the idea of time travel,” said Gale in 2002, “whether it was from watching The Twilight Zone, reading Superman comics, or when the H.G. Wells Time Machine – the George Pal movie – came out, but I do remember being totally fascinated by that film.”
Writer-director Robert Zemeckis & writer-producer Bob Gale
Getting Back to the Future made proved challenging. Most of the studios that Gale and Zemeckis approached found the script too sweet and innocent compared with the typical R-rated teen movies of the time. Disney, on the other hand, felt that the mother-falls-for-son plot was too taboo.
Making matters worse was the duo’s less than spectacular track record. Their first two feature films, I Wanna Hold Your Hand and Used Cars, were both box office flops. They even had the dubious honour of writing the least successful film of Steven Spielberg’s directorial career so far, 1941.
Everything changed when Michael Douglas hired Zemeckis to direct 1984’s Romancing the Stone. The adventure romp was a hit and suddenly everyone in the notoriously fickle Hollywood wanted Back to the Future. Spielberg, who had always loved the script, signed on as executive producer and – after a false start at Columbia – the movie was green-lit by Universal Pictures.
Studio president Sid Sheinberg requested a number of script changes. Professor Brown became “Doc” and his chimp became a dog. Marty’s video piracy (which would have explained his possession of the camcorder with which he films the time machine’s test run) was written out, as the studio were understandably unwilling to promote the revenue-slashing crime.
Sheinberg also hated the title Back to the Future and wanted it changed to Spaceman from Pluto, a reference to the comic clutched by the Peabody children after the DeLorean crashes into their barn on arriving in 1955. Zemeckis and Gale turned to Spielberg to help them dodge this title without offending Sheinberg; his solution was to send a memo saying what a big laugh they all got out of Sheinberg’s joke. The studio president never mentioned it again.
The title Back to the Future was retained, but the barn scene did prompt another change. By this point the writers had realised that an immobile fridge was not dramatic or practical as a time machine, and were searching for a suitable vehicle for Doc to build it into. They chose the slick, stainless steel DeLorean with its futuristic gull-wing doors so that the Peabody family could mistake it for a UFO.
Budget concerns drove the elimination of the A-bomb scene. Shooting on location and building the miniatures of the bomb and its test tower were estimated to cost $1 million. Switching the power source to a lightning bolt not only saved this money by keeping all the action in Hill Valley, it enhanced the time metaphor represented by the clock tower as well as giving Doc an active part in the climax rather than being stuck in a blast bunker with a walkie-talkie.
The filmmakers’ first choice for the role of Marty McFly was Michael J. Fox, the 23-year-old star of sitcom Family Ties. But that show’s creator, Gary David Goldberg, refused to even let Fox see the Back to the Future script, fearing the actor would love it and resent Goldberg for not releasing him from his Family Ties commitment.
A disappointed Zemeckis accordingly began screen-testing other actors, eventually narrowing the choice down to C. Thomas Howell (best known for the coming-of-age drama The Outsiders) and Eric Stoltz (who had appeared in Fast Times at Ridgemont High and The Wild Life). It seems that Sid Sheinberg was Stoltz’s most vocal advocate. Gale recalled the studio president declaring: “I’m so convinced that Eric is going to be great in this part, if it doesn’t work out you can recast it and start all over again.”
No-one expected that to actually happen.
Filming began on November 26th, 1984. The logistics of transforming a real town into Hill Valley in both 1955 and 1985 were daunting, so instead production designer Lawrence G. Paull adapted the town square set on Universal Studios’ backlot, which had originally been built for the 1948 film noir An Act of Murder.
Special effects supervisor Kevin Pike had taken three DeLoreans and, working to concept art by the legendary Ron Cobb amongst others, fitted them with a variety of aircraft surplus parts and other junk to create the iconic time machine. The “Mr. Fusion” generator added to the vehicle in the final scene started life as a coffee grinder.
Cast in the role of Doc Brown was Christopher Lloyd, whose prior roles included a Klingon commander in Star Trek III: The Search for Spock, a psychiatric patient in One Flew Over the Cuckoo’s Nest and five years in the sitcom Taxi. In another alternate timeline he wasn’t involved in Back to the Future either, having binned the script in favour of a stage role in New York; it was his wife who made him reconsider.
Basing the character on the conductor Leopold Stokowski, Lloyd made the Doc larger than life. Eric Stoltz had a very different approach, a method approach, focusing on the serious aspect of Marty’s out-of-time predicament and apparently ignoring the fact that he was starring in a comedy. “Eric didn’t get it,” camera assistant Clyde E. Bryan remembered in 2015. “Eric didn’t understand the physical, pratfall type of humour that Bob [Zemeckis] was looking for.”
By the sixth week of filming, almost halfway through the schedule, Zemeckis knew he had a huge problem. After conferring with Gale and his fellow producer Neil Canton, the director asked Spielberg to come to the editing suite and watch the 45-minute rough cut of everything that had been shot so far. All the filmmakers agreed that Stoltz had to go.
Unwilling to have Universal shut down the film and suffer the attendant negative press, Zemeckis kept filming with Stoltz for another week, with most of the cast and crew unaware of the situation. Meanwhile, behind the scenes, Canton worked out exactly how much reshoots would cost ($4 million) while Zemeckis and Gale went back to Goldberg at Family Ties, begging him to let Michael J. Fox take the role. Goldberg agreed on condition that the TV show would take priority. Fox himself claims to have merely weighed the script in his hand before agreeing to do it.
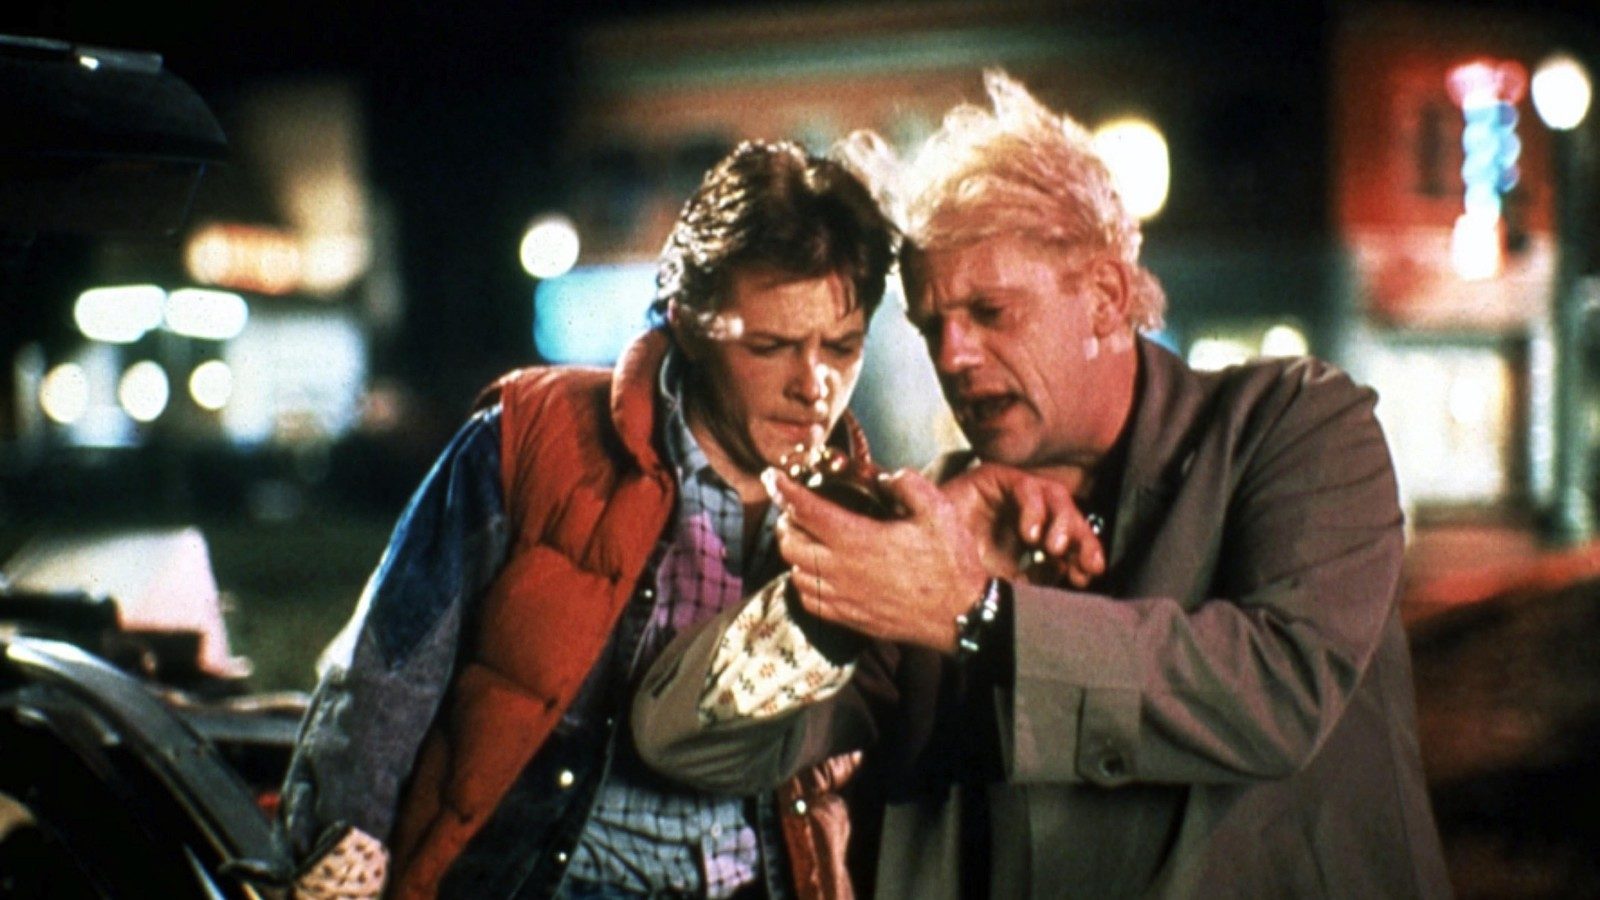
During the lunch break on Thursday, January 10th, 1985, halfway through filming the DeLorean’s test run in the car park of the Twin Pines Mall, Zemeckis called Stoltz into his trailer and broke the bad news. By the following Monday, Michael J. Fox was Marty McFly.
The young actor’s schedule was exhausting. He would wake at 9am, work on Family Ties from 10am to 6:30pm, get driven to Universal and shoot Back to the Future until 2:30am. Any scenes that required Marty in daylight had to be filmed at weekends.
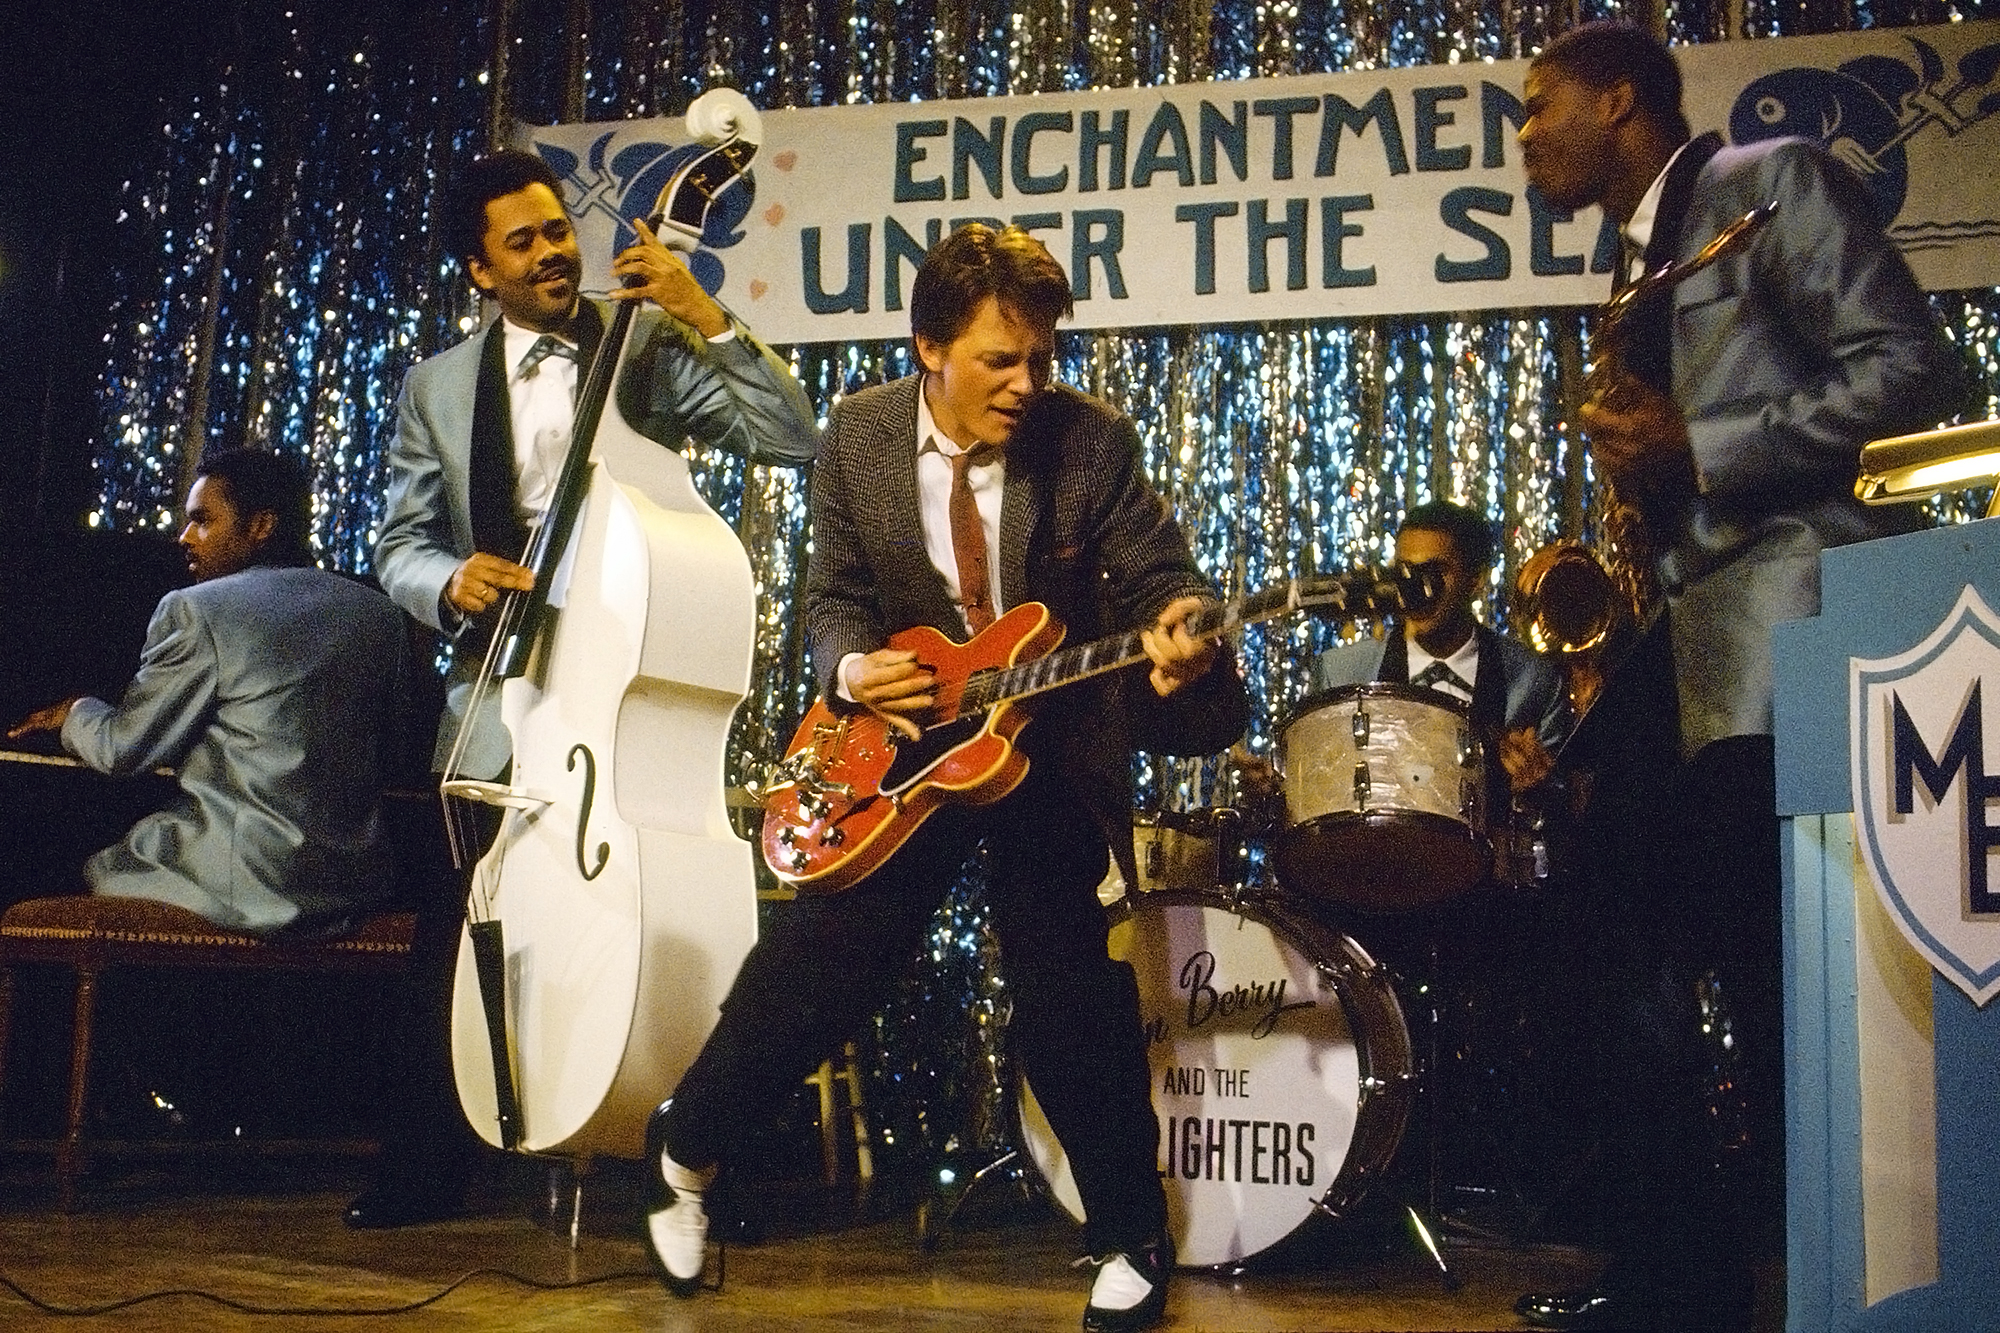
Nonetheless, Fox somehow managed to squeeze in guitar lessons in preparation for Marty’s performance at the Enchantment Under the Sea Dance. He already had some experience with the instrument, but was determined to learn to play “Johnny B. Goode” note for note so that he could finger-sync perfectly to the pre-recorded track. Marty’s singing voice was provided by Mark Campbell, while the energetic choreography of his performance incorporated the signature moves of Pete Townshend, Jimi Hendrix and Eric Clapton as well as Chuck Berry.
The scene is one of the most memorable in the movie, but Zemeckis and Gale were very worried about it during editing. “It’s the only scene that doesn’t advance story or character, and we didn’t know how that was going to play,” said Gale. A preview screening in San Jose removed any doubts; the audience loved “Johnny B. Goode” and everything else about the movie.
After a second preview, this time with Sid Sheinberg in attendance, Universal realised they were onto a winner and moved the film’s release date up to the July 4th weekend, paying through the nose to accelerate post-production.
“I want it to be violent,” Zemeckis told the animators creating the effect of the DeLorean breaking the time barrier, “something akin to a Neanderthal sitting on the hood of the car, chipping away at the fabric of time in front of him.” The hand-drawn cell animation combined with built-in lighting on the car and actual fire trails that had been captured on location, plus additional pyrotechnics overlaid after the fact, created the signature effect.
Meanwhile, Alan Silvestri assembled the largest orchestra in Universal’s history to record Back to the Future’s iconic score, and a tie-in single was provided by Huey Lewis and the News. The latter took a couple of attempts to get right; Lewis’ first submission was a minor-key track that didn’t work at all, according to Zemeckis. It was only after the filmmaker showed Lewis the skateboarding scene that he understood the upbeat mood required and composed “The Power of Love”.
Fox was away filming a Family Ties special in England when Back to the Future was released. He was surprised to get a call from his agent telling him that it was the biggest film in America. It spent 12 weeks at the top of the US box office charts and quickly became part of popular culture, with even Presidents Reagan and Bush Senior giving speeches about taking the country “back to the future”. To date it has grossed almost $400 million.
Summing up the film’s appeal in 2002, Gale offered: “There’s something very special about this story that everyone can identify with, the idea of trying to imagine what your parents were like when they were kids – that just touches everybody.”
When Back to the Future was released on VHS in May 1986, fans noticed a small change from the theatrical version. There as expected was the DeLorean’s lift-off and departure to the future – originally intended by Zemeckis and Gale simply as a joke on which to end the story. But now, sandwiched between that final scene and the end credits, was a caption.
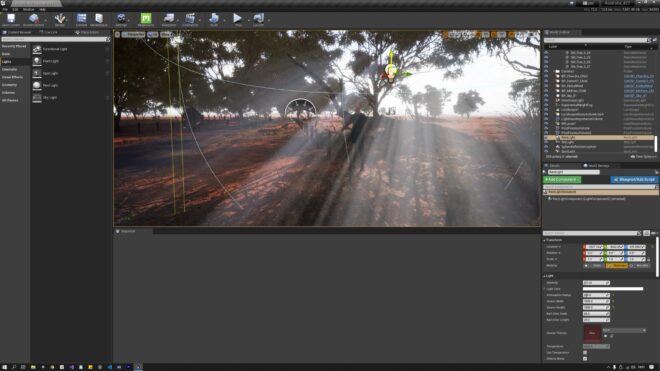
Yesterday I paid a visit to my friend Chris Bouchard, co-director of The Little Mermaid and director of the hugely popular Lord of the Rings fan film The Hunt for Gollum. Chris has been spending a lot of time working with Unreal, the gaming engine, to shape it into a filmmaking tool.
The use of Unreal Engine in LED volumes has been getting a lot of press lately. The Mandalorian famously uses this virtual production technology, filming actors against live-rendered CG backgrounds displayed on large LED walls. What Chris is working on is a little bit different. He’s taking footage shot against a conventional green screen and using Unreal to create background environments and camera movements in post-production. He’s also playing with Unreal’s MetaHumans, realistic virtual models of people. The faces of these MetaHumans can be puppeteered in real time by face-capturing an actor through a phone or webcam.
Chris showed me some of the environments and MetaHumans he has been working on, adapted from pre-built library models. While our friend Ash drove the facial expressions of the MetaHuman, I could use the mouse and keyboard to move around and find shots, changing the focal length and aperture at will. (Aperture and exposure were not connected in this virtual environment – changing the f-stop only altered the depth of field – but I’m told these are easy enough to link if desired.) I also had complete control of the lighting. This meant that I could re-position the sun with a click and drag, turn God rays on and off, add haze, adjust the level of ambient sky-light, and so on.
Of course, I tended to position the sun as backlight. Adding a virtual bounce board would have been too taxing for the computer, so instead I created a “Rect Light”, a soft rectangular light source of any width and height I desired. With one of these I could get a similar look to a 12×12′ Ultrabounce.
The system is pretty intuitive and it wasn’t hard at all to pick up the basics. There are, however, a lot of settings. To be a user-friendly tool, many of these settings would need to be stripped out and perhaps others like aperture and exposure should be linked together. Simple things like renaming a “Rect Light” to a soft light would help too.
The system raises an interesting creative question. Do you make the image look like real life, or like a movie, or as perfect as possible? We DPs might like to think our physically filmed images are realistic, but that’s not always the case; a cinematic night exterior bears little resemblance to genuinely being outdoors at night, for example. It is interesting that games designers, like the one below (who actually uses a couple of images from my blog as references around 3:58), are far more interested in replicating the artificial lighting of movies than going for something more naturalistic.
As physical cinematographers we are also restricted by the limitations of time, equipment and the laws of physics. Freed from these shackles, we could create “perfect” images, but is that really a good idea? The Hobbit‘s endless sunset and sunrise scenes show how tedious and unbelievable “perfection” can get.
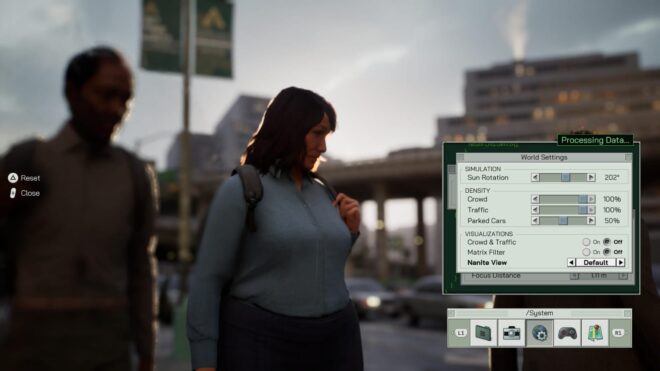
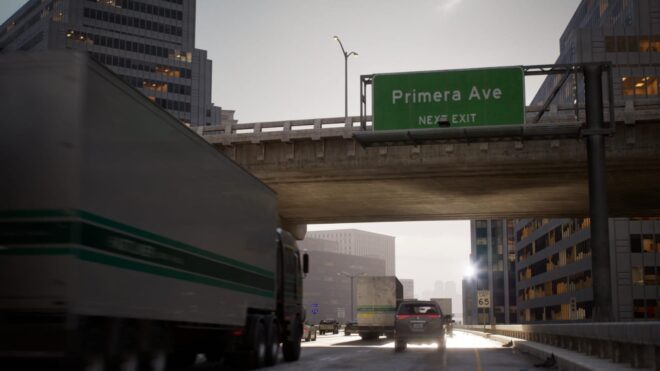
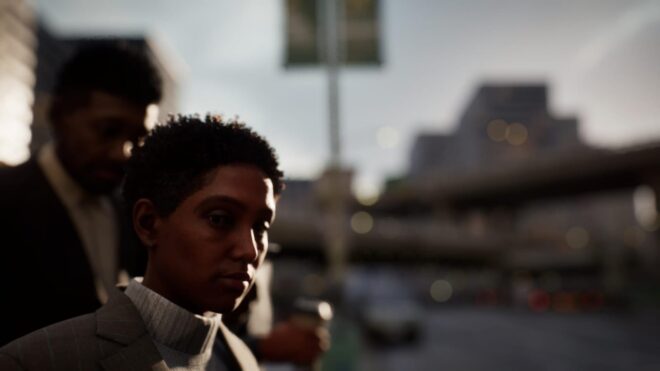
There is no denying that the technology is incredibly impressive, and constantly improving. Ash had brought along his Playstation 5 and we watched The Matrix Awakens, a semi-interactive film using real-time rendering. Genuine footage of Keanu Reeves and Carrie-Anne Moss is intercut with MetaHumans and an incredibly detailed city which you can explore. If you dig into the menu you can also adjust some camera settings and take photos. I’ll leave you with a few that I captured as I roamed the streets of this cyber-metropolis.
Award-winning visual effects artist Douglas Trumbull died recently, leaving behind a body of memorable work including the slit-scan “Stargate” sequence from 2001: A Space Odyssey. But what is slit-scan and where else has it been used?
Slit-scan has its origins in still photography of the 1800s. A mask with a slit in it would be placed in front of the photographic plate, and the slit would be moved during the exposure. It was like a deliberate version of the rolling shutter effect of a digital sensor, where different lines of the image are offset slightly in time.
The technique could be used to capture a panorama onto a curved plate by having the lens (with a slit behind it) rotate in the centre of the curve. Later it was adapted into strip photography, a method used to capture photo-finishes at horse races. This time the slit would be stationary and the film would move behind it. The result would be an image in which the horizontal axis represented not a spatial dimension but a temporal one.
Such a collision of time and space was exactly what Stanley Kubrick required for the Stargate sequence in 2001: A Space Odyssey, when astronaut Dr David Bowman is treated to a mind-warping journey by the alien monolith.
Douglas Trumbull, then only 25, had already been working on the film for a couple of years, first producing graphics for the monitors in the spacecraft (all done with physical photography), then detailing and shooting miniatures like the moon bus, creating planets by projecting painted slides onto plexiglass hemispheres, and so on, eventually earning a “special photographic effects supervisor” credit.
“The story called for something that represented this transit into another dimension,” Trumbull said of the Stargate in a 2011 interview with ABC, “something that would be completely abstract, not something you could aim a camera at in the real world.
“I had been exposed to some things like time-lapse photography and what is called ‘streak photography’,” he continued, referring to long exposures which turn a point light source into a streak on film.
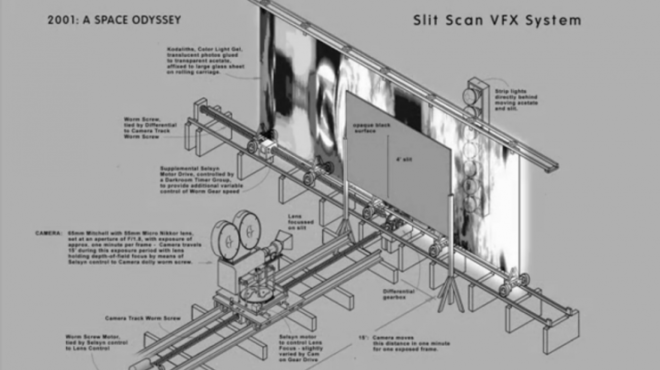
This germ of an idea developed into a large and elaborate machine that took five minutes to shoot a single frame.
The camera was mounted on a special tracking dolly driven by a worm gear to ensure slow, precise movement. While exposing a single frame it would creep towards a large black mask with a 4ft-high slit in it. Behind the slit was a piece of backlit artwork mounted on a carriage that could move perpendicularly to the camera. This artwork – an abstract painting or a photo blow-up of flowers or coral – slid slowly to the right or left as the camera tracked towards it. Remember, this was all just to capture one frame.
The resulting image showed a wall of patterned light stretching into the distance – a wall generated by that slit streaking across the frame.
For each new frame of film the process was repeated with the artwork starting in a slightly different position. Then the whole strip of film was exposed a second time with the camera adjusted so that the slit now produced a second wall on the other side of frame, creating a tunnel.
The Stargate sequence was unlike anything audiences had seen before, and one of the many people inspired by it was the BBC’s Bernard Lodge, who was responsible for creating Doctor Who’s title sequences at the time. For early versions he had used a ‘howl-around’ technique, pointing a camera at a monitor showing its own output, but when a new look was requested in 1973 he decided to employ slit-scan.
Lodge used circles, diamonds and even the silhouette of Jon Pertwee’s Doctor rather than a straight slit, creating tunnels of corresponding shapes. Instead of artwork he used stressed polythene bags shot through polarising filters to create abstract textures. The sequence was updated to incorporate Tom Baker when he took over the lead role the following year, and lasted until the end of the decade.
An adaptation of slit-scan was used in another sci-fi classic, Star Trek: The Next Generation, where it was used to show the Enterprise-D elongating as it goes to warp. This time a slit of light was projected onto the miniature ship, scanning across it as the camera pulled back and a single frame was exposed. “It appears to stretch, like a rubber band expanding and then catching back up to itself,” visual effects supervisor Robert Legato told American Cinematographer. “This process can only be used for a couple of shots, though; it’s very expensive.”
Thanks to CGI, such shots are now quick, cheap and easy, but the iconic images produced by the painstaking analogue techniques of artists like Douglas Trumbull will live on for many years to come.
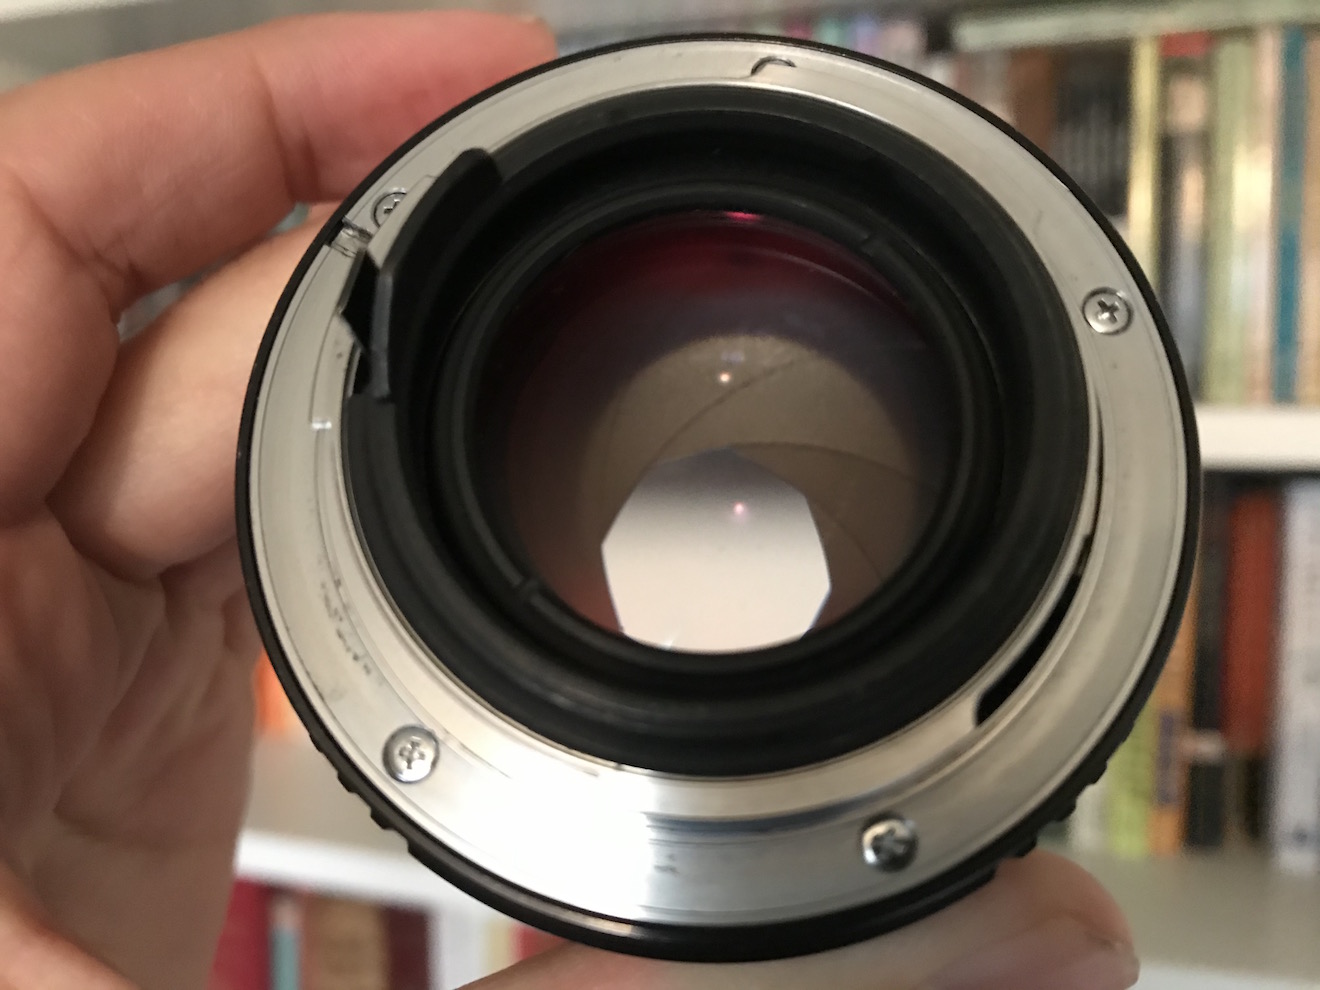
Inside a lens, amongst the various glass elements, is an ingenious mechanism which we call the iris. Just like your biological iris, it controls the amount of light passing through the pupil to form an image. I’ve written about the iris’s use to control exposure before, and its well-known side effect of controlling depth of field. But here are five things that aren’t so commonly known about irises.
1. f-stops and the entrance pupil
This image shows the exit pupil because it’s seen through the rear element of the lens. A view through the front element would show the entrance pupil.
The f-number of a lens is the ratio of the focal length to the diameter of the aperture, but did you know that it isn’t the actual diameter of the aperture that’s used in this calculation? It’s the apparent diameter as viewed through the front of the lens. A lens might have a magnifying front element, causing the aperture to appear larger than its physical size, or a reducing one, causing it to appear smaller. Either way, it’s this apparent aperture – known as the entrance pupil – which is used to find the f-number.
2. No-parallax point
The no-parallax point of a lens is located at its entrance pupil. Sometimes called the nodal point, although that’s technically something different, this is the point around which the camera must pan and tilt if you want to eliminate all parallax. This is important for forced perspective work, for panoramas stitched together from multiple shots, and other types of VFX.
3. Focus
If you need to check your focal distance with a tape measure, many cameras have a handy Phi symbol on the side indicating where the sensor plane is located so that you can measure from that point. But technically you should be measuring to the entrance pupil. The sensor plane marker is just a convenient shortcut because the entrance pupil is in a different place for every lens and changes when the lens is refocused or zoomed. In most cases the depth of field is large enough for the shortcut to give perfectly acceptable results, however.
4. Bokeh shape
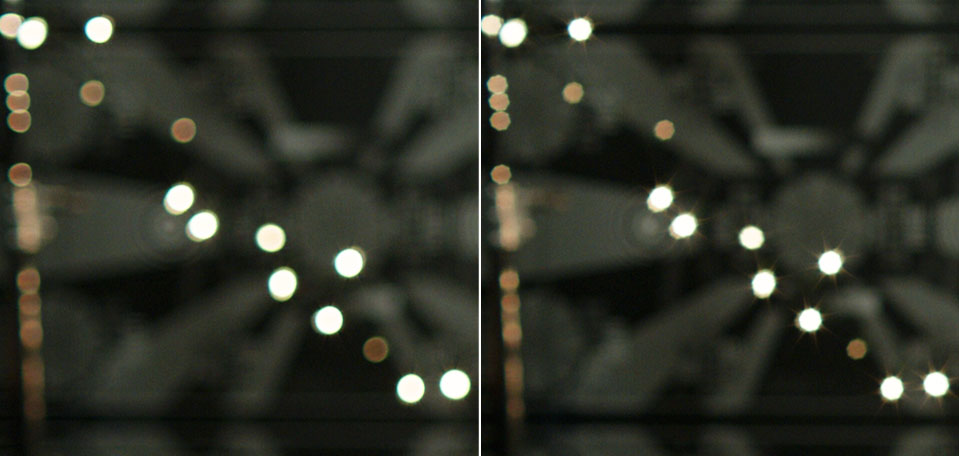
The bokeh of a 32mm Cooke S4 wide open at T2 (left) and stopped down to T2.8 (right). Note also the diffraction spikes visible in the righthand image.
The shape of the entrance pupil determines the shape of the image’s bokeh (out of focus areas), most noticeable in small highlights such as background fairy lights. The pupil’s shape is determined both by the number of iris blades and the shape of their edges. The edges are often curved to approximate a circle when the iris is wide open, but form more of a polygon when stopped down. For example, a Cooke S4 produces octagonal bokeh at most aperture settings, indicating eight iris blades. Incidentally, an anamorphic lens has a roughly circular aperture like any other lens, but the entrance pupil (and hence the bokeh) is typically oval because of the anamorphosing effect of the front elements.
5. Diffraction spikes
When the edge of an iris blade is straight or roughly straight, it spreads out the light in a perpendicular direction, creating a diffraction spike. The result is a star pattern around bright lights, typically most visible at high f-stops. Every blade produces a pair of spikes in opposite directions, so the number of points in the star is equal to twice the number of iris blades – as long as that number is odd. If the number of blades is even, diffraction spikes from opposite sides of the iris overlap, so the number of apparent spikes is the same as the number of blades, as in the eight-pointed Cooke diffraction pictured above right.
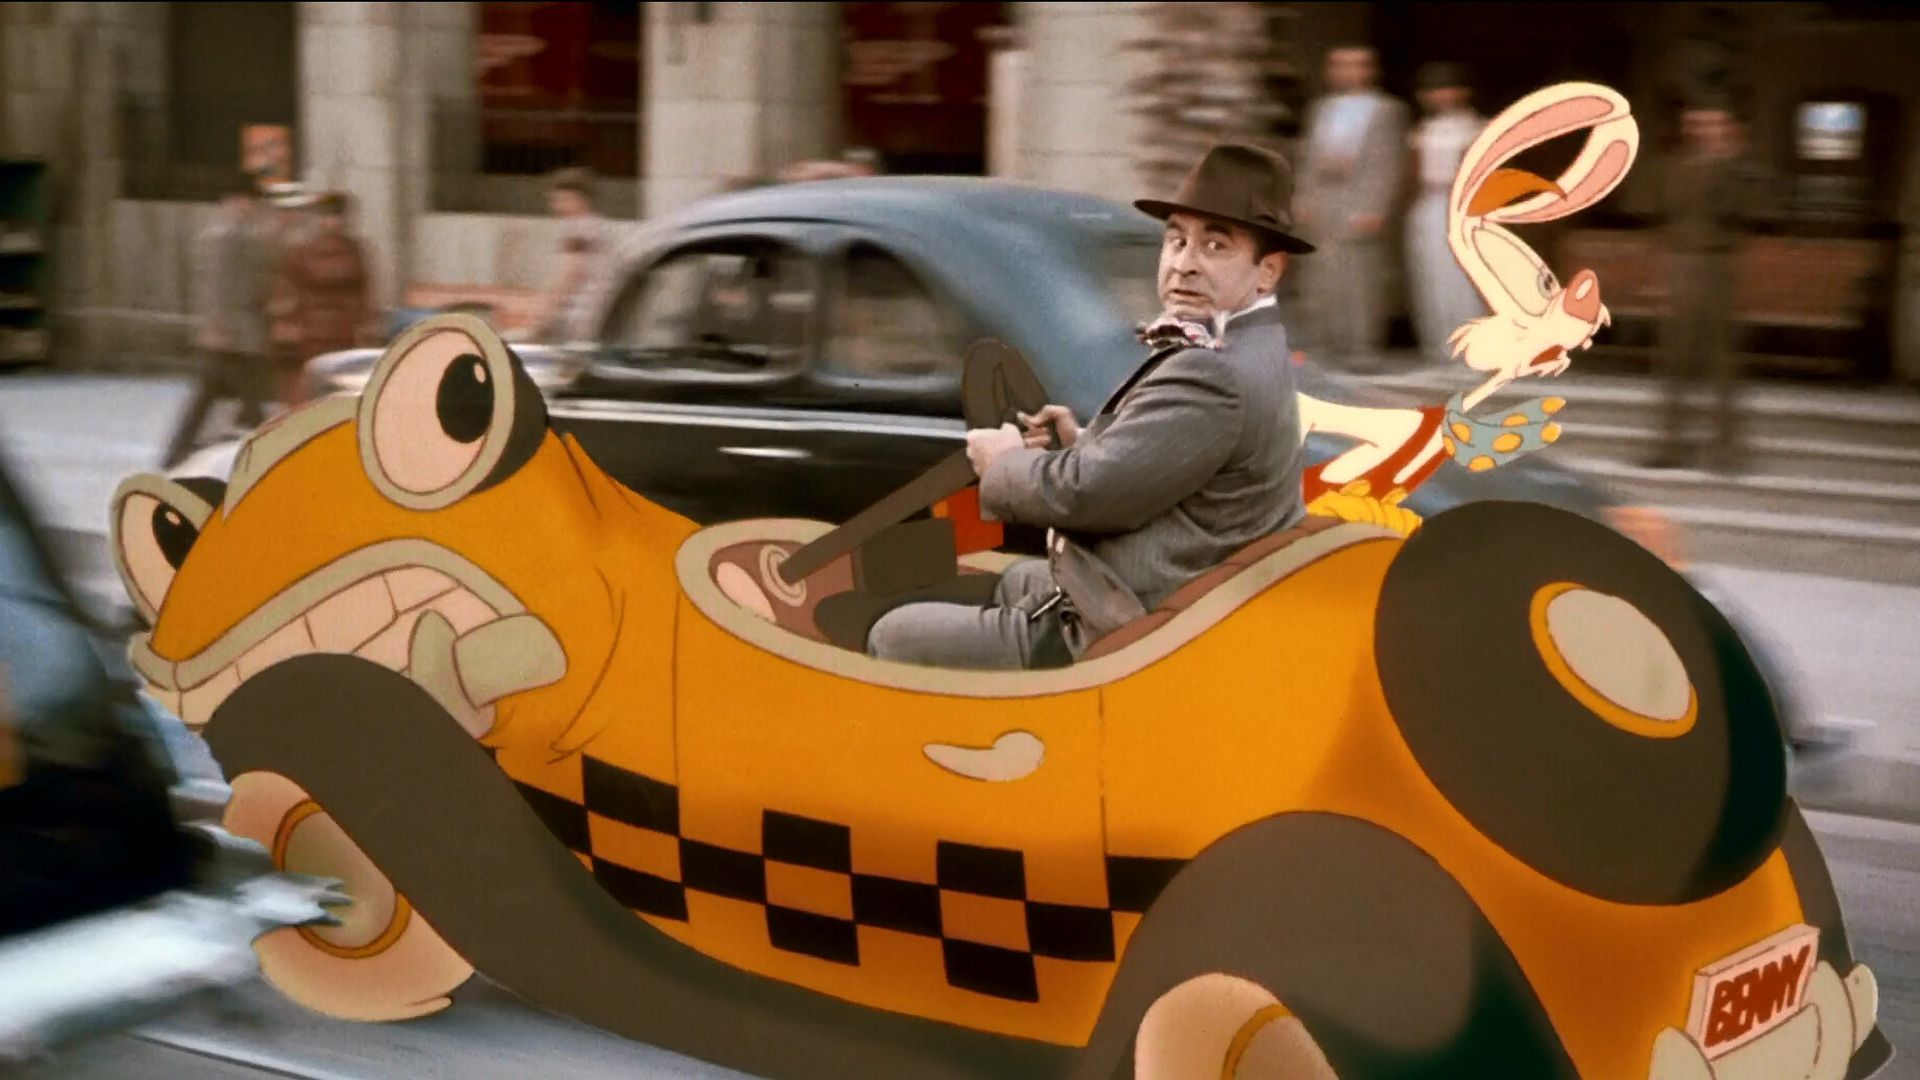
With the recent releases of Tom and Jerry and Space Jam: A New Legacy, it’s clear that there’s an appetite for traditional cartoon characters in live-action movies. While this mash-up of techniques goes back at least as far as 1964’s Mary Poppins, perhaps no film has done it quite as well as Who Framed Roger Rabbit.
The 1988 movie was loosely based on a Gary K. Wolf novel published seven years earlier, Who Censored Roger Rabbit? However, most of the plot was jettisoned, keeping only the central characters: Eddie Valiant, a private detective; his client, the titular Roger Rabbit; Roger’s wife and femme fatale Jessica; and Roger’s colleague, the libidinous, cigar-smoking Baby Herman. The original villain, a genie of the lamp, was replaced in early script drafts by the hunter who killed Bambi’s mother in the 1942 Disney classic, and finally by Christopher Lloyd’s pop-eyed Judge Doom.
Ditching the contemporary setting of its source material, Who Framed Roger Rabbit? takes place in Hollywood, 1947, where cartoon characters (“toons”) co-exist with humans. Bob Hoskins plays the toon-hating Valiant, who reluctantly teams up with Roger after the latter is implicated in the murder of Marvin Acme. The unlikely pair’s investigations lead them to Toontown, where they uncover a conspiracy to demolish this animated region and build a freeway in its place. Screenwriters Jeffrey Price and Peter S. Seaman found inspiration for this plot in Roman Polanski’s 1974 thriller Chinatown. Several film noirs of the 1940s were also referenced, with Hoskins modelling his character on Humphrey Bogart.
Numerous famous cartoon characters make cameos, including Mickey Mouse, Daffy Duck, Donald Duck, Tweetie Pie and Betty Boop, with executive producer Steven Spielberg pulling his weight behind the scenes to accomplish the historic meeting of competing studios’ properties.
Robert Zemeckis pitched to direct Roger Rabbit in 1982, but his films’ poor box office up to that point put him out of the running. Terry Gilliam was in the frame for a time, while the likes of Harrison Ford, Chevvy Chase and Bill Murray were considered for the lead. Spielberg’s Amblin Entertainment joined the project in 1985, but the projected budget of $50 million was deemed too big to green-light. Meanwhile, Zemeckis’s Back to the Future made him far more bankable with the result that he signed on to direct Roger Rabbit that same year, albeit with a reduced budget of $30 million. Ironically, the film would go over schedule and wind up costing just over its original price tag.
The animation was directed by Richard Williams, otherwise best known for his title sequences for the Pink Panther films. Williams refused to work in LA, forcing the production to shoot primarily in England. While Williams and his 326-strong team set up in Camden Town, Zemeckis and company filmed the interiors at Elstree, with warehouses and bus depots in Shepherd’s Bush standing in for exteriors of Hollywood studios and backlots.
Some of the sets, including the Ink & Paint Club where Jessica is memorably introduced, were raised 10ft off the floor to accommodate puppeteers. Although no puppets are seen in the finished film, whenever a toon had to hold a real object it was either mounted on a rod coming up through the floor, marionetted on wires from above, or manipulated by a robotic arm.
Rehearsals were conducted using a dummy of Roger, or with voice artist Charles Fleischer – bedecked in a rabbit suit – standing in. Hoskins even studied his three-year-old daughter’s antics with an imaginary friend to prepare for the challenge of acting to nothing.
Creating the film’s 55 minutes of animation took two years. The live-action footage was printed as a series of enlarged black-and-white frames over which a cel (sheet of transparent acetate) could be placed for the animator to draw on. 82,080 frames were generated in this way, every single one by hand.
To better blend the animated characters with the live backgrounds, Industrial Light and Magic composited layers of shading and shadows. The sparkling sequins on Jessica’s dress were achieved by shining a light through a plastic bag which had holes scratched in it.
The finished film attracted a degree of controversy, not least from the top brass at Disney. It’s easy to see why the family-friendly company would object to the over-sexualisation of Jessica, or to Valiant’s constant drinking and even bumming a cigarette off children at one point. But Zemeckis’s deal gave him final cut, so the compromise was to release the unaltered film under Disney’s Touchstone label.
The result was the second highest grossing film of 1988 and critical acclaim, with an impressive 97% on Rotten Tomatoes and four Academy Awards.
Like many articles on my blog, this one first appeared on RedShark News.
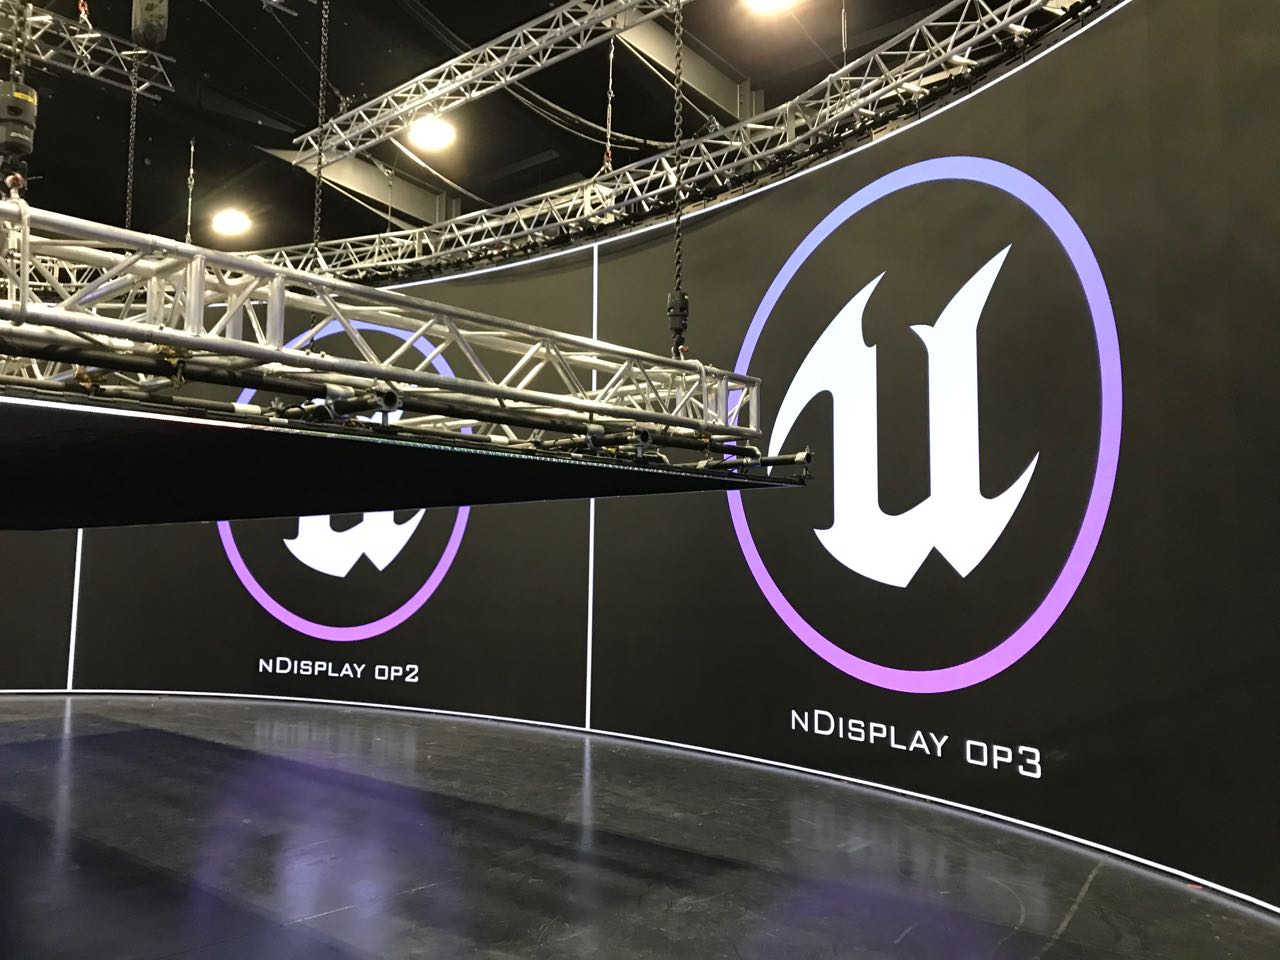
Part of the volume at ARRI Rental in Uxbridge, with the ceiling panel temporarily lowered
Virtual production technically covers a number of things, but what people normally mean by it is shooting on an LED volume. This is a stage where the walls are giant LED screens displaying real-time backgrounds for photographing the talent in front of. The background may be a simple 2D plate shot from a moving vehicle, for a scene inside a car, or a more elaborate set of plates shot with a 360° rig.
The most advanced set-ups do not use filmed backgrounds at all, but instead use 3D virtual environments rendered in real time by a gaming engine like Unreal. A motion-tracking system monitors the position of the camera within the volume and ensures that the proper perspective and parallax is displayed on the screens. Furthermore, the screens are bright enough that they provide most or all of the illumination needed on the talent in a very realistic way.
I have never done any virtual production myself, but earlier this year I was fortunate enough to interview some DPs who have, for a British Cinematographer article. Here are some tips about VP shooting which I learnt from these pioneers.
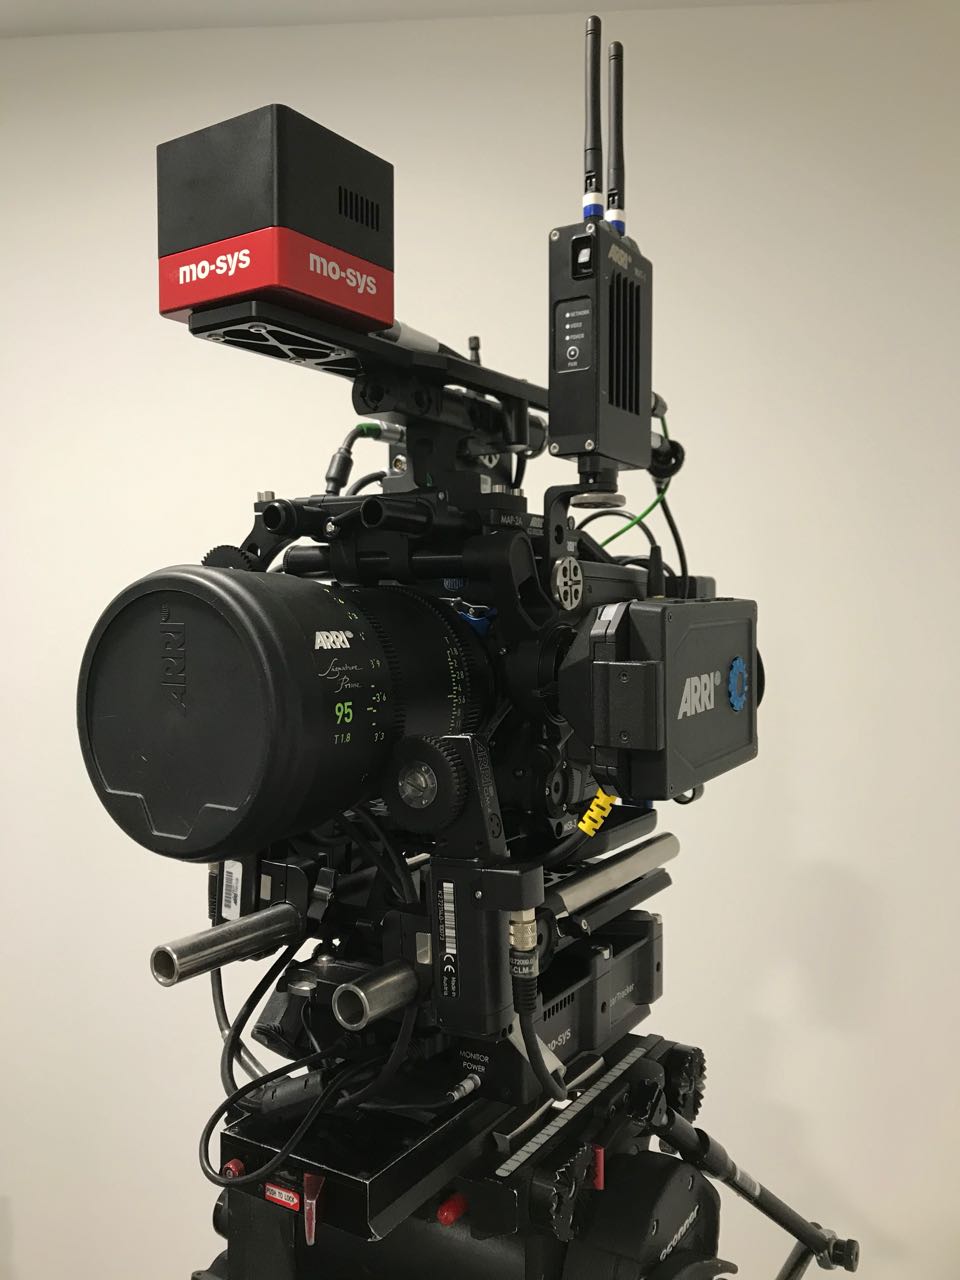
1. Shoot large format
An ARRI Alexa Mini LF rigged with Mo-Sys for tracking its position within the volume
To prevent a moiré effect from the LED pixels, the screens need to be out of focus. Choosing an LF camera, with their shallower depth of field, makes this easier to accomplish. The Alexa Mini LF seems to be a popular choice, but the Sony Venice evidently works well too.
2. Keep your distance
To maintain the illusion, neither the talent nor the camera should get too close to the screens. A rule of thumb is that the minimum distance in metres should be no less than the pixel pitch of the screens. (The pixel pitch is the distance in millimetres between the centre of one pixel and the centre of the next.) So for a screen of 2.3mm pixel pitch, keep everything at least 2.3m away.
3. Tie it all together
Several DPs have found that the real foreground and the virtual background fit together more seamlessly if haze or a diffusion filter are used. This makes sense because both soften the image, blending light from nearby elements of the frame together. Other in-camera effects like rain (if the screens are rated weatherproof) and lens flares would also help.
4. Surround yourself
The back of ARRI’s main screen, composed of ROE LED panels
The most convincing LED volumes have screens surrounding the talent, perhaps 270° worth, and an overhead screen as well. Although typically only one of these screens will be of a high enough resolution to shoot towards, the others are important because they shed interactive light on the talent, making them really seem like they’re in the correct environment.
5. Match the lighting
If you need to supplement the light, use a colour meter to measure the ambience coming from the screens, then dial that temperature into an LED fixture. If you don’t have a colour meter you should conduct tests beforehand, as what matches to the eye may not necessarily match on camera.
6. Avoid fast camera moves
Behind the scenes at the ARRI volume, built in partnership with Creative Technology
It takes a huge amount of processing power to render a virtual background in real time, so there will always be a lag. The Mandalorian works around this by shooting in a very classical style (which fits the Star Wars universe perfectly), with dolly moves and jibs rather than a lot of handheld shots. The faster the camera moves, the more the delay in the background will be noticeable. For the same reason, high frame rates are not recommended, but as processing power increases, these restrictions will undoubtedly fall away.
This week issue 40 of Infinity magazine comes out, featuring a couple of articles I wrote, including one about the cult sci-fi series Quantum Leap. The show saw Dr. Sam Beckett (Scott Bakula) bouncing around time into other people’s bodies and striving to put right what once went wrong, while his holographic friend Al (Dean Stockwell) smoked cigars, letched, and relayed exposition from Ziggy the computer.
I end the article by wondering whether it’s time for someone like Netflix to bring the show back (it definitely is). What I don’t mention in the magazine is that – unbeknownst to almost everyone – Quantum Leap has already been rebooted once.
This, my loyal readers, is the story of Quantum Leaper.
Season One (1995)
As teenagers, my friend David Abbott and I were huge Quantum Leap fans, and were bereft when the show was axed in 1993. I was developing an interest in filmmaking, having dabbled in 2D computer animation on my Atari ST and borrowed my grandfather’s Video-8 camcorder on a couple of occasions. When I was given that camcorder for my 15th birthday, David and I decided that we would make our own version of Quantum Leap, which we imaginatively titled Quantum Leaper.
The first episode was called “Just What the Doctor Ordered” and saw my character – named, again with great imagination, Neil – leaping into a doctor just as his patient is flatlining. I don’t remember much about the plot, but I do remember that we climbed the nearby Malvern Hills to film a fight scene.
Dave played Albert, my holographic helper, communicating with Project Quantum Leap’s supercomputer Ziggy by means of a special hand-link, just like Dean Stockwell did. Unlike Dean Stockwell’s, this hand-link was a calculator.
The two of us also played all the supporting characters (often with the judicious addition of a hat or jacket) and operated the camera, unless we were both in shot, in which case it was locked off. Much of the the editing was done in camera – rewinding the 8mm videotape, cueing it up to the exact moment the last piece of action ended, then hitting record and calling action simultaneously – and the rest I did tape-to-tape with two VCRs connected together. A cheap four-track disco mixer enabled the addition of music (badly composed by me) and sound effects (many of which were sampled from Quantum Leap itself). As YouTube was still years away, the only viewers for the series were our parents and friends, forced to sit down in front of the TV and watch it off VHS.
Episode two, “Boom!”, saw the fictional Neil as a bomb disposal expert supposedly in Northern Ireland in 1980, though like the first episode it was all shot in and around my house. My sister Kate was drafted in to play a journalist whose life Neil has to save.
“A Leap into the Blue” was the next episode, with Neil in the body of a parachutist. Scenes of characters in free-fall were shot with us standing in front of a white wall; I digitised the footage on my ST with a Videomaster cartridge and composited scrolling clouds into the background. The resolution of the Videomaster was very limited – maybe 320×240 – the frame rate was very low too, and it could only do black and white.
A digitised visual effect using a shot of a plane stolen from some TV programme or other
Next we shot a “pilot” episode explaining how Neil and Albert switched places with Sam and Al. I remember digitising shots of Scott Bakula and Dean Stockwell from Quantum Leap and compositing them atrociously into our own footage. At about 30 minutes long, the pilot was double the length of our other episodes.
Then we continued the series where we’d left off. Dave’s script “One Giant Leap” has Neil on a space shuttle mission, an episode that included NASA footage taped off the TV. We made almost no attempt to create sets; the space shuttle cockpit was a plain wall, a computer keyboard and a piece of card to cover an incongruous bookcase.
The space shuttle cockpit “set”
The next two episodes find Neil meeting (and shooting) an evil future version of himself, then leaping into the crazy future space year of 2017. The latter involves a flying car – my mum’s Citroen AX with the wheels framed out, intercut with an extremely crude CGI model.
Dave’s episodes “Virtual Leaping” and “Bullets Over Leaping” see Neil become a VR programmer (with a headset made of Lego) and then an actor (in a studio suspiciously like Dave’s shed).
The VR headset “prop”
My next episode has Neil leaping into himself and saving his father’s life. (My actual dad provided some splendidly wooden acting.) But doing this causes a paradox, and the season finale sees Neil and Albert swap places (as Sam and Al do in a classic Quantum Leap episode) and Neil having to restore the timeline to prevent the destruction of the universe.
We were ambitious. You can say that much for us.
Season Two (1996)
The following year, while doing our GCSEs, we began work on a second season. In between I’d made a bad 40-minute comedy, Bob the Barbarian, and an appalling feature-length sci-fi film, The Dark Side of the Earth, and I’d learnt a few things that would lift the production values of Season Two very slightly. I’d also nagged my parents into buying me a genlock which would let me superimpose CGI over analogue video, meaning I didn’t have to digitise footage and suffer the horrendous image degradation any more.
The holographic Albert enters the Imaging Chamber, an effect enabled by my new genlock.
The actual Quantum Leaping effect from this era of the show is surprisingly decent given the equipment we were working with. We would lock the camera off and jump-cut to a blue filter being over the lens, then a white glow would creep over me – an animation I achieved in software called Deluxe Paint – followed by tendrils of electricity. The screen would then fade to white and a similar effect would play out in reverse to show the leap in.
Leaping from life to life, striving to put right what once went wrong…
Another improvement was that we managed to convince a few other friends to act in the series, including fellow Quantum Leap fan Lee Richardson, as well as Chris Jenkins, Conrad Allen, Matt Hodges, Si Timbrell and Jim McKelvie. Recognising my lack of musical talent at last, I abandoned composing and instead used soundtrack CDs from Star Trek: Deep Space Nine (Dennis McCarthy), the John Woo film Broken Arrow (Hans Zimmer), and the Doctor Who story “The Curse of Fenric” (Mark Ayres). Albert’s hand-link prop got an upgrade too, from a calculator to a custom Lego build with flashing lights.
Lee Richardson “acting” in the control room “set”
Season Two opens with Dave’s episodes “Project Hijacked” and “Oh Brother, Where Art Thou?” which focus on events at Project Quantum Leap, supposedly a high-tech facility in the New Mexico desert in 2005. In reality it was a living room with a control console made out of painted cardboard boxes and Christmas lights. In an early manifestation of my cinematography leanings, I snooted the ceiling light with a rolled-up piece of silver card, lending a little bit of mood to the look.
At the time, Dave’s family were training a hearing dog, Louis, so I wrote an episode to feature him; “Silence is Golden” sees Neil leap into a deaf man, and was followed by the morbid “Ashes to Ashes” where he leaps into a corpse.
The next episode, Dave’s “Driven to Distraction”, is probably the best of the lot. For once there were few enough characters that no-one needed to confusingly play dual roles, and there is plenty of action to boot. (I uploaded this episode to YouTube so long ago that the ten-minute time limit still applied.)
The X-Files-inspired “Close Encounters of the Leaping Kind” comes next, with Neil as a ufologist bothered by a shadowy government agent. Then Neil becomes a teenager who must prevent a drugs overdose, then a one-armed man who must overcome prejudice to hold down a job. Cringingly entitled “Not So Armless”, this latter was shot in a newsagent’s owned by a friend’s parents, one of the series’ few non-domestic locations.
Like Quantum Leap we had a mirror shot in every episode where Neil would see the leapee’s reflection looking back at him. Sometimes Dave would track the camera behind my back and we’d hide a cut in the darkness to swap me with whoever was playing the reflection. Another time we pretended the serving hatch in Dave’s house was a mirror and the two of us synchronised our movements. For a fight scene in “Not So Armless” Chris hid one arm inside his t-shirt so that Neil’s mirror image could appear to punch the antagonist with an invisible fist!
Facing mirror images that were not his own…
The penultimate episode of the season features several brief leaps, ending with one to Hiroshima in 1945, where the A-bomb detonation (more footage off the TV) causes both Neil and Albert to leap simultaneously. In the finale, Albert becomes a mountaineer caught in an avalanche, while Neil is a member of the rescue team – a premise thieved from the Quantum Leap novel “Search and Rescue”. We started shooting it during snowy weather, but the snow thawed and the episode was never completed. The friends who had been appearing as supporting characters now had part-time jobs and couldn’t spare the time for filming.
Legacy
We wrote all six episodes of a third season which would have explained how Neil became the evil future version of himself seen in an earlier episode, but nothing was ever filmed.
In 1997 we began a remake of the pilot using the experience we had gained since shooting the original, but again it was never completed. One part we did film was an action sequence with me on the roof rack of a car while the driver swerves around trying to throw me off. We shot this on Malvern’s Castlemorton Common and used a dummy of me for some of the wider and more dangerous shots. Its acting was probably better than mine. We remade the scene four years later as part of my Mini-DV feature The Beacon.
Today only five of the 20 Quantum Leaper episodes that we made survive, the rest having been callously taped over at some point in my late teens. That’s probably for the best, as most of it was hilariously bad, but making it taught me a hell of a lot about filmmaking. Without it, I doubt I’d have a career in cinematography today.
His only guide on these journeys is Al, an observer from his own time…


 Award-winning visual effects artist Douglas Trumbull died recently, leaving behind a body of memorable work including the slit-scan “Stargate” sequence from 2001: A Space Odyssey. But what is slit-scan and where else has it been used?