Award-winning visual effects artist Douglas Trumbull died recently, leaving behind a body of memorable work including the slit-scan “Stargate” sequence from 2001: A Space Odyssey. But what is slit-scan and where else has it been used?
Slit-scan has its origins in still photography of the 1800s. A mask with a slit in it would be placed in front of the photographic plate, and the slit would be moved during the exposure. It was like a deliberate version of the rolling shutter effect of a digital sensor, where different lines of the image are offset slightly in time.
The technique could be used to capture a panorama onto a curved plate by having the lens (with a slit behind it) rotate in the centre of the curve. Later it was adapted into strip photography, a method used to capture photo-finishes at horse races. This time the slit would be stationary and the film would move behind it. The result would be an image in which the horizontal axis represented not a spatial dimension but a temporal one.
Such a collision of time and space was exactly what Stanley Kubrick required for the Stargate sequence in 2001: A Space Odyssey, when astronaut Dr David Bowman is treated to a mind-warping journey by the alien monolith.
Douglas Trumbull, then only 25, had already been working on the film for a couple of years, first producing graphics for the monitors in the spacecraft (all done with physical photography), then detailing and shooting miniatures like the moon bus, creating planets by projecting painted slides onto plexiglass hemispheres, and so on, eventually earning a “special photographic effects supervisor” credit.
“The story called for something that represented this transit into another dimension,” Trumbull said of the Stargate in a 2011 interview with ABC, “something that would be completely abstract, not something you could aim a camera at in the real world.
“I had been exposed to some things like time-lapse photography and what is called ‘streak photography’,” he continued, referring to long exposures which turn a point light source into a streak on film.
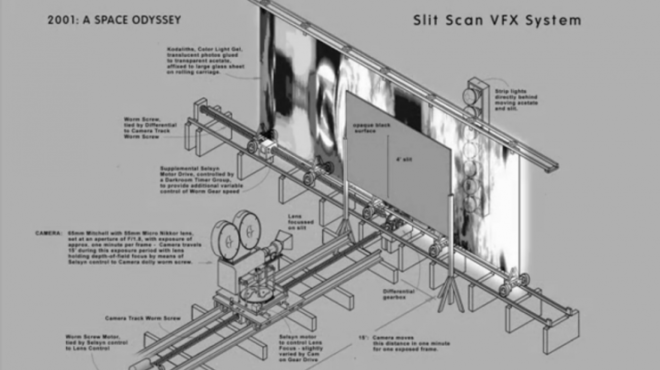
This germ of an idea developed into a large and elaborate machine that took five minutes to shoot a single frame.
The camera was mounted on a special tracking dolly driven by a worm gear to ensure slow, precise movement. While exposing a single frame it would creep towards a large black mask with a 4ft-high slit in it. Behind the slit was a piece of backlit artwork mounted on a carriage that could move perpendicularly to the camera. This artwork – an abstract painting or a photo blow-up of flowers or coral – slid slowly to the right or left as the camera tracked towards it. Remember, this was all just to capture one frame.
The resulting image showed a wall of patterned light stretching into the distance – a wall generated by that slit streaking across the frame.
For each new frame of film the process was repeated with the artwork starting in a slightly different position. Then the whole strip of film was exposed a second time with the camera adjusted so that the slit now produced a second wall on the other side of frame, creating a tunnel.
The Stargate sequence was unlike anything audiences had seen before, and one of the many people inspired by it was the BBC’s Bernard Lodge, who was responsible for creating Doctor Who’s title sequences at the time. For early versions he had used a ‘howl-around’ technique, pointing a camera at a monitor showing its own output, but when a new look was requested in 1973 he decided to employ slit-scan.
Lodge used circles, diamonds and even the silhouette of Jon Pertwee’s Doctor rather than a straight slit, creating tunnels of corresponding shapes. Instead of artwork he used stressed polythene bags shot through polarising filters to create abstract textures. The sequence was updated to incorporate Tom Baker when he took over the lead role the following year, and lasted until the end of the decade.
An adaptation of slit-scan was used in another sci-fi classic, Star Trek: The Next Generation, where it was used to show the Enterprise-D elongating as it goes to warp. This time a slit of light was projected onto the miniature ship, scanning across it as the camera pulled back and a single frame was exposed. “It appears to stretch, like a rubber band expanding and then catching back up to itself,” visual effects supervisor Robert Legato told American Cinematographer. “This process can only be used for a couple of shots, though; it’s very expensive.”
Thanks to CGI, such shots are now quick, cheap and easy, but the iconic images produced by the painstaking analogue techniques of artists like Douglas Trumbull will live on for many years to come.
This week issue 40 of Infinity magazine comes out, featuring a couple of articles I wrote, including one about the cult sci-fi series Quantum Leap. The show saw Dr. Sam Beckett (Scott Bakula) bouncing around time into other people’s bodies and striving to put right what once went wrong, while his holographic friend Al (Dean Stockwell) smoked cigars, letched, and relayed exposition from Ziggy the computer.
I end the article by wondering whether it’s time for someone like Netflix to bring the show back (it definitely is). What I don’t mention in the magazine is that – unbeknownst to almost everyone – Quantum Leap has already been rebooted once.
This, my loyal readers, is the story of Quantum Leaper.
Season One (1995)
As teenagers, my friend David Abbott and I were huge Quantum Leap fans, and were bereft when the show was axed in 1993. I was developing an interest in filmmaking, having dabbled in 2D computer animation on my Atari ST and borrowed my grandfather’s Video-8 camcorder on a couple of occasions. When I was given that camcorder for my 15th birthday, David and I decided that we would make our own version of Quantum Leap, which we imaginatively titled Quantum Leaper.
The first episode was called “Just What the Doctor Ordered” and saw my character – named, again with great imagination, Neil – leaping into a doctor just as his patient is flatlining. I don’t remember much about the plot, but I do remember that we climbed the nearby Malvern Hills to film a fight scene.
Dave played Albert, my holographic helper, communicating with Project Quantum Leap’s supercomputer Ziggy by means of a special hand-link, just like Dean Stockwell did. Unlike Dean Stockwell’s, this hand-link was a calculator.
The two of us also played all the supporting characters (often with the judicious addition of a hat or jacket) and operated the camera, unless we were both in shot, in which case it was locked off. Much of the the editing was done in camera – rewinding the 8mm videotape, cueing it up to the exact moment the last piece of action ended, then hitting record and calling action simultaneously – and the rest I did tape-to-tape with two VCRs connected together. A cheap four-track disco mixer enabled the addition of music (badly composed by me) and sound effects (many of which were sampled from Quantum Leap itself). As YouTube was still years away, the only viewers for the series were our parents and friends, forced to sit down in front of the TV and watch it off VHS.
Episode two, “Boom!”, saw the fictional Neil as a bomb disposal expert supposedly in Northern Ireland in 1980, though like the first episode it was all shot in and around my house. My sister Kate was drafted in to play a journalist whose life Neil has to save.
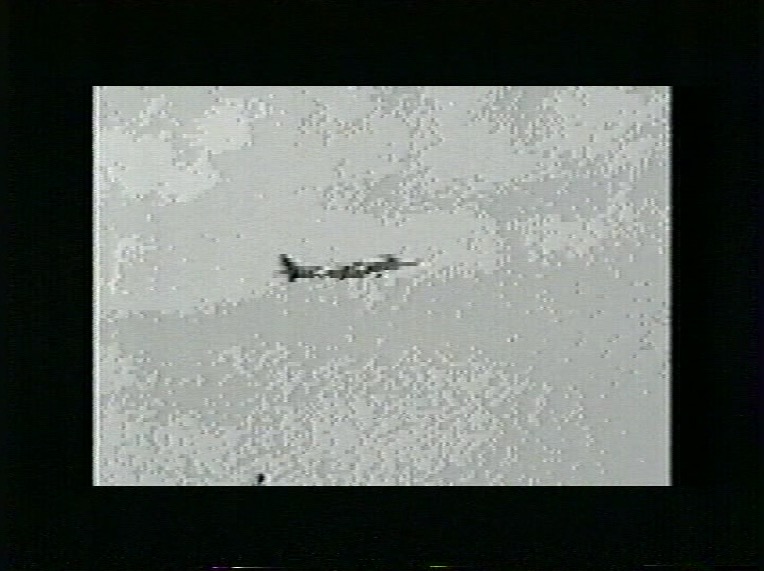
“A Leap into the Blue” was the next episode, with Neil in the body of a parachutist. Scenes of characters in free-fall were shot with us standing in front of a white wall; I digitised the footage on my ST with a Videomaster cartridge and composited scrolling clouds into the background. The resolution of the Videomaster was very limited – maybe 320×240 – the frame rate was very low too, and it could only do black and white.
A digitised visual effect using a shot of a plane stolen from some TV programme or other
Next we shot a “pilot” episode explaining how Neil and Albert switched places with Sam and Al. I remember digitising shots of Scott Bakula and Dean Stockwell from Quantum Leap and compositing them atrociously into our own footage. At about 30 minutes long, the pilot was double the length of our other episodes.
Then we continued the series where we’d left off. Dave’s script “One Giant Leap” has Neil on a space shuttle mission, an episode that included NASA footage taped off the TV. We made almost no attempt to create sets; the space shuttle cockpit was a plain wall, a computer keyboard and a piece of card to cover an incongruous bookcase.
The space shuttle cockpit “set”
The next two episodes find Neil meeting (and shooting) an evil future version of himself, then leaping into the crazy future space year of 2017. The latter involves a flying car – my mum’s Citroen AX with the wheels framed out, intercut with an extremely crude CGI model.
Dave’s episodes “Virtual Leaping” and “Bullets Over Leaping” see Neil become a VR programmer (with a headset made of Lego) and then an actor (in a studio suspiciously like Dave’s shed).
The VR headset “prop”
My next episode has Neil leaping into himself and saving his father’s life. (My actual dad provided some splendidly wooden acting.) But doing this causes a paradox, and the season finale sees Neil and Albert swap places (as Sam and Al do in a classic Quantum Leap episode) and Neil having to restore the timeline to prevent the destruction of the universe.
We were ambitious. You can say that much for us.
Season Two (1996)
The following year, while doing our GCSEs, we began work on a second season. In between I’d made a bad 40-minute comedy, Bob the Barbarian, and an appalling feature-length sci-fi film, The Dark Side of the Earth, and I’d learnt a few things that would lift the production values of Season Two very slightly. I’d also nagged my parents into buying me a genlock which would let me superimpose CGI over analogue video, meaning I didn’t have to digitise footage and suffer the horrendous image degradation any more.
The holographic Albert enters the Imaging Chamber, an effect enabled by my new genlock.
The actual Quantum Leaping effect from this era of the show is surprisingly decent given the equipment we were working with. We would lock the camera off and jump-cut to a blue filter being over the lens, then a white glow would creep over me – an animation I achieved in software called Deluxe Paint – followed by tendrils of electricity. The screen would then fade to white and a similar effect would play out in reverse to show the leap in.
Leaping from life to life, striving to put right what once went wrong…
Another improvement was that we managed to convince a few other friends to act in the series, including fellow Quantum Leap fan Lee Richardson, as well as Chris Jenkins, Conrad Allen, Matt Hodges, Si Timbrell and Jim McKelvie. Recognising my lack of musical talent at last, I abandoned composing and instead used soundtrack CDs from Star Trek: Deep Space Nine (Dennis McCarthy), the John Woo film Broken Arrow (Hans Zimmer), and the Doctor Who story “The Curse of Fenric” (Mark Ayres). Albert’s hand-link prop got an upgrade too, from a calculator to a custom Lego build with flashing lights.
Lee Richardson “acting” in the control room “set”
Season Two opens with Dave’s episodes “Project Hijacked” and “Oh Brother, Where Art Thou?” which focus on events at Project Quantum Leap, supposedly a high-tech facility in the New Mexico desert in 2005. In reality it was a living room with a control console made out of painted cardboard boxes and Christmas lights. In an early manifestation of my cinematography leanings, I snooted the ceiling light with a rolled-up piece of silver card, lending a little bit of mood to the look.
At the time, Dave’s family were training a hearing dog, Louis, so I wrote an episode to feature him; “Silence is Golden” sees Neil leap into a deaf man, and was followed by the morbid “Ashes to Ashes” where he leaps into a corpse.
The next episode, Dave’s “Driven to Distraction”, is probably the best of the lot. For once there were few enough characters that no-one needed to confusingly play dual roles, and there is plenty of action to boot. (I uploaded this episode to YouTube so long ago that the ten-minute time limit still applied.)
The X-Files-inspired “Close Encounters of the Leaping Kind” comes next, with Neil as a ufologist bothered by a shadowy government agent. Then Neil becomes a teenager who must prevent a drugs overdose, then a one-armed man who must overcome prejudice to hold down a job. Cringingly entitled “Not So Armless”, this latter was shot in a newsagent’s owned by a friend’s parents, one of the series’ few non-domestic locations.
Like Quantum Leap we had a mirror shot in every episode where Neil would see the leapee’s reflection looking back at him. Sometimes Dave would track the camera behind my back and we’d hide a cut in the darkness to swap me with whoever was playing the reflection. Another time we pretended the serving hatch in Dave’s house was a mirror and the two of us synchronised our movements. For a fight scene in “Not So Armless” Chris hid one arm inside his t-shirt so that Neil’s mirror image could appear to punch the antagonist with an invisible fist!
Facing mirror images that were not his own…
The penultimate episode of the season features several brief leaps, ending with one to Hiroshima in 1945, where the A-bomb detonation (more footage off the TV) causes both Neil and Albert to leap simultaneously. In the finale, Albert becomes a mountaineer caught in an avalanche, while Neil is a member of the rescue team – a premise thieved from the Quantum Leap novel “Search and Rescue”. We started shooting it during snowy weather, but the snow thawed and the episode was never completed. The friends who had been appearing as supporting characters now had part-time jobs and couldn’t spare the time for filming.
Legacy
We wrote all six episodes of a third season which would have explained how Neil became the evil future version of himself seen in an earlier episode, but nothing was ever filmed.
In 1997 we began a remake of the pilot using the experience we had gained since shooting the original, but again it was never completed. One part we did film was an action sequence with me on the roof rack of a car while the driver swerves around trying to throw me off. We shot this on Malvern’s Castlemorton Common and used a dummy of me for some of the wider and more dangerous shots. Its acting was probably better than mine. We remade the scene four years later as part of my Mini-DV feature The Beacon.
Today only five of the 20 Quantum Leaper episodes that we made survive, the rest having been callously taped over at some point in my late teens. That’s probably for the best, as most of it was hilariously bad, but making it taught me a hell of a lot about filmmaking. Without it, I doubt I’d have a career in cinematography today.
His only guide on these journeys is Al, an observer from his own time…
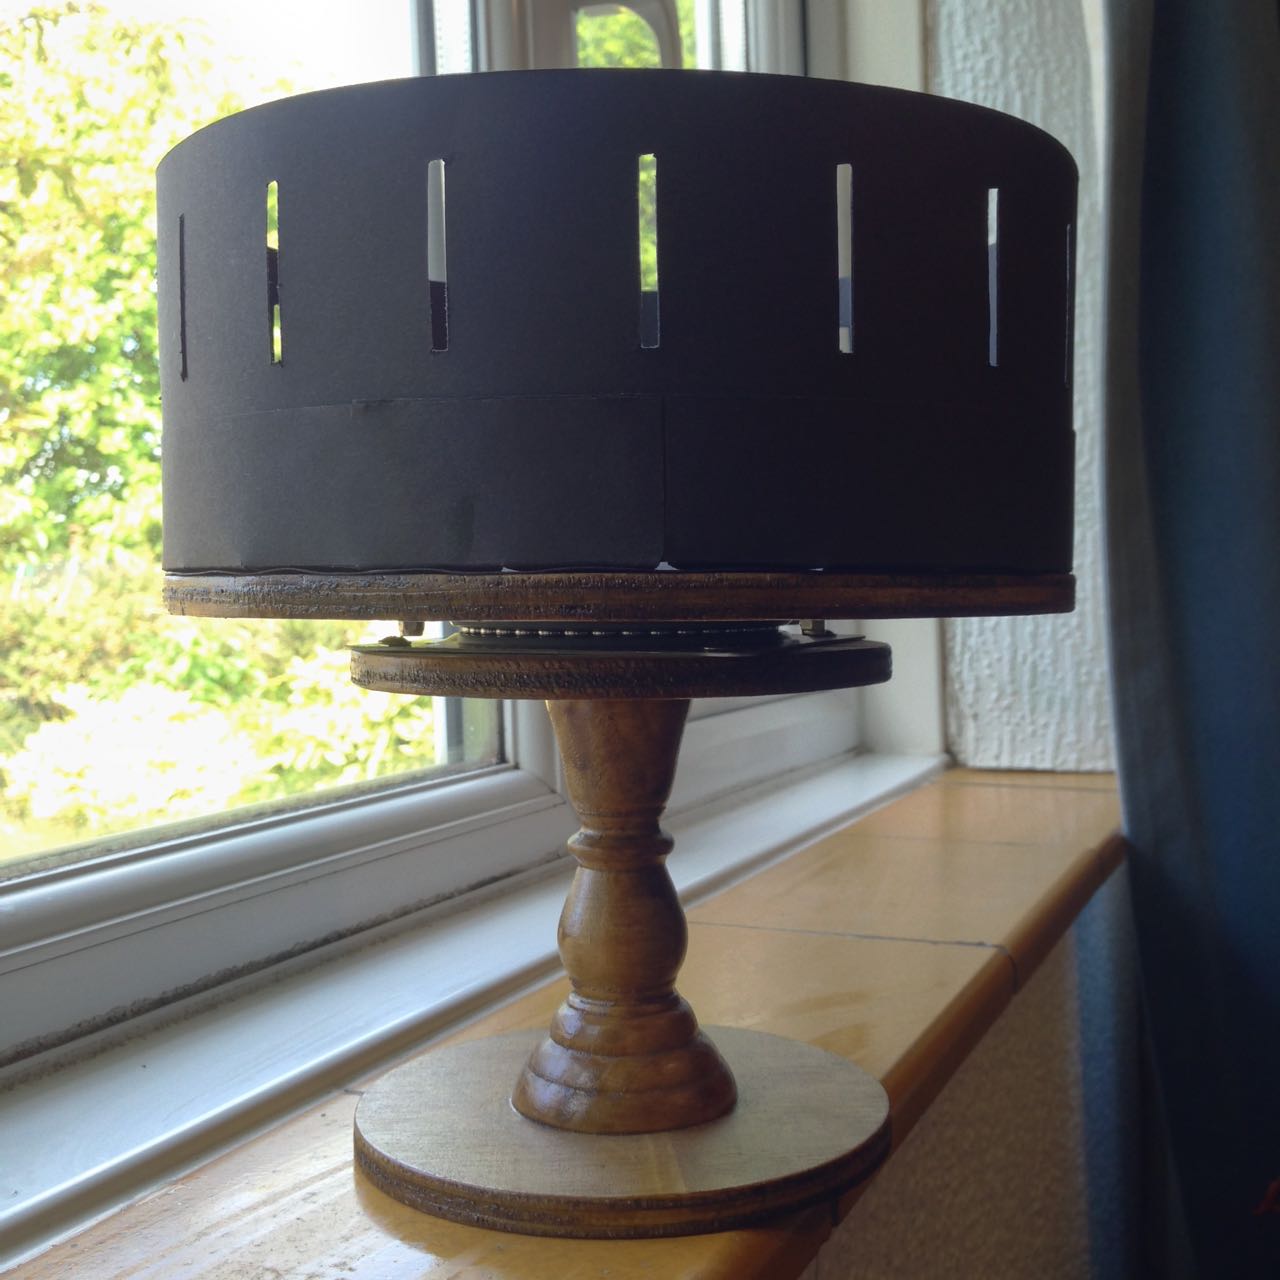
In the early days of lockdown, I blogged about my intentions to build a zoetrope, a Victorian optical device that creates the illusion of a moving image inside a spinning drum. I even provided instructions for building your own, sized like mine to accommodate 18 looping frames of contact-printed 35mm photographs. Well, last week I was finally able to hire my usual darkoom, develop and print the image sequences I had shot over the last five months, and see whether my low-tech motion picture system worked.
Making Mini Movies
Shooting “Sundial”
Before I get to the results, let me say a little about the image sequences themselves and how they were created. Because I was shooting on an SLR, the fastest frame rate I could ever hope to record at was about 1fps, so I was limited to time-lapses or stop motion animation.
Regular readers may recall that the very first sequence I captured was a time-lapse of the cherry tree in my front garden blossoming. I went on to shoot two more time-lapses, shorter-term ones showing sunlight moving across objects during a single day: a circle of rotting apples in a birdbath (which I call Sundial), and a collection of props from my flatmate’s fantasy films (which I call Barrels). I recorded all the time-lapses with the pinhole I made in 2018.
Filming “Social Distance”
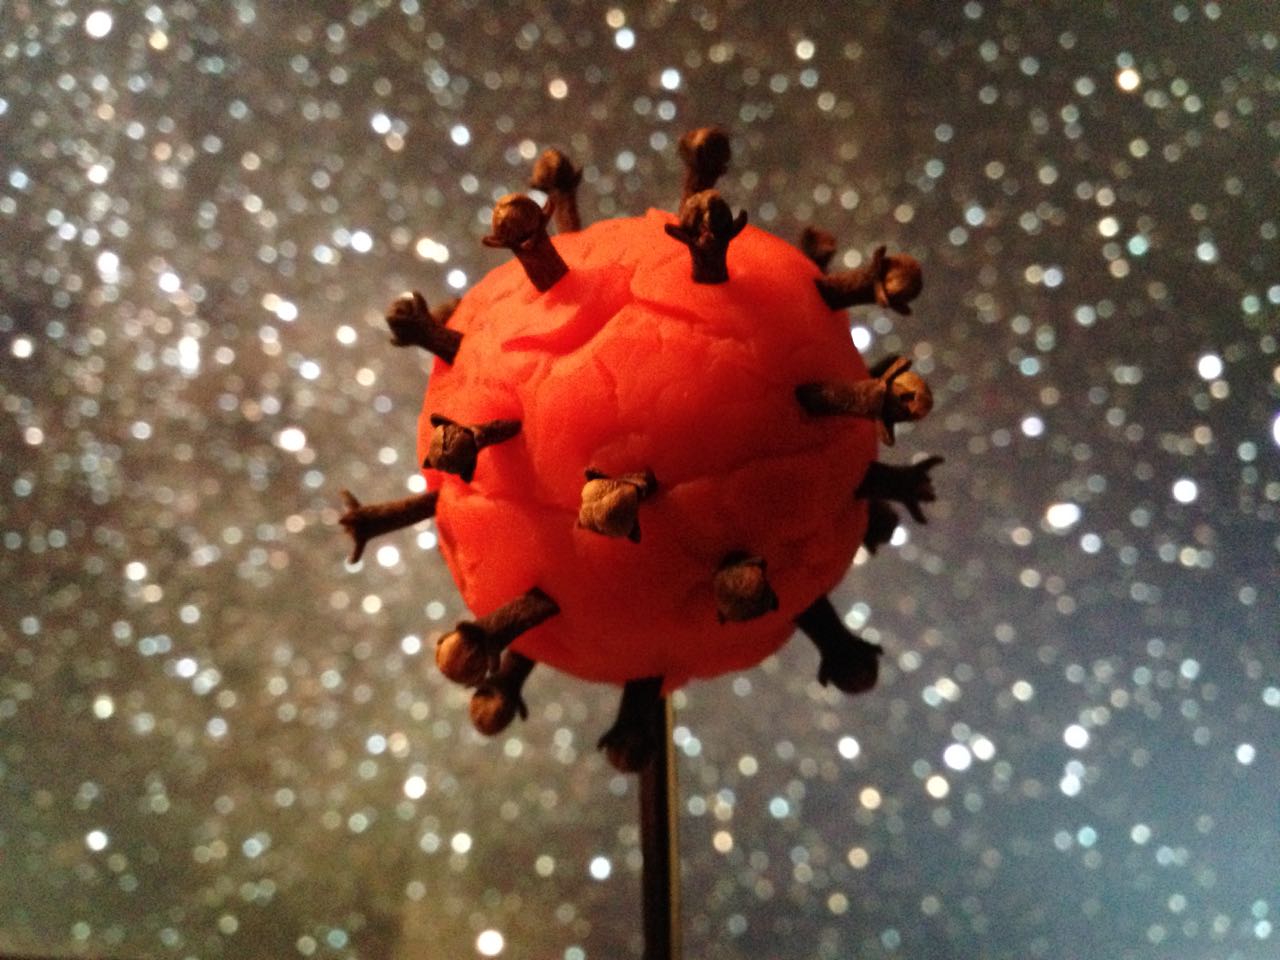
The remaining six sequences were all animations, lensed on 28mm, 50mm or 135mm SMC Pentax-Asahi glass. I had no signficant prior experience of this artform, but I certainly had great fun creating some animated responses to the Covid-19 pandemic. My childish raw materials ranged from Blue Peter-esque toilet roll tubes, through Play-Doh to Lego. Orbit features the earth circling a giant Covid-19, and The Sneeze sees a toilet roll person sternutating into their elbow. Happy Birthday shows a pair of rubber glove hands washing themselves, while Avoidance depicts two Lego pedestrians keeping their distance. 360° is a pan of a room in which I am variously sitting, standing and lying as I contemplate lockdown, and finally Social Distance tracks along with a pair of shoes as they walk past coronavirus signage.
The replacement faces for the toilet paper star of “The Sneeze”
By the time I finished shooting all these, I had already learnt a few things about viewing sequences in a zoetrope, by drawing a simple animation of a man walking. Firstly I discovered that the slots in my device – initially 3mm in width – were too large. I therefore retrofitted the drum with 1mm slots, resulting in reduced motion blur but a darker image, much like reducing the shutter angle on a movie camera. I initially made the mistake of putting my eye right up to the drum when viewing the animation, but this destroys the shuttering effect of the slots. Instead the best results seem to be obtained with a viewing distance of about 30cm (1ft).
I could already see where I might have made mistakes with my photographed sequences. The hand-drawn man was bold and simple; it looked best in good light, by a window or outdoors, but it was clear enough to be made out even if the light was a bit poor and there was too much motion blur. Would the same be said of my 35mm sequences?
Postproduction
I contact-printed the nine photographic sequences in the usual way, each one producing three rows of six frames on a single sheet of 8×10″ Ilford MG RC paper. In theory, all that was left was to cut out these rows and glue them together.
In practice, I had managed to screw up a few of the sequences by fogging the start of the film, shooting a frame with bad exposure, or some other act of shameful incompetence. In such cases I had to edit much like filmmakers did before the invention of digital NLEs – by cutting the strips of images, excising the rotten frames and taping them back together. I even printed some of the sequences twice so that I could splice in duplicate frames, where my errors had left a sequence lacking the full 18 images. (This was effectively step-printing, the obsolete optical process by which a shot captured at 24fps could be converted to slow motion by printing each frame twice.)
"Blossom"
Once the sequences were edited, I glued them into loops and could at last view them in the zoetrope. The results were mixed.
Barrels fails because the moving sunlight is too subtle to be discerned through the spinning slots. The same is partly true of Sundial, but the transient glare caused by the sun reflecting off the water at its zenith gives a better sense of motion. Blossom shows movement but I don’t think an uninitiated viewer would know what they were looking at, so small and detailed is the image. Orbit suffers from smallness too, with the earth and Covid-19 unrecognisable. (These last two sequences would have benefitted from colour, undoubtedly.)
The planet Covid-19 (as seen by my phone camera) made from Play-Doh and cloves
I’m very pleased with the animation of Social Distance, though I need to reprint it brighter for it to be truly effective. You can just about make out that there are two people passing each other in Avoidance, but I don’t think it’s at all clear that one is stepping into the road to maintain a safe distance from the other. Happy Birthday is a bit hard to make out too. Similarly, you can tell that 360° is a pan of a room, but that’s about it.
Perhaps the most successful sequence is The Sneeze, with its bold, white toilet roll man against a plain black background.
"Happy Birthday"
Conclusions
Any future zoetrope movies need to be bold, high in contrast and low in detail. I need to take more care to choose colours that read as very different tones when captured in black and white.
Despite the underwhelming results, I had a great time doing this project. It was nice to be doing something hands-on that didn’t involve sitting at a screen, and it’s always good to get more practice at exposing film correctly. I don’t think I’ll ever make an animator though – 18 frames is about the limit of my patience.
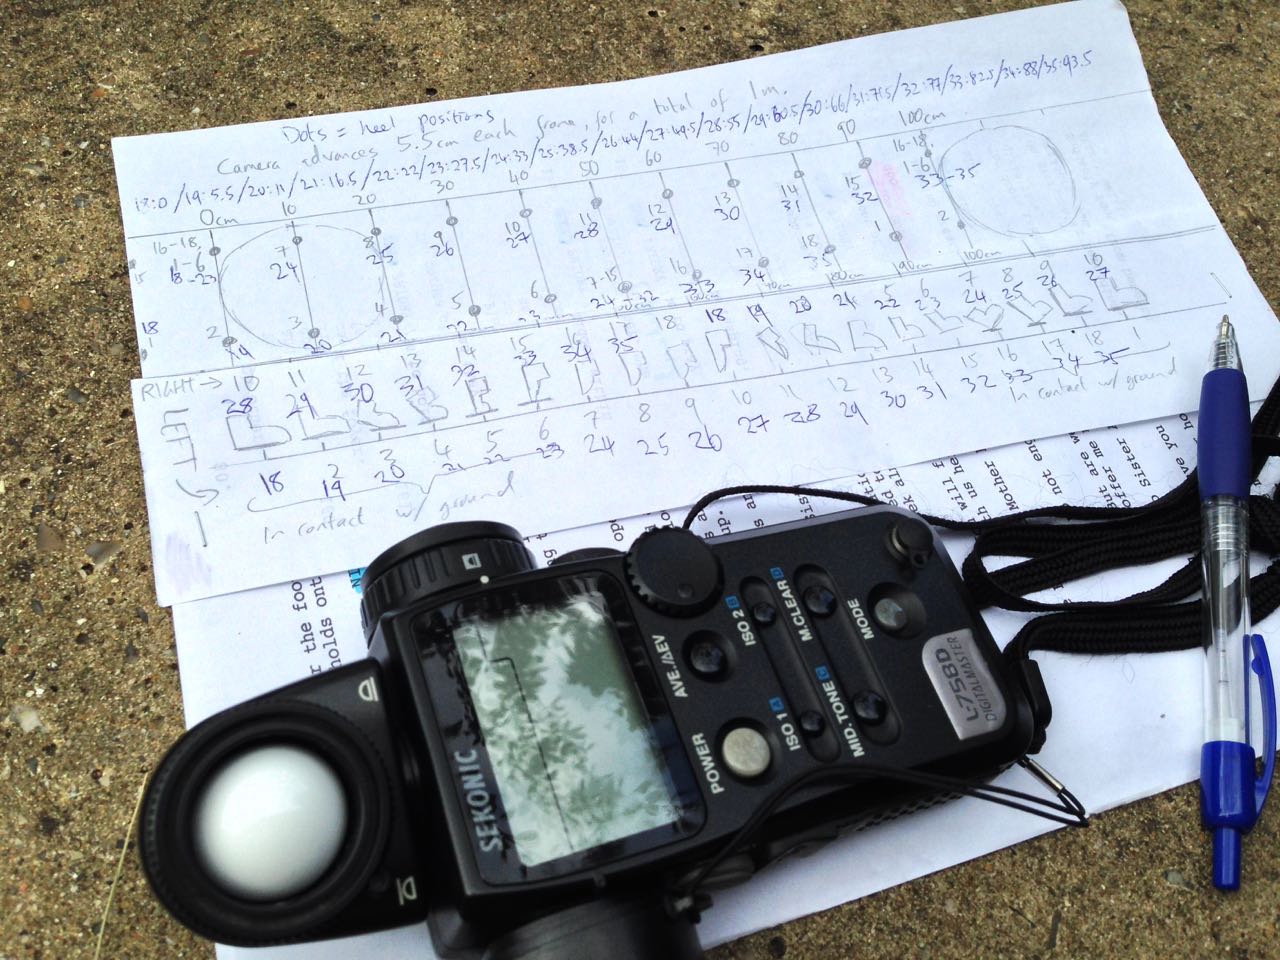
My light meter lies beside my animation chart for the walking feet in “Social Distance”.
This is the latest in my series about analogue photography. Previously, I’ve covered the science behind film capture, and how to develop your own black-and-white film. Now we’ll proceed to the next step: taking your negative and producing a print from it. Along the way we’ll discover the analogue origins of Photoshop’s dodge and burn tools.
Contact printing
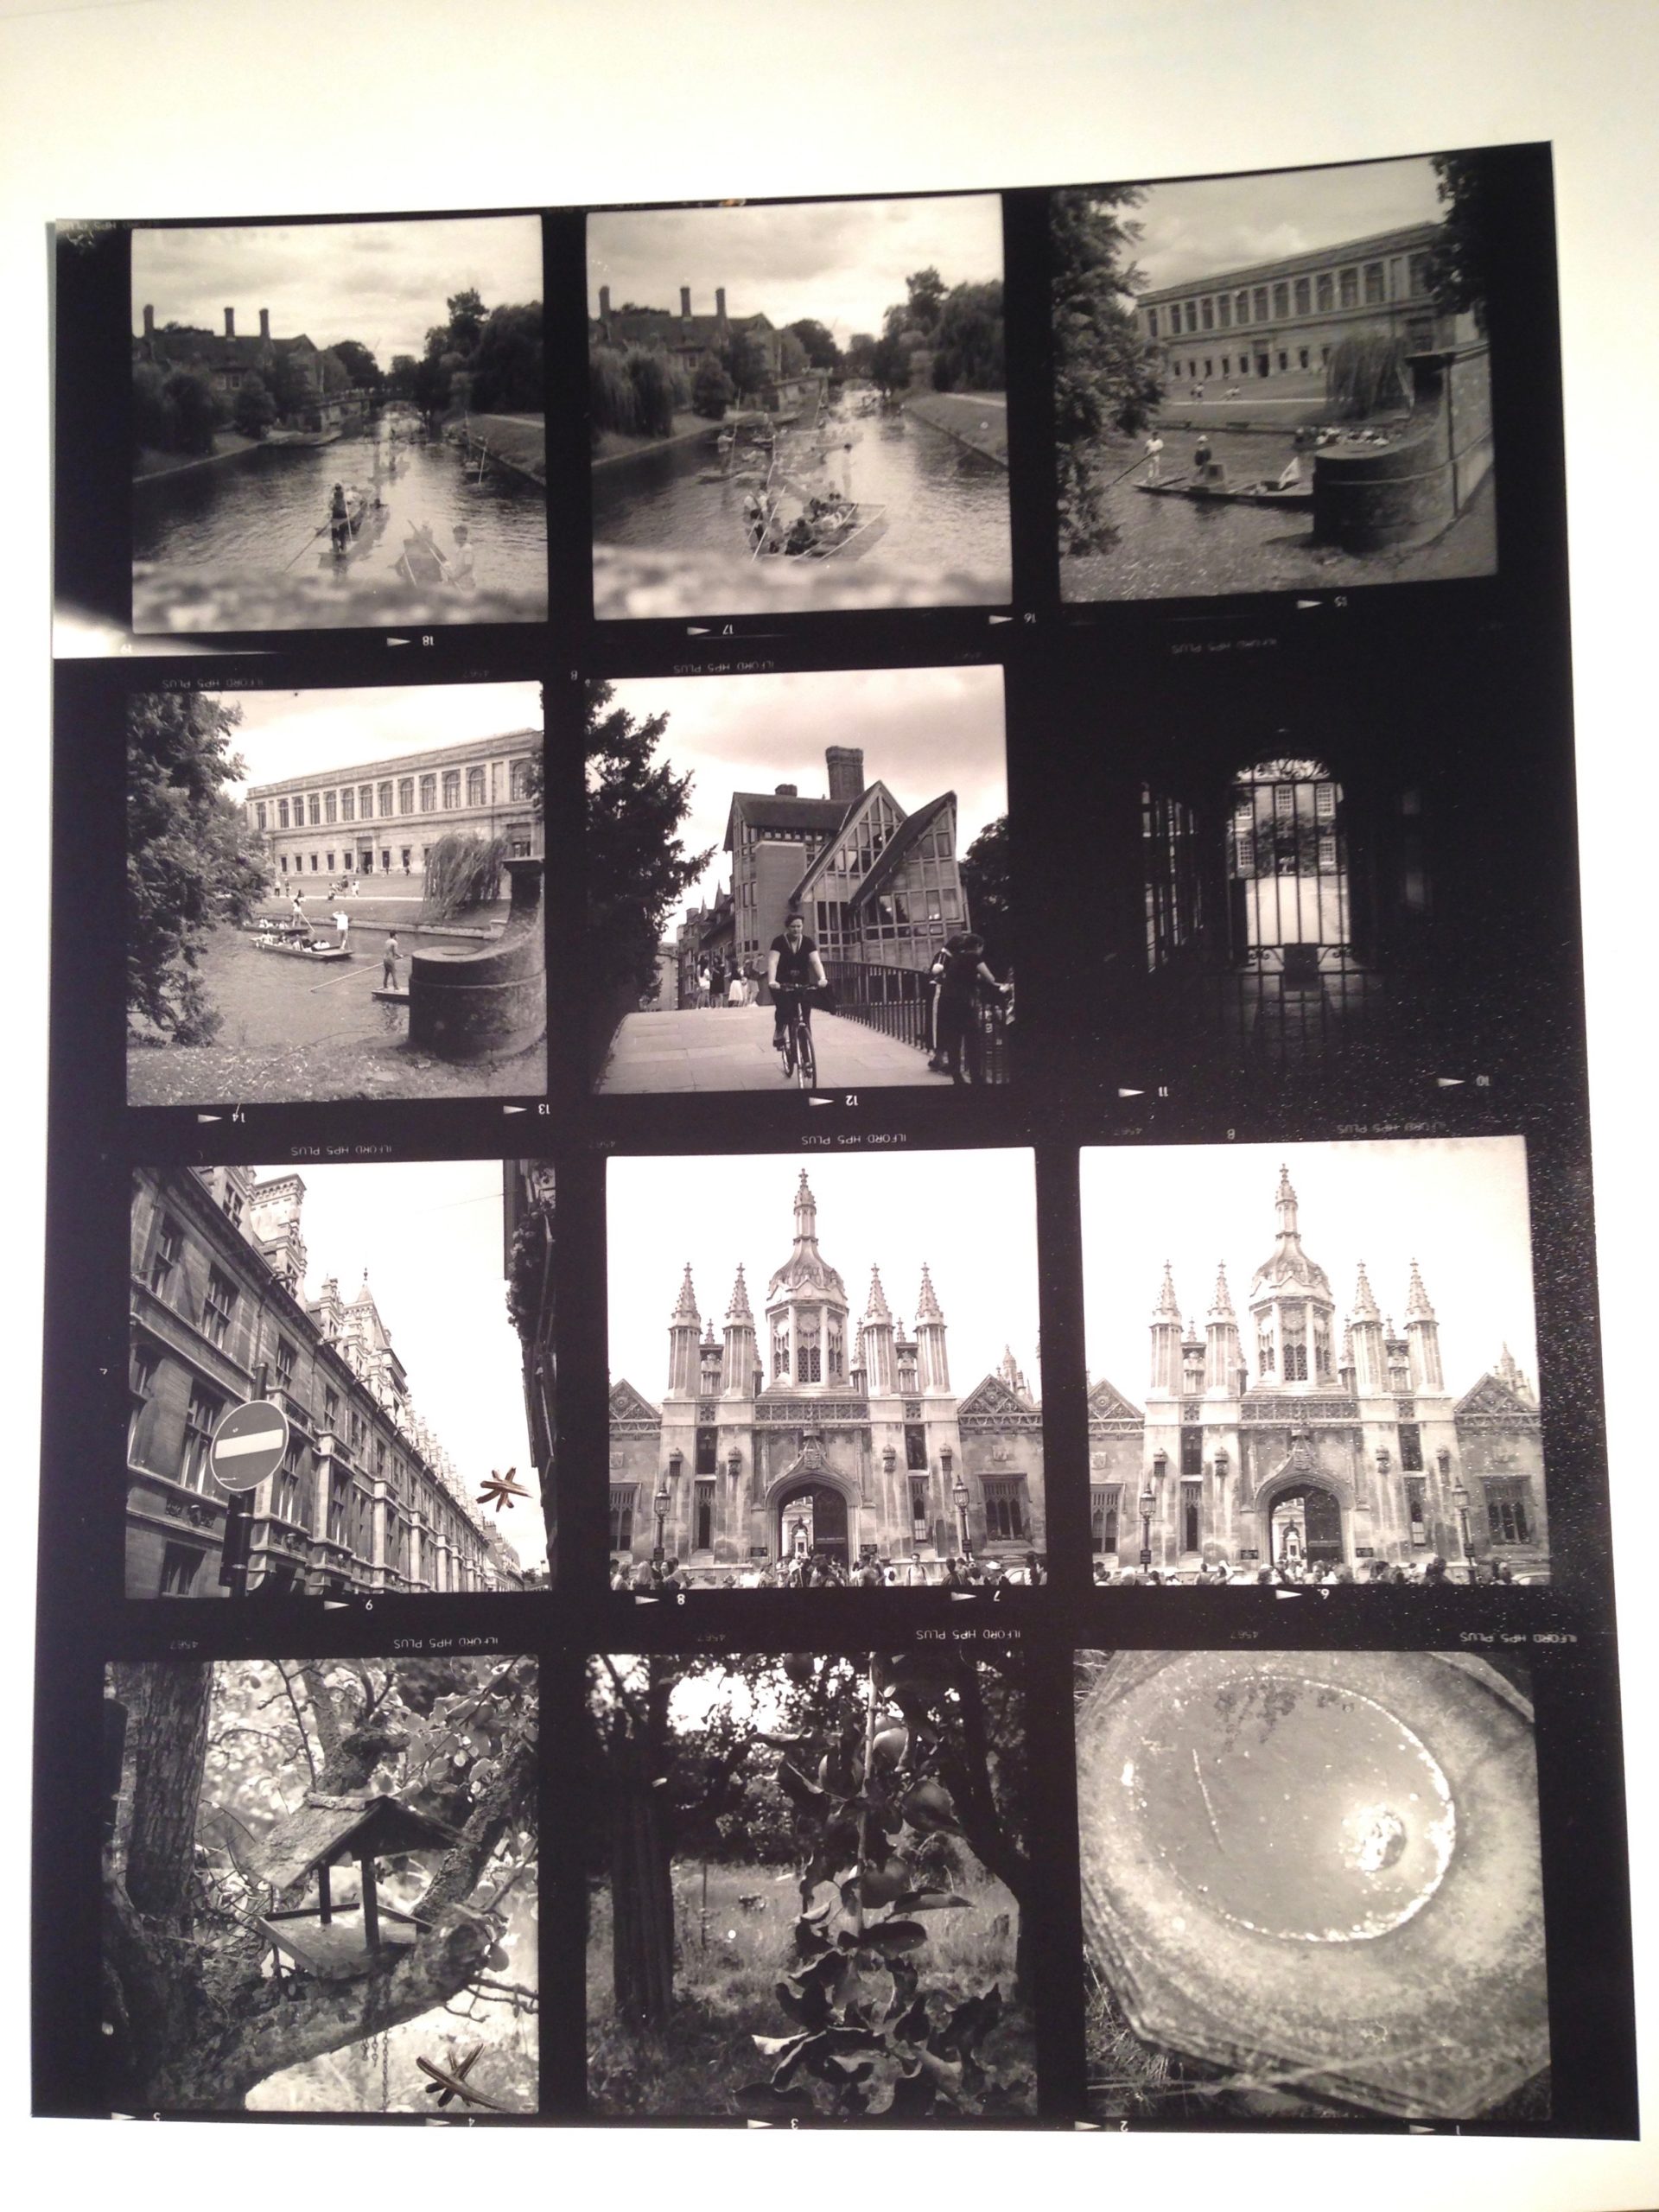
35mm contact sheet
To briefly summarise my earlier posts, we’ve seen that photographic emulsion – with the exception of colour slide film – turns black when exposed to light, and remains transparent when not. This is how we end up with a negative, in which dark areas correspond to the highlights in the scene, and light areas correspond with the shadows.
The simplest way to make a positive print from a negative is contact-printing, so called because the negative is placed in direct contact with the photographic printing paper. This is typically done in a spring-loaded contact printing frame, the top of which is made of glass. You shine light through the glass, usually from an enlarger – see below – for a measured period of time, determined by trial and error. Where the negative is dark (highlights) the light can’t get through, and the photographic emulsion on the paper remains transparent, allowing the white paper base to show through. Where the negative is transparent (shadows) the light passes through, and the emulsion – once developed and fixed in the same way as the original film – turns black. Thus a positive image is produced.
Normally you would contact-print multiple strips of negative at the same time, perhaps an entire roll of film’s worth, if your paper is large enough to fit them all. Then you can examine them through a loupe to decide which ones are worth enlarging. You have probably seen contact sheets, complete with circled images, stars and arrows indicating which frames the photographer or picture editor likes, where they might crop it, and which areas need doctoring. In fact, contact sheets are so aesthetically pleasing that it’s not uncommon these days for graphic designers to create fake digital ones.
The correct exposure time for a contact print can be found by exposing the whole sheet for, say, ten seconds, then covering a third of it with a piece of card, exposing it for another ten seconds, then covering that same third plus another third and exposing it for ten seconds more. Once developed, you can decide which exposure you like best, or try another set of timings.
120 contact sheet
Making an enlargement
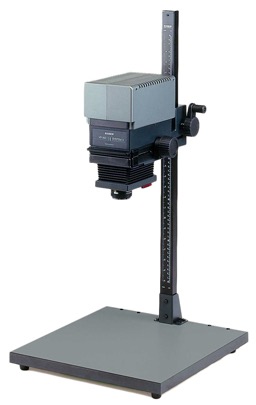
Contact prints are all well and good, but they’re always the same size as the camera negative, which usually isn’t big enough for a finished product, especially with 35mm. This is where an enlarger comes in.
An enlarger is essentially a projector mounted on a stand. You place the negative of your chosen image into a drawer called the negative carrier. Above this is a bulb, and below it is a lens. When the bulb is turned on, light shines through the negative, and the lens focuses the image (upside-down of course) onto the paper below. By adjusting the height of the enlarger’s stand, you can alter the size of the projected image.
Just like a camera lens, an enlarger’s lens has adjustable focus and aperture. You can scrutinise the projected image using a loupe; if you can see the grain of the film, you know that the image is sharply focused.
The aperture is marked in f-stops as you would expect, and just like when shooting, you can trade off the iris size against the exposure time. For example, a print exposed for 30 seconds at f/8 will have the same brightness as one exposed for 15 seconds at f/5.6. (Opening from f/8 to f/5.6 doubles the light, or increases exposure by one stop, while halving the time cuts the light back to its original value.)
Dodging and burning
As with contact-printing, the optimum exposure for an enlargement can be found by test-printing strips for different lengths of time. This brings us to dodging and burning, which are respectively methods of decreasing or increasing the exposure time of specific parts of the image.
Remember that the printing paper starts off bright white, and turns black with exposure, so to brighten part of the image you need to reduce its exposure. This can be achieved by placing anything opaque between the projector lens and the paper for part of the exposure time. Typically a circle of cardboard on a piece of wire is used; this is known as a dodger. That’s the “lollipop” you see in the Photoshop icon. It’s important to keep the dodger moving during the exposure, otherwise you’ll end up with a sharply-defined bright area (not to mention a visible line where the wire handle was) rather than something subtle.
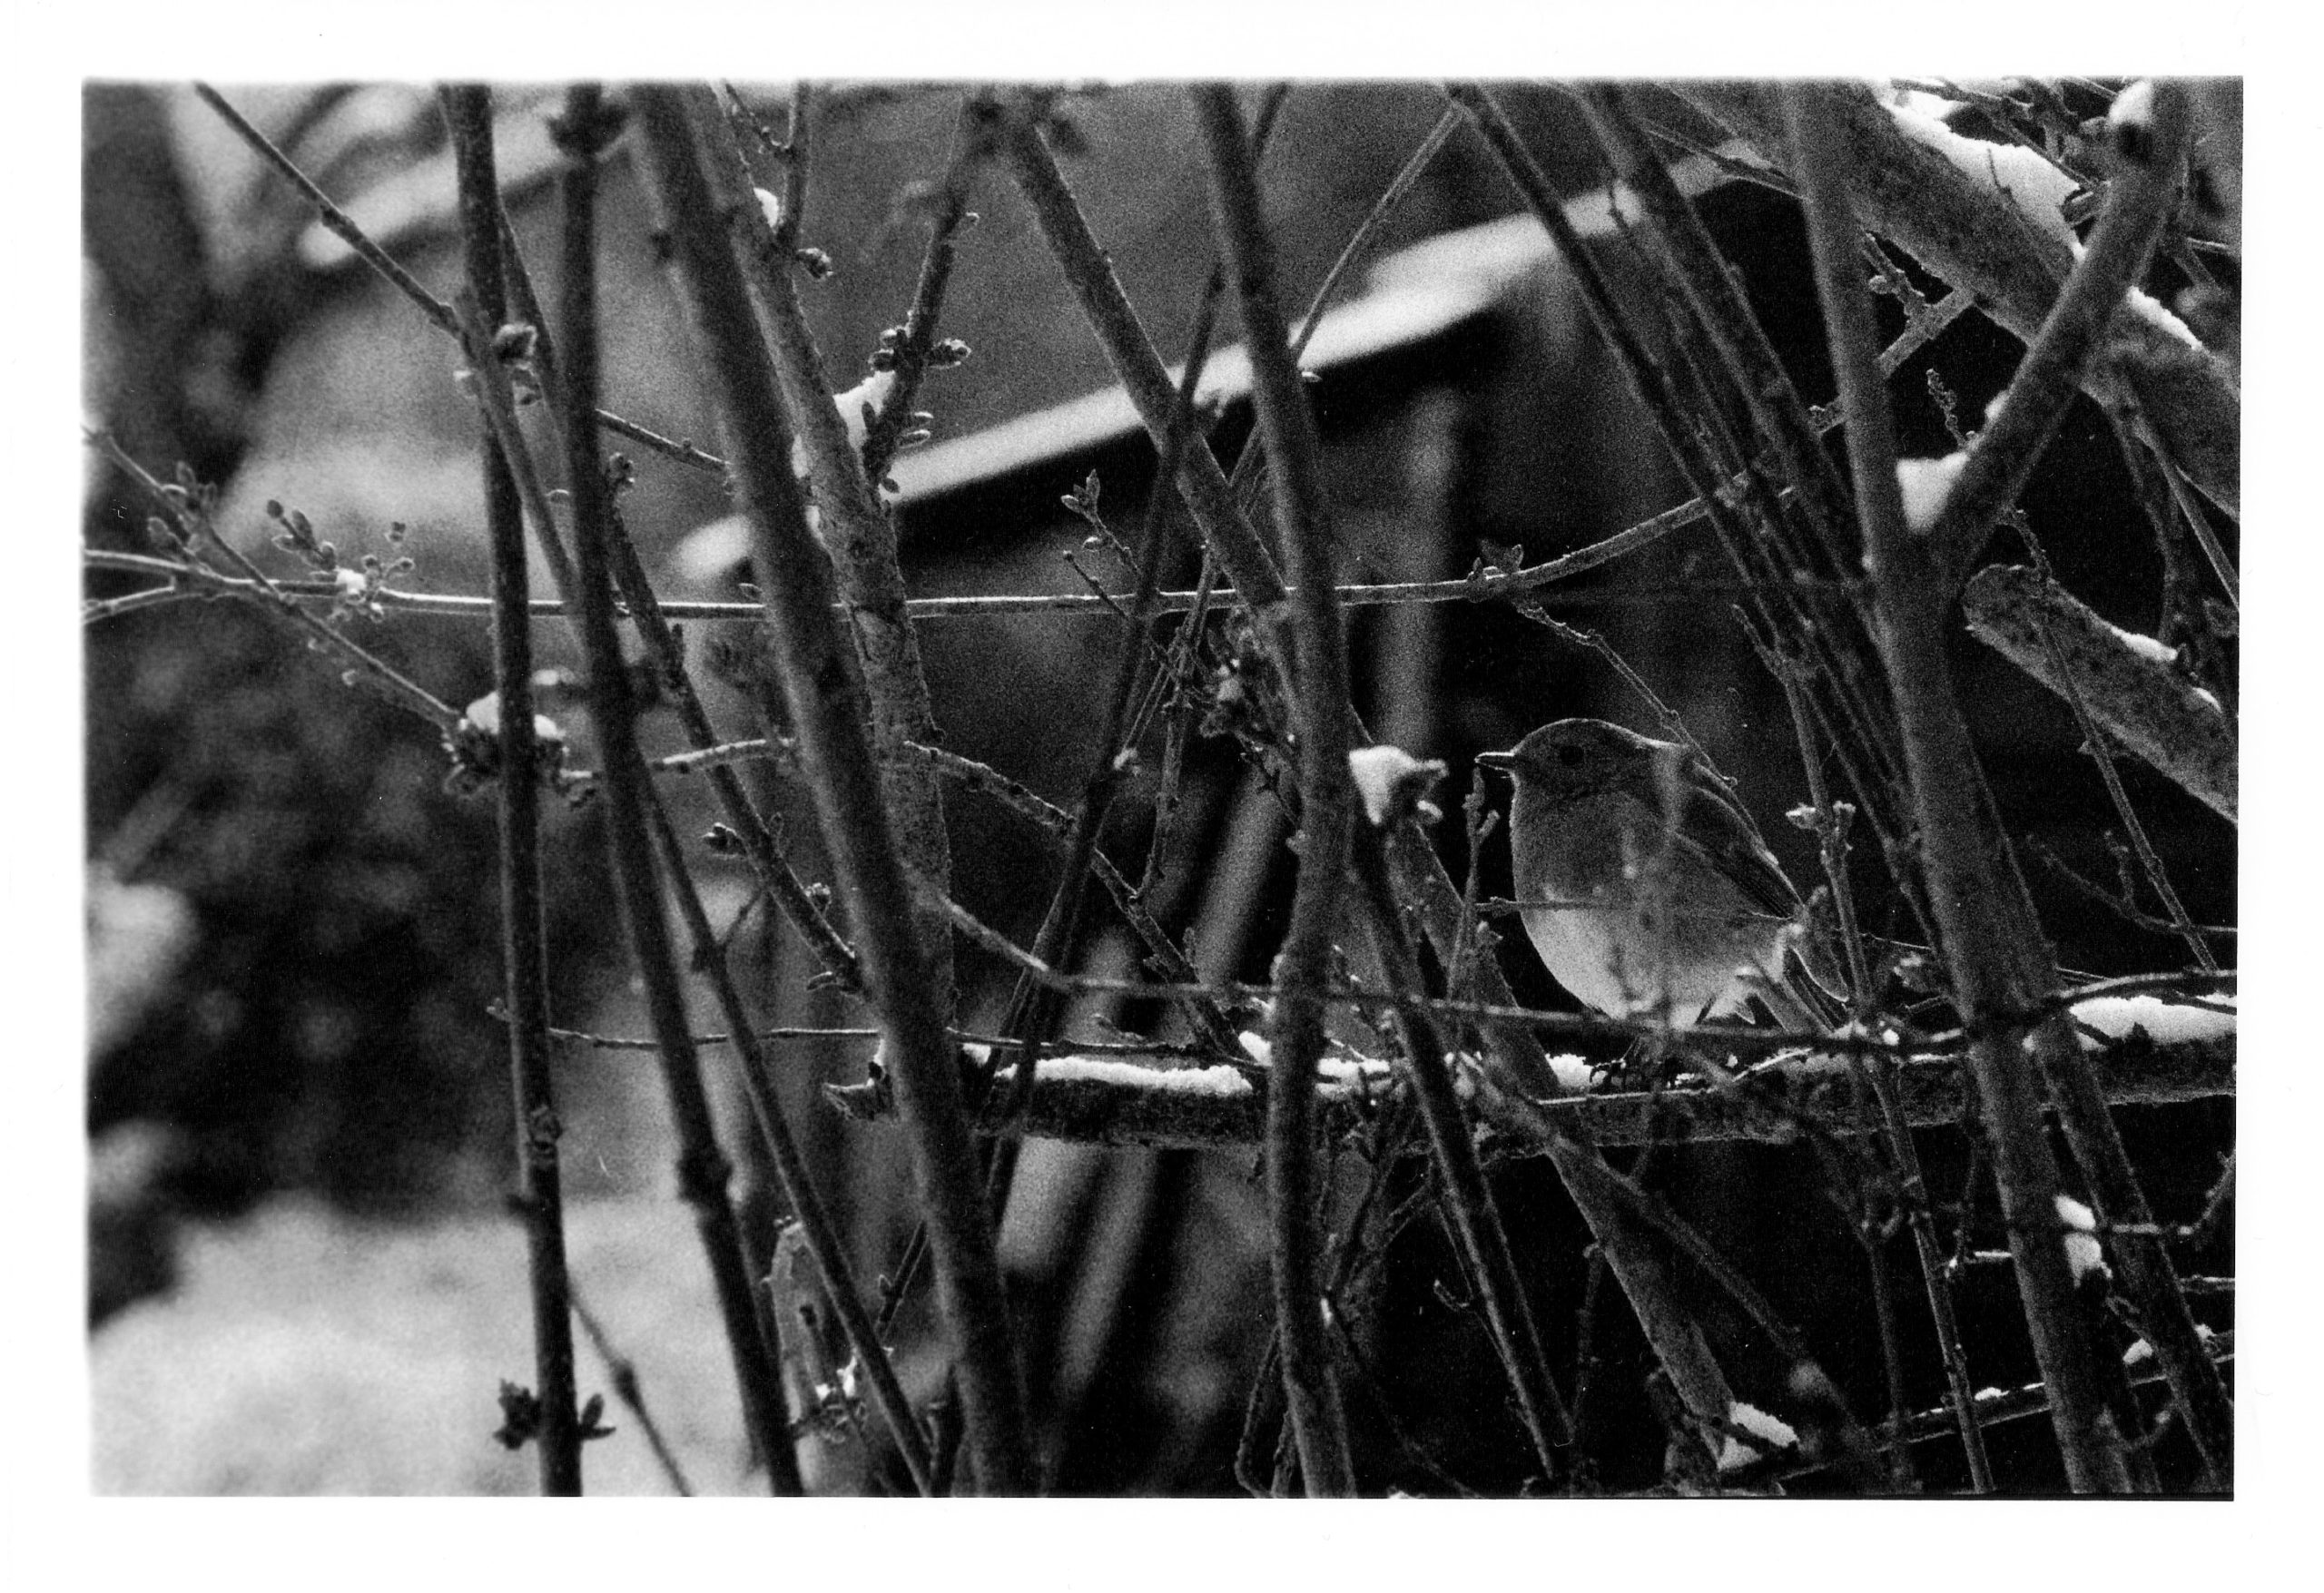
I dodged the robin in this image, to help him stand out.
Let me just say that dodging is a joyful thing to do. It’s such a primitive-looking tool, but you feel like a child with a magic wand when you’re using it, and it can improve an image no end. It’s common practice today for digital colourists to power-window a face and increase its luminance to draw the eye to it; photographers have been doing this for decades and decades.
Burning is of couse the opposite of dodging, i.e. increasing the exposure time of part of the picture to make it darker. One common application is to bring back detail in a bright sky. To do this you would first of all expose the entire image in such a way that the land will look good. Then, before developing, you would use a piece of card to cover the land, and expose the sky for maybe five or ten seconds more. Again, you would keep the card in constant motion to blend the edges of the effect.
To burn a smaller area, you would cut a hole in a piece of card, or simply form your hands into a rough hole, as depicted in the Photoshop icon.
Requirements of a darkroom
The crucial thing which I haven’t yet mentioned is that all of the above needs to take place in near-darkness. Black-and-white photographic paper is less sensitive to the red end of the spectrum, so a dim red lamp known as a safe-light can be used to see what you’re doing. Anything brighter – even your phone’s screen – will fog your photographic paper as soon as you take it out of its lightproof box.
Once your print is exposed, you need to agitate it in a tray of diluted developer for a couple of minutes, then dip it in a tray of water, then place it in a tray of diluted fixer. Only then can you turn on the main lights, but you must still fix the image for five minutes, then leave it in running water for ten minutes before drying it. (This all assumes you’re using resin-coated paper.)
Because you need an enlarger, which is fairly bulky, and space for the trays of chemicals, and running water, all in a room that is one hundred per cent lightproof, printing is a difficult thing to do at home. Fortunately there are a number of darkrooms available for hire around the country, so why not search for a local one and give analogue printing a go?
A few weeks ago, I came very close to investing in an Ilford/Paterson Starter Kit so that I could process film at home. I have four exposed rolls of 35mm HP5+ sitting on my shelf, and I thought that developing them at home might be a nice way to kill a bit of lockdown time. However, I still wouldn’t be able to print them, due to the difficulties of creating a darkroom in my flat. And with lockdown now easing, it probably won’t be long until I can get to Holborn Studios and hire their darkroom as usual.
So in this article I’ll talk through the process of developing a roll of black-and-white 35mm, as I would do it in the Holborn darkoom. If you haven’t already, you might want to read my post about how film works first.
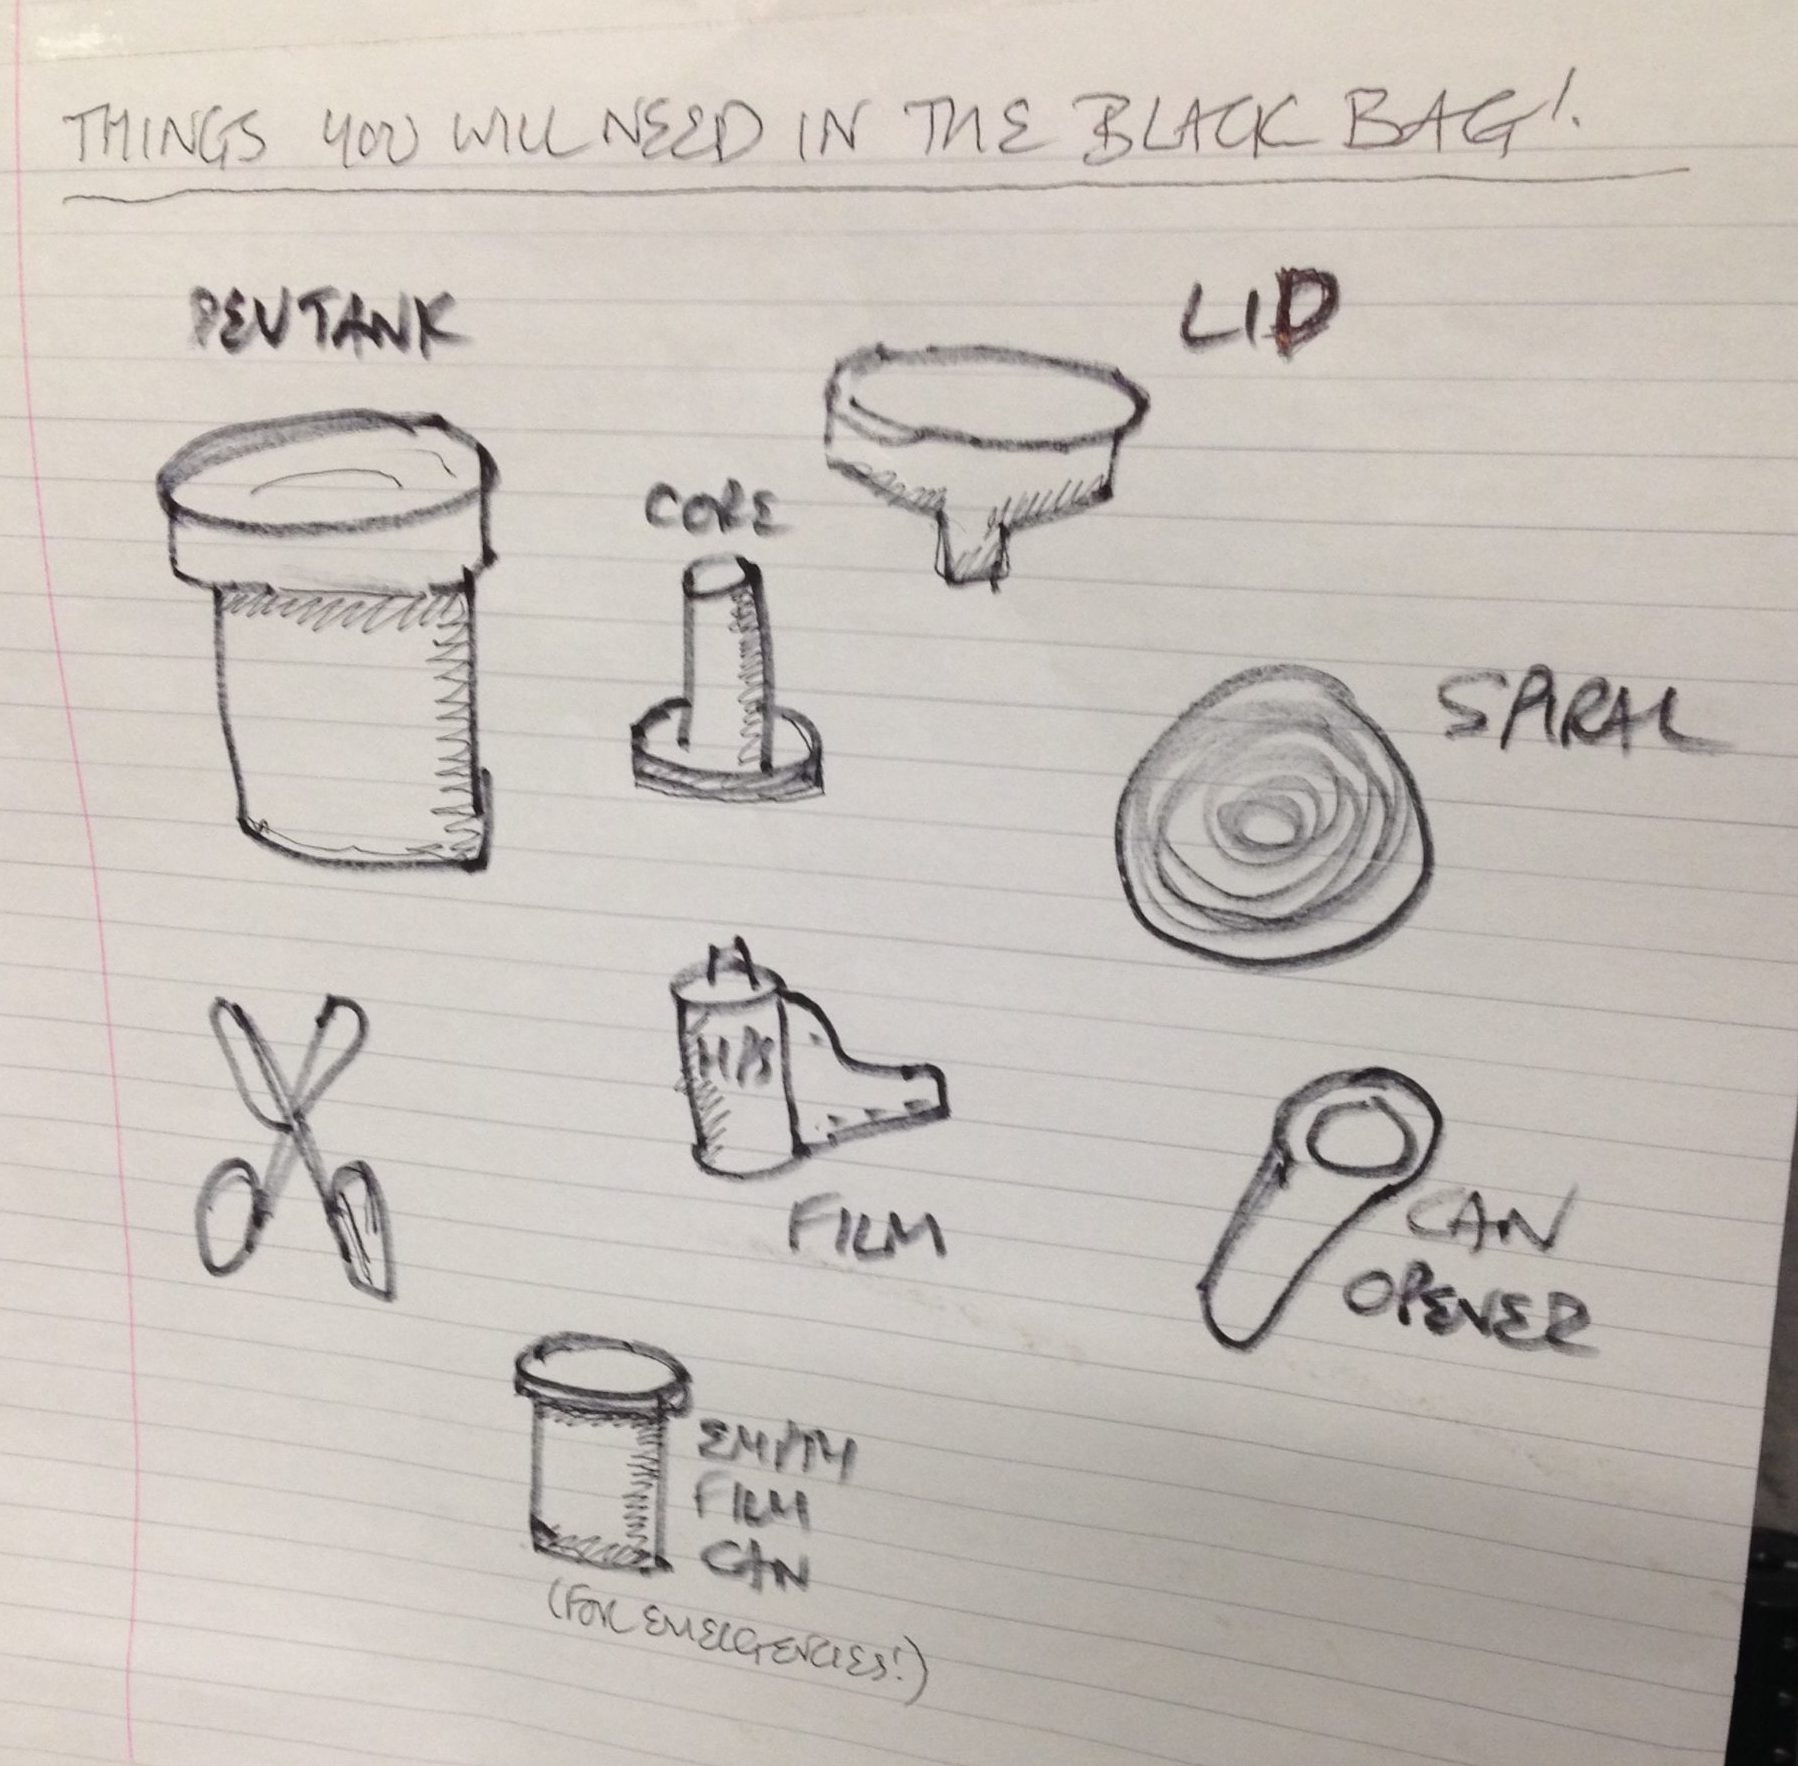
You will need
Exposed roll of 35mm, with the tail of the film still sticking out of the cassette
Changing bag, or a room that you can completely eliminate ALL light from
Holborn Studios’ darkroom, run by Bill Ling, displays this handy reminder.
The first step is to transfer the exposed film from its cassette – which is of course light-proof – into the Paterson tank, which is designed to admit the developing chemicals but not light. This transfer must take place in complete darkness, to avoid fogging the film. I’ve always done this using a changing bag, which is a black bag with a double seal and elasticated arm-holes.
Start by putting the following items into the bag: the film cassette, scissors and the various components of the Paterson tank, including the spiral. It’s wise to put in an empty film canister too, in case something goes wrong, and if the tail of your film isn’t sticking out of the cassette then you’ll need a can opener as well.
Seal the bag, put your arms in, and pull all the film out of the cassette. It’s important NOT to remove your arms from the bag now, until the film is safely inside the closed tank, otherwise light can get in through the arm-holes and fog the film.
Use the scissors to cut the end of the film from the cassette, and to trim the tongue (narrower part) off the head of the film.
Paterson Universal Developing Tank components, clockwise from the white items: developing reels or spirals, tank, light-proof lid, waterproof cap, and agitator – which I never use. In the centre is the core.
Now we come to the most difficult part, the part which always has me sweating and swearing and regretting all my life choices: loading the film onto the spiral. I have practised this with dead film many times, but when I’m fumbling around in the dark of the changing bag it’s a hundred times harder.
It’s hard to describe loading the spiral verbally, but this blog post by Chris Waller is very clear and even includes pictures. (Chris recommends cutting a slight chamfer onto the leading corners of the film, which I shall certainly try next time, as well as using your thumbs to keep the film flat on its approach to the reel.)
If you’re working with 120 film, the loading process is very slightly different, and this video describes it well.
Once the spiral is loaded, you can thread it onto the core, place the core inside the tank, and then put the lid on. It is now safe to open the bag.
Developing
Developing time info displayed at Holborn Studios
Holborn Studios’ darkroom is stocked with a working solution of Kodak HC-110 developer, but if you don’t have this luxury, or you’re not using the Ilford Simplicity packs, then you’ll need to make up a working solution yourself by diluting the developer according to the manufacturer’s instructions. For HC-110 dilution B, which is what Holborn uses, it’s 1+31, i.e.one part concentrated developer to 31 parts water. The working solution has a limited shelf life, so again consult the manufacturer’s instructions.
Further dilution is required at the point of development, at a ratio of 1+7 in this case, but once more this may vary depending on the chemicals you choose. For one roll of 35mm, you need 37.5ml of the HC-110 dilution B, and 262.5ml of water for a total of 300ml.
The developing time depends on the type of film stock, the speed you rated it at, the type of developer and its dilution, and the temperature of the chemicals. Digital Truth has all the figures you need to find the right development time.
Agitating
I was taught to ensure my water is always at 20°C before mixing it with the developer, to keep the timing calculations a little simpler. At this temperature, a roll of Ilford HP5+ rated at its box speed of ISO 400 needs five minutes to develop in HC-110 dilution B. Ilford Delta, on the other hand, needs a whopping 14.5 minutes to process at its box speed of 3200.
Once your diluted developer is ready, pour it into the Paterson tank and put on the cap. It is now necessary to agitate the chemicals in order to distribute them evenly around the film. My technique is inversion, i.e. turning the tank upside-down and back again. Do this continuously for the first 30 seconds, then for 10 seconds every minute after that.
Inside the tank, your latent image is being transformed into an image proper, wherein every exposed silver halide crystal is now black metallic silver.
Fixing
Once the developing time is up, remove the cap from the tank, and pour away the developer immediately. At this point some people will say you need to use a stop bath to put a firm halt to the developing process, but I was taught simply to rinse the tank out with tap water and then proceed straight to fixing. This method has always worked fine for me.
After rinsing the tank, pour in enough fix solution (again prepared to the manufacturer’s instructions) to fill it completely. Put the cap back on, agitate it for 30 seconds, then leave it for ten minutes.
During this time, the fixer renders the film’s unexposed crystals inactive and water soluble. When the ten minutes is up, pour the fixer back into its container (it’s reuseable) and leave the tank under running water for a further ten minutes. This washes away the unused silver halide crystals, leaving only the exposed black silver corresponding with light areas of the scene, and just the transparent plastic base corresponding with the dark areas.
Squirt a little diluted washing-up liquid into the tank to prevent drying rings, then drain it. You can now open the tank and see your negative for the first time.
Drying
Remove the film from the developing spiral, taking care to only touch the ends and the edges. Squeegee the top part of the film, dry your hands, then squeegee the rest. This removes droplets which can otherwise mark the negative.
Now attach two hooks to the film, a light one at the top to hang it from, and a heavy one at the bottom to stop the film curling as it dries. Holborn Studios is equipped with a heated drying cabinet, but with patience you can hang a film to dry in any dust-free area.
When your film is dry, you can cut it into strips of six frames and insert them into a negative storage sheet.
You can now scan your negatives, or better still print them photo-chemically, as I’ll describe in a future post.
Last week I delved into the science of how film captures an image. This time we’ll investigate the very different means by which electronic sensors achieve the same result.
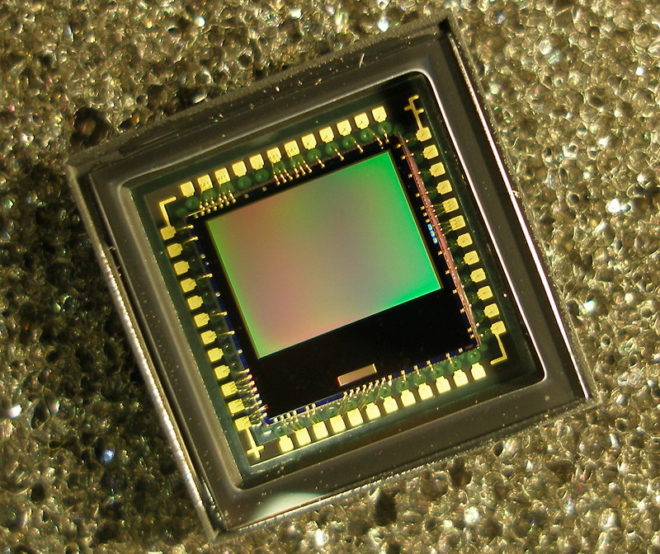
CCD
In the twentieth century, the most common type of electronic imaging sensor was the charge-coupled device or CCD. A CCD is made up of metal-oxide-semiconductor (MOS) capacitors, invented by Bell Labs in the late fifties. Photons striking a MOS capacitor give it a charge proportional to the intensity of the light. The charges are passed down the line through adjacent capacitors to be read off by outputs at the edges of the sensor. This techniques limits the speed at which data can be output.
My first camcorder, an early nineties analogue 8mm video device by Sanyo, contained a single CCD. Professional cameras of that time had three: one sensor each for red, green and blue. Prisms and dichroic filters would split the image from the lens onto these three CCDs, resulting in high colour fidelity.
A CCD alternates between phases of capture and read-out, similar to how the film in a traditional movie camera pauses to record the image, then moves on through the gate while the shutter is closed. CCD sensors therefore have a global shutter, meaning that the whole of the image is recorded at the same time.
CCDs are still used today in scientific applications, but their slow data output, higher cost and greater power consumption have seen them fall by the wayside in entertainment imaging, in favour of CMOS.
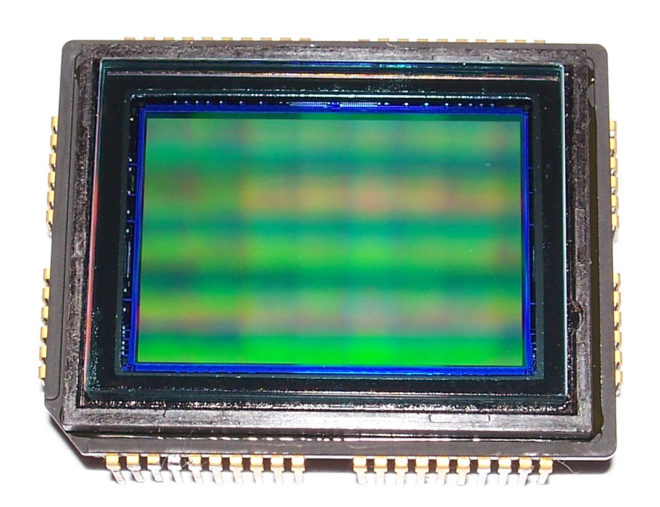
CMOS
Complementary metal-oxide-semiconductor sensors (a.k.a. APS or active-pixel sensors) have been around just as long as their CCD cousins, but until the turn of the millennium they were not capable of the same imaging quality.
Each pixel of a typical CMOS sensors consists of a pinned photodiode, to detect the light, and a metal-oxide-semiconductor field-effect transistor. This MOSFET is an amplifier – putting the “active” into the name “active-pixel sensor” – which reduces noise and converts the photodiode’s charge to a voltage. Other image processing technology can be built into the sensor too.
The primary disadvantage of CMOS sensors is their rolling shutter. Because they capture an image row by row, top to bottom, rather than all at once, fast-moving subjects will appear distorted. Classic examples include vertical pillars bending as a camera pans quickly over them, or a photographer’s flash only lighting up half of the frame. (See the video below for another example, shot an iPhone.) The best CMOS sensors read the rows quickly, reducing this distortion but not eliminating it.
Today, all the major cinema cameras use CMOS sensors, from Blackmagics to Alexas. Medium format stills cameras clung on to CCD technology longest for that higher image quality, but even these are now CMOS.
CMOS sensors are cheaper, less power-hungry, and not suspectible to the highlight blooming or smearing of CCDs. They are also faster in terms of data output, and in recent years their low-light sensitivity has surpassed CCD technology too.
Beyond the Sensor
The analogue voltages from the sensor, be it CCD or CMOS, are next passed to an analogue-to-digital convertor (ADC) and thence to the digital signal processor (DSP). How much work the DSP does depends whether you’re recording in RAW or not, but it could include things like correcting the gamma and colour balance, and converting linear values to log. Debayering the image is a very important task for the DSP, and I’ve covered this in detail in my article on how colour works.
After the DSP, the signal is sent to the monitor outputs and the storage media, but that’s another story.
With many of us looking for new hobbies to see us through the zombie apocalypse Covid-19 lockdown, analogue photography may be the perfect one for an out-of-work DP. While few of us may get to experience the magic and discipline of shooting motion picture film, stills film is accessible to all. With a range of stocks on the market, bargain second-hand cameras on eBay, seemingly no end of vintage glass, and even home starter kits for processing your own images, there’s nothing to stop you giving it a go.
Since taking them up again In 2018, I’ve found that 35mm and 120 photography have had a positive impact on my digital cinematography. Here are five ways in which I think celluloid photography can help you too sharpen your filmmaking skills.
1. Thinking before you click
When you only have 36 shots on your roll and that roll cost you money, you suddenly have a different attitude to clicking the shutter. Is this image worthy of a place amongst those 36? If you’re shooting medium or large-format then the effect is multiplied. In fact, given that we all carry phone cameras with us everywhere we go, there has to be a pretty compelling reason to lug an SLR or view camera around. That’s bound to raise your game, making you think longer and harder about composition and content, to make every frame of celluloid a minor work of art.
2. Judging exposure
I know a gaffer who can step outside and tell you what f-stop the light is, using only his naked eye. This is largely because he is a keen analogue photographer. You can expose film by relying on your camera’s built-in TTL (through the lens) meter, but since you can’t see the results until the film is processed, analogue photographers tend to use other methods as well, or instead, to ensure a well-exposed negative. Rules like “Sunny Sixteen” (on a sunny day, set the aperture to f/16 and the shutter speed reciprocal to match the ISO, e.g. 1/200th of a second at ISO 200) and the use of handheld incident meters make you more aware of the light levels around you. A DP with this experience can get their lighting right more quickly.
3. Pre-visualising results
We digital DPs can fall into the habit of not looking at things with our eyes, always going straight to the viewfinder or the monitor to judge how things look. Since the optical viewfinder of an analogue camera tells you little more than the framing, you tend to spend less time looking through the camera and more using your eye and your mind to visualise how the image will look. This is especially true when it comes to white balance, exposure and the distribution of tones across a finished print, none of which are revealed by an analogue viewfinder. Exercising your mind like this gives you better intuition and increases your ability to plan a shoot, through storyboarding, for example.
4. Grading
If you take your analogue ethic through to post production by processing and printing your own photographs, there is even more to learn. Although detailed manipulation of motion pictures in post is relatively new, people have been doctoring still photos pretty much since the birth of the medium in the mid-19th century. Discovering the low-tech origins of Photoshop’s dodge and burn tools to adjust highlights and shadows is a pure joy, like waving a magic wand over your prints. More importantly, although the printing process is quick, it’s not instantaneous like Resolve or Baselight, so you do need to look carefully at your print, visualise the changes you’d like to make, and then execute them. As a DP, this makes you more critical of your own work and as a colourist, it enables you to work more efficiently by quickly identifying how a shot can be improved.
5. Understanding
Finally, working with the medium which digital was designed to imitate gives you a better understanding of that imitation. It was only when I learnt about push- and pull-processing – varying the development time of a film to alter the brightness of the final image – that my understanding of digital ISO really clicked. Indeed, some argue that electronic cameras don’t really have ISO, that it’s just a simulation to help users from an analogue background to understand what’s going on. If all you’ve ever used is the simulation (digital), then you’re unlikely to grasp the concepts in the same way that you would if you’ve tried the original (analogue).
20 years ago today, I was on TV. I had my fifteen seconds of fame on a slightly obscure BBC2 Sunday morning show in the late nineties, primarily watched by stoned students. Yes, I was a King of the Show on Lee & Herring’s This Morning with Richard Not Judy.
https://youtu.be/9LXCjx97_-o?t=1084
The year was 1999. All anyone could talk about was The Phantom Menace and the Y2K bug. I had a rubbish beard that looked like the strap of a helmet. (Thank God beards have gone out of fashion, eh?) And I worked as an admin assistant for the Ministry of Agriculture, Fisheries and Food in Worcester.
On Sunday mornings (or sometimes Friday teatimes, for the edited repeat) I would turn on my comically huge cathode ray tube TV, receiving its hilariously archaic analogue UHF signals, and watch Stewart Lee and Richard Herring squeeze as many blasphemies and euphemisms as possible into what was most definitely a pre-watershed slot.
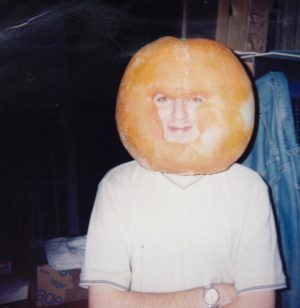
Trying on the Curious Orange head
Broadcast live, TMWRNJ (“TMWRNJ!“) was a surreal, sketch-packed affair loosely hung on the format of a spoof daytime show. Memorable characters included the Curious Orange, Simon Quinlank and his weak lemon drink, Jesus (“Aaaaah!”/”No, not ‘aaaah’!”) and an inexplicably jelly-obsessed Rod Hull.
Each week Lee and Herring would crown someone “King of the Show”, a largely ceremonial office with no real power. Usually it was a random member of the studio audience, but in an episode which saw Rich taking a shady product placement deal from Ian Cress of the Cress Marketing Board, a competition was announced. The next week’s King of the Show would be whoever could make the best advert for cress.
Immediately I picked up my amusingly quaint landline and tediously placed a call to my friend Matt Hodges by pressing a sequence of numbers associated with his own, equally quaint landline, a sequence of numbers I had to remember using my actual brain or possibly pen and paper. Do you remember the nineties, Stew? Weren’t they hilarious? Ahahahahahahaha!
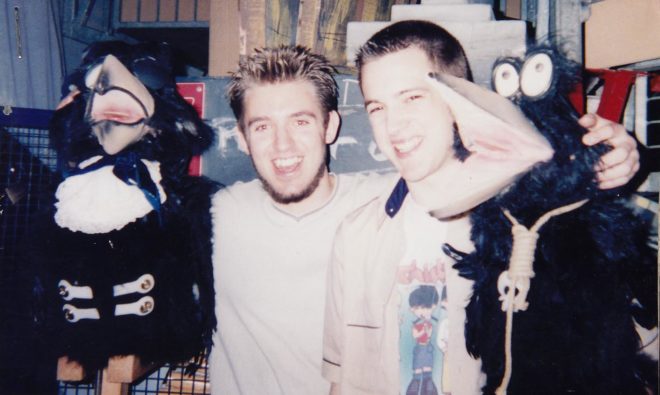
Matt and I backstage with the Curious Alien, TV’s Emma Kennedy and Darth Maul
Matt was one of the poor unfortunates who regularly got roped into appearing in my amateur filmmaking efforts with my Video-8 camcorder. A massive Python fan, Matt’s influence had ensured that I churned out many surreal comedies in those halcyon days.
We quickly came up with four ideas for cress commercials, each one spoofing a different type of ad: McDonald’s, army recruitment, charity appeal and gay exchange. Sadly I no longer have copies of the latter three. I recall the army one involved a punnet of cress with a cardboard machine gun glued to it, abseiling down ropes to a bombastic voiceover (“Be the best!”). The charity appeal, shot in the sandpit of our local primary school, featured a cardboard cut-out of Mark Hamill pathetically farming in a desert. (“If you give Mark a punnet of cress, he can feed his family for a day. But give him the means to grow his own cress…”) The less said about the gay exchange one the better.
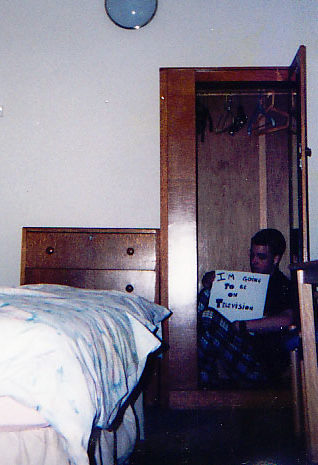
Matt contemplates his upcoming moment of fame in the glamorous BBC B&B. “I’m going to be on television,” reads the sign.
We sent off the four ads on a VHS tape (imagine Netflix but… oh, never mind) and crossed our fingers.
A few days later, I was sitting at my desk at MAFF, probably trying to skive proper work by writing macros in Excel, when the phone rang. I couldn’t quite believe it when the voice at the other end told me he was calling from TMWRNJ (“TMWRNJ!“), they loved our ads, we were going to be on the show on Sunday, travel and accommodation all paid by the BBC.
That Saturday, Matt and I caught the train to London. Even the decidedly-unglamorous Bayswater B&B we were booked into couldn’t quell our ex-like-a-bird’s-eggs-citement. We spent most of the evening trying to come up with witty proclamations to make when we were crowned. “I’d like to see Jamie open a passage with his magic torch,” was the punchline, but I forget the set-up.
The following morning a taxi dropped us at Riverside Studios in Hammersmith, where we felt very important muscling past the queueing audience and into the backstage area. I remember awkwardly hanging around Stew and Rich, agog at meeting actual famous people in real life.
Awkward
The show itself seemed to go by very quickly, and we didn’t get chance to deliver our hilarious Jamie gag. But afterwards we got to hang out and properly meet the cast, having lunch with them in the studio canteen.
Less awkward
Then we were given a tour of the studio and allowed to sit and watch – just the two of us, the rest of the audience having departed – while sketches for the next week’s episode were pre-recorded. These included an instalment of Histor & Pliny, a spoof children’s series featuring a pair of time-travelling crows puppeteered by Stew and Rich, whose dialogue on set that day was considerably bluer than what would ultimately be broadcast. (“Eat the fucking eggs, you cunt!”)
I vividly recall TV’s Emma Kennedy walking past us, dressed in some typically outlandish costume, remarking that she might have just farted a baked bean out of her bumhole. What a great day!
With TV’s Emma Kennedy
Later that year, Matt and I bumped into Stewart Lee on the platform of Worcester Foregate Street station while on our way to the Reading Festival. I asked Stew if we could have a regular slot on the next series of TMWRNJ (“TMWRNJ!“) and he replied in his usual lugubrious tone, “Firstly, we don’t know if we’re going to get another series. And secondly, no.”
We may not have become the next Adam & Joe, but my brief moment in the spotlight did have an impact on my career. It was only when I told the Rural Media Company’s head of production that I had appeared on TV because of a spoof advert I’d made that she agreed to look at my amateur showreel. She saw some potential and started hiring me, kicking off two decades of freelancing.
Egg egg egg-egg egg egg egg-egg-egg egg.
I’ll leave you with Rich’s own thoughts from his blog at the time…
Thanks to everyone who sent in cress photos etc. The lads from Malvern were actually two of the nicest people we’ve had as king and to be honest the clip we showed was not the best thing they sent us, but it was the shortest and most TV friendly. They did a great Gay Exchange parody which was just a bit too rude. We were also very impressed by the editing and choice of shots. Those 2 guys will go far, but I’ve already forgotten their names! Sorry!
 Award-winning visual effects artist Douglas Trumbull died recently, leaving behind a body of memorable work including the slit-scan “Stargate” sequence from 2001: A Space Odyssey. But what is slit-scan and where else has it been used?