During Lockdown 1.0 I made a zoetrope and shot a number of time-lapses and animations with my 35mm SLR to go in it. Below is an update on this project, but first here are the links to the earlier posts about it, in case you missed them:
Although the zoetrope itself turned out very nicely – all the more surprising because I’m terrible at DIY – the content did not. I concluded that any future efforts needed to be very simple, bold and high-contrast.
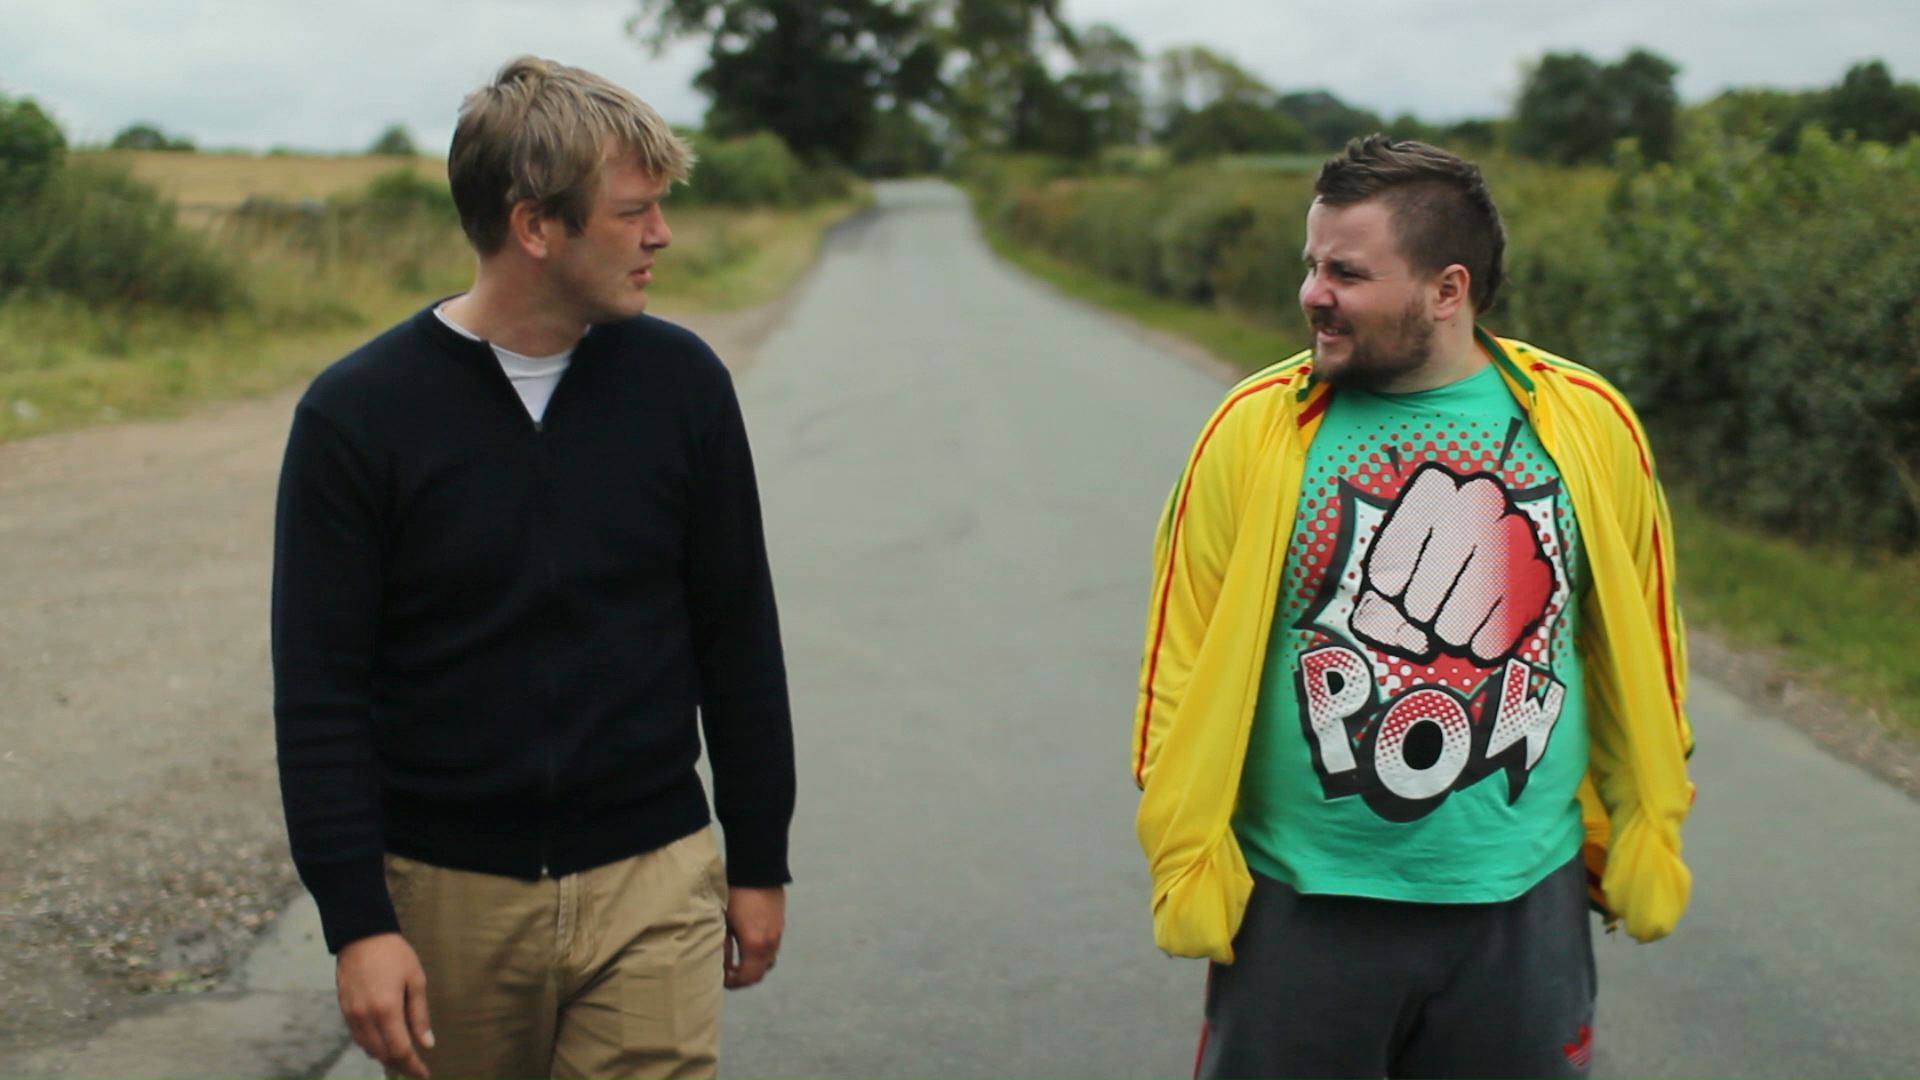
Recently I got around to shooting a couple of new animations. This time, instead of detailed, complex or subtle efforts like sunlight moving across rotting apples or Lego minifigs passing each other in the street, I went back to basics. Inspired by typical animations supplied with zoetropes in the Victorian era, I created loops of a figure walking and running.
First of all I drew out the 18 frames of each cycle using online reference material. I wanted to shoot in natural light so I rigged a black backdrop outside on the patio. Dressed in my lightest-toned clothes, I adopted the 18 positions of the walk cycle one by one as my flatmate clicked my Pentax P30t’s shutter. Then I went through the run cycle in the same way to complete the roll of 36 exposures. We used Ilford Delta 3200 film, one second of exposure time and a pinhole (purely so I could say I had made and exhibited a motion picture without ever using a lens). By the time we finished, the light had fallen off a stop or two.
When I got the material into the darkroom I under-exposed the contact prints (making them lighter) because I had learnt that a spinning zoetrope darkens the image considerably. After all, you are only viewing it through tiny slots; what you’re mostly looking at is the opaque outside of the drum. I always print on multigrade paper which means that the contrast can be adjusted using a special set of colour filters. In this case I used the 4½ filter (on a scale where 0 produces the softest contrast and 5 the hardest) to get the boldest possible look. The resulting prints still looked very milky, especially the running one which I’d had to brighten more to compensate for the light falling off, but that was what I knew I needed.
When I got home and tried them in the zoetrope, the running animation just didn’t have enough contrast in it to work. The walking animation works better but still isn’t as good as I’d hoped. I think that what’s really required is strong studio lighting absolutely blasting the subject, a completely white outfit, and a backdrop with all light flagged off it.
The learning process continues!
The results look better in this video than they actually are, because the phone I shot it on conducted its own process of reducing the motion into discrete frames for your device and brain to reassemble.
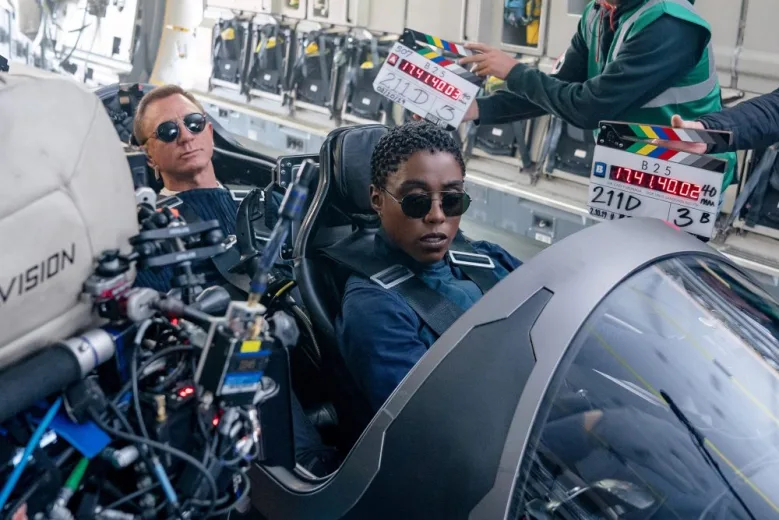
After many delays, No Time to Die hit UK cinemas a month ago, and has already made half a billion dollars around the world. The 25th James Bond movie was shot on celluloid, making it part of a small group of productions that choose to keep using the traditional medium despite digital becoming the dominant acquisition format in 2013.
Skyfall made headlines the year before that when it became the first Bond film to shoot digitally, captured on the Arri Alexa by the legendary Roger Deakins. But when director Sam Mendes returned to helm the next instalment, 2015’s Spectre, he opted to shoot on 35mm.
“With the Alexa, I missed the routine of film and the dailies,” Mendes told American Cinematographer. “Watching dailies on the big screen for the first time is kind of like Christmas. Film is difficult, it’s imprecise, but that’s also the glory of it. It had romance, a slight nostalgia… and that’s not inappropriate when dealing with a classic Bond movie.”
Early rumours suggested that Bond’s next outing, No Time to Die, would return to digital capture, but film won out again. Variety reported last year: “[Director Cary Joji] Fukunaga and cinematographer Linus Sandgren pushed to have No Time to Die shot on film instead of digital, believing it enhanced the look of the picture.”
Charlotte Bruus Christensen believed the same when she photographed the horror film A Quiet Place on 35mm. “Film captures the natural warmth, colour and beauty of the daylight,” she told British Cinematographer, “but it’s also wonderful in the dark, the way it renders the light on a face from a candle, before falling off into deep detailed blacks. It is quite simply beautiful and uniquely atmospheric.”
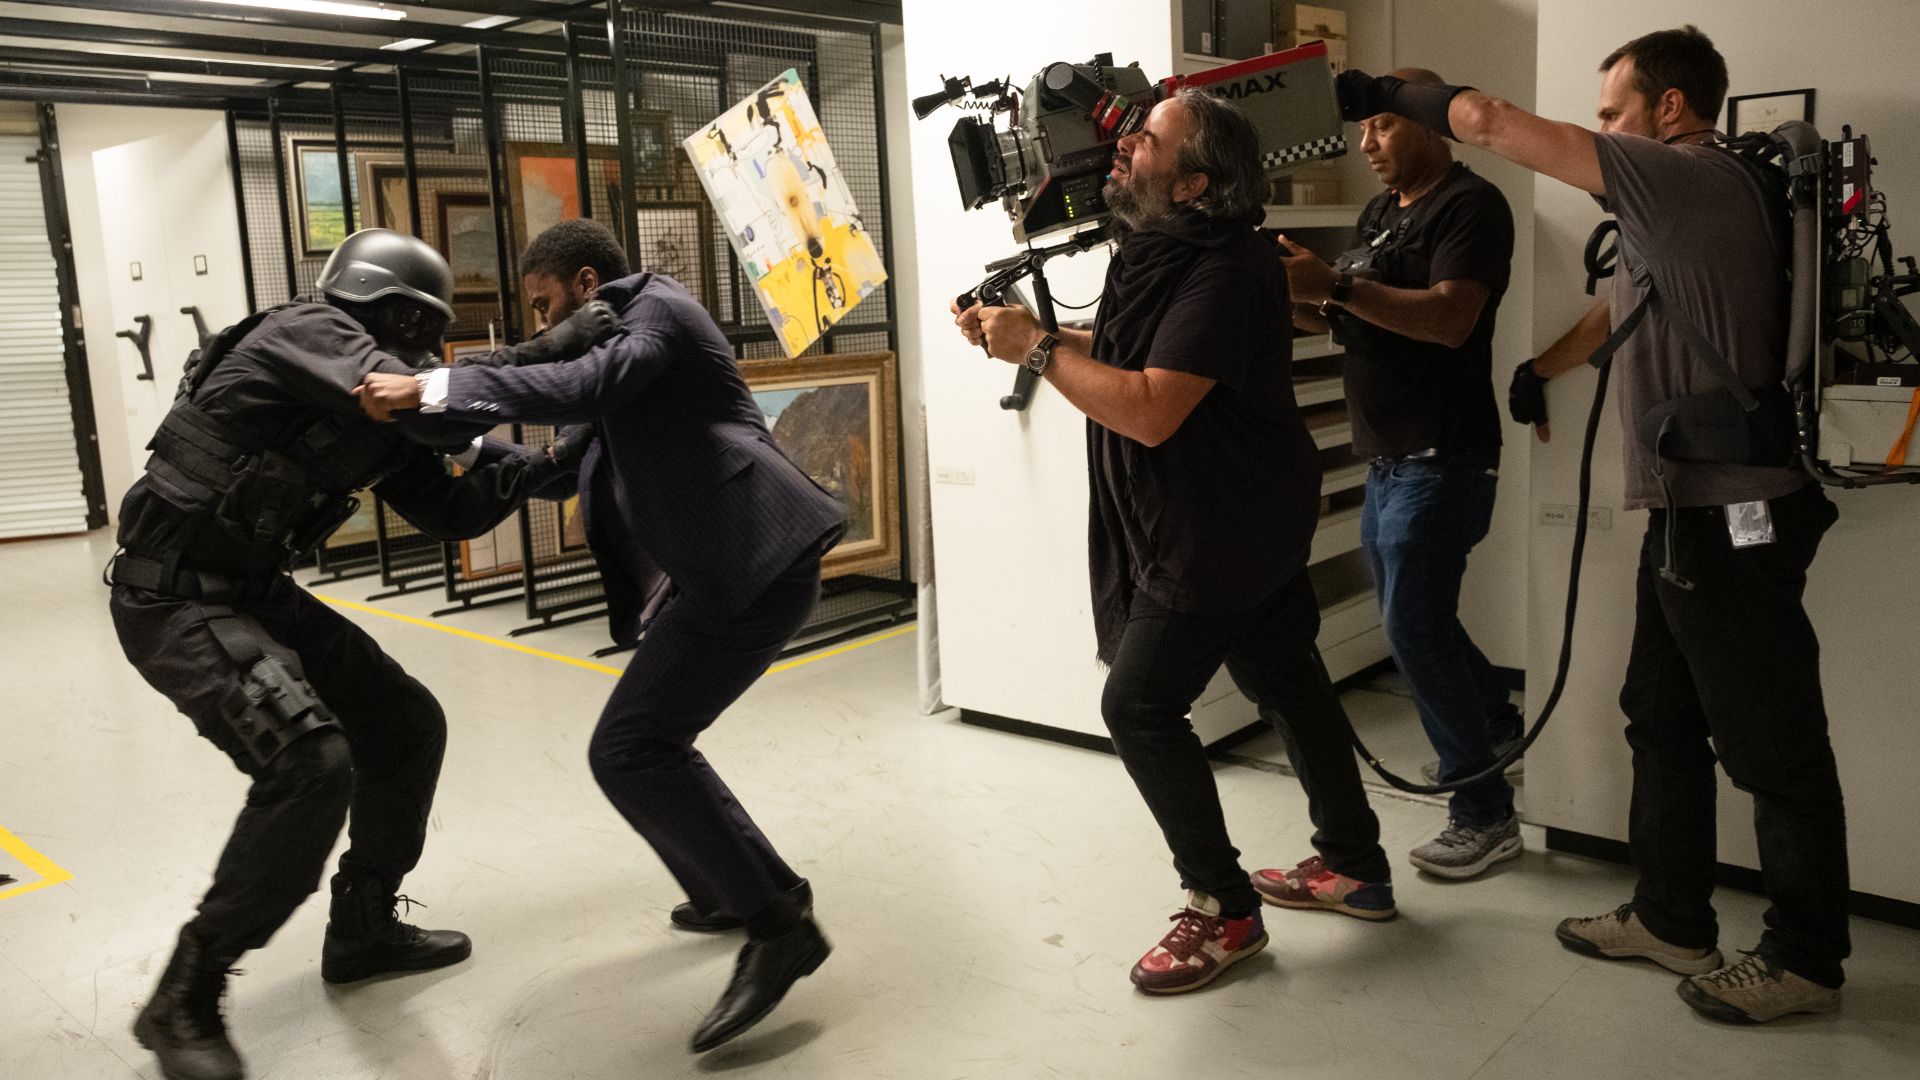
The Bond filmmakers went one step further, making No Time to Die the franchise’s first instalment to utilise IMAX 65mm (reportedly for action sequences only). In this respect they follow in the footsteps of film’s most passionate advocate, Christopher Nolan, who mixed 35mm and IMAX for The Dark Knight, The Dark Knight Rises and Interstellar.
“I think IMAX is the best film format that was ever invented,” said the celebrated director in a DGA interview. “It’s the gold standard and what any other technology has to match up to, but none have, in my opinion.” For his most recent films, Dunkirk and Tenet, Nolan eschewed 35mm altogether, mixing IMAX with standard 65mm.
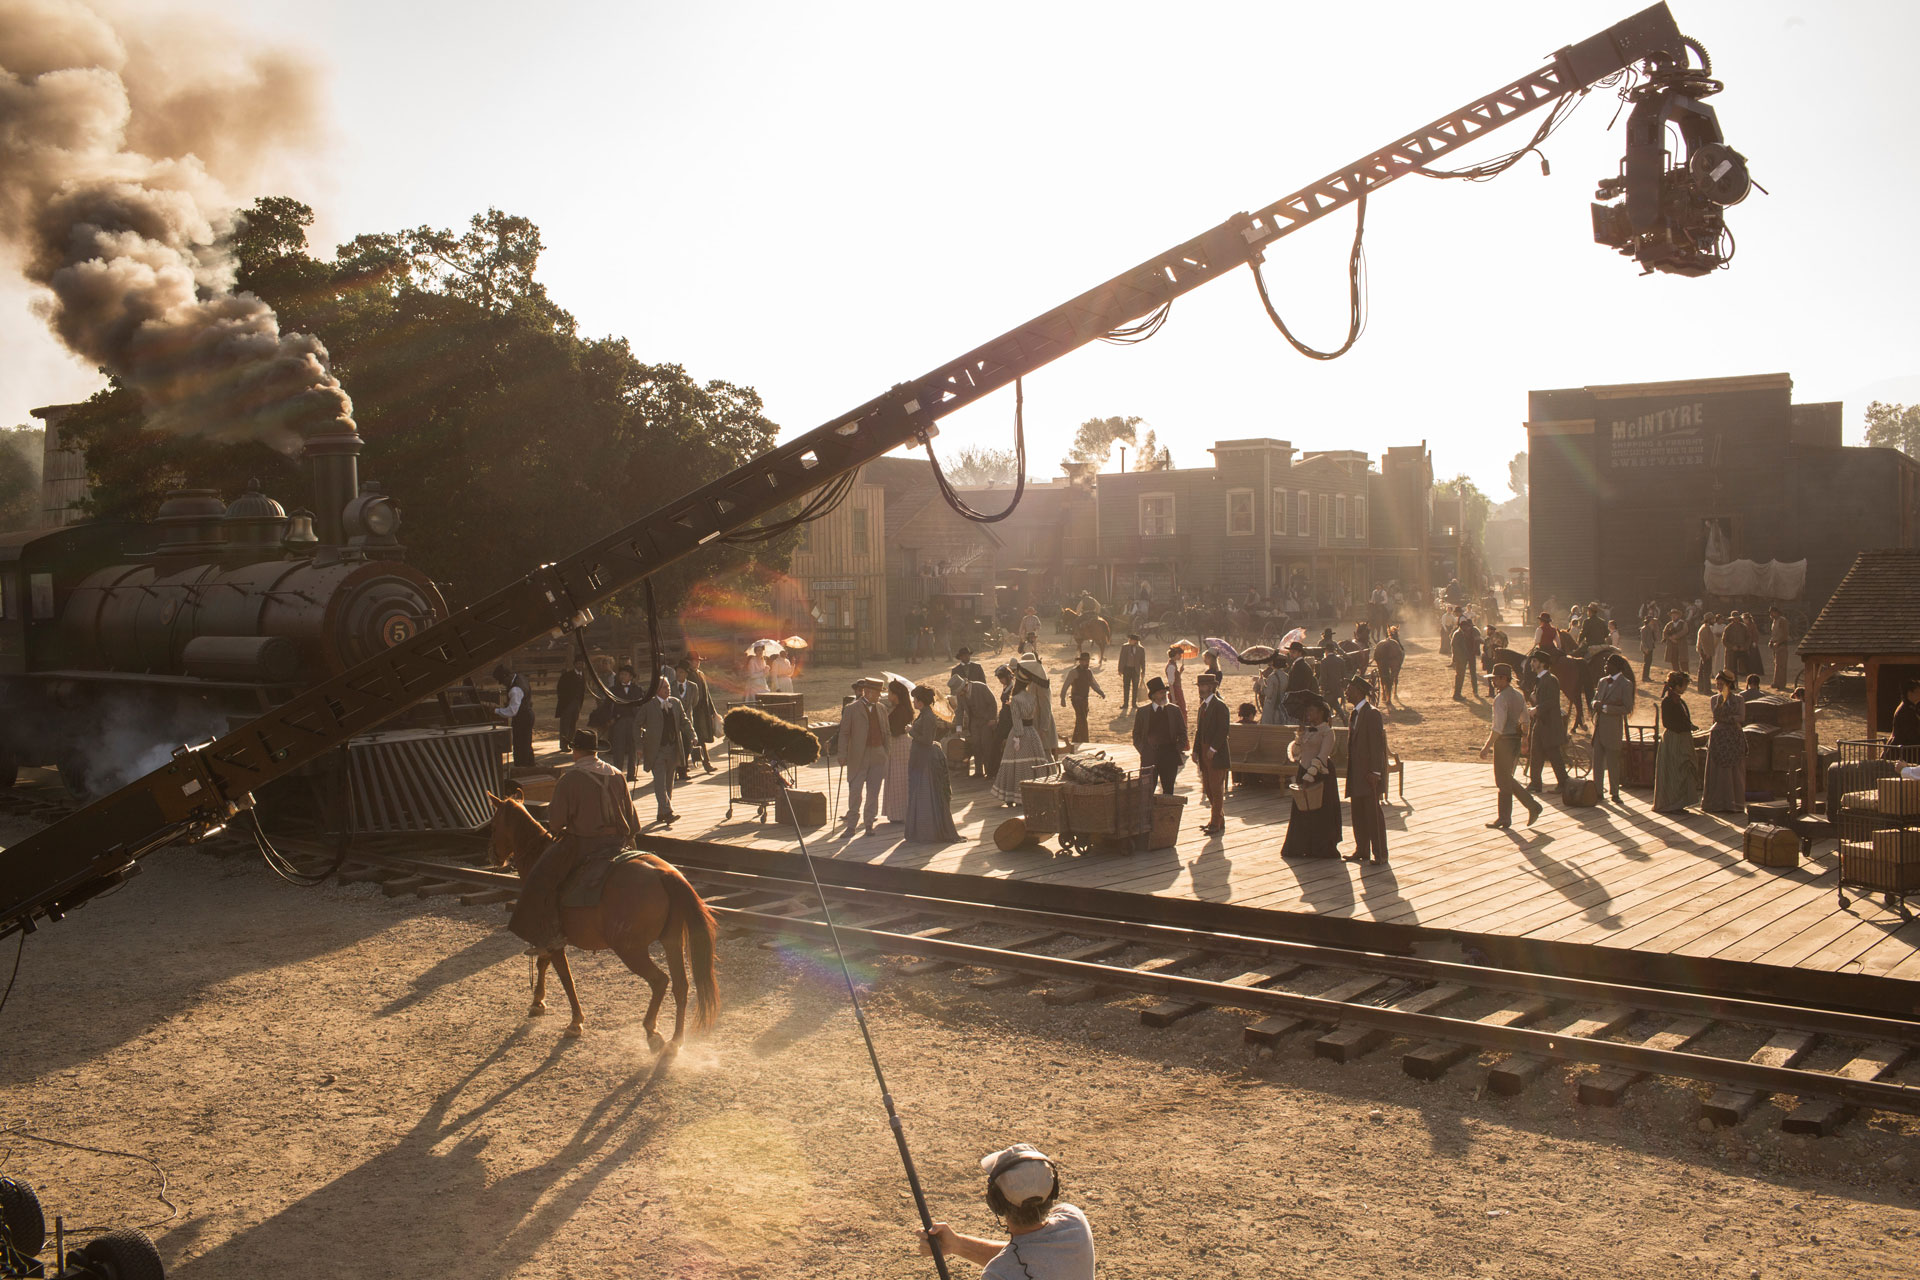
Nolan’s brother Jonathan brought the same passion for celluloid to his TV series Westworld. “Jonathan told me that he had already made up his mind about film,” said pilot DP Paul Cameron in an Indiewire interview. “We wanted the western town to feel classy and elegant… There’s something tactile and formidable [about film] that’s very real.”
Cameron and another of the show’s DPs, John Grillo, both felt that film worked perfectly for the timeless, minimalist look of the desert, but when the story moved to a futuristic city for its third season Grillo expected a corresponding switch in formats. “I thought we might go digital, shooting in 4K or 6K. But it never got past my own head. Jonathan would never go for it. So we stuck with film. We’re still telling the same story, we’re just in a different place.”
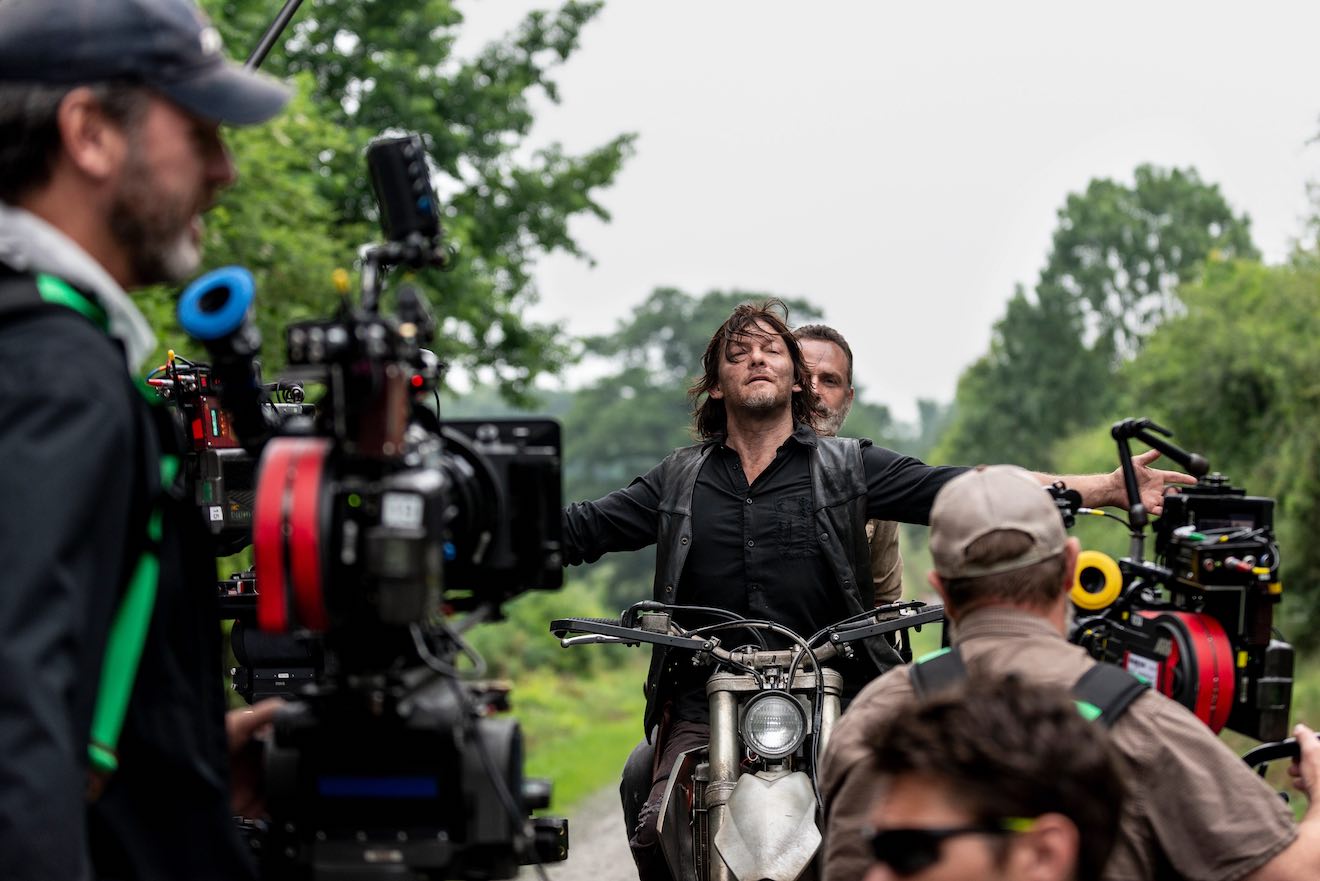
One series that did recently transition from film to digital is The Walking Dead. For nine and a half seasons the zombie thriller was shot on Super 16, a decision first made for the 2010 pilot after also testing a Red, a Panavision Genesis and 35mm. “When the images came back, everyone realised that Super 16 was the format that made everything look right,” reported DP David Boyd. “With the smaller gauge and the grain, suddenly the images seemed to derive from the graphic novel itself. Every image is a step removed from reality and a step deeper into cinema.”
“You really are in there with the characters,” added producer Gale Anne Hurd during a Producers Guild of America panel. “The grain itself, it somehow makes it feel much more personal.” Creator Frank Darabont also noted that the lightweight cameras can be squeezed guerilla-style into small spaces for a more intimate feel.
The team were forced to switch to digital capture during season ten when the COVID-19 pandemic struck. “The decision came about because there are fewer ‘touch points’ with digital than 16mm,” showrunner Angela Kang explained to the press. “We don’t have to swap out film every few minutes, for example.”
The pandemic also hit No Time to Die, pushing its release date back by 18 months and triggering the closure of the Cineworld chain, putting 45,000 jobs in jeopardy. But its reception so far has proved that there’s life yet in both celluloid capture and cinema as a whole.
I know that as a professional director of photography I should want cinemas to recover and flourish. After all, even if many of the productions I work on don’t get a theatrical release, my livelihood must still be in some indirect way tied to the methods of exhibition, of which cinema is a foundational pillar. But I think we’ve reached the point where the film industry could survive the death of fleapits, and I’m starting to think that wouldn’t be such a bad thing.
Disclaimer: I’m writing this from a place of anger. Last Friday, the day that the cinemas of Cambridge reopened, I went along to the Light for a screening of Jurassic Park. The experience – which I shall detail fully in a future post – reminded me why going to the cinema can often be frustrating or disappointing. Since lockdown we’ve added the risk of deadly infection to the downsides, and before long we’ll have to add huge price hikes, the inevitable consequence of all those empty seats between households. (Controversially, I think that current ticket prices are reasonable.)
Setting Covid-19 to one side for the moment, here are ten long-standing reasons why cinemas deserve to be put out of their misery.
1. No real film any more
My faith in cinema was seriously shaken in the early 2010s when 35mm projection was binned in favour of digital. Some may prefer the crisp quality of electronic images, but for me the magic was in the weave, the dirt, the cigarette burns. The more like real life it looks, the less appeal it holds.
2. Adverts
I’m not sure what’s worse, the adverts themselves, or the people who aim to arrive after the adverts and overshoot, spoiling the first few minutes of the movie by walking in front of the screen as they come in late.
3. No ushers
Yes, I’m old enough to remember ushers in cinemas, just as I’m old enough to remember when supermarket shelf-stackers waited until the shop was closed before infesting the aisles. (Perhaps the unwanted stackers could be seconded to the needy cinema auditoria?) It’s not that I need a waistcoated teenager with a torch to show me to my seat, but I do need them there to discourage the range of antisocial behaviours in the next three points.
4. People eating noisily
I understand that the economics make it unavoidable for cinemas to supplement their income by selling overpriced snacks. But do they have to sell such noisy ones? Is it beyond the wit of humanity to develop quieter packaging? Or for the gluttons to chomp and rustle a little less energetically, especially during the softer scenes?
5. People chatting
One of the Harry Potter films was ruined by a child behind me constantly asking his mum what was happening… and his mum answering in great detail every time. Serves me right for going to a kids’ film, perhaps, but you never know what kind of movie might be spoiled by unwanted additional dialogue. I recall a very unpopular individual who answered his phone during The Last Jedi. And I’m sure we’ve all experienced that most maddening of all cinema phenomena: the people who inexplicably attend purely to hold conversations with each other, often conversations that aren’t even related to the film.
(5a. People snoring – a signficant drawback of Vue’s recliner seats.)
6. People looking at their phones
“The light from your phone can be distracting too,” say the announcements, and they’re not wrong. Basically, the biggest problem with cinemas is people.
7. Arctic air conditioning
Why is cinema air con always turned up so high? No matter how hot it is outside, you always have to take a jacket to keep off the artifical chill in the auditorium.
8. Small screens
Home TV screens have been getting bigger for years, so why are cinema screens going the opposite way? Shouldn’t cinemas be trying to give their customers something they can’t experience at home? There’s nothing more disappointing than shelling out for a ticket and walking into the auditorium to see a screen the size of a postage stamp.
9. Bad projection
The purpose of going to the cinema is to see a movie projected at the highest possible technical quality by competent professionals, but the reality is often far from that. Stretched, cropped, faint or blurry images – I’ve witnessed the whole gamut of crimes against cinematography. The projectionists seem poorly trained, unfairly lumbered with multiple screens, and locked out of making crucial adjustments to the sound and picture. And because there are no ushers, it’s up to you to miss a couple of minutes of the movie by stepping outside to find someone to complain to.
10. Netflix is better
This is the killer. This is what will ultimately bring cinemas down. TV used to be film’s poorer cousin, but these days long-form streaming shows are better written, better photographed and infinitely more engaging than most of what traditional filmmakers seem able to create. Maybe it’s just that I’m middle-aged now, and movies are still being made exclusively for 16-25-year-olds, but it’s rare for a film to excite me the way a series can.
Having said all of that, Christopher Nolan’s Tenet is out on Wednesday. Now that’s something I am looking forward to, if I can just find somewhere showing it on 70mm….
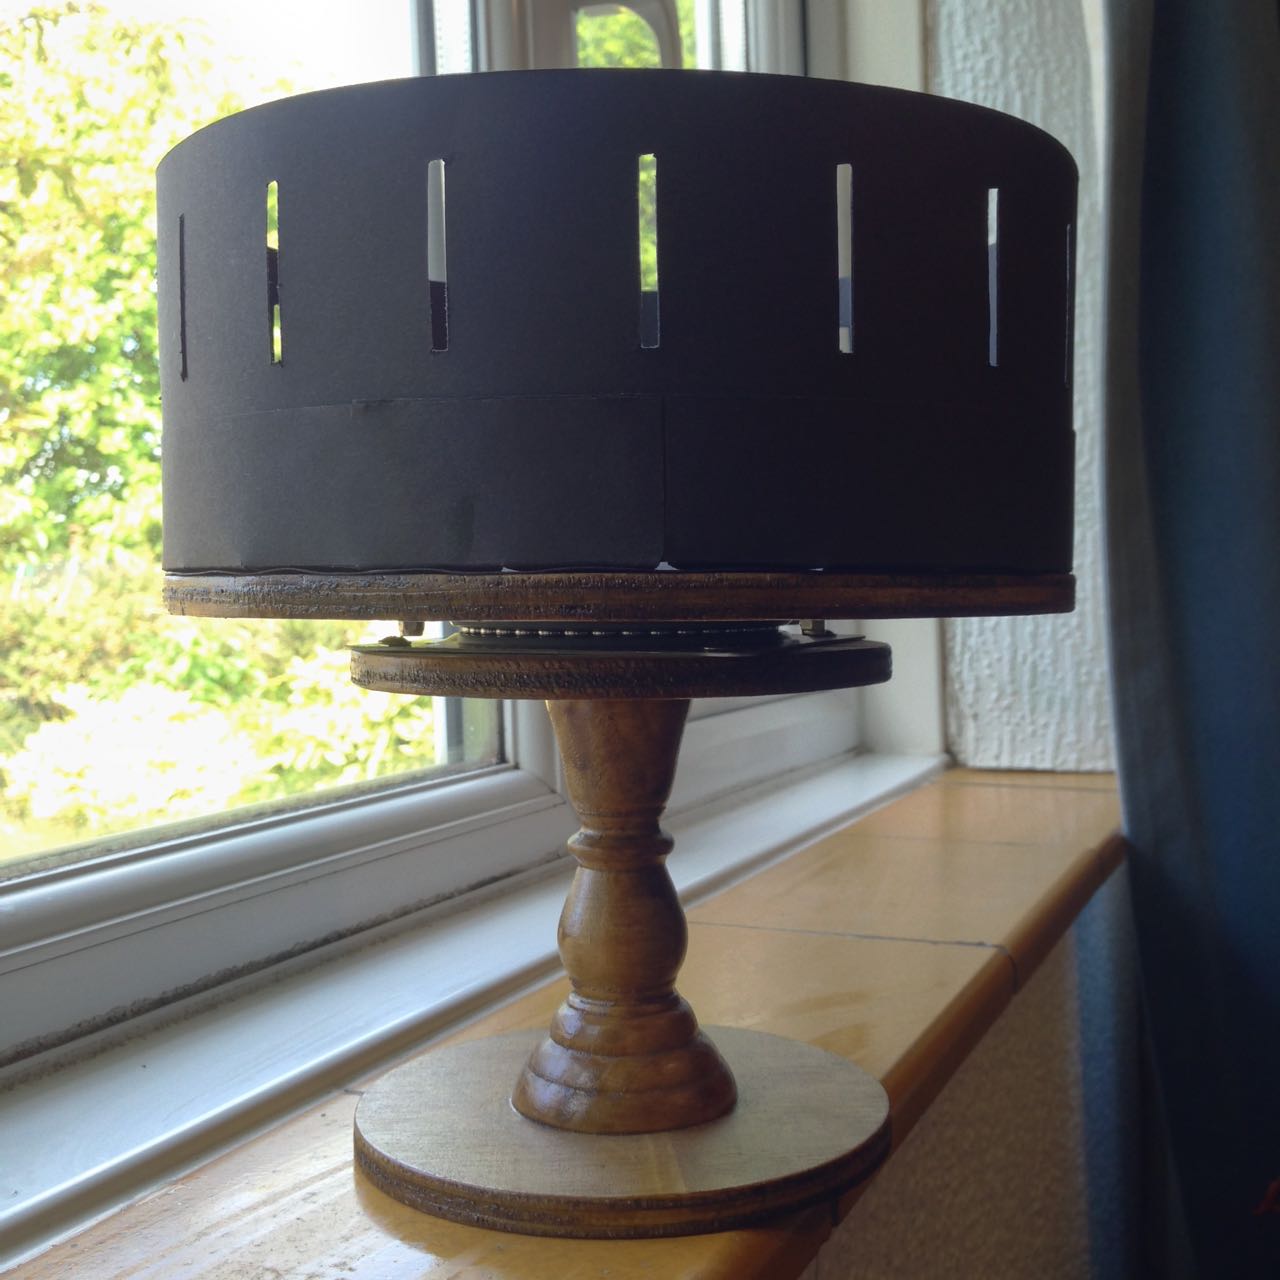
In the early days of lockdown, I blogged about my intentions to build a zoetrope, a Victorian optical device that creates the illusion of a moving image inside a spinning drum. I even provided instructions for building your own, sized like mine to accommodate 18 looping frames of contact-printed 35mm photographs. Well, last week I was finally able to hire my usual darkoom, develop and print the image sequences I had shot over the last five months, and see whether my low-tech motion picture system worked.
Making Mini Movies
Shooting “Sundial”
Before I get to the results, let me say a little about the image sequences themselves and how they were created. Because I was shooting on an SLR, the fastest frame rate I could ever hope to record at was about 1fps, so I was limited to time-lapses or stop motion animation.
Regular readers may recall that the very first sequence I captured was a time-lapse of the cherry tree in my front garden blossoming. I went on to shoot two more time-lapses, shorter-term ones showing sunlight moving across objects during a single day: a circle of rotting apples in a birdbath (which I call Sundial), and a collection of props from my flatmate’s fantasy films (which I call Barrels). I recorded all the time-lapses with the pinhole I made in 2018.
Filming “Social Distance”
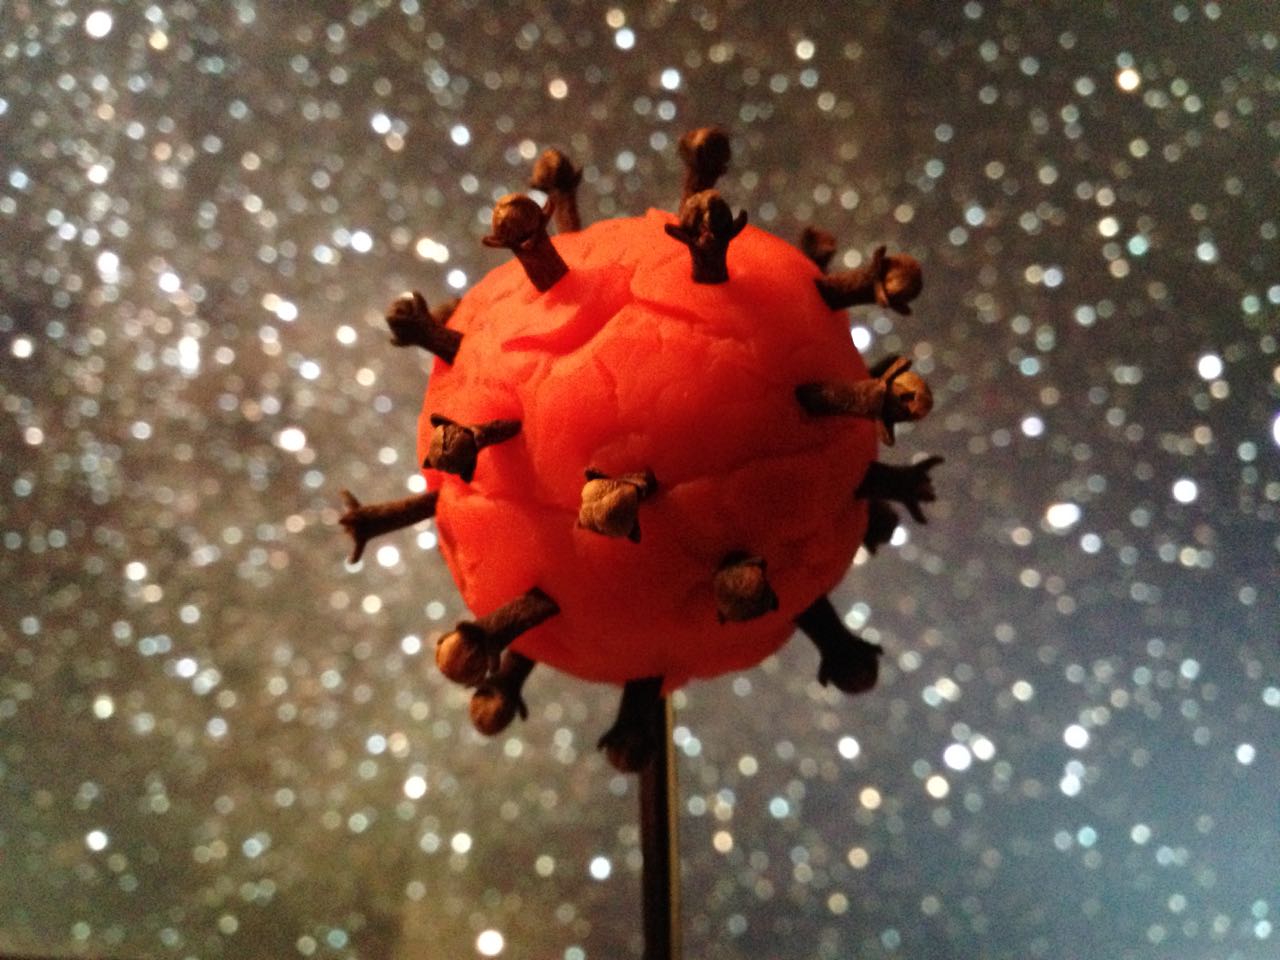
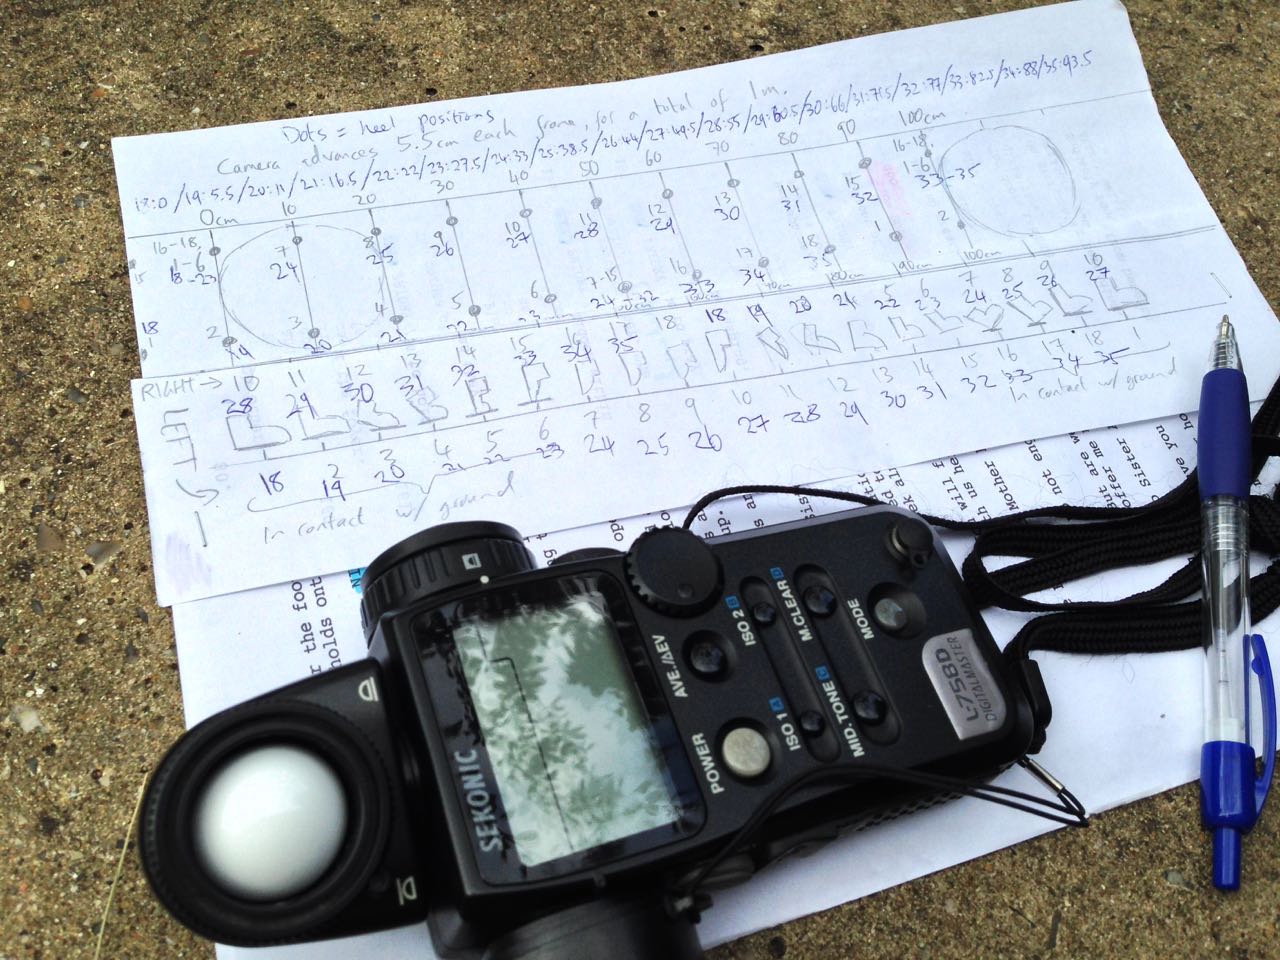
The remaining six sequences were all animations, lensed on 28mm, 50mm or 135mm SMC Pentax-Asahi glass. I had no signficant prior experience of this artform, but I certainly had great fun creating some animated responses to the Covid-19 pandemic. My childish raw materials ranged from Blue Peter-esque toilet roll tubes, through Play-Doh to Lego. Orbit features the earth circling a giant Covid-19, and The Sneeze sees a toilet roll person sternutating into their elbow. Happy Birthday shows a pair of rubber glove hands washing themselves, while Avoidance depicts two Lego pedestrians keeping their distance. 360° is a pan of a room in which I am variously sitting, standing and lying as I contemplate lockdown, and finally Social Distance tracks along with a pair of shoes as they walk past coronavirus signage.
The replacement faces for the toilet paper star of “The Sneeze”
By the time I finished shooting all these, I had already learnt a few things about viewing sequences in a zoetrope, by drawing a simple animation of a man walking. Firstly I discovered that the slots in my device – initially 3mm in width – were too large. I therefore retrofitted the drum with 1mm slots, resulting in reduced motion blur but a darker image, much like reducing the shutter angle on a movie camera. I initially made the mistake of putting my eye right up to the drum when viewing the animation, but this destroys the shuttering effect of the slots. Instead the best results seem to be obtained with a viewing distance of about 30cm (1ft).
I could already see where I might have made mistakes with my photographed sequences. The hand-drawn man was bold and simple; it looked best in good light, by a window or outdoors, but it was clear enough to be made out even if the light was a bit poor and there was too much motion blur. Would the same be said of my 35mm sequences?
Postproduction
I contact-printed the nine photographic sequences in the usual way, each one producing three rows of six frames on a single sheet of 8×10″ Ilford MG RC paper. In theory, all that was left was to cut out these rows and glue them together.
In practice, I had managed to screw up a few of the sequences by fogging the start of the film, shooting a frame with bad exposure, or some other act of shameful incompetence. In such cases I had to edit much like filmmakers did before the invention of digital NLEs – by cutting the strips of images, excising the rotten frames and taping them back together. I even printed some of the sequences twice so that I could splice in duplicate frames, where my errors had left a sequence lacking the full 18 images. (This was effectively step-printing, the obsolete optical process by which a shot captured at 24fps could be converted to slow motion by printing each frame twice.)
"Blossom"
Once the sequences were edited, I glued them into loops and could at last view them in the zoetrope. The results were mixed.
Barrels fails because the moving sunlight is too subtle to be discerned through the spinning slots. The same is partly true of Sundial, but the transient glare caused by the sun reflecting off the water at its zenith gives a better sense of motion. Blossom shows movement but I don’t think an uninitiated viewer would know what they were looking at, so small and detailed is the image. Orbit suffers from smallness too, with the earth and Covid-19 unrecognisable. (These last two sequences would have benefitted from colour, undoubtedly.)
The planet Covid-19 (as seen by my phone camera) made from Play-Doh and cloves
I’m very pleased with the animation of Social Distance, though I need to reprint it brighter for it to be truly effective. You can just about make out that there are two people passing each other in Avoidance, but I don’t think it’s at all clear that one is stepping into the road to maintain a safe distance from the other. Happy Birthday is a bit hard to make out too. Similarly, you can tell that 360° is a pan of a room, but that’s about it.
Perhaps the most successful sequence is The Sneeze, with its bold, white toilet roll man against a plain black background.
"Happy Birthday"
Conclusions
Any future zoetrope movies need to be bold, high in contrast and low in detail. I need to take more care to choose colours that read as very different tones when captured in black and white.
Despite the underwhelming results, I had a great time doing this project. It was nice to be doing something hands-on that didn’t involve sitting at a screen, and it’s always good to get more practice at exposing film correctly. I don’t think I’ll ever make an animator though – 18 frames is about the limit of my patience.
My light meter lies beside my animation chart for the walking feet in “Social Distance”.
This is the latest in my series about analogue photography. Previously, I’ve covered the science behind film capture, and how to develop your own black-and-white film. Now we’ll proceed to the next step: taking your negative and producing a print from it. Along the way we’ll discover the analogue origins of Photoshop’s dodge and burn tools.
Contact printing
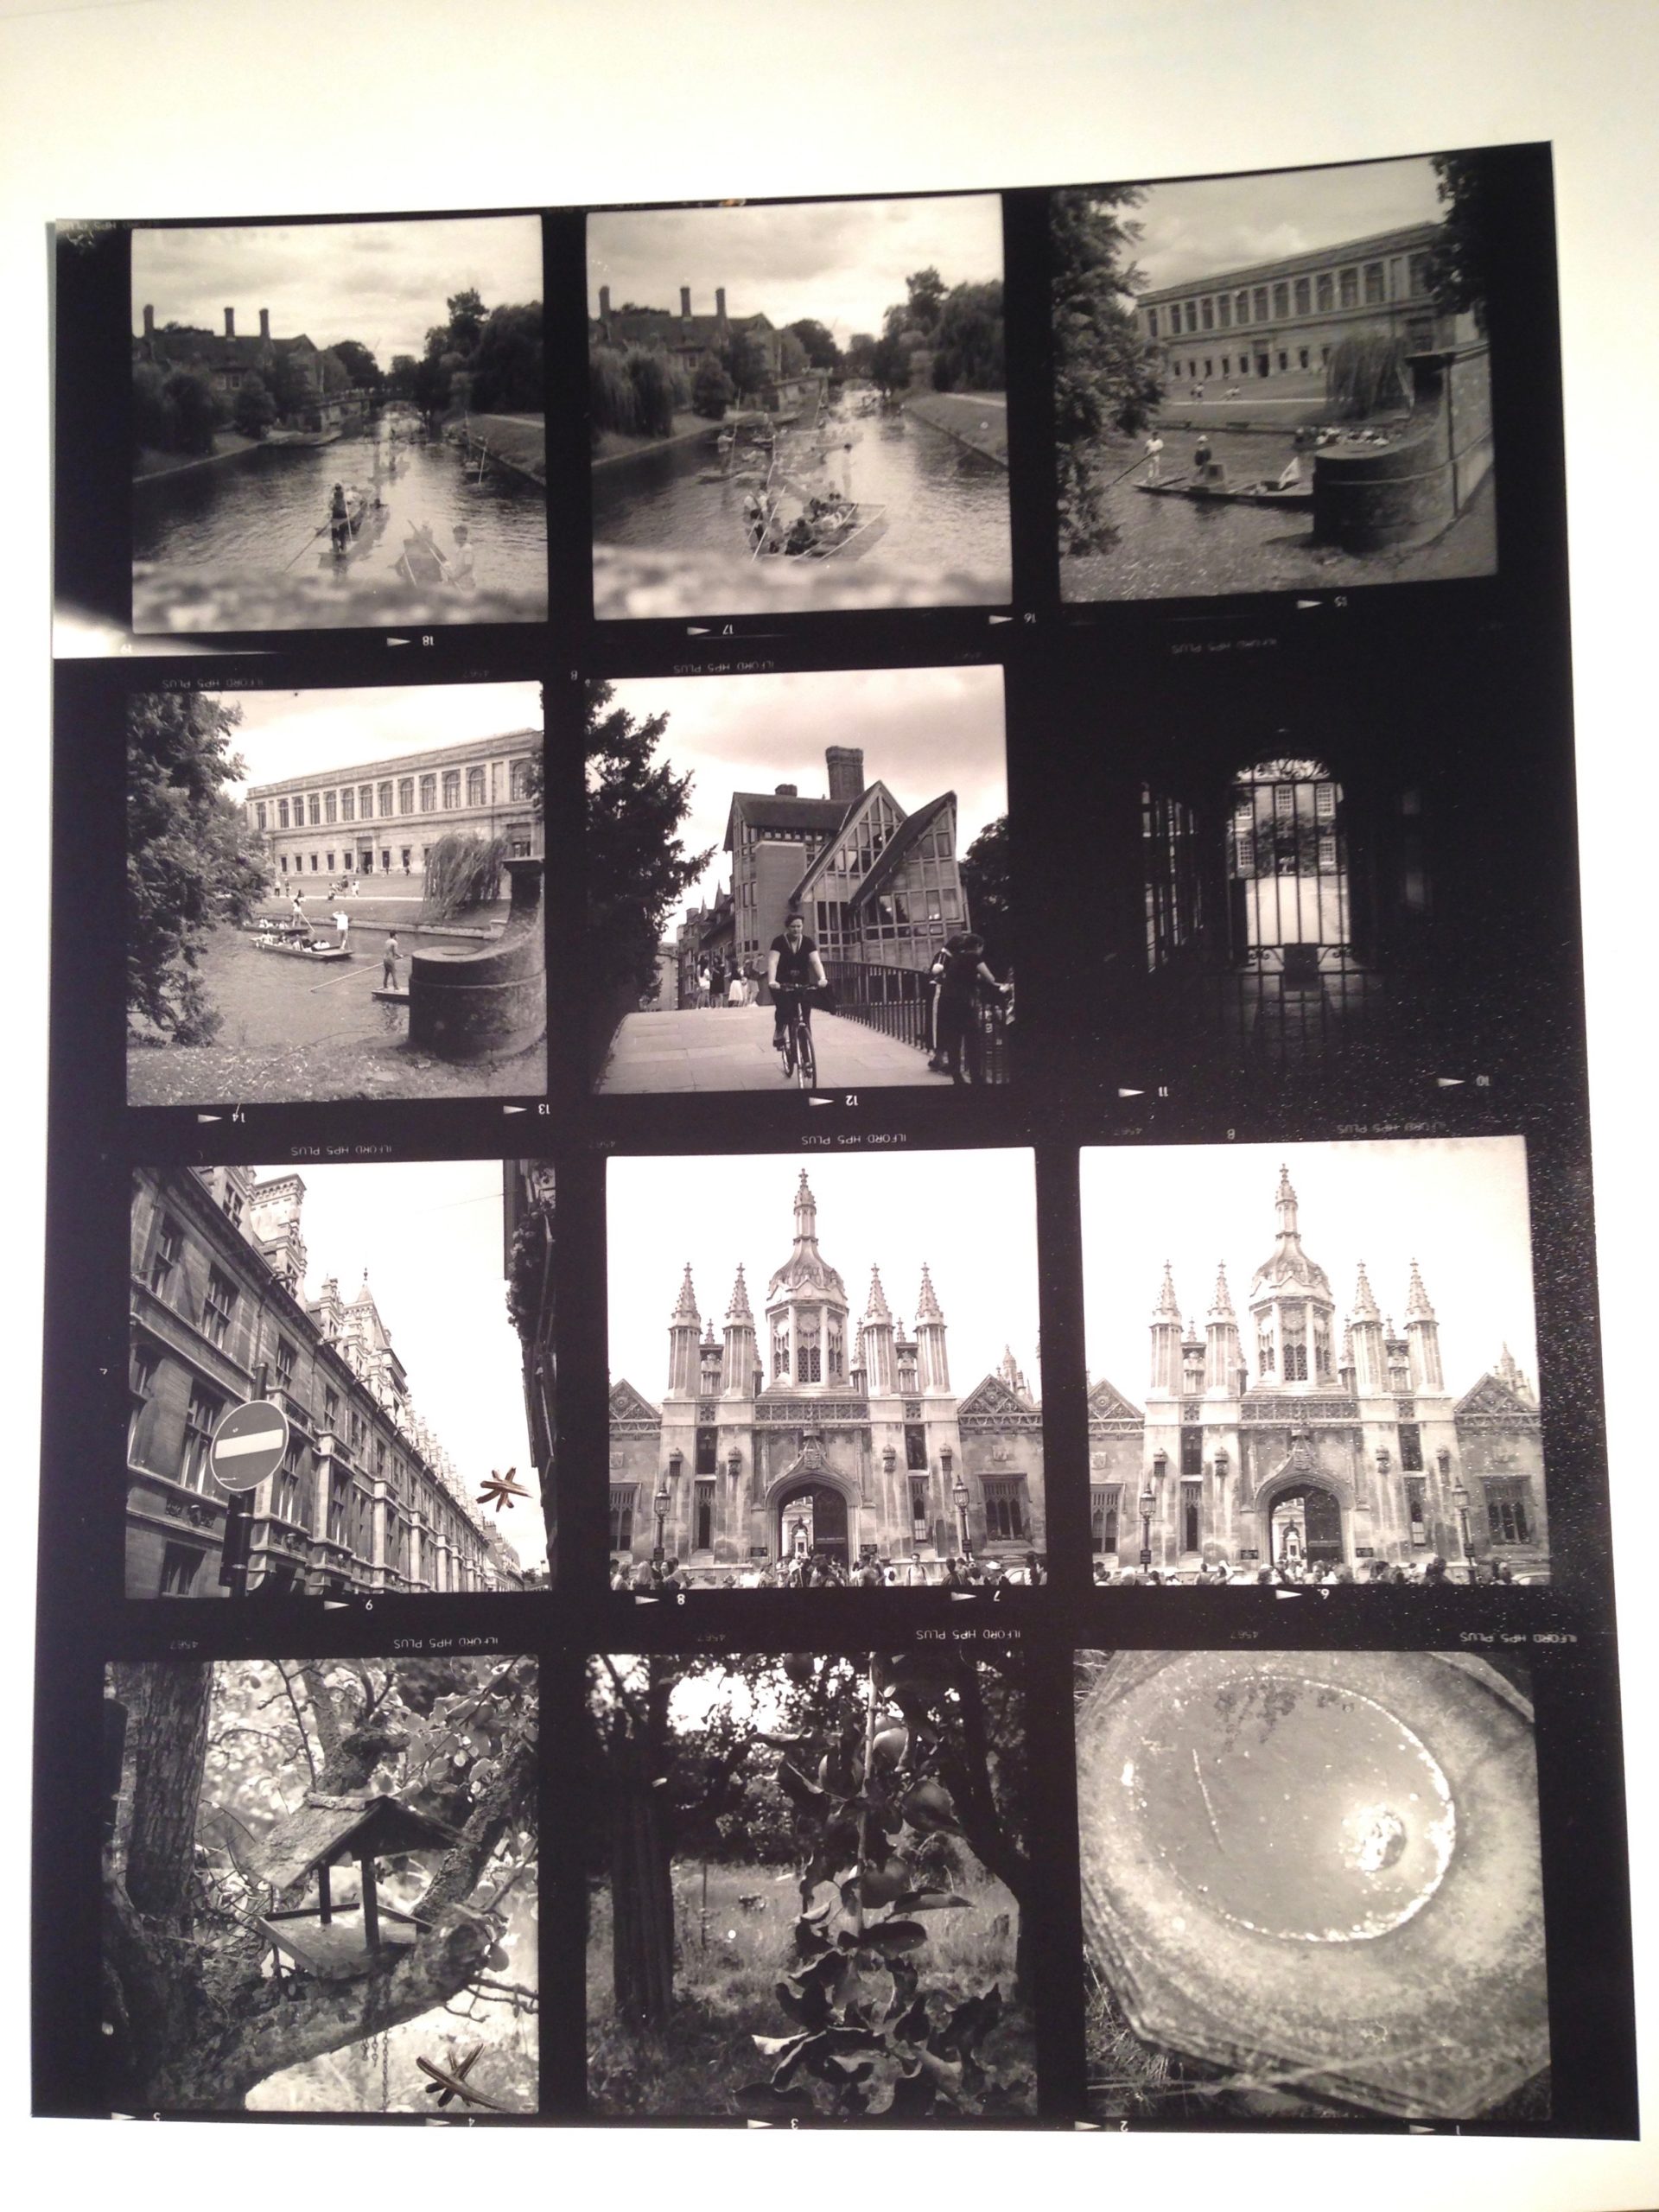
35mm contact sheet
To briefly summarise my earlier posts, we’ve seen that photographic emulsion – with the exception of colour slide film – turns black when exposed to light, and remains transparent when not. This is how we end up with a negative, in which dark areas correspond to the highlights in the scene, and light areas correspond with the shadows.
The simplest way to make a positive print from a negative is contact-printing, so called because the negative is placed in direct contact with the photographic printing paper. This is typically done in a spring-loaded contact printing frame, the top of which is made of glass. You shine light through the glass, usually from an enlarger – see below – for a measured period of time, determined by trial and error. Where the negative is dark (highlights) the light can’t get through, and the photographic emulsion on the paper remains transparent, allowing the white paper base to show through. Where the negative is transparent (shadows) the light passes through, and the emulsion – once developed and fixed in the same way as the original film – turns black. Thus a positive image is produced.
Normally you would contact-print multiple strips of negative at the same time, perhaps an entire roll of film’s worth, if your paper is large enough to fit them all. Then you can examine them through a loupe to decide which ones are worth enlarging. You have probably seen contact sheets, complete with circled images, stars and arrows indicating which frames the photographer or picture editor likes, where they might crop it, and which areas need doctoring. In fact, contact sheets are so aesthetically pleasing that it’s not uncommon these days for graphic designers to create fake digital ones.
The correct exposure time for a contact print can be found by exposing the whole sheet for, say, ten seconds, then covering a third of it with a piece of card, exposing it for another ten seconds, then covering that same third plus another third and exposing it for ten seconds more. Once developed, you can decide which exposure you like best, or try another set of timings.
120 contact sheet
Making an enlargement
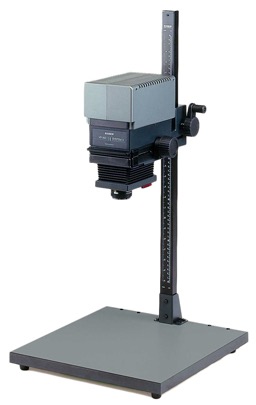
Contact prints are all well and good, but they’re always the same size as the camera negative, which usually isn’t big enough for a finished product, especially with 35mm. This is where an enlarger comes in.
An enlarger is essentially a projector mounted on a stand. You place the negative of your chosen image into a drawer called the negative carrier. Above this is a bulb, and below it is a lens. When the bulb is turned on, light shines through the negative, and the lens focuses the image (upside-down of course) onto the paper below. By adjusting the height of the enlarger’s stand, you can alter the size of the projected image.
Just like a camera lens, an enlarger’s lens has adjustable focus and aperture. You can scrutinise the projected image using a loupe; if you can see the grain of the film, you know that the image is sharply focused.
The aperture is marked in f-stops as you would expect, and just like when shooting, you can trade off the iris size against the exposure time. For example, a print exposed for 30 seconds at f/8 will have the same brightness as one exposed for 15 seconds at f/5.6. (Opening from f/8 to f/5.6 doubles the light, or increases exposure by one stop, while halving the time cuts the light back to its original value.)
Dodging and burning
As with contact-printing, the optimum exposure for an enlargement can be found by test-printing strips for different lengths of time. This brings us to dodging and burning, which are respectively methods of decreasing or increasing the exposure time of specific parts of the image.
Remember that the printing paper starts off bright white, and turns black with exposure, so to brighten part of the image you need to reduce its exposure. This can be achieved by placing anything opaque between the projector lens and the paper for part of the exposure time. Typically a circle of cardboard on a piece of wire is used; this is known as a dodger. That’s the “lollipop” you see in the Photoshop icon. It’s important to keep the dodger moving during the exposure, otherwise you’ll end up with a sharply-defined bright area (not to mention a visible line where the wire handle was) rather than something subtle.
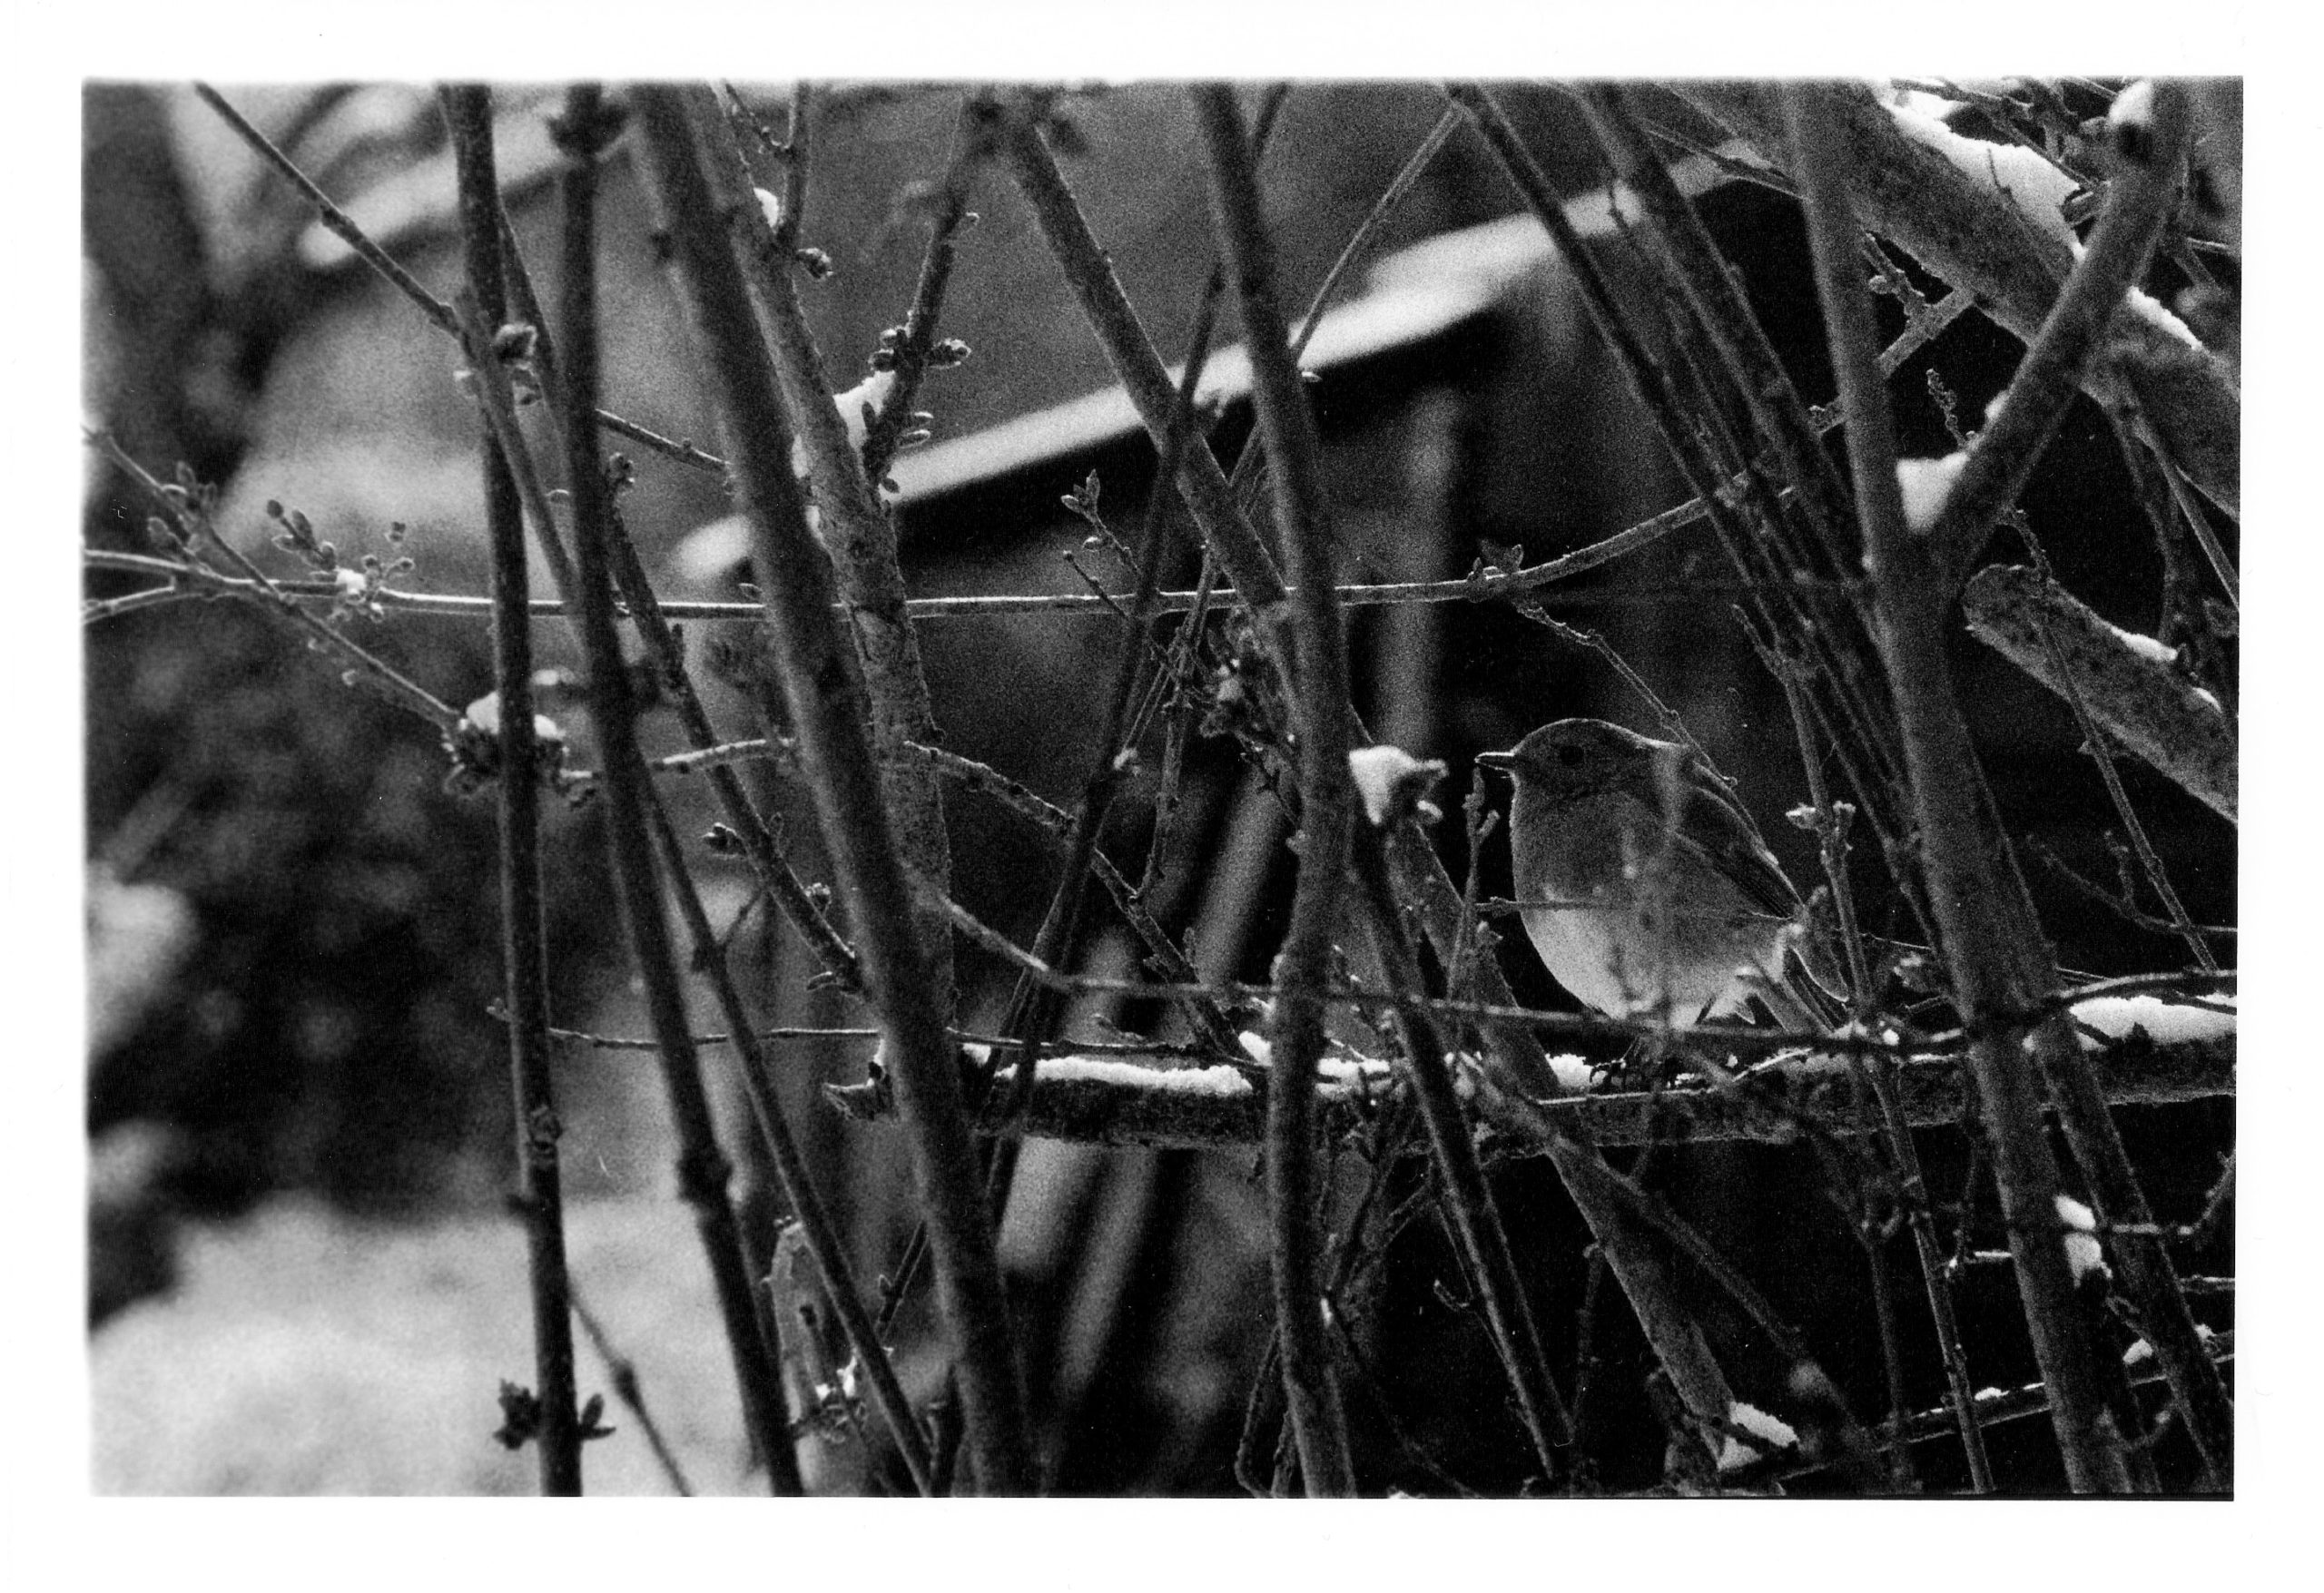
I dodged the robin in this image, to help him stand out.
Let me just say that dodging is a joyful thing to do. It’s such a primitive-looking tool, but you feel like a child with a magic wand when you’re using it, and it can improve an image no end. It’s common practice today for digital colourists to power-window a face and increase its luminance to draw the eye to it; photographers have been doing this for decades and decades.
Burning is of couse the opposite of dodging, i.e. increasing the exposure time of part of the picture to make it darker. One common application is to bring back detail in a bright sky. To do this you would first of all expose the entire image in such a way that the land will look good. Then, before developing, you would use a piece of card to cover the land, and expose the sky for maybe five or ten seconds more. Again, you would keep the card in constant motion to blend the edges of the effect.
To burn a smaller area, you would cut a hole in a piece of card, or simply form your hands into a rough hole, as depicted in the Photoshop icon.
Requirements of a darkroom
The crucial thing which I haven’t yet mentioned is that all of the above needs to take place in near-darkness. Black-and-white photographic paper is less sensitive to the red end of the spectrum, so a dim red lamp known as a safe-light can be used to see what you’re doing. Anything brighter – even your phone’s screen – will fog your photographic paper as soon as you take it out of its lightproof box.
Once your print is exposed, you need to agitate it in a tray of diluted developer for a couple of minutes, then dip it in a tray of water, then place it in a tray of diluted fixer. Only then can you turn on the main lights, but you must still fix the image for five minutes, then leave it in running water for ten minutes before drying it. (This all assumes you’re using resin-coated paper.)
Because you need an enlarger, which is fairly bulky, and space for the trays of chemicals, and running water, all in a room that is one hundred per cent lightproof, printing is a difficult thing to do at home. Fortunately there are a number of darkrooms available for hire around the country, so why not search for a local one and give analogue printing a go?
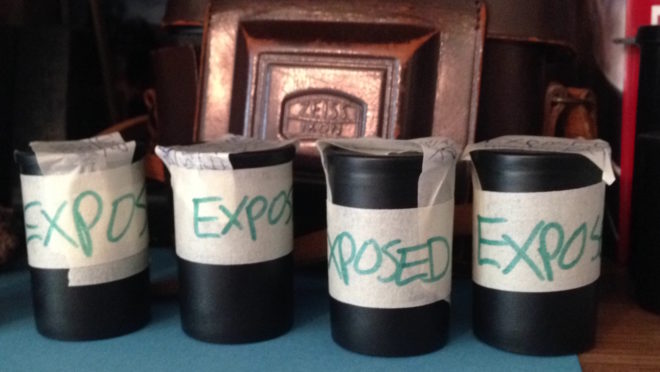
A few weeks ago, I came very close to investing in an Ilford/Paterson Starter Kit so that I could process film at home. I have four exposed rolls of 35mm HP5+ sitting on my shelf, and I thought that developing them at home might be a nice way to kill a bit of lockdown time. However, I still wouldn’t be able to print them, due to the difficulties of creating a darkroom in my flat. And with lockdown now easing, it probably won’t be long until I can get to Holborn Studios and hire their darkroom as usual.
So in this article I’ll talk through the process of developing a roll of black-and-white 35mm, as I would do it in the Holborn darkoom. If you haven’t already, you might want to read my post about how film works first.
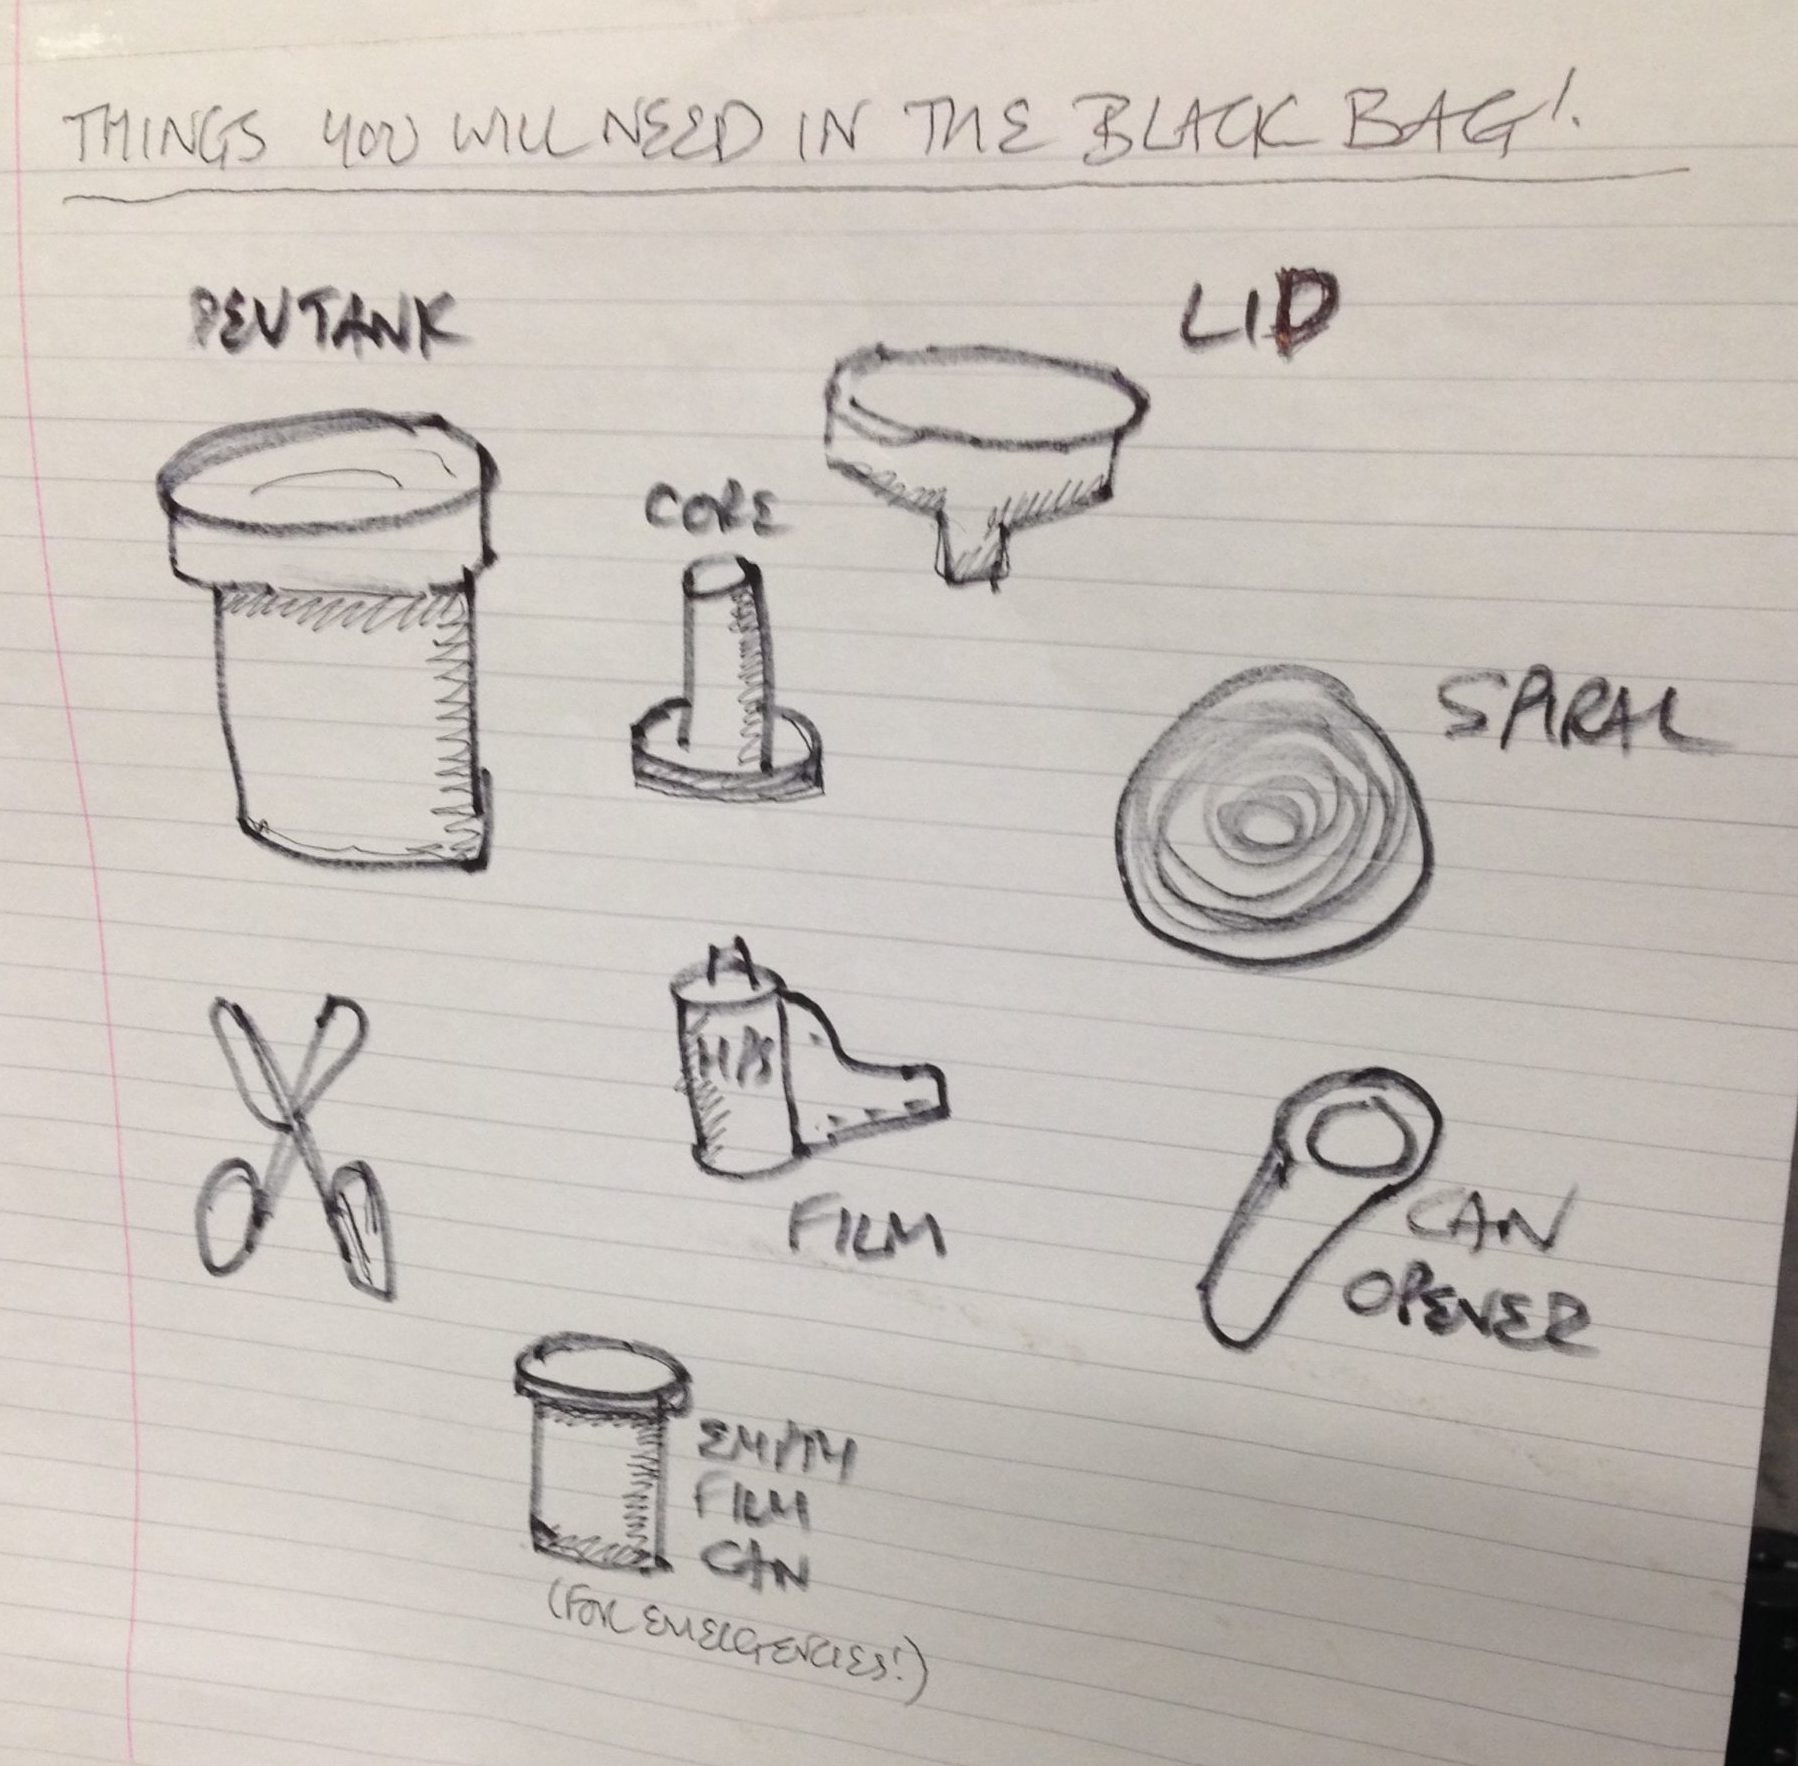
You will need
Exposed roll of 35mm, with the tail of the film still sticking out of the cassette
Changing bag, or a room that you can completely eliminate ALL light from
Holborn Studios’ darkroom, run by Bill Ling, displays this handy reminder.
The first step is to transfer the exposed film from its cassette – which is of course light-proof – into the Paterson tank, which is designed to admit the developing chemicals but not light. This transfer must take place in complete darkness, to avoid fogging the film. I’ve always done this using a changing bag, which is a black bag with a double seal and elasticated arm-holes.
Start by putting the following items into the bag: the film cassette, scissors and the various components of the Paterson tank, including the spiral. It’s wise to put in an empty film canister too, in case something goes wrong, and if the tail of your film isn’t sticking out of the cassette then you’ll need a can opener as well.
Seal the bag, put your arms in, and pull all the film out of the cassette. It’s important NOT to remove your arms from the bag now, until the film is safely inside the closed tank, otherwise light can get in through the arm-holes and fog the film.
Use the scissors to cut the end of the film from the cassette, and to trim the tongue (narrower part) off the head of the film.
Paterson Universal Developing Tank components, clockwise from the white items: developing reels or spirals, tank, light-proof lid, waterproof cap, and agitator – which I never use. In the centre is the core.
Now we come to the most difficult part, the part which always has me sweating and swearing and regretting all my life choices: loading the film onto the spiral. I have practised this with dead film many times, but when I’m fumbling around in the dark of the changing bag it’s a hundred times harder.
It’s hard to describe loading the spiral verbally, but this blog post by Chris Waller is very clear and even includes pictures. (Chris recommends cutting a slight chamfer onto the leading corners of the film, which I shall certainly try next time, as well as using your thumbs to keep the film flat on its approach to the reel.)
If you’re working with 120 film, the loading process is very slightly different, and this video describes it well.
Once the spiral is loaded, you can thread it onto the core, place the core inside the tank, and then put the lid on. It is now safe to open the bag.
Developing
Developing time info displayed at Holborn Studios
Holborn Studios’ darkroom is stocked with a working solution of Kodak HC-110 developer, but if you don’t have this luxury, or you’re not using the Ilford Simplicity packs, then you’ll need to make up a working solution yourself by diluting the developer according to the manufacturer’s instructions. For HC-110 dilution B, which is what Holborn uses, it’s 1+31, i.e.one part concentrated developer to 31 parts water. The working solution has a limited shelf life, so again consult the manufacturer’s instructions.
Further dilution is required at the point of development, at a ratio of 1+7 in this case, but once more this may vary depending on the chemicals you choose. For one roll of 35mm, you need 37.5ml of the HC-110 dilution B, and 262.5ml of water for a total of 300ml.
The developing time depends on the type of film stock, the speed you rated it at, the type of developer and its dilution, and the temperature of the chemicals. Digital Truth has all the figures you need to find the right development time.
Agitating
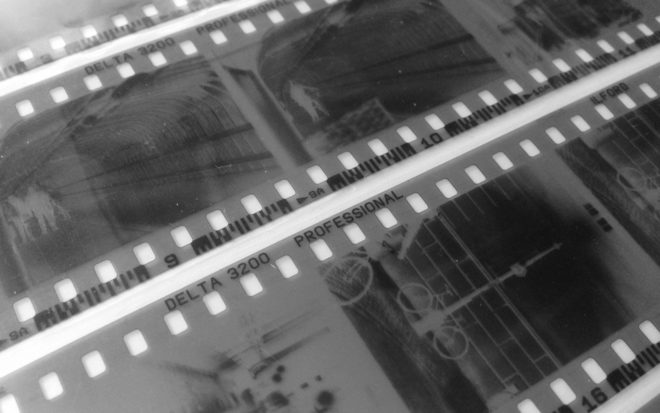
I was taught to ensure my water is always at 20°C before mixing it with the developer, to keep the timing calculations a little simpler. At this temperature, a roll of Ilford HP5+ rated at its box speed of ISO 400 needs five minutes to develop in HC-110 dilution B. Ilford Delta, on the other hand, needs a whopping 14.5 minutes to process at its box speed of 3200.
Once your diluted developer is ready, pour it into the Paterson tank and put on the cap. It is now necessary to agitate the chemicals in order to distribute them evenly around the film. My technique is inversion, i.e. turning the tank upside-down and back again. Do this continuously for the first 30 seconds, then for 10 seconds every minute after that.
Inside the tank, your latent image is being transformed into an image proper, wherein every exposed silver halide crystal is now black metallic silver.
Fixing
Once the developing time is up, remove the cap from the tank, and pour away the developer immediately. At this point some people will say you need to use a stop bath to put a firm halt to the developing process, but I was taught simply to rinse the tank out with tap water and then proceed straight to fixing. This method has always worked fine for me.
After rinsing the tank, pour in enough fix solution (again prepared to the manufacturer’s instructions) to fill it completely. Put the cap back on, agitate it for 30 seconds, then leave it for ten minutes.
During this time, the fixer renders the film’s unexposed crystals inactive and water soluble. When the ten minutes is up, pour the fixer back into its container (it’s reuseable) and leave the tank under running water for a further ten minutes. This washes away the unused silver halide crystals, leaving only the exposed black silver corresponding with light areas of the scene, and just the transparent plastic base corresponding with the dark areas.
Squirt a little diluted washing-up liquid into the tank to prevent drying rings, then drain it. You can now open the tank and see your negative for the first time.
Drying
Remove the film from the developing spiral, taking care to only touch the ends and the edges. Squeegee the top part of the film, dry your hands, then squeegee the rest. This removes droplets which can otherwise mark the negative.
Now attach two hooks to the film, a light one at the top to hang it from, and a heavy one at the bottom to stop the film curling as it dries. Holborn Studios is equipped with a heated drying cabinet, but with patience you can hang a film to dry in any dust-free area.
When your film is dry, you can cut it into strips of six frames and insert them into a negative storage sheet.
You can now scan your negatives, or better still print them photo-chemically, as I’ll describe in a future post.
Over the ten weeks of lockdown to date, I have accumulated four rolls of 35mm film to process. They may have to wait until it is safe for me to visit my usual darkroom in London, unless I decide to invest in the equipment to process film here at home. As this is something I’ve been seriously considering, I thought this would be a good time to remind myself of the science behind it all, by describing how film and the negative process work.
Black and White
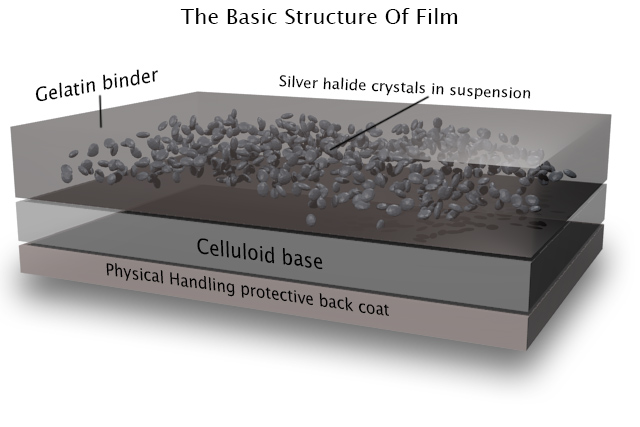
The first thing to understand is that the terminology is full of lies. There is no celluloid involved in film – at least not any more – and there never has been any emulsion.
However, the word “film” itself is at least accurate; it is quite literally a strip of plastic backing coated with a film of chemicals, even if that plastic is not celluloid and those chemicals are not an emulsion. Celluloid (cellulose mononitrate) was phased out in the mid-twentieth century due to its rampant inflammability, and a variety of other flexible plastics have been used since.
As for “emulsion”, it is in fact a suspension of silver halide crystals in gelatine. The bigger the crystals, the grainier the film, but the more light-sensitive too. When the crystals are exposed to light, tiny specks of metallic silver are formed. This is known as the latent image. Even if we could somehow view the film at this stage without fogging it completely, we would see no visible image as yet.
For that we need to process the film, by bathing it in a chemical developer. Any sufficiently large specks of silver will react with the developer to turn the entire silver halide crystal into black metallic silver. Thus areas that were exposed to light turn black, while unlit areas remain transparent; we now have a negative image.
Before we can examine the negative, however, we must use a fixer to turn the unexposed silver halide crystals into a light-insensitive, water-soluble compound that we can wash away.
Now we can dry our negative. At this stage it can be scanned for digital manipulation, or printed photo-chemically. This latter process involves shining light through the negative onto a sheet of paper coated with more photographic emulsion, then processing and fixing that paper as with the film. (As the paper’s emulsion is not sensitive to the full spectrum of light, this procedure can be carried out under dim red illumination from a safe-light.) Crystals on the paper turn black when exposed to light – as they are through the transparent portions of the negative, which you will recall correspond to the shadows of the image – while unexposed crystals again remain transparent, allowing the white of the paper to show through. Thus the negative is inverted and a positive image results.
Colour
Things are a little more complicated with colour, as you might expect. I’ve never processed colour film myself, and I currently have no intention of trying!
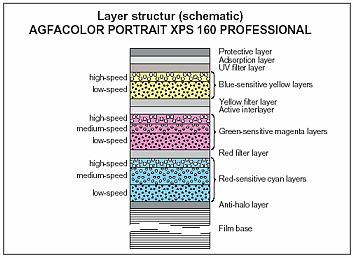
The main difference is that the film itself contains multiple layers of emulsion, each sensitive to different parts of the spectrum, and separated by colour filters. When the film is developed, the by-products of the chemical reaction combine with colour couplers to create colour dyes.
An additional processing step is introduced between the development and the fixing: the bleach step. This converts the silver back to silver halide crystals which are then removed during fixing. The colour dyes remain, and it is these that form the image.
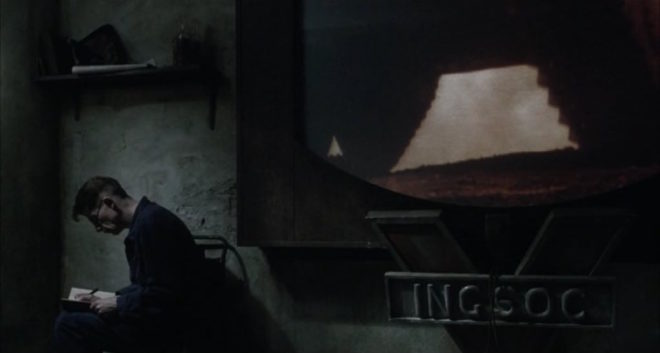
Many cinematographers will have heard of a process call bleach bypass, used on such movies as 1984 and Saving Private Ryan. You can probably guess now that this process means skipping or reducing the bleach step, so as to leave the metallic silver in the negative. We’ve seen that this metallic silver forms the entire image in black-and-white photography, so by leaving it in a colour negative you are effectively combining colour and black-and-white images in the same frame, resulting in low colour saturation and increased contrast.
“1984” (DP: Roger Deakins CBE, ASC, BSC)
Colour printing paper also contains colour couplers and is processed again with a bleach step. Because of its spectral sensitivity, colour papers must be printed and processed in complete darkness or under a very weak amber light.
Coming Up
In future posts I will cover the black-and-white processing and printing process from a much more practical standpoint, guiding you through it, step by step. I will also look at the creative possibilities of the enlargement process, and we’ll discover where the Photoshop “dodge” and “burn” tools had their origins. For those of you who aren’t Luddites, I’ll delve into how digital sensors capture and process images too!
With many of us looking for new hobbies to see us through the zombie apocalypse Covid-19 lockdown, analogue photography may be the perfect one for an out-of-work DP. While few of us may get to experience the magic and discipline of shooting motion picture film, stills film is accessible to all. With a range of stocks on the market, bargain second-hand cameras on eBay, seemingly no end of vintage glass, and even home starter kits for processing your own images, there’s nothing to stop you giving it a go.
Since taking them up again In 2018, I’ve found that 35mm and 120 photography have had a positive impact on my digital cinematography. Here are five ways in which I think celluloid photography can help you too sharpen your filmmaking skills.
1. Thinking before you click
When you only have 36 shots on your roll and that roll cost you money, you suddenly have a different attitude to clicking the shutter. Is this image worthy of a place amongst those 36? If you’re shooting medium or large-format then the effect is multiplied. In fact, given that we all carry phone cameras with us everywhere we go, there has to be a pretty compelling reason to lug an SLR or view camera around. That’s bound to raise your game, making you think longer and harder about composition and content, to make every frame of celluloid a minor work of art.
2. Judging exposure
I know a gaffer who can step outside and tell you what f-stop the light is, using only his naked eye. This is largely because he is a keen analogue photographer. You can expose film by relying on your camera’s built-in TTL (through the lens) meter, but since you can’t see the results until the film is processed, analogue photographers tend to use other methods as well, or instead, to ensure a well-exposed negative. Rules like “Sunny Sixteen” (on a sunny day, set the aperture to f/16 and the shutter speed reciprocal to match the ISO, e.g. 1/200th of a second at ISO 200) and the use of handheld incident meters make you more aware of the light levels around you. A DP with this experience can get their lighting right more quickly.
3. Pre-visualising results
We digital DPs can fall into the habit of not looking at things with our eyes, always going straight to the viewfinder or the monitor to judge how things look. Since the optical viewfinder of an analogue camera tells you little more than the framing, you tend to spend less time looking through the camera and more using your eye and your mind to visualise how the image will look. This is especially true when it comes to white balance, exposure and the distribution of tones across a finished print, none of which are revealed by an analogue viewfinder. Exercising your mind like this gives you better intuition and increases your ability to plan a shoot, through storyboarding, for example.
4. Grading
If you take your analogue ethic through to post production by processing and printing your own photographs, there is even more to learn. Although detailed manipulation of motion pictures in post is relatively new, people have been doctoring still photos pretty much since the birth of the medium in the mid-19th century. Discovering the low-tech origins of Photoshop’s dodge and burn tools to adjust highlights and shadows is a pure joy, like waving a magic wand over your prints. More importantly, although the printing process is quick, it’s not instantaneous like Resolve or Baselight, so you do need to look carefully at your print, visualise the changes you’d like to make, and then execute them. As a DP, this makes you more critical of your own work and as a colourist, it enables you to work more efficiently by quickly identifying how a shot can be improved.
5. Understanding
Finally, working with the medium which digital was designed to imitate gives you a better understanding of that imitation. It was only when I learnt about push- and pull-processing – varying the development time of a film to alter the brightness of the final image – that my understanding of digital ISO really clicked. Indeed, some argue that electronic cameras don’t really have ISO, that it’s just a simulation to help users from an analogue background to understand what’s going on. If all you’ve ever used is the simulation (digital), then you’re unlikely to grasp the concepts in the same way that you would if you’ve tried the original (analogue).
A miniature Saturn V rocket is prepared for filming
If you’re a DP, you’re probably familiar with the “Guess the Format” game. Whenever you see a movie, you find yourself trying to guess what format it was shot on. Film or digital? Camera? Glass? Resolution?
As I sat in the cinema last autumn watching First Man, I was definitely playing the game. First Man tells the true story of Neil Armstrong’s (Ryan Gosling) extraterrestrial career, including his test flights in the hypersonic X-15, his execution of the first ever docking in space aboard Gemini 8, the tragic deaths of his colleagues in the launchpad fire of Apollo 1, and of course the historic Apollo 11.
The game was given away fairly early on when I noticed frames with dust on, a sure sign of celluloid acquisition. (Though most movies have so much digital clean-up now that a lack of dust doesn’t necessarily mean that film wasn’t involved.) I automatically assumed 35mm, though as the film went on I occasionally wondered if I could possibly be watching Super-16? There was something of the analogue home movie about certain scenes, the way the searing highlights of the sun blasting into the space capsules rolled off and bloomed.
When I got home I tracked down this Studio Daily podcast and my suspicions were confirmed, but we’ll get to that in a minute.
Cinéma Vérité
Let’s start at the beginning. First Man was directed by Damien Chazelle and photographed by Linus Sandgren, FSF, the same team who made La La Land, for which both men won Oscars. What I remember most about the cinematography of that earlier film is the palette of bright but slightly sickly colours, and the choreographed Steadicam moves.
First Man couldn’t be more different, adopting a cinéma vérité approach that often looks like it could be real and previously-unseen Nasa footage. Sandgren used zoom lenses and a documentary approach to achieve this feeling:
When you do a documentary about a person and you’re there in their house with them and they’re sad or they’re talking, maybe you don’t walk in there and stand in the perfect camera position. You can’t really get the perfect angles. That in itself creates some sort of humbleness to the characters; you are a little respectful and leave them a little alone to watch them from a distance or a little bit from behind.
Similarly, scenes in the spacecraft relied heavily on POVs through the small windows of the capsule, which is all that the astronauts or a hypothetical documentary camera operator would have been able to see. This blinkered view, combined with evocative and terrifying sound design – all metallic creaks, clanks and deafening booms, like the world itself is ending – makes the spaceflight sequences incredibly visceral.
Multiple gauges
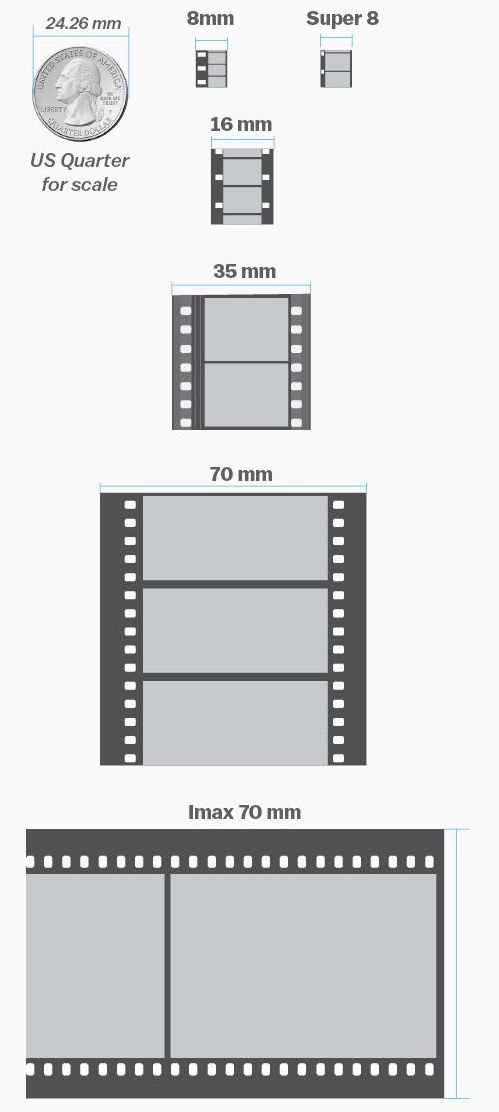
Scale comparison of film formats. Note that Imax is originated on 65mm stock and printed on 70mm to allow room for the soundtrack.
Documentaries in the sixties would have been shot on Super-16, which is part of the reason that Sandgren and Chazelle chose it as one of their acquisition formats. The full breakdown of formats is as follows:
Super-16 was employed for intense or emotional material, specifically early sequences relating to the death of Armstrong’s young daughter, and scenes inside the various spacecraft. As well as the creative considerations, the smaller size of Super-16 equipment was presumably advantageous from a practical point of view inside the cramped sets.
35mm was used for most of the non-space scenes. Sandgren differentiated the scenes at Nasa from those at Armstrong’s home by push-processing the former and pull-processing the latter. What this means is that Nasa scenes were underexposed by one stop and overdeveloped, resulting in a detailed, contrasty, grainy look, while the home scenes were overexposed and underdeveloped to produce a cleaner, softer, milkier look. 35mm was also used for wide shots in scenes that were primarily Super-16, to ensure sufficient definition.
Imax (horizontally-fed 65mm) was reserved for scenes on the moon.
In-camera effects
In keeping with the vintage aesthetic of celluloid capture, the visual effects were captured in-camera wherever possible. I’ve written in the past about the rise of LED screens as a replacement for green-screen and a source of interactive lighting. I guessed that First Man was using this technology from ECUs which showed the crescent of Earth reflected in Ryan Gosling’s eyes. Such things can be added in post, of course, but First Man‘s VFX have the unmistakeable ring of in-camera authenticity.
Imposing a “no green-screen” rule, Chazelle and his team used a huge LED screen to display the views out of the spacecraft windows. A 180° arc of 60′ diameter and 35′ in height, this screen was bright enough to provide all the interactive lighting that Sandgren required. His only addition was a 5K tungsten par or 18K HMI on a crane arm to represent the direct light of the sun.
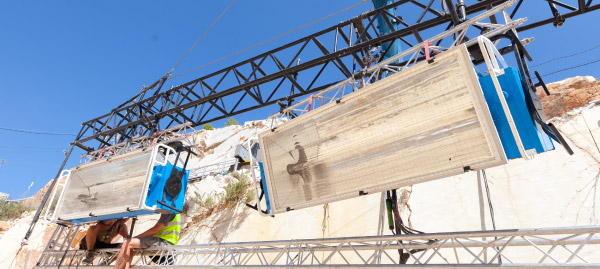
The old-school approach extended to building and filming miniatures, of the Saturn V rocket and its launch tower for example. For a sequence of Armstrong in an elevator ascending the tower, the LED screen behind Gosling displayed footage of this miniature.
For external views of the capsules in space, the filmmakers tried to limit themselves to realistic shots which a camera mounted on the bodywork might have been able to capture. This put me in mind of Christopher Nolan’s Interstellar, which used the same technique to sell the verisimilitude of its space vehicles. In an age when any conceivable camera move can be executed, it can be very powerful to stick to simple angles which tap into decades of history – not just from cinema but from documentaries and motorsports coverage too.
Lunar Lighting
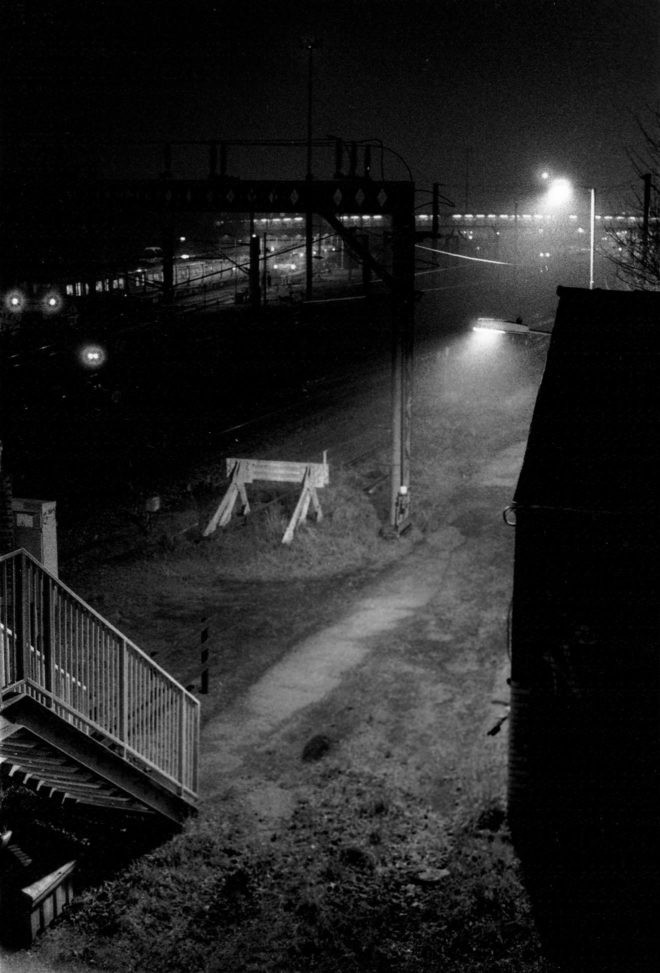
For scenes on earth, Landgren walked a line between naturalism and expression, influenced by legendary DPs like Gordon Willis, ASC. My favourite shot is a wide of Armstrong’s street at night, as he and his ill-fated friend Ed White (Jason Clarke) part company after a drinking session. The mundane suburban setting is bathed in blue moonbeams, as if the the moon’s fingers are reaching out to draw the characters in.
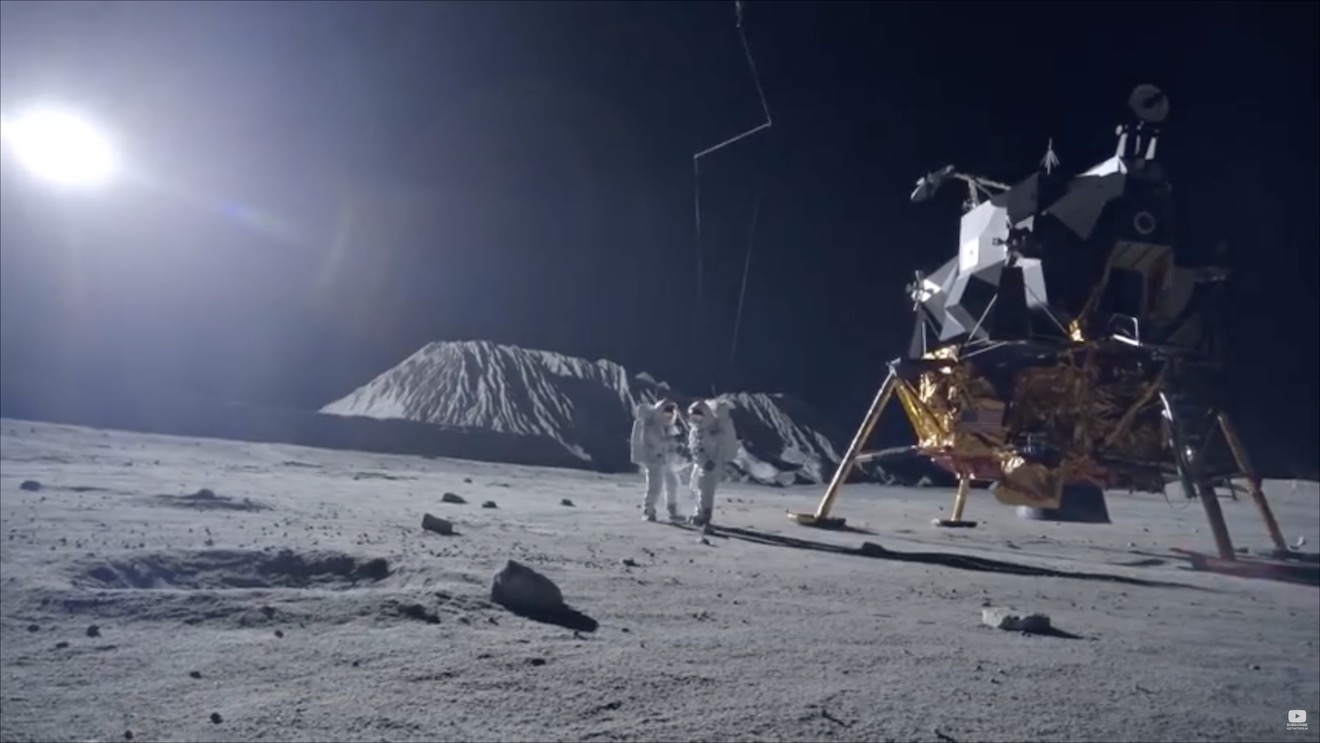
Scenes on the lunar surface were captured at night on an outdoor set the size of three football pitches. To achieve absolute authenticity, Sandgren needed a single light source (representing the sun) fixed at 15° above the horizon. Covering an area that size was going to require one hell of a single source, so he went to Luminys, makers of the Softsun.
Softsuns
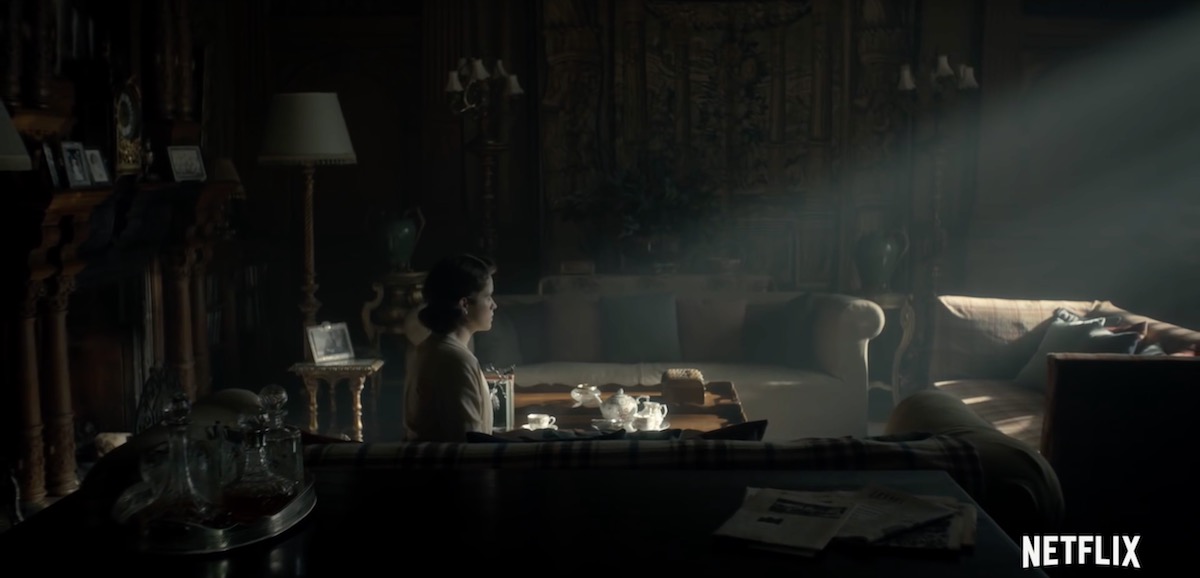
Softsuns are lamps of frankly ridiculous power. The 50KW model was used, amongst other things, to blast majestic streams of light through the windows of Buckingham Palace on The Crown, but Sandgren turned to the 100KW model. Even that proved insufficient, so he challenged Luminys to build a 200KW model, which they did.
The result is a completely stark and realistic depiction of a place where the sun is the only illumination, with no atmosphere to diffuse or redistribute it, no sky to glow and fill in the shadows. This ties in neatly with a prevailing theme in the film, that of associating black with death, when Armstrong symbolically casts his deceased daughter’s bracelet into an obsidian crater.
First Man may prove unsatisfying for some, with Armstrong’s taciturn and emotionally closed-off nature making his motivations unclear, but cinematically it is a tour de force. Taking a human perspective on extraordinary accomplishments, deftly blending utterly convincing VFX and immersive cinéma vérité photography, First Man recalls the similarly analogue and similarly gripping Dunkirk as well as the documentary-like approach of 1983’s The Right Stuff. The film is currently available on DVD, Blu-ray and VOD, and I highly recommend you check it out.
Earlier this year I undertook a personal photography project called Stasis. I deliberately set out to do something different to my cinematography work, shooting in portrait, taking the paintings of Dutch seventeenth century masters as my inspiration, and eschewing traditional lighting fixtures in favour of practical sources. I was therefore a little disappointed when I began showing the images to people and they described them as “cinematic”.
An image from “Stasis”
This experience made me wonder just what people mean by that word, “cinematic”. It’s a term I’ve heard – and used myself – many times during my career. We all seem to have some vague idea of what it means, but few of us are able to define it.
Dictionaries are not much help either, with the Oxford English Dictionary defining it simply as “relating to the cinema” or “having qualities characteristic of films”. But what exactly are those qualities?
Shallow depth of field is certainly a quality that has been widely described as cinematic. Until the late noughties, shallow focus was the preserve of “proper” movies. The size of a 35mm frame (or of the digital cinema sensors which were then emerging) meant that backgrounds could be thrown way out of focus while the subject remained crisp and sharp. The formats which lower-budget productions had thereto been shot on – 2/3” CCDs and Super-16 film – could not achieve such an effect.
Then the DSLR revolution happened, putting sensors as big as – or bigger than – those of Hollywood movies into the hands of anyone with a few hundred pounds to spare. Suddenly everyone could get that “cinematic” depth of field.
My first time utilising the shallow depth of field of a DSLR, on a never-completed feature back in 2011.
Before long, of course, ultra-shallow depth of field became more indicative of a low-budget production trying desperately to look bigger than of something truly cinematic. Gradually young cinematographers started to realise that their idols chose depth of field for storytelling reasons, rather than simply using it because they could. Douglas Slocombe, OBE, BSC, ASC, cinematographer of the original Indiana Jones trilogy, was renowned for his deep depth of field, typically shooting at around T5.6, while Janusz Kaminski, ASC, when shooting Kingdom of the Crystal Skull, stopped down as far as T11.
There was also a time when progressive scan – the recording of discrete frames rather than alternately odd and even horizontal lines to make an interlaced image – was considered cinematic. Now it is standard in most types of production, although deviations from the norm of 24 or 25 frames per second, such as the high frame rate of The Hobbit, still make audiences think of reality TV or news, rejecting it as “uncinematic”.
Other distinctions in shooting style between TV/low-budget film and big-budget film have slipped away too. The grip equipment that enables “cinematic” camera movement – cranes, Steadicams and other stabilisers – is accessible now in some form to most productions. Meanwhile the multi-camera shooting which was once the preserve of TV, looked down upon by filmmakers, has spread into movie production.
A direct comparison may help us drill to the core of what is “cinematic”. Star Trek: Generations, the seventh instalment in the sci-fi film franchise, went into production in spring 1994, immediately after the final TV season of Star Trek: The Next Generation wrapped. The movie shot on the same sets, with the same cast and even the same acquisition format (35mm film) as the TV series. It was directed by David Carson, who had helmed several episodes of the TV series, and whose CV contained no features at that point.
Yet despite all these constants, Star Trek: Generations is more cinematic than the TV series which spawned it. The difference lies with the cinematographer, John A. Alonzo, ASC, one of the few major crew members who had not worked on the TV show, and whose experience was predominantly in features. I suspect he was hired specifically to ensure that Generations looked like a movie, not like TV.
The main thing that stands out to me when comparing the film and the series is the level of contrast in the images. The movie is clearly darker and moodier than the TV show. In fact I can remember my schoolfriend Chris remarking on this at the time – something along the lines of, “Now it’s a movie, they’re in space but they can only afford one 40W bulb to light the ship.”
The bridge of the Enterprise D as seen on TV (top) and in the “Generations” movie (bottom).
It was a distinction borne of technical limitations. Cathode ray tube TVs could only handle a dynamic range of a few stops, requiring lighting with low contrast ratios, while a projected 35mm print could reproduce much more subtlety.
Today, film and TV is shot on the same equipment, and both are viewed on a range of devices which are all good at dealing with contrast (at least compared with CRTs). The result is that, with contrast as with depth of field, camera movement and progressive scan, the distinction between the cinematic and the uncinematic has reduced.
The cinematography of “Better Call Saul” owes much to film noir.
In fact, I’d argue that it’s flipped around. To my eye, many of today’s TV series – and admittedly I’m thinking of high-end ones like The Crown, Better Call Saul or The Man in the High Castle, not Eastenders – look more cinematic than modern movies.
As my friend Chris had realised, the flat, high-key look of Star Trek: The Next Generation was actually far more realistic than that of its cinema counterpart. And now movies seem to have moved towards realism in the lighting, which is less showy and not so much moody for the sake of being moody, while TV has become more daring and stylised.
A typically moody and contrasty shot from “The Crown”
The Crown, for examples, blasts a 50KW Soft Sun through the window in almost every scene, bathing the monarchy in divine light to match its supposed divine right, while Better Call Saul paints huge swathes of rich, impenetrable black across the screen to represent the rotten soul of its antihero.
Film lighting today seems to strive for naturalism in the most part. Top DPs like recent Oscar-winner Roger Deakins, CBE, ASC, BSC, talk about relying heavily on practicals and using fewer movie fixtures, and fellow nominee Rachel Morrison, ASC, despite using a lot of movie fixtures, goes to great lengths to make the result look unlit. Could it be that film DPs feel they can be more subtle in the controlled darkness of a cinema, while TV DPs choose extremes to make their vision clear no matter what device it’s viewed on or how much ambient light contaminates it?
“Mudbound”, shot by Rachel Morrison, ASC
Whatever the reason, contrast does seem to be the key to a cinematic look. Even though that look may no longer be exclusive to movies released in cinemas, the perception of high contrast being linked to production value persists. The high contrast of the practically-lit scenes in my Stasis project is – as best I can tell – what makes people describe it as cinematic.
What does all of this mean for a filmmaker? Simply pumping up the contrast in the grade is not the answer. Contrast should be built into the lighting, and used to reveal and enhance form and depth. The importance of good production design, or at least good locations, should not be overlooked; shooting in a friend’s white-walled flat will kill your contrast and your cinematic look stone dead.
A shot of mine from “Forever Alone”, a short film where I was struggling to get a cinematic look out of the white-walled location.
Above all, remember that story – and telling that story in the most visually appropriate way – is the essence of cinema. In the end, that is what makes a film truly cinematic.