Making a Pinhole Attachment for an SLR

Last autumn, after a few years away from it, I got back into 35mm stills photography. I’ve been reading a lot of books about photography: the art of it, the science and the history too. I’ve even taken a darkroom course to learn how to process and print my own black and white photos.

Shooting stills in my spare time gives me more opportunities to develop my eye for composition, my exposure-judging skills and my appreciation of natural light. Beyond that, I’ve discovered interesting parallels between electronic and photochemical imaging which enhance my understanding of both.

For example, I used to think of changing the ISO on a digital camera as analogous to loading a different film stock into a traditional camera. However, I’ve come to realise it’s more like changing the development time – it’s an after-the-fact adjustment to an already-captured (latent) image. There’s more detail on this analogy in my ISO article at Red Shark News.

The importance of rating an entire roll of film at the same exposure index, as it must all be developed for the same length of time, also has resonance in the digital world. Maintaining a consistency of exposure (or the same LUT) throughout a scene or sequence is important in digital filmmaking because it makes the dailies more watchable and reduces the amount of micro-correction which the colourist has to do down the line.

Anyway, this is all a roundabout way of explaining why I decided to make a pinhole attachment for my SLR this week. It’s partly curiosity, partly to increase my understanding of image-making from first principles.

The pinhole camera is the simplest image-making device possible. Because light rays travel in straight lines, when they pass through a very small hole they emerge from the opposite side in exactly the same arrangement, only upside-down, and thus form an image on a flat surface on the other side. Make that flat surface a sheet of film or a digital sensor and you can capture this image.


How to make a pinhole attachment

I used Experimental Filmmaking: Break the Machine by Kathryn Ramey as my guide, but it’s really pretty straightforward.

You will need:

  • an extra body cap for your camera,
  • a drill,
  • a small piece of smooth, non-crumpled black wrap, or kitchen foil painted black,
  • scissors,
  • gaffer tape (of course), and
  • a needle or pin.

Instructions:

  1. Drill a hole in the centre of the body cap. The size of the hole is unimportant.
  2. Use the pin or needle to pierce a hole in the black wrap, at least a couple of centimetres from the edge.
  3. Cut out a rough circle of the black wrap, with the pinhole in the middle. This circle needs to fit on the inside of the body cap, with the pinhole in the centre of the drilled hole.
  4. Use the gaffer tape to fix the black wrap tightly to the inside of the body cap.
  5. Fit the body cap to your camera.

The smaller the pinhole is, the sharper the image will be, but the darker too. The first pinhole I made was about 0.1-0.2mm in diameter, but when I fitted it to my camera and looked through the viewfinder I could hardly make anything out at all. So I made a second one, this time pushing the pin properly through the black wrap, rather than just pricking it with the tip. (Minds out of the gutter, please.) The new hole was about 0.7mm but still produced an incredibly dark image in the viewfinder.


Exposing a pinhole image

If you’re using a digital camera, you can of course judge your exposure off the live-view screen. Things are a little more complicated if, like me, you’re shooting on film.

In theory the TTL (through the lens) light meter should give me just as reliable a reading as it would with a lens. The problem is that, even with the shutter set to 1 second, and ISO 400 Fujifilm Super X-tra loaded, the meter tells me I’m underexposed. Admittedly the weather has been overcast since I made the pinhole yesterday, so I may get a useful reading when the sun decides to come out again.

Failing that, I can use my handheld incident-light meter to determine the exposure…. once I’ve worked out what the f-stop of my pinhole is.

As I described in my article on aperture settings, the definition of an f-stop is: the ratio of the focal length to the aperture diameter. We’re all used to using lenses that have a clearly defined and marked focal length, but what is the focal length in a pinhole system?

The definition of focal length is the distance between the point where the light rays focus (i.e. converge to a point) and the image plane. So the focal length of a pinhole camera is very simply the distance from the pinhole itself to the film or digital sensor. Since my pinhole is more or less level with the top of the lens mount, the focal length is going to be approximately equal to the camera’s flange focal distance (defined as the distance between the lens mount and the image plane). According to Wikipedia, the flange focal distance for a Pentax K-mount camera is 45.46mm.

So the f-stop of my 0.7mm pinhole is f/64, because 45.64 ÷ 0.7 ≈ 64. Conveniently, f/64 is the highest stop my light meter will handle.

The website Mr Pinhole has a calculator to help you figure this sort of stuff out, and it even tells you the optimal pinhole diameter for your focal length. Apparently this is 0.284mm in my case, so my images are likely to be quite soft.

Anyway, when the sun comes out I’ll take some pictures and let you know how I get on!

Making a Pinhole Attachment for an SLR

Lighting I Like: “Breaking Bad”

My YouTube series Lighting I Like is back for a second season of six episodes. It’s a very short and simple show, aimed at raising awareness of the art of lighting amongst non-cinematographers, or those at the very start of their cinematography career. Each week I look at the lighting choices made in one or two scenes of a TV/VOD show and how those choices help tell the story.

First up is Breaking Bad, the critically acclaimed series about a high-school chemistry teacher who, after being diagnosed with leukaemia, resorts to manufacturing drugs to ensure his family’s financial future. All five seasons of the show are available on Netflix in the UK.

Breaking Bad is dark and gritty, shot on 35mm film, and features some beautiful cinematography, one example of which I recently covered in my post on modifying window light. You can read an interesting analysis of the show’s photography on Cinevenger.

In the above video I also provide additions and corrections to some episodes of Lighting I Like‘s first season. Click here to see the playlist of all Lighting I Like episodes.

New episodes of Lighting I Like will be released at 8pm BST every Wednesday. Next week I’ll look at a couple of scenes from The Man in the High Castle.

Lighting I Like: “Breaking Bad”

5 Facts About the Cinematography of “Dunkirk”

Some have hailed it as a masterpiece, others have complained it left them cold. Personally, seeing it on 70mm, I found Dunkirk a highly immersive and visceral film, cinematic in the truest sense of the word. The huge, sharp images free from any (apparent) CGI tampering, combined with the nerve-jangling gunshots and rumbling engines of the superlative soundtrack, gave me an experience unlike any other I can recall in recent movie-going history. I can imagine that it was less effective projected from a DCP onto a smaller screen, which may account for the underwhelmed reactions of some.

But however you feel about Dunkirk as a film, it’s hard not to admire its technical accomplishments. Here are five unique aspects of its cinematography.


1. It was shot on two huge formats.

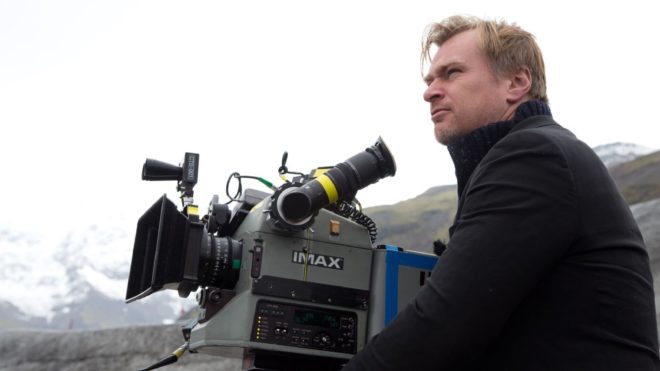
Director Christopher Nolan has long been a champion of large-format celluloid capture, eschewing the digital imaging which has become the dominant medium in recent years. “I think IMAX is the best film format that was ever invented,” says Nolan in a DGA interview. “It’s the gold standard and what any other technology has to match up to, but none have, in my opinion.”

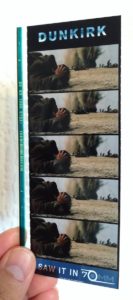
Imax is a process which uses 65mm film (printed on 70mm for exhibition, with the extra space used for the soundtrack) running horizontally through the gate, yielding an image over eight times larger than Academy 35mm. Following some test shots in The Prestige, Nolan captured whole sequences from The Dark KnightThe Dark Knight Rises and Interstellar in Imax.

For Dunkirk, Nolan and cinematographer Hoyte van Hoytema, ASC, FSF, NSC were determined to eliminate 35mm altogether, to maintain the highest possible resolution throughout the movie. Imax cameras are noisy, so they shot dialogue scenes on standard 65mm – running vertically through the gate – but Imax footage makes up over 70% of the finished film.


2. The movie was framed with three different aspect ratios in mind.

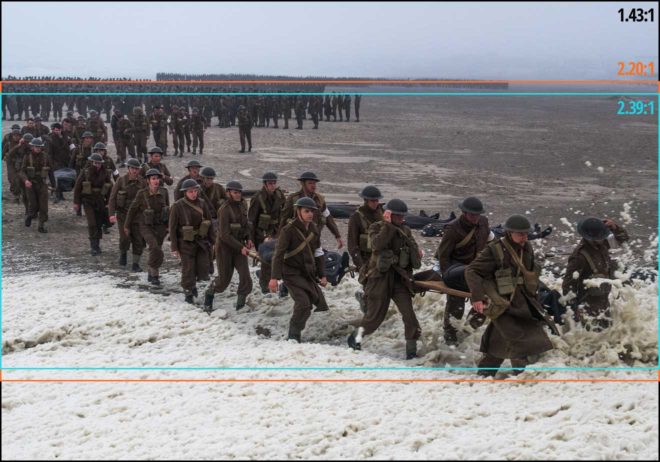
Those who watched Dunkirk in an Imax cinema got to see the native aspect ratio each sequence was captured in, i.e. 2:20:1 for the standard 65mm dialogue scenes but the much taller 1.43:1 for the Imax material, the bulk of the film. Those, like me, who attended a standard 70mm screening, saw it in 2:20:1 throughout. And those hapless individuals who watched it digitally apparently saw the standard Scope ratio of 2.39:1, at least in some cases.

This means that, when composing his shots, van Hoytema had to have two ratios in mind for the dialogue scenes and three for everything else. “Framing was primarily for the 2.40 [a.k.a. 2:39:1], then protecting what was outside of it,” 1st AC Bob Hall explains. This left close-ups, for example, with a large amount of headroom in 1.43:1, but the huge size of Imax screens made such framing desirable anyway.  “Imax is such an immersive experience that it’s not so much the composition that the cinematographer’s done as where your eyes are going on the screen that creates the composition.”


3. Parts of the camera rig were worn as a backpack.

Breaking with the accepted norms of large format cinematography, van Hoytema captured a significant proportion of the movie handheld. The 65mm camera package weighed over 40kg – about three times the weight of a typical Alexa rig – with the Imax camera only a little lighter. To avoid adding the weight of the batteries, video transmitter, Cinetape display and Preston (wireless follow focus) brain, these were placed in a special tethered backpack which was either worn by key grip Ryan Monro or, for water tank work, floated on a small raft.

Unfortunately, Hall quickly found that electromagnetic interference from the Imax camera rendered the Cinetape inoperable, so he ended up relying on his extensive experience to keep the images sharp. “I had to go back to the technology of the 1980s, where I basically guess how far famous people are from me,” he remarks drily in this enlightening podcast from Studio Daily.


4. A periscope lens was used to shoot spitfire cockpit interiors.

“I wanted to tell an intensively subjective version of this story,” says Nolan. To that end he requested over-the-shoulder views out of the windscreens of Spitfires in flight. Furthermore, he wanted to be able to pan and tilt to follow other aircraft passing by. Given the huge size of the Imax camera, there was no room to rotate it within the cockpit. Instead, custom periscope lenses were built which could snake over the pilot’s shoulder, and pan and tilt independently of the camera body, using prisms to maintain the correct image orientation to the film plane.

Other glass used on Dunkirk included an 80mm Imax lens belonging to Nolan himself, and converted stills lenses.

Note that the camera is mounted upside-down, to compensate for the flipped image generated by the prism in the periscope lens.


5. At one point the camera sunk to the bottom of the sea for an hour and a half.

A specific Spitfire POV required was from a damaged plane diving towards the sea and hitting the water. The practical effects department devised a catapult to launch an unmanned mock-up from a ship, the grips built a crash housing for the Imax camera which would be inside, and a plan was devised to recover it before the mock-up sank. But they weren’t quick enough, and the crew watched the plane and the camera disappear beneath the waves and plunge to the bottom of the English Channel, where it sat for 90 minutes until divers retrieved it. Incredibly, once dried out and developed, the film footage was found to be completely undamaged. “The shot was all there, in full colour and clarity,” says van Hoytema in the American Cinematographer article. “This material would have been lost if shot digitally.”


5 Facts About the Cinematography of “Dunkirk”

My 5 Favourite Cinematographer Commentaries

I won my first DVD player in a trailer competition on a sort of YouTube forerunner site in December 2000. Over the next decade I was entertained and educated by many extras-packed Digital Versatile Discs. Now, of course, physical media is a thing of the past, but many of the anecdotes I heard in DVD commentaries have stuck in my mind. Some have even helped me on set when facing a new situation.

So, if you’ve got these discs on your shelf and never given the commentary a listen, or if you’re passing a CEX or Cash Convertor with a shiny new pound coin burning a hole in your pocket, you could do worse than seek out these classic chat tracks.


5. Moulin Rouge

DP Don McAlpine is actually quite quiet on this track, leaving director Baz Luhrmann and production designer Catherine Martin to do much of the work. This latter pair explain how sets, miniatures and CGI were blended to create the world of Moulin Rouge. At one point Luhrmann notes that he resisted the temptation to digitally stabilise the crane shots in the Elephant Love Medley, preferring to recall the look of classic 20th century musicals which did not have access to such postproduction trickery. A few nuggets we get from McAlpine include his use of blue light on Satine (Nicole Kidman) to make the most of her pale skin, the anachronistic use of follow spots for the stage shows, and how he was briefed by Luhrmann in one scene to light Jim Broadbent like the devil – which he did with flickering orange firelight from a low angle.

Highlight: Performing in what proves to be her final show, Satine wears a diamond necklace which reflects dazzling light onto Richard Roxburgh’s lustful duke. McAlpine reveals that he created the shimmering reflections by shaking some canvas with pieces of broken mirror on it.


4. X-Men 2

Although the DVD menu lists it as a director’s commentary, Bryan Singer in fact pairs up with his DP Newton Thomas Sigel for this track. Sigel discusses the importance of building practicals into the sets to enhance realism and flexibility of shooting. He explains how he colour-coded certain scenes so that the audience would more readily understand where they were during the fast-paced action sequences; for example, the corridors of the Alkali Lake bunker were lit with a moss green.

Highlight: The brutal claw-fight between Wolverine and Lady Deathstrike features dynamic and unusual camerawork. Sigel and Singer reveal that they used a cable rig to swoop the camera towards the duelling mutants, knowing that the camera would bounce back when it reached the end of its cable, but embracing this for the extra energy it added to the sequence.


3. Garden State

DP Lawrence Sher shares (no pun intended) a commentary track with director Zach Braff and production designer Judy Becker. The trio give an insight into the way that the moods and emotions of the film were enhanced by the colours, design, framing and camera movement. Braff and Sher chose a static look with strong compositions, punctuated by occasional Technocrane moves and at least one quasi-crane move that was actually captured on a Steadicam. Various happy (and unhappy) accidents helped shape the look too, like the constant rain throughout the exterior shoots, the mist and flaring practicals in the pool party scene, and the square of light on the airport wall behind Braff and Natalie Portman in the final shot.

Highlight: Sher explains the use of different film stocks to delineate threads of the story. Scenes with Large’s father (Ian Holm) were rendered cold and clinical by shooting on a sharper, harder Kodak film, while Portman’s sequences were imbued with organic warmth by Fuji stock. The feel was further enhanced by lighting and the colour choices in the respective sets.


2. Alien 3

The departure of director David Fincher from Alien 3 – under a cloud of studio interference and re-edits – is an infamous part of movie lore. Less well known is that the director of photography changed a week into shooting, after original DP Jordan Cronenworth (of Blade Runner fame) fell ill. Alex Thompson stepped in, and his humble, soft-spoken observations are spliced with other crew and cast members to form the commentary track on the Alien Quadrilogy boxset version of this film. Throughout the track he explains how he created the cool, toppy look of the prison’s communal areas, the dark, shadowy environs of the basements, and the hot, hellish feel of the lead-works. There are some interesting remarks about practicals too, such as the deliberate use of mismatched, low-CRI fluorescent tubes to give the canteen a run-down look, and tips for creating convincing firelight flicker.

Highlight: To create the illusion of glowing molten metal in the colony’s lead-works set, Thompson placed a veritable arsenal of lamps – almost 1,000 amps’ worth – underneath sheets of trace. Despite their brilliance, the individual units were still visible on camera, rather than a continuous white glow. According to Thompson, it was Fincher who came to the rescue, wiping grease from the side of his nose onto the lens to diffuse the offending lamps. I hope he let the AC put an optical flat on first!


1. Armageddon

Whatever you think of this slice of outer-space Bayhem, there’s no denying that DP John Schwartzman’s commentary on the Criterion Collection edition (spliced in with two of the film’s scientific advisors) is a fascinating insight into photographing the biggest of big-budget blockbusters. Schwartzman reveals that seven miles of cable were laid by his electrical department in preparation for extreme wide shots of the Armadillo vehicle travelling across the asteroid – in reality the South Dakota Badlands at night. Elsewhere he discusses lighting through coloured windows, shooting under UV lights (pictured above), dealing with spacesuit helmet reflections, and how Spielberg’s lens-meister Janusz Kaminski stepped in to shoot pick-ups of meteorites wiping out Shanghai.

Highlight: Schwartzman and his team photographed two real shuttle launches for the movie. Nasa decreed that the 35mm cameras had to sit in position on the launchpad, threaded with film and ready to go, for two days before take-off. The camera dept undertook extensive testing to making this possible, dealing with such problems as the condensation that would form as the temperature changed over the 48 hours. When they returned to the cameras after the launch and examined the one which had been the closest to the shuttle’s rocket motors, they discovered that the lens was in pieces, the vibrations having undone every single screw!

My 5 Favourite Cinematographer Commentaries

A Window on Oblivion

Last month the lastest Eric Bana movie, Deadfall, was released in US cinemas. The unusual thing is that it had already been out for a month on demand. This is one of the first examples of yet another massive shift that’s occurring in the film industry.

For the first few decades of its life, cinema was unique. Then television came along. The film industry responded by introducing colour and widescreen aspect ratios to the cinema. TV eventually caught up with both of these developments. As we approached and entered the new millennium our home entertainment options were expanding exponentially. TVs are now huge, 5.1 surround sound systems are highly affordable; you can even watch 3D at home if you want.

So why go to the cinema?

Until recently, the answer was “because you have to if you don’t want to wait months for the DVD release”. This is known as the theatrical window, the time within which a film must be exclusive to cinemas, before it becomes available in other media. Many claim this system fosters piracy. After all, if you could buy or watch a film on demand for a reasonable price as soon as it’s first released, why would you pirate it?

Many others claim that without this system, cinemas would go bust. I suspect this may be true.

I will be interested to see what happens as more and films follow Deadfall’s example. Clearly the aim is to create word of mouth with the on-demand release, building the film up to the point where people will be desperate to see it on the big screen. Sorry, I mean the slightly-bigger-than-the-screen-you-have-at-home screen.

35mm projectors - a thing of the past.
35mm projectors – a thing of the past.

Ask yourself this: what happened to phone boxes when the infinitely convenient and flexible mobile phone became affordable? The same fate, I fear, awaits cinemas.

Because we can all have cinemas in our homes now. If we want to ban popcorn from our living rooms and pause the film whenever some weak-bladdered buffoon has to get up, we can. Or (and I’ll never, ever understand this behaviour) if we want to make phone calls and chat to our mates all through the movie, we can do that too without spoiling anyone else’s enjoyment.

The only possible reason to go to the cinema is to watch a movie on 35mm film….. Oh no, hang on… You can’t do that any more either.

Right, I’m off out to see Les Miserables. At the cinema. While I still can. If I could watch it on demand, would I? Given that it’s f**king cold outside and Hereford Odeon only seems to project digitally now, yes, I’d probably stay home and watch it on demand. A sobering thought.

A Window on Oblivion

2012: The Year that Film Died

Dark Side camera negative lab rolls

A couple of weeks ago I screened the 35mm print of The Dark Side of the Earth‘s pilot at the last FilmWorks session in Bristol. It had been about 18 months since I last ran the print, and I was shocked how much attitudes towards celluloid had changed in that time. People were acting like they hadn’t seen a roll of film in 20 years, like I was some kind of whacked-out nostalgia hippy for wanting to shoot on 35mm. (But it still looked fucking awesome on the big screen.)

Digital cinema is one of those things that’s been lurking on the horizon for ages, then suddenly, silently… it’s here, like it’s always been here. Projection of moving images from celluloid is very, very quickly becoming extinct, as is acquisition of moving images on celluloid. Suddenly the likes of Christopher Nolan and Quentin Tarantino, staunch defenders of shooting films on film, are starting to look a bit loony, although I agree with them completely.

In September Fuji announced it would cease manufacturing of film stock, leaving only Kodak in the “market”, if such a word can be applied to an unwitting monopoly.

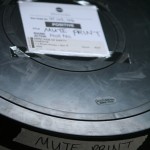
Dark Side mute print

So we’re quickly heading towards a world in which “film” is a word completely divorced from its original meaning. Plastic strips coated in light sensitive emulsion will no longer play any part in the production or consumption of “films”.

The other day I went to see The Hobbit: An Unexpected Journey. Although I chose to see a 2D 24fps screening, Peter Jackon’s sedate trilogy has been made in 3D at 48fps. The higher frame rate produces smoother motion which most people will associate with news broadcasts and documentaries. Overall the aim seems to be to make watching a film more like experiencing real life – sharper, smoother, three-dimensional. But is that what we really go to the cinema for?

It’s not what I go for. I want the scratches and the weave and the flicker because without them there is no magic, there is no suspension of disbelief. I want escapism. I want film. It seems I’m to be disappointed for the rest of my life.

2012: The Year that Film Died

The Dark Side Guide to Shooting on Film

Aimed at filmmakers used to working on video who want to move up to shooting on film, this guide covers all the major decisions you’ll have to make, including gauge, aspect ratio, stock, lens and crew. The costs of 35mm are also revealed. I shares everything I learnt about shooting on film while making the demo sequence for my fantasy-adventure feature The Dark Side of the Earth, starring Benedict Cumberbatch (Sherlock), Kate Burdette (The Duchess) and Mark Heap (Spaced, Green Wing).

The Dark Side Guide to Shooting on Film