“Harvey Greenfield is Running Late”: June 2022 Pick-ups

Last summer I lensed Harvey Greenfield is Running Late, a hilarious comedy feature starring Paul Richards, based on his acclaimed one-man play, soon to have its 100th performance. We had a 14-day window in Paul’s schedule for the shoot, during which we captured two thirds of the film – less than we’d hoped, but still a remarkable achievement given the resources we had and the production value we achieved. This summer we shoot the rest.


Day 15

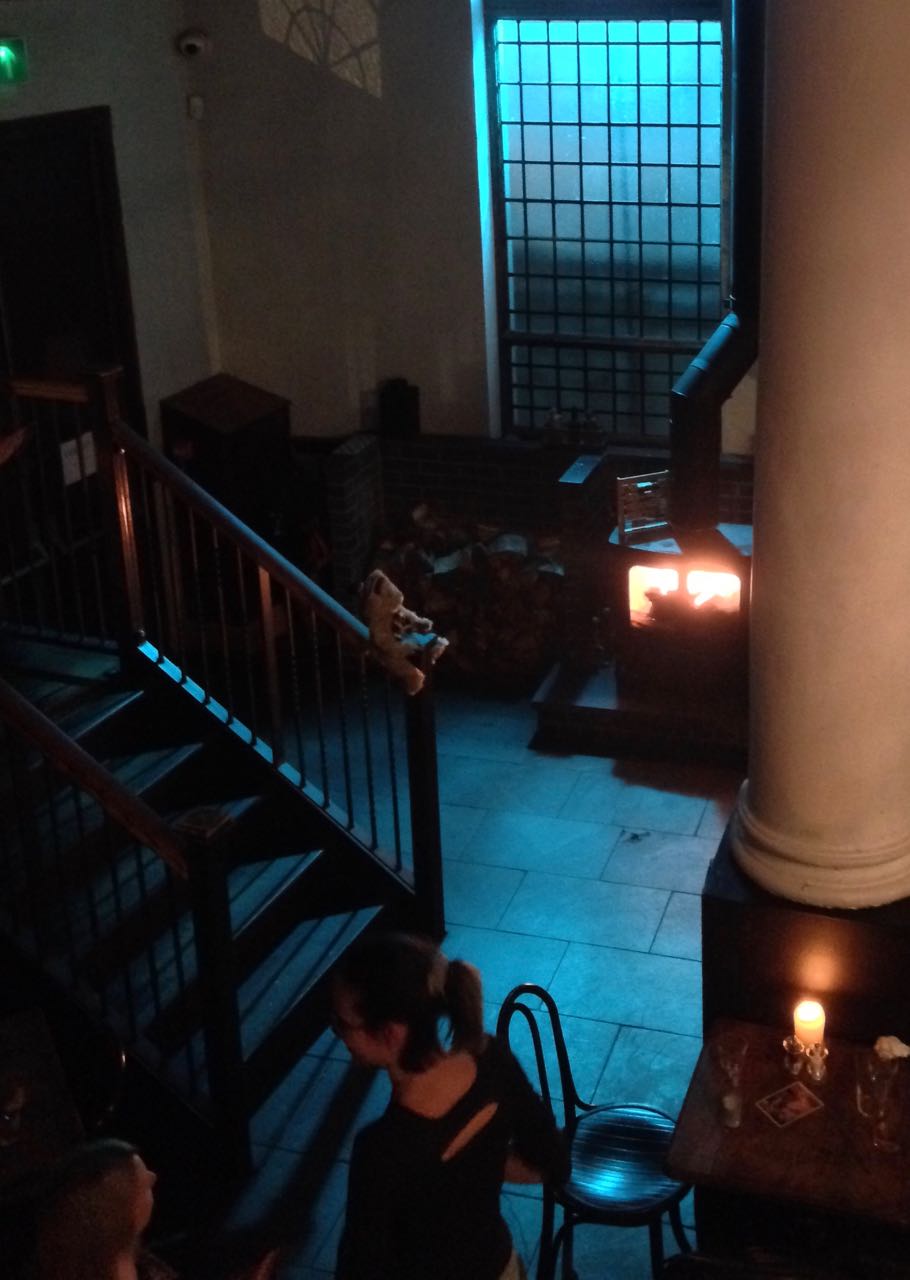
Ten months on, we returned to the house from days 11 and 12. It’s on the verge of being sold, and this was our last chance to mop up the outstanding material here.

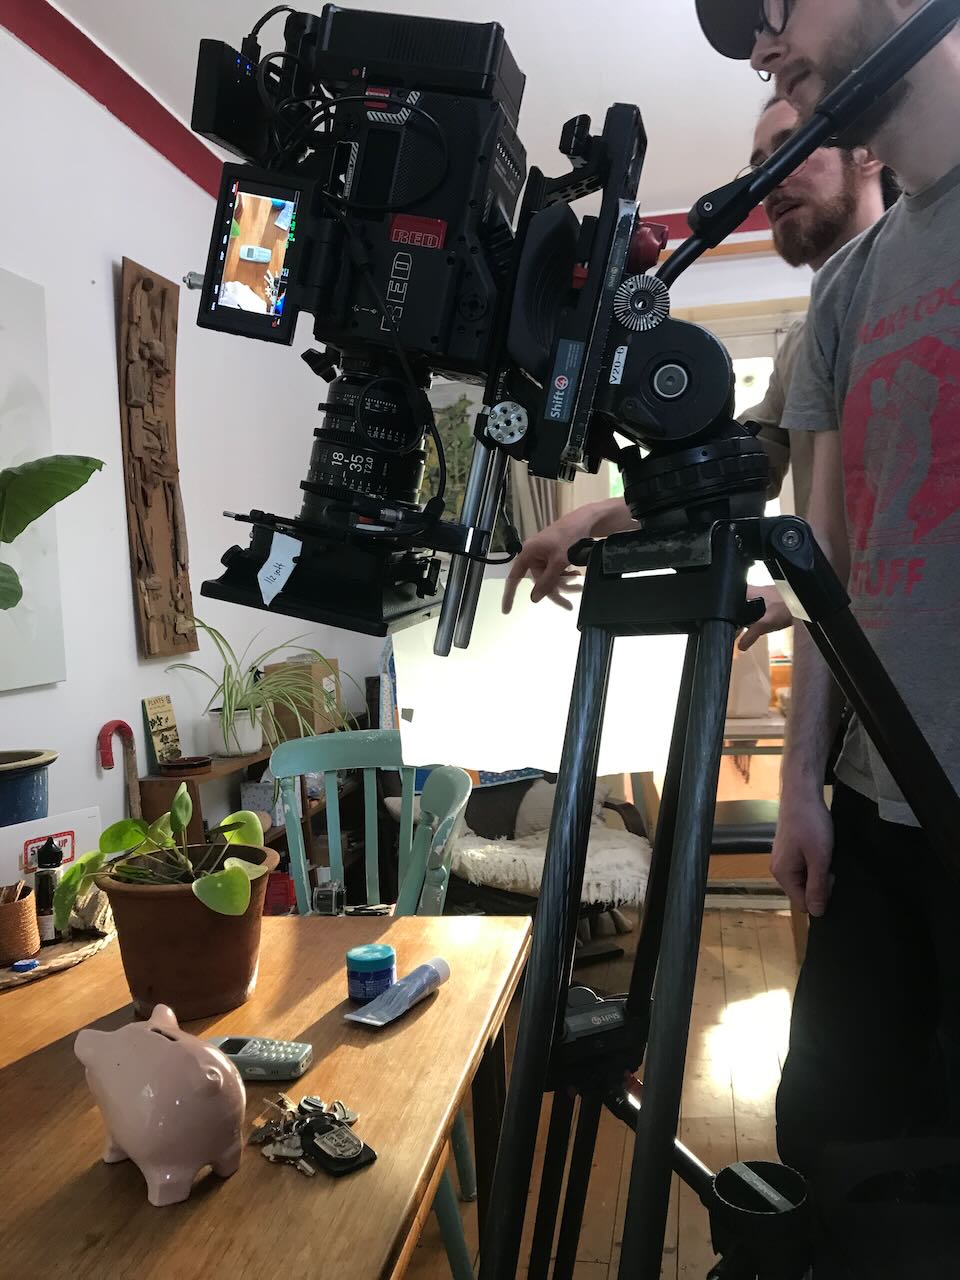
We eased into it gradually with simple inserts, recreating the look and lighting in the kitchen using Fifi’s camera notes, clips from the assembly edit, and this blog (yes, it’s not just for you, dear reader). At times like this I wish I recorded even more information – intensity and colour temperature readings for every source would be extremely useful, but is that really practical?

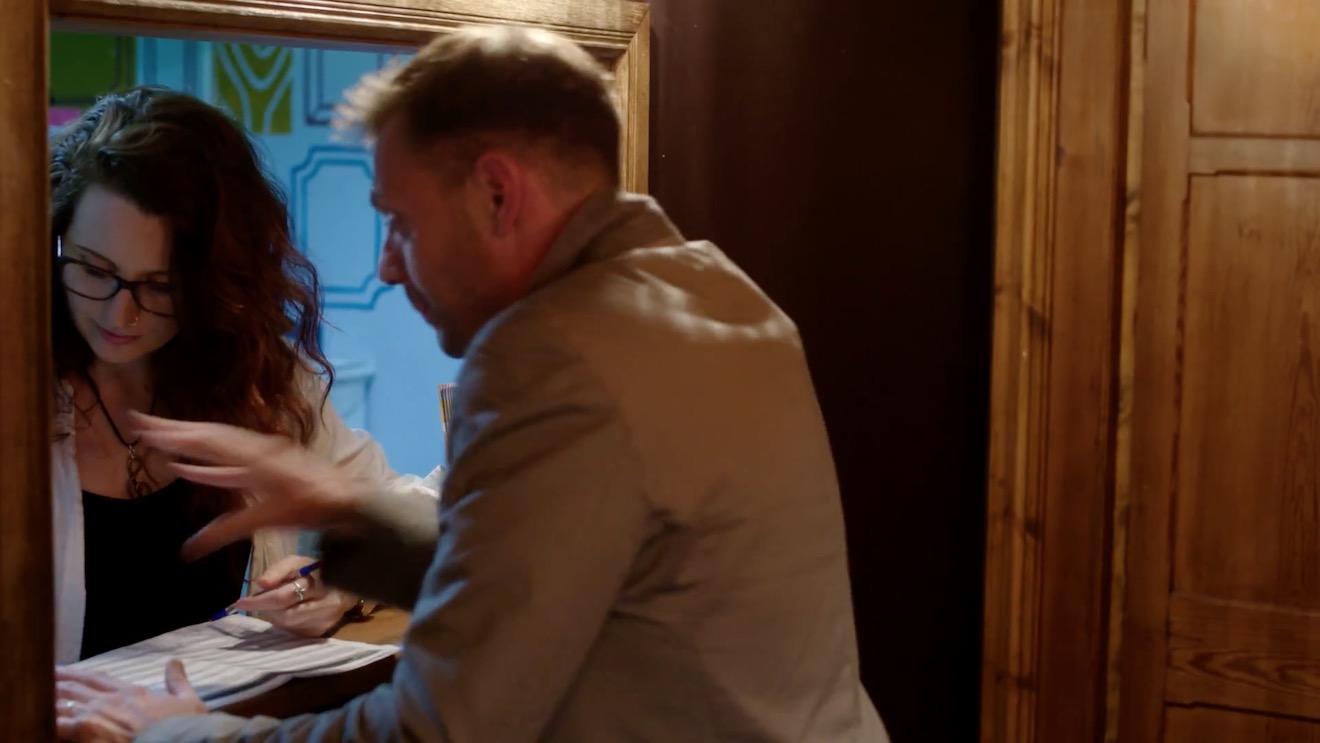
After traumatising Paul with a reshoot of a scene in which he gets slapped (accidentally for real the first time around) we popped outside to get a shot of him on the street, filmed through a car windscreen. Last year we captured the first monologue of the film as a oner, but with hindsight director Jonnie Howard decided it needed breaking up; this windscreen shot is one of several that he has added to illustrate the things Harvey monologues about. Proving that there are no easy shots, it took me an embarrassingly long time to eliminate annoying reflections in the glass by covering shiny parts of the dashboard with matt black tape and putting a polarising filter in the matte box.

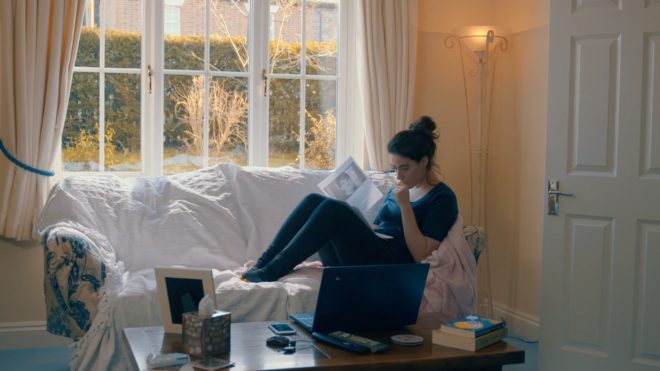
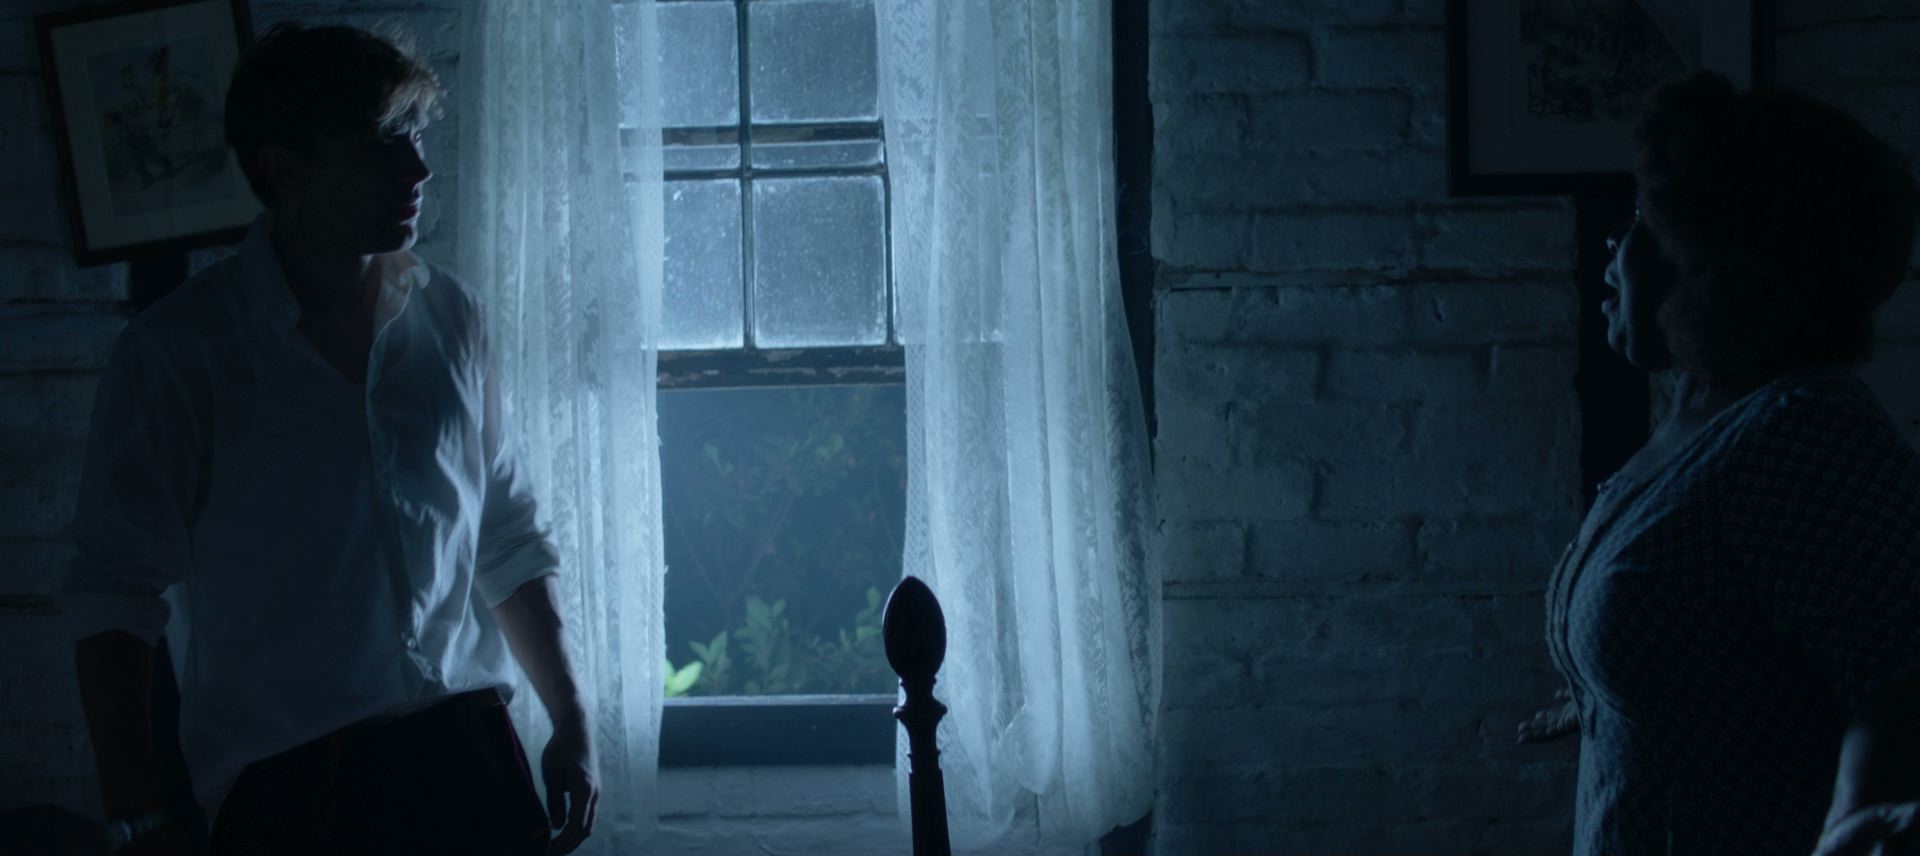
Next we moved to the back garden for one of the film’s most complicated shots. It starts off as a two-shot of Harvey and Alice (Liz Barker) in a nighttime interior setting then – via a low-tech, Michel Gondry-style transition – becomes a single of Harvey in a daytime exterior. Gaffer Stephen Allwright and spark Jeremy Dawson built a dark box out of flags and bolton, parts of which had to swing away to let in the natural light during the transition. A light had to be panned off and a reflector swung in too, while production designer Amanda Stekly and her helpers performed their own magic with the set. By the time we got it in the can we were losing the light, but the result was well worth it.

The dusk gave us just the look we needed for a quick scene in the bedroom, then we were into full nighttime scenes. I climbed into the wardrobe to get the right camera angle – we were without our beloved 14mm lens this time around, so the locations felt a little tighter!

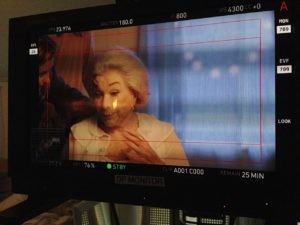
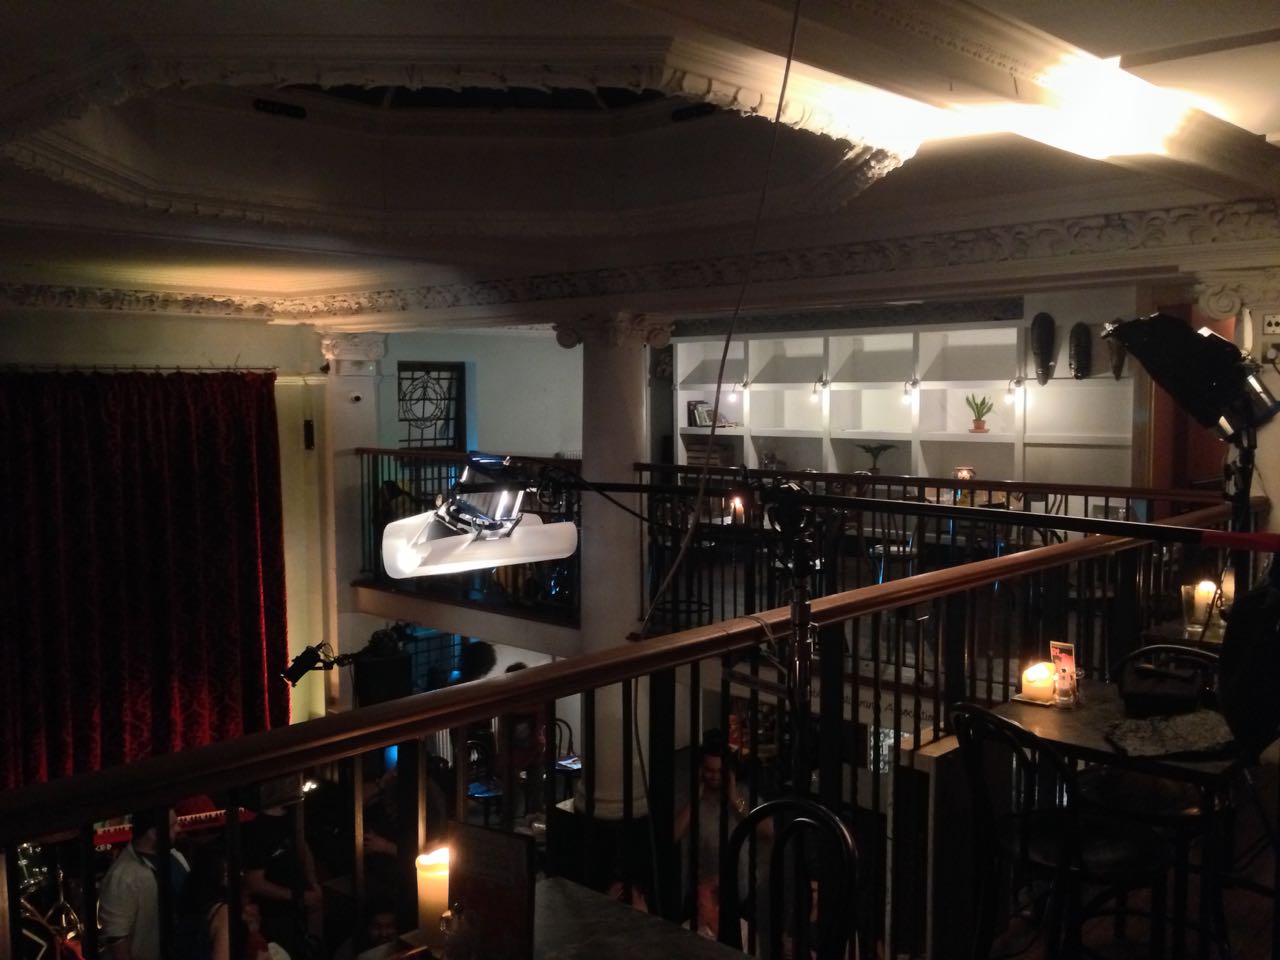
Later we had to recreate the lighting of the aforementioned oner, so we could shoot coverage, again with extensive reference to the camera notes, rushes and R3D metadata, this blog, and on-set photos captured on my phone. Last year we dialled a custom cyan colour into the Astera tubes and I really wish I had noted the XY or HSL numbers so that we could have dialled those into the Rayzr MC 200 that was replacing them for the pick-ups. Instead we had to judge it by eye.

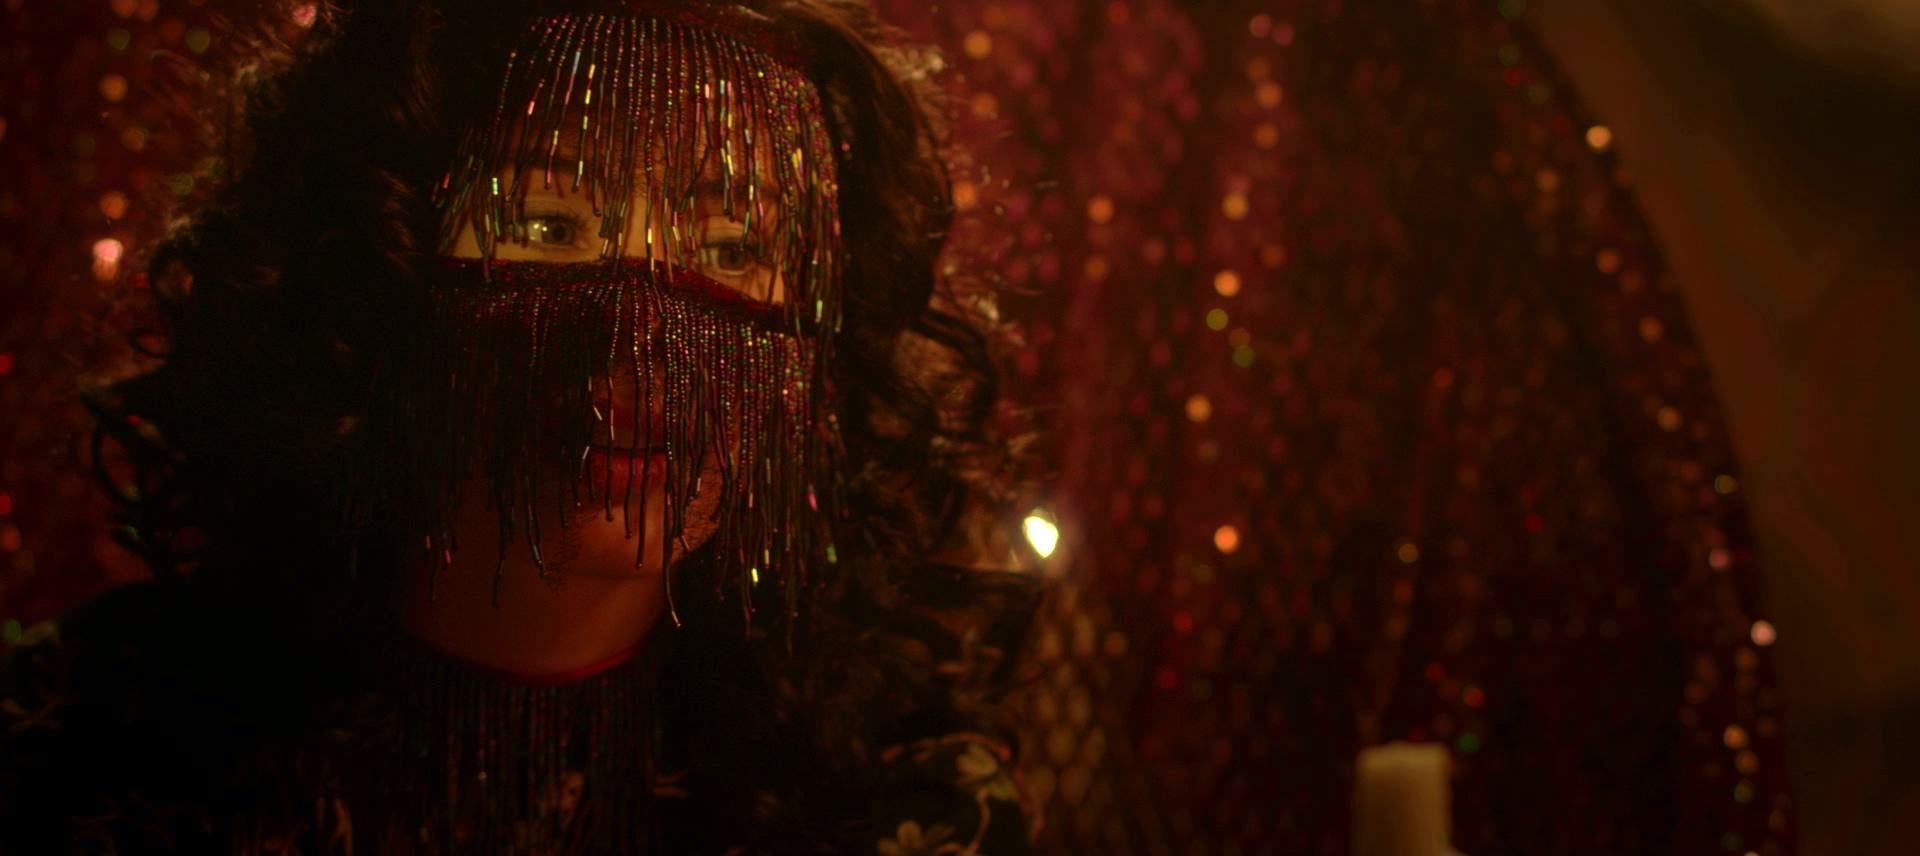
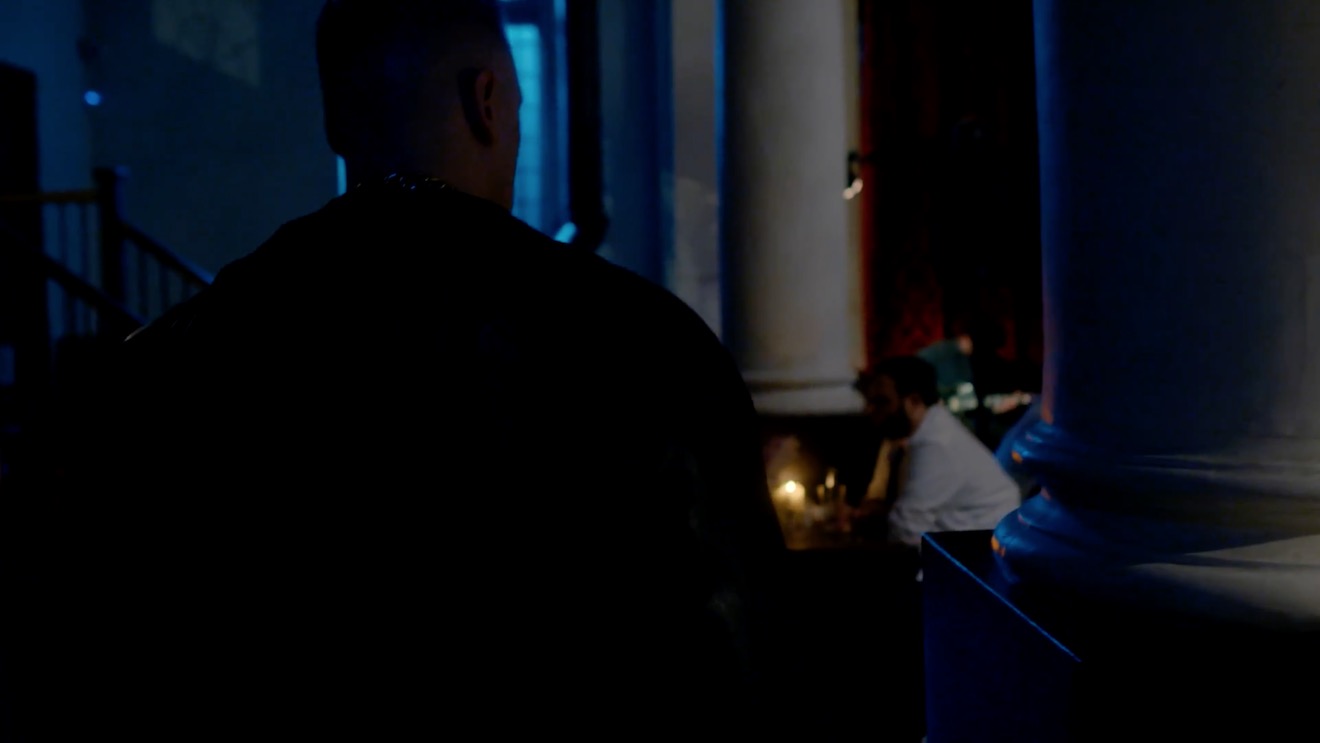
It was now about midnight and we still had an important sequence in the kitchen and living room to shoot; we ultimately captured it in two set-ups and an insert. This day’s filming had seen the most extreme examples of the colour scheme I planned last year: orangey-red colours to represent Harvey’s stress, and cooler, greenish shades for calmer moments. By the end of the night it was starting to look like The Neon Demon and I was wondering if I had gone too far. I guess I will find out when it’s all cut together.


Day 16

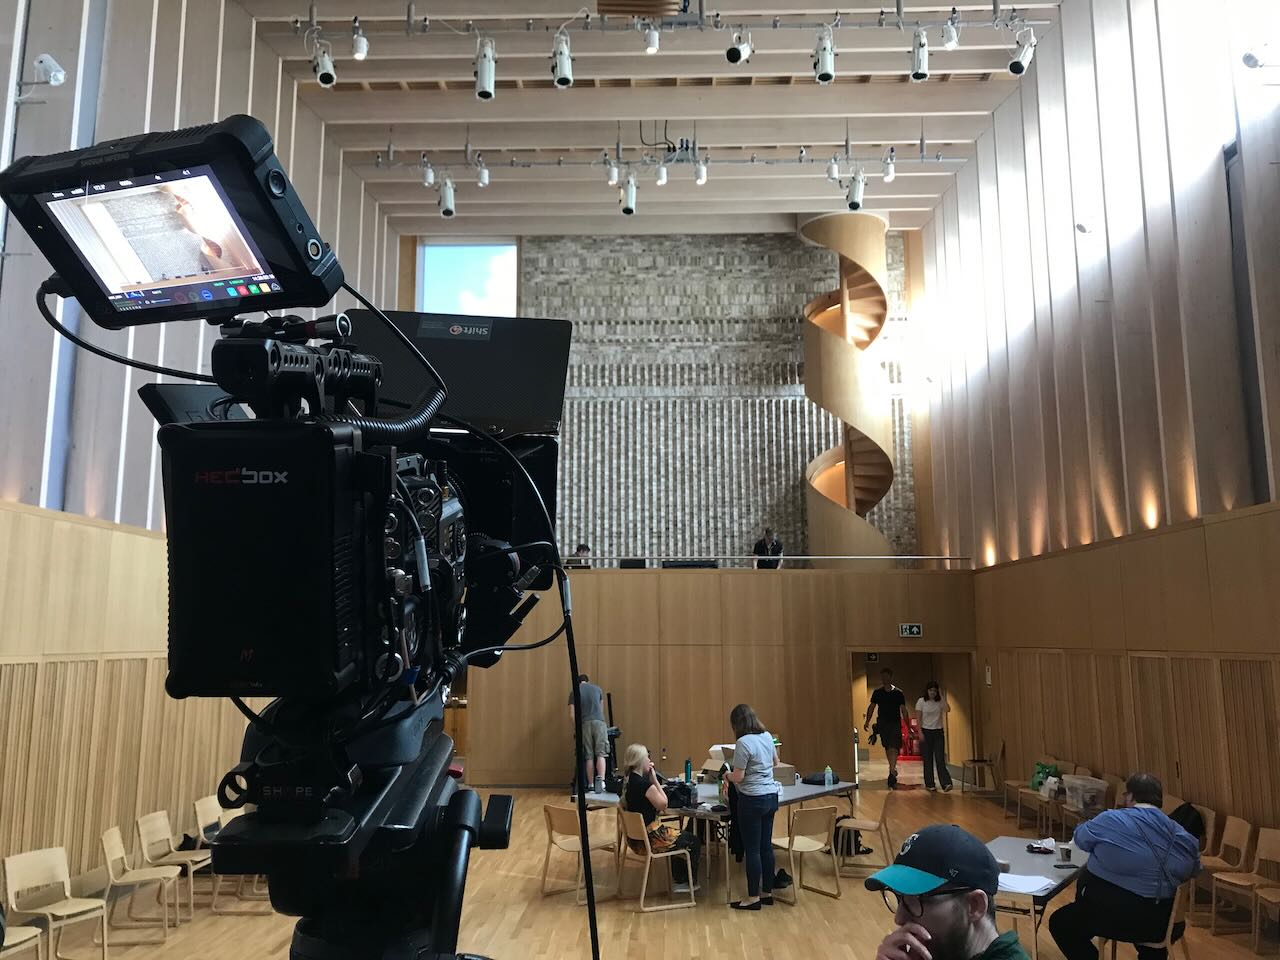
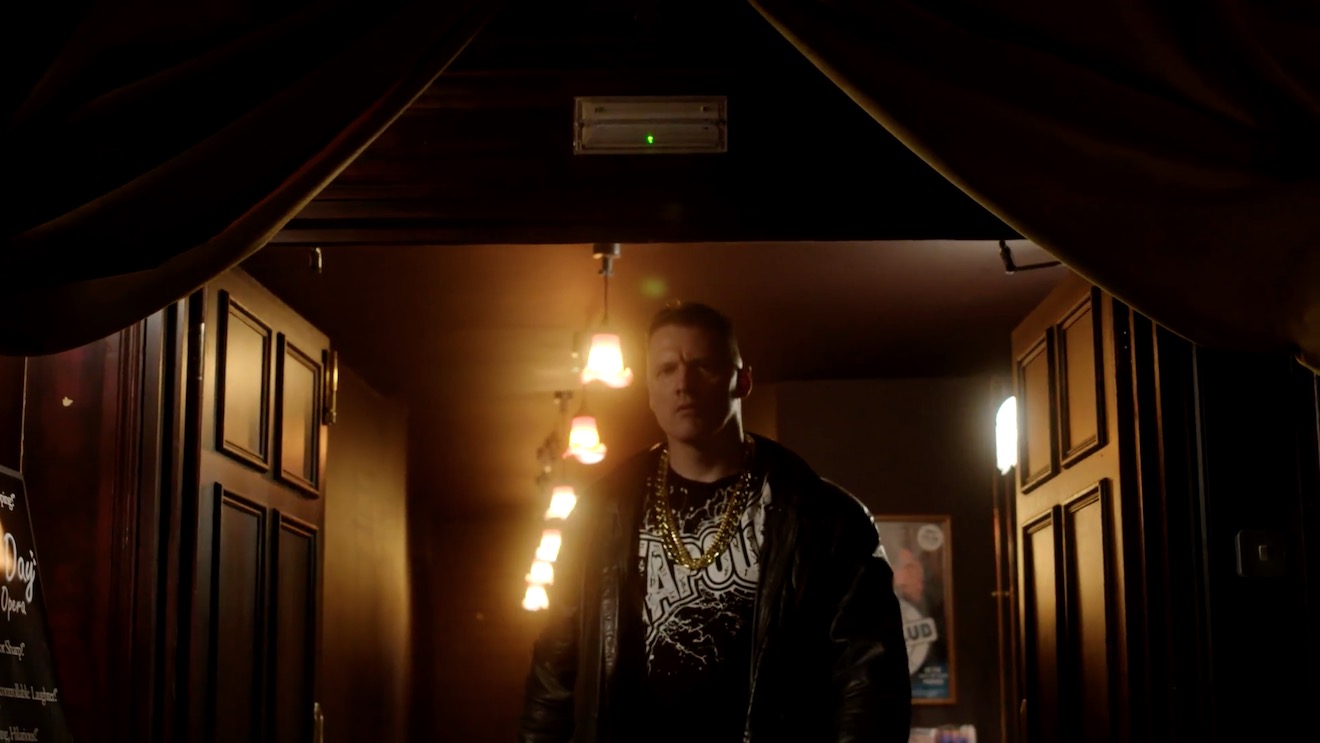
A pleasant cycle ride through Cambridge and out across a meadow brought me to the brand-new village of Eddington and the impressive Storey’s Field Centre where we would be filming the office of Harvey’s boss, Bryan (Alan Hay). First up was a fantastic shot of Harvey huffing and puffing up a spiral staircase in the centre’s main hall. The high-tech building had its lights and two layers of blinds controlled electronically, and Stephen was able to completely reshape the natural light in the huge wide shot and even put a glorious streak of light on the staircase just by pressing a few buttons. If only every location was equipped so.

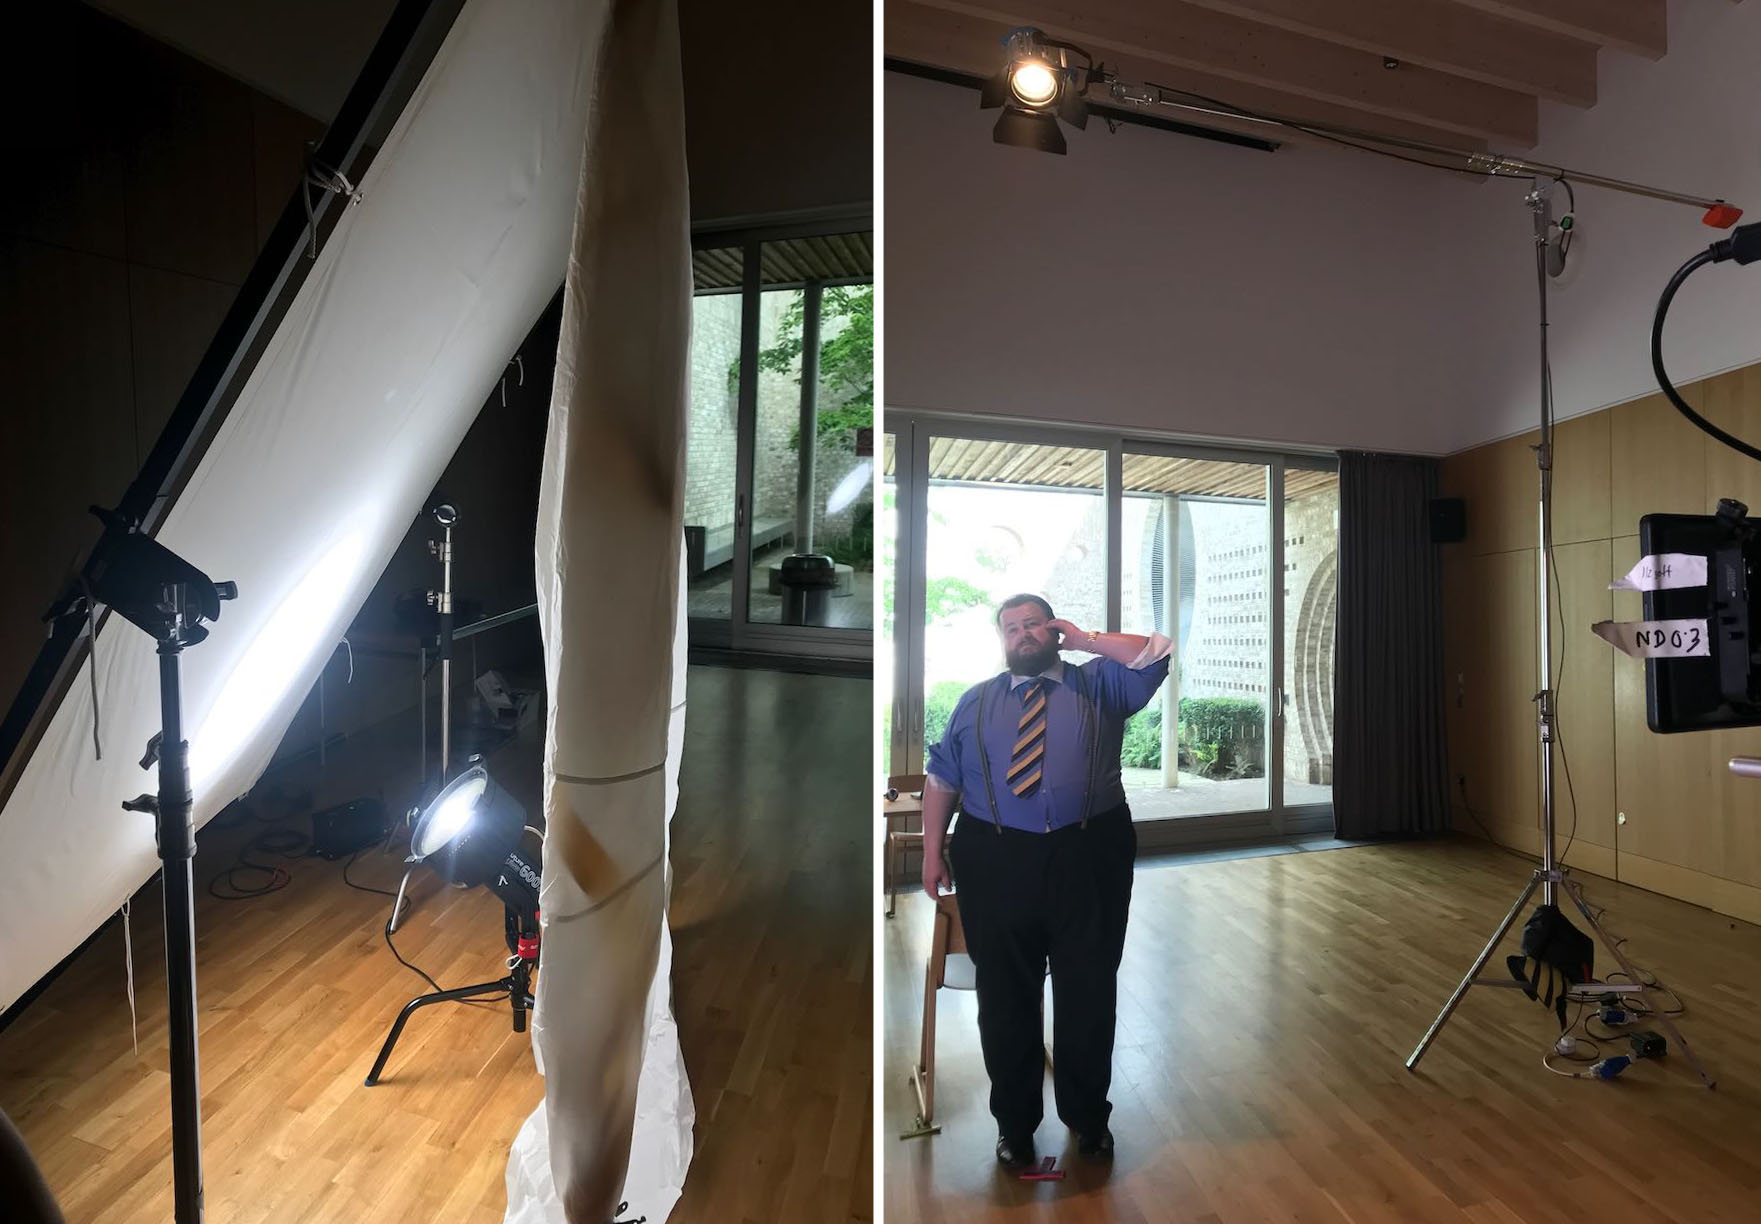
A smaller, but still obscenely spacious, hall served as Bryan’s office. French windows faced east into a beautiful courtyard garden. High windows on the opposite side of the room featured motorised blinds again, which sadly would not stop halfway, forcing us to close them completely to control the light. An overhang above the French windows, combined with the high walls of the courtyard, meant that very little natural light now entered the room. For a key, Stephen constructed a book-light by pointing an Aputure 600D up into a tilted frame of Ultrabounce and then hanging some diffusion (half grid, I think) off the top edge. We added a tungsten fresnel on a boom to give some orange, stress-themed hair-light to characters in the middle of the room.

The first shot was effectively the POV of a dartboard, so we stuck three darts to the matte box with Blu Tack. Sharp points and oily substances – exactly the things you want right next to your lens! – but it looked great.

The next couple of shots featured co-writer Raymond Howard’s baby daughter. One was a contra-zoom, captured on the 18-35mm which I zoomed manually off the barrel while pushing in on the Tango ProSup slider. The other required me to brandish the handheld camera right in baby’s face for a very long time until she eventually cried.

Then it was onto the big scene. This featured Bryan referring to a PowerPoint presentation, which meant a lighting transition as the screen came down and the projector fired up. For Harvey’s angle, with his back to the projector, we boomed an Aputure 300D behind him to simulate the projection beam, and sat a pocket LED light on the matte box to represent the bounce off the screen; these faded up as the 600D book-light and tungsten hair-light dimmed down. For Bryan’s angle the real projection light wasn’t doing enough on his face, so we “extended” the practical lamp on his desk with a small tungsten fresnel. For the wide shot we could get away with re-angling the practical so that it cast a dramatic, Citizen Kane-esque shadow from Bryan up onto the screen.

All in all, the day’s work added a huge amount of scale and humour to the movie. It was lovely to see and work with everyone again for the weekend. Next month most of us will be back for eight more days of running late.

“Harvey Greenfield is Running Late”: June 2022 Pick-ups

“Harvey Greenfield is Running Late”: Week 2-and-a-Bit

Day 11

In a conference room at a business centre in north Cambridge we set up for a scene in which the titular Harvey arrives titularly late for a big meeting at work. Here we were joined by my good friend Alan Hay, who voiced all the pre-recorded male characters in the stage play, and now portrays Harvey’s overbearing boss Bryan on screen.

A TV monitor in the background of Bryan’s shot, displaying relevant graphics, gave us some trouble. Neither the 50Hz or 60Hz “flicker free” modes in the monitor’s menu lived up to their names. The best – though not perfect – results were achieved by setting the camera’s shutter to 144°, which works out as 60Hz at our frame rate of 24fps. (Next week’s post will be dedicated to the maths behind this. I bet you can’t wait.)

Stephen and James rigged several Astera tubes to the ceiling, which we mostly used to give everyone a tungsten-coloured backlight whichever direction we shot in (Harvey’s stress colour again). The key light was motivated from the window, which we weren’t able to light from outside of, but we generally used the Litemat 2S to punch up or wrap the natural light from that direction. We used floppy flags on the opposite side of the room to stop too much ambience from the atrium spilling in.

Unfortunately by the time we wrapped the meeting scene we were left with a difficult choice: to rush a long and funny scene in Bryan’s office, or to postpone it for some future pick-up shoot when we could do it justice. Jonnie wisely chose the latter, allowing us to decamp to a private home in Arbury and get ahead with the scenes set in Harvey’s house.

First up at the house was a happy flashback of Harvey and Alice dancing in the bedroom, which Amanda had dressed in calming shades of green. We shot towards the window at 48fps and supplemented the natural light with a single Astera tube in a corner.

Next was a less positive flashback set at night. As it was still broad daylight I closed the curtains, framed out the window and set the white balance to 3600K to turn the remaining light seeping through the curtains into a dim nighttime ambience. I had asked Amanda to provide matching practicals on the bedside cabinets, which we now turned on and dimmed to get a nice warm orange glow. This looked great but left the actors’ faces very under-exposed, so we added a 300W tungsten fresnel motivated by one of the tablelamps. (The thing you see hanging in front of it in the above photo is a makeshift flag to stop the other tablelamp from casting an unrealistic shadow.)

Then it was back to daylight – again natural light supplemented by an Astera – and the camera had to stay locked off so that Jonnie could jump-cut to this shot from the same angle at night. Stephen and James set up the lighting while the daylight faded. The main element that I wanted was a streak of sodium streetlight through a gap in the curtains, again part of the stress colour theme, which was achieved with the Aputure 300D gelled appropriately. We wanted to give the impression that this was bouncing off the wall and edge-lighting Harvey in his second position, but in reality we used the tungsten 300W fresnel – now hidden on top of the wardrobe – to get this effect. We bounced two Astera tubes, set very blue with a bit of green mixed in, off a wall to provide ambience.

Overall the frame was still pretty dark, so I decided to do something I’ve seen advised for night scenes before but never actually done: I reduced the ISO by one stop and opened the iris to compensate. Read my article about ISO if you want to understand all the ins and outs, but essentially doing this allowed one more stop of light to reach the sensor – that’s more information to grade with – without increasing the apparent brightness of the image.


Day 12

Back in the house, this time downstairs in the kitchen. We had three daylight scenes to shoot here, and the lighting approach was to push in soft light through the windows using the Litemat or an Aladdin, with some harder streaks where appropriate from the Aputure. Hiding another Aladdin on top of a cabinet and firing it into a corner of the ceiling was a good move by Stephen to raise the ambience in the room while still keeping some directionality.


Day 13

Our first task today was to return to the cemetery and pick up a dropped shot from day 8. Then it was another Steadicam/rickshaw scene on an Ely street where rain, traffic and a recalcitrant beer can combined to make things quite tricky.

After lunch we had a strict two-hour window in which to shoot three scenes with a hired limousine. The first required it to be driving around, so Filipe (sound mixer), Olga (focus puller) and I squeezed into the front of the main cabin, shooting down the length of the vehicle on the 14mm to where Paul and Alan’s characters were sitting at the back. Jonnie rode in the front passenger seat and watched the monitor over my shoulder. Next to him was an Aladdin which I could use for fill when necessary, but mostly I relied on the dynamic natural light. The heavily tinted windows were a big help, allowing me to retain most of the detail in the sky outside without under-exposing the talent.

When we returned to base, Stephen had all the flags, bolton and lights ready to move into position around the limo for the night scene. His custom-built LED was gelled with Urban Sodium again to key Alan, and an Astera tube inside the limo provided the impression of a passing ambulance.

Then we were left with less than 25 minutes to capture a daytime dialogue scene around the limo. Jonnie had storyboarded it as three set-ups but there was only time for one. Rupert came to the rescue, quickly balancing his Steadicam as Jonnie devised a camera move that would hit all the needed beats.

After a couple more Steadicam shots we moved on to a scene in a hospital car park, a rare moment of calm for the beleagured Harvey. We shot this mostly on the slider, capturing the dialogue in another single developing shot that taxed poor Filipe again but set exactly the right mood for the story. The natural light was very shapeless, so Stephen set up some floppies on one side and bounce on the other.

The day brought principal photography to an end for Stephen and for leading man Paul Richards, both of whom have done stellar work despite the long hours and high energy levels required.

Just after I wrote this Jonnie sent me a rough edit of the limo/hospital sequence and it has turned out very nicely indeed.


Day 14

We convened at a farm near Mildenhall to film Billy the pig farmer, one of the many people who hassles Harvey by phone during the story. In a last-minute casting coup Billy was portrayed by 1st AD Rob Oliver with the unscripted addition of his mother Shirley. A comedy duo to be reckoned with. Between takes we scattered food around to entice the porcine supporting artists into the right positions.

After completing this sequence we all took it in turns to hold a piglet. I’m not sure why.

The final scene of principal photography was a spoof charity appeal for “No More Racism UK”. We shot this down at Ely riverside again, where a crowd steadily gathered to watch us film an old white lady throwing bread at a black couple. We captured the whole thing on the slider with the 50-100mm zoom at 48fps and with the Soft FX 1 for extra cheesiness. To get the depth of field as shallow as possible with our limited ND filters I went down to ISO 250, the downside being a reduction in highlight detail which threatened to blow out the feathers of a white swan in shot. I’m sure that’s symbolic somehow.

We wrapped at the astonishingly reasonable time of 3pm and reconvened in the evening for a pizza-fuelled celebration at Othersyde. The shoot was great fun, the whole team has worked really hard, and I look forward to seeing everyone again for the pick-ups.

The “Harvey Greenfield” camera department: 1st AC Olga Lagun, 2nd AC Fiyin Oladimeji and me
“Harvey Greenfield is Running Late”: Week 2-and-a-Bit

The Hardest Shot I’ve Ever Done

It is night. We Steadicam into a moonlit bedroom, drifting across a window – where a raven is visible on the outside ledge, tapping at the glass with its beak – and land on a sleeping couple. The woman, Annabel, wakes up and goes to the window, causing the bird to flee. Crossing over to her far shoulder, we rest on Annabel’s reflection for a moment, before racking focus to another woman outside, maybe 200ft away, running towards a cliff. All in one shot.

Such was the action required in a scene from Annabel Lee, the most ambitious short I’ve ever been involved with. Based on Edgar Allen Poe’s poem, the film was the brainchild of actor Angel Parker, who plays the titular character. It was directed by Amy Coop, who had already to decided to shoot on an Alexa Mini with Cooke Anamorphics before I was even hired.

Working with animals has its own difficulties, but for me as director of photography the challenges of this particular shot were:

  1. Making the bedroom appear moonlit by the single window, without any lamps being visible at any point in the Steadicam move.
  2. Lighting the view outside.
  3. Ensuring the live raven read on camera even though the shot was quite wide.
  4. Making Annabel bright enough that her reflection would read, without washing out the rest of the scene.
  5. Blocking the camera in concert with Annabel’s move so that its reflection would not be seen.

I left that last one in the capable hands of Steadicam op Rupert Peddle, along with Angel and Amy. What they ended up doing was timing Angel’s move so that she would block the window from camera at the moment that the camera’s reflection would have appeared.

Meanwhile, I put my head together with gaffer Bertil Mulvad to tackle the other four challenges. We arrived at a set-up using only three lights:

  1. A LiteMat 1 above the window (indoors) which served to light Annabel and her reflection, as well as reaching to the bed.
  2. Another LED source outside the window to one side, lighting the raven.
  3. A nine-light Maxibrute on a cherry-picker, side-lighting the woman outside and the cliffs. This was gelled with CTB to match the daylight LEDs.

Unfortunately the outside LED panel backlit the window glass, which was old and kept fogging up, obscuring the raven. With hindsight that panel might have been better on the other side of the window (left rather than right, but still outside), even though it would have created some spill problems inside. (To be honest, this would have made the lighting direction more consistent with the Maxibrute “moonlight” as well. It’s so easy to see this stuff after the fact!)

Everything else worked very well, but editor Jim Page did have to cut in a close-up of the raven, without which you’d never have known it was there.

The Hardest Shot I’ve Ever Done

Working with White Walls

White walls are the bane of a DP’s existence. They bounce light around everywhere, killing the mood, and they look cheap and boring in the background of your shot. Nonetheless, with so many contemporary buildings decorated this way, it’s a challenge we all have to face. Today I’m going to look back on two short films I’ve photographed, and explain the different approaches I took to get the white-walled locations looking nice.

Finding Hope is a moving drama about a couple grieving for the baby they have lost. It was shot largely at the home of the producer, Jean Maye, on a Sony FS7 with Sigma and Pentax stills glass.

Exit Eve is a non-linear narrative about the dehumanisation of an au pair by her wealthy employers. With a fairly respectable budget for a short, this production shot in a luxurious Battersea townhouse on an Arri Alexa Classic with Ultra Primes.


“Crown”-inspired colour contrast

Cheap 300W dimmers like these are great for practicals.

It was January 2017 when we made Finding Hope, and I’d recently been watching a lot of The Crown. I liked how that series punctuated its daylight interior frames with pools of orange light from practicals. We couldn’t afford much of a lighting package, and I thought that pairing existing pracs with dimmers and tungsten bulbs would be a cheap and easy way to break up the white walls and bring some warmth – perhaps a visual representation of the titular hope – into the heavy story.

I shot all the daylight interiors at 5600K to get that warmth out of the pracs. Meanwhile I shaped the natural light as far as possible with the existing curtains, and beefed it up with a 1.2K HMI where I could. I used no haze or lens diffusion on the film because I felt it needed the unforgiving edges.

For close-ups, I often cheated the pracs a little closer and tweaked the angle, but I chose not to supplement them with movie lamps. The FS7’s native ISO of 2500 helped a lot, especially in a nighttime scene where the grieving parents finally let each other in. Director Krysten Resnick had decided that there would be tea-lights on the kitchen counter, and I asked art director Justine Arbuthnot to increase the number as much as she dared. They became the key-light, and again I tweaked them around for the close-ups.

My favourite scene in Finding Hope is another nighttime one, in which Crystal Leaity sits at a piano while Kevin Leslie watches from the doorway. I continued the theme of warm practicals, bouncing a bare 100W globe off the wall as Crystal’s key, and shaping the existing hall light with some black wrap, but I alternated that with layers of contrasting blue light: the HMI’s “moonlight” coming in through the window, and the flicker of a TV in the deep background. This latter was a blue-gelled 800W tungsten lamp bounced off a wobbling reflector.

When I saw the finished film, I was very pleased that the colourist had leant into the warm/cool contrast throughout the piece, even teasing it out of the daylight exteriors.


Trapped in a stark white townhouse

I took a different approach to colour in Exit Eve. Director Charlie Parham already knew that he wanted strong red lighting in party scenes, and I felt that this would be most effective if I kept colour out of the lighting elsewhere. As the film approaches its climax, I did start to bring in the orange of outside streetlamps, and glimpses of the party’s red, but otherwise I kept the light stark and white.

Converted from a Victorian schoolhouse, the location had high ceilings, huge windows and multiple floors, so I knew that I would mostly have to live with whatever natural light did or didn’t shine in. We were shooting during the heatwave of 2018, with many long handheld takes following lead actor Thalissa Teixeria from room to room and floor to floor, so even the Alexa’s dynamic range struggled to cope with the variations in light level.

For a night scene in the top floor bedroom, I found that the existing practicals were perfectly placed to provide shape and backlight. I white-balanced to 3600K to keep most of the colour out of them, and rigged black solids behind the camera to prevent the white walls from filling in the shadows.

(Incidentally, the night portions of this sequence were shot as one continuous take, despite comprising two different scenes set months apart. The actors did a quick-change and the bed was redressed by the art department while it was out frame, but sadly this tour de force was chopped up in the final cut.)

I had most control over the lighting when it came to the denouement in the ground floor living area. Here I was inspired by the work of Bradford Young, ASC to backlight the closed blinds (with tungsten units gelled to represent streetlights) and allow the actors inside to go a bit dim and murky. For a key moment we put a red gel on one of the existing spotlights in the living room and let the cast step into it.

So there we have it, two different approaches to lighting in a while-walled location: creating colour contrast with dimmed practicals, or embracing the starkness and saving the colour for dramatic moments. How will you tackle your next magnolia-hued background?

For another example of how I’ve tackled white-walled locations, see my Forever Alone blog.

Working with White Walls

“The Little Mermaid”: Lighting from the Back

So far, this blog series about my cinematography of The Little Mermaid has covered the biggest and most complex scenes in the movie. Today I’m going to look at some smaller scenes, and how I employed the cinematography tenet of lighting from the back to quickly build a look for these which has depth, mood and drama.

Many of these examples are specifically cross-backlighting, something I covered in my Lighting Techniques series, but I’ll quickly recap since it has so much relevance here. It involves lighting two characters facing each other with two sources, on the far side of the eye-line (short key), crossed so that each source keys one character and often backlights the other too.

So with that in mind, let’s proceed to the examples from my shooting diary.


Day 1

The first week is pretty much all in houses with just a few principals, so an easy start. Day 1’s schedule is tight though. We start in a third floor bedroom – no way lamps are getting up to those windows from outside, so I’m relying on natural light augmented with a bit of cross-backlight cheated inside the room. (There’s a Kino Flo shining at Elle over Cam’s right shoulder, for example.) Once the haze is in it looks great. After we get the main coverage, we head out to the garden for the next scene, while the ‘B’ camera team steps in to pick up a couple of inserts…


Day 3

…It’s a night scene and the grips have tented the window. To get a nice blue glow coming in, I have two 4×4 Kino Flos set either side of the window (outside), and they give a great wrapping backlight to the actors and the set dressing. Smoke and a cool white balance of 3,200K (the Kinos are tubed for 5,600K) complete the look. It owes a lot to a scene from Hook, one of Blake’s (director Blake Harris) reference movies which I watched during preprod. This stuff definitely filters in and inspires things!


Day 13

Our first day on stage. It’s weird to be back at the former supermarket I spent five weeks of preproduction in. The first set, Locke’s chamber, is very confined and the walls don’t wild, so it’s quite slow-going to work in there. We fire a 5K fresnel through the stained glass window at the back of the set. Then I fall back on the tried and tested method of cross-backlighting even though I know that it will be hard to hide the lamps (a 650W fresnel in both of the upper rear corners of the set) from camera. In the end I have the art department dress drapes in front of them. For the villain’s single I leave the light hard, but for the hero’s single we use bounce boards to wrap the light around his face more…


Day 28

We start with the fortune-teller’s tent, another small set constructed on stage. In fact, it’s just an Easy-Up artfully draped with fabrics. Initially there’s nowhere to get light in from except the front, but I know that this will leave the scene looking flat and fake, so I work with the art department again to make holes in the top rear corners. Through those we shine tungsten-bubbled “Fat Boy” Kino Flos. (These 2ft 4-bank units are giving the dual kickers on Cam in the centre, and the beautiful down-light on the background fabrics, bringing out the ruching. Each one also provides a little key-light on the two ladies.) The other sources are “moonlight” coming in through the entrance, linking us to the circus exteriors, and a stylised slash of light across Thora’s eyes from a Source Four, suggested by Jason (key grip Jason Batey). Adding foreground practicals is an important final touch to expand the depth and scale of the set…


Day 31

It’s the last day of principal photography. Our big scene of the day is the newspaper office where Cam works, which is a set in the front of the studio, using the building’s real windows. We fire the 12K in and gel it with half CTS for a nice morning sunlight effect. We’re shooting towards the windows, which have blinds, so we get some nice shafts of light, though sometimes it’s a little too smokey. Running haze is a pretty skilled and tricky job, and involves considering the lens length and backlight, which both affect how much the smoke shows up on camera. When we get it right, combined with the dark wood period furniture, it totally sells the 1937 setting. Apparently people at video village are loving it, saying it looks like Mad Men….

Next week, in the final part of my blog series on The Little Mermaid, I’ll share my experiences of shooting the sunset denouement while up to my waist in the Atlantic Ocean.

“The Little Mermaid”: Lighting from the Back

“The Little Mermaid”: Shooting Shirley

The Little Mermaid, an independent live-action take on the Hans Christian Andersen fairytale, is now showing in cinemas across the USA. To mark the release, over the next few weeks I’ll be posting a series of articles about my cinematography of the film, using extracts from the diary I kept during production.

In this first instalment I’ll focus on the “pre-shoot”, two days of capturing the present-day scenes, undertaken a few weeks before principal photography began. For these scenes, we were all very excited to be working with bona fide Hollywood royalty in the form of Shirley MacLaine. Since debuting in the 1955 Hitchcock comedy The Trouble with Harry (and winning a Golden Globe), Shirley’s career has taken in six Oscar nominations as well as a win for Terms of Endearment, plus an AFI Life Achievement Award, two Baftas, an Emmy and several more Golden Globes.

No pressure then….


Saturday

Shirley is installed at a five-star hotel in downtown Savannah for hair, make-up and wardrobe tests. Taking it easy at the studio, I get a call from the UPM telling me that Shirley wants to meet me. Nervously I transfer my lighting reference images (including screen grabs I gathered last week from her previous movies) to my iPad and await my car.

When I get to the hotel I bump into her and the rest of the crew in the hall. Plunging straight in, I shake her hand and introduce myself as “Neil Oseman, the DP”. Evidently not hearing that last bit, and presuming I’m a PA or possibly a fan, she looks me up and down and asks me who I am. I repeat that I am the director of photography. “You’re so young!” she exclaims, laughing at her mistake.

“Well, I’ve been doing this for fifteen years,” I reply, all too aware of how short my career is compared with hers.

“Which pictures? Tell me,” she says.

Again acutely aware that my credits list isn’t going to sound very impressive to her, I mention Heretiks, and Ren: The Girl with the Mark and mutter something about doing lots of features.

To my great relief she doesn’t press the point, instead asking what I think of the wig and make-up she’s wearing. I ask her to step into the daylight, and assure her that it looks good, but that I’d like to warm up her skin tone a little with the lighting, an idea she responds well to.

Satisfied, Shirley moves on to other things, and I hang out in a meeting room at the hotel drawing storyboards, until it’s time for a production meeting.


SUNDAY

The present-day scenes were shot on Arri Alexas using Zeiss Super Speed Mark I primes and an Angenieux Optimo zoom, diffused with Tiffen Soft FX filters.

I arrive on location before even the early crew call of 8am, with my gaffer Mike Horton. His and key grip Jason Batey’s teams have rigged a dark box around the beach house’s deck/balcony so we can shoot day-for-night interiors.

At 10am Shirley arrives, blocks the scene, then goes off to hair and makeup. We’re starting with close-ups of her, so the grip and electric teams come in and build a book light. (This is a V-shaped arrangement of bounce and diffusion material, resembling an open book, which greatly softens the light fired into it.) When we start to turn over and Shirley watches playback, I’m gratified to find she is very happy with how she looks on camera. We shoot out all her close-ups, then bring in the little girls playing opposite her and block the wide shots.

In the lefthand foreground here is the 2K source for the book light. In the top right you can see the diffusion frame it’s firing through, and you can just make out the poly or rag we attached to the wall to bounce the light back onto Shirley (in the white nightgown). The net in the upper centre is cutting some light off the background. The camera can just be seen on the right of the photo.

As time begins to crunch, I fall back on cross-backlighting as a quick no-brainer solution to get the wide shot looking good. It’s so important to have these lighting templates up your sleeve when the pressure’s on. (Later on in this blog series I’ll discuss the use of cross-backlighting in several other scenes in the movie.)

For a little while it looks like we might not make the day, but I suggest a way to maximise the beautiful beach view at twilight and get the story beats covered in one two-camera set-up. The shot feels like something out of a classic old movie. Shirley MacLaine walking off into the sunset! Everyone loves how it looks, including Shirley. The praise of an actor as experienced as her is high praise indeed, and it makes my day!


Monday

At the monitors with producer Rob Molloy. Photo: Brooks Patrick Allen

We start lighting for our “sunset” scene, which involves firing a pink-gelled 6K through the window and netting the background to get some highlight detail into it. Rather than a book light, this time I use a diffused 4×4 Kino Flo as Shirley’s key. I take a risk and place it further off to the side to get a bit more shape into the light.

Shirley enters, takes one glance at the lighting and remarks, “So, you like this cross-light, huh?”

Busted!

We compromise by adding a little fill from a reflector which Shirley positions herself before each take. Her awareness of how she’s being photographed is astounding. She knows more about lighting than some DPs I’ve met!

Looking at the scenes now, I realise that a large white horizontal reflector in front of Shirley would have been perfect to simulate bounce off the bed, which we moved out when we were shooting the close-ups. Hindsight is 20/20, but I’m still pleased with how it turned out.

Next week I’ll break down the huge lighting set-up required for the night exterior circus scenes.

“The Little Mermaid”: Shooting Shirley

Lighting I Like: “Preacher”

Preacher is the subject of this week’s episode of Lighting I Like. I discuss two scenes, from the second episode of the second season, “Mumbai Sky Tower”, which demonstrate the over-the-top, comic-book style of the show.

Both seasons of Preacher can be seen on Amazon Video in the UK.

New episodes of Lighting I Like are released at 8pm BST every Wednesday. Next week I’ll look at two scenes from BroadchurchClick here to see the playlist of all Lighting I Like episodes.

Lighting I Like: “Preacher”

Lighting I Like: “Breaking Bad”

My YouTube series Lighting I Like is back for a second season of six episodes. It’s a very short and simple show, aimed at raising awareness of the art of lighting amongst non-cinematographers, or those at the very start of their cinematography career. Each week I look at the lighting choices made in one or two scenes of a TV/VOD show and how those choices help tell the story.

First up is Breaking Bad, the critically acclaimed series about a high-school chemistry teacher who, after being diagnosed with leukaemia, resorts to manufacturing drugs to ensure his family’s financial future. All five seasons of the show are available on Netflix in the UK.

Breaking Bad is dark and gritty, shot on 35mm film, and features some beautiful cinematography, one example of which I recently covered in my post on modifying window light. You can read an interesting analysis of the show’s photography on Cinevenger.

In the above video I also provide additions and corrections to some episodes of Lighting I Like‘s first season. Click here to see the playlist of all Lighting I Like episodes.

New episodes of Lighting I Like will be released at 8pm BST every Wednesday. Next week I’ll look at a couple of scenes from The Man in the High Castle.

Lighting I Like: “Breaking Bad”

Negative Lighting

There were no practicals in this corner of the pub, so we placed an 800 open-face outside the window, gelled with Midnight Blue, and a 1×1′ LED panel in the wood-burner, gelled with CTO.

This year I’ve shot a couple of productions on the Sony FS7, a camera I’ve been very impressed by. Its most interesting feature is its high native ISO of 2000, which makes quite an impact on how you go about lighting. The light shed by practicals is often enough to illuminate a scene, or a large part of it, and sometimes you need to take existing practicals away in order to maintain contrast and shape, similar to how you take ambient light away (negative fill) when shooting exteriors.

It’s a strange thing about being a DP that, yes, sometimes you’re required to plan a mammoth lighting set-up using tens of kilowatts of power, but other times it’s just a case of saying, “Take the bulb out of that sconce.” You’re working to exactly the same principles, using your creative eye just as much in both scenarios.

Let’s look at some examples from a promotional film I shot with director Oliver Park for Closer Each Day, an improvised stage soap.

Our location was a pub, which had a large number of existing practicals: mainly wall sconces, but some overheads above the bar and in the corridors too. The film had to be shot in a single night, entirely on Steadicam, with some shots revealing almost the whole room, and to further complicate matters I was a last-minute hire due to another DP having to step down. Keeping the lighting simple, and avoiding putting any “film lights” on the floor where the roving camera might see them, was clearly the way to go.

I identified the darker areas of the room and added a few extra sources: two blue-gelled 800s outside the windows, an orange-gelled 1×1′ LED panel in the wood-burner, an LED reporter light in one key corner, and a small tungsten fresnel toplight onto a key table, firing down from the mezzanine so it would never be in shot. Other than those, and a low level of fill bounced off the ceiling, we relied exclusively on the existing practicals. (They were mainly fluorescent, and ideally we would have reglobed these all with tungsten, but it wasn’t possible.)

This view from the mezzanine shows the diffused 300W fresnel top-lighting the drinking contest table, and the black-wrapped 650 firing into the ceiling for fill.


So, that’s the “positive” lighting. Here are three examples of “negative” lighting in the film…

When Big Dick Johnson (yep, that’s the character’s name) first enters the pub, I put a piece of tape over a little halogen spotlight just above his point of entry. This was partly because it was very bright and I didn’t want him to blow out as he walked under it, but it also made for a much better sense of depth in the overall shot. As I’ve often mentioned on this blog, the best depth in an image is usually achieved by having the foreground dark, the mid-ground at key and the background bright. Killing the halogen spotlight helped create this progression of brightness and therefore depth. It’s also just nice in a shot like this to come out of darkness into the light, enhancing the reveal of the new space to the viewers.

When Billy De Burgh scrambles to buy a ticket at the box office, there are two practicals just above his head. Depending on which way we were shooting, I de-globed one of the fixtures – always the one closest to camera. This ensured that Billy always had backlight, and never had a really hot, toppy front-light shining harshly down on him.

On a side note, the blue light inside the box office was existing – I guess they were using cool white LED bulbs in there – and I really like the way it differentiates the spaces on camera. It puts the bored ticket-seller in a cold, detached world very separate to Billy’s warmer, more urgent world.

This doorway where Big Dick ends the film had sconces on both sides. It’s never very interesting to have an actor evenly lit on both sides of their face, and especially as Dick is such a tough, unpleasant character, I felt that more contrast was required. I chose to remove the globe from the righthand sconce, so that when he turns camera left to look at the sign he turns into the remaining sconce, his key-light. We filled in the other side of his face a tiny touch with a reflector.

I would love to have been able to exercise the same control over the street-lamps in the opening scene of the film – some of them are quite flat and frontal – but unfortunately time, budget and permissions made that impossible. We would have needed huge flags, or a council-approved electrician to switch the lamps off.

That’s all for today. Next time you’re in Bristol, check out Closer Each Day. I didn’t get chance to see it, but I hear it’s brilliant.

Negative Lighting

5 Lighting Modifiers You Can Put on Windows

Lighting through windows is the cornerstone of a DP’s day interior work. I’ve previously written about the various ways that hard light through a window can be used. Today I’m going to look at some examples of how dressing on the windows – anything from curtains to paint or newspaper – can create interesting lighting looks and help you tell the story.

Please note: there are some minor spoilers in this post, and a quite big one for the season two finale of Mr Robot.


1. PAINTS AND STAINS

Director Michael Bay and DP John Schwartzman, ASC recycled many techniques they had used on commercials when they shot Armaggeddon. One of these was to create coloured light, not by arbitrarily gelling lamps, but by having the art department paint the windows. In an early scene on the oil rig, the windows are yellowed to give a warm feel to a romantic scene between AJ and Grace, contrasting with the cool, monochromatic look of the asteroid later on in the film. “The windows here are like a Filon fibreglass that we then threw some orange asphaltum stain on to give it that warm tone,” Schwartzman explains in the commentary.


2.NEWSPAPER

During the first season of time travel thriller 12 Monkeys, our heroes James Cole and Dr Cassandra Railly base themselves out of a disused shop. It’s a safe place they retreat to when they need to plan or regroup, and a womb-like feeling of warmth and security is created visually by the orange newspaper covering the shop’s front windows.

The season two finale of Mr Robot uses a similar technique to a very different end. Gaps in the paper here allow violent shafts of light to pierce the room, foreshadowing the bullet which is about to pierce Elliot’s body.


3. Blinds

When I lensed the race drama Exile Incessant in 2015, director James Reynolds wanted to visually represent the ideological differences between the older and younger South Africans. I decided to bathe the progressive youngsters in soft, low-contrast light, while throwing hard light and deep shadows onto the more narrow-minded adults, whose world is black and white in more ways than one. For the hospital scene pictured below, I adjusted the venetian blinds – with a 2.5K HMI behind them – to give a contrasty pattern of light and shade on the old man.

Lighting through blinds is of course a famous feature of film noir cinematography, and has found its way into countless movies of all genres over the last several decades.

He Walked by Night (1948, dir. Alfred L. Werker)


4. Diffusing curtains

Placing sheer curtains on a window can solve two problems for filmmakers: disguising an unwanted or non-existent (if on stage) background, and softening the light. This is a widely-used technique; in fact it’s common practice for art departments to consult with DPs about curtains to ensure that the right options are available for the style of lighting that will be employed.

In an episode of my YouTube series Lighting I Like, I discussed a scene from The Crown – Netflix’s dramatisation of Queen Elizabeth II’s reign – in which King George VI is found dead. Unlike many daylight interiors in the series which feature hard shafts of sunlight, the scene in question employed net curtains to create a softer, more subdued light, appropriate to the sombre content.


5. Billowing curtains

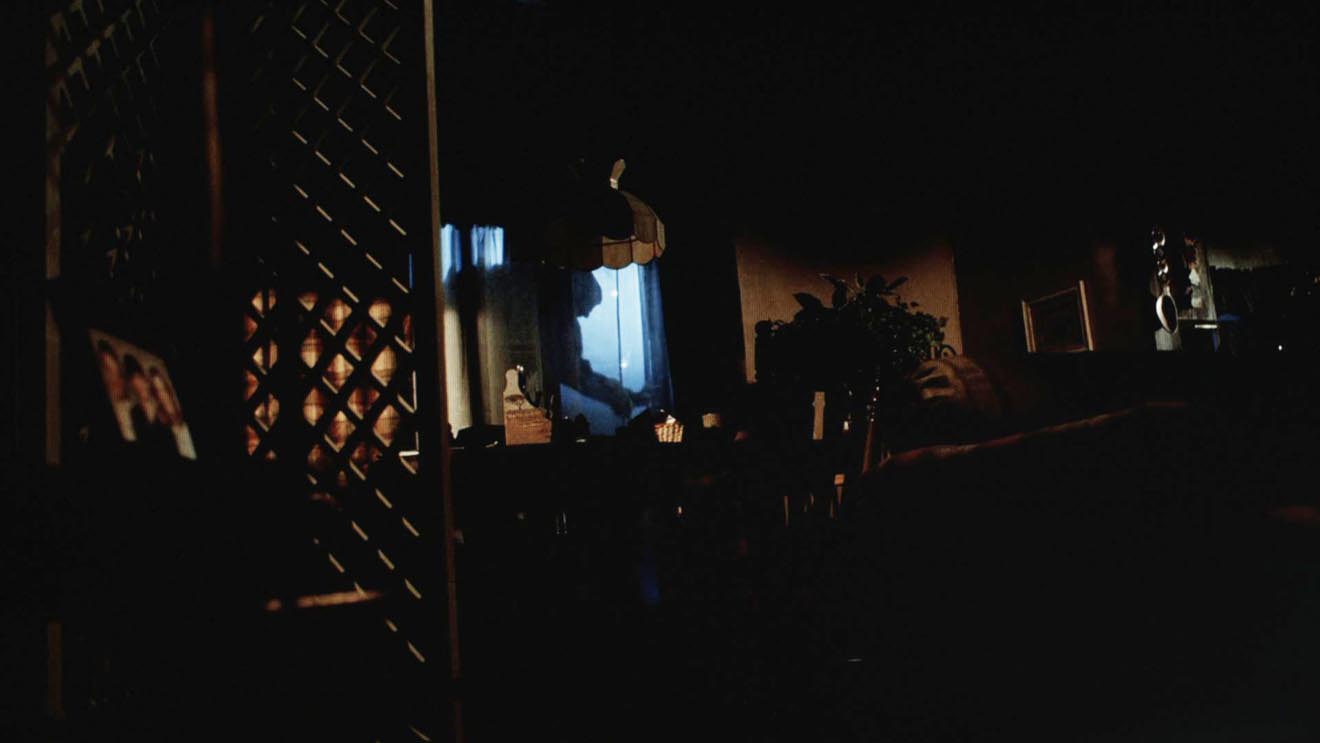
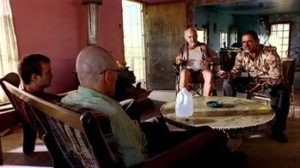
The season two Breaking Bad episode “Grilled” sees out-of-their-depth crystal meth cooks Walter White and Jesse Pinkman taken hostage by crazy drug lord Tuco Salamanca. Realising that their only hope of escape lies in killing Tuco, Walter and Jesse plot to poison his burrito. The episode bristles with tension, generated not just through the script and performances, but also by flapping curtains which paint the scene with restless shadows. The scene appears to have been shot on location, so whether the wind was artificial or just a happy accident I don’t know, but either way it adds immeasurably to the atmosphere.

Both Breaking Bad and 12 Monkeys feature in the second season of Lighting I Like – coming soon!

5 Lighting Modifiers You Can Put on Windows