6 Tips for Making DIY Lighting Look Pro

Good lighting can boost the production values of a film tremendously, making the difference between an amateur and a professional-looking piece. For filmmakers early in their careers, however, the equipment typically used to achieve these results can be prohibitively expensive. Far from the Hollywood productions attended by trucks full of lights, a micro-budget film may be unable to rent even a single HMI. Do not despair though, as there are ways to light scenes well without breaking the bank. Here are my top six tips for lighting on the cheap.


1. Make the most of natural light
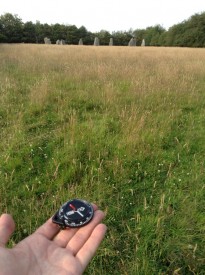
Checking my compass at the stone circle
Guesstimating the sun path on location

The hardest shots to light without the proper equipment are wide shots. Where a fully-budgeted production would rig Maxi Brutes on cherry-pickers, or pound HMIs through windows, a filmmaker of limited means simply won’t have access to the raw power of such fixtures. Instead, plan your day carefully to capture the wide shots at the time when natural light gives you the most assistance. For a day interior, this means shooting when the sun is on the correct side of the building.

See also: “Sun Paths”


2. Keep L.E.D.s to the background

£2 LED camping light

There are a plethora of LED fixtures on the market, designed for all kinds of applications, some of them very reasonably priced. It might be tempting to purchase some of these to provide your primary illumination, but I advise against it. Cheap LED units (and fluorescents) have a terrible Colour Rendering Index (CRI), making for unnatural and unappealing skintones. Such units are therefore best restricted to backgrounds, accent lighting and “specials”. For example, I purchased a little LED camping light from a charity shop for about £2, and I often use it to create the blue glow from computer screens or hang it from the ceiling to produce a hint of hair-light.

See also my article on LEDs from my “Know Your Lights” series.


3. Key with tungsten or halogen

Worklight
Halogen floodlight

By far the best solution for a high output, high CRI, low cost key is a halogen floodlight; 500W models are available for as little as £5. Their chief disadvantage is the lack of barn doors, making the light hard to control, though if you can stretch to a roll of black wrap you can fashion a kind of snoot. Alternatively, consider investing in a secondhand tungsten movie fixture. With many people switching to LEDs, there are plenty of old tungsten units out there. Try to get a reputable brand like Arri or Ianiro, as some of the unbranded units available on Ebay are poorly wired and can be unsafe.

See also: “DIY Interview Lighting for the ‘Ren’ EPK”


4. Control the light

Lace curtains used to break up light in a Camerimage workshop last year

Flooding a halogen light onto a scene is never going to look good, but then the same is often true of dedicated movie fixtures. Instead it’s more how you modify the light that creates the nuanced, professional look. Improvise flags from pieces of cardboard to stop the light spilling into unwanted places – but be VERY careful how close you put them to a tungsten or halogen source, as these get extremely hot. For example, when shooting indoors, flag light off the background wall (especially if it’s white or cream) to help your subject stand out.

See also “Lighting Micro-sets” for an example of this.


5. Soften the light

Almost all cinematographers today prefer the subtlety of soft light to the harshness of hard light. You can achieve this by bouncing your fixture off a wall or ceiling, or a sheet of polystyrene or card. Or you could hang a white bedsheet or a shower curtain in front of the light as diffusion, but again be sure to leave a safe distance between them. Professional collapsible reflectors are available very cheaply online, and can be used in multiple ways to diffuse or reflect light.

Hot tub cover = bounce board
Hot tub cover = bounce board. Towel = flag

See also: “How to Soften Harsh Sunlight with Tinfoil and a Bedsheet”; and to read more about the pictured example: “Always Know Where Your Towel Is”


6. Make use of practicals
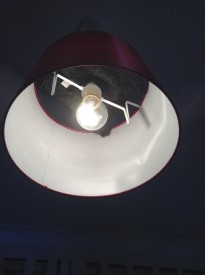
Black-wrapped ceiling light

Finally, don’t be afraid to use existing practical lighting in your scene. Turning on the main overhead light usually kills the mood, but sometimes it can be useful. You can generate more contrast and shape by covering up the top of the lampshade, thus preventing ceiling bounce, or conversely use the ceiling bounce to give some ambient top-light and cover the bottom of the lampshade to prevent a harsh hotspot underneath it. Table lamps and under-cupboard kitchen lights can add a lot of interest and production value to your backgrounds. If possible, swap out LED or fluorescent bulbs for conventional tungsten ones for a more attractive colour and to eliminate potential flickering on camera.

See also: “5 Tips for Working with Practicals”, and for an example of the above techniques, my blog from day two of the Forever Alone shoot.

6 Tips for Making DIY Lighting Look Pro

The Science of Smoke

Smoke, haze, atmos, whatever you want to call it, anyone who knows me knows that I’m a big fan. But how does it work and what is the purpose of smoking up a set?


Aerial perspective

At the most basic level, smoke simulates a natural phenomenon called aerial perspective. If you look at – for example – a range of mountains receding into the distance, the further mountains will appear bluer, lighter, less contrasty and less colour-saturated than the nearer mountains.

An example of aerial perspective

This effect is due to light being scattered by particles naturally suspended in the air, and by molecules of the air itself. It is described by the scary-looking Rayleigh Equation:

We don’t need to get into what all the variables stand for, but there are a couple of things worth noting:

  • The symbol on the far right represents the angle between the incident light and the scattered light. In practice this means that the more you shoot into the sun – the more the air you’re photographing is backlit – the more scattering there will be. Place the sun behind your camera and scattering will be minimal.
  • Lamda (the sort of upside-down y next to the x) is the wavelength of the light, so the shorter the wavelength, the more scattering. This is why things look bluer with distance: blue light has a shorter wavelength and so is scattered more. It’s also why shooting through an ultraviolet filter reduces the appearance of aerial perspective/atmospheric haze.


How smoke works

An Artem smoke gun

Foggers, hazers and smoke machines simulate aerial perspective by adding suspended particles to the air. These particles start off as smoke fluid (a.k.a. “fog juice”) which is made of mineral oil, or of a combination of water and glycol/glycerin.

In a smoke machine or gas-powered smoke gun (like the Artem), smoke fluid is pushed into a heat exchanger which vaporises it. When the vapour makes contact with the colder air, it condenses to form fog.

A hazer uses compression rather than heat to vaporise the fluid, meaning you don’t have to wait for the machine to heat up. The particles are smaller, making for a more subtle and longer-lasting effect.

As a general rule, you should use only hazers for interior cinematography, unless there is a story reason for smoke to be present in the scene. Outdoors, however, hazers are ineffective. An Artem or two will work well for smaller exterior scenes; for larger ones, a Tube of Death is the best solution. This is a long, plastic inflatable tube with regularly-spaced holes, with a fan and a smoke machine (usually electric) at the end. It ensures that smoke is distributed fairly evenly over a large area.

A Tube of Death in action on the set of “The Little Mermaid”


The effects of smoke

Just like aerial perspective, smoke/haze separates the background from the foreground, as the background has more smoke between it and the camera. The background becomes brighter, less contrasty, less saturated and (depending on the type of smoke) bluer, making the foreground stand out against it.

Since smoke also obeys the Rayleigh Equation, it shows up best when it’s backlit, a bit when it’s side-lit and barely at all when front-lit.

Here are some of the other things that smoke achieves:

  • It diffuses the image, particularly things further away from camera.
  • It lowers contrast.
  • It brightens the image.
  • It lifts the shadows by scattering light into them.
  • If it’s sufficiently thick, and particularly if it’s smoke rather than haze, it adds movement and texture to the image, which helps to make sets look less fake.
  • It volumises the light, showing up clear shafts of hard light and diffuse pools of soft light. (For more on this, read 5 Tips for Perfect Shafts of Light.)
  • Backlit smoke in front of a person or an object will obscure them, concealing identity.
Heavy smoke (from an Artem) pops Lyanna (Dita Tantang) out of the background in “Ren: The Girl with the Mark” (dir. Kate Madison).
Backlit smoke through a roof of branches creates magical shafts of light in “Ren: The Girl with the Mark”.
The final day/sunset look. From each side an orange-gelled and a pink-gelled par can light the backdrop. A 2K tungsten fresnel provides backlight, while a 650W fresnel with a cucoloris provides dappled light on the tree and tarsier. An LED panel off right supplies fill, and a second panel is inside the cave with a turquoise gel.
The colour-washed infinity cove in the background of this music promo for Lewis Watson’s “Droplets” (dir. Tom Walsh) is softened and disguised by smoke.
Haze gives the LED panels their glowing appearance in this video for “X, Y & Z Rays” (dir. Tom Walsh) by Revenge of Calculon.
This torch beam in “Above the Clouds” (dir. Leon Chambers) shows up so well because the set is heavily fogged.
Smoke backlit by an HMI creates the blue background glow against which the heroes of “The First Musketeer” (dir. Harriet Sams) stand out.
Haze creates the shafts of light from HMIs outside the windows, and adds to the gothic feel of “Heretiks” (dir. Paul Hyett).
The Science of Smoke

5 Lighting Modifiers You Can Put on Windows

Lighting through windows is the cornerstone of a DP’s day interior work. I’ve previously written about the various ways that hard light through a window can be used. Today I’m going to look at some examples of how dressing on the windows – anything from curtains to paint or newspaper – can create interesting lighting looks and help you tell the story.

Please note: there are some minor spoilers in this post, and a quite big one for the season two finale of Mr Robot.


1. PAINTS AND STAINS

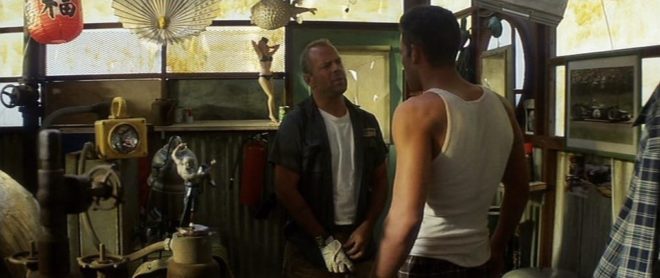
Director Michael Bay and DP John Schwartzman, ASC recycled many techniques they had used on commercials when they shot Armaggeddon. One of these was to create coloured light, not by arbitrarily gelling lamps, but by having the art department paint the windows. In an early scene on the oil rig, the windows are yellowed to give a warm feel to a romantic scene between AJ and Grace, contrasting with the cool, monochromatic look of the asteroid later on in the film. “The windows here are like a Filon fibreglass that we then threw some orange asphaltum stain on to give it that warm tone,” Schwartzman explains in the commentary.


2.NEWSPAPER

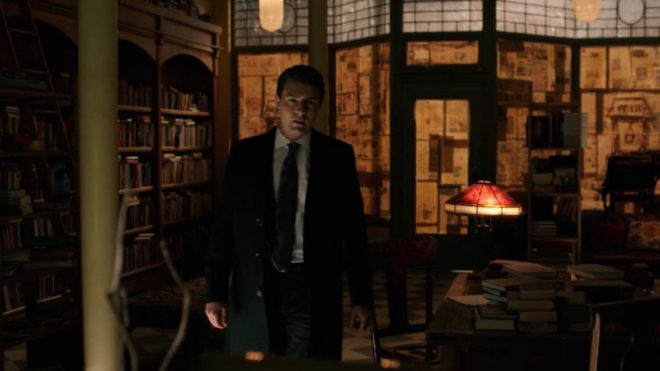
During the first season of time travel thriller 12 Monkeys, our heroes James Cole and Dr Cassandra Railly base themselves out of a disused shop. It’s a safe place they retreat to when they need to plan or regroup, and a womb-like feeling of warmth and security is created visually by the orange newspaper covering the shop’s front windows.

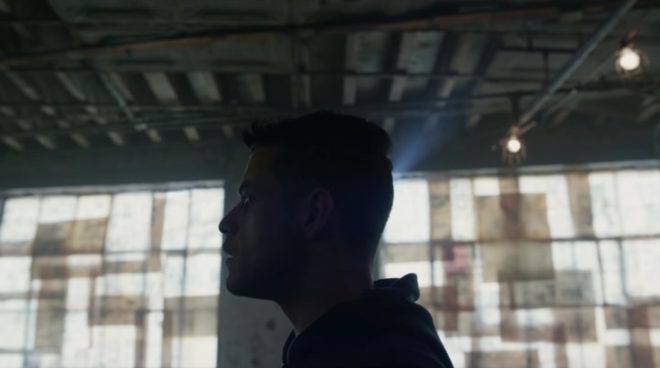
The season two finale of Mr Robot uses a similar technique to a very different end. Gaps in the paper here allow violent shafts of light to pierce the room, foreshadowing the bullet which is about to pierce Elliot’s body.


3. Blinds

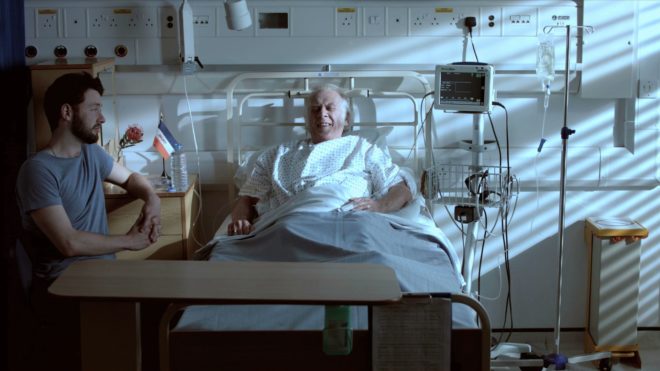
When I lensed the race drama Exile Incessant in 2015, director James Reynolds wanted to visually represent the ideological differences between the older and younger South Africans. I decided to bathe the progressive youngsters in soft, low-contrast light, while throwing hard light and deep shadows onto the more narrow-minded adults, whose world is black and white in more ways than one. For the hospital scene pictured below, I adjusted the venetian blinds – with a 2.5K HMI behind them – to give a contrasty pattern of light and shade on the old man.

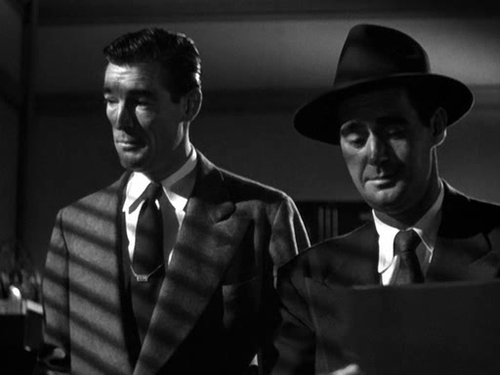
Lighting through blinds is of course a famous feature of film noir cinematography, and has found its way into countless movies of all genres over the last several decades.

He Walked by Night (1948, dir. Alfred L. Werker)


4. Diffusing curtains

Placing sheer curtains on a window can solve two problems for filmmakers: disguising an unwanted or non-existent (if on stage) background, and softening the light. This is a widely-used technique; in fact it’s common practice for art departments to consult with DPs about curtains to ensure that the right options are available for the style of lighting that will be employed.

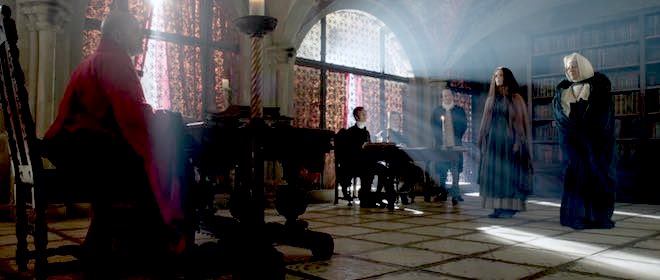
In an episode of my YouTube series Lighting I Like, I discussed a scene from The Crown – Netflix’s dramatisation of Queen Elizabeth II’s reign – in which King George VI is found dead. Unlike many daylight interiors in the series which feature hard shafts of sunlight, the scene in question employed net curtains to create a softer, more subdued light, appropriate to the sombre content.


5. Billowing curtains

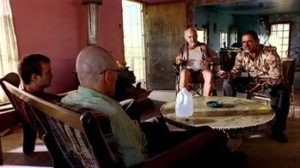
The season two Breaking Bad episode “Grilled” sees out-of-their-depth crystal meth cooks Walter White and Jesse Pinkman taken hostage by crazy drug lord Tuco Salamanca. Realising that their only hope of escape lies in killing Tuco, Walter and Jesse plot to poison his burrito. The episode bristles with tension, generated not just through the script and performances, but also by flapping curtains which paint the scene with restless shadows. The scene appears to have been shot on location, so whether the wind was artificial or just a happy accident I don’t know, but either way it adds immeasurably to the atmosphere.

Both Breaking Bad and 12 Monkeys feature in the second season of Lighting I Like – coming soon!

5 Lighting Modifiers You Can Put on Windows