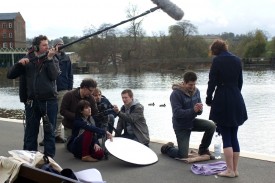
Today I’m going to take a brief look at what you can do to shape natural light when you’re filming outside and you don’t have the budget for big HMIs or massive silks hanging from cranes.
Firstly, choose the right direction to shoot in. Work out where the sun is going to be at the time you need to film the scene and decide whether you want to shoot into the light, with your back to it or at an angle. There are iPhone apps that will tell you where the sun’s going to be if you’re too lazy to figure it out for yourself. Remember the sun moves left to right across the sky in the northern hemisphere.
Amateur photographers are often told not to shoot towards the sun. This is simply because amateurs will be using auto-exposure, which will close the iris right up as soon as the sun flares into the lens and leave you with a silhouette. As a professional, you’ll be setting your camera manually, so you can expose for the shadows and let the backlight from the sun blow out beautifully.
Here’s a shot from Stop/Eject where we made the most of this effect, and really lucked out with the reflections in the water:


Out the bottom of frame is a reflector, bouncing some of the sunlight back at the actors – and it’s being wiggled by a crew member to suggest it’s a watery reflection.

If you don’t have a reflector you should drop what you’re doing and order one now off Amazon. They’re less than £10 and have a reversible zip-off cover giving the options of white, silver or gold surfaces to reflect off, or black to block light. If you remove the cover entirely you’re left with a translucent white disc which can be used to diffuse light, as we’ll see shortly.
If you choose to shoot with your back to the sun, you won’t be able to affect the light in your wide shots without big-budget gear, but you can transform your close-ups.
Let’s look at another example from Stop/Eject, before we did anything to the light:

Georgina Sherrington (“Kate”) is facing directly towards the sun, which is behind and above camera. As you can see, the light is incredibly harsh and the shadows are so dark that you can’t see her eyes; an effect that would only have got worse had I stopped down to prevent the highlights blowing out.
Two reflectors were required to sort this out. The first, with cover removed, was held over her head so that the sunlight hitting her face would have to pass through the translucent material and be diffused. (The diffusion is actually less significant than the amount of light the material blocks.) A second reflector was held out of the bottom of frame, bouncing sunlight back into the shadows on her face and putting a sparkle in her eyes.

A much nicer image.
If it’s a cloudy day – and let’s face it, this is the overwhelming likelihood here in the UK – the above techniques will still work, but much more subtly. If you have access to a power supply, try to set up a lamp to get some eye-sparkle and fill in your actors’ faces.
In 2008 I DPed a short set entirely in a forest: Into the Woods, directed by Matt Taabu. I knew that getting light into people’s eye sockets was going to be a major challenge, so I insisted on hiring a battery-powered 200W daylight par. We put a layer of tough-spun diffuser on this and the gaffer hand-held it for most shots, aiming it into the talent’s face. You can see the eye-sparkle it produced in this production still:

So if you’re DPing a daylight exterior, don’t think that means you can rest on your laurels. It’s still up to you to create the right mood and make the talent look their best.