The Cinematography of “Alder”

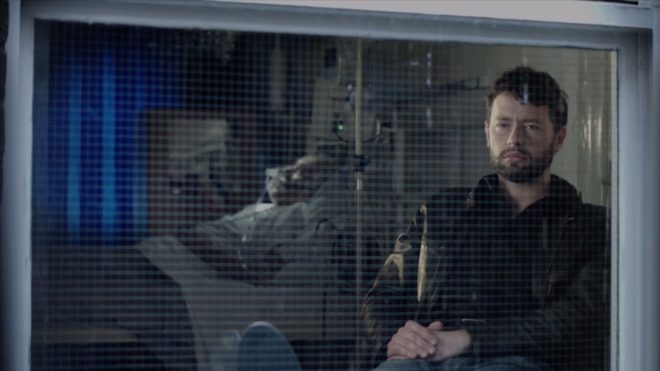
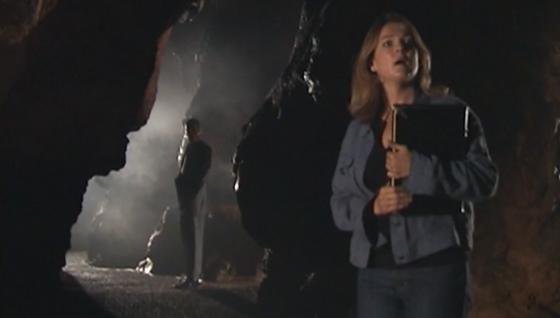
Back in February 2019 I spent a long day in Black Park, a forest behind Pinewood Studio, shooting a short film called Alder for director Vanda Ladeira. A little late perhaps, but here are my reflections on the cinematography and general experience of making this experimental fairytale.

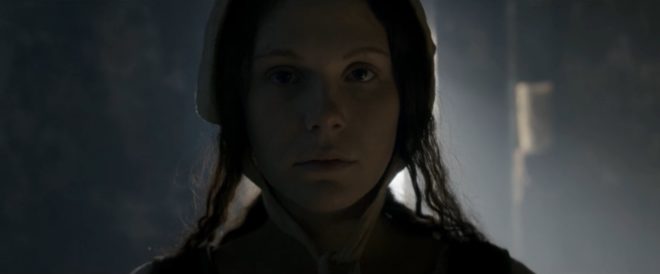
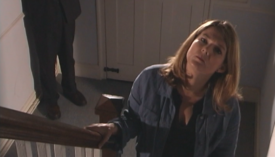
The film is about a forager (Odne Stenseth) who does not realise he is being watched by the very spirit of the forest, the titular Alder (Libby Welsh). As he cuts a sprig of holly, or steps on a mushroom, he is unknowingly causing her pain. Meanwhile a group of ghosts – Alder’s former victims? – cavort in the woodland, and strips of film made with ground-up human bone reach out from the trees to ensnare the forager.

Vanda contacted me after seeing my work on Ren: The Girl with the Mark. She was keen for Alder’s lair to have the same feel as Karn’s house in that series. We had a number of meetings to discuss the tone, visuals and the logistics of the shoot, which initially was going to take place over two days but was eventually compressed to one.

In October 2018 we conducted a recce in a forest that we ultimately weren’t able to use. I remember at the time that I was considering shooting the project on celluloid, tying in with the plot point about Alder making film from her victims’ bones. I dropped the idea after taking light readings on that recce – when it was very overcast – and realising just how dark it could be under the tree canopy.

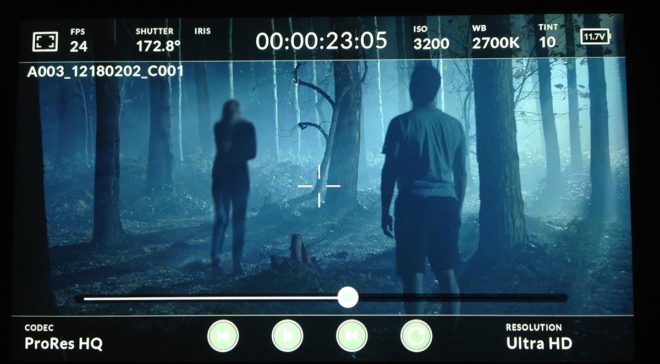
We ultimately shot on a Blackmagic Ursa Mini and Xeen primes, provided along with the lighting kit by gaffer Jeremy Dawson. The Blackmagic sensors seem to do very well with earthy tones, as I noticed on the village set of Ren, and the Ursa rendered the browns of the bracken, the soil and the forager’s costume nicely. Jeremy also provided us with a jib which enabled us to underscore the forager’s action with some definite moves: an introductory crane down; a dramatic pull up as he drives his knife into a tree; and a frantic boom down with him as he searches for his lost compass. In Alder’s lair we kept the camera drifting from side to side or up and down to bring energy to her more static scenes.

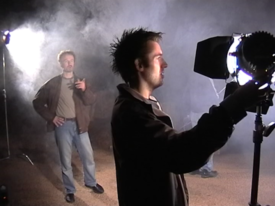
Lighting for the forager’s scenes was all natural, with just a little bounce or negative fill from time to time to keep some shape to the image. An Artem smoke gun, operated by Claire Finn, was used on almost every shot to give the forest some life and mystery, and also to keep the backgrounds from getting too busy; the grey wall of smoke serves to fade the background slightly, keeping the eye focused on the foreground action.

As there was no dialogue, I was free to change the frame rate expressively. Examples include: over-cranking close-ups of the forager’s feet and hands in contact with nature, emphasing the sensuality of his unwitting connection to Alder; over-cranking the dance of the ghosts to make their movements even more beautiful and supernatural; and under-cranking the forager slightly to enhance his panic when he finds himself lost and surrounded.

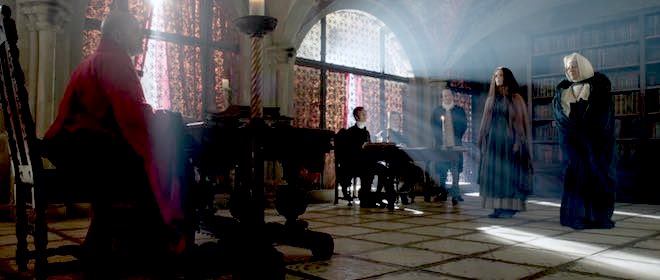
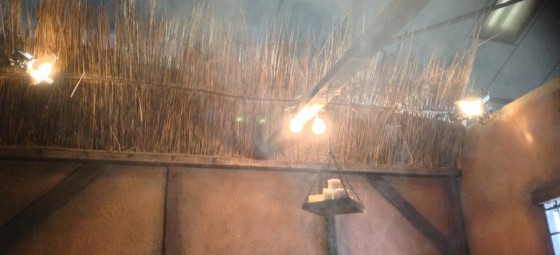
Alder’s lair was a set built by Denisa Dumitrescu in the forest. I took broadly the same approach to lighting it as I had for the reference scene from Ren, making some holes in the branch-covered roof and shining a blinder (a bank of four LED spotlights) through it to produce dappled shafts of sunlight. On the floor around Alder were a number of candles; we beefed up the light from these by skipping an 800W tungsten lamp off a bounce board on the floor.

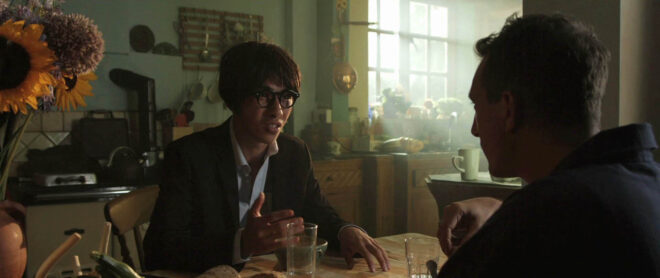
The biggest challenge was the meeting between the two main characters, a scene scripted for daylight which we were forced to shoot after dark due to running behind schedule. It was the longest and most important scene in the film and suddenly the cinematography had to be completely improvised. We did not have anywhere near the lighting package that a woodland night exterior normally calls for – just 800W tungsten lamps, a few LED fixtures, and a generator only powerful enough to run one of each.

What I ended up doing was putting an 800 in the background, ostensibly as a setting sun, and bouncing a blinder off poly-board as fill. We shot the whole scene through in a single handheld shot, once with smoke and once without, then picked up a few close-ups.I tried to hide the lack of light in the background by allowing the 800 to flare the lens and render the smoke almost impenetrable at times. Vanda and her editor, Tom Chandler, leant into the strange, stylised look and bravely intercut the smoky and smokeless takes. The result is much more magical and expressive than what we would have shot if we had still had daylight.

You can watch the finished film here. It won me Best Cinematographer at the New York Cinematography Awards (August 2019) and Film Craft Award: Cinematography at Play Short International Film Awards (2019).

The Cinematography of “Alder”

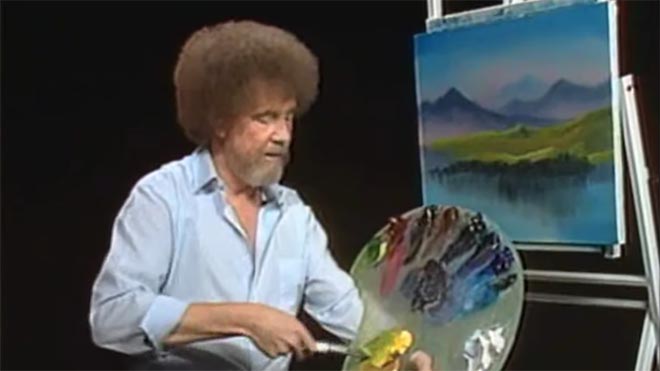
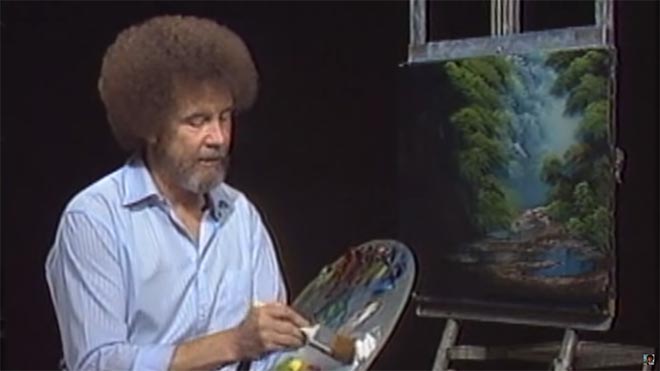
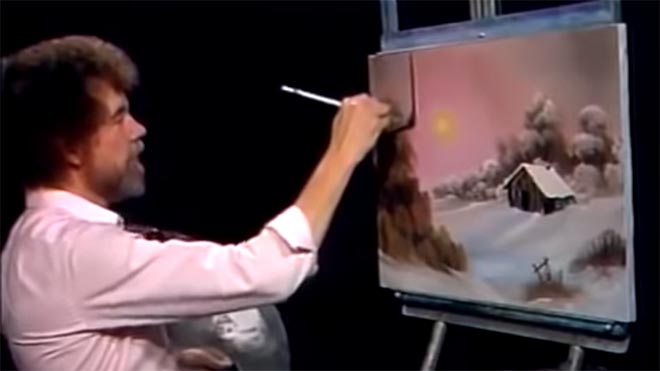
5 Things Bob Ross Can Teach Us About Cinematography

I’m certainly glad you could join me today. It’s a fantastic day here and I hope it is wherever you’re at. Are you ready to read a fantastic little blog post? Good, then let’s get started.

For twelve years, across 400 episodes, Bob Ross entertained all generations of Americans with his public access TV series, The Joy of Painting. Although he floated up to join the happy little clouds in 1995, in recent years YouTube and Twitch have brought his shows to a new audience, of which I am a humble member. Bob’s hypnotic, soft-spoken voice, his unfailingly positive attitude, and the magical effects of his wet-on-wet oil-painting technique make his series calming, comforting and captivating in equal measure.

Having watched every episode at least twice now, I’ve noticed several nuggets of Bob Ross wisdom that apply just as well to cinematography as they do to painting.


1. “The more plains you have in your painting, the more depth it has… and that’s what brings the happy buck.”

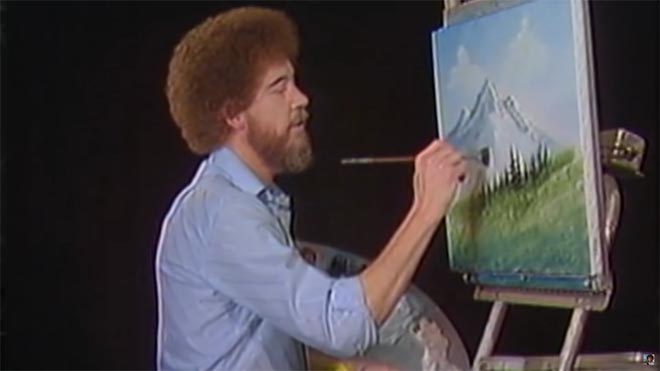
Bob always starts with the background of his scene and paints forward: first the sky with its happy little clouds; then often some almighty mountains; then the little footy hills; some trees way in the distance, barely more than scratches on the canvas; then perhaps a lake, its reflections springing forth impossibly from Bob’s brush; the near bank; and some detailed trees and bushes in the foreground, with a little path winding through them.

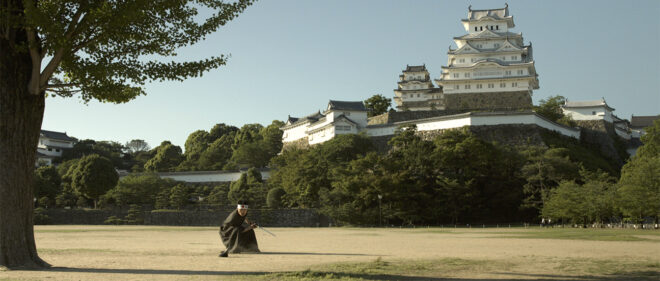
“Exile Incessant” (dir. James Reynolds)

Just as with landscape painting, depth is tremendously important in cinematography. Creating a three-dimensional world with a monoscopic camera is a big part of a DP’s job, which starts with composition – shooting towards a window, for example, rather than a wall – and continues with lighting. Depth increases production value, which makes for a happy producer and a happy buck for you when you get hired again.


2. “As things get further away from you in a landscape, they get lighter in value.”

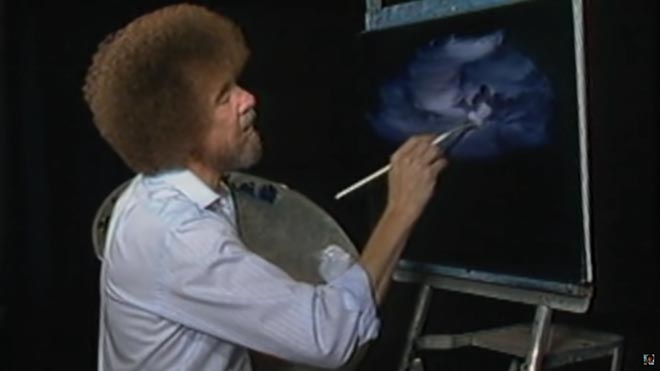
Regular Joy of Painting viewers soon notice that the more distant layers of Bob’s paintings use a lot more Titanium White than the closer ones. Bob frequently explains that each layer should be darker and more detailed than the one behind it, “and that’s what creates the illusion of depth”.

“The Gong Fu Connection” (dir. Ted Duran)

Distant objects seem lighter and less contrasty because of a phenomenon called aerial perspectivebasically atmospheric scattering of light. As a DP, you can simulate this by lighting deeper areas of your frame brightly, and keeping closer areas dark. This might be achieved by setting up a flag to provide negative fill to an object in the foreground, or by placing a battery-powered LED fixture at the end of a dark street. The technique works for night scenes and small interiors, just as well as daytime landscapes, even though aerial perspective would never occur there in real life. The viewer’s brain will subconsciously recognise the depth cue and appreciate the three-dimensionality of the set much more.


3. “Don’t kill the little misty area; that’s your separator.”

After completing each layer, particularly hills and mountains, Bob takes a clean, dry brush and taps gently along the bottom of it. This has a blurring and fading effect, giving the impression that the base of the layer is dissolving into mist. When he paints the next layer, he takes care to leave a little of this misty area showing behind it.

“Heretiks” (dir. Paul Hyett)

We DPs can add atmos (smoke) to a scene to create separation. Because there will be more atmos between the lens and a distant object than between the lens and a close object, it really aids the eye in identifying different plains. That makes the image both clearer and more aesthetically pleasing. Layers can also be separated with backlight, or a differentiation of tones or colours.


4. “You need the dark in order to show the light.”

Hinting at the tragedy in his own life, Bob often underlines the importance of playing dark tones against light ones. “It’s like in life. Gotta have a little sadness once in a while so you know when the good times come,” he wisely remarks, as he taps away at the canvas with his fan-brush, painting in the dark rear leaves of a tree. Then he moves onto the lighter foreground leaves, “but don’t kill your dark areas,” he cautions.

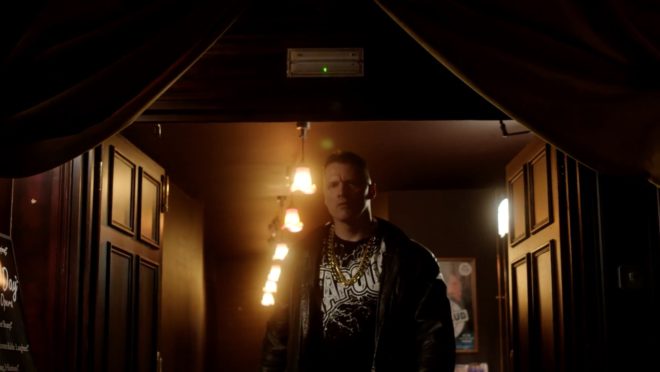
“Closer Each Day” promo (dir. Oliver Park)

If there’s one thing that makes a cinematic image, it’s contrast. It can be very easy to over-light a scene, and it’s often a good idea to try turning a fixture or two off to see if the mood is improved. However bright or dark your scene is, where you don’t put light is just as important as where you do. Flagging a little natural light, blacking out a window, or removing the bubble from a practical can often add a nice bit of shape to the image.


5. “Maybe… maybe… maybe… Let’s DROP in an almighty tree.”

As the end of the episode approaches, and the painting seems complete, Bob has a habit of suddenly adding a big ol’ tree down one or both sides of the canvas. Since this covers up background layers that have been carefully constructed earlier in the show, Bob often gets letters complaining that he has spoilt a lovely painting. “Ruined!” is the knowing, light-hearted comment of the modern internet viewer.

“Synced” (dir. Devon Avery)

The function of these trees is to provide a foreground framing element which anchors the side of the image. I discussed this technique in my article on composing a wide shot. A solid, close object along the side or base of the frame makes the image much stronger. It gives a reason for the edge of the frame to be there rather than somewhere else. As DPs, we may not be able to just paint a tree in, but there’s often a fence, a pillar, a window frame, even a supporting artist that we can introduce to the foreground with a little tweaking of the camera position.

The ol’ clock on the wall tells me it’s time to go, so until next time: happy filming, and God bless, my friend.

If you’re keen to learn more about cinematography, don’t forget I have an in-depth course available on Udemy.

5 Things Bob Ross Can Teach Us About Cinematography

5 Steps to Lighting a Forest at Night

EXT. FOREST - NIGHT

A simple enough slug line, and fairly common, but amongst the most challenging for a cinematographer. In this article I’ll break down into five manageable steps my process of lighting woodlands at night.


1. Set up the moon.

Forests typically have no artificial illumination, except perhaps practical torches carried by the cast. This means that the DP will primarily be simulating moonlight.
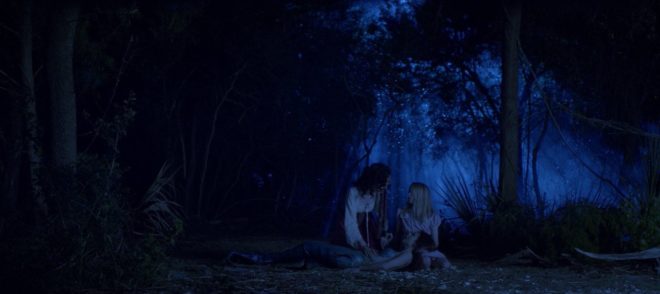
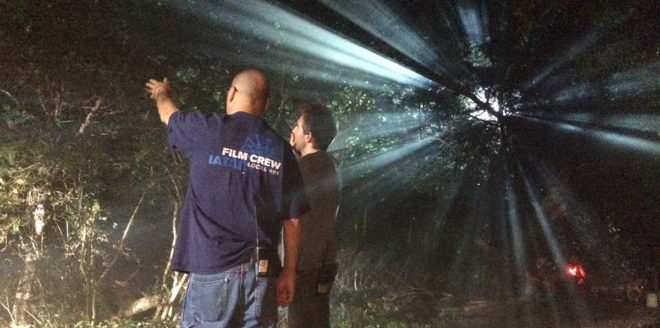
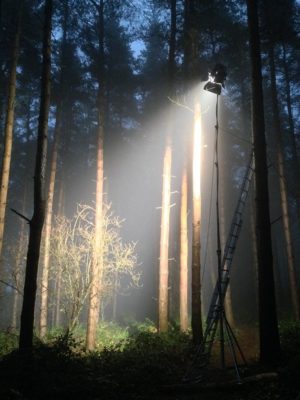
Your “moon” should usually be the largest HMI that your production can afford, as high up and far away as you can get it. (If your production can’t afford an HMI, I would advise against attempting night exteriors in a forest.) Ideally this would be a 12K or 18K on a cherry-picker, but in low-budget land you’re more likely to be dealing with a 2.5K on a triple wind-up stand.

Why is height important? Firstly, it’s more realistic. Real moonlight rarely comes from 15ft off the ground! Secondly, it’s hard to keep the lamp out of shot when you’re shooting towards it. A stand might seem quite tall when you’re right next to it, but as soon as you put it far away, it comes into shot quite easily. If you can use the terrain to give your HMI extra height, or acquire scaffolding or some other means of safely raising your light up, you’ll save yourself a lot of headaches.

In this shot from “The Little Mermaid” (dir. Blake Harris), a 12K HMI on a cherry-picker creates the shafts of moonlight, while another HMI through diffusion provides the frontlight. (This frontlight was orange to represent sunrise, but the scene was altered in the grade to be pure night.)

The size of the HMI is of course going to determine how large an area you can light to a sufficient exposure to record a noise-free image. Using a good low-light camera is going to help you out here. I shot a couple of recent forest night scenes on a Blackmagic Pocket Cinema Camera, which has dual native ISOs, the higher being 3200. Combined with a Speedbooster, this camera required only 1 or 2 foot-candles of illuminance, meaning that our 2.5K HMI could be a good 150 feet away from the action. (See also: “How Big a Light do I Need?”)


2. Plan for the reverse.

A fake moon looks great as a backlight, but what happens when it comes time to shoot the reverse? Often the schedule is too tight to move the HMI all the way around to the other side, particularly if it’s rigged up high, so you may need to embrace it as frontlight.

Frontlight is generally flat and undesirable, but it can be interesting when it’s broken up with shadows, and that’s exactly what the trees of a forest will do. Sometimes the pattern of light and dark is so strong and camouflaging that it can be hard to pick out your subject until they move. One day I intend to try this effect in a horror film as a way of concealing a monster.

One thing to look out for with frontlight is unwanted shadows, i.e. those of the camera and boom. Again, the higher up your HMI is, the less of an issue this will be.

If you can afford it, a second HMI set up in the opposite direction is an ideal way to maintain backlight; just pan one off and strike up the other. I’ve known directors to complain that this breaks continuity, but arguably it does the opposite. Frontlight and backlight look very different, especially when smoke is involved (and I’ll come to that in a minute). Isn’t it smoother to intercut two backlit shots than a backlit one and frontlit one? Ultimately it’s a matter of opinion.

An example of cheated moonlight directions in “His Dark Materials” – DP: David Luther


3. Consider Ground lights.

One thing I’ve been experimenting with lately is ground lights. For this you need a forest that has at least a little undulation in its terrain. You set up lights directly on the ground, pointed towards camera but hidden from it behind mounds or ridges in the deep background.

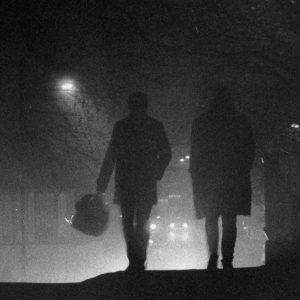
Detail from one of my 35mm stills: pedestrians backlit by car headlights in mist. Shot on Ilford Delta 3200

I once tried this with an HMI and it just looked weird, like there was a rave going on in the next field, but with soft lights it is much more effective. Try fluorescent tubes, long LED panels or even rows of festoon lights. When smoke catches them they create a beautiful glow in the background. Use a warm colour to suggest urban lighting in the distance, or leave it cold and it will pass unquestioned as ambience.

Put your cast in front of this ground glow and you will get some lovely silhouettes. Very effective silhouettes can also be captured in front of smoky shafts of hard light from your “moon”.


4. Fill in the faces.

All of the above looks great, but sooner or later the director is going to want to see the actors’ faces. Such is the cross a DP must bear.

On one recent project I relied on practical torches – sometimes bounced back to the cast with silver reflectors – or a soft LED ball on a boom pole, following the cast around.

Big-budget movies often rig some kind of soft toplight over the entire area they’re shooting in, but this requires a lot of prep time and money, and I expect it’s quite vulnerable to wind.

A recipe that I use a lot for all kinds of night exteriors is a hard backlight and a soft sidelight, both from the same side of camera. You don’t question where the sidelight is coming from when it’s from the same general direction as the “moon” backlight. In a forest you just have to be careful not to end up with very hot, bright trees near the sidelight, so have flags and nets at the ready.

This shot (from a film not yet released, hence the blurring) is backlit by a 2.5K HMI and side-lit by a 1×1 Aladdin LED with a softbox, both from camera right.


5. Don’t forget the Smoke.

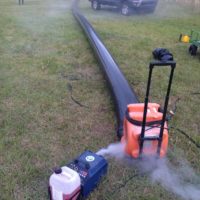
Finally, as I’ve already hinted, smoke is very important for a cinematic forest scene. The best options are a gas-powered smoke gun called an Artem or a “Tube of Death”. This latter is a plastic tube connected to a fan and an electric smoke machine. The fan forces smoke into the tube and out of little holes along its length, creating an even spread of smoke.

A Tube of Death in action on the set of “The Little Mermaid”

All smoke is highly suspectible to changes in the wind. An Artem is easier to pick up and move around when the wind changes, and it doesn’t require a power supply, but you will lose time waiting for it to heat up and for the smoke and gas canisters to be changed. Whichever one you pick though, the smoke will add a tremendous amount of depth and texture to the image.

Overall, nighttime forest work scenes may be challenging, but they offer some of the greatest opportunities for moody and creative lighting. Just don’t forget your thermals and your waterproofs!

5 Steps to Lighting a Forest at Night

“The Little Mermaid”: Lighting from the Back

So far, this blog series about my cinematography of The Little Mermaid has covered the biggest and most complex scenes in the movie. Today I’m going to look at some smaller scenes, and how I employed the cinematography tenet of lighting from the back to quickly build a look for these which has depth, mood and drama.

Many of these examples are specifically cross-backlighting, something I covered in my Lighting Techniques series, but I’ll quickly recap since it has so much relevance here. It involves lighting two characters facing each other with two sources, on the far side of the eye-line (short key), crossed so that each source keys one character and often backlights the other too.

So with that in mind, let’s proceed to the examples from my shooting diary.


Day 1

The first week is pretty much all in houses with just a few principals, so an easy start. Day 1’s schedule is tight though. We start in a third floor bedroom – no way lamps are getting up to those windows from outside, so I’m relying on natural light augmented with a bit of cross-backlight cheated inside the room. (There’s a Kino Flo shining at Elle over Cam’s right shoulder, for example.) Once the haze is in it looks great. After we get the main coverage, we head out to the garden for the next scene, while the ‘B’ camera team steps in to pick up a couple of inserts…


Day 3

…It’s a night scene and the grips have tented the window. To get a nice blue glow coming in, I have two 4×4 Kino Flos set either side of the window (outside), and they give a great wrapping backlight to the actors and the set dressing. Smoke and a cool white balance of 3,200K (the Kinos are tubed for 5,600K) complete the look. It owes a lot to a scene from Hook, one of Blake’s (director Blake Harris) reference movies which I watched during preprod. This stuff definitely filters in and inspires things!


Day 13

Our first day on stage. It’s weird to be back at the former supermarket I spent five weeks of preproduction in. The first set, Locke’s chamber, is very confined and the walls don’t wild, so it’s quite slow-going to work in there. We fire a 5K fresnel through the stained glass window at the back of the set. Then I fall back on the tried and tested method of cross-backlighting even though I know that it will be hard to hide the lamps (a 650W fresnel in both of the upper rear corners of the set) from camera. In the end I have the art department dress drapes in front of them. For the villain’s single I leave the light hard, but for the hero’s single we use bounce boards to wrap the light around his face more…


Day 28

We start with the fortune-teller’s tent, another small set constructed on stage. In fact, it’s just an Easy-Up artfully draped with fabrics. Initially there’s nowhere to get light in from except the front, but I know that this will leave the scene looking flat and fake, so I work with the art department again to make holes in the top rear corners. Through those we shine tungsten-bubbled “Fat Boy” Kino Flos. (These 2ft 4-bank units are giving the dual kickers on Cam in the centre, and the beautiful down-light on the background fabrics, bringing out the ruching. Each one also provides a little key-light on the two ladies.) The other sources are “moonlight” coming in through the entrance, linking us to the circus exteriors, and a stylised slash of light across Thora’s eyes from a Source Four, suggested by Jason (key grip Jason Batey). Adding foreground practicals is an important final touch to expand the depth and scale of the set…


Day 31

It’s the last day of principal photography. Our big scene of the day is the newspaper office where Cam works, which is a set in the front of the studio, using the building’s real windows. We fire the 12K in and gel it with half CTS for a nice morning sunlight effect. We’re shooting towards the windows, which have blinds, so we get some nice shafts of light, though sometimes it’s a little too smokey. Running haze is a pretty skilled and tricky job, and involves considering the lens length and backlight, which both affect how much the smoke shows up on camera. When we get it right, combined with the dark wood period furniture, it totally sells the 1937 setting. Apparently people at video village are loving it, saying it looks like Mad Men….

Next week, in the final part of my blog series on The Little Mermaid, I’ll share my experiences of shooting the sunset denouement while up to my waist in the Atlantic Ocean.

“The Little Mermaid”: Lighting from the Back

The Science of Smoke

Smoke, haze, atmos, whatever you want to call it, anyone who knows me knows that I’m a big fan. But how does it work and what is the purpose of smoking up a set?


Aerial perspective

At the most basic level, smoke simulates a natural phenomenon called aerial perspective. If you look at – for example – a range of mountains receding into the distance, the further mountains will appear bluer, lighter, less contrasty and less colour-saturated than the nearer mountains.

An example of aerial perspective

This effect is due to light being scattered by particles naturally suspended in the air, and by molecules of the air itself. It is described by the scary-looking Rayleigh Equation:

We don’t need to get into what all the variables stand for, but there are a couple of things worth noting:

  • The symbol on the far right represents the angle between the incident light and the scattered light. In practice this means that the more you shoot into the sun – the more the air you’re photographing is backlit – the more scattering there will be. Place the sun behind your camera and scattering will be minimal.
  • Lamda (the sort of upside-down y next to the x) is the wavelength of the light, so the shorter the wavelength, the more scattering. This is why things look bluer with distance: blue light has a shorter wavelength and so is scattered more. It’s also why shooting through an ultraviolet filter reduces the appearance of aerial perspective/atmospheric haze.


How smoke works

An Artem smoke gun

Foggers, hazers and smoke machines simulate aerial perspective by adding suspended particles to the air. These particles start off as smoke fluid (a.k.a. “fog juice”) which is made of mineral oil, or of a combination of water and glycol/glycerin.

In a smoke machine or gas-powered smoke gun (like the Artem), smoke fluid is pushed into a heat exchanger which vaporises it. When the vapour makes contact with the colder air, it condenses to form fog.

A hazer uses compression rather than heat to vaporise the fluid, meaning you don’t have to wait for the machine to heat up. The particles are smaller, making for a more subtle and longer-lasting effect.

As a general rule, you should use only hazers for interior cinematography, unless there is a story reason for smoke to be present in the scene. Outdoors, however, hazers are ineffective. An Artem or two will work well for smaller exterior scenes; for larger ones, a Tube of Death is the best solution. This is a long, plastic inflatable tube with regularly-spaced holes, with a fan and a smoke machine (usually electric) at the end. It ensures that smoke is distributed fairly evenly over a large area.

A Tube of Death in action on the set of “The Little Mermaid”


The effects of smoke

Just like aerial perspective, smoke/haze separates the background from the foreground, as the background has more smoke between it and the camera. The background becomes brighter, less contrasty, less saturated and (depending on the type of smoke) bluer, making the foreground stand out against it.

Since smoke also obeys the Rayleigh Equation, it shows up best when it’s backlit, a bit when it’s side-lit and barely at all when front-lit.

Here are some of the other things that smoke achieves:

  • It diffuses the image, particularly things further away from camera.
  • It lowers contrast.
  • It brightens the image.
  • It lifts the shadows by scattering light into them.
  • If it’s sufficiently thick, and particularly if it’s smoke rather than haze, it adds movement and texture to the image, which helps to make sets look less fake.
  • It volumises the light, showing up clear shafts of hard light and diffuse pools of soft light. (For more on this, read 5 Tips for Perfect Shafts of Light.)
  • Backlit smoke in front of a person or an object will obscure them, concealing identity.
Heavy smoke (from an Artem) pops Lyanna (Dita Tantang) out of the background in “Ren: The Girl with the Mark” (dir. Kate Madison).
Backlit smoke through a roof of branches creates magical shafts of light in “Ren: The Girl with the Mark”.
The final day/sunset look. From each side an orange-gelled and a pink-gelled par can light the backdrop. A 2K tungsten fresnel provides backlight, while a 650W fresnel with a cucoloris provides dappled light on the tree and tarsier. An LED panel off right supplies fill, and a second panel is inside the cave with a turquoise gel.
The colour-washed infinity cove in the background of this music promo for Lewis Watson’s “Droplets” (dir. Tom Walsh) is softened and disguised by smoke.
Haze gives the LED panels their glowing appearance in this video for “X, Y & Z Rays” (dir. Tom Walsh) by Revenge of Calculon.
This torch beam in “Above the Clouds” (dir. Leon Chambers) shows up so well because the set is heavily fogged.
Smoke backlit by an HMI creates the blue background glow against which the heroes of “The First Musketeer” (dir. Harriet Sams) stand out.
Haze creates the shafts of light from HMIs outside the windows, and adds to the gothic feel of “Heretiks” (dir. Paul Hyett).
The Science of Smoke

Roger Deakins’ Oscar-winning Cinematography of “Blade Runner 2049”

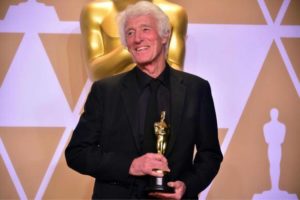
After fourteen nominations, celebrated cinematographer Roger Deakins, CBE, BSC, ASC finally won an Oscar last night, for his work on Denis Villeneuve’s Blade Runner 2049. Villeneuve’s sequel to Ridley Scott’s 1982 sci-fi noir is not a perfect film; its measured, thoughtful pace is not to everyone’s taste, and it has serious issues with women – all of the female characters being highly sexualised, callously slaughtered, or both – but the Best Cinematography Oscar was undoubtedly well deserved. Let’s take a look at the photographic style Deakins employed, and how it plays into the movie’s themes.
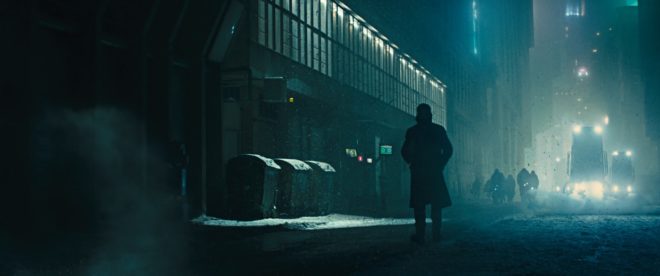
Blade Runner 2049 returns to the dystopian metropolis of Ridley Scott’s classic three decades later, introducing us to Ryan Gosling’s K. Like Harrison Ford’s Deckard before him, K is a titular Blade Runner, tasked with locating and “retiring” rogue replicants – artificial, bio-engineered people. He soon makes a discovery which could have huge implications both for himself and the already-strained relationship between humans and replicants. In his quest to uncover the truth, K must track down Deckard for some answers.

Villeneuve’s film meditates on deep questions of identity, creating a world in which you can never be sure who is or isn’t real – or even what truly constitutes being “real”. Deakins reinforces this existential uncertainty by reducing characters and locations to mere forms. Many scenes are shrouded in smog, mist, rain or snow, rendering humans and replicants alike as silhouettes.

K spends his first major scene seated in front of a window, the side-light bouncing off a nearby cabinet the only illumination on his face. Deakins’ greatest strength is his ability to adapt to whatever style each film requires, but if he has a recognisable signature it’s this courage to rely on a single source and let the rest of the frame go black.

Whereas Scott and his DP Jordan Cronenweth portrayed LA mainly at night, ablaze with pinpoints of light, Villeneuve and Deakins introduce it in daylight, but a daylight so dim and smog-ridden that it reveals even less than those night scenes from 1982.

All this is not to say that the film is frustratingly dark, or that audiences will struggle to make out what is going on. Shooting crisply on Arri Alexas with Arri/Zeiss Master Primes, Deakins is a master of ensuring that you see what you need to see.

A number of the film’s sequences are colour-coded, delineating them as separate worlds. The city is mainly fluorescent blues and greens, visually reinforcing the sickly state of society, with the police department – an attempt at justice in an insane world – a neutral white.

The Brutalist headquarters of Jared Leto’s blind entrepreneur Wallace are rendered in gold, as though the corporation attempted a friendly yellow but was corrupted by greed. These scenes also employ rippling reflections from pools of water. Whereas the watery light in the Tyrell HQ of Scott’s Blade Runner was a random last-minute idea by the director, concerned that his scene lacked enough interest and production value, here the light is clearly motivated by architectural water features. Yet it is used symbolically too, and very effectively so, as it underscores one of Blade Runner 2049’s most powerful scenes. At a point in the story where more than one character is calling their memories into question, the ripples playing across the walls are as intangible and illusory as those recollections. “I know what’s real,” Deckard asserts to Wallace, but both the photography and Ford’s performance bely his words.

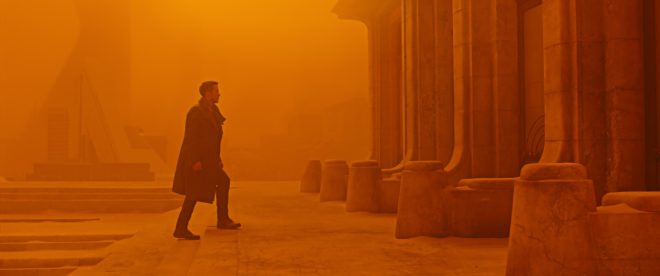
The most striking use of colour is the sequence in which K first tracks Deckard down, hiding out in a Las Vegas that’s been abandoned since the detonation of a dirty bomb. Inspired by photos of the Australian dust storm of 2009, Deakins bathed this lengthy sequence in soft, orangey-red – almost Martian – light. This permeating warmth, contrasting with the cold artificial light of LA, underlines the personal nature of K’s journey and the theme of birth which is threaded throughout the film.

Deakins has stated in interviews that he made no attempt to emulate Cronenweth’s style of lighting, but nonetheless this sequel feels well-matched to the original in many respects. This has a lot to do with the traditional camerawork, with most scenes covered in beautifully composed static shots, and movement accomplished where necessary with track and dolly.

The visual effects, which bagged the film’s second Oscar, also drew on techniques of the past; the above featurette shows a Canon 1DC tracking through a miniature landscape at 2:29. “Denis and I wanted to do as much as possible in-camera,” Deakins told Variety, “and we insisted when we had the actors, at least, all the foreground and mid-ground would be in-camera.” Giant LED screens were used to get authentic interactive lighting from the advertising holograms on the city streets.

One way in which the lighting of the two Blade Runner movies is undeniably similar is the use of moving light sources to suggest an exciting world continuing off camera. (The infamous lens flares of J.J. Abrahms’ Star Trek served the same purpose, illustrating Blade Runner’s powerful influence on the science fiction genre.) But whereas, in the original film, the roving searchlights pierce the locations sporadically and intrusively, the dynamic lights of Blade Runner 2049 continually remodel the actors’ faces. One moment a character is in mysterious backlight, the next in sinister side-light, and the next in revealing front-light – inviting the audience to reassess who these characters are at every turn.

This obfuscation and transience of identity and motivation permeates the whole film, and is its core visual theme. The 1982 Blade Runner was a deliberate melding of sci-fi and film noir, but to me the sequel does not feel like noir at all. Here there is little hard illumination, no binary division of light and dark. Instead there is insidious soft light, caressing the edge of a face here, throwing a silhouette there, painting everyone on a continuous (and continuously shifting) spectrum between reality and artificiality.

Blade Runner 2049 is a much deeper and more subtle film than its predecessor, and Deakins’ cinematography beautifully reflects this.

Roger Deakins’ Oscar-winning Cinematography of “Blade Runner 2049”

Lighting I Like: “Harry Potter and the Philosopher’s Stone”

The third episode of my YouTube cinematography series Lighting I Like is out now. This time I discuss a scene from the first instalment in the Harry Potter franchise, directed by Chris Columbus and photographed by John Seale, ACS, ASC.


You can find out more about the forest scene from Wolfman which I mentioned, either in the February 2010 issue of American Cinematographer if you have a subscription, or towards the bottom of this page on Cine Gleaner.

If you’re a fan of John Seale’s work, you may want to read my post “20 Facts About the Cinematography of Mad Max: Fury Road.

To read about how I’ve tackled nighttime forest scenes myself, check out “Poor Man’s Process II” (Ren: The Girl with the Mark) and Above the Clouds: Week Two”.

I hope you enjoyed the show. Episode four goes out at the same time next week: 8pm GMT on Wednesday, and will cover a scene from episode two of the lavish Netflix series The Crown. Subscribe to my YouTube channel to make sure you never miss an episode.

Lighting I Like: “Harry Potter and the Philosopher’s Stone”

Looking Back: “Daemos Rising”

Who is that handsome young chap?Last month saw the re-release of Reeltime Pictures‘ Daemos Rising, an unofficial Doctor Who spin-off film I photographed way back in 2003. It’s lovely to know that the film is popular enough for a high street release after so much time, and watching it again brought back many memories. Let the sharing of these memories commence…

2003 was Doctor Who’s 40th anniversary year, but the show had been off the air for over a decade and many fans, myself included, thought it would never return. In September I was weeks away from the start of principal photography on my second (and last) no-budget feature, Soul Searcher, but I was delighted to take a break from the stresses of self-producing to DP a tribute to the show I’d grown up with. “You won’t hear anything more from me now for a week,” I announced on my Soul Searcher blog on September 16th, “for I shall be ensconced in a cottage in a woodland area of Dorset (or possibly Devon – they’re easily confused), shooting a Doctor Who spin-off film for Reeltime Pictures. As you do.”

Screen Shot 2016-08-13 at 14.59.00The location was in fact in Devon: the home of Ian Richardson, who has since sadly passed away. (Ian had an illustrious stage and screen career, including the lead role in the original UK version of House of Cards.) Although Ian’s involvement would be limited to a voiceover, his son Miles Richardson played the role of Douglas Cavendish, an ex-UNIT operative troubled by a time-travelling ghost, a creepy moving statue and of course the Daemons. For those non-Whoovers amongst you, the Daemons are a devilish alien race featured in a classic Third Doctor serial. Reaching its tentacles deep into the expanded Who-niverse, Daemos Rising was also a sequel to a prior Reeltime production, Downtime, and was tied in to a spin-off book series.

Screen Shot 2016-08-13 at 15.16.32It was Miles who recommended me to director Keith Barnfather, having worked with me earlier that year on a feature called Blood Relative. Miles was joined on screen by his wife Beverley Cressman, playing Brigadier Lethbridge-Stewart’s daughter Kate. Rounding out the cast of three, as the aforementioned spectre, was Andrew Wisher, whose father Michael was the very first (and arguably best) actor to portray Dalek creator Davros.

The shoot didn’t start well. On the journey down to Devon, the prop shaft (bit that connects the engine to the wheels) dropped out of our rental van on the M5! Luis, the driver miraculously got us onto the hard shoulder while we still had some momentum, and the DVD extras include footage of us recovering as we awaited the RAC.

But this brush with death aside, I remember the shoot as a very happy one. It was a small team, just the three actors, Keith, his partner Anastasia, writer David J. Howe and his wife Rosie, and Luis on sound. We all stayed at the cottage, which was lovely, and enjoyed many a home-cooked meal and showbiz yarn. Miles and Andrew even gave an impromptu rendition of Billy Joel’s a cappella classic The Longest Time at one point.

Screen Shot 2016-08-13 at 14.57.17

It was the era of Mini-DV, so I was shooting on my Canon XL1-S in glorious 576i. (I remember the damp playing havoc with the DV tapes when we shot the third act in a cave system called Kent’s Cavern.) I also supplied the lighting package, which consisted of 2 x 800W Arrilites, 2 x 1000W Arrilites and a vintage 5K Mole Richardson fresnel. The latter required a local electrician to wire us a 32A socket into Ian’s fusebox! Back then I used only hard light because I didn’t know any better, and it gave everything a distinctive noir style.

Screen Shot 2016-08-13 at 15.15.26 (2)Speaking of a distinctive style, Daemos Rising is a significant milestone in my career because it was the first time I ever used smoke. The script called for spooky mist in several scenes, so Keith bought a Magnum 550 and we ended up using it on all the night exteriors. He kindly gifted me the machine at the end of the shoot, and needless to say I never looked back. Many a cast and crew may think of their poor lungs and rue the day that Keith Barnfather gave Neil Oseman his first smoke machine!

While the day interior lighting looks rough to me now, I think many of the night scenes still look pretty good 13 years on. Although my lamps were all tungsten, and the XL1 didn’t allow me to dial in a white balance, I would point the camera at something red and force the camera to white-balance on that, turning everything a nice James Cameron cyan.

Screen Shot 2016-08-13 at 15.01.20Just days after we wrapped, the BBC announced that Doctor Who would return in 2005. I fear the new generation of kids who now form the core of Who’s avid audience might find Daemos Rising a little slow and talky, but for fans of the classic series there is lots to enjoy. The tone and storyline are very Who, and there are several easter eggs scattered throughout the film. And some aspects of Daemos Rising fit the new series’ continuity too, including the Brigadier’s daughter Kate — now played by Jemma Redgrave – and UNIT’s Black Archive.

The re-release provides the opportunity to watch Daemos Rising in the aspect ratio we originally intended, 16:9 (the original DVD having been masked only to 14:9) and also offers the option of 5.1 surround sound. It’s available now from Amazon and high street retailers.

Looking Back: “Daemos Rising”

Lensing Ren – episode 4

On Tuesday the penultimate episode of Ren: The Girl with the Mark was released and so here’s my video breaking down the cinematography of that fourth episode. This week I cover lighting the guardroom and the prison cell, and demonstrate cross-backlighting.

Here are the lighting plans for the guardroom and the cell:

Guard-room-1080p Cell-1080p

You may also be interested to read the blog I wrote during the shoot about Lighting the Prison Cell, and my post explaining the technique of Cross-backlighting. And here is an unpublished post I wrote during the shoot about the guardroom….

33_GuardRoomWide1

The guard room shoot came at the end of a long and intense week of shooting interiors. By Sunday most of the lead actors had left, we had crested the hill and the end of principal photography was in sight. The atmosphere was even more relaxed and informal than usual, particularly as everyone’s favourite spouter of inappropriate comments, Richard “Squish” Roberts, was playing the lead jailor.

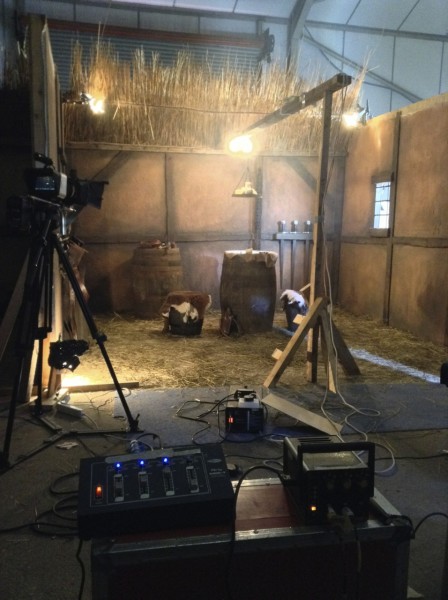
A behind-the-scenes view of the lighting set-up for the window and swords

Ren’s bedroom had been repainted and redressed to be the Kah’Nath guard room. This meant a single, small window again, and as usual I couldn’t resist blasting a 2.5K HMI through there for a shaft of hot, smoky sunlight.

The Window Wrap in action on the swords

I wanted to highlight the rack of swords next to the window, which the shaft of light wasn’t catching, so I used a variant on my Window Wrap technique. I put a 2′ 4-bank kinoflo outside the window at such an angle as to light up the swords without blocking any of the HMI light.

I was interested to find that the art team had done something a bit different with the room’s candles, hanging a cluster of them from an overhead beam. I asked for the “table” (actually a barrel) – where the guards would be playing a board game – to be placed directly under that.

The Dedos (left and right of the picture) and 100W globes used to enhance the light from the candles

The candles wouldn’t shed light directly down on the game in the classic single-light-source-coming-straight-down-onto-the-poker-table style, but I felt it would give me an excuse to cross-backlight. I clamped a Dedo to the top of each side of the set, each one spotted on one of the two characters who would face each other across the barrel.

A view of the finished lighting set-up from over the dimmer boards
A view of the finished lighting set-up from over the dimmer boards. On the floor to the right can be seen the shaft of light from the LED fresnel coming through the fake door (off right).

These Dedos couldn’t be flickered, being the kind which go into a single control box with only three discreet settings for brightness. So to introduce some dynamics, and soften the light a bit, I clipped a dimmable 100W bulb to either side of the beam from which the candles hung. This would also ensure that Hunter would be lit when he stood next to the barrel.

An additional light source in the set was a small brazier on the wall next to the dungeon door. This seemed bright enough to shed plenty of light by itself, particularly as Squish would be standing right next to it for a large part of the scene.

The final touch for lighting was to re-use the fake door to create the effect of daylight spilling in as characters exited and entered from off camera. This time I placed an LED fresnel behind it.

41_GuardsHunter

Check back next Saturday for another instalment of Lensing Ren, and meanwhile watch the next episode of Ren itself from Tuesday at 8pm GMT at rentheseries.com

Lensing Ren – episode 4

Lensing Ren – episode 3

It’s the mid-point of season one of Ren: The Girl with the Mark and here’s my video breaking down the cinematography of that third episode. Topics covered this week include grip equipment, aspect ratio, smoke and faking candlelight.

Here is the lighting plan for Ren’s bedroom:

Rens-bedroom-1080p

There is more on simulating firelight in my First Musketeer blog post Candlelight.

For my thoughts on composing for the cinemascope aspect ratio, take a look at 2.39:1 Composition.

Want to know more about smoke? Check out Lighting Techniques #5: Smoke.

Check back next Saturday for another instalment of Lensing Ren, and meanwhile watch the next episode of Ren itself from Tuesday at 8pm GMT at rentheseries.com

Lensing Ren – episode 3