“Harvey Greenfield is Running Late”: Week 3 Part 2

Day 21

Photo by Jonnie Howard

A morning full of short running scenes, all shot as oners on the Steadicam by Luke Oliver. Pretty much every crew member had had a cameo by this point, and today it was my turn. My character: Nerdy Cyclist. Alright, technically it was just Cyclist. The nerdy bit was just me (a) beefing up my part and (b) playing to type.

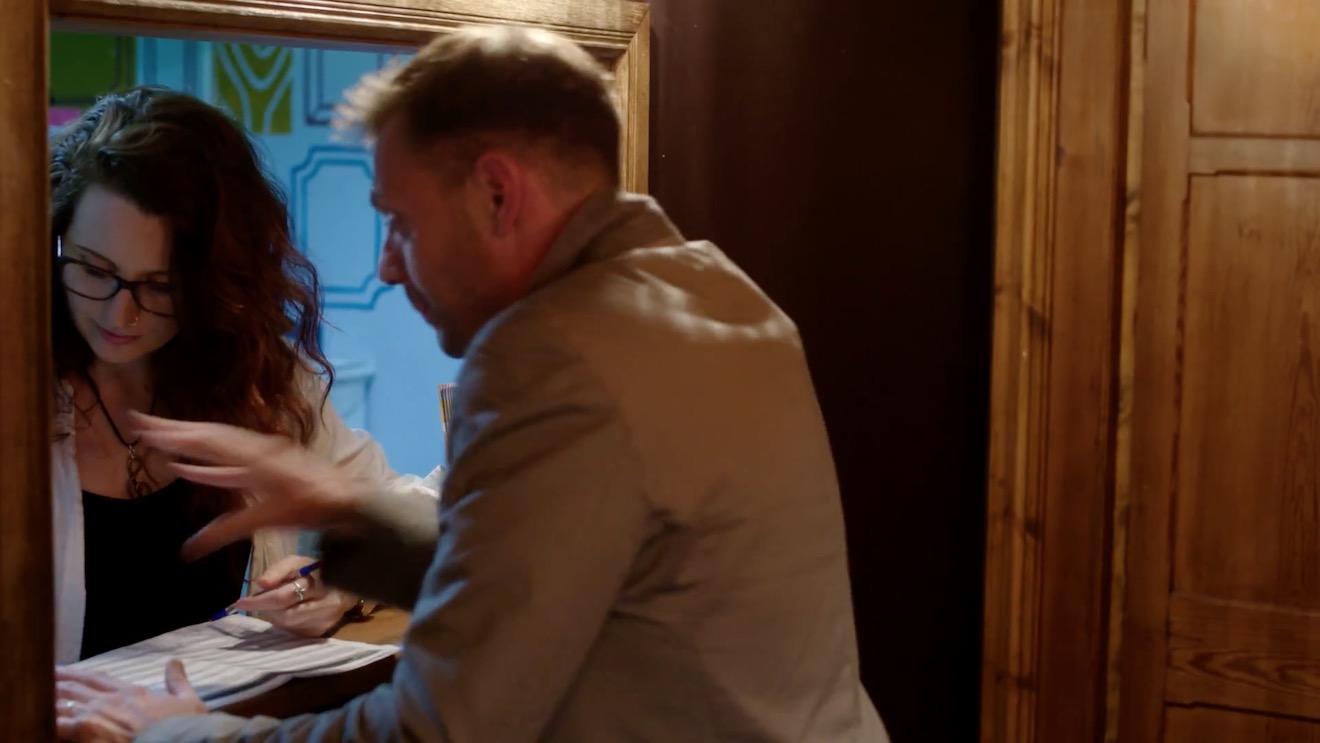
For the afternoon we moved to The Lab, a cocktail bar, where we filmed one of the fantasy/imaginary scenes that cuts with the very first shot we did of Harvey back on Day 1. Mixologist Tom was dressed in an elaborate all-black costume so Stephen and I hit him with two tungsten lamps, one either side, at an angle somewhere between side-light and backlight. This cut him out from the background, showed up the layering in the costume, edge-lit the cocktail shaker and liquids being poured, and deliberately kept Tom’s face dark. Quadruple win!


Day 22

We returned to Othersyde to pick up the one scene we dropped there on our most packed day of principal photography, Day 7. I referred to the blog post to help get the vibe of the lighting the same. The main motivation was the real streetlamp at the front of the site, which we wrapped using an Aputure with a lantern attachment, rigged on a mini boom. Another Aputure lantern gave a cool moonlight wash on the venue’s terraced outdoor seating, and a blue-gelled 300W tungsten fresnel uplighter replicated what we did on the other side of the building last year. A 2K blasted light from the direction Harvey has come; this light represented the ongoing wedding, so we had a couple of people moving around in front of it for dynamic shadows.

I ended up turning off the first Aputure for the wide as it seemed to kill the mood, but we brought it back for the close-up to show more of Paul’s face. To represent the light of his phone as he turns it on, Stephen held a PavoTube just above the camera and twisted it quickly around to face Paul on cue. We adjusted the eyebrow on the camera to flag the tube’s light off the phone itself.

There were a few bitty pick-ups to do while we were outside with access to power, including a “BOV” – a POV of a bee. We did this with the probe lens on Jonnie’s Canon C200, which I had to float around and then jab into Paul’s neck. Sorry, Paul.

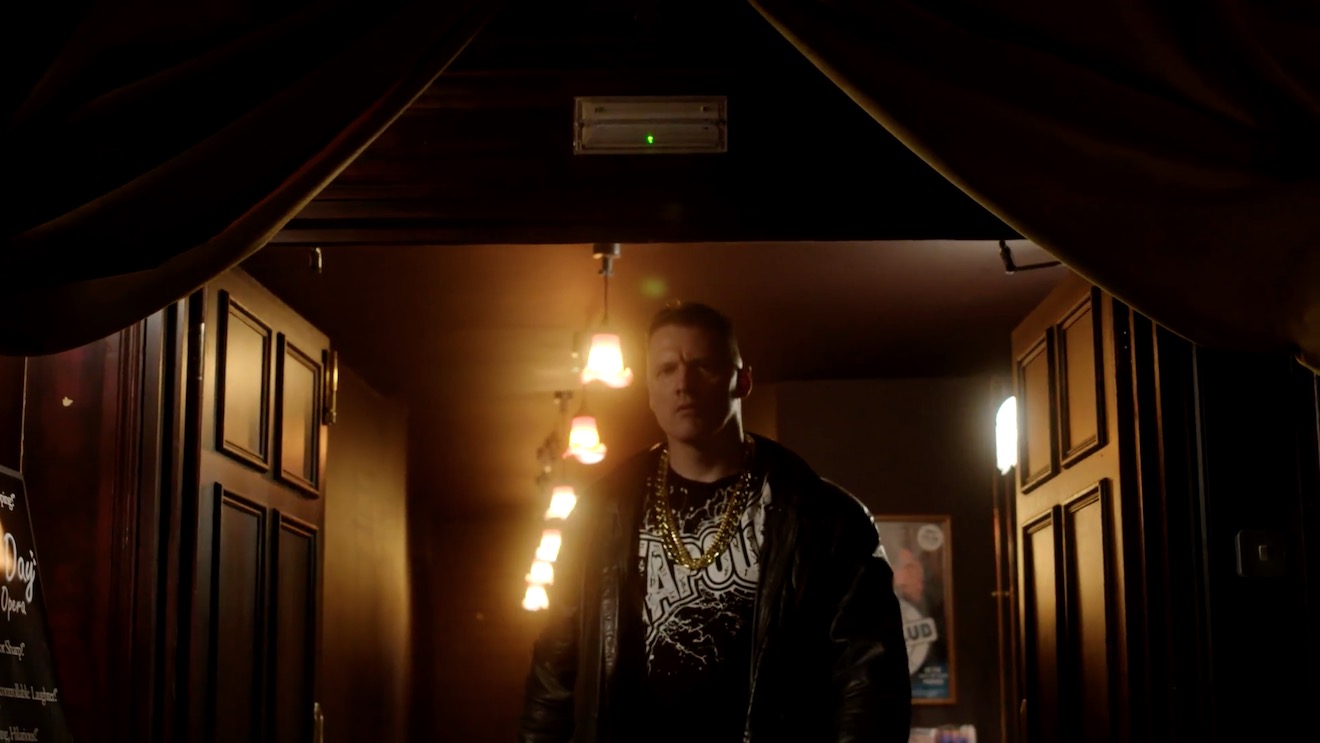
At 1am we moved into an adjacent industrial street – having decided that it was unreasonable to have Paul shouting dialogue in a residential area at that hour – for some Steadicam shots. I went to the Gemini’s low-light ISO 3200 and Stephen hand-bashed a lantern on a boom pole to fill Paul in between streetlamps, which became a fun dance when we had to do a 270° orbit!


Day 23

We convened at Cambridge’s Castle Hill. Nearby Indian restaurant Namaste Village kindly agreed to let us shoot a brief scene there at the last minute, even having one of the staff do a spot of acting. I posted a video breakdown on Instagram – here it is:


View this post on Instagram


A post shared by Neil Oseman (@neiloseman)

Back outside we filmed a nice sequence of shots ending with a 360° pan following Harvey as he walks around the top of Castle Hill talking on the phone. As the other end of the phone call had been shot with Steve’s head sometimes out of frame, we went the other way and gave Harvey loads of headroom, capturing some nice clouds along the way.

Then it was time for another pick-up from Day 7, reshooting the tent scene for continuity reasons. Again we put a light on one side and black-draped the other to get some shape into the light inside. This time we used a wider lens, the 14mm, and with the help of a runner I handheld it over Paul rather than trying to squeeze the tripod in around him like last time. He got a nasty shock when I accidentally knocked the matte box off and it hit him in the face. Er, sorry again.

After wrapping a few of us went back across the road to Namaste Village, where the food was excellent.


Day 24

On our last day we caught up to the elusive pick-up that was always meant to be a pick-up: the scenes with Harvey’s mum. We took over Rachel’s grandmother’s house for several hours, most of the shots being in a corner of her living room. Unusually I was drawn to a corner that didn’t have a window in it, because it had the best furniture and dressing to establish the character in our standard 24mm tableau shot.

But this meant – with all the windows behind camera – that it was a challenge to make the lighting interesting. We faked a window just off camera left using a diffusion frame with muslin and a grid over it; Stephen bounced the 600D into it from across the room. I closed the room’s curtains as much as I could get away with before the lack of natural fill light started to make it look like night. (For later scenes we closed them all the way and put a 300D behind the muslin, as pictured above.)

To add more interest to the shot I played around with the positions of two table lamps and a floor lamp. Pausing to check my script breakdown notes from last year I saw that I had written “a single practical floor lamp” in the lighting column; too many lamps would kill the scene’s sad tone. This is a good example of a breakdown keeping me honest as a DP and preventing me from getting carried away doing stuff on set just because I can (though that definitely still happens sometimes). I ended up with just one lamp in the back of the main shot.

After some variations on that main shot for later scenes, and a brief scene in the kitchen, we packed up and headed out for exteriors. Most of these were happy flashbacks from the early days of Harvey and Alice’s relationship, and Jonnie wanted to fill them with filmic references. First up was a Jules et Jim homage with the pair racing across a bridge, then a “remake” of one of Jonnie’s own amateur films with Harvey and Alice spinning around holding hands. For POV reverse shots we put the tripod on the point which they span around, and I set the panning tension to zero so that they could pull the camera around themselves by holding the moose bars (handgrips).

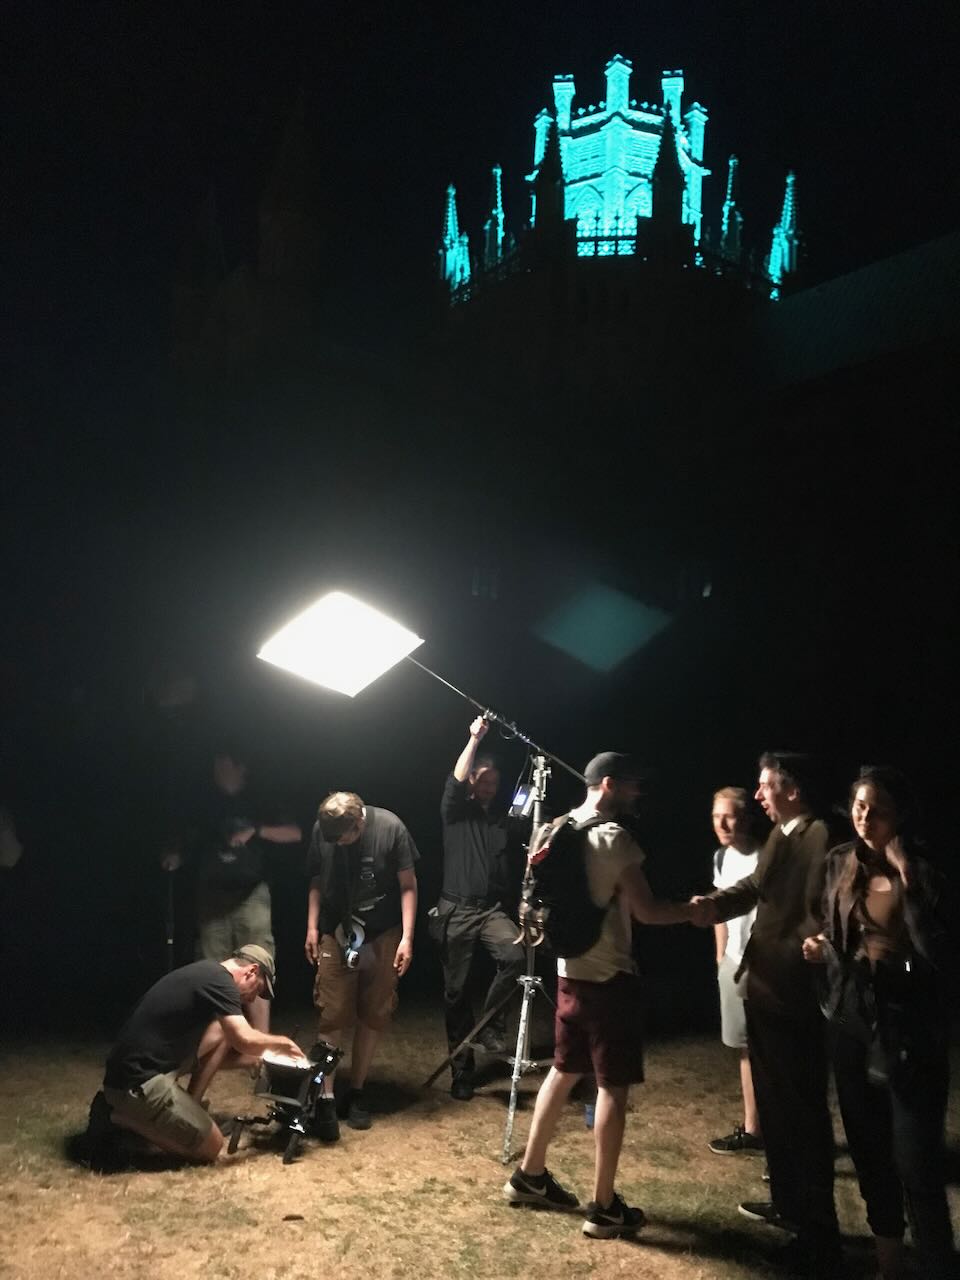
Next was a Manhattan-esque shot with the couple on a bench looking up at Ely Cathedral. We clearly weren’t going to light the cathedral on our budget, so we set up around sunset and waited for the streetlamps to come on and the ambient light to drop to a nice dusky level. We rolled when the daylight was metering at T1.4 at ISO 800, though I exposed at T2. To cut Harvey and Alice out from the background a bit Stephen stood just out of frame with an LED lantern motivated by a nearby streetlamp.

He pulled the same trick at our next location, a passageway beside Prezzo, where we did actually have to light a small portion of the cathedral wall as well, using a battery-powered Aputure (200X I think). We couldn’t have done it for long on the batteries we had, but fortunately it was a brief scene.

Our final set-up was a Poor Man’s shot of Harvey running at night. We did this on the green beside the cathedral because it was a handy open space where we could get a completely dark background save for a few dots of distant lights. Stephen armed a FalconEyes over Paul and swung it back and forth to create the illusion of passing streetlamps. The shot needed a tiny touch of fill, so we taped a PavoTube to the top of the matte box, setting it to 1% intensity and taping over most of it to get it down to a low enough level. (I was at ISO 3200 and on a 14mm lens, so mere inches from Paul’s face.)

Then Rob said the magic words, “It’s a wrap.” Like most micro-budget projects there are still a few loose ends to be shot, but those will be done with Jonnie’s camera and no crew. For most of the cast and crew Harvey Greenfield has run his course and I’ll see them at some distant time for the premiere. Thank you Stephen Allwright (gaffer), Jeremy Dawson (spark), Hamish Nichols (1st AC), Fiyin Oladimeji (2nd AC) and Nana Nabi (2nd AC daily) for all your hard work, and to Jonnie for bringing me onto this fun and creative film. Huge thanks also to Global Distribution, Red and Sigma who supported us with equipment which brought the whole thing up a level. The rough cut is already fantastic and I can’t wait to see it finished.

Read all my Harvey Greenfield is Running Late posts:

“Harvey Greenfield is Running Late”: Week 3 Part 2

“Harvey Greenfield is Running Late”: Week 2

Day 6

I think the director is turning into Harvey Greenfield. This morning Jonnie burst unexpectedly out of a hedge apologising for being slightly late.

Our first location was a surprisingly busy park in the village of Exning. We shot under the trees lining the edge of the park, keeping the camera on the same side of the eye-line as this handy arboreal negative fill, allowing the open sky of the park proper to light the actors’ off-camera sides. It’s great when blocking works out in your favour like this.

Then we moved around the corner to Wests Garage. First up here was a 24mm tableau shot to establish Barry the mechanic when he first calls Harvey, just as we have done to introduce the other supporting characters. We placed Barry in an office with a window behind him showing the workshop. Stephen arranged our four Astera tubes (in tungsten mode) around the workshop as practical work-lights, clamping some to pillars and placing others on the floor; wherever possible we are adding orange splashes of light (Harvey’s stress colour) into the background of these tableaux.

Next we shot outside around a car (a Rover I think – they all look the same to me), getting a nice slider shot parallel to the vehicle. Shades of Wes Anderson again. The trouble with all these straight-on shots of windows and shiny cars is hiding all the reflections. Stephen had to build a wall of floppy flags to disguise the slider.

By the time we wrapped the heat was getting to us all, and there was nothing for it but to try out the local pub.

But that was closed for a private party so we went to the other local pub instead.


Day 7

Jonnie was wearing Harvey’s jacket. Definitely turning into him.

We were at Othersyde, part of the Cambridge Museum of Technology, for the biggest day of the shoot: 12 scenes and nine pages of script to cover.

We began in a tent – Amanda had kindly found an orange one at my request – which we flagged on one side, adding the Aputure 300D to the other side to bring some shape to the lighting.

Then we moved into one of the venue’s toilet cubicles, where we simply added a skirt of black wrap to the existing overhead light fitting to reduce the light on the walls and add contrast. (Stephen and spark daily James also had to build a black-out tent around the door so that it could be open for the camera to see in without admitting daylight.)

Then we jumped into the bar of the Engineer’s House to grab a one-shot flashback scene. We lit through two windows (the Aputure and the Litemat 2S, I think) and added fill (a CTB-gelled 2K bounced off poly) and a couple of other sources inside (an Aladdin into a dark corner; a tungsten lamp shining down some background stairs). The shot required some well-timed whip-pans – always good for comedy. These require great skill as a camera operator when executed on sticks, but fortunately for me this one was handheld which makes the muscle-memory involved much easier.

Next we were in another toilet cubicle. Again we skirted the ceiling light and tented around the door, but this time another character had to come in. Here we used an LED fixture which Stephen built himself, gelling it with Urban Sodium as this shot is part of a sequence that has a stressy, streetlamp look to it.

By this time it was getting towards evening and we set up for a slider shot at the front of the site, overlooking the River Cam and shooting towards the low sun. Thanks to Helios Pro – a sun tracking app – we managed to time this just right. A 4×4 poly bounce either side of camera was all that was needed to supplement the beautiful natural light.

Sounds like all that would be enough for one day, doesn’t it? But oh no, the big scene was still to come. With 20 or 30 extras we staged a wedding reception under Othersyde’s marquee. Stephen keyed the wedding party at the head table with the Aputure bounced off poly (both rigged to the marquee’s ceiling) and we backlit them with a tungsten 1K firing out of an upper window of the Engineer’s House. A character off to one side was lit with an Aladdin rigged to the roof of the bar. The aim was to keep the lighting fairly warm overall, but to make those warm foreground colours pop we added blue-gelled 300W fresnels uplighting the Engineer’s House and a 1K in the deep background, gelled with Steel Blue, for a hint of moonlight. All of this was supplemented by the venue’s existing string lights, bar lights, LED uplighters in the flower beds and candles which Amanda placed on the tables.

Although we didn’t quite make the call sheet, we only dropped one brief scene – a pretty amazing result and one for the whole team to be proud of. Our welcome reward was a selection of Othersyde’s finest pizzas.


Day 8

The morning was spent with a beautiful horse-drawn hearse (featuring more fun reflective surfaces!) while the afternoon took place around an off-camera grave in Ely Cemetery. Some brief scenes with the child actors, faking a corner of the cemetery as a park, completed a damp but straightforward day for cinematography.


Day 9

About a third of Harvey Greenfield is Running Late takes its title very literally, seeing Paul Richards’ character hurrying to his next appointments as he makes phone calls and talks to camera. Today was the first day dedicated to capturing these scenes.

The first few scenes were shot as Annie Hall-esque wides in the streets and parkland around of Ely. (Much as Hot Fuzz filmed in Wells but painted out the cathedral, we framed out Ely Cathedral to avoid it becoming an identifiable landmark.)

To get a shot of Harvey looking down at a piece of litter, we put the empty beer can on top of two peli cases. Using the lovely wide 14mm lens we were then able to shoot up past it to Harvey and even rack focus to the can. I never usually hire anything wider than an 18mm but I have certainly learnt to appreciate what a 14mm can do on this shoot, even if it does make lighting and boom-operating more challenging.

Our Steadicam operator Rupert joined us again for the rest of the day, bringing along a rickshaw to enable him to track Harvey more smoothly. This drew plenty of attention from the general public, particularly when we moved down to Ely’s picturesque riverside. Most people were very friendly and kindly stayed out of frame if asked to, but a couple of self-styled pirates seemed determined to get an unscripted cameo. Nevertheless we managed to pull off a long and complicated shot which begins with Harvey approaching camera down a tree-lined car park and then tracks him in profile as he pelts along the riverbank.


Day 10

The morning was spent filming outside a house in Romsey – a short walk from home for me – which was standing in for Harvey’s. There was yet more fun with reflections when we had to shoot Harvey’s neighbour looking out of his window. No matter how tight the budget is, I will never ever take a polarising filter off my kit hire list again.

In the afternoon we captured more Steadicam running scenes around Romsey Park, before moving onto the nearby streets when it got dark. Here the Gemini’s low light mode saw use again, allowing us to rely mostly on the existing streetlamps (not pretty, but it works for the story). Stephen rigged an Aladdin to the rickshaw so that Harvey would have a little fill light moving with him.

Finally we moved back into the park, where Stephen had cross-lit the kids’ playground with tungsten sources. This formed the background of the scene, with the action taking place under a streetlamp in front of the play area. As the streetlamp was naturally very toppy, we fired in a Litemat (gelled with Urban Sodium) from above the camera to make sure that we would see Paul’s face for this critical performance scene.

There will be more on Harvey Greenfield‘s second week in my next post. In the meantime you can follow the film’s official Instagram account or Facebook page.

“Harvey Greenfield is Running Late”: Week 2

The Colour of Moonlight

What colour is moonlight? In cinema, the answer is often blue, but what is the reality? Where does the idea of blue moonlight come from? And how has the colour of cinematic moonlight evolved over the decades?


The science bit

According to universetoday.com the lunar surface “is mostly oxygen, silicon, magnesium, iron, calcium and aluminium”. These elements give the moon its colour: grey, as seen best in photographs from the Apollo missions and images taken from space.

When viewed from Earth, Rayleigh scattering by the atmosphere removes the bluer wavelengths of light. This is most noticeable when the moon is low in the sky, when the large amount of atmosphere that the light has to travel through turns the lunar disc quite red, just as with the sun, while at its zenith the moon merely looks yellow.

Yellow is literally the opposite (or complement) of blue, so where on (or off) Earth did this idea of blue cinematic moonlight come from?

One explanation is that, in low light, our vision comes from our rods, the most numerous type of receptor in the human retina (see my article “How Colour Works” for more on this). These cells are more sensitive to blue than any other colour. This doesn’t actually mean that things look blue in moonlight exactly, just that objects which reflect blue light are more visible than those that don’t.

In reality everything looks monochromatic under moonlight because there is only one type of rod, unlike the three types of cones (red, green and blue) which permit colour vision in brighter situations. I would personally describe moonlight as a fragile, silvery grey.

Blue moonlight on screen dates back to the early days of cinema, before colour cinematography was possible, but when enterprising producers were colour-tinting black-and-white films to get more bums on seats. The Complete Guide to Colour by Tom Fraser has this to say:

As an interesting example of the objectivity of colour, Western films were tinted blue to indicate nighttime, since our eyes detect mostly blue wavelengths in low light, but orange served the same function in films about the Far East, presumably in reference to the warm evening light there.

It’s entirely possible that that choice to tint night scenes blue has as much to do with our perception of blue as a cold colour as it does with the functioning of our rods. This perception in turn may come from the way our skin turns bluer when cold, due to reduced blood flow, and redder when hot. (We saw in my recent article on white balance that, when dealing with incandescence at least, bluer actually means hotter.)

Whatever the reason, by the time it became possible to shoot in colour, blue had lodged in the minds of filmmakers and moviegoers as a shorthand for night.


Examples

Early colour films often staged their night scenes during the day; DPs underexposed and fitted blue filters in their matte boxes to create the illusion. It is hard to say whether the blue filters were an honest effort to make the sunlight look like moonlight or simply a way of winking to the audience: “Remember those black-and-white films where blue tinting meant you were watching a night scene? Well, this is the same thing.”

This scene from “Ben Hur” (1959, DP: Robert Surtees, ASC) appears to be a matte painting combined with a heavily blue-tinted day-for-night shot.
A classic and convincing day-for-night scene from “Jaws” (1975, DP: Bill Butler, ASC)

Day-for-night fell out of fashion probably for a number of reasons: 1. audiences grew more savvy and demanded more realism; 2. lighting technology for large night exteriors improved; 3. day-for-night scenes looked extremely unconvincing when brightened up for TV broadcast. Nonetheless, it remains the only practical way to show an expansive seascape or landscape, such as the desert in Mad Max: Fury Road.

Blue moonlight on stage for “Gone with the Wind” (1939, DP: Ernest Haller)
Cold stage lighting matches the matte-painted mountains in “Black Narcissus” (1947, DP: Jack Cardiff, OBE)

One of the big technological changes for night shooting was the availability of HMI lighting, developed by Osram in the late 1960s. With these efficient, daylight-balanced fixtures large areas could be lit with less power, and it was easy to render the light blue without gels by photographing on tungsten film stock.

Cinematic moonlight reached a peak of blueness in the late 1980s and early ’90s, in keeping with the general fashion for saturated neon colours at that time. Filmmakers like Tony Scott, James Cameron and Jan de Bont went heavy on the candy-blue night scenes.

“Beverly Hills Cop II” (1987, DP: Jeffrey Kimball, ASC)
“Flatliners” (1990, DP: Jan de Bont, ASC)
“Terminator 2: Judgment Day” (1991, DP: Adam Greenberg, ASC) uses a lot of strong, blue light, partly to symbolise the cold inhumanity of the robots, and partly because it’s a hallmark of director James Cameron.

By the start of the 21st century bright blue moonlight was starting to feel a bit cheesy, and DPs were experimenting with other looks.

“The Fast and the Furious” (2001, DP: Ericson Core) has generally warm-coloured night scenes to reflect LA’s mild weather after dark, but often there is a cooler area of moonlight in the deep background.
“War of the Worlds” (2005, DP: Janusz Kaminski, ASC)

Speaking of the above ferry scene in War of the Worlds, Janusz Kaminski, ASC said:

I didn’t use blue for that night lighting. I wanted the night to feel more neutral. The ferryboat was practically illuminated with warm light and I didn’t want to create a big contrast between that light and a blue night look.

The invention of the digital intermediate (DI) process, and later the all-digital cinematography workflow, greatly expanded the possibilities for moonlight. It can now be desaturated to produce something much closer to the silvery grey of reality. Conversely, it can be pushed towards cyan or even green in order to fit an orange-and-teal scheme of colour contrast.

“Pirates of the Carribean: Dead Man’s Chest” (2006, DP: Darius Wolski, ASC)

Darius Wolksi, ASC made this remark to American Cinematographer in 2007 about HMI moonlight on the Pirates of the Caribbean movies:

The colour temperature difference between the HMIs and the firelight is huge. If this were printed without a DI, the night would be candy blue and the faces would be red. [With a digital intermediate] I can take the blue out and turn it into more of a grey-green, and I can take the red out of the firelight and make it more yellow.

Compare Shane Hurlbut, ASC’s moonlight here in “Terminator Salvation” (2009) to the “Terminator 2” shot earlier in the article.
The BBC series “The Musketeers” (2014-2016, pilot DP: Stephan Pehrsson) employed very green moonlight, presumably to get the maximum colour contrast with orange candles and other fire sources.

My favourite recent approach to moonlight was in the Amazon sci-fi series Tales from the Loop. Jeff Cronenweth, ASC decided to shoot all the show’s night scenes at blue hour, a decision motivated by the long dusks (up to 75 minutes) in Winnipeg, where the production was based, and the legal limits on how late the child actors could work.

The results are beautiful. Blue moonlight may be a cinematic myth, but Tales from the Loop is one of the few places where you can see real, naturally blue light in a night scene.

“Tales from the Loop” (2020, DP: Jeff Cronenweth, ASC)

If you would like to learn how to light and shoot night scenes, why not take my online course, Cinematic Lighting? 2,300 students have enrolled to date, awarding it an average of 4.5 stars out of 5. Visit Udemy to sign up now.

The Colour of Moonlight

The Cinematography of “Alder”

Back in February 2019 I spent a long day in Black Park, a forest behind Pinewood Studio, shooting a short film called Alder for director Vanda Ladeira. A little late perhaps, but here are my reflections on the cinematography and general experience of making this experimental fairytale.

The film is about a forager (Odne Stenseth) who does not realise he is being watched by the very spirit of the forest, the titular Alder (Libby Welsh). As he cuts a sprig of holly, or steps on a mushroom, he is unknowingly causing her pain. Meanwhile a group of ghosts – Alder’s former victims? – cavort in the woodland, and strips of film made with ground-up human bone reach out from the trees to ensnare the forager.

Vanda contacted me after seeing my work on Ren: The Girl with the Mark. She was keen for Alder’s lair to have the same feel as Karn’s house in that series. We had a number of meetings to discuss the tone, visuals and the logistics of the shoot, which initially was going to take place over two days but was eventually compressed to one.

In October 2018 we conducted a recce in a forest that we ultimately weren’t able to use. I remember at the time that I was considering shooting the project on celluloid, tying in with the plot point about Alder making film from her victims’ bones. I dropped the idea after taking light readings on that recce – when it was very overcast – and realising just how dark it could be under the tree canopy.

We ultimately shot on a Blackmagic Ursa Mini and Xeen primes, provided along with the lighting kit by gaffer Jeremy Dawson. The Blackmagic sensors seem to do very well with earthy tones, as I noticed on the village set of Ren, and the Ursa rendered the browns of the bracken, the soil and the forager’s costume nicely. Jeremy also provided us with a jib which enabled us to underscore the forager’s action with some definite moves: an introductory crane down; a dramatic pull up as he drives his knife into a tree; and a frantic boom down with him as he searches for his lost compass. In Alder’s lair we kept the camera drifting from side to side or up and down to bring energy to her more static scenes.

Lighting for the forager’s scenes was all natural, with just a little bounce or negative fill from time to time to keep some shape to the image. An Artem smoke gun, operated by Claire Finn, was used on almost every shot to give the forest some life and mystery, and also to keep the backgrounds from getting too busy; the grey wall of smoke serves to fade the background slightly, keeping the eye focused on the foreground action.

As there was no dialogue, I was free to change the frame rate expressively. Examples include: over-cranking close-ups of the forager’s feet and hands in contact with nature, emphasing the sensuality of his unwitting connection to Alder; over-cranking the dance of the ghosts to make their movements even more beautiful and supernatural; and under-cranking the forager slightly to enhance his panic when he finds himself lost and surrounded.

Alder’s lair was a set built by Denisa Dumitrescu in the forest. I took broadly the same approach to lighting it as I had for the reference scene from Ren, making some holes in the branch-covered roof and shining a blinder (a bank of four LED spotlights) through it to produce dappled shafts of sunlight. On the floor around Alder were a number of candles; we beefed up the light from these by skipping an 800W tungsten lamp off a bounce board on the floor.

The biggest challenge was the meeting between the two main characters, a scene scripted for daylight which we were forced to shoot after dark due to running behind schedule. It was the longest and most important scene in the film and suddenly the cinematography had to be completely improvised. We did not have anywhere near the lighting package that a woodland night exterior normally calls for – just 800W tungsten lamps, a few LED fixtures, and a generator only powerful enough to run one of each.

What I ended up doing was putting an 800 in the background, ostensibly as a setting sun, and bouncing a blinder off poly-board as fill. We shot the whole scene through in a single handheld shot, once with smoke and once without, then picked up a few close-ups.I tried to hide the lack of light in the background by allowing the 800 to flare the lens and render the smoke almost impenetrable at times. Vanda and her editor, Tom Chandler, leant into the strange, stylised look and bravely intercut the smoky and smokeless takes. The result is much more magical and expressive than what we would have shot if we had still had daylight.

You can watch the finished film here. It won me Best Cinematographer at the New York Cinematography Awards (August 2019) and Film Craft Award: Cinematography at Play Short International Film Awards (2019).

The Cinematography of “Alder”

The Hardest Shot I’ve Ever Done

It is night. We Steadicam into a moonlit bedroom, drifting across a window – where a raven is visible on the outside ledge, tapping at the glass with its beak – and land on a sleeping couple. The woman, Annabel, wakes up and goes to the window, causing the bird to flee. Crossing over to her far shoulder, we rest on Annabel’s reflection for a moment, before racking focus to another woman outside, maybe 200ft away, running towards a cliff. All in one shot.

Such was the action required in a scene from Annabel Lee, the most ambitious short I’ve ever been involved with. Based on Edgar Allen Poe’s poem, the film was the brainchild of actor Angel Parker, who plays the titular character. It was directed by Amy Coop, who had already to decided to shoot on an Alexa Mini with Cooke Anamorphics before I was even hired.

Working with animals has its own difficulties, but for me as director of photography the challenges of this particular shot were:

  1. Making the bedroom appear moonlit by the single window, without any lamps being visible at any point in the Steadicam move.
  2. Lighting the view outside.
  3. Ensuring the live raven read on camera even though the shot was quite wide.
  4. Making Annabel bright enough that her reflection would read, without washing out the rest of the scene.
  5. Blocking the camera in concert with Annabel’s move so that its reflection would not be seen.

I left that last one in the capable hands of Steadicam op Rupert Peddle, along with Angel and Amy. What they ended up doing was timing Angel’s move so that she would block the window from camera at the moment that the camera’s reflection would have appeared.

Meanwhile, I put my head together with gaffer Bertil Mulvad to tackle the other four challenges. We arrived at a set-up using only three lights:

  1. A LiteMat 1 above the window (indoors) which served to light Annabel and her reflection, as well as reaching to the bed.
  2. Another LED source outside the window to one side, lighting the raven.
  3. A nine-light Maxibrute on a cherry-picker, side-lighting the woman outside and the cliffs. This was gelled with CTB to match the daylight LEDs.

Unfortunately the outside LED panel backlit the window glass, which was old and kept fogging up, obscuring the raven. With hindsight that panel might have been better on the other side of the window (left rather than right, but still outside), even though it would have created some spill problems inside. (To be honest, this would have made the lighting direction more consistent with the Maxibrute “moonlight” as well. It’s so easy to see this stuff after the fact!)

Everything else worked very well, but editor Jim Page did have to cut in a close-up of the raven, without which you’d never have known it was there.

The Hardest Shot I’ve Ever Done

5 Steps to Lighting a Forest at Night

EXT. FOREST - NIGHT

A simple enough slug line, and fairly common, but amongst the most challenging for a cinematographer. In this article I’ll break down into five manageable steps my process of lighting woodlands at night.


1. Set up the moon.

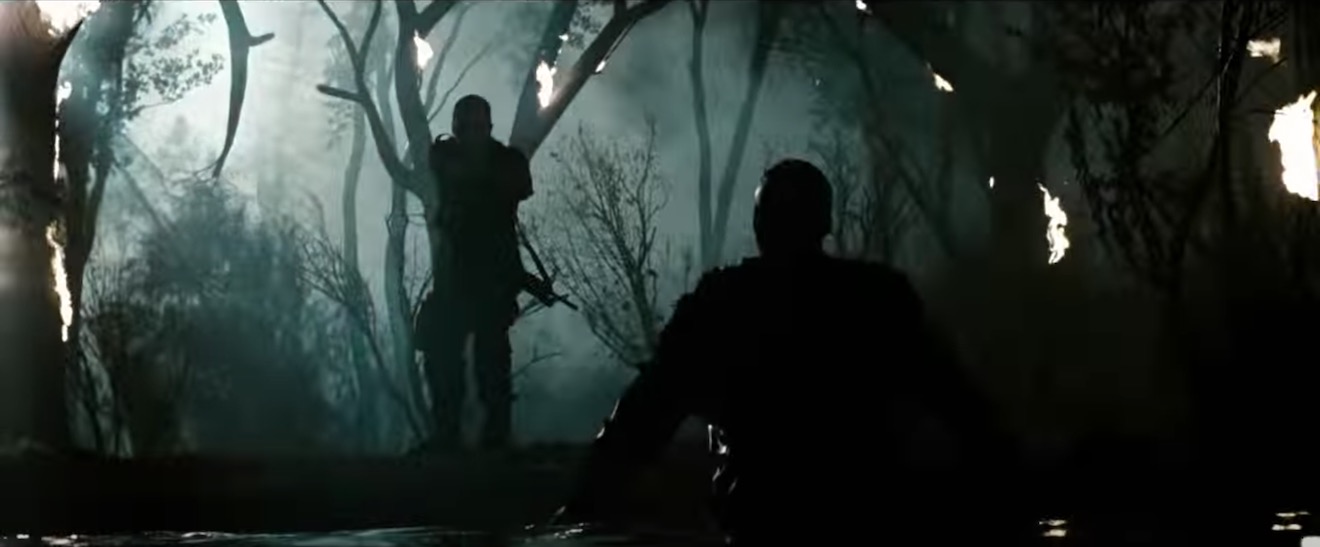
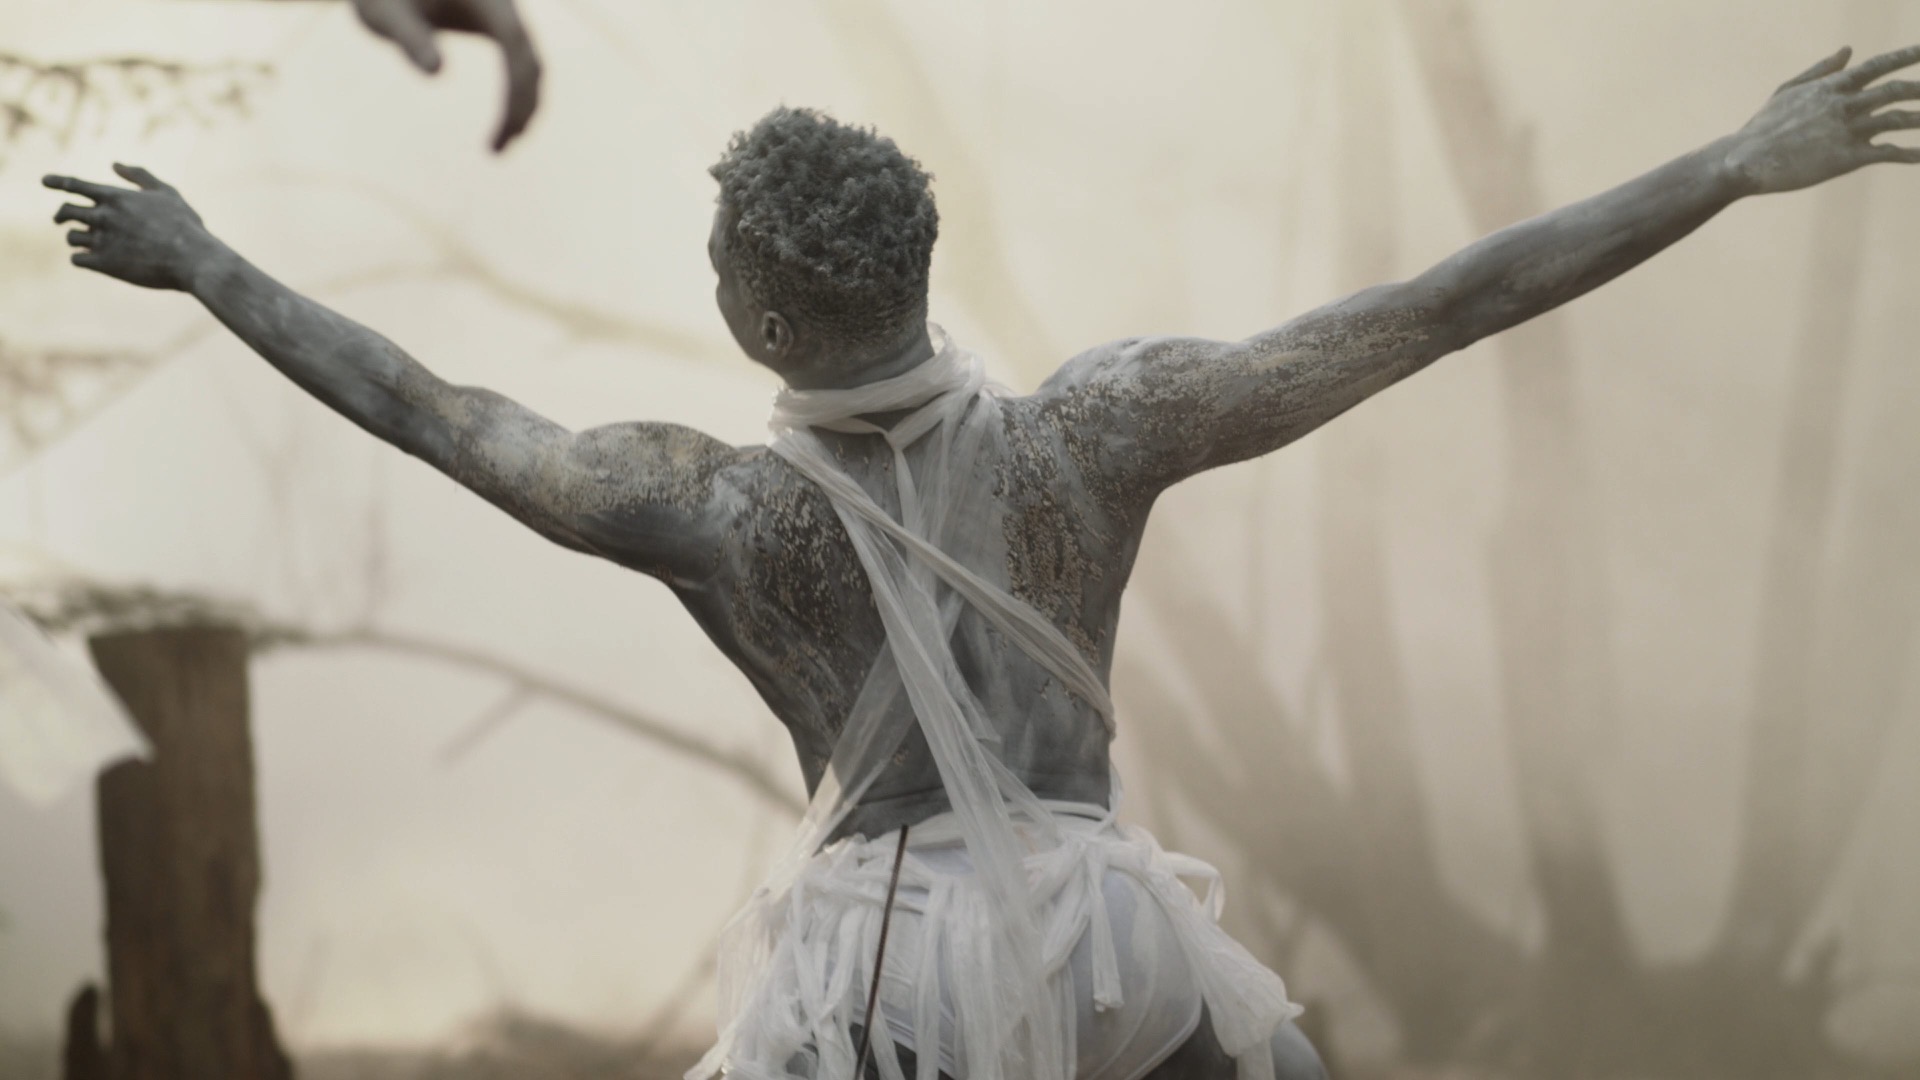
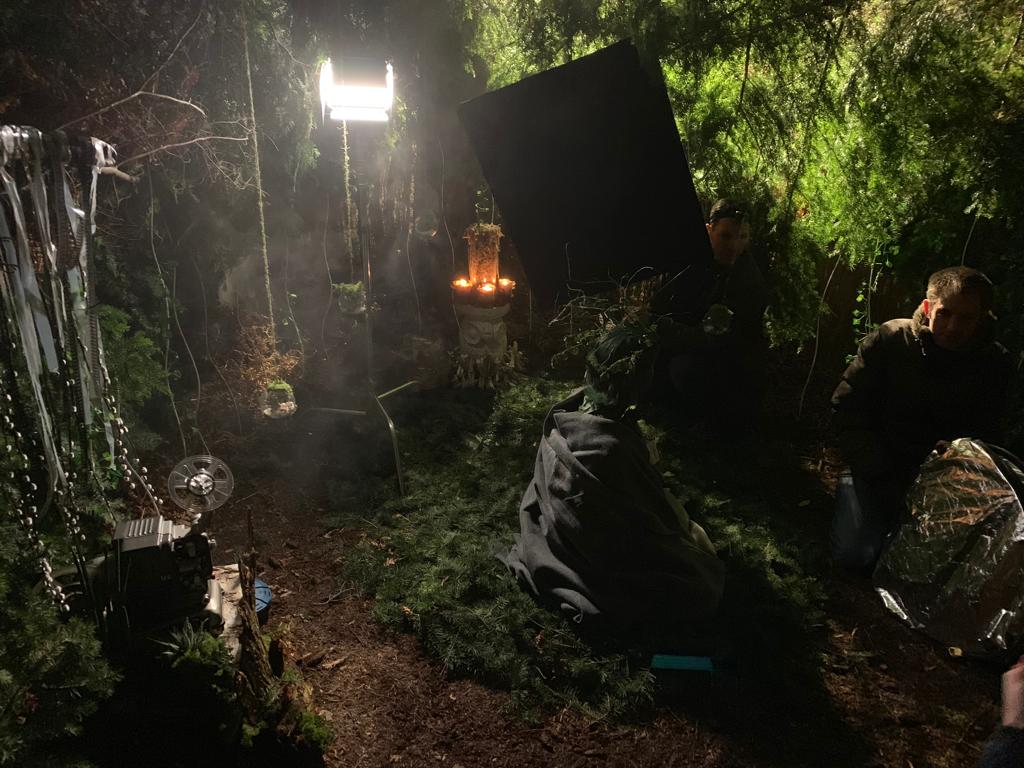
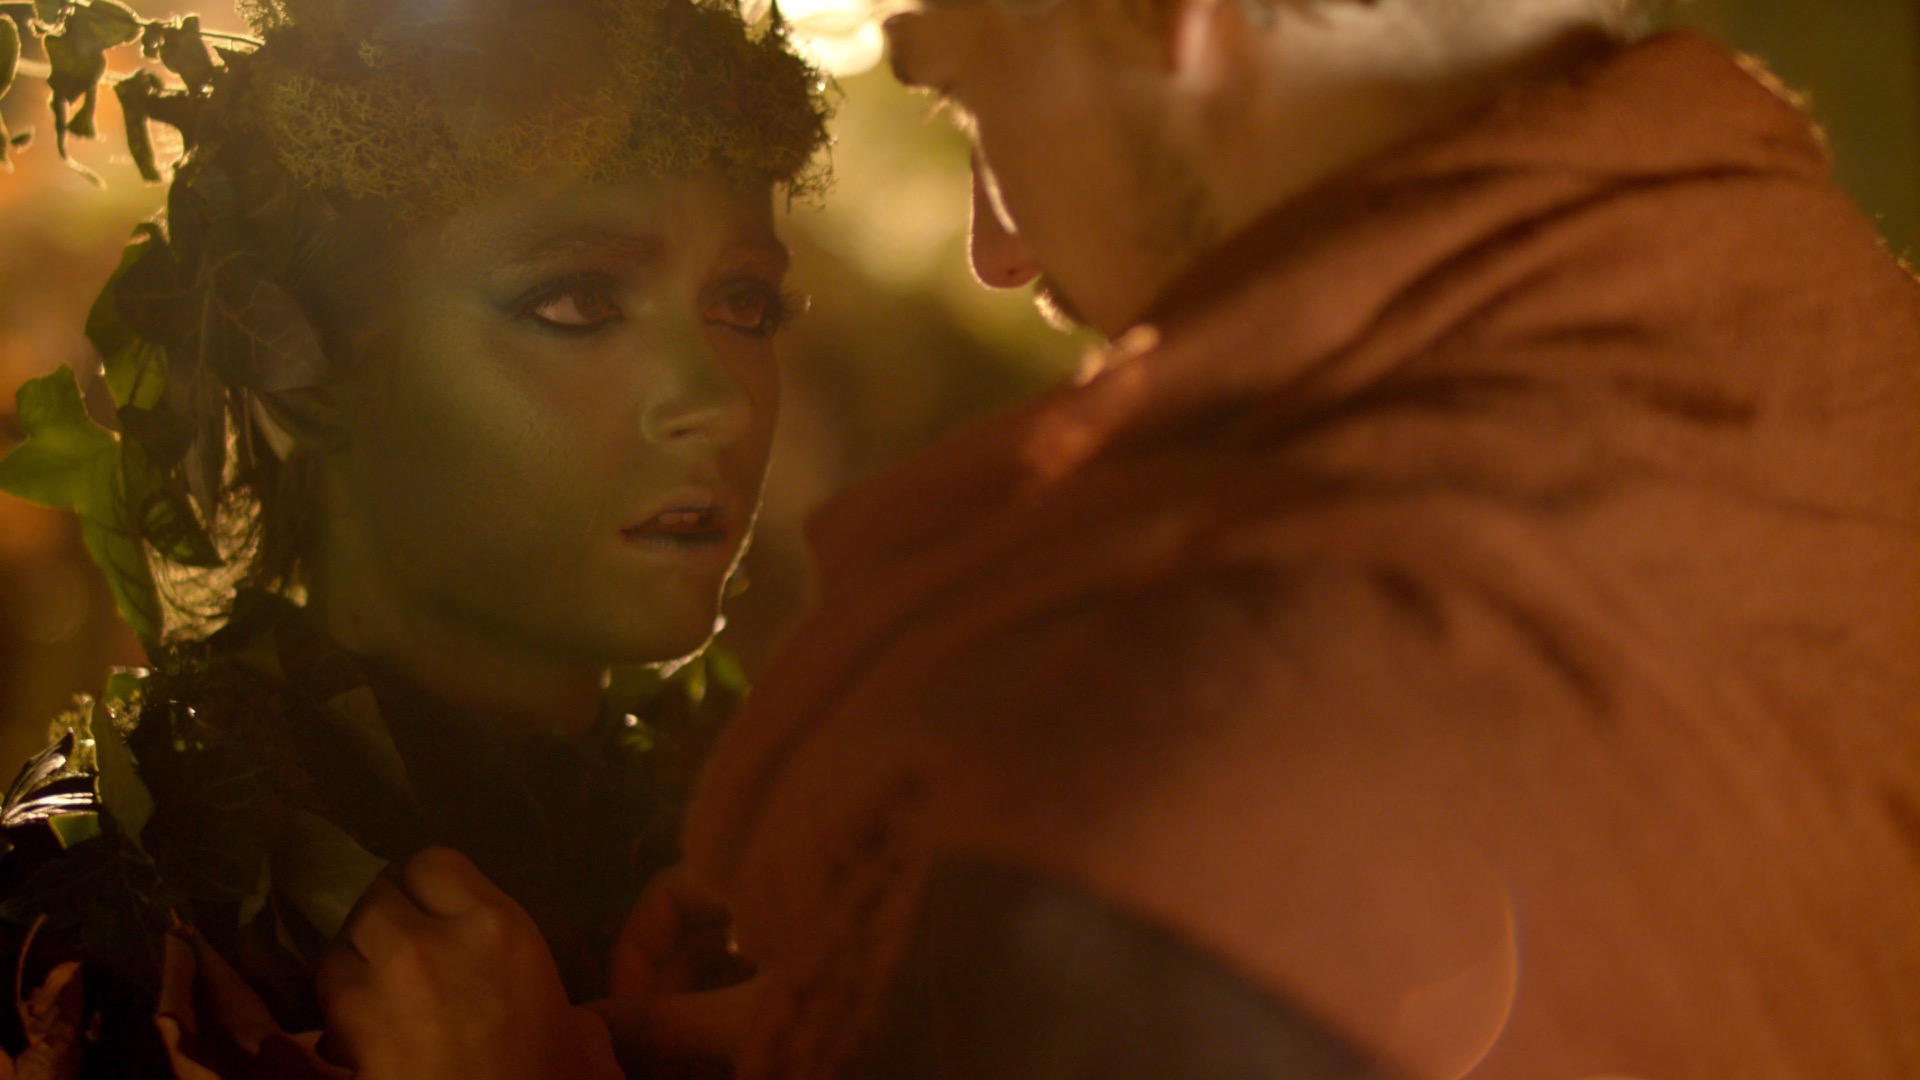
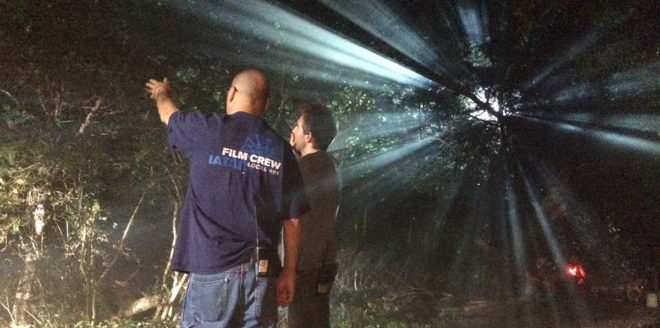
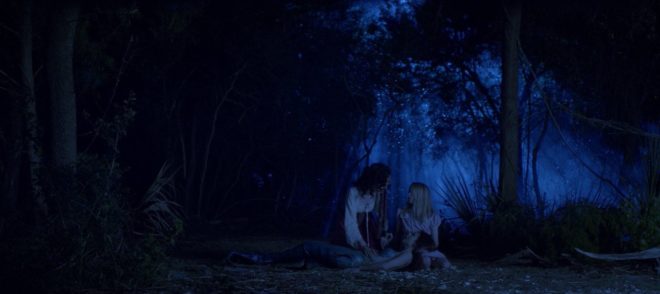
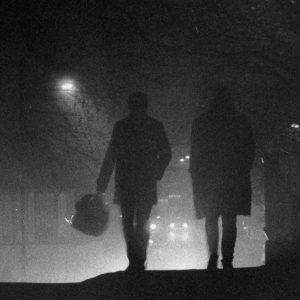
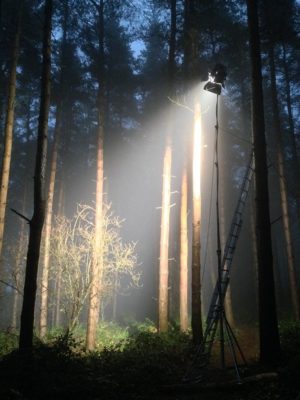
Forests typically have no artificial illumination, except perhaps practical torches carried by the cast. This means that the DP will primarily be simulating moonlight.

Your “moon” should usually be the largest HMI that your production can afford, as high up and far away as you can get it. (If your production can’t afford an HMI, I would advise against attempting night exteriors in a forest.) Ideally this would be a 12K or 18K on a cherry-picker, but in low-budget land you’re more likely to be dealing with a 2.5K on a triple wind-up stand.

Why is height important? Firstly, it’s more realistic. Real moonlight rarely comes from 15ft off the ground! Secondly, it’s hard to keep the lamp out of shot when you’re shooting towards it. A stand might seem quite tall when you’re right next to it, but as soon as you put it far away, it comes into shot quite easily. If you can use the terrain to give your HMI extra height, or acquire scaffolding or some other means of safely raising your light up, you’ll save yourself a lot of headaches.

In this shot from “The Little Mermaid” (dir. Blake Harris), a 12K HMI on a cherry-picker creates the shafts of moonlight, while another HMI through diffusion provides the frontlight. (This frontlight was orange to represent sunrise, but the scene was altered in the grade to be pure night.)

The size of the HMI is of course going to determine how large an area you can light to a sufficient exposure to record a noise-free image. Using a good low-light camera is going to help you out here. I shot a couple of recent forest night scenes on a Blackmagic Pocket Cinema Camera, which has dual native ISOs, the higher being 3200. Combined with a Speedbooster, this camera required only 1 or 2 foot-candles of illuminance, meaning that our 2.5K HMI could be a good 150 feet away from the action. (See also: “How Big a Light do I Need?”)


2. Plan for the reverse.

A fake moon looks great as a backlight, but what happens when it comes time to shoot the reverse? Often the schedule is too tight to move the HMI all the way around to the other side, particularly if it’s rigged up high, so you may need to embrace it as frontlight.

Frontlight is generally flat and undesirable, but it can be interesting when it’s broken up with shadows, and that’s exactly what the trees of a forest will do. Sometimes the pattern of light and dark is so strong and camouflaging that it can be hard to pick out your subject until they move. One day I intend to try this effect in a horror film as a way of concealing a monster.

One thing to look out for with frontlight is unwanted shadows, i.e. those of the camera and boom. Again, the higher up your HMI is, the less of an issue this will be.

If you can afford it, a second HMI set up in the opposite direction is an ideal way to maintain backlight; just pan one off and strike up the other. I’ve known directors to complain that this breaks continuity, but arguably it does the opposite. Frontlight and backlight look very different, especially when smoke is involved (and I’ll come to that in a minute). Isn’t it smoother to intercut two backlit shots than a backlit one and frontlit one? Ultimately it’s a matter of opinion.

An example of cheated moonlight directions in “His Dark Materials” – DP: David Luther


3. Consider Ground lights.

One thing I’ve been experimenting with lately is ground lights. For this you need a forest that has at least a little undulation in its terrain. You set up lights directly on the ground, pointed towards camera but hidden from it behind mounds or ridges in the deep background.

Detail from one of my 35mm stills: pedestrians backlit by car headlights in mist. Shot on Ilford Delta 3200

I once tried this with an HMI and it just looked weird, like there was a rave going on in the next field, but with soft lights it is much more effective. Try fluorescent tubes, long LED panels or even rows of festoon lights. When smoke catches them they create a beautiful glow in the background. Use a warm colour to suggest urban lighting in the distance, or leave it cold and it will pass unquestioned as ambience.

Put your cast in front of this ground glow and you will get some lovely silhouettes. Very effective silhouettes can also be captured in front of smoky shafts of hard light from your “moon”.


4. Fill in the faces.

All of the above looks great, but sooner or later the director is going to want to see the actors’ faces. Such is the cross a DP must bear.

On one recent project I relied on practical torches – sometimes bounced back to the cast with silver reflectors – or a soft LED ball on a boom pole, following the cast around.

Big-budget movies often rig some kind of soft toplight over the entire area they’re shooting in, but this requires a lot of prep time and money, and I expect it’s quite vulnerable to wind.

A recipe that I use a lot for all kinds of night exteriors is a hard backlight and a soft sidelight, both from the same side of camera. You don’t question where the sidelight is coming from when it’s from the same general direction as the “moon” backlight. In a forest you just have to be careful not to end up with very hot, bright trees near the sidelight, so have flags and nets at the ready.

This shot (from a film not yet released, hence the blurring) is backlit by a 2.5K HMI and side-lit by a 1×1 Aladdin LED with a softbox, both from camera right.


5. Don’t forget the Smoke.

Finally, as I’ve already hinted, smoke is very important for a cinematic forest scene. The best options are a gas-powered smoke gun called an Artem or a “Tube of Death”. This latter is a plastic tube connected to a fan and an electric smoke machine. The fan forces smoke into the tube and out of little holes along its length, creating an even spread of smoke.

A Tube of Death in action on the set of “The Little Mermaid”

All smoke is highly suspectible to changes in the wind. An Artem is easier to pick up and move around when the wind changes, and it doesn’t require a power supply, but you will lose time waiting for it to heat up and for the smoke and gas canisters to be changed. Whichever one you pick though, the smoke will add a tremendous amount of depth and texture to the image.

Overall, nighttime forest work scenes may be challenging, but they offer some of the greatest opportunities for moody and creative lighting. Just don’t forget your thermals and your waterproofs!

5 Steps to Lighting a Forest at Night

“The Little Mermaid”: Circus Cinematography

‘B’ cam 2nd AC Matt Dixon preps the camera on the crane’s Scorpio remote head. Photo: Tim Gill

The biggest set on The Little Mermaid was the circus, an area the size of a football pitch which was transformed into a period spectacle. The big top and many other pieces were driven across the country from LA, and during our first week of principal photography the art department were hard at work setting it all up and dressing it.

Today’s post is about how I lit the night exterior scenes on this huge set. To that end I’m going to focus on the two biggest shots in the sequence: a tracking shot outside the big top, and the crane-up which first reveals the circus to the audience. Below, as well as my diary entries from the shoot, you’ll find a little behind-the-scenes video I grabbed on my phone for the tracking shot, and a lighting plan for the crane shot.


Day 7

The two 18K HMI fresnels rigged on the condor

A couple of daylight pick-ups today, then we start setting up for a big night scene. The camera will dolly with Cam and Elle from the exit of the big top, past candy floss and ‘healing water’ stalls where bits of dialogue will happen, and finally reveal a ferris wheel in the distance. We block while the sun’s still up, and paint in the light as night sets in. We are trying to light most of it in a way that will also work for our big crane shot reveal of the circus later in the week, because repositioning large HMIs – especially the two 18Ks we’re flying on a condor (cherry-picker) – is very time-consuming. Inevitably it doesn’t quite work out that way, and one of the 18Ks has to die for now at least.

The ferris wheel is backlit by a 12K, with a little front-light from a 5K tungsten fresnel. Cross-light on the talent comes from the working 18K and a 6K on the opposite side of frame. Nine-light Maxi Brutes illuminate the tent from inside, some of that light spilling out onto the talent, while par cans uplight a row of banners outside. A 1K baby provides edge-light to the talent in their final position. A 300W fresnel inside the healing water wagon spills out, and a bare 40W globe inside the umbrella of the candy floss stall gives us a little glow there.

The final lamp to go up is another 300W fresnel, because the directors are concerned that the ’sold out’ sign on the healing water wagon isn’t clear enough. We end up firing it in from the front because there’s no time for anything else, but as always with front-light, I deeply regret it. Ideally we would have armed it out from the roof of the wagon to rake down the side of it.

Once the supporting artists are choreographed, the shot looks great.

A post shared by Neil Oseman (@neiloseman) on


Day 9

A Nine-light Maxi Brute inside the big top

We start with a big crane shot revealing the whole circus at night. For this shot we have the following lamps burning: 2 x 18Ks (on a condor), 1 x 12K, 1 x 4K – all those are providing moonlight or starlight, with varying degrees of blue gel on them; 2 x Nine-light Maxi Brutes making the big top glow from inside; a 5K spilling some orange glow on the background; 2 or 3 smaller tungsten units spilling out light from inside the smaller tents; and lighting the foreground, a 4×4 Kino and a 1K baby bounced off unbleached muslin. There are also numerous practicals on, including the lights on the ferris wheel, the illuminated ‘circus’ sign, several par can up-lighters, and about 7KW of fairy lights. Totalling over 80KW, it is easily the biggest lighting set-up of my career. Although the grip and electrical crew is relatively small given the scale of the set-up, they handle it with aplomb.

We have rebuilt our Giraffe crane to its maximum 31ft configuration, so we can swoop up over the entrance tent, past the ’circus’ sign, and reveal the twinkling string-lights of the midway leading to the big top, and the rides beyond.

Here’s a retrospective lighting plan for this crane shot (not to scale); click to enlarge it. Note that additional tents were added in postproduction, as you can see in the trailer.

Ideally we would have had two condors, with an 18K on each, and put one of them way back behind the trees, to maintain a consistent direction of moonlight, but budget and the practicalities of the location made this impossible.

The ‘A’ camera on the dolly, with the two 18Ks on the condor in the background

One thing that was a little different to my original plan was the hard 4K edging the roofs of the midway tents on the lefthand side. This was meant to be a pair of 6Ks firing through a diffusion frame, to get a much softer, less “sourcey” look than the hard “moonlight” from the 18Ks. But unfortunately both our 6Ks were malfunctioning.

Another change was the lighting of the midway itself. We had a tungsten helium balloon on the truck, which I had planned to float above the midway to provide warm ambience. As it turned out, the practical string lights, although only 40W each, were so numerous that they provided ample illumination in the centre of the frame.

Later on in production, I was chatting to one of the ADs about this scene and he expressed surprise at how well I had handled it, given that it was so much bigger than any lighting set-up I’d previously done. Honestly it never fazed me. Lighting is entirely scaleable; the principles are identical, whether your set is a small bathroom or a football pitch. I’d done so much night exterior in my career, I’d just never had the big toys I wanted before. I’ll let you in on a secret though: the only reason I knew to ask for 18Ks and a condor was from reading American Cinematographer!

In my next post I’ll discuss shooting some of Poppy Drayton’s key scenes as the eponymous mermaid, including her introduction inside the big top. Don’t forget that The Little Mermaid is currently showing in movie theatres across the US and on Amazon in the UK.

“The Little Mermaid”: Circus Cinematography

Lighting I Like: “Preacher”

Preacher is the subject of this week’s episode of Lighting I Like. I discuss two scenes, from the second episode of the second season, “Mumbai Sky Tower”, which demonstrate the over-the-top, comic-book style of the show.

Both seasons of Preacher can be seen on Amazon Video in the UK.

New episodes of Lighting I Like are released at 8pm BST every Wednesday. Next week I’ll look at two scenes from BroadchurchClick here to see the playlist of all Lighting I Like episodes.

Lighting I Like: “Preacher”

Negative Lighting

There were no practicals in this corner of the pub, so we placed an 800 open-face outside the window, gelled with Midnight Blue, and a 1×1′ LED panel in the wood-burner, gelled with CTO.

This year I’ve shot a couple of productions on the Sony FS7, a camera I’ve been very impressed by. Its most interesting feature is its high native ISO of 2000, which makes quite an impact on how you go about lighting. The light shed by practicals is often enough to illuminate a scene, or a large part of it, and sometimes you need to take existing practicals away in order to maintain contrast and shape, similar to how you take ambient light away (negative fill) when shooting exteriors.

It’s a strange thing about being a DP that, yes, sometimes you’re required to plan a mammoth lighting set-up using tens of kilowatts of power, but other times it’s just a case of saying, “Take the bulb out of that sconce.” You’re working to exactly the same principles, using your creative eye just as much in both scenarios.

Let’s look at some examples from a promotional film I shot with director Oliver Park for Closer Each Day, an improvised stage soap.

Our location was a pub, which had a large number of existing practicals: mainly wall sconces, but some overheads above the bar and in the corridors too. The film had to be shot in a single night, entirely on Steadicam, with some shots revealing almost the whole room, and to further complicate matters I was a last-minute hire due to another DP having to step down. Keeping the lighting simple, and avoiding putting any “film lights” on the floor where the roving camera might see them, was clearly the way to go.

I identified the darker areas of the room and added a few extra sources: two blue-gelled 800s outside the windows, an orange-gelled 1×1′ LED panel in the wood-burner, an LED reporter light in one key corner, and a small tungsten fresnel toplight onto a key table, firing down from the mezzanine so it would never be in shot. Other than those, and a low level of fill bounced off the ceiling, we relied exclusively on the existing practicals. (They were mainly fluorescent, and ideally we would have reglobed these all with tungsten, but it wasn’t possible.)

This view from the mezzanine shows the diffused 300W fresnel top-lighting the drinking contest table, and the black-wrapped 650 firing into the ceiling for fill.


So, that’s the “positive” lighting. Here are three examples of “negative” lighting in the film…

When Big Dick Johnson (yep, that’s the character’s name) first enters the pub, I put a piece of tape over a little halogen spotlight just above his point of entry. This was partly because it was very bright and I didn’t want him to blow out as he walked under it, but it also made for a much better sense of depth in the overall shot. As I’ve often mentioned on this blog, the best depth in an image is usually achieved by having the foreground dark, the mid-ground at key and the background bright. Killing the halogen spotlight helped create this progression of brightness and therefore depth. It’s also just nice in a shot like this to come out of darkness into the light, enhancing the reveal of the new space to the viewers.

When Billy De Burgh scrambles to buy a ticket at the box office, there are two practicals just above his head. Depending on which way we were shooting, I de-globed one of the fixtures – always the one closest to camera. This ensured that Billy always had backlight, and never had a really hot, toppy front-light shining harshly down on him.

On a side note, the blue light inside the box office was existing – I guess they were using cool white LED bulbs in there – and I really like the way it differentiates the spaces on camera. It puts the bored ticket-seller in a cold, detached world very separate to Billy’s warmer, more urgent world.

This doorway where Big Dick ends the film had sconces on both sides. It’s never very interesting to have an actor evenly lit on both sides of their face, and especially as Dick is such a tough, unpleasant character, I felt that more contrast was required. I chose to remove the globe from the righthand sconce, so that when he turns camera left to look at the sign he turns into the remaining sconce, his key-light. We filled in the other side of his face a tiny touch with a reflector.

I would love to have been able to exercise the same control over the street-lamps in the opening scene of the film – some of them are quite flat and frontal – but unfortunately time, budget and permissions made that impossible. We would have needed huge flags, or a council-approved electrician to switch the lamps off.

That’s all for today. Next time you’re in Bristol, check out Closer Each Day. I didn’t get chance to see it, but I hear it’s brilliant.

Negative Lighting

5 Lighting Tips from Classic Art

A few weeks ago I discussed compositional techniques which we can learn from the work of JMW Turner. This time I’m looking at the use of light, and I’m broadening the scope to cover a few other classical artists whose works have caught my eye at galleries lately.

Without artificial illumination, these old masters had to make the most of the light God gave them. Here are five examples of their techniques which we can trace directly forward to cinematographic techniques of today.


Cross-light

“Mornington Crescent Nude” (circa 1907) – Walter Richard Sickert

Decades before DPs started encouraging directors to shoot interior scenes towards windows to achieve the most interesting modelling, Sickert had the same idea. See how the light from the window in the background throws the model’s body into relief, giving it form and dimension? Cross-light is commonly used today in commercials for sport and fitness products, to emphasise muscle tone.

See also: Lighting Techniques #6: Cross-light


Background strokes

“Tancred’s Servant Presenting the Heart of Guiscard in a Golden Cup to Guismond” (circa 1675) – Adriaen van der Werff

What caught my eye about this painting was the slash of light on the background wall in the top left corner. It may seem trivial, but a little stroke of background light like this can really elevate the quality of a shot. Here it anchors the corner of the composition and gives us a hint of the room’s decor, adding interest to what would otherwise be a black void behind Guismond.

While lighting the subject of the shot is clearly a DP’s priority, it’s important to find time to paint in the surroundings even if they’re in the deep background or extreme foreground.

“Drive” (DP: Newton Thomas Sigel)

See also: 5 Ways to Use Hard Light Through a Window


Haze

“Chloe Idille” (1811) – Salomon Gessner & Carl Wilhelm Kolbe

This monochrome etching has a tremendous feeling of depth, and it is achieved purely through contrast. The further away an object is, the more air there is between that object and your eye. Since air isn’t 100% transparent, that distant object appears lighter and lower-contrast than closer objects. Gessner and Kolbe capture this effect beautifully here.

Many cinematographers today use hazers to create or enhance this atmospheric effect, even for interiors. In the days of miniature effects, smoke was often used to create atmospheric haze and increase the feeling of scale. On Blade Runner, for example, Douglas Trumbull’s VFX crew sealed the motion control stage and used infra-red sensors linked to hazers to automatically keep the smoke level constant during the long-exposure passes over the futuristic cityscape.

“Blade Runner” (DP: Jordan Cronenweth)

See also: Depth Cues in Cinematography


Golden hour

“Abingdon” (1806) – Joseph Mallord William Turner

Painters figured out centuries ago that the most beautiful light is found at the beginning and end of the day. It’s partly due to the cross-light effect (see above) of the lower sun, and partly due to the beautiful orange colour caused by the greater amount of atmosphere the sun’s rays must pass through. To shoot the perfect sunset, you’ll need patience, and a sun-tracker app or at least a compass. Ensure the schedule permits you to try again another day if clouds spoil the view.

“Raiders of the Lost Ark” (DP: Douglas Slocombe)

See also: Sun Paths


Wet-Downs

“The Boulevard Montmartre” (1897) – Camille Pissarro

This is the only night image in a series of impressionist oil paintings which Pissarro executed from a hotel window overlooking the Boulevard Montmartre. What makes it particularly beautiful is the wet street, turning what might otherwise have been a dull grey central swathe of the image into an arena of alternately shadowy and glittering reflections.

Cinematographers shooting night exteriors on streets will often have the tarmac hosed down for four reasons: (1) as already noted, the beauty of the reflections; (2) the deeper blacks and increased contrast; (3) the extra exposure gained by the light sources bouncing off the water; and (4) avoidance of continuity problems if it rains.

A scene from “Terminator 2” (DP: Adam Greenberg) on a street that’s been wetted down

See also: 7 Considerations for Night Shooting

5 Lighting Tips from Classic Art