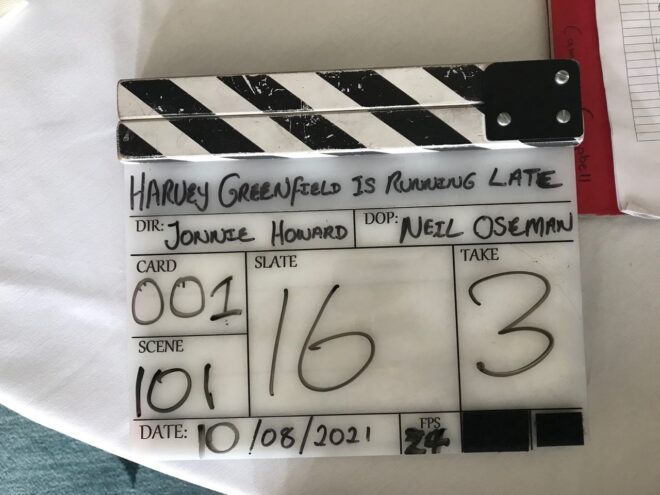
“Harvey Greenfield is Running Late”: Week 3 Part 1

Photo by Jonnie Howard

Day 17

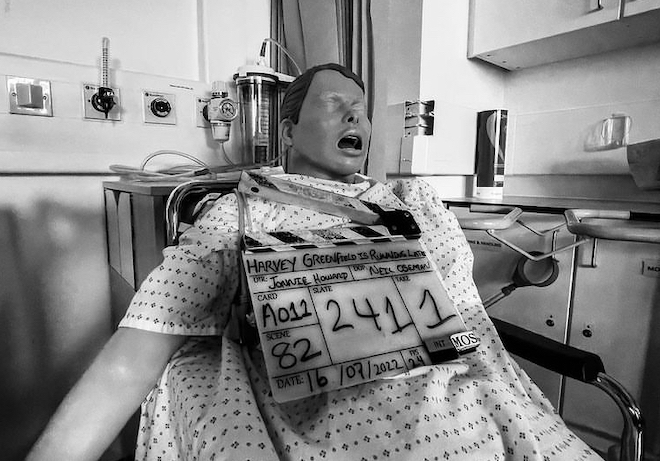
Our first location was a medical training ward populated by creepy dummies; we had a brief flashback scene to do around a hospital bed. When we arrived there was nice warm sunlight coming in through the frosted glass behind the bed, so we made sure that stuck around by putting an orange-gelled Aputure 600D out there. Inside we wrapped this with a FalconEyes and Stephen added some soft fill because I wanted the scene to feel romantic. To get some green into the frame (a calming colour in the film’s visual language) we stuck a couple of Nanlite PavoTubes into the background as practicals.

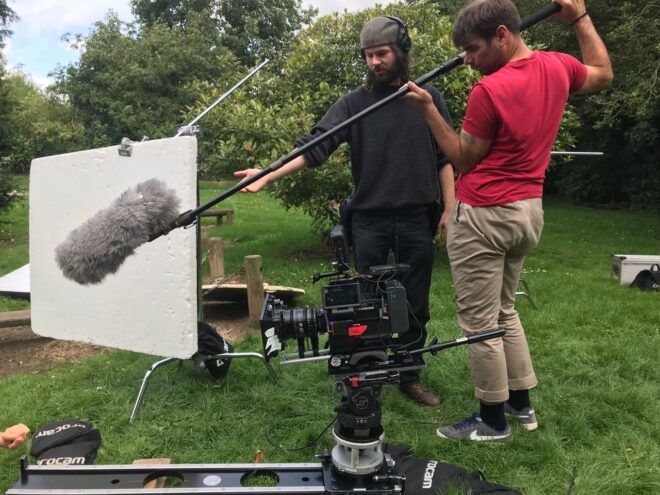
While Hamish (our new 1st AC) and Fifi were building the camera I faffed about with the Prosup Tango slider, trying to figure out a way to have the track go over the bed so we could pull straight back from Paul. It proved impossible simply because the track also ended up in frame, and instead we simply set it up beside the bed. It took a bit of clever blocking by director Jonnie to ensure that the camera could point directly along the axis of the track, rather than at an angle, which would have broken the established visual grammar of the film. This is the sort of thing that takes a bit of time to get back into after months away from the project, but it’s important to get it right.

Next we moved into the foyer, which we were playing as a bank. There was plenty of natural light but we made sure to keep that in the background, neg-filling behind the camera, and adding a key (a Rayzr MC 200) at 90° to the talent (Alex Wilber), who was partly facing towards a computer monitor on that side of camera anyway. A heavily dimmed 2K served as backlight.

After a brief panic when we thought we were missing our favourite lens, the 14mm, we moved to Cambridge 105’s studio a couple of blocks away. A special guest star played a Tony Blackburn-esque DJ and threw in some brilliant improvs.

We fought a battle against the high, bright sun that kept trying to come in the south-facing window, despite us having diffed a lot of it, and blacked out the whole top section, and having blinds partly lowered, and the windows having some special solar coating on them anyway. Once again we fired in the 600D, which probably did very little compared with that sun, and wrapped it inside with a FalconEyes, and added the PavoTubes into the background for colour. The DJ’s computer monitors were set to 60Hz, but I’d learnt my lesson from last year and immediately set the shutter to 144° to sort that out.


Day 18

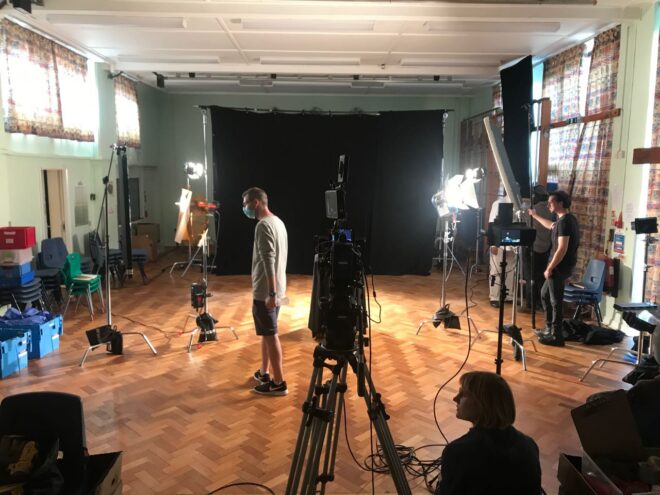
We were at Anglia Ruskin University for the day, mostly in one of their media studios. Here we had to shoot a number of things against a black backdrop, mainly to cut into the climax of the film. These included a 180° camera move using the university’s track and dolly. I thought briefly about doing some elaborate lighting rig in which lamps would have to be dimmed up and down to maintain backlight and eliminate front-light as the camera circled, but then I came to my senses and we just fired a Source Four straight down onto the makeshift table that the two actors were hunched over so that it would bounce back up to them. I was using the Soft FX 1 to match the look of the Happy Place scenes from Day 3, which helped to take the harshness out of the highlights where the Source Four was directly hitting the cast.

A little later Jonnie started flinging things in front of the camera. Had he finally cracked? No, he just wanted some lovely slo-mo shots of key props arcing through a black void. We went to 120fps, the Red Gemini’s maximum 4K frame rate, and the higher native ISO of 3200. We were able to make a stop of somewhere between T4 and T5.6 by bouncing two 2Ks into an 8×4′ poly just out of frame, and using three triple banks of the uni’s linear cyc lights in the grid as backlight.

After lunch we came to a couple of crucial shots that were dropped from the night shoot on Day 10, meaning we had to replicate the lighting from Vinery Park. We used the cycs again, a Source Four on a stand as a special flaring backlight simulating the park’s streetlamp, and a couple of 2Ks through a diffusion frame as the key. Although we were back to 24fps we still needed loads of light because one of the set-ups was on an f/14 probe lens sliding into Harvey’s mouth! “It feels really weird,” Paul remarked. Yep. And sorry for bashing you in the teeth with it.

As our time on the campus ticked down we moved across to another building to shoot a call centre scene. We went for our 24mm “tableau” frame that we’ve used to establish all the characters who ring Harvey in their own environments, followed by a couple of other set-ups. We kept the talent’s (Kate Madison) eye-line between the camera and the windows for a nice short key, beefing it up with a FalconEyes, and added a dimmed 2K backlight and some warm PavoTubes in the background (orange being the stress colour in the film’s visual language).


Day 19

The good folks at BBC Breakfast were up bright and early, set up at the Granta beside Sheep’s Green, shooting live news footage of what was widely forecast to be a record-breakingly hot day. We were up pretty early too, watching from the banks of the Cam at 5:30am as the BBC drone flew over, and hoping that it wouldn’t ruin a take (which it didn’t).

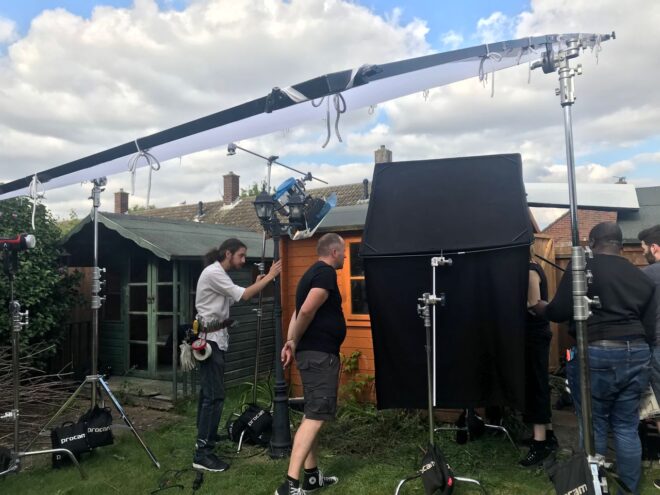
We were shooting Harvey Greenfield‘s only stunt, which I probably shouldn’t spoil by describing. We’d given Stephen the day off, and my trusty 5-in-1 reflector was our only lighting gear, but of course there was no shortage of sunlight. I used the white side for most set-ups, running along beside the Steadicam later in the day to keep Paul’s face filled in when he wasn’t facing the sun.

There was an interesting moment when we had the sun in the background of a low-angle shot. As I’ve experienced before, the Soft FX filter reflected a rectangle of light onto the subject. But even when we took it out, the IRND filter did the same thing. Do all filters do it, I wonder? Must test that one day.

We wrapped a little after 3pm, as the heat was reaching its maximum. Despite all the dire warnings (and drone-worthy news coverage) it hadn’t been too hot to work. We were all sensible with hydration, shade and sunblock, and I even swam in the Cam a couple of times during the day to cool off. You don’t get to do that very often on a shoot!

Straight after wrap I went for another swim in Jesus Green Lido, whence a Channel 5 news crew were broadcasting live weather reports with the pool in the background. The presenter was positioned in the shade and they’d set up a 600D on either side of him to fill him in. Believe it or not, that would inspire the next day’s lighting.


Day 20

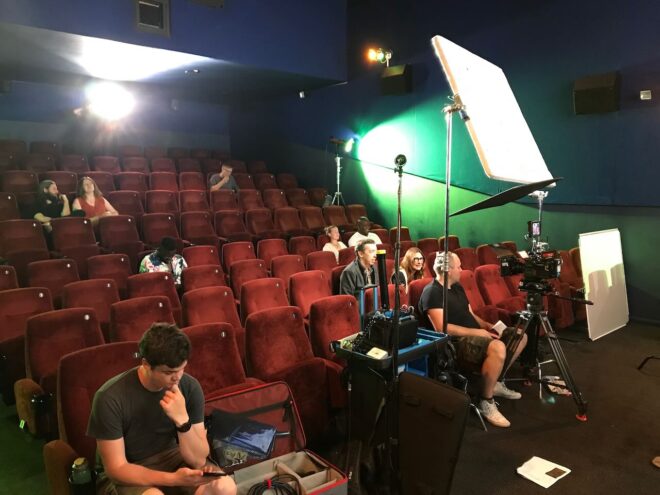
First up was a one-shot flashback scene at the Arts Picturehouse. We used the 600D as the “projector”, positioning it just barely out of the top of frame, and a 4×4′ poly armed over the camera as the screen bounce. During the takes Jeremy wiggled his hand in front of the 600D to create dynamics in the flare.

The day’s main scene was a fake advert starring a nineties keep-fit icon. The aim was a cheesy infomercial vibe, with a 4:3 aspect ratio and over-the-top acting. We cross-front-lit the scene with the Aputures 300D and 200X (thank you, Channel 5), with only a bit of diff on them. I over-exposed by a stop and took out the Soft FX filter to make the image even less filmic. I framed with a lot of headroom and even did a deliberately late tilt-down at one point. When the actual aerobics start, we went even more naff by adding two PavoTubes into the background and the Rayzr MC behind camera, all flashing nasty disco colours. It was great fun.

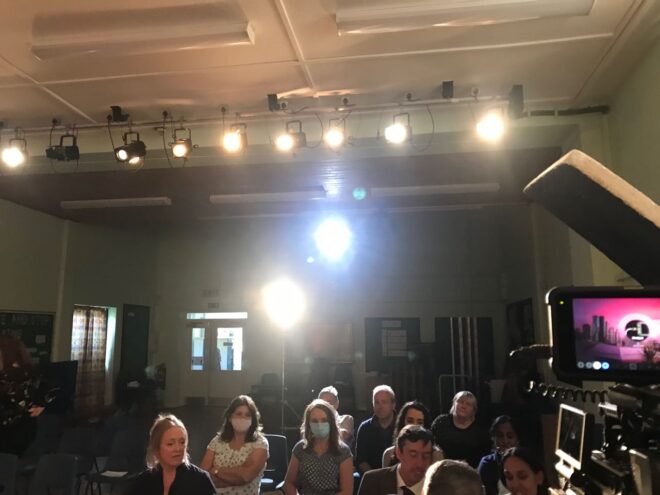
By the time we moved onto the last scene – another 24mm phone call, in a GP’s waiting room – it was at least 39°C in Cambridge and the UK’s temperature record had been broken.

There’ll be more from this shoot in next week’s post. In the meantime, you can read all the Harvey posts here. Note that the link will display them in reverse chronological order, so scroll down for the older ones.

“Harvey Greenfield is Running Late”: Week 3 Part 1

How Does a DP Choose Lenses?

There is a huge range of glass available to filmmakers today – everything from vintage cinema lenses from the 60s to modern stills glass made for DSLRs. How can a DP choose which is right for their production?


Mount

The first thing to take into account is the lens mount on your camera. If it is PL mount you will have access to a huge range of cinema lenses, some of them with decades of movie history. Other mounts such as Canon EF also provide plenty of choice, but mainly glass aimed at stills rather than cinematography. Some lenses can be mount-converted, some cameras can switch mounts, and adapters are available too, but it’s important to know upfront which lenses are going to be ruled out by your camera choice and which aren’t.


Spherical or Anamorphic

Test of a 30mm Cooke Xtal anamoprhic lens

Anamorphic lenses squeeze the image horizontally, to be unsqueezed in post-production. The results are a wider picture, distinctive oval bokeh (out of focus areas) and often lens flares with horizontal streaks in them. This look is very cinematic, but anamorphic lenses tend to be bigger, heavier, more expensive, need more light than and don’t focus as close as their spherical counterparts, so think carefully before you choose them.


Speed

The speed of a lens – i.e. its maximum aperture – is one of its most important characteristics. A fast prime lens might open to T1.4, while a zoom or anamorphic prime might only go to T4. That’s three stops’ difference, equating to eight times more light required by the T4 lens. That can have a big impact on the size and number of lights you need. The ISO you plan to shoot at will also factor into this, of course.

Also consider how deep or shallow a depth of field you want. If you’re after super-blurry backgrounds, only a fast lens will give you those (though shooting on a large-format camera will help). This brings us to…


Bokeh

A quick bokeh test of a Sigma Cine 50-100mm zoom lens using fairy lights

Bokeh is the appearance of out-of-focus areas in your image. It is most noticeable in small highlights such as fairy lights, which generally turn into big circles when they’re out of focus. Just how big and how smoothly circular depends on the lens and the aperture settings. Some lenses will have more geometric bokeh, octagons for example, which is a result of the shape and number of iris blades within. The bokeh may look rounder when the lens is wide open and more geometric when it is stopped down, or vice versa. It will also have a different shape at the edges of frame. What this comes down to is what look you feel is most aesthetically pleasing or appropriate for your story.


Lens Flares

Testing the flare of a Cooke Century 32mm

Another aesthetic choice. How much does the lens flare when light shines straight into it? What about when the light is just out of frame? Is there much veiling flare – an overall milkiness to the image? Do you like the colours and shapes of the flare? Do they feel natural or intrusive, and which is most fitting for the tone of your piece?


Sharpness

This is an important factor with the resolutions of cameras ever increasing. Any decent lens will be sharp at T5.6, but the more you open the iris the more you might start to see the image softening, especially when it is wide open (or conversely when it is stopped down to its minimum aperture). Check also the edges of frame, which may be less sharp than the centre, especially on a vintage or anamorphic lens. If you plan to do a lot of central framing then soft edges may not matter, or may even help to draw the viewer’s eye to the subject, but if you plan to put your subjects at the extreme sides of the frame then you should be careful what lenses you select.


Breathing

A lens is said to breathe when pulling the focus makes the image zoom in or out slightly. It is most noticeable with zoom lenses, some stills lenses and older glass. If you are racking back and forth between the characters in a deep two-shot, lens breathing can become very distracting.


Other Considerations

Other things to look out for are diffraction spikes, the star effect that happens around bright light sources, and colour rendition, which can vary slightly from lens to lens. If you expect to be physically close to your subject you should note the minimum focus distance of the lenses, which will be different for each length in the series. Also consider what focal lengths your chosen lens series contains – are there enough different lengths to cover everything you hope to shoot, especially at the shortest and longest ends of the range?

If you’re still not sure where to start, test footage and comparison videos of different lenses can be found online, like this one I made in 2017:

Better still, ask a rental house if you can come in for a day and shoot your own tests.

See also:

How Does a DP Choose Lenses?

Large Format

Recently I shot my second online cinematography course, provisionally titled The Secrets of Cinematography, which will be out in the spring. In it I shoot on a Z Cam E2-F6, a full-frame camera. As far as I can remember, the only other time I’ve shot full-frame was for the miniature map in Above the Clouds, captured on a Canon 5D Mk III. So I thought this would be a good time to post a few facts about large-format, and a good excuse to get some more use out of this graphic I created for the course…

First of all, some definitions:

  • Super-35, about 24x14mm, has been the standard sensor size since digital cinematography took off in the noughties. It’s based on an analogue film standard which has its own complex history that I won’t go into here.
  • A large-format digital cinema camera is any that has a sensor larger than Super-35. It’s not to be confused with large-format still photography, which uses much bigger sensors/film than any currently existing for moving images.
  • Full-frame is a subset of large-format. Confusingly, this term does come from still photography, where it is used to identify digital sensors that are the same size as a frame of 35mm stills film: 36x24mm.

These are the differences you will notice shooting in large-format versus Super-35:

  • Lenses will have a wider field of view. (You’ll need to make sure your chosen lenses have a large enough image circle to cover your sensor.)
  • If you increase your focal length to get the same field of view you would have had on Super-35, perspective will be rendered exactly the same as it was on Super-35…
  • … but the depth of field will be shallower…
  • … and you may see more imperfections at the edges of frame where the lens is working harder. (A Super-35 sensor would crop these imperfections out.)
  • Picture noise will probably be finer and less noticeable due to the photosites being larger and more sensitive.

In the case of full-frame, the crop factor is 1.4. This means you should multiply your Super-35 focal length by 1.4 to find the lens that will give you the same field of view on a full-frame camera. (Some examples are given in the graphic above.) It also means that you can multiply your Super-35 T-stop by 1.4 to find the full-frame T-stop to match the depth of field.

For a detailed comparison of Super-35 and full-frame, check out this test by Manuel Luebbers.

Large Format

What I Learnt from DSLRs

RedShark News recently published an article called “The DSLR is now dead”, based on the fact that the Canon 1D X Mark III will be the last flagship DSLR from the company and that mirrorless cameras are now first choice for most photographers. This prompted me to reflect on some of the things I learnt when I bought my first (and only) DSLR.

It was 2011, and I documented some of the challenges my new Canon 600D created for me in this blog post. But what the DSLR did really well was to introduce me to a workflow very similar in many ways to the bigger productions I’m working on now. Previously I had shot everything on prosumer camcorders, so the following things were new to me with DSLRs and have been constant ever since.


Shallow Depth of Field

I had been used to everything being in focus, so not really thinking about my aperture setting, just turning the iris dial until the exposure looked right. My Canon 600D set me on a journey of understanding f-stops, and eventually choosing a target stop to shoot at for focus reasons and then using lighting or ND filters to achieve that stop.


Prime Lenses

My lenses

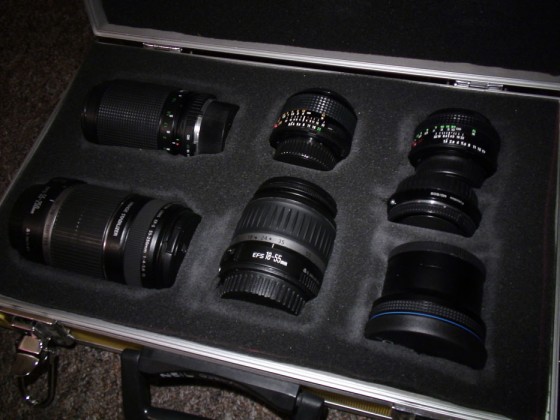
Although for several years I owned a Canon XL1-S, which had interchangeable lenses, I only ever owned a couple of zooms for it. As far as I’m aware, no prime lenses to fit the XL1-S’s proprietary mount were ever made, so prime lenses were completely new to me when I got my 600D. As with aperture, it forced me to think about what field of view and degree of perspective or compression I wanted, select the appropriate lens, and then place the camera accordingly, rather than lazily zooming to get the desired framing.


Dual-System Sound

It’s weird now to think that I used to be tethered to the sound recordist before I switched to DSLR shooting. At the time I was doing most of my own editing as well, so syncing the sound was a pain in the arse, but it was a valuable introduction to this industry-standard way of working. It’s also weird to think that clapperboards were optional for me before this.


Building a camera rig

All my cameras before the 600D had a built-in viewfinder, handgrip, shoulder mount (if the camera was large enough to need one) and lens (except the XL1-S), and there was no need to add an external battery plate or a follow-focus. The idea that a camera rig needed to be built, and that it could be customised to suit different operators and situations, was a novel one to me. I have to say that I still prefer cameras that have more things built in, like the Alexa Classic. A good part of the reason I rarely use Reds is because they don’t come with viewfinders. Why anyone ever thinks a viewfinder is an optional part of a camera is utterly beyond me. It’s an important point of stabilising contact for handheld work, and your face shields it completely from extraneous light, unlike a monitor.


Tapeless recording

The 600D was my first camera to record to memory cards rather than magnetic tape. It was certainly scary to have to wipe the cards during a shoot, being careful to back everything up a couple of times first. Data wrangling was a tricky thing to deal with on the kind of tiny-crewed productions I was usually doing back then, but of course now it’s completely normal. Just last week I shot my new cinematography course and had the fun of staying up until 2:30am after a long day of shooting, to make sure all the footage was safely ingested! More on that course soon.

What I Learnt from DSLRs

5 Things You Didn’t Know About the Iris in Your Lens

Inside a lens, amongst the various glass elements, is an ingenious mechanism which we call the iris. Just like your biological iris, it controls the amount of light passing through the pupil to form an image. I’ve written about the iris’s use to control exposure before, and its well-known side effect of controlling depth of field. But here are five things that aren’t so commonly known about irises.


1. f-stops and the entrance pupil

This image shows the exit pupil because it’s seen through the rear element of the lens. A view through the front element would show the entrance pupil.

The f-number of a lens is the ratio of the focal length to the diameter of the aperture, but did you know that it isn’t the actual diameter of the aperture that’s used in this calculation? It’s the apparent diameter as viewed through the front of the lens. A lens might have a magnifying front element, causing the aperture to appear larger than its physical size, or a reducing one, causing it to appear smaller. Either way, it’s this apparent aperture – known as the entrance pupil – which is used to find the f-number.


2. No-parallax point

The no-parallax point of a lens is located at its entrance pupil. Sometimes called the nodal point, although that’s technically something different, this is the point around which the camera must pan and tilt if you want to eliminate all parallax. This is important for forced perspective work, for panoramas stitched together from multiple shots, and other types of VFX.


3. Focus

If you need to check your focal distance with a tape measure, many cameras have a handy Phi symbol on the side indicating where the sensor plane is located so that you can measure from that point. But technically you should be measuring to the entrance pupil. The sensor plane marker is just a convenient shortcut because the entrance pupil is in a different place for every lens and changes when the lens is refocused or zoomed. In most cases the depth of field is large enough for the shortcut to give perfectly acceptable results, however.


4. Bokeh shape

The bokeh of a 32mm Cooke S4 wide open at T2 (left) and stopped down to T2.8 (right). Note also the diffraction spikes visible in the righthand image.

The shape of the entrance pupil determines the shape of the image’s bokeh (out of focus areas), most noticeable in small highlights such as background fairy lights. The pupil’s shape is determined both by the number of iris blades and the shape of their edges. The edges are often curved to approximate a circle when the iris is wide open, but form more of a polygon when stopped down. For example, a Cooke S4 produces octagonal bokeh at most aperture settings, indicating eight iris blades. Incidentally, an anamorphic lens has a roughly circular aperture like any other lens, but the entrance pupil (and hence the bokeh) is typically oval because of the anamorphosing effect of the front elements.


5. Diffraction spikes

When the edge of an iris blade is straight or roughly straight, it spreads out the light in a perpendicular direction, creating a diffraction spike. The result is a star pattern around bright lights, typically most visible at high f-stops. Every blade produces a pair of spikes in opposite directions, so the number of points in the star is equal to twice the number of iris blades – as long as that number is odd. If the number of blades is even, diffraction spikes from opposite sides of the iris overlap, so the number of apparent spikes is the same as the number of blades, as in the eight-pointed Cooke diffraction pictured above right.

5 Things You Didn’t Know About the Iris in Your Lens

Newton Thomas Sigel on the Cinematography of “Bohemian Rhapsody”

The following article originally appeared on RedShark News in 2018.

Directed by Bryan Singer, of X-Men and The Usual Suspects fame, Bohemian Rhapsody charts the story of Queen from their formation in 1970 to their triumphant Live Aid set in 1985, with plenty of their classic rock hits along the way. Rami Malek (from Amazon’s Mr. Robot) turns in an Oscar-winning performance as larger-than-life frontman Freddie Mercury.

In his tenth collaboration with Singer was director of photography Newton Thomas Sigel, ASC. I spoke to Sigel about how he approached evoking an era, recreating the concerts, and lensing a legend.

“Every day was this wonderful trip back in time,” enthuses Sigel, who saw the movie as a chance to relive his own youth. “I love shooting music. There is this wonderful transition from the end of the counter-culture, through glam-rock into the hedonism of the eighties.”

Shooting digitally, Sigel employed both the Alexa SXT and Alexa 65. “I decided the movie needed to have a visual arc that best represented the band’s transition from idealists to rock stars, and all the issues that creates. To that effect, I did the first act with old Cooke Speed Panchro lenses on the Alexa SXT. As Queen is discovered, and begins to be known on the international stage, we transition to the Alexa 65.” Sigel later fine-tuned this arc during grading.

The cinematographer paired the large-format Alexa 65 with Prime DNA and Prime 65-S glass, testing all the lenses to find the ones with the most gentle fall-off in focus. “Each lens had its own personality, and was never really ‘perfect’. Our 28mm had a particularly crazy quality that, when used sparingly, had great effect.”

One thing that struck me immediately about the cinematography is the distinctly un-British, warm and glowing look, with lots of sun streaming through windows. This was all part of Sigel’s plan, which develops as the film progresses. “What begins as warm and golden, with its own special LUT, grows ever sharper and cooler, even desaturated,” he explains. “The beginning is all handheld and grainy, the rest much cleaner, with the camera on Steadicam and crane.”

Sigel took a down-to-earth approach to photographing Malek’s Mercury. “I always wanted Freddie to feel very real,” he states. “It is important that you sense his vulnerability at the same time as he is projecting the bravado of the consummate showman. Like so many great performers, Freddie exuded confidence and brashness on stage, and yet, had a terribly shy insecurity in ‘real’ life.”

The highlights of Bohemian Rhapsody are undoubtedly the concert scenes. To tackle these, Sigel began by watching every single piece of Queen footage he could lay his hands on, noting the development of the stage lighting over the years. “I wanted to be as faithful to that as I could, while still having it service our story,” he says. That meant eschewing the easily-coloured RGB LED fixtures so common in movies and concerts today, and going back to the traditional method of laboriously changing gels on tungsten units. “We stuck to period lights,” Sigel confirms, “predominantly par cans and follow spots.”

The sheer number of concert scenes was a challenge for the filmmakers, who at one point had to shoot four gigs in just two days. “We had so many concerts to shoot and so little time, I needed to develop a system to quickly change from one venue to the next,” Sigel recalls. “Because Queen’s lighting was based on large racks of par cans, we were able to construct a very modular system that would allow us to raise or lower different sections very quickly. By pre-programming lighting sequences, we could also create sequence patterns with different configurations of light pods to make it look like a different venue.”

The types of units change as the story progresses through the band’s career. “By the late 70s, Queen was among the first bands to adopt the Vari-Lite, which was championed by the band Genesis,” Sigel explains. “That opened up many more possibilities in the theatrical lighting, which also reflected the band’s ascendancy to the upper echelons of the rock world.”

Sigel notes that he embraced all opportunities to capture lens flares from the concert lighting. “There is a great moment during Live Aid where Freddie makes this sweeping gesture through a circular flare, and it almost seems as if he is drawing on the lens.”

The historic Live Aid concert forms the jubilant climax of the film. Queen’s entire 20-minute set was recreated over seven days of shooting. “We photographed it in every type of weather Great Britain has ever seen: rain, sun, overcast, front-light, backlight – you name it. We couldn’t afford to silk the area as I would have liked,” Sigel adds, referring to large sheets of diffusion hung from cranes to maintain a soft, consistent daylight. “So it was a constant battle and the DI [digital intermediate] certainly helped.”

Filming for Bohemian Rhapsody began in autumn 2017, but by December trouble was brewing. Twentieth Century Fox halted production for a while, with the Hollywood Reporter citing the “unexpected unavailability of director Bryan Singer” as the reason. Dexter Fletcher, who had been attached to direct the nascent film back in 2013, ultimately replaced Singer for the last leg of photography.

“A change like that is never ideal,” admits Sigel, “but Dexter was very impressed with what we had done so far. With only a couple weeks to go, he was happy to carry on in the direction we had begun. Obviously he brought some of his own personal touches, but what I noticed the most was the ease he had in communicating with the actors.”

Reflecting on his long history of collaboration with Singer, Sigel is very positive. “When you have done that many movies together, there is a shorthand that develops and makes much of the work easier because you know your parameters from the beginning. Bohemian Rhapsody was truly the ‘labour of love’ cliché for so many people involved; it was quite remarkable.”

Asked to sum up the appeal of Bohemian Rhapsody, the cinematographer declares, “The film has everything – a deep emotional core at the centre of what is otherwise an exuberant celebration of Queen’s music. I also think Freddie’s story of an immigrant outsider just trying to fit in has a resonance today that is very profound.”

Newton Thomas Sigel on the Cinematography of “Bohemian Rhapsody”

“Harvey Greenfield is Running Late”: Week 1

Day 1

The weather was dry and overcast, shedding a pleasantly soft light on the proceedings as the crew of Harvey Greenfield is Running Late set up for our first scene, in front of a small primary school in rural Cambridgeshire.

Then we started shooting and the weather went bananas.

One moment we had bright sunshine, the next we had heavy rain bordering on hail… sometimes in the same take. We had lots of fun and games dodging the showers, maneouvering a 12×12′ silk to soften the sun, keeping reflections and shadows out of shot, waiting for noisy trains to pass, and trying to get through takes without the light changing. But we got there in the end.

In the afternoon we moved into the school hall, which we were using as a makeshift studio. As well as numerous flashbacks, the film includes several imaginary sequences, including a spoof advert. This we shot against a black backdrop using dual backlights, one on either side, to highlight the talent. I totally stole this look from the Men in Black poster.

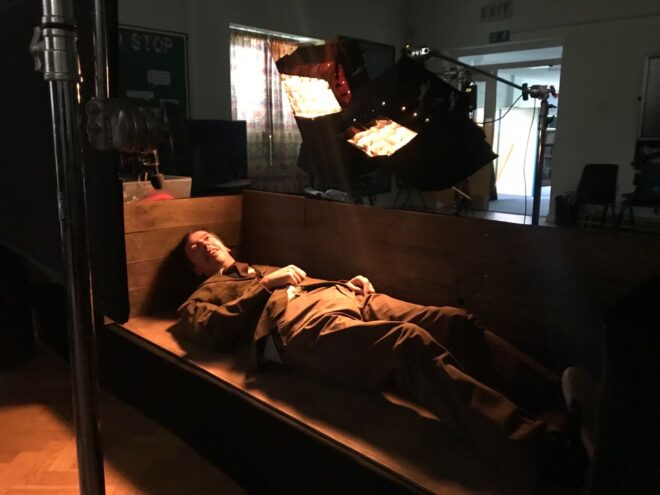
Our last shot of the day was Harvey’s first, and another imaginary scene, this time set in a coffin. To give the appearance of it being underground, the coffin (with no lid and one side missing) was placed on rostra with a black drape hanging below it. To create darkness above it, we simply set a flag in front of camera. Harvey (Paul Richards) lights a match to illuminate himself, which gaffer Stephen Allwright supplemented with two 1×1′ Aladdin Bi-flexes set to tungsten and gelled even more orange.


Day 2

One of the few occasions in my life when I’ve been able to walk to set from home: we started at the University Arms Hotel overlooking Parker’s Piece, one of Cambridge’s many green spaces (and, fact fans, the place where the rules of Association Football were first established).

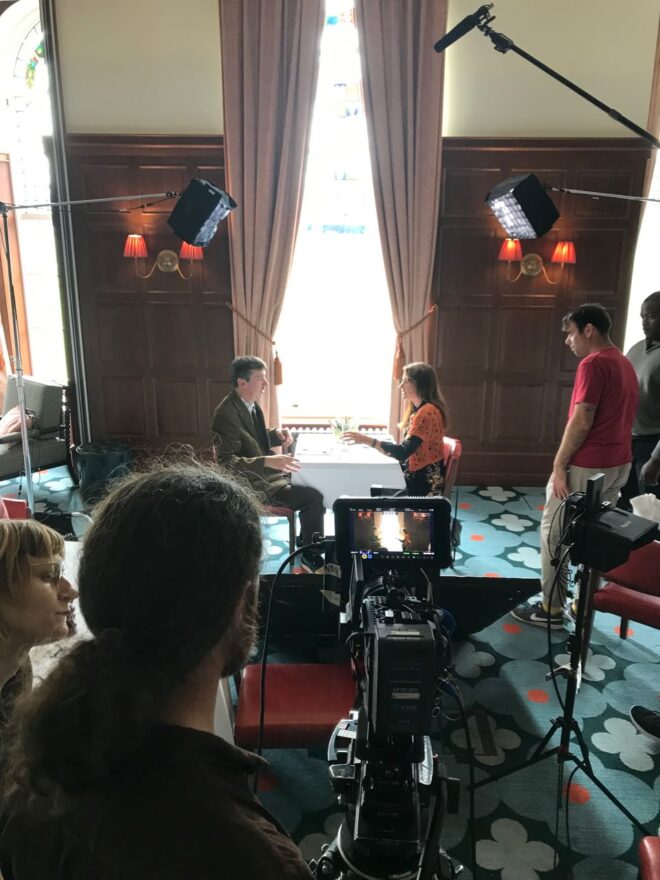
The hotel’s function room was dressed as an upmarket restaurant, where we captured Harvey’s first date with his girlfriend Alice (Liz Todd). We shot towards a window; putting your main light source in the background is always a good move, and it gave us the perfect excuse to do soft cross-backlight on the two characters. The room’s wood panelling and sconces looked great on camera too.

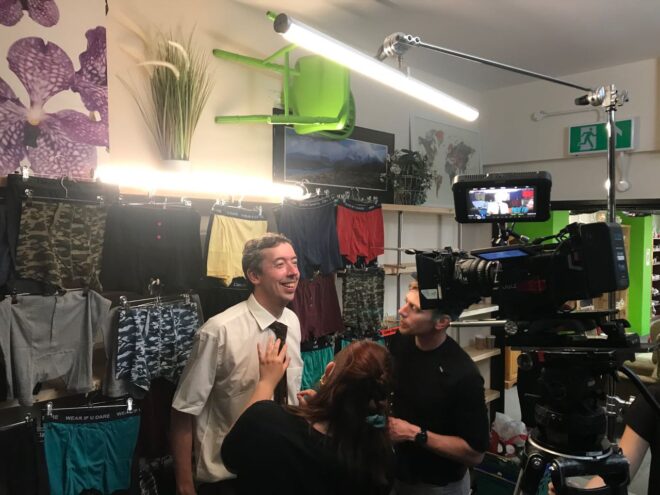
The unit then moved to Emmaus, a large charity shop north of the city, where we filmed a Wall of Pants and some tightly choreographed Sandwich Action. Here we broke out the Astera tubes for the fist time, using them as a toppy, fluorescent-style key-light and backlight.

By now we were getting into the visual rhythm of the film, embracing wide angles (our 18-35mm zoom gets heavy use), central framing (or sometimes short-siding), Wes Anderson-type pans/tilts, and a 14mm lens and/or handheld moves for crazier moments.


Day 3

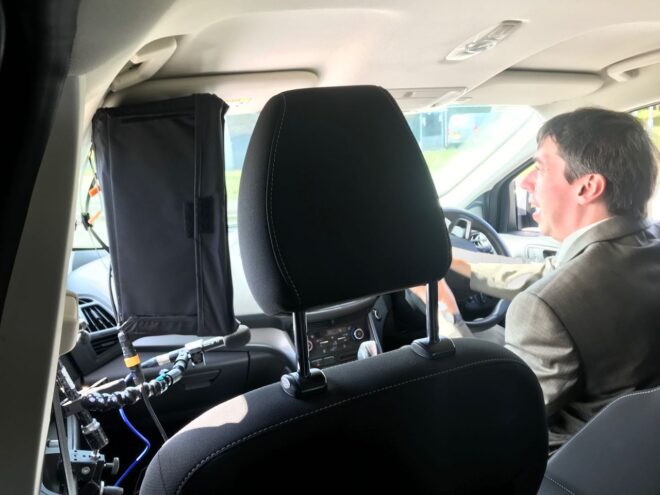
We were based at Paul’s house for day 3, beginning in the street outside for a brief scene in his car. Shooting from the back, we mounted an Aladdin in the passenger seat to key Paul, and blacked out some of the rear windows to create negative fill, much like I did for the driving scenes in Above the Clouds.

The rest of the day was spent in and around Paul’s shed. Or, to be more specific, the middle one of his three sheds. This is Harvey’s “Happy Place” so I stepped up from the Soft FX 0.5 filter I’d been shooting with so far to the Soft FX 1, to diffuse the image a little more. We also used haze for the only time on the film.

Some shots through the shed window gave us the usual reflection challenges. Stephen rigged a 12×12 black solid to help with this, and we draped some bolton over the camera. Inside the shed we used an Aladdin to bring up the level, and once we stopped shooting through the window we fired a tungsten 2K in through there instead. This was gelled with just half CTB so that it would still be warm compared with the daylight, and Stephen swapped the solid for a silk to keep the natural light consistent and eliminate the real direct sun.

I made my first use of the Red Gemini’s low light mode today, switching to ISO 3200 to maintain the depth of field when filming in slow motion. (I have been shooting at T4-5.6 because a sharper, busier background feels more stressful for Harvey.)


Day 4

Back to the primary school. We spent the morning outside shooting flashbacks with some talented child actors from the Pauline Quirke Academy. We got some nice slider shots and comedy pans while dealing with the ever-changing cloud cover.

Inside in the afternoon we picked up a dropped scene from day 1, then moved on to one of the film’s biggest challenges: a six-minute dialogue scene travelling through a corridor and around a classroom, to be filmed in a single continuous Steadicam shot. This could easily have been a nightmare, but a number of factors worked in our favour. Firstly, we had rehearsed the scene on location with actors and a phone camera during pre-production. Secondly, we had the brilliant Rupert Peddle operating the Steadicam. Thirdly, it would have been so difficult to keep a boom and its shadows out of shot that mixer Filipe Pinheiro and his team didn’t even try, instead relying on lavaliers and a mic mounted on the camera.

For similar reasons, we didn’t do much lighting either; there were almost no areas of the rooms and their ceilings that didn’t come into shot at some point. In two places Stephen rigged blackout for negative fill. I then chose which of the existing ceiling lights to turn off and which to keep on, to get as much shape into the image as possible. We tried to rig a grid onto one of the ceiling lights to take it off a wall that was getting too hot, but after one take we realised that this was in frame, so instead we stuck a square of ND gel to it. We also rigged two Astera tubes in the corridor, but discovered that one of those came into frame too, so in the end a single Astera tube was the only additive lighting. The existing ceiling lights worked particularly well for a slow push-in to Alice near the end of the shot, providing her with both key and backlight from perfect angles.


Day 5

Today we shot a big scene based around a school play. Production designer Amanda Stekly had created a suitably cheesy, sparkly backdrop, and more PQA students dressed up in weird and wonderful costumes to enact snatches of a very random production called Spamlet (making it the second time this year I’ve shot “to be or not to be”, though this time was… er… a little different).

The school had a basic lighting rig already. We refocused and re-gelled some of the lights, keeping it very simple and frontal. Behind the set I put one of my old 800W Arri Lites as a backlight for the kids on stage. To one side, where Alice was standing, we used two Astera tubes, one to key her and one to backlight her. These were both set to a cool, slightly minty colour. My idea of using green for calming characters and moments hasn’t come to fruition quite as I’d planned, because it hasn’t fitted the locations and other design elements, but there’s a little hint of it here.

For the audience, Stephen rigged an Aputure 300D to the ceiling as a backlight, then we bounced the stage lighting back onto them using a silver board. We also used the school’s follow spot, which gave us some nice flares for the stressful moments later in the scene. It was daytime both in reality and in the story, but we closed the (thin) curtains and reduced the ambience outside with floppy flags so that the artificial lighting would have more effect.

We had to move at breakneck speed in the afternoon to get everything in the can before wrap time, but we managed it, finishing our first week on schedule. No mean feat.

“Harvey Greenfield is Running Late”: Week 1

Pre-production for “Harvey Greenfield is Running Late”

Next week filming commences for Harvey Greenfield is Running Late, a comedy feature based on the critically acclaimed one-man play by Paul Richards. Paul reprises the title role in the film, directed by Jonnie Howard, who I previously worked with on A Cliché for the End of the World and The Knowledge.

The production is based locally to me in Cambridgeshire, and over the last couple of months I’ve attended recces, rehearsals and meetings. I’ve tried to approach it the same way I did Hamlet, reading each draft of the script carefully and creating a spreadsheet breakdown. Scene by scene, the breakdown lists my ideas for camerawork and lighting.

Harvey is a stressed and neurotic character who can’t say no to anything. The film takes place over a single day of his life when he finds himself having to attend a wedding, a funeral, a big meeting at his office, a school play and an appointment at a garage. Numerous scenes see him jogging from commitment to commitment (always running late in more ways than one) while taking phone calls that only add to the pressure. In the finest tradition of Alfie, Ferris Bueller and Fleabag, he also talks to camera.

Talking of finest traditions, the budget is very low but ambitions are high! With 100 script pages and 14 days the shoot will be more of a sprint than a marathon.

The UK film and TV industry is busier at present than I’ve ever known it, making up for lost time last year, so sourcing crew and kit has certainly been challenging. But thanks to generous sponsorship by Global Distribution and Sigma we will be shooting on a Red Ranger Gemini – which regular readers may recall I almost selected for Hamlet – with Sigma Cine primes and zooms. I will be working with a completely new camera team and gaffer.

One of the first things Jonnie told me was that he wanted to use a lot of wide lenses. This makes a lot of sense for the story. Wide lenses fill the background with more clutter, making the frame busier and more stressful for Harvey. They also put us into Harvey’s headspace by forcing the camera physically close to get a tighter shot. We shot some tests early on with Paul, primarily on the Sigma Cine 14mm, to start getting a feel for that look.

Influences include Woody Allen, the Coen brothers, Wes Anderson, Terry Gilliam and Napoleon Dynamite, and as usual, watching reference films has formed an important part of prep for me.

Based on the colour palette Nicole Stone has put together for her costumes, I’ve decided to use orange as Harvey’s stress colour and green when he’s calmer. For most of the film this will just be a case of framing in orange or green elements when appropriate, or putting a splash of the relevant colour in the background. For key scenes later in the story we may go so far as to bathe Harvey in the colour.

Right, I’d better get back to trying to sort out the lighting kit hire, which is still up in the air. Possibly this post should have been called Pre-production for “Harvey Greenfield” is running late.

Pre-production for “Harvey Greenfield is Running Late”

Using Depth of Field Creatively

“The Handmaid’s Tale: Offred” (2017, DP: Colin Watkinson, ASC, BSC)

When DSLR video exploded onto the indie filmmaking scene a decade ago, film festivals were soon awash with shorts with ultra-blurry backgrounds. Now that we have some distance from that first novelty of large-sensor cinematography we can think more intelligently about how depth of field – be it shallow or deep – is best used to help tell our stories.

First, let’s recap the basics. Depth of field is the distance between the nearest and farthest points from camera that are in focus. The smaller the depth of field, the less the subject has to move before they go out of focus, and the blurrier any background and foreground objects appear. On the other hand, a very large depth of field may make everything from the foreground to infinity acceptably sharp.

Depth of field varying with aperture
Everyone’s favourite time machine at f/5 (left) and f/1.8 (right)

Depth of field is affected by four things: sensor (or film) size, focal length (i.e. lens length), focal distance, and aperture. In the days of tiny Mini-DV sensors, I was often asked by a director to zoom in (increase the focal length) to decrease the depth of field, but sometimes that was counter-productive because it meant moving the camera physically further away, thus increasing the focal distance, thus increasing the depth of field.

It was the large 35mm sensors of DSLRs, compared with the smaller 1/3” or 2/3” chips of traditional video cameras, that made them so popular with filmmakers. Suddenly the shallow depth of field seen in a Super-35 movie could be achieved on a micro-budget. It is worth noting for the purists, however, that a larger sensor technically makes for a deeper depth of field. The shallower depth of field associated with larger sensors is actually a product of the longer lenses required to obtain the same field of view.

Once a camera is selected and filming is underway, aperture is the main tool that DPs tend to use to control depth of field. A small aperture (large f- or T-number) gives a large depth of field; a large aperture (small f- or T-number) gives a narrow depth of field. What all those early DSLR filmmakers, high on bokeh, failed to notice is that aperture is, and always has been, a creative choice. Plenty of directors and DPs throughout the history of cinema have chosen deep focus when they felt it was the best way of telling their particular story.

“Citizen Kane” (1941, DP: Gregg Toland, ASC)

One of the most famous deep-focus films is 1941’s Citizen Kane, frequently voted the greatest movie ever made. First-time director Orson Welles came from a theatre background, and instructed DP Gregg Toland to keep everything in focus so that the audience could choose what to look at just as they could in a theatre. “What if they don’t look at what they’re supposed to look at?” Welles was apparently asked. “If that happens, I would be a very bad director,” was his reply.

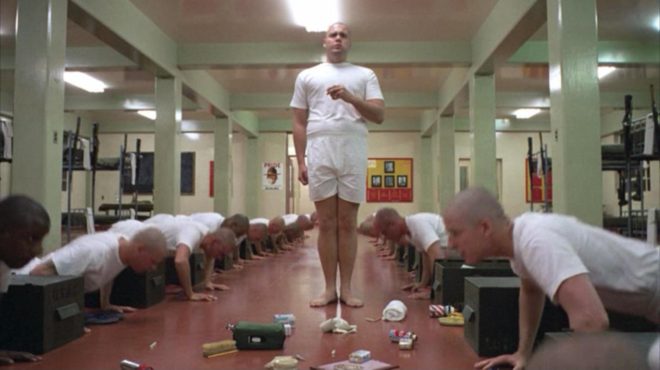
Stanley Kubrick was also fond of crisp backgrounds. The infamous f/0.7 NASA lenses used for the candlelight scenes in Barry Lyndon were a rare and extreme exception borne of low-light necessity. A typical Kubrick shot has a formal, symmetrical composition with a single-point perspective and everything in focus right into the distance. Take the barracks in Full Metal Jacket, for example, where the background soldiers are just as sharp as the foreground ones. Like Welles, Kubrick’s reasons may have lain in a desire to emulate traditional art-forms, in this case paintings, where nothing is ever blurry.
“Full Metal Jacket” (1987, DP: Douglas Milsome, ASC, BSC)

The Indiana Jones trilogy was shot at a surprisingly slow stop by the late, great Douglas Slocombe. “I prefer to work in the aperture range of T14-T14.5 when I am shooting an anamorphic film like Raiders,” he said at the time. “The feeling of depth contributed to the look.” Janusz Kamiński continued that deep-focus look, shooting at T8-T11 when he inherited the franchise for Kingdom of the Crystal Skull.

At the other end of the aperture scale, the current Hulu series The Handmaid’s Tale makes great creative use of a shallow depth of field, creating a private world for the oppressed protagonist which works in tandem with voiceovers to put the viewer inside her head, the only place where she is free.

A director called James Reynolds had a similar idea in mind when I shot his short film, Exile Incessant. He wanted to photograph closed-minded characters with shallow focus, and show the more tolerant characters in deep focus, symbolising their openness and connection with the world. (Unfortunately the tiny lighting budget made deep focus impossible, so we instead achieved the symbolism by varying the harshness of the lighting.)

“Ren: The Girl with the Mark” (2016, DP: Neil Oseman)

One production where I did vary the depth of field was Ren: The Girl with the Mark, where I chose f/4 as my standard working stop, but reduced it to as little as f/1.4 when the lead character was bonding with the mysterious spirit inside her. It was the same principle again of separating the subject from the world around her.

Depth of field is a fantastic creative tool, and one which we are lucky to have so much control over with today’s cameras. But it will always be most effective when it’s used expressively, not just aesthetically.
Using Depth of Field Creatively