5 Facts About the Cinematography of “Dunkirk”

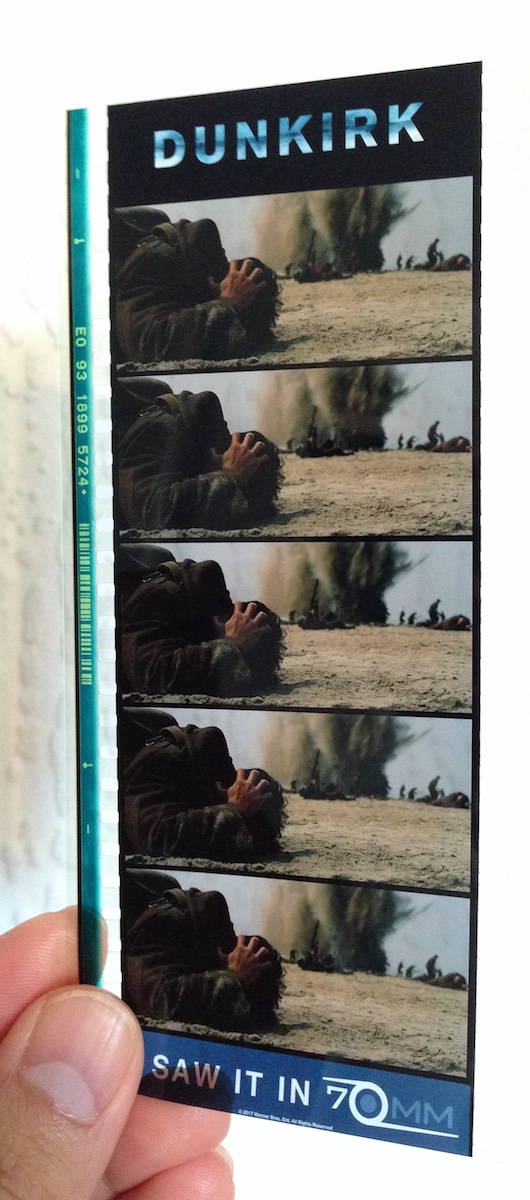
Some have hailed it as a masterpiece, others have complained it left them cold. Personally, seeing it on 70mm, I found Dunkirk a highly immersive and visceral film, cinematic in the truest sense of the word. The huge, sharp images free from any (apparent) CGI tampering, combined with the nerve-jangling gunshots and rumbling engines of the superlative soundtrack, gave me an experience unlike any other I can recall in recent movie-going history. I can imagine that it was less effective projected from a DCP onto a smaller screen, which may account for the underwhelmed reactions of some.

But however you feel about Dunkirk as a film, it’s hard not to admire its technical accomplishments. Here are five unique aspects of its cinematography.


1. It was shot on two huge formats.

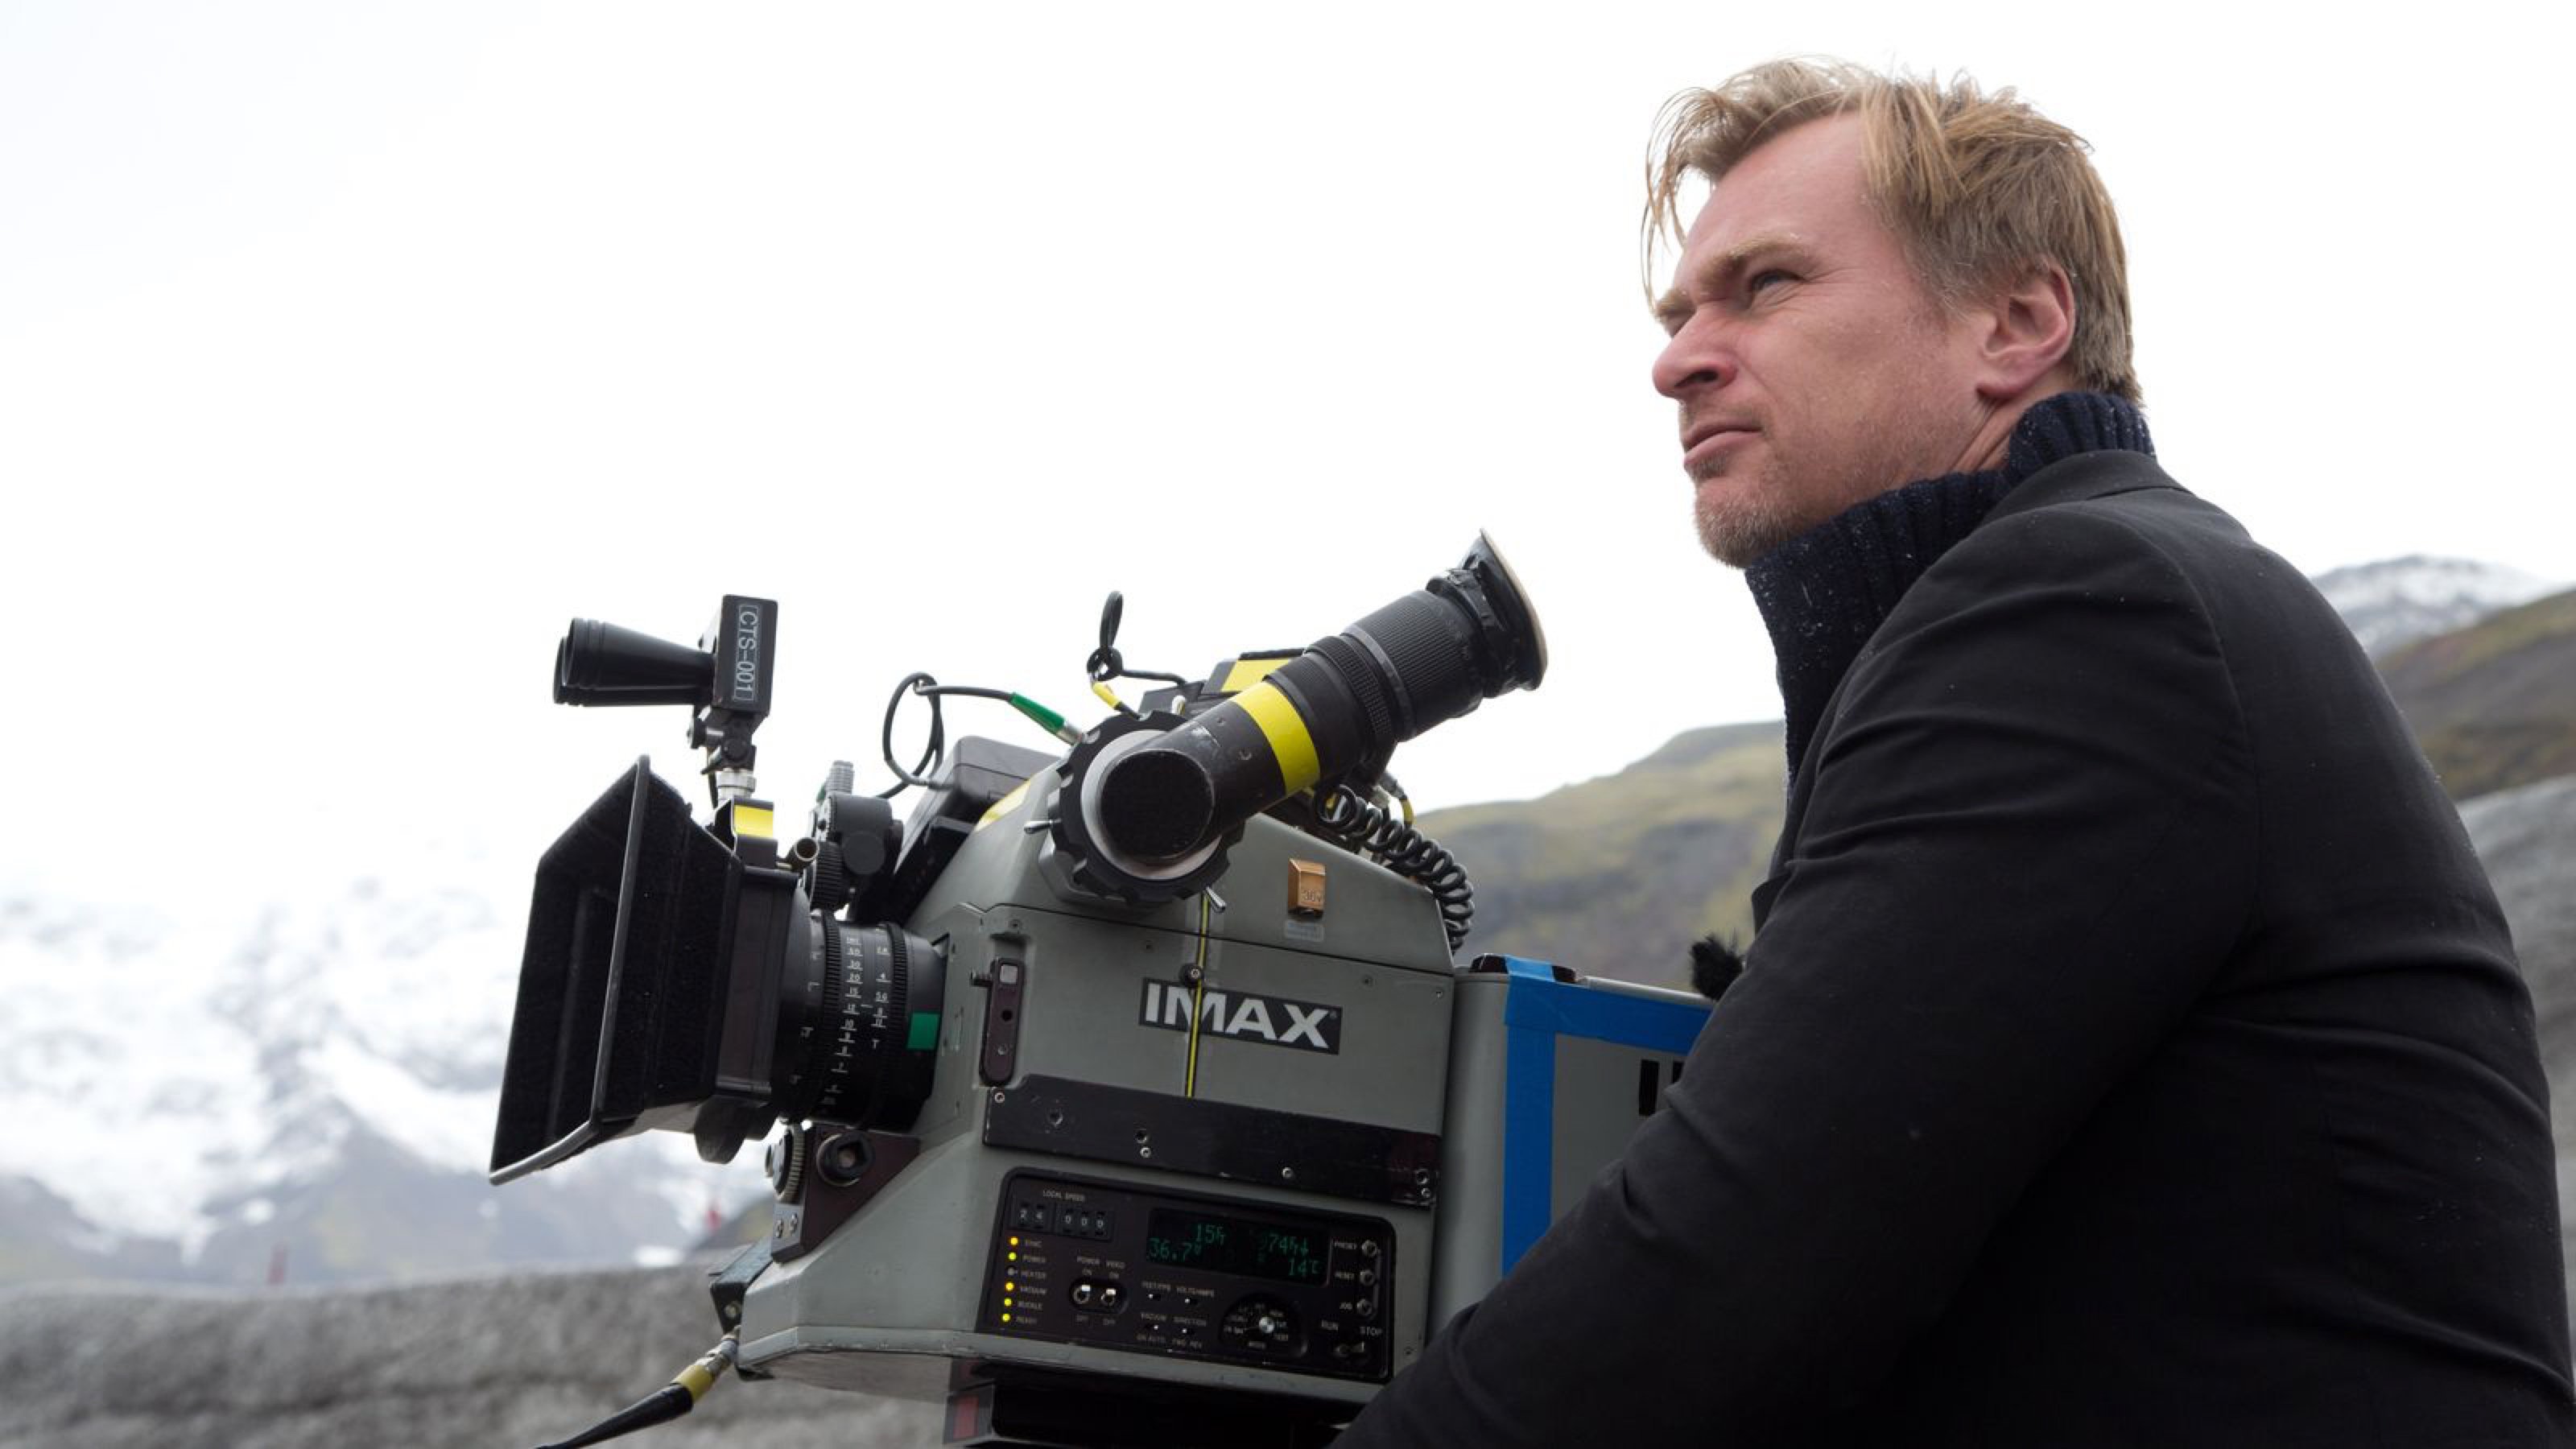
Director Christopher Nolan has long been a champion of large-format celluloid capture, eschewing the digital imaging which has become the dominant medium in recent years. “I think IMAX is the best film format that was ever invented,” says Nolan in a DGA interview. “It’s the gold standard and what any other technology has to match up to, but none have, in my opinion.”

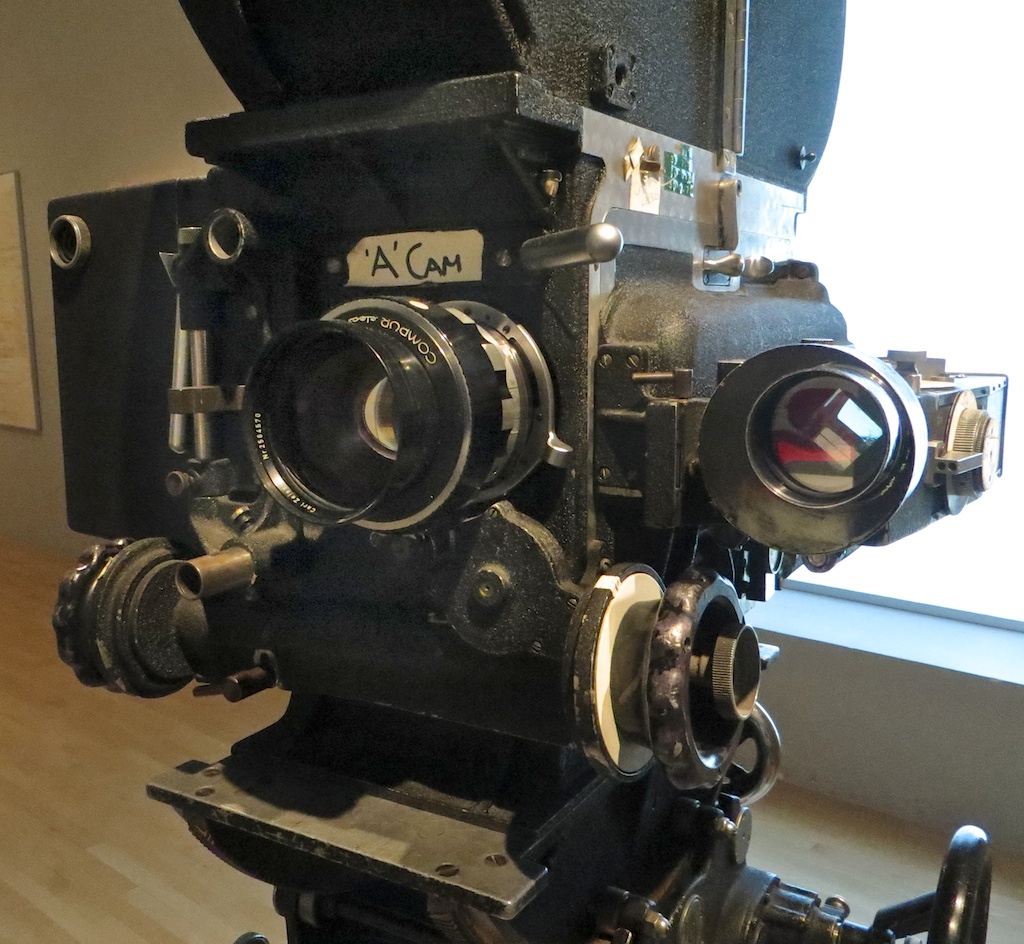
Imax is a process which uses 65mm film (printed on 70mm for exhibition, with the extra space used for the soundtrack) running horizontally through the gate, yielding an image over eight times larger than Academy 35mm. Following some test shots in The Prestige, Nolan captured whole sequences from The Dark KnightThe Dark Knight Rises and Interstellar in Imax.

For Dunkirk, Nolan and cinematographer Hoyte van Hoytema, ASC, FSF, NSC were determined to eliminate 35mm altogether, to maintain the highest possible resolution throughout the movie. Imax cameras are noisy, so they shot dialogue scenes on standard 65mm – running vertically through the gate – but Imax footage makes up over 70% of the finished film.


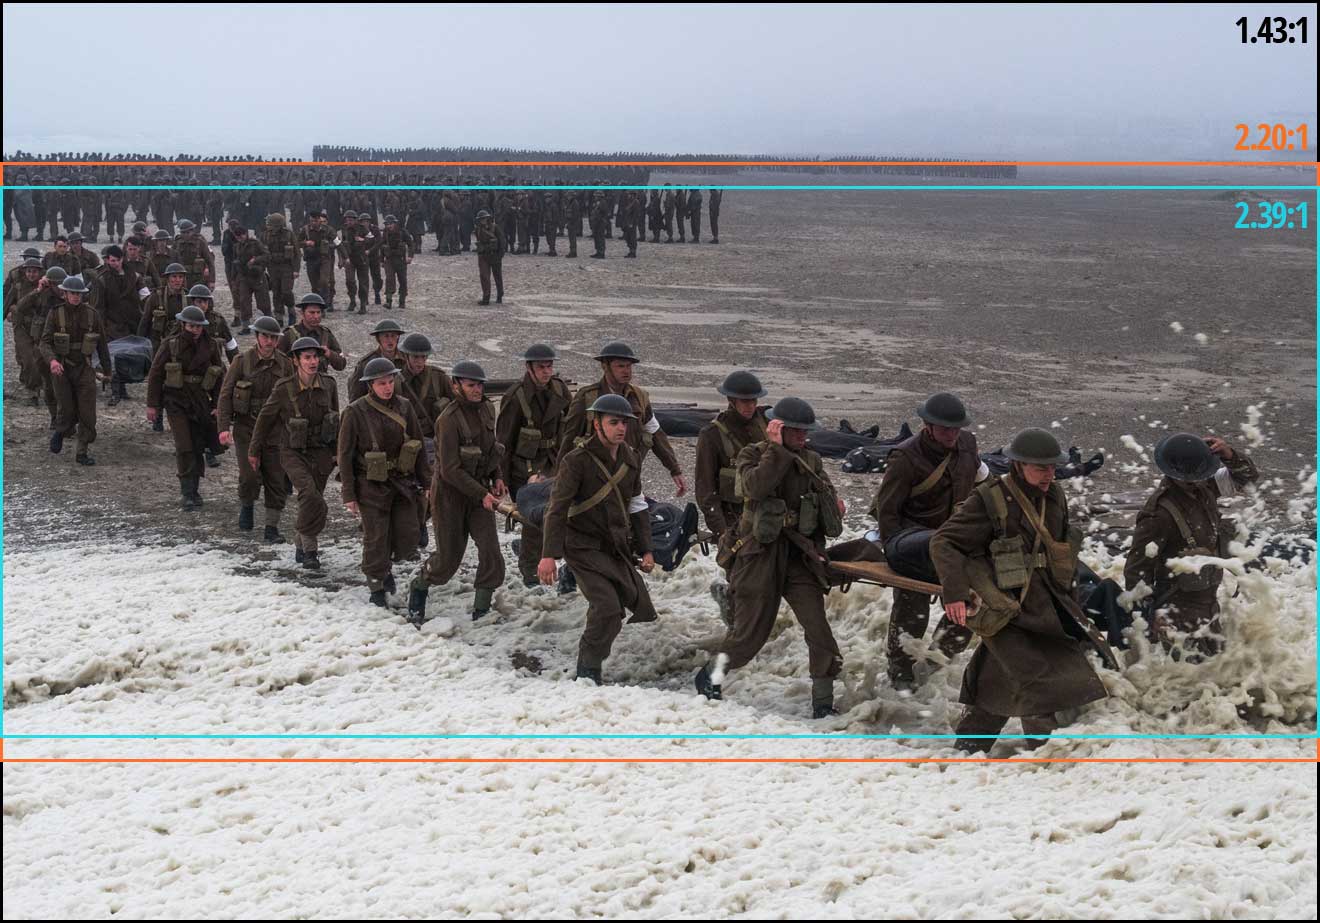
2. The movie was framed with three different aspect ratios in mind.

Those who watched Dunkirk in an Imax cinema got to see the native aspect ratio each sequence was captured in, i.e. 2:20:1 for the standard 65mm dialogue scenes but the much taller 1.43:1 for the Imax material, the bulk of the film. Those, like me, who attended a standard 70mm screening, saw it in 2:20:1 throughout. And those hapless individuals who watched it digitally apparently saw the standard Scope ratio of 2.39:1, at least in some cases.

This means that, when composing his shots, van Hoytema had to have two ratios in mind for the dialogue scenes and three for everything else. “Framing was primarily for the 2.40 [a.k.a. 2:39:1], then protecting what was outside of it,” 1st AC Bob Hall explains. This left close-ups, for example, with a large amount of headroom in 1.43:1, but the huge size of Imax screens made such framing desirable anyway.  “Imax is such an immersive experience that it’s not so much the composition that the cinematographer’s done as where your eyes are going on the screen that creates the composition.”


3. Parts of the camera rig were worn as a backpack.

Breaking with the accepted norms of large format cinematography, van Hoytema captured a significant proportion of the movie handheld. The 65mm camera package weighed over 40kg – about three times the weight of a typical Alexa rig – with the Imax camera only a little lighter. To avoid adding the weight of the batteries, video transmitter, Cinetape display and Preston (wireless follow focus) brain, these were placed in a special tethered backpack which was either worn by key grip Ryan Monro or, for water tank work, floated on a small raft.

Unfortunately, Hall quickly found that electromagnetic interference from the Imax camera rendered the Cinetape inoperable, so he ended up relying on his extensive experience to keep the images sharp. “I had to go back to the technology of the 1980s, where I basically guess how far famous people are from me,” he remarks drily in this enlightening podcast from Studio Daily.


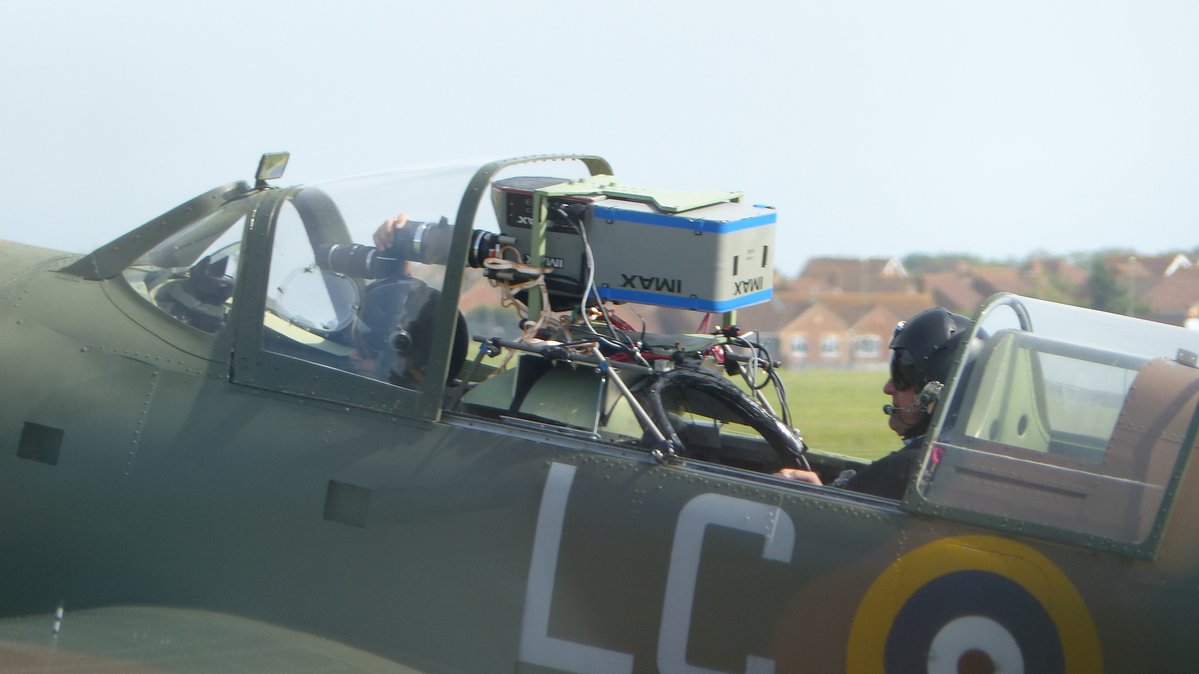
4. A periscope lens was used to shoot spitfire cockpit interiors.

“I wanted to tell an intensively subjective version of this story,” says Nolan. To that end he requested over-the-shoulder views out of the windscreens of Spitfires in flight. Furthermore, he wanted to be able to pan and tilt to follow other aircraft passing by. Given the huge size of the Imax camera, there was no room to rotate it within the cockpit. Instead, custom periscope lenses were built which could snake over the pilot’s shoulder, and pan and tilt independently of the camera body, using prisms to maintain the correct image orientation to the film plane.

Other glass used on Dunkirk included an 80mm Imax lens belonging to Nolan himself, and converted stills lenses.

Note that the camera is mounted upside-down, to compensate for the flipped image generated by the prism in the periscope lens.


5. At one point the camera sunk to the bottom of the sea for an hour and a half.

A specific Spitfire POV required was from a damaged plane diving towards the sea and hitting the water. The practical effects department devised a catapult to launch an unmanned mock-up from a ship, the grips built a crash housing for the Imax camera which would be inside, and a plan was devised to recover it before the mock-up sank. But they weren’t quick enough, and the crew watched the plane and the camera disappear beneath the waves and plunge to the bottom of the English Channel, where it sat for 90 minutes until divers retrieved it. Incredibly, once dried out and developed, the film footage was found to be completely undamaged. “The shot was all there, in full colour and clarity,” says van Hoytema in the American Cinematographer article. “This material would have been lost if shot digitally.”


5 Facts About the Cinematography of “Dunkirk”

“Barry Lyndon”: The Full Story of the Famous f/0.7 Lenses

After seeing Barry Lyndon (1975) on the big screen this week, I felt compelled to write a blog post about its cinematography. But what aspect of the cinematography? The painterly look? The many zooms? The use of natural light?

What I knew for certain is that I should definitely not write about the entirely candlelit scenes lensed on f/0.7 Nasa glass, because everyone knows that story. However, reading the vintage American Cinematographer article and some other material, I found the details surrounding this groundbreaking use of high-speed lenses so interesting that I decided to do it anyway.


The Vision

Barry Lyndon is the 18th century tale of a low-born Irishman who strives – through various misadventures, and ups and downs of fortune – to become a gentleman. The key visual influence of director Stanley Kubrick and DP John Alcott, BSC were the great painters of the story’s era, such as Vermeer.

Next week’s post will look at this painterly influence in Barry Lyndon more closely, but for now the important thing is the use of candlelight on those classical canvases, and Kubrick’s desire to replicate that look. According to lens expert Ed DiGuilio, who was tasked with adapting the f/0.7 glass for Lyndon, Kubrick “wanted to preserve the natural patina and feeling of these old castles at night as they actually were”.

Typically in movies, a candle in frame may motivate the lighting, but most of the illumination on the actors actually comes from an orange-gelled lamp just out of frame. Kubrick wasn’t interested in shooting Lyndon that way. He wanted all the light in those night interior scenes to genuinely come from the candles themselves.


The Problem

How much light does a candle shed? Conveniently, there is a unit of illumination called the foot-candle. One foot-candle is the amount of light received from a standard candle one foot away. Without going into the detail of what a “standard” candle is, it is enough for our purposes to say that the scene below has a key light of about three foot-candles…

… because there are three candles, about a foot away from the actor’s face. (The level of your key light, and consequently where you set your aperture, is almost always measured at your subject’s face, as that is usually the focus of the shot and the most important thing to get correctly exposed. This is why we DPs are always waving light meters in actors’ faces.)

If we look at an exposure table, such as this one, we can see that a three foot-candle key can be correctly exposed with an aperture of T1.4 and an EI (exposure index) of 800. Today that would be no problem, with many digital cameras having a native EI of 800, and the availability of fast lenses like Zeiss Master Primes and Super Speeds.

In the mid-seventies however, long before the advent of digital cameras, things were not so simple. Kubrick and Alcott had little choice but to shoot on Eastman Kodak 100T 5254. Those first three digits denote the film stock’s exposure index: 100. Alcott pushed the stock (brought the brightness up during processing) one stop, re-rating it to an EI of 200. But it still needed four times more light, or two stops more light than our modern-day Alexa or Red. (Check out my post on f-stops and T-stops if you’re getting lost.)

If we’re losing two stops on the EI, we need to gain two stops on the aperture to compensate. And two stops up from T1.4 is T0.7. You may notice that T0.7 isn’t on that table I linked to. This is because a lens with such a large relative aperture pretty much doesn’t exist.

Pretty much…


The Solution

Kubrick obsessively researched the problem. He eventually discovered that Nasa had commissioned Carl Zeiss to build ten Planar 50mm f/0.7 stills lenses in the sixties, which were used to take photos of the dark side of the moon. (I was unable to find out the T-stop of these lenses, but I’ll assume it was close enough to T0.7 for it to make little difference to my calculations above.) The developments leading to these lenses stretched back through Nazi military applications during WW2 all the way to the late Victorian era, when the double-Gauss cell at the core of the lenses was first invented.

Anyway, Kubrick promptly bought three of the Zeiss Planars. He liked to own equipment himself, rather than hire it in, and to this end he had also purchased at least one Mitchell BNC camera. As befits Kubrick’s perfectionism, these were perhaps the world’s most precisely engineered cameras, previously used for special effects work.

This is where Ed DiGuilio comes in: “[Kubrick] called one day to ask me if I thought I could fit a Zeiss lens he had procured… to his BNC.” It wasn’t simply a case of the f/0.7 glass having the wrong mount. The rear element was so large and needed to be so close to the film plane that DiGuilio had to extensively modify the camera, literally cutting parts out of it.

Ed DiGuilio (left), President of Cinema Products Corporation, working on adapting a zoom lens for Kubrick’s Mitchell BNC

Once this was done, extensive testing ensued. The focus scale (distances marked on the barrel) had to be calibrated from scratch, and indeed the focus ring was re-engineered to allow the precision focusing that the lens’ tiny depth of field would require. Whereas the focus ring on a stills lens will turn about 90° to go from infinity to close focus, and the ring on a cine lens might turn 270°, the rings on these unique Planars now turned a whopping 720° – two whole revolutions!

50mm is a very useful lens length for close-ups, but Kubrick understandably wanted a wider option as well. Accordingly, DiGuilio located an adapter designed to adjust the throw of cinema projector lenses. Mounted onto one of the 50s, it gave an effective focal length of 36.5mm with only very minor light loss. A 24mm version was also tested, but Kubrick disliked the amount of distortion in its images, and rejected it.


The Execution

The colour brown and the trousers of Doug Milsone, Barry Lyndon‘s focus puller, cannot have been strangers to each other. Imagine trying to hold focus on this dolly-back at f/0.7!

By my calculations (which were difficult, because most depth of field tables/calculators don’t go to f/0.7!) an MCU on Kubrick’s 50mm Planar with the subject at 2.5m (8.2ft) and the iris wide open would have had a depth of field of about 43mm (1.7″). To get this same depth of field at f2.8, a popular working stop for cinematographers today, the subject would have to be just 1m (3.3ft) from the sensor plane, which would be a biggish close-up. And remember that focus monitors, peaking and Cine Tape did not exist in the seventies.

To give Milsone a fighting chance, a unique system of focus assist was developed. While the main camera shot an actor from the front, a CCTV camera captured them in profile. This profile image was piped to a monitor, over which a grid was placed. This grid was marked off with distances so that Milsone could see how much the actor had moved by, far more accurately than judging it by eye from beside the lens.

Another problem thrown up by the low-light cinematography was with the viewfinder. Interestingly, the Mitchell BNC was a non-reflex camera, meaning that it didn’t have a mirror on the shutter, reflecting the image to the viewfinder when the shutter was closed. Instead, the camera body racked over to one side to allow the viewfinder to get an image during line-ups and rehearsals, and when it was actually rolling the operator got their images from a side viewfinder with its own lens – just like in a disposable 35mm stills camera. The original prism-based viewfinder on Kubrick’s Mitchell BNC suffered from far too much light loss for a candlelit image to be visible through it, so it was replaced with a mirror-based viewfinder adapted from a Technicolor camera.

The shots resulting from all of these technical challenges are quite soft to the modern eye, but I think that only adds to their beauty. Barry Lyndon captured the exquisite fragility of candelight, and 42 years on the images are still unique and captivating.

“Barry Lyndon”: The Full Story of the Famous f/0.7 Lenses

Proaim Shoulder Rig Review: Ten Months On

Last July when I bought my Canon 600D (Rebel T3i) DSLR I also invested in a Proaim shoulder rig from Cine City. I reviewed the rig on this site soon afterwards, based mainly on playing about with it at home, but although I mentioned briefly how it fared during the Field Trip shoot last August I’ve never got around to giving a proper verdict on how this rig performs in a shoot scenario. Until now.

First and foremost, the rig is designed to give you the kind of smooth(ish) handheld shots you would get from a shoulder-mounted camera – broadcast/ENG, 16mm or whatever. While it certainly does that, all the weight of your DSLR is on the front of the rig, so it very quickly becomes difficult to hold up. You need to add a counterweight to the back – mine being a backpack which I can fill with whatever heavy stuff is to hand, loosely fastening the waist strap to prevent it swinging around. I’ve yet to make any serious use of this set-up, so I’ll have to get back to you on how it works out in the field.

The Proaim shoulder rig with top handle

Aside from the shoulder pad, the Proaim rig comprises several other elements which can be fitted onto the core rail system as required. These are:

  • a two-stage matte box and sunshade
  • follow focus
  • hand grips
  • a top handle (an optional extra I went for) with microphone mount

Prior to Stop/Eject, I generally fitted everything bar the follow focus whenever I used the camera. (Sadly most jobs I do lack the budget for a focus puller, and I don’t find the follow focus useful when pulling by eye.) To be perfectly honest, I did this mainly to make the camera look bigger and more impressive – particularly important on corporate jobs!

Shooting for Astute Graphics
Shooting for Astute Graphics. Photo: Nicholas van der Walle

On Stop/Eject there was no time to have unnecessary accessories getting in our way, so I fitted only the follow focus, adding the matte box and sunshades very occasionally to flag a bit of backlight or use a graduated ND filter. Whenever I had to pick the camera up while still on the tripod, I regretted not fitting the top handle, but I never found time to put it on.

So the follow focus was the main part of the rig to get used. And I’m afraid the verdict here is not good. I knew before I bought the rig that many reviewers had complained about the gears having a little play in them. But I also knew that better quality follow focus units were out of my price range, and that some reviewers reported being able to reduce or remove the play by tightening a screw.

Focus pulling
On Stop/Eject, Rick Goldsmith operates camera while Colin Smith pulls focus. Photo: Paul Bednall

Well, no amount of screw tightening has done the job; there is still play. You can turn the focus knob about a millimetre before the focus ring of the lens starts to rotate. Shooting at f1.8 on my 20mm Sigma lens for a big wide – such as the master shot of the basement – that single millimetre can represent 20 metres of focal distance. Result? I had to pull the focus on that master shot by eye.

Col got skilled enough by the end of the shoot to compensate for this play, but it still caused us problems from time to time. I believe Cine City have now released a version two of their follow focus, so perhaps this is an improvement.

I have to say that the most effective parts of the rig are the matte box and sunshades. Aside from looking impressive, the ease with which you can flag off stray light is brilliant – no more gaffer-taping bits of cardboard to your camera.

But I was surprised to find on Stop/Eject that I was often bypassing the rig altogether and slapping the camera straight on the tripod.

You’ve got to do whatever’s going to get the job done right. I’d definitely advise having this rig in your arsenal, assuming you can’t afford one of the better quality options. With a decent counterweight it will massively improve your handheld shots, and the rest of the bits will come in handy too – just don’t expect to use all of them all of the time.

Filming Stop/Eject with a minimal rig
Filming Stop/Eject with a minimal rig. Photo: Paul Bednall
Proaim Shoulder Rig Review: Ten Months On