Undisclosed Project: Experimentation

The main event of last week’s prep was a test at Panavision of the Arri Alexa XT, Red Gemini and Sony F55, along with Cooke Panchro, Cooke Varotal, Zeiss Superspeed and Angenieux glass. More on that below, along with footage.

The week started with Zoom meetings with the costume designer, the make-up artist, potential fight choeographers and a theatrical lighting designer. The latter is handling a number of scenes which take place on a stage, which is a new and exciting collaboration for me. I met with her at the location the next day, along with the gaffer and best boy. After discussing the stage scenes and what extra sources we might need – even as some of them were starting to be rigged – I left the lighting designer to it. The rest of us then toured the various rooms of the location, with the best boy making notes and lighting plans on his tablet as the gaffer and I discussed them. They also took measurements and worked out what distro they would need, delivering a lighting kit list to production the next day.

Meanwhile, at the request of the producer, I began a shot list, beginning with two logistically complex scenes. Despite all the recces so far, I’ve not thought about shots as much as you might think, except where they are specified in the script or where they jumped out at me when viewing the location. I expect that much of the shot planning will be done during the rehearsals, using Artemis Pro. That’s much better and easier than sitting at home trying to imagine things, but it’s useful for other departments to be able to see a shot list as early as possible.

So, the camera tests. I knew all along that I wanted to test multiple cameras and lenses to find the right ones for this project, a practice that is common on features but which, for one reason and another, I’ve never had a proper chance to do before. So I was very excited to spend Wednesday at Panavision, not far from my old stomping ground in Perivale, playing around with expensive equipment.

Specifically we had: an Arri Alexa – a camera I’m very familiar with, and my gut instinct for shooting this project on; a Sony F55 – which I was curious to test because it was used to shoot the beautiful Outlander series; and a Red Gemini – because I haven’t used a Red in years and I wanted to check I wasn’t missing out on something awesome.

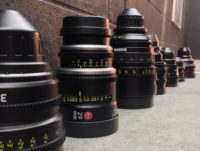
For lenses we had: a set of Cooke Panchros – again a gut instinct (I’ve never used them, but from what I’ve read they seemed to fit); a set of Zeiss Superspeeds – selected after reviewing my 2017 test footage from Arri Rental; a couple of Cooke Varotal zooms, and the equivalents by the ever-reliable Angenieux. Other than the Angenieux we used on the B-camera for The Little Mermaid (which I don’t think we ever zoomed during a take), I’ve not used cinema zooms before, but I want the old-fashioned look for this project.

Here are the edited highlights from the tests…

You’ll notice that the Sony F55 disappears from the video quite early on. This is because, although I quite liked the camera on the day, as soon as I looked at the images side by side I could see that the Sony was significantly softer than the other two.

So it was down to the Alexa vs. the Gemini, and the Cookes vs. the Superspeeds. I spent most of Thursday and all of Friday morning playing with the footage in DaVinci Resolve, trying to decide between these two pairs of very close contenders. I tried various LUTs, did some rough grading (very badly, because I’m not a colourist), tested how far I could brighten the footage before it broke down, and examined flares and bokeh obsessively.

Ultimately I chose the Cooke Panchros because (a) they have a beautiful and very natural-looking flare pattern, (b) the bokeh has a slight glow to it which I like, (c) the bokeh remains a nice shape when stopped down, unlike the Superspeeds’, which goes a bit geometric, (d) they seem sharper than the Superspeeds at the edges of frame when wide open, and (e) more lengths are available.

As for the zoom lenses (not included in the video), the Cooke and the Angenieux were very similar indeed. I chose the former because it focuses a little closer and the bokeh again has that nice glow.

I came very close to picking the Gemini as my camera. I think you’d have to say, objectively, it produces a better image than the Alexa, heretical as that may sound. The colours seem more realistic (although we didn’t shoot a colour chart, which was a major oversight) and it grades extremely well. But…

I’m not making a documentary. I want a cinematic look, and while the Gemini is by no means un-cinematic, the Alexa was clearly engineered by people who loved the look of film and strove to recreate it. When comparing the footage with the Godfather and Fanny and Alexander screen-grabs that are the touchstone of the look I want to create, the Alexa was just a little bit closer. My familiarity and comfort level with the Alexa was a factor too, and the ACs felt the same way.

I’m very glad to have tested the Gemini though, and next time I’m called upon to shoot something great and deliver in 4K (not a requirement on this project) I will know exactly where to turn. A couple of interesting things I learnt about it are: (1) whichever resolution (and concomitant crop factor) you select, you can record a down-scaled 2K ProRes file, and this goes for the Helium too; (2) 4K gives the Super-35 field of view, whereas 5K shows more, resulting in some lenses vignetting at this resolution.

Undisclosed Project: Experimentation

“Above the Clouds”: The Spoiler Blogs

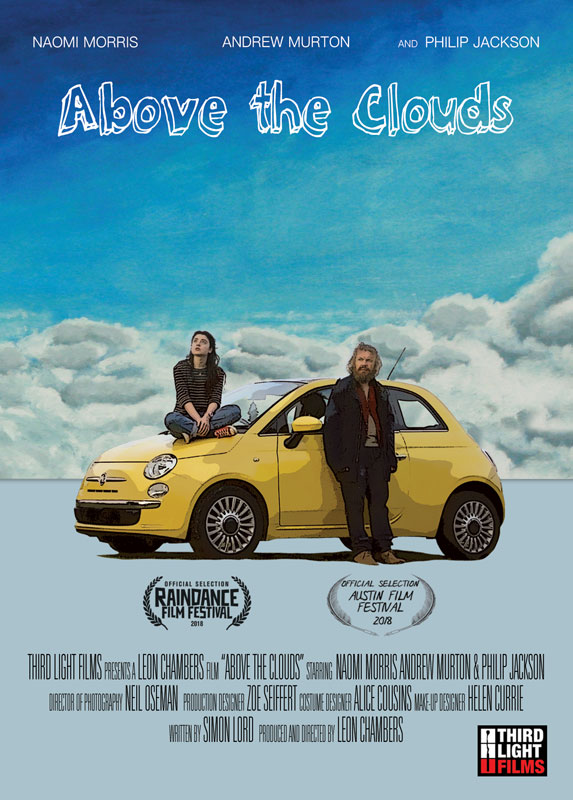
During 2016-2017 I blogged about the production of Above the Clouds, a comedy road movie which I shot for director Leon Chambers. It premiered at Raindance in 2018, closely followed by Austin Film Festival, where it won the audience award for Best Narrative Feature, the first of four gongs it would collect.

In two decades of filmmaking, Above the Clouds is easily in the top five productions I’m most proud of. Since this January it has been available on AmazoniTunesGoogle Play and other platforms, and I highly recommend you give it a watch. DO NOT continue reading this blog unless you have, because what follows are two blog entries that I held back due to spoilers.


DAY 14

(from Week 3)

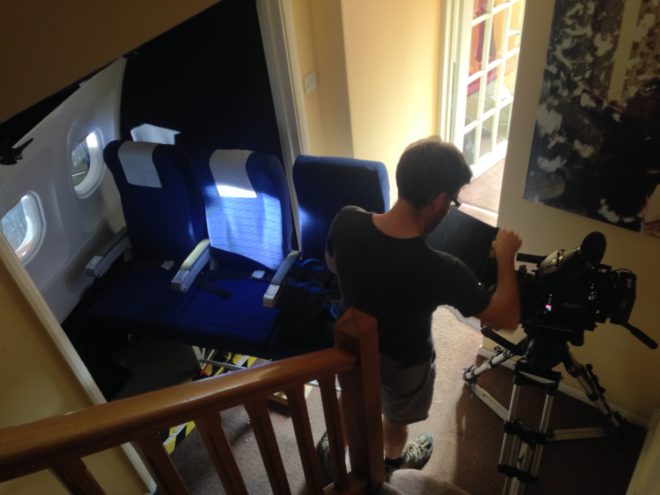
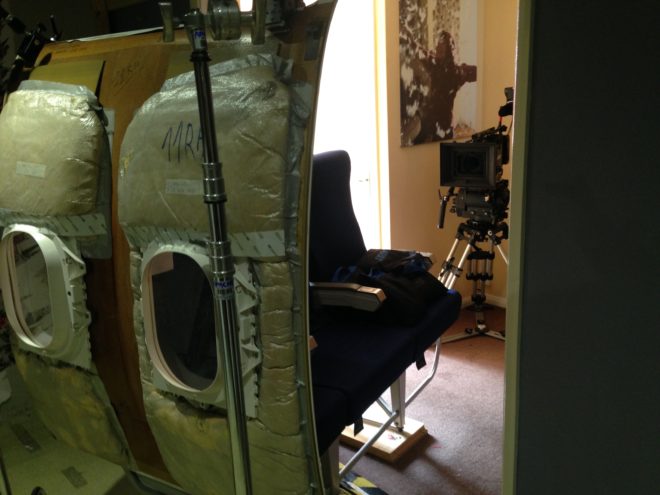
The script calls for Charlie to be seen sitting in the window seat of a plane as it rises quite literally above the clouds. This is another micro-set filmed in Leon’s living room, in fact half in the living room and half in the hall, to leave enough room for the lights beyond.

Although the view out of the window will be added in post, I need to simulate the lighting effect of bursting through the clouds. My plan involves a 1.2K HMI, and a 4×4 poly board held horizontally with a triple layer of 4×4 Opal sheets hanging from one edge.

We start with the HMI pointed straight into the window and the poly board held high up so that the Opal hangs in front of the lamp. As the plane supposedly rises through the cloud layer, Colin lowers the poly until it is below the level of the lamp, while Gary tilts the HMI down so its light skips off the poly (like sun skipping off the top of clouds) and bounces back up into the window. Gary then tilts the HMI back up to point straight into the window, to suggest further banking or climbing of the aircraft. This direct light is so hot that it bounces off the armrest of Charlie’s seat and gives a glow to her cheek which syncs perfectly with a smile she’s doing.


DAY 25

(from February 2017 pick-ups)

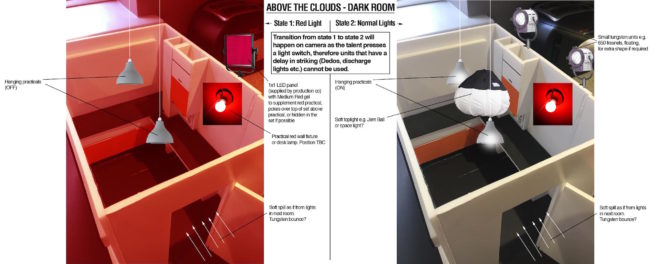
Today’s set is a dark room. A photographer’s dark room, that is. Not just a random dimly-lit room.

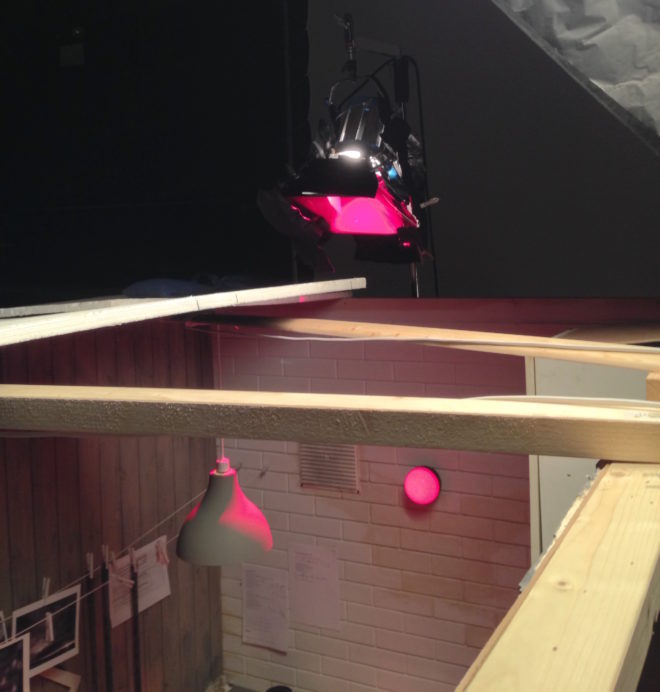
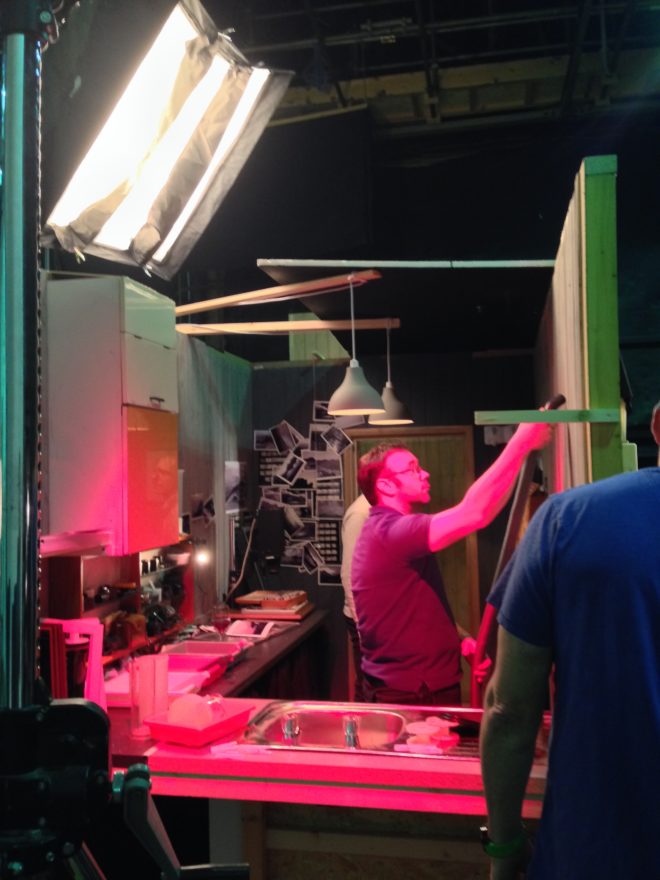
We begin with only the red safe-light in play. The wall-mounted practical has a 15W bulb, so it needs some serious help to illuminate the room. Micky rigs a 1K pup with Medium Red gel and fires it over the top of the set, above the practical. The effect is very convincing. Pure red light can make everything look out of focus on camera, which is why I chose the slightly magenta Medium Red gel, rather than the more realistic Primary Red. The colourist will be able to add some green/yellow to correct this.

During the scene, Naomi pulls a cord and the normal lights come on. These are two hanging practicals, fitted with dimmed 100W tungsten globes. In a very similar set-up to yesterday, we use a 2K with a chimera, poking over the set wall on the camera’s down-side, to enhance and soften the practicals’ light.

To read all the Above the Clouds blogs from the start, click here.

“Above the Clouds”: The Spoiler Blogs

Pick-ups for “Rory’s Way”

In August 2016 I was recommended to a production manager who was crewing up a small pick-ups shoot in London. The pick-ups were for Rory’s Way, or The Etruscan Smile as it was then known, a $12 million feature based on the best-selling novel of the latter name, starring Brian Cox and Thora Birch. Apparently test screenings had shown that the film’s ending wasn’t quite satisfying enough, and parts of it were to be remounted.

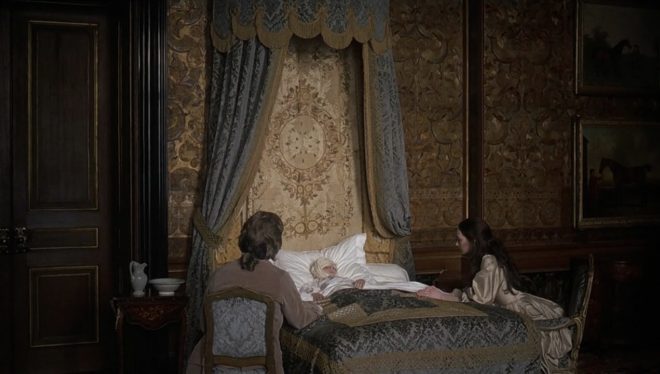
I was given a storyboard consisting of actual frame-grabs from the original version of the scene, alongside notes explaining how the action would be different. Not to give too much away, but the scene involves Brian’s character in bed, and a baby in a cot next to him. The changes simply involved Brian giving a different reaction to what the baby is doing. The bed was to be set up on stage against a blue screen, and composited into backgrounds extracted from the principal photography footage. The baby’s performance was not to be changed, so he was to be rotoscoped out of the original footage too.

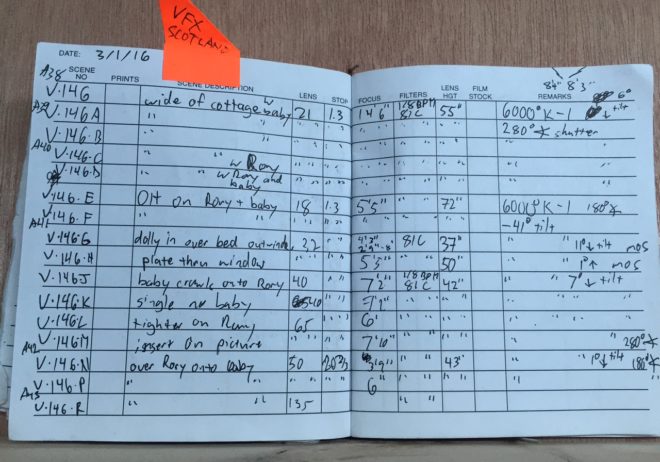
I was sent the camera report, 2nd AC’s notebook and script notes from principal photography. The crew had known that the view out of the bedroom window would be added in post, and that separate takes of the baby and Brian would be digitally combined, so they recorded plenty of information for the VFX team. Between the three documents, I had the focal length, focal distance, aperture, white balance, shutter angle, filters, lens height and tilt of every set-up in the scene.

My next step was to email  the main unit DP, who was none other than Javier Aguirresarobe, ASC, AE – the man behind the lens on Thor: Ragnarok, Nicole Kidman vehicle The Others, two of the Twilight films, and Woody Allen’s Vicky Cristina Barcelona. Needless to say, I was honoured to be recreating the work of such an experienced cinematographer.

Unit still of Javier Aguirresarobe, ASC, AE on location in Scotland for “Rory’s Way”/”The Etruscan Smile”

Javier told me that he had shot with Arri/Zeiss Master Primes, and explained the feel and colour of lighting he had been going for. He had used an 81C (coral) filter to warm up the image a little, and a 1/8th Black Promist for diffusion.

After that, I sat down over coffee with Ben Millar, my gaffer. We analysed the footage from principal photography and reverse-engineered the lighting. I say “we”; it was mostly Ben. This is why a DP hires a good gaffer!
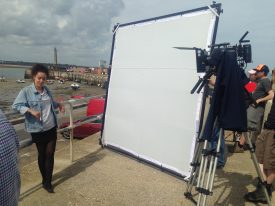
The pick-ups shoot was a single day. The afternoon before, the director and the camera department convened at the studio. The plan was to go through each of the set-ups using a stand-in in the bed. For each set-up, we first used the camera logs and script notes to put on the correct lens and filters, and set the sticks to the right height and tilt. Then, with a print-out of the original shot taped underneath the monitor, we nudged the camera around until we had the closest possible match in framing. This done, ACs Max Quinton and Bex Clives marked the tripod position on the floor with tape, writing the lens length, height, filters etc. on the tape itself to make things super-efficient the next day.

The pick-ups set was nothing more than a bed surrounded by blue screens. The bright gap between the screens represents the window from the original location.

On the morning of the shoot, the lighting department had two or three hours to set up before Brian was called. We used mostly Kinoflos, with a lot of flags to represent window frames through which light sources had been shining on the original set. The VFX supervisor Stephen Coren and I checked the histograms on the monitor to ensure the blue screen was lit evenly and to the level he required.

We were ready to roll in plenty of time, and things went more or less to plan, with the addition of an extra shot or two. The editorial team were in the next room, checking our shots against the original material, and they reported that all was well.

We finished up with a single wide night interior shot for an earlier scene in the movie. This was an interesting one, because we had to extrapolate the lighting for the whole room from a single close-up that had been shot in principal photography. Our wide shot, recorded entirely against blue, would be dropped into a wide shot from principal – a daylight wide shot, that would be digitally painted and retimed for night.

At the time of writing, Rory’s Way has just hit UK cinemas, but I have yet to see it. For all I know it might have been re-edited again, but hopefully my shots are still in there! Either way, it was a fascinating exercise to analyse and reproduce the work of a top cinematographer.
Pick-ups for “Rory’s Way”

Spherical Lens Tests

The other week I spent a day at Arri Rental in Uxbridge, in the Bafta Room no less, conducting various camera and lens tests. I’ve done a number a productions now where I wanted to test but there wasn’t the time or money, so for a while I’ve been meaning to go into Arri on my own time and do some general tests for my education and edification. An upcoming short provided the catalyst for me to get around to it at last.

Aided by 1st AC Rupert Peddle and 2nd AC Bex Clives, I tested a dozen lenses, some spherical, some anamorphic. Today I will cover the spherical lenses; next time I’ll look at the anamorphics.


Method

We shot on an Alexa XT Plus in log C ProRes 4444 XQ at 3.2K. In the video the image has been downscaled to 1080P and a standard Rec.709 LUT has been added.

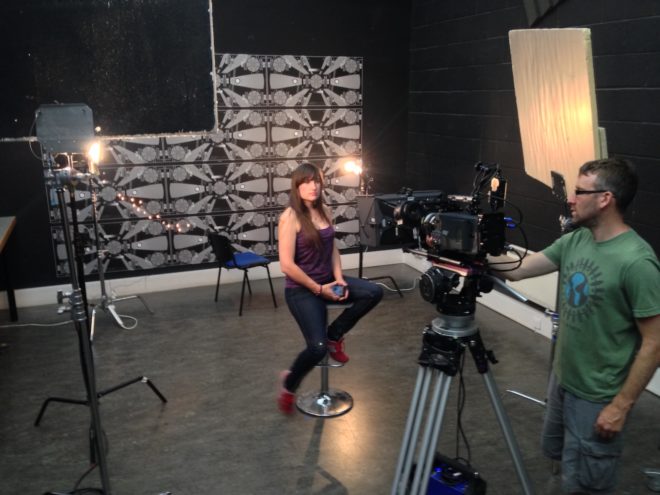
I set the Alexa to ISO 800 and lit Bex to a T2.8 using a 650W tungsten fresnel bounced off poly. For fill I caught a little of the spill from the fresnel with a matte silver bounce board on the opposite side of camera. I placed fairy lights in the background to observe the bokeh (out of focus areas) and turned on a 100W globe during each take to see what the flare did.

We shot all the lenses at 2.8 – the stop I most commonly use – and also wide open (compensating with the shutter angle), but the direct 2.8 comparison proved most useful, so that’s mainly what you’ll see in the video. We tested a single length: 35mm or the closest available to it.

What we didn’t do was shoot grey-scale or colour charts, or do any testing of vignettes or distortion. (The day after doing these tests, Shane Hurlbut, ASC published an Inner Circle post about how to tests lenses, so I immediately learnt what my omissions were!)

We tested the following lenses:

Series Length Speed CF* Weight Price
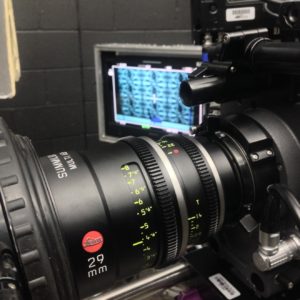
Leica Summilux-C 29mm T1.4 18″ 1.7kg £27K
Arri/Zeiss Master Prime 35mm T1.3 14″ 2.2kg £16K
Cooke S4 32mm T2 6″ 1.85kg £14K
Leica Summicron-C 35mm T2 14″ 1.3kg £13K
Zeiss High Speed
(a.k.a. Superspeed Mk III)
35mm T1.3 14″ 0.79kg £12K
(refurb)
Arri/Zeiss Ultra Prime 32mm T1.9 15″ 1.1kg £10K
Zeiss T2.1 32mm T2.1 24″ 0.45kg £4K
(used)
Canon 35mm T1.5 12″ 1.1kg £3K

* CF = close focus

Here’s the video…


Skin tones

Click the image to see it at best quality.

The Arri/Zeiss Master Prime and the two Leicas seem to have the most vibrant skin tones. To my eye, the Leicas have a slight creaminess that’s very pleasing. The Canon looks just a little cooler and less dynamic. I was surprised to find that the Cooke S4, the lens I’ve used most, appears to have a grey, flat skin tone compared with the Master Prime, Leicas and Canon. I would rank the Ultra Prime and Superspeed next, on a par except that the Ultra Prime has a noticeable magenta cast. My least favourite skin tones are on the Zeiss T2.1, which comparatively makes poor Bex look a little bit ill!

Some of the nuances will be lost in the YouTube and Jpeg compression, but this is a very subjective assessment anyway, so feel free to completely disagree with all of the above. Any of the differences noted above could be corrected by grading, to some extent . But remember that the lens is at the very start of the light’s journey from set to screen, and any wavelengths that don’t get through it are lost forever. It’s like fluorescent lamps with colours missing from the spectrum; you can’t put those back in in post.


Sharpness

I have to say, I’m unable to detect any difference in sharpness between the Master Prime, Cooke S4, Canon and Leicas. The Ultra Prime and Superspeed both look a hair softer, while the T2.1 is very soft.


Breathing

Breathing is the slight zooming effect that you get with some lenses when you pull focus. Looking at 4:44 in the video you can clearly see the differences in breathing between the eight lenses. Because this part of the video is showing a crop of the bottom left corner of the image, the breathing manifests as a shift to the left (zoom in) as the lens is racked closer (goes soft) and a shift to the right (zoom out) as it’s racked deeper (goes sharp).

All the Zeiss lenses except the Master Prime have a significant amount of breath when seen in isolation like this, but not enough to be noticeable to an audience in most real-world situations. The Cooke S4 has a little bit of breathe, and the Canon a hair less. The Master Prime and the Leicas are rock solid.


Bokeh

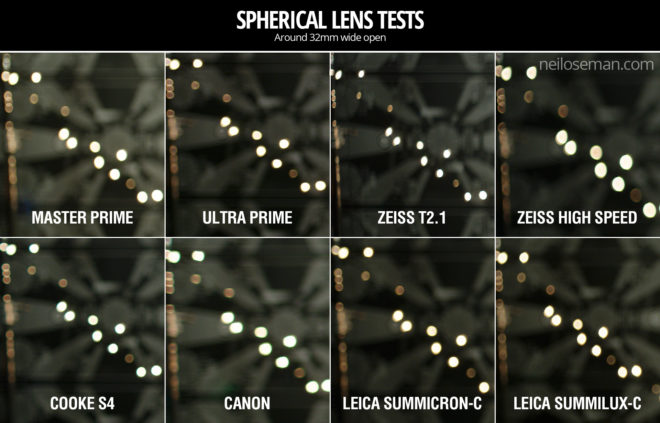
Small points of light, when thrown out of focus, most clearly demonstrate the bokeh pattern of a lens. The shape of the bokeh is determined by the number of iris blades and the shape of those blades. Generally a circle is preferred, because it’s a natural shape, but for certain stories a more unusual shape might be appropriate. The shape of the iris changes with the T-stop, hence the T2.8 and wide open images above.

Immediately noticeable is the difference in the Cooke S4’s bokeh between wide open (circular) and T2.8 (octagonal). All of the other lenses have round bokeh at T2.8, apart from the Superspeed, which has heptagonal (seven-sided) bokeh.

It’s entirely subjective which bokeh you prefer. The only other thing I’ll point out is that the Canon’s bokeh wide open is very fuzzy, with noticeable colour aberration, though this may be due to the bright highlight rather than the defocusing.


Flare

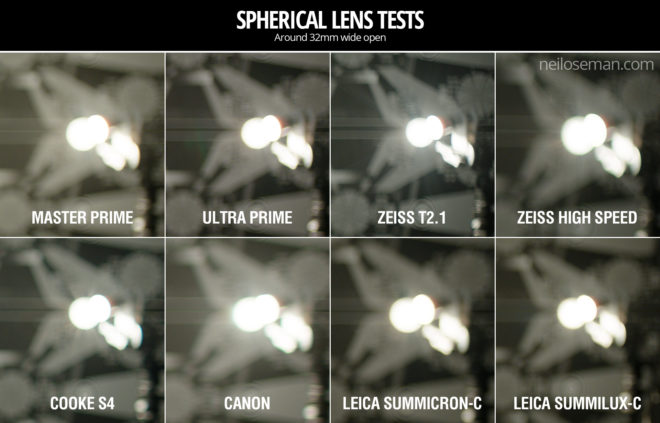
Flare patterns also vary with aperture. The smaller the aperture, the more of a star effect you will get, as the light interacts with the corners in the iris blades. The Summilux shows this most clearly, with a pronounced star at T2.8 (two stops down from its maximum aperture) and almost none when wide open. The Cooke S4 also has a nice star pattern at T2.8. With the other lenses it’s much more subtle, and the Canon has almost none.


Conclusions

The real revelations in these tests, for me, were the Leicas. The Summilux in particular is a beautiful lens, with rich, dynamic skin tones, nice bokeh, no breathing, plus the bonus of nice star flares. I will definitely be looking to work with this glass in the future, although given the price tag that may be optimistic!

The Summicron also performed incredibly well, matching the more expensive Summilux and Master Prime in every respect except speed. I can see this becoming my new go-to lens.

The Master Prime of course produced a beautiful, sharp, clean image, but it lacks character. It might work nicely for science fiction, a drama requiring a neutral look, or something where filtration was being used to give the image character.

The Canon impressed me too – no mean feat given that it’s the cheapest lens we tested. With nice skin tones and attractive flares, I could see this working well for a romantic movie.

The Zeiss T2.1 did not appeal to me, with poor sharpness and cold, washed-out skin tones, so I would avoid it.

The Superspeed is a decent lens, but in most cases I’d plump for an Ultra Prime instead. Ultra Primes are certainly easier to work with for the 1st AC, and have proven to be a good workhorse lens for drama. (I shot Above the Clouds on them.)

The Cooke S4 has been my go-to glass up to now, and while it will probably remain my first choice for period pieces, due to its gentle focus fall-off, I’m excited to try some of the other glass in this test on other productions.

I’ll say it one last time: this is all subjective. Our visual preferences are what make every director of photography unique.

Tune in next week when I’ll look at the anamorphic lenses: Hawk-V, Cooke Xtal and Kowa Mirrorscope.

Spherical Lens Tests

8 Ways “Barry Lyndon” Emulates Paintings

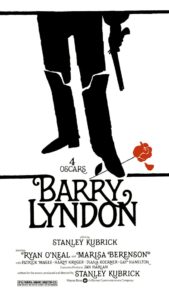
Stanley Kubrick’s 1975 period epic Barry Lyndon, although indifferently received upon its original release, is considered a masterpiece by many today. This is largely due to its painterly photography with strong, precisely composed frames that leave the viewer feeling more like they’ve wandered through an art gallery than watched a movie. Today I’m going to look at eight methods that Kubrick and his team used to create this feel. It’s an excellent example of how a director with a strong vision can use the many aspects of filmmaking to realise that vision.


1. Storytelling

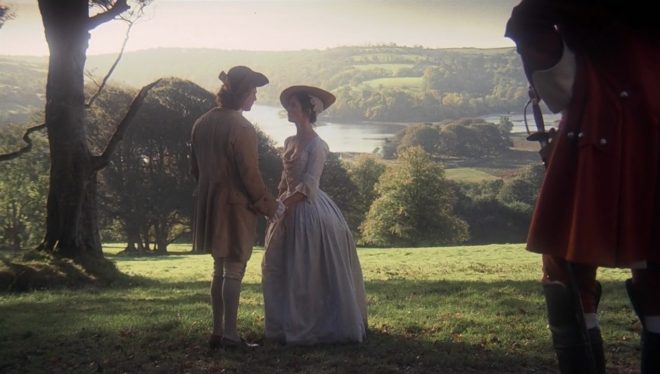
The American Cinematographer article on Barry Lyndon notes that “Kubrick has taken a basically talky novel and magically transformed it into an intensely visual film.” You have only to look at a series of frame-grabs from the movie to see just how much of the story is contained in the images. Just like a painter, Kubrick reveals a wealth of narrative within a single frame. The shot above, for example, while recalling the landscapes of artists like Constable in its background and composition, also clearly tells the story of a courtship threatened by a third party with violent designs.


2. Design

Kubrick was keen for Lyndon to feature the type of rich fabrics which are often seen in 18th century art. He referred costume designer Milena Canonero to various painters of the period. “Stanley wanted beautiful materials,” she recalls in the documentary Stanley Kubrick: A Life in Pictures, “because as he quite rightly said, that’s why in those paintings they gave that wonderful light.”


3. Aspect ratio

There was much confusion and controversy surrounding Kubrick’s intended ratio for Lyndon. The negative was apparently hard-masked to 1.6:1, with the result that VHS and DVDs used this ratio, while the images were vertically cropped to 1.78:1 for the later Blu-ray release. However, the discovery in 2011 of a letter from Kubrick to cinema projectionists finally proved that 1.66:1 was the ratio he wanted audiences to see the film in.

1.66:1 was a standard ratio in parts of Europe, but unusual in the UK and USA. It’s not far off the golden ratio (1.6180:1) – a mathematically significant ratio which some artists believe to be aesthetically pleasing. There is evidence that Kubrick was not a fan of wide aspect ratios in general, perhaps because of his background as a photographer, but it can be no coincidence that Lyndon distances itself from the cinematic ratios of 1.85 and 2.39, and instead takes a shape closer to that of a typical painting.

(Most of the images in this post come from Evan Richards’ Cinematographers Index, and he in turn grabbed them from the 1.78:1 Blu-ray. The image above is in 1.66:1 but shows the 1.78:1 crop-lines.)


4. Composition

“The actual compositions of our setups were very authentic to the drawings of the period,” says DP John Alcott, BSC in his interview with American Cinematographer. Perhaps the film’s most obvious compositional nod to classical art is the large amount of headroom seen in the wide shots. As this article by Art Adams explains, the concept of placing the subject’s head at the top of the frame is fairly new in the history of image creation. Plenty of traditional art includes lots of headroom, and Lyndon does the same.


5. Camera movement

There is little camera movement in Barry Lyndon, but there are 36 zoom shots. Unlike a physical dolly move, in which the parallax effect causes different planes of the image to shrink or enlarge at differing rates, a zoom merely magnifies or reduces the whole image as a single element. This of course only serves to enhance the impression of a two-dimensional piece of art. In fact, the zooms resemble nothing so much as the rostrum camera moves a documentary filmmaker might make across a painting – what today we’d call a Ken Burns effect.

It’s interesting to note that, although Barry Lyndon is famous for its fast lenses – the f/0.7 Zeiss Planar primes – the movie also used a very slow lens, a custom-built T9 24-480mm zoom. From various accounts, other zooms used seem to include a Cooke T3.1 20-100mm and possibly a 25-250mm of some description. Of course, none of the zoom lenses were anywhere near fast enough for the candlelit scenes, so in those instances the filmmakers were forced to use a Planar and pull back physically on a dolly.


6. Lighting

“In preparation for Barry Lyndon we studied the lighting effects achieved in the paintings of the Dutch masters,” Alcott says. “In most instances we were trying to create the feeling of natural light within the houses, mostly stately homes, that we used as shooting locations.”  The DP closely observed how natural light would come in through the windows and emulate that using diffused mini-brutes outside. This made it possible to shoot long days during the British winter when natural light was in short supply. Last week I covered in detail the technical innovations which allowed Alcott and Kubrick to shoot night scenes with just genuine candlelight, as 18th century painters would have seen and depicted them.


7. Contrast

Film stock in the seventies was quite contrasty, so Alcott employed a few methods to adjust his images to a tonal range more in keeping with 18th century paintings. He used a Tiffen No. 3 Low Contrast Filter at all times, with an additional brown net for the wedding scene “where I wanted to control the highlights on the faces a bit more,” he explains. He also used graduated ND filters (as in the above frame) both outdoors and indoors, if one side of the room was too bright. Most interestingly, he even went so far as to cover white fireplaces and doorways with fine black nets – not on the lens but on the objects themselves.


8. Blocking

The blocking in Barry Lyndon is often static. While this is certainly a creative decision by Kubrick, again recalling painted canvases and their frozen figures, it was also technically necessary in the candlelit scenes. Whenever the f/0.7 lenses were in use, the cast were apparently instructed to move as little as possible, to prevent them going out of focus. As one YouTube commenter points out, the stillness imposed by these lenses mirrors the stillness required of a painter’s model.

8 Ways “Barry Lyndon” Emulates Paintings

“Barry Lyndon”: The Full Story of the Famous f/0.7 Lenses

After seeing Barry Lyndon (1975) on the big screen this week, I felt compelled to write a blog post about its cinematography. But what aspect of the cinematography? The painterly look? The many zooms? The use of natural light?

What I knew for certain is that I should definitely not write about the entirely candlelit scenes lensed on f/0.7 Nasa glass, because everyone knows that story. However, reading the vintage American Cinematographer article and some other material, I found the details surrounding this groundbreaking use of high-speed lenses so interesting that I decided to do it anyway.


The Vision

Barry Lyndon is the 18th century tale of a low-born Irishman who strives – through various misadventures, and ups and downs of fortune – to become a gentleman. The key visual influence of director Stanley Kubrick and DP John Alcott, BSC were the great painters of the story’s era, such as Vermeer.

Next week’s post will look at this painterly influence in Barry Lyndon more closely, but for now the important thing is the use of candlelight on those classical canvases, and Kubrick’s desire to replicate that look. According to lens expert Ed DiGuilio, who was tasked with adapting the f/0.7 glass for Lyndon, Kubrick “wanted to preserve the natural patina and feeling of these old castles at night as they actually were”.

Typically in movies, a candle in frame may motivate the lighting, but most of the illumination on the actors actually comes from an orange-gelled lamp just out of frame. Kubrick wasn’t interested in shooting Lyndon that way. He wanted all the light in those night interior scenes to genuinely come from the candles themselves.


The Problem

How much light does a candle shed? Conveniently, there is a unit of illumination called the foot-candle. One foot-candle is the amount of light received from a standard candle one foot away. Without going into the detail of what a “standard” candle is, it is enough for our purposes to say that the scene below has a key light of about three foot-candles…

… because there are three candles, about a foot away from the actor’s face. (The level of your key light, and consequently where you set your aperture, is almost always measured at your subject’s face, as that is usually the focus of the shot and the most important thing to get correctly exposed. This is why we DPs are always waving light meters in actors’ faces.)

If we look at an exposure table, such as this one, we can see that a three foot-candle key can be correctly exposed with an aperture of T1.4 and an EI (exposure index) of 800. Today that would be no problem, with many digital cameras having a native EI of 800, and the availability of fast lenses like Zeiss Master Primes and Super Speeds.

In the mid-seventies however, long before the advent of digital cameras, things were not so simple. Kubrick and Alcott had little choice but to shoot on Eastman Kodak 100T 5254. Those first three digits denote the film stock’s exposure index: 100. Alcott pushed the stock (brought the brightness up during processing) one stop, re-rating it to an EI of 200. But it still needed four times more light, or two stops more light than our modern-day Alexa or Red. (Check out my post on f-stops and T-stops if you’re getting lost.)

If we’re losing two stops on the EI, we need to gain two stops on the aperture to compensate. And two stops up from T1.4 is T0.7. You may notice that T0.7 isn’t on that table I linked to. This is because a lens with such a large relative aperture pretty much doesn’t exist.

Pretty much…


The Solution

Kubrick obsessively researched the problem. He eventually discovered that Nasa had commissioned Carl Zeiss to build ten Planar 50mm f/0.7 stills lenses in the sixties, which were used to take photos of the dark side of the moon. (I was unable to find out the T-stop of these lenses, but I’ll assume it was close enough to T0.7 for it to make little difference to my calculations above.) The developments leading to these lenses stretched back through Nazi military applications during WW2 all the way to the late Victorian era, when the double-Gauss cell at the core of the lenses was first invented.

Anyway, Kubrick promptly bought three of the Zeiss Planars. He liked to own equipment himself, rather than hire it in, and to this end he had also purchased at least one Mitchell BNC camera. As befits Kubrick’s perfectionism, these were perhaps the world’s most precisely engineered cameras, previously used for special effects work.

This is where Ed DiGuilio comes in: “[Kubrick] called one day to ask me if I thought I could fit a Zeiss lens he had procured… to his BNC.” It wasn’t simply a case of the f/0.7 glass having the wrong mount. The rear element was so large and needed to be so close to the film plane that DiGuilio had to extensively modify the camera, literally cutting parts out of it.

Ed DiGuilio (left), President of Cinema Products Corporation, working on adapting a zoom lens for Kubrick’s Mitchell BNC

Once this was done, extensive testing ensued. The focus scale (distances marked on the barrel) had to be calibrated from scratch, and indeed the focus ring was re-engineered to allow the precision focusing that the lens’ tiny depth of field would require. Whereas the focus ring on a stills lens will turn about 90° to go from infinity to close focus, and the ring on a cine lens might turn 270°, the rings on these unique Planars now turned a whopping 720° – two whole revolutions!

50mm is a very useful lens length for close-ups, but Kubrick understandably wanted a wider option as well. Accordingly, DiGuilio located an adapter designed to adjust the throw of cinema projector lenses. Mounted onto one of the 50s, it gave an effective focal length of 36.5mm with only very minor light loss. A 24mm version was also tested, but Kubrick disliked the amount of distortion in its images, and rejected it.


The Execution

The colour brown and the trousers of Doug Milsone, Barry Lyndon‘s focus puller, cannot have been strangers to each other. Imagine trying to hold focus on this dolly-back at f/0.7!

By my calculations (which were difficult, because most depth of field tables/calculators don’t go to f/0.7!) an MCU on Kubrick’s 50mm Planar with the subject at 2.5m (8.2ft) and the iris wide open would have had a depth of field of about 43mm (1.7″). To get this same depth of field at f2.8, a popular working stop for cinematographers today, the subject would have to be just 1m (3.3ft) from the sensor plane, which would be a biggish close-up. And remember that focus monitors, peaking and Cine Tape did not exist in the seventies.

To give Milsone a fighting chance, a unique system of focus assist was developed. While the main camera shot an actor from the front, a CCTV camera captured them in profile. This profile image was piped to a monitor, over which a grid was placed. This grid was marked off with distances so that Milsone could see how much the actor had moved by, far more accurately than judging it by eye from beside the lens.

Another problem thrown up by the low-light cinematography was with the viewfinder. Interestingly, the Mitchell BNC was a non-reflex camera, meaning that it didn’t have a mirror on the shutter, reflecting the image to the viewfinder when the shutter was closed. Instead, the camera body racked over to one side to allow the viewfinder to get an image during line-ups and rehearsals, and when it was actually rolling the operator got their images from a side viewfinder with its own lens – just like in a disposable 35mm stills camera. The original prism-based viewfinder on Kubrick’s Mitchell BNC suffered from far too much light loss for a candlelit image to be visible through it, so it was replaced with a mirror-based viewfinder adapted from a Technicolor camera.

The shots resulting from all of these technical challenges are quite soft to the modern eye, but I think that only adds to their beauty. Barry Lyndon captured the exquisite fragility of candelight, and 42 years on the images are still unique and captivating.

“Barry Lyndon”: The Full Story of the Famous f/0.7 Lenses

“Above the Clouds”: February 2017 Pick-ups

Last weekend saw many of the crew of Above the Clouds reunite to shoot the remaining scenes of this comedy road movie. Principal photography was captured on an Alexa Mini during summer 2016 on location in Kent, on the Isle of Skye, and at Longcross Studio in Buckinghamshire, with additional location shooting on a Blackmagic Micro Cinema Camera in October.

The outstanding scenes were to be photographed on stage, at Halliford Studio in Shepperton, this time on an Arri Amira. The Amira uses the same sensor as the Alexas, allowing us to match the look from principal photography in the most cost-effective way. With the addition of a Premium license, the camera is capable of the same ProRes 4444 recording codec as the Alexas too. As per last summer, our glass was a set of Arri/Zeiss Ultra Primes, with a half Soft FX filter to take the digital edge off.

Director Leon Chambers designed and built the set himself, sending me photos of a scale model well in advance. He was also specific about certain lighting cues and states that were required across the two sets and six scenes we would be recording to complete the movie. Based on this information, I concocted a lighting plan, which I communicated to Halliford’s in-house gaffer Micky Reeves by Photoshopping stock images of lamps onto Leon’s set model photos.

Last Saturday was devoted to pre-lighting the sets, mainly the kitchen, while construction work continued on the second set.


Day 24 / Sunday

We begin with a morning scene. A 5K fresnel serves as a low sun, streaking across the back wall of the set (see my post about lighting through windows). Even with this direct light four stops over, the natural bounce off the set isn’t enough to bring actor Philip Jackson – with his back to the window – up to key. Micky rigs a Dedo firing into a soft silver bounce just out of frame to solve the problem.

Also coming through the window are two 4×4 kinos, rigged on goalposts above the window. Their daylight tubes reflect off the blinds, serendipitously creating the illusion of a blue sky “outdoors”, where in fact there is only a wall and a white backdrop.

Philip exits into the hallway and disappears from view, supposedly to go out through the front door. No door exists. Instead there is a flag which spark Amir Moulfi rotates in front of a 2K, creating a momentary oblong of light in which Philip’s shadow appears.

The next scene follows on from an exterior captured last October at dusk, when the natural light was soft, flat and cool in colour, cheated even cooler with the white balance. This failing daylight is to be the only source of illumination now in the kitchen set, until Philip enters and turns on the lights. This is the main reason that the daylight 4×4 kinos outside the window were rigged. A third kino from the direction of the front door is added, plus a small LED reporter light to pick an important prop out of the shadows.

Lead actress Naomi Morris enters, silhouetted against the windows. Then Philip enters and hits the lights. Simultaneously, Amir flips a breaker on a lunchbox, activating a hanging practical fixture above the breakfast bar and the 5K which that practical motivates.

Generally I don’t like toplight. It throws the eyes – those windows to the soul… or windows to the performance – into shadow. But with the hanging practical in shot, whatever I was going to use to beef it up had to be somewhat toppy or it wouldn’t make sense. I considered space-lights and Jem balls, but in consultation with Micky I ultimately picked a 5K with a chimera, coming in at a 45 degree back/toplight angle. As you can see from the photos, this looks almost comically large. But large and close means soft, which is what I want. It had to be soft enough to wrap both actors when they faced each other across the bar.


But why such a large lamp? Why not use a 2K, like Micky suggested yesterday? Bitter experience has always taught me to go with a bigger unit than you think you need, particularly if you’re softening it, and particularly if it’s going to take a while to rig. (The 5K was hung from another goalposts set-up.) We ended up dimming the 5K to 50% and scrimming it down a stop and a half. But having too much light like that is easy to deal with. If we had put up a 2K and it wasn’t bright enough, we would have to have taken the whole thing down and re-rigged with a 5K. And even if the 2K had seemed sufficient to begin with, blocking can often take actors into unexpected, dark corners of the set. Being able to turn up a dimmer a couple of notches to handle that kind of situation is very useful.

Besides the 5K, there are a few other sources playing: some 300W hairlights, a pup bouncing off the side of a cupboard to bring up the area around the cooker, a China ball in the hallway, and Leon’s Rosco LitePads serving as practical under-cabinet down-lighters.


Day 25 / Monday

I probably shouldn’t say what today’s set is, because it’s a little bit of a spoiler. There are some lighting similarities to the kitchen: again we have a character flicking a light switch, bringing on two hanging overhead practicals and a 2K with a chimera to beef them up.

A practical lamp on a desk was supposed to be turned on during the scene as well, but we all forget until it’s too late. It would have bounced off the desk and given Philip a little eye-light, and at first I regret losing this. But soon I realise that it is more appropriate for the scene not to have that level of refinement, for the lighting to be a little raw. The toppy, “broken key” angle of the chimera’s light works well for this tone too.

We wrap just before noon, releasing Naomi to high-tail it to Oxford to appear on stage in a musical this evening. Eventually there will be second-unit-style GVs and establishing shots to do, but there will only be three or four of us for that. For the cast and most of the crew, today brings Above the Clouds to an end, eight months after the camera first rolled.

See all my Above the Clouds posts here, or visit the official website.

“Above the Clouds”: February 2017 Pick-ups

“Above the Clouds”: Week 2

Day 7 / Monday

image
One of our biggest days, shooting several key scenes from the first act of the movie. We’re in the Turner Contemporary in Margate, and getting this location is a big coup for the production. On the flip side, the amount of material we have to get through in our nine hour day is only achievable if lighting is kept to an absolute minimum. I know from the photos that Leon has shown me that there is plenty of natural light from the floor-to-ceiling windows and bright white walls. I also know that with eight scenes on the day’s schedule, there isn’t time to rig the kind of extensive negative fill we used at the roadside cafe last week.

We start in the Turner’s cafe, where angles towards the windows look great with the beach and seafront in the background and the daylight wrapping softly from behind and one side. In the opposite direction the light is extremely flat, but there is no time to do anything but hand-bash a little negative fill, grin and bear it.

Upstairs in the gallery, the sea-view windows are so big and there is so much bounce off the walls that there is only about a single stop’s difference between looking towards the window and looking away from it. Nonetheless, we bring in poly and Celotex for the seaward shots to add a little shape and put nice reflections in the talent’s eyes.

Responding to the formality of the gallery setting, there is an unspoken agreement between Leon and I to shoot on sticks and compose centrally or symmetrically. I end the day feeling that we have captured some of the film’s most iconic images.


imageDay 8 / Tuesday

Back in Margate for seafront exteriors. The weather is lovely to start with, but gradually goes down hill as the day progresses. For the first scene we have light cloud, and we use the 8×8 full grid cloth as a bounce to fill in the shadows. For close-ups we add silver from Celotex or a Lasolite to give the talent extra radiance and a glint in their eyes. (See my post on Health Bounce for more on this.)

The influence of yesterday’s gallery scenes is still being felt on the compositions. In wide shots I try to use the horizon to divide the frame into two halves, like the diptych the characters were looking at in the Turner: one above the clouds (or more accurately OF the clouds), and one below. I use a graduated ND filter on most of the day’s wide shots. Even though the Alexa’s dynamic range means that grads are rarely necessary to retain the detail in skies, and they can be added in post, I prefer to get the look in camera, especially on a micro-budget project where time in the grading suite may be very precious.

The day ends with a dusk shot of Oz shuffling along the seafront, which we shoot in the window between the streetlights coming on and the daylight dropping off completely. I set the white balance to 3200K to emphasise the evening look. The colour and positions of the streetlights aren’t great, but there is a lot of production value in the backdrop of Margate, bathed in cool ambience and sprinkled with points of light.


imageDay 9 / Wednesday

Our first scene is on a layby overlooking an estuary. Again the weather starts off nice but deteriorates as the day goes on. By the time we get back to Leon’s for the next scene, the rain is getting noticeable enough that continuity with adjacent scenes is an issue. We decide to wrap for the day.

The camera team uses the time to re-build the Alexa Mini as small as possible and test different lenses inside the picture car for upcoming driving scenes. Our main angles will be from the back seat, looking diagonally forwards for three-quarter singles and straight ahead for a central shot over both driver and passenger’s shoulders to the windscreen. We find that the 24 and 32 work well for the former, and the 20 for the latter. We have a 14, because I knew space would be tight in the car, but it just looks like a Top Gear Go Pro shot.


imageDay 10 / Thursday

We’re in another tiny set in Leon’s living room. Production designer Zoë Seiffert has dressed it as a beautiful/hideous den of clashing patterns and colours, and practical lamps. First up is a day scene, newly added to the script, so as with the Travel Inn I fire in the 2.5K HMI, this time with the curtains open. That might seem like a ridiculous amount of light for a room only about 10ft square, but only a powerful source like that creates all the bounce and ambience that sun would. I make sure the direct beam only really hits the floor. For some shots I put a white sheet over the carpet to maximise the bounce off the floor.

For the night scenes Colin puts all the practicals on dimmers and I place one of Leon’s ETC Profiles outside the window with Urban Sodium gel. Although the curtains will be closed, they are thin enough to be backlit by this ‘streetlight’. The bulb is even visible through the curtains sometimes, but it totally passes as a streetlight. That’s the only source of light when the characters first enter in silhouette, before turning up the practicals.

imageTo beef up the practicals, we rig a couple of Dedos to the top of the set and direct one through sheets of Opal hung from the ceiling, as a key, and use the other as backlight with half CTO on it. We tweak them around shot by shot to follow the blocking. For a scene with more character conflict, I lose the backlight and go hard with the key.

Later we move to another location – conveniently the cottage neighbouring the one where most of us are staying – for a little doorstep night scene. Again I rake the 2.5K along the front of the building, through the full silent grid cloth. In the singles we beef up the existing exterior sconce with three tungsten globes wrapped in Opal. I would rather have used an 800 bounced off poly, for a softer texture, but our package is pretty lacking in tungsten units.

After wrapping we throw a surprise birthday party for Zoë. Colin lights the party with a remote-controlled colour-changing LED fixture and smoke.


imageDay 11 / Friday

We have two hours in a charity shop to set up (including blacking out windows), shoot two scenes, and tear down. Leon decides to shoot them both using only torchlight, and choreographs the cast to light each other throughout the scenes. We hide silver Lasolites and other bounces around the set to reflect the torchlight when it doesn’t make sense for the actors to point their torches where they’re needed. We smoke up the shop heavily to show up the beams.

To anchor the shots, so the pools of torchlight aren’t floating around in a black nothingness, I set two lamps in the background. One, a Divalite gelled with Urban Sodium, spills out of a changing room, and the other, a 1×1 LED panel gelled heavily blue to suggest a computer screen, glows out from behind the counter. As well as adding colour, and colour contrast, to the scene, the pools of light from these two lamps serve to silhouette the characters so you get a sense of where they are when the torch beams aren’t on them.

image

We move to a forest car park for the film’s only major night exterior. With our HMI package consisting of only a 2.5K and 1.2K, and no tungsten bigger than a Dedo, this was always going to be challenging. We place the 2.5K in the deep background, purely to light up the smoke and foliage behind the action. The action itself is lit by the 1.2K and two 1×1 LED panels, plus smaller panels taped to the dashboards of the vehicles in the scene.

To get it all done with the time and resources we have, a compromise must be made somewhere with the lighting. I decide that this compromise will be motivation of sources. Other than dashboard lights, there should really only be one source in this scene: the moon. If I had time, I would move the biggest source around to backlight every shot and then bounce it back as sidelight. Instead we leave the HMIs mostly where they are, and fly the 1×1 panels around to backlight or sidelight as needed. It makes no sense whatsoever, but it looks good.

“Above the Clouds”: Week 2

“Above the Clouds”: Week 1

Principal photography has begun on my latest feature, Above the Clouds, a comedy road movie written by Simon Lord and directed by Leon Chambers. The film stars Naomi Morris as Charlie, an 18-year-old learner driver who sets off on an epic road trip from Margate to Skye with a ‘gentleman of no fixed abode’ as her responsible adult.


imageDay 1 / Monday

It’s a very different shoot to my last one. With a five figure budget and a total crew of about ten or twelve, we’re lean and mean. About a quarter of that crew are working for me – 1st AC Rupert Peddle and 2nd AC Max Quinton, veterans of Heretiks, and my long-serving one-man lighting team, Colin Smith. We’re shooting on an Alexa Mini. Although it’s lovely how much lighter it is than the full-size model, it’s quite fiddly. It doesn’t help that the EVF is faulty, and while we wait for a replacement Max has to change many of the settings via a smartphone app. The lenses are Arri/Zeiss Ultra Primes, my first time with these, and I’m once again using a half Soft FX filter to take off the digital edge.

We start with a dining room scene. As many of the sets will be, it’s built in director Leon Chambers’ living room, so it’s not very big. We’re prepared for this though, and Leon has purchased several Rosco Litepads in 6″x2″, 4″x4″ and 12″x12″ sizes. We stick a 4×4 to the wall behind each character as hairlights, and rig the two 6x2s, at a perpendicular angle to each other, to a flag arm. Wrapped in unbleached muslin, they’re a pleasing key.

image

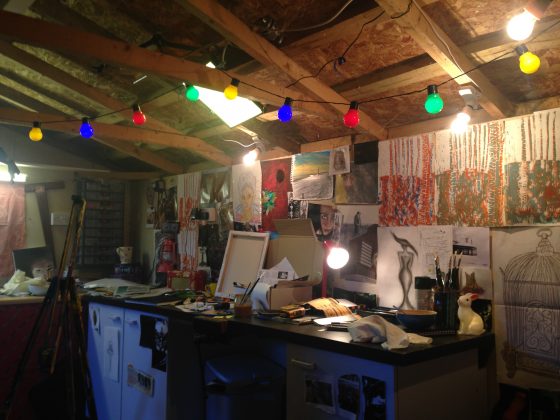
After lunch we move into the shed, dressed as a young artist’s studio, complete with coloured string lights. Colin and I add three tungsten bulbs as additional practicals, plus a couple of the Litepads amongst the rafters. Outside the window we place a 4×4 kino or 2.5K HMI depending on the time of day.


imageDay 2 / Tuesday

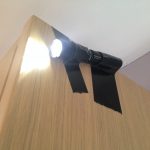
Today we’re in Leon’s kitchen primarily, but with several of the scenes spilling into the hall and porch. We put our two HMIs outside the windows and initially use an LED panel on top of a cabinet and my brand new torch gaffered to the side of a cabinet to augment these for a scene that is meant to have an evening feel. Then we move onto a proper daylight scene and those have to go, to ensure all the light seems to be coming in from outside. The other reason they have to go is that we are now doing an ambitious steadicam shot which moves from the kitchen to the hall and porch, then back into the kitchen, then back into the hall and porch as characters exit the house. To the two HMIs we add the 4×4 kinoflo shining down the stairs, augmenting the natural light coming down from the landing windows. Thanks to the Alexa’s large dynamic range, we are able to accomplish the shot without any clipping, even when the door opens and when the characters move through the darkest part of the hall. The rest of the day passes in variations on the theme. I quickly find that the window positions are limiting and a fair bit of head scratching to make the angles work goes on before we wrap.


Day 3 / Wednesday

Back in the kitchen, one of our first scenes involves heavy smoke as a story beat. I decide to go with purely natural light, so that it’s soft enough to illuminate the smoke evenly, rather than producing shafts or pools.

After lunch we shoot a dusk scene in broad (albeit overcast) daylight. I cool down the white balance to 4300K and use a .9 soft edge graduated ND, just edging into frame, to bring down the sky a little.

Later we move to a garage, a scenario in which all the light is coming from outside through the door. Although this looks flat when the camera is looking into the garage, I decide not to fight that. When we look the other way I use matt silver bounce and a 4×4 kino to fill in.


Day 4 / Thursday

image

We’re on location at a roadside cafe, and I agonised long last night about how much lighting gear we should take. We don’t have transpo or security so reducing the kit means a lot less hassle for us all, though generally I prefer to have everything to hand just in case. Ultimately I decided to keep it small – just LEDs, a 4×4 kino and then flags and bounce – knowing from location photos that there will be plenty of natural light.

In fact there’s too much. The photos failed to warn me of the skylights, which take a while to block with floppy flags and Easy Up walls clipped between them. Leon has set me up for success though by choosing to shoot the scene with the windows (and therefore the key light) in the background. Flagging the skylights and ambience allows the window light to wrap around the actors in a pleasing fashion, and makes for great modelling in the close-ups, with the window light hitting the talent’s down-sides. This natural light approach requires you to work with and respond to that natural light as well, and so I embrace the appropriate ‘broken key’ look that the sun position creates on male lead Andrew, a homeless man with a troubled past. (‘Broken key’ is a term Shane Hurlbut uses to describe a key light striking the talent not quite from the side, but slightly behind.)

imageLater we shoot a scene in the Fiat 500 ‘Yellow Peril’ outside in the car park. I use a rota polar to find the perfect amount of reflection in the car windows, striking a balance between seeing some clouds (the film is called Above the Clouds after all) and seeing the characters inside.

Again the 4×4 kino proves the ideal source to bring up the light coming through the windscreen, due to its shape and softness. As shooting progresses, the sky darkens. A storm is coming. We drop the kino down to one tube, quartering the amount of key light and therefore allowing me to turn off the Alexa Mini’s internal .6 ND, bringing up the background by 2 stops and re-balancing the overall exposure. But after one more take the rain begins, and we have to wrap. Fortunately we seem to have everything we need in the can.


Day 5 / Friday

After watching the news in shock over breakfast, and wondering just how badly Brexit is going to screw the UK film and TV industry, we head to Leon’s for some more scenes in his living room studio. This time it’s dressed as a Travel Inn, and my lighting is motivated by the bedside practicals on the back wall. (Lighting from the back first – always a good plan.) We put a dedo above each practical and a divalite between those to give us something softer and little wrappy. The only other sources are a third practical and a Mustard Yellow gelled 1×1 LED panel outside the window, representing a streetlight. For a morning scene in the same set we put a 2.5K HMI outside the window and let the closed curtains diffuse it, with no other sources.

The set is then reconfigured into reception, and I employ a cross-backlighting set-up, with an added LED panel to represent the glow from a computer monitor.


imageDay 6 / Saturday

Today’s location is a tiny little mechanic’s garage in the middle of nowhere. Most of the scenes take place in the doorway, so we are at the mercy of the weather, which is incredibly changeable. Bright sunshine, cloud and heavy showers alternate throughout the day.

On the first set-up I ask to wait for cloud on at least one take because I can see from the sky that is going to be the easiest thing to match to as the day goes on. Balancing the light inside and outside the garage will also be easier in cloud, even though the Alexa’s incredible dynamic range can handle it in bright sun too.

Aside from the weather, the big challenge for me is making the shots looking into the garage have depth. The best depth is normally achieved by having the brightest area of the frame be the background, and the darkest area the foreground. Looking into the garage though, the opposite is true. But there are other ways of creating depth. One is to make pools of light with practicals, so I leave on the location’s suitably grungy fluorescents. Another is smoke, so we pump a little in and use a 2.5K HMI through a window and a 4×4 kino tucked around a corner to pick it up.

image

After dinner we have a very brief night scene to do. The blocking suggests raking the 2.5K across the front of the building which will also three-quarter-backlight the talent. Extensive experience of doing this in the past warns me that the angle of incidence could cause a massive reflection of the lamp in the shiny garage door, so I choose the lamp position carefully, and push it through an 8×8 frame of full silent grid cloth to mitigate any glare. Also this particular film seems to call for a ‘softly, softly’ approach to moonlight. It’s not fantasy, it’s contemporary comedy, so most of the time my night sources will be streetlights to keep it feeling realistic, but when I have to use moonlight as motivation I don’t want it to be hard and draw attention to itself.

The diffusion looks great, and the door is glare free, but I failed to consider the window. Fortunately Rupert spots a way to flag it. Saved by a great team!

All in all, a very productive day and a good week.

“Above the Clouds”: Week 1