6 Things to Beware of with Vintage Lenses

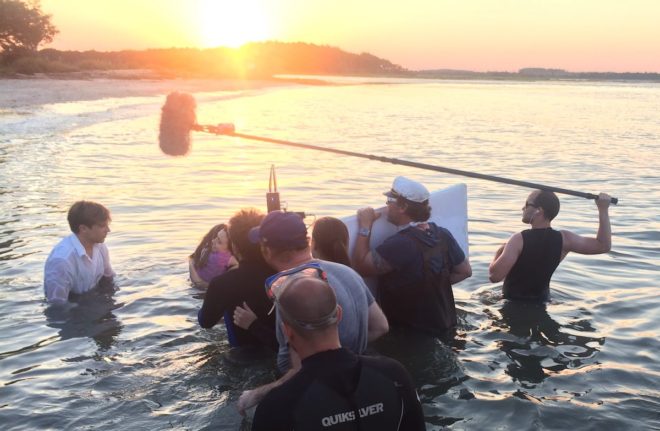
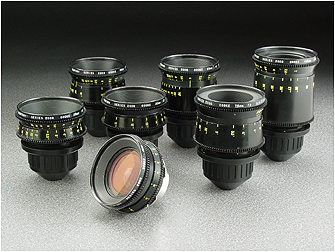
Ever since digital cinematography became the norm, DPs have sought to counter the format’s perfection with characterful vintage lenses. Having just completed a feature film shoot, Hamlet, on Cooke Panchros and a Cooke 10:1 Varotal, I’m over the moon with the beautiful, creamy, organic look they brought to the production. However, I can’t deny that they have some disadvantages over modern glass which you should take into consideration before choosing the vintage approach.


1. Softness

Vintage lenses simply aren’t as sharp as their modern counterparts, particularly at the edges of frame and particularly when the iris is wide open. On Hamlet I deliberately shot with the Panchros wide open to soften the image, rather than adding a diffusion filter like I’ve often done in the past, but that look is not for everyone, and it does make things a little harder for your focus puller. Be sure to test the sharpness and view the results on a large screen before committing.


2. BreathING

Breathe is the phenomenon whereby a lens appears to zoom slightly in or out when the focus is pulled. The Cooke Varotal is especially prone to this. As a result, my focus puller Aristide Russo had to be very gentle with his pulls otherwise the breathing was distracting.


3. Veiling

Many DPs love lens flares, and beautiful, natural flares were one of the reasons I picked the vintage Cooke glass. But look out for veiling flare – a milkiness and lift in the shadows affecting the whole frame. I noticed this a lot when shooting under the practical fluorescents in Hamlet‘s stage set, especially with handheld shots where the veiling would appear and disappear depending on the camera’s angle to the lights. I decided to embrace it and make it part of the film’s look, but if maintaining high contrast at all times is important to you, lenses without modern coatings may not be the right choice.


4. Vignetting

Check for dark patches in the corners of your image. The Varotal I used vignetted at certain parts of the zoom range and not at others, so the dark corners would appear and disappear during a zoom. Although not ideal, it isn’t noticeable most of the time. Besides, I figured that most colourists add vignettes to most shots anyway, so I was simply saving them a little time!


5. Mechanics

Older lenses are, quite naturally, less reliable. Even if they have been rehoused, like our Cooke “Century” Panchros had been in 2000, you may find that the iris and/or focus sticks sometimes. Our 25mm started to play up halfway through our shoot, forcing Aris to use the rosettes to support the matte box, otherwise the motor wasn’t powerful enough to turn the focus ring. This possibility was flagged for me during testing when we had a similar issue with the 50mm. Even if all your lenses seem to be fine during prep, know that a vintage lens could start misbehaving at any time, and your rental house may not have another on the shelf to replace it with.


6. Uniformity

Don’t expect a set of vintage primes to all have the same maximum aperture or the same external configuration. The iris ring might be buried in the matte box, the matte box might not fit on at all, or it may be impossible to engage both iris and focus motors at the same time.


All this sounds quite negative, but the flares, softness, breathing and vignettes can be absolutely beautiful. Be aware of the downsides of using vintage glass, absolutely, but if they suit your story then embrace the flaws and get ready to be blown away by your dailies.

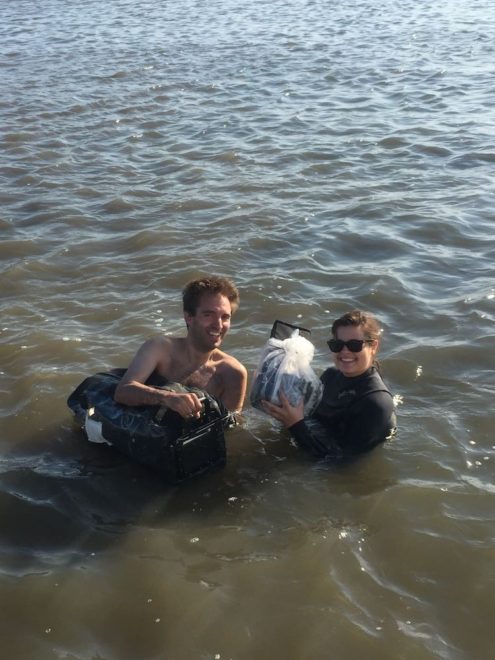
In case you missed them the first time, I’ll leave you with some highlights from my Hamlet lens tests.

6 Things to Beware of with Vintage Lenses

“The Little Mermaid”: Sun, Sea and Cinematography

(Spoiler alert!) The denouement of The Little Mermaid takes place in the waves on a picturesque beach, where Cam (William Moseley) has carried Elizabeth (Poppy Drayton). In true fairytale style, our hero and heroine finally share their first kiss, parting to reveal the flaring orange sun behind them, just above the horizon. By the time we got to this sequence, we had already shot some water scenes, but those were in controlled, studio-like conditions. Working with natural light and real waves was going to be a whole different ball-game.

Here are some extracts from my diary, revealing how this magical moment was ultimately captured.


Day 22

Scenes at the beach today, with actors in the ocean. We’ve been worried about this sequence since the earliest stages of preproduction. Will the cast get too cold? Will it be too dangerous with waves and jellyfish and razor-sharp oyster beds? Will we get the magical dawn lighting the script requires? Building a partial beach set against green-screen was considered for a long time, but eventually shooting on a real beach, and this one particular beach, turned out to be our only option. (We’re back on Tybee Island, the same island we did the Shirley Shoot on so very long ago, and Baywatch seems to have all the other beaches tied up.)

The weather is good, with a cloudless sky. We’re cheating sunset for sunrise, and I know exactly where the sun will go down, thanks to the Helios and Sun Tracker apps.

We get ready to go into the water shortly after 6pm. The ACs put the camera in the splash bag and we bring it into the ocean. It starts to leak. Which is pretty much the last thing you want to happen. We pull it out before the camera gets damaged, but now we’re wondering how to shoot the scene. Someone suggests I just put the camera on my shoulder (I’m only going in up to my waist) and a couple of the crew spot me to make sure I don’t drop it. Sounds risky, doesn’t it? But it works. Meanwhile Captain Dan joins us in his waders to hand-bash a polyboard bounce, and the ‘B’ camera team are on a pontoon trying to get alternate angles.

Perhaps the most important thing I do today is ask Will to pick Poppy up the other way around. You see, when we’re about to turn over, Will picks up Poppy with her head to his right and her tail to his left. But I can see that if they play the scene with Poppy this way around, I will end up framing the two-shot with my back to the sun, losing that magical image of the low sun in the background, and probably casting camera shadows on them to boot. So I ask Will to pick Poppy up the other way around.

As the sun races towards the horizon, we get two magical takes. I’m constantly reframing to keep the setting sun in the background, and as the hero and heroine kiss, it flares out perfectly between them. Everyone is ecstatic.


Day 23

‘B’ cam 1st AC Geran Daniels on the pontoon with the Alexa XR Studio and the hefty Angenieux 19.5-94mm Optimo

It’s another beautiful day, and the first task is to go out on the pontoon and shoot Poppy’s double swimming about in the mermaid tail. I use the Angenieux zoom for only the second time (it normally lives on the ‘B’ camera), and for the first time on my shoulder. Damn, that thing’s heavy. But my shoulder has worse to come today.

As sunset approaches, we must shoot pick-ups for Saturday’s water scene with the principal cast. Today the tide is much lower at sunset, and getting out to a deep enough spot (up to around waist or chest level) means walking over very squelchy mud which you sometimes sink in up to your knees, and sharp oyster beds. So instead we get into the water via the pontoon. This boat has a limited capacity, so I’m dropped off on the first trip, before it returns to the dock twice more to get the rest of the cast and crew who are needed. It’s extremely pleasant to swim about in the ocean (more of an estuary really) while we wait.

In the water with 2nd AC Kane Pearson and some expensive electronics. The white patch on the splash bag is the $5 of tape!

Line producer Fabio has proudly repaired the leaky splash bag with a $2 bicycle inner tube patch. 2nd AC Kane, a big spender, added $5 of tape, and we successfully tested it before we set sail.

Because the splash-bag doesn’t fit our Alexa’s viewfinder, Kane has to hand-bash a 5.6” monitor in a ziplock bag (along with a Teradek receiver and battery) so that I can see what I’m shooting. This works pretty well though. The hardest thing is the mud; it’s impossible to find a firm spot, so during the takes I’m always sinking and trying to keep my balance and follow the action at the same time. Kane has to prop me up on a couple of occasions.

For all the material in the ocean I stick to a (Cooke S4i) 32mm lens; the zoom won’t fit in the splash housing, and lens changes take too long. (The cast can only be in the water for 30 minutes at a time, according to Screen Actors Guild rules.) Although we mostly shoot at water level, where the splash bag floats and is easy to control, one set-up requires me to put it on my shoulder. The weight is quite something, but with help I get the shot.

With the water scenes wrapped, and the tide now higher, we swim back to shore. We’ve been in the water at least three hours, and it was exhausting but a lot of fun too.

That concludes my blog series on The Little Mermaid. If you missed any of the earlier instalments, here are the links:

Don’t forget, if you’re in the UK, the film is currently available from all good high-street DVD retailers and on Amazon as a DVD or download.

SaveSave

SaveSave

SaveSave

“The Little Mermaid”: Sun, Sea and Cinematography

8 Ways “Barry Lyndon” Emulates Paintings

Stanley Kubrick’s 1975 period epic Barry Lyndon, although indifferently received upon its original release, is considered a masterpiece by many today. This is largely due to its painterly photography with strong, precisely composed frames that leave the viewer feeling more like they’ve wandered through an art gallery than watched a movie. Today I’m going to look at eight methods that Kubrick and his team used to create this feel. It’s an excellent example of how a director with a strong vision can use the many aspects of filmmaking to realise that vision.


1. Storytelling

The American Cinematographer article on Barry Lyndon notes that “Kubrick has taken a basically talky novel and magically transformed it into an intensely visual film.” You have only to look at a series of frame-grabs from the movie to see just how much of the story is contained in the images. Just like a painter, Kubrick reveals a wealth of narrative within a single frame. The shot above, for example, while recalling the landscapes of artists like Constable in its background and composition, also clearly tells the story of a courtship threatened by a third party with violent designs.


2. Design

Kubrick was keen for Lyndon to feature the type of rich fabrics which are often seen in 18th century art. He referred costume designer Milena Canonero to various painters of the period. “Stanley wanted beautiful materials,” she recalls in the documentary Stanley Kubrick: A Life in Pictures, “because as he quite rightly said, that’s why in those paintings they gave that wonderful light.”


3. Aspect ratio

There was much confusion and controversy surrounding Kubrick’s intended ratio for Lyndon. The negative was apparently hard-masked to 1.6:1, with the result that VHS and DVDs used this ratio, while the images were vertically cropped to 1.78:1 for the later Blu-ray release. However, the discovery in 2011 of a letter from Kubrick to cinema projectionists finally proved that 1.66:1 was the ratio he wanted audiences to see the film in.

1.66:1 was a standard ratio in parts of Europe, but unusual in the UK and USA. It’s not far off the golden ratio (1.6180:1) – a mathematically significant ratio which some artists believe to be aesthetically pleasing. There is evidence that Kubrick was not a fan of wide aspect ratios in general, perhaps because of his background as a photographer, but it can be no coincidence that Lyndon distances itself from the cinematic ratios of 1.85 and 2.39, and instead takes a shape closer to that of a typical painting.

(Most of the images in this post come from Evan Richards’ Cinematographers Index, and he in turn grabbed them from the 1.78:1 Blu-ray. The image above is in 1.66:1 but shows the 1.78:1 crop-lines.)


4. Composition

“The actual compositions of our setups were very authentic to the drawings of the period,” says DP John Alcott, BSC in his interview with American Cinematographer. Perhaps the film’s most obvious compositional nod to classical art is the large amount of headroom seen in the wide shots. As this article by Art Adams explains, the concept of placing the subject’s head at the top of the frame is fairly new in the history of image creation. Plenty of traditional art includes lots of headroom, and Lyndon does the same.


5. Camera movement

There is little camera movement in Barry Lyndon, but there are 36 zoom shots. Unlike a physical dolly move, in which the parallax effect causes different planes of the image to shrink or enlarge at differing rates, a zoom merely magnifies or reduces the whole image as a single element. This of course only serves to enhance the impression of a two-dimensional piece of art. In fact, the zooms resemble nothing so much as the rostrum camera moves a documentary filmmaker might make across a painting – what today we’d call a Ken Burns effect.

It’s interesting to note that, although Barry Lyndon is famous for its fast lenses – the f/0.7 Zeiss Planar primes – the movie also used a very slow lens, a custom-built T9 24-480mm zoom. From various accounts, other zooms used seem to include a Cooke T3.1 20-100mm and possibly a 25-250mm of some description. Of course, none of the zoom lenses were anywhere near fast enough for the candlelit scenes, so in those instances the filmmakers were forced to use a Planar and pull back physically on a dolly.


6. Lighting

“In preparation for Barry Lyndon we studied the lighting effects achieved in the paintings of the Dutch masters,” Alcott says. “In most instances we were trying to create the feeling of natural light within the houses, mostly stately homes, that we used as shooting locations.”  The DP closely observed how natural light would come in through the windows and emulate that using diffused mini-brutes outside. This made it possible to shoot long days during the British winter when natural light was in short supply. Last week I covered in detail the technical innovations which allowed Alcott and Kubrick to shoot night scenes with just genuine candlelight, as 18th century painters would have seen and depicted them.


7. Contrast

Film stock in the seventies was quite contrasty, so Alcott employed a few methods to adjust his images to a tonal range more in keeping with 18th century paintings. He used a Tiffen No. 3 Low Contrast Filter at all times, with an additional brown net for the wedding scene “where I wanted to control the highlights on the faces a bit more,” he explains. He also used graduated ND filters (as in the above frame) both outdoors and indoors, if one side of the room was too bright. Most interestingly, he even went so far as to cover white fireplaces and doorways with fine black nets – not on the lens but on the objects themselves.


8. Blocking

The blocking in Barry Lyndon is often static. While this is certainly a creative decision by Kubrick, again recalling painted canvases and their frozen figures, it was also technically necessary in the candlelit scenes. Whenever the f/0.7 lenses were in use, the cast were apparently instructed to move as little as possible, to prevent them going out of focus. As one YouTube commenter points out, the stillness imposed by these lenses mirrors the stillness required of a painter’s model.

8 Ways “Barry Lyndon” Emulates Paintings