5 Ways to Fake Firelight

Real SFX run a fishtail on the set of “Heretiks”

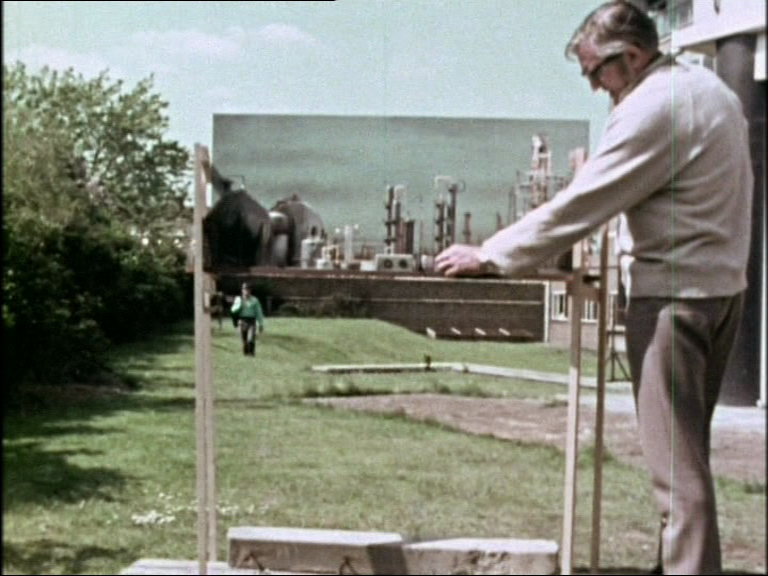
Firelight adds colour and dynamism to any lighting set-up, not to mention being essential for period and fantasy films. But often it’s not practical to use real firelight as your source. Even if you could do it safely, continuity could be a problem.

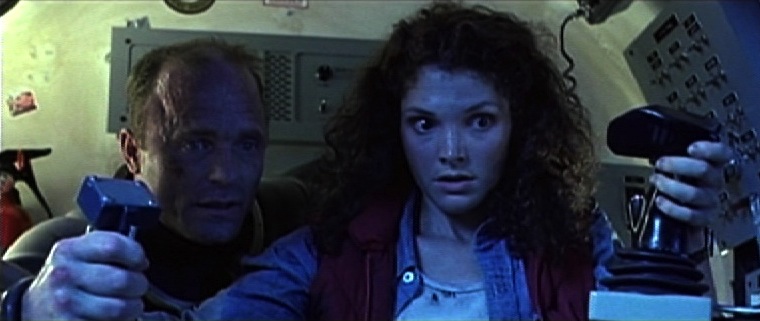
A production that can afford an experienced SFX crew might be able to employ fishtails, V-shaped gas outlets that produce a highly controllable bar of flame, as we did on Heretiks. If such luxuries are beyond your budget, however, you might need to think about simulating firelight. As my gaffer friend Richard Roberts once said while operating an array of flickering tungsten globes (method no. 3), “There’s nothing like a real fire… and this is nothing like a real fire.”


1. Waving Hands

The simplest way to fake firelight is to wave your hands in front of a light source. This will work for any kind of source, hard or soft; just experiment with movements and distances and find out what works best for you. A layer of diffusion on the lamp, another in a frame, and the waving hands in between, perhaps?

Visit my Instagram feed for loads more diagrams like this.

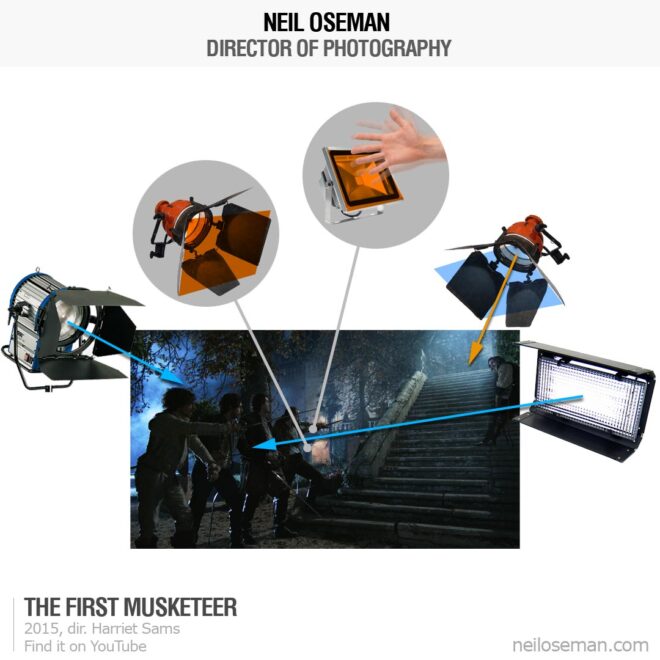
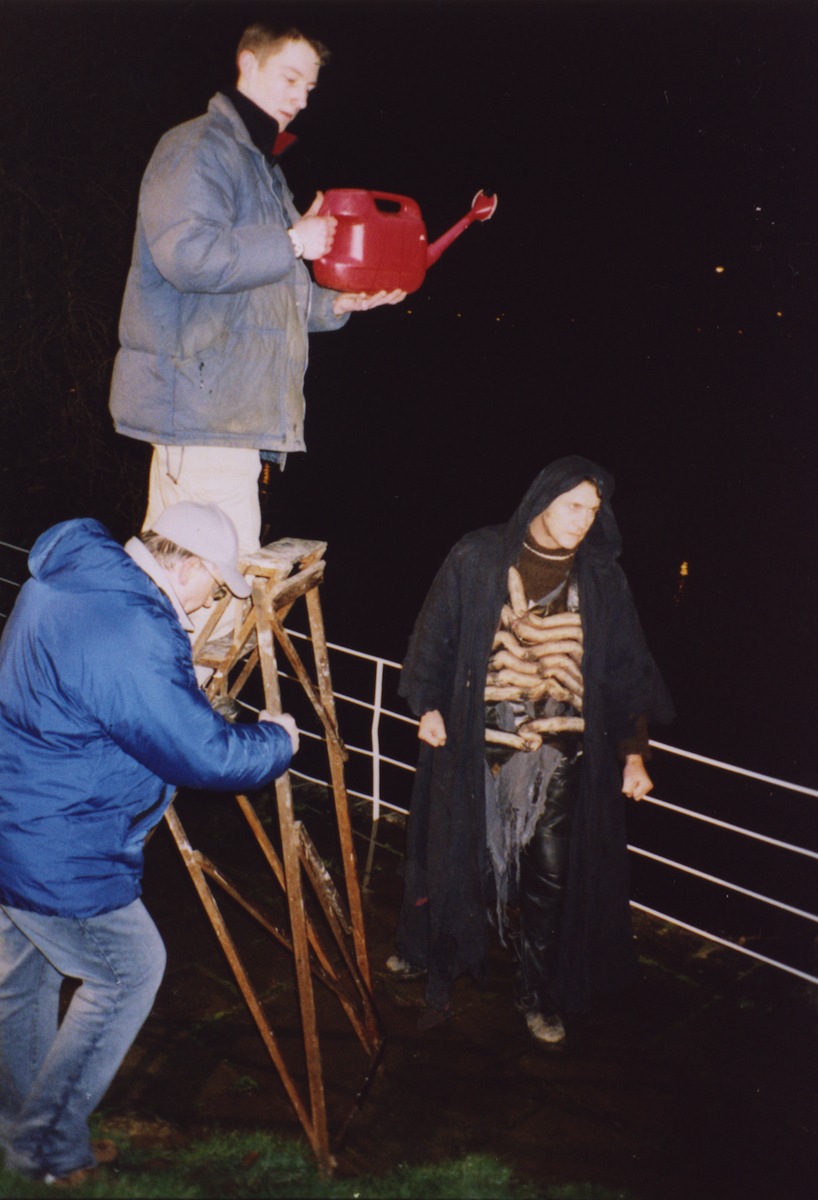
One of my favourite lighting stories involves a big night exterior shot from The First Musketeer which was done at the Chateau de Fumel in the Lot Valley, France. We were just about to turnover when a bunch of automatic floodlights came on, illuminating the front of the chateau and destroying the period illusion of our scene. We all ran around for a while, looking for the off switch, but couldn’t find it. In the end I put orange gel on the floodlights and had someone crouch next to each one, wiggling their hands like a magician, and suddenly the chateau appeared to be lit by burning braziers.


2. Wobbling Reflector

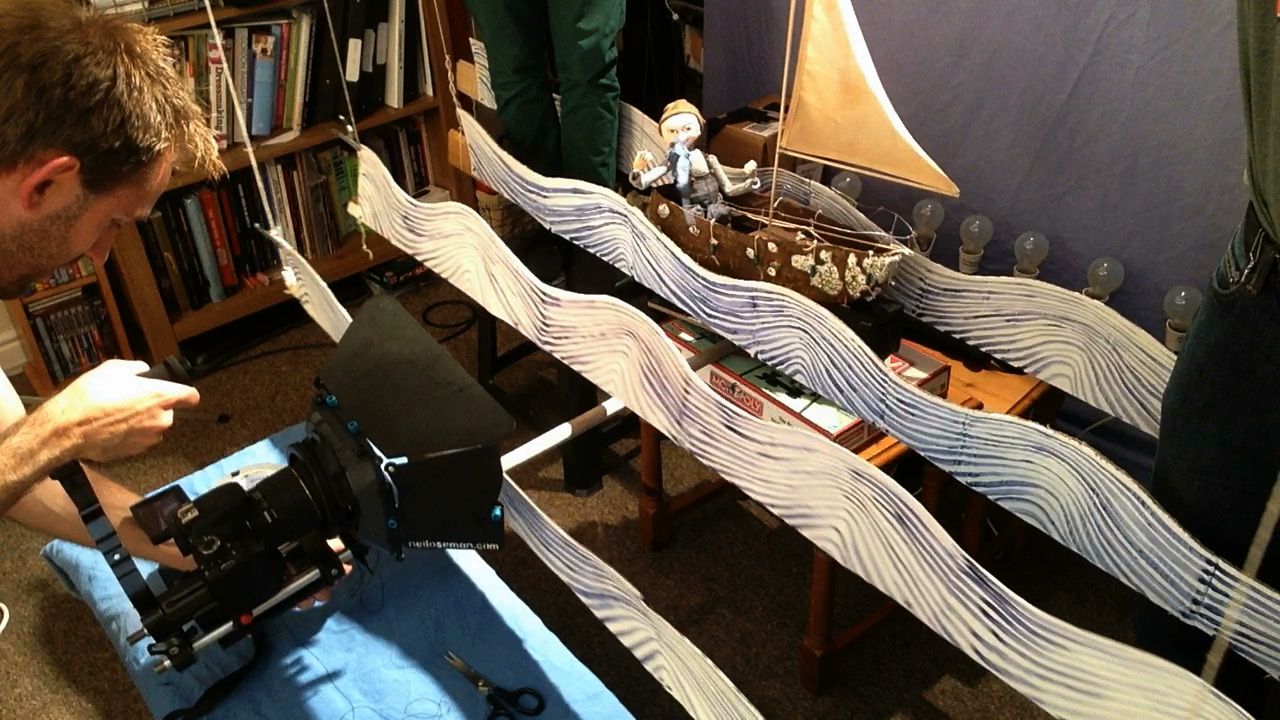
This is my go-to technique – quick, easy and effective. It’s demonstrated in my Cinematic Lighting course on Udemy and also in this episode of Lensing Ren:

All you need is a collapsible reflector with a gold side, and an open-face tungsten fixture. Simply point the latter at the former and wobble the reflector during the take to create the flickering effect.


3. Tungsten Array

If you want to get more sophisticated, you can create a rig of tungsten units hooked up to a dimmer board. Electronic boxes exist to create a flame-like dimming pattern, but you can also just do it by pushing the sliders up and down randomly. I’ve done this a lot with 100W tungsten globes in simple pendant fittings, clipped to parts of the set or to wooden battens. You can add more dynamics by gelling the individual lamps with different colours – yellows, oranges and reds.

John Higgins’ 2MW firelight rig from “1917”

Larger productions tend to use Brutes, a.k.a. Dinos, a.k.a. 9-lights, which are banks of 1K pars. The zenith of this technique is the two megawatt rig built by gaffer John Higgins for Roger Deakins, CBE, BSC, ASC on 1917.


4. Programmed L.E.D.

Technological advances in recent years have provided a couple of new methods of simulating firelight. One of these is the emergence of LED fixtures with built-in effects programmes like police lights, lightning and flames. These units come in all shapes, sizes and price-ranges.

Philip Bloom’s budget fire-effect rig on location for “Filmmaking for Photographers”

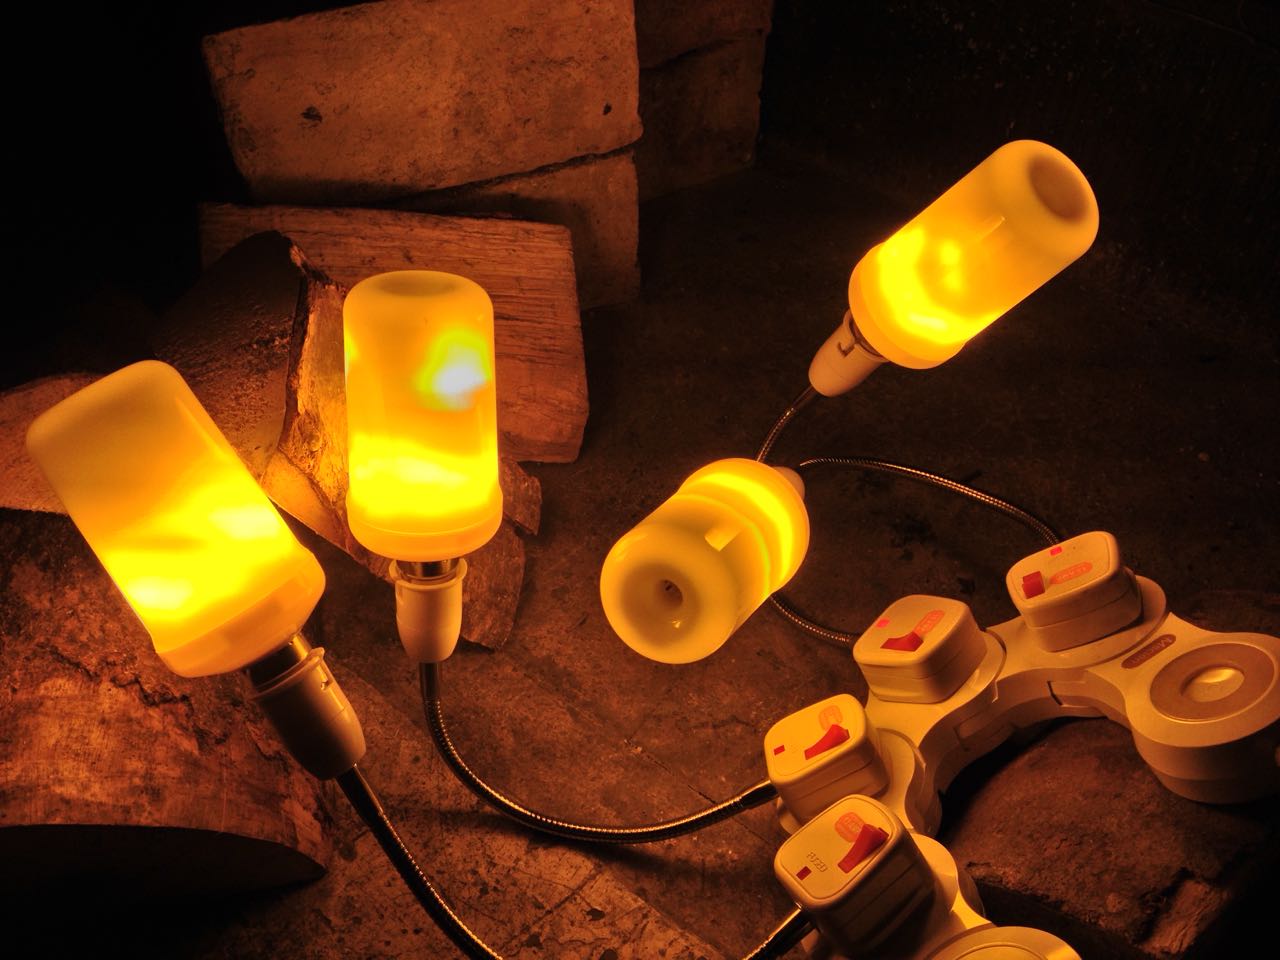
On War of the Worlds: The Attack last year, gaffer Callum Begley introduced me to Astera tubes, and we used their flame effect for a campfire scene in the woods when we were having continuity problems with the real fire. For the more financially challenged, domestic fire-effect LED bulbs are cheap and screw into standard sockets. Philip Bloom had a few of these on goose-neck fittings which we used extensively in the fireplaces of Devizes Castle when shooting a filmmaking course for Mzed.


5. L.e.D. Screen

A logical extension of an LED panel or bulb that crudely represents the pattern of flames is an LED screen that actually plays video footage of a fire. The oil rig disaster docu-drama Deep Horizon and Christoper Nolan’s Dunkirk are just two films that have used giant screens to create the interactive light of off-camera fires. There are many other uses for LED screens in lighting, which I’ve covered in detail before, with the ultimate evolution being Mandalorian-style virtual volumes.

You don’t necessarily need a huge budget to try this technique. What about playing one of those festive YouTube videos of a crackling log fire on your home TV? For certain shots, especially given the high native ISOs of some cameras today, this might make a pretty convincing firelight effect. For a while now I’ve been meaning to try fire footage on an iPad as a surrogate candle. There is much here to explore.

So remember, there may be no smoke without fire, but there can be firelight without fire.

5 Ways to Fake Firelight

Poor Man’s Process II

Back in 2013 I wrote a blog about Poor Man’s Process, a low-tech method of faking shots inside a supposedly moving car, using lighting gags and camera movement to sell the illusion. But Poor Man’s Process doesn’t have to be limited to cars.

While gaffering for DP Paul Dudbridge on By Any Name, we had to tackle a nighttime scene in which the hero flees through a forest. Rather than trying to get close-ups with any kind of tracking rig, Paul decided to use a technique apparently favoured on Lost, whereby the actor and camera are stationary, and lights and branches are moved around them to create the impression of movement.

It worked a treat, so when faced with a very similar scene on Ren, I shamelessly ripped Paul off. The actors weren’t sure; they felt pretty silly running on the spot, but we persevered. My lighting set-up used the 2.5K HMI, already rigged for earlier shots, as a side key, and an LED panel as three-quarter backlight. Branches were waved in front of both to throw shadows, and I shook the camera a lot.

Poor Man’s Process was required a second time on the series, in the very last scene, on the very last day of the shoot.

Sophie Skelton (Ren) and Duran Fulton Brown (Hunter) ride Tony the Phony Pony. Photo: Miriam Spring Davies

By this time we were one big happy family and we were all having far too much fun. Gaffer Squish was singing “One Day More” from Les Miserables, actor Duran was riding Tony The Phony Pony like a rodeo champ, candy was being freely imbibed and marshmallows were being toasted. The Poor Man’s shot seemed more like an extension of us all just larking about than anything else.

Ren and Hunter were required to ride off into the moonlight on a single horse, but the horse in question was quite jumpy and not safe for the actors to ride. Designer Chris and production assistant Claire knocked up the highly impressive phony pony, which was used extensively, but moving it fast enough for the final shot was out of the question.

Claire Finn prepares for some arboreal lighting action. Photos: Miriam Spring Davies
Claire Finn prepares for some arboreal lighting action.

So Tony remained stationary while Claire, her sister Alex and producer Michelle threw dignity to the wind and ran around with bits of trees.

I was using the 2.5K HMI as backlight, and a 1.2K HMI bounced off Celotex as a side key. Claire, I think, was on the 2.5K, jiggling a branch about to create some nice dynamism cutting up the hard backlight. Alex, if I recall rightly, was doing a windmill action with her branch in front of the Celotex. Michelle, meanwhile, stood ready with her branch until director Kate called “Tree!”, at which point Michelle would run past at full pelt and Sophie (Ren) would duck under the branch she was supposedly riding by.

You can see some behind-the-scenes footage in Lensing Ren episode 5.

Aided by smoke, a wind machine and the obligatory camera shake, the whole thing was quite effective. Less so the Epping Forest shots, which didn’t make the final cut. Somehow the running-on-the-spot was never quite convincing. Not enough choppy shadows, maybe?

My last project was a $4 million feature, but even that called for Poor Man’s in one instance. A small train carriage set piece had to appear to be moving as our heroes jumped onto it, so in front of each light we placed a ‘branch-a-loris’, a kind of man-powered windmill made from scaff tube and branches. Again lots of smoke, wind and camera shake were employed to sell the illusion.

I think Poor Man’s Process is one of my favourite techniques. It doesn’t always work, but if there’s enough movement in the camera and the lighting, and it’s cut in with genuine wide shots, it can often be extremely effective.

If you’ve enjoyed this post, please do me a little favour and vote for Ren: The Girl with the Mark in the Melbourne Web Fest Audience Award Poll (find us in the drama section). It only takes a moment!

Poor Man’s Process II

The Visual Effects of The Abyss

It’s time for one of my occasional asides celebrating the world of traditional visual effects – miniatures, matte paintings, rear projection, stop motion and the like. For a film using all of those techniques, look no further than The Abyss (1989). Arguably James Cameron’s most underrated film, it can also be considered his most ambitious. Whereas Terminator 2 had bigger action scenes, Titanic had a bigger set and Avatar had more cutting edge technology, these concerns all pale in comparison to the sheer difficulty of shooting so much material underwater.

The hour-long documentary Under Pressure makes the risks and challenges faced by Cameron and his crew very clear.

The Abyss won an Oscar for Best Visual Effects, and is remembered chiefly for the then-cutting-edge CG water tentacle. But it also ran the gamut of traditional effects techniques.

The film follows the crew of an experimental underwater drilling platform, led by Bud (Ed Harris), as they are roped into helping a team of navy divers, led by Lt. Coffey (Michael Biehn), investigate the sinking of a submarine. Underwater-dwelling aliens and cold war tensions become involved, and soon an unhinged Coffey is setting off in a submersible to dispatch a nuke to the bottom of the Cayman Trench and blow up the extra-terrestrials.

When Bud and his wife Lindsey (Mary Elizabeth Mastrantonio) give chase in a second submersible, a visual effects tour de force ensues. The following methods were used to build the sequence:

abyss1

  • Medium-wide shots of the actors in real submersibles shot in an abandoned power station that had been converted by the production into the world’s largest fresh-water filtered tank, equal in capacity to about eleven Olympic swimming pools.

abyss2

  • Close-ups of the actors in a submersible mock-up on stage.

abyss3

  • Over-the-shoulder shots of the actors in the submersible mock-up, with a rear projection screen  outside the craft’s dome, showing miniature footage accomplished with….

abyss4

  • Quarter-scale radio-controlled submarines, shot in a smaller tank. These miniatures were remarkably powerful and, due to the lights and batteries on board, weighed around 450lb (204kg). In order to see what they were doing, the operators were underwater as well, using sealed waterproof joysticks to direct the craft. The RC miniatures were used when the craft needed to collide with each other, or with the underwater landscape, and whenever the audience was not going to get a good look at the domes on the front of the submersibles and notice the lack of actors within.

abyss5

  • One of the custom film projectors inserted into the miniature subs
    One of the custom film projectors inserted into the miniature subs

    Where a more controlled camera move was required, or the actors needed to be visible inside the subs, but it was not practical to shoot full-scale, motion control was used. This is the same technique used to shoot spaceships in, for example, the original Star Wars trilogy. A computer-controlled camera moves around a static model (or vice versa), exposing film very slowly in order to maintain a large depth of field. The move is repeated several times for each different vehicle under different lighting conditions, before compositing all of the “passes” together on the optical printer in the desired ratios, to achieve the final look. For The Abyss’s motion control work, the illusion of being underwater was created with smoke. In shots featuring the submersibles’ robot arms, stop motion was employed to animate these appendages. But perhaps the neatest trick was in making the miniature subs appear to be inhabited; the models were fitted with tiny projectors which would throw pre-filmed footage of the actors onto a circular screen behind the dome.

The sub chase demonstrates perfectly how visual effects should work: mixing a range of techniques so that the audience never has time to figure out how each one is done, and using an appropriate technique for each individual shot so that you’re making things no more and no less complicated than necessary to tell that little piece of the story.

My favourite effect in the sequence is near the end, when the dome of Coffey’s sub cracks under the water pressure. This was filmed over-the-shoulder using rear projection for the view outside of the dome. But the dome was taken from a real submersible, and as such was too thick and too valuable to be genuinely cracked. So someone, and whoever he or she is is an absolute genius, came up with the idea of using an arrangement of backlit sellotape on the dome to create the appearance of a crack. A flag was then set in front of the backlight, rendering the sellotape invisible. On cue, the flag was slid aside, gradually illuminating the “crack”.

crack

Now that, my friends, is thinking outside the box.

The Visual Effects of The Abyss

Five Simple But Effective Camera Tricks

Today I’m running down the five simplest yet most effective camera tricks I’ve used in my films. These are all techniques that have been used on the biggest Hollywood productions as well.

1. Looming Hollywood Sign (The Beacon)

Building Moon's forced perspective corridor
Building Moon’s forced perspective corridor

In amongst all the terrible CGI, The Beacon did feature the odd moment of low-tech triumph. As a damaged helicopter dives towards the Hollywood hills, the famous sign is reflected in the sunglasses of the injured pilot, played by my friend and fellow filmmaker Rick Goldsmith. The letters were actually 2″ high cardboard cut-outs stuck to a black piece of card, and Rick himself is holding it at arm’s length and moving it slowly towards his face.

This is a type of forced perspective shot, which I covered in my previous post. Die Hard 2’s airport control tower set was surrounded by a forced perspective miniature of the runways, complete with model planes, and more recently Duncan Jones and his team used the technique to create an endless corridor of clone drawers in Moon.

Colin Smith readies the watering can for Jonny Lewis's close-up, while Chris Mayall steadies the ladder.
Colin Smith readies the watering can for Jonny Lewis’s close-up, while Chris Mayall steadies the ladder. Photo: Simon Ball

2. Rain Fight Close-ups (Soul Searcher)

While most of this fight sequence was shot under the downpour created by an industrial hosepipe fired into the air, this wasn’t available when extra close-ups were required later. Instead a watering can was used.

It’s not uncommon for close-ups in a scene to be achieved much more simply than their corresponding wide shots. NASA allowed Bruce Willis and Ben Affleck to be filmed in their training tank for Michael Bay’s Armageddon, but CUs of the other actors had to be shot dry-for-wet with a fishtank in front of the lens and someone blowing bubbles through it.

3. The Wooden Swordsman Catches His Sword (The Dark Side of the Earth)

Getting the puppet to genuinely catch his sword was likely to require a prohibitive number of takes. (We were shooting on 35mm short ends.) So instead we ran the action in reverse, ending with with the sword being pulled up out of the puppet’s hand. When the film is run backwards, he appears to be catching it.

Backwards shots have been used throughout the history of cinema for all kinds of reasons. Examples can be seen in the Face Hugger sequence in Aliens (the creature’s leaps are actually falls in reverse) and in John Carpenter’s The Thing (tentacles grabbing their victims). At the climax of Back to the Future Part III, the insurers refused to allow Michael J. Fox to sit in the DeLorean while it was pushed by the train, in case it crushed him, so instead the train pulled the car backwards and the film was reversed.

4. Distortion of Tape and Time (Stop/Eject)

A classic Who extermination

At a crucial point in this fantasy-drama about a tape recorder that can stop and rewind time, I needed to show the tape getting worn out and images of the past distorting. I combined two techniques to create a distorted image of Dan (Oliver Park) without any manipulation in post. One was lens whacking, whereby the lens is detached from the camera and held in front of it, moving it around slightly to distort the focal plane. (See this episode of Indy Mogul and this article by Philip Bloom for more on lens whacking.) The other was to shake the camera (and lens) rapidly, to deliberately enhance the rolling shutter “jello” effect which DSLRs suffer from.

Flaws in camera technology can often lead to interesting effects if used appropriately. Let’s not forget that lens flares, which many filmmakers love the look of, are actually side-effects of the optics which lens manufacturers have worked for decades to try to reduce or eliminate. And in the early days of Doctor Who, the crew realised that greatly over-exposing their Marconi TV cameras caused the image to become a negative, and they put this effect to use on the victims of Dalek extermination.

Shooting The One That Got Away. A row of 100W bulbs can be seen on the right.

5. Sunset (The One That Got Away)

A painted sunset would have been in keeping with the style of this puppet fairy tale, but it was quicker and more effective to peek an ordinary 100W tungsten bulb above the background waves. Click here for a complete breakdown of the lighting in The One That Got Away.

Using an artificial light to represent the sun is extremely common in cinematography, but showing that lamp in shot is less common. For another example, see the opening Arctic sequence of Captain America: The First Avenger, in which a large HMI stands in for a low sun at the back of the mist-shrouded set.

Click here for my rundown of the top five low-tech effects in Hollywood blockbusters.

Five Simple But Effective Camera Tricks

Forced Perspective

The Ark
The Ark

The other day I watched a 1966 Doctor Who story called The Ark. It’s easy to look at a TV show that old and laugh at the stilted acting, rubber monsters and crude effects. But given the archaic and draconian conditions the series was made under back then, I can only admire the creativity displayed by the director and his team in visualising a script which was scarcely less demanding than a contemporary Who story.

Studio floor plan from the very first episode of Doctor Who, showing camera positions (coloured circles)

In the sixties, each Doctor Who episode was recorded virtually as live on a Friday evening, following a week of rehearsals. BBC rules strictly limited the number of times the crew could stop taping during the 90 minute recording session, which was to produce a 22 minute episode. Five cameras would glide around the tightly-packed sets in a carefully choroegraphed dance, with the vision mixer cutting between them in real-time as per the director’s shooting script. (Interesting side note: some of Terminator 2 was shot in a very similar fashion to maximise the number of angles captured in a day.) It’s no wonder that fluffed lines and camera wobbles occasionally marred the show, as there was rarely time for re-takes.

But what’s really hard for anyone with a basic knowledge of visual effects to get their head around today is that, until the Jon Pertwee era began in 1970, there was no chromakey (a.ka. blue- or green-screening) in Doctor Who. Just think about that for a moment: you have to make a science fiction programme without any electronic means of merging two images together, simple dissolves excepted.

Setting up a foreground miniature for a later Who story, Inferno (1970)

So the pioneers behind those early years of Doctor Who had to be particularly creative when when they wanted to combine miniatures with live action. One of the ways they did this in The Ark was through forced perspective.

Forced perspective is an optical illusion, a trick of scale. We’ve all seen holiday photos where a friend or relative appears to be holding up the Eiffel Tower or the Leaning Tower of Pisa. The exact same technique can be used to put miniature spaceships into a full-scale live action scene.

In these frames from The Ark, two miniature landing craft are lowered into the background before the camera pans to a full-size craft in the foreground:

The camera pans from a miniature descending in the background to a full-scale craft in the foreground.

And in these later frames, another miniature craft is placed much closer to the camera than the Monoid (a.k.a. a man in a rubber suit). The miniature craft takes off, pulled up on a wire I presume – a feat which time, money and safety would have rendered impossible with the full-size prop:

The camera pulls focus from a foreground miniature taking off to an actor in the background. A greater depth of field would have made the shot more convincing, but  the principle is sound.
The camera pulls focus from a foreground miniature taking off to an actor in the background. A greater depth of field would have made the shot more convincing, but the principle is sound.

Of course, Doctor Who was not by any means the first show to use forced perspective, nor was it the last. This nineties documentary provides a fascinating look at the forced perspective work in the Christopher Guest remake of Attack of the 50 Ft. Woman, and other films…

And Peter Jackson famously re-invented forced perspective cinematography for the Lord of the Rings trilogy, when his VFX team figured out a way to maintain the illusion during camera moves, by sliding one of the actors around on a motion control platform…

So remember to consider all your options, even the oldest tricks in the book, when you’re planning the VFX for your next movie.

Forced Perspective

The Miniature Effects of “The Day of the Doctor”

The cannon miniature

The fiftieth anniversary special of Doctor Who has been lauded for its cinema quality FX; indeed, I saw it in a cinema and at no point did I feel like I was just watching a TV show on a big screen. The Time War sequence was particularly impressive, and in amongst the CGI and special effects you may be surprised to learn there were some miniature effects which helped to up the ante. These were created by Mike Tucker and his team at The Model Unit, who a few years back did such a brilliant job of building the Wooden Swordsman for my Dark Side of the Earth pilot. This press release from the Model Unit reveals their contribution and how it was done.

The Model Unit’s involvement in Doctor Who: Day of the Doctor was for the Time War section of this historic episode, providing several cutaways of the Time Lord staser cannon (including its destruction) and a longer sequence showing John Hurt’s TARDIS crashing through a wall and destroying several Daleks that are unlucky enough to be in its path.

Model Unit supervisor Mike Tucker working on the Wooden Swordsman for The Dark Side of the Earth back in 2008

Following an initial discussion with producer Marcus Wilson to establish the sort of shots that might be needed Miniature Effects Supervisor Mike Tucker met up with stereo supervisors Adam Sculthorp and David Wigram to work through the practicalities of shooting high speed miniature effects sequences in 3D – a first for a British television drama production.

A proof of concept test utilising an existing miniature established that the models shouldn’t be smaller than 1/6th scale, and ideally at 1⁄4 scale. Further research established that the miniature effects sequences for the Martin Scorsase movie ‘Hugo’ had been done at 1⁄4 scale and with the same Alexa high speed camera rigs that we were planning to use, and so we were able to proceed with a certain amount of confidence that what we were about to do was realistically achievable.

Blowing up the cannon

With a five-week lead-time and a two-day shoot in Cardiff in April of this year model construction was split between several Model Unit regulars. Alan ‘Rocky’ Marshal was given the task of constructing the staser cannon, Nick Kool took on the TARDIS model and associated rigs and Colin Mapson worked with new recruit Paul Jarvis on the ruined Arcadian buildings and breakaway wall sections.

In a nod to past effects sequences, the Dalek miniatures were achieved in the time honoured way by utilising off-the-shelf toys (in this case the 18 inch voice- interactive toys that had been produced by Character Options a few years back), albeit with a few careful modifications in order to match them more closely to the actual props. Further detail was added to the interiors, including a scaled model of the mutant creature.

Model Unit DoP Peter Tyler worked closely with main unit DoP Neville Kidd to establishing a lighting design for the miniatures as, due to camera rig availability, we were shooting our miniatures in advance of the live action unit – a complete reversal of how things are usually done.

Close collaboration was also needed with the production design team with Mike and assistant art director Richard Hardy constantly swapping notes about the final design details of both Time Lord machinery and architecture to ensure a seamless blend with the location.

Day one of the shoot concentrated on the shooting of the cannon allowing the more complex rig of the TARDIS to be set up and tested, whilst the second day took in several takes of the TARDIS shots. The 1⁄4 scale TARDIS miniature was fixed to a steel rig mounted on a trolley system that allowed us to fire it at the wall using bungee cord.

Filming the Tardis breaking through the wall

Two takes of each set up were shot on two high speed Alexa stereo rigs shooting at 120fps.

Mike and his crew watched the completed episode at the Doctor Who Celebration at Excel with an audience of 2000 fans.

Visit The Model Unit’s website at www.themodelunit.co.uk

The Miniature Effects of “The Day of the Doctor”

Soul Searcher: Low Tech FX

In this 2005 featurette I break down many of the visual effects in my feature film Soul Searcher, revealing how they were created using old school techniques, like pouring milk into a fishtank for apocalyptic clouds. Watch the shots being built up layer by layer, starting with mundane elements like the water from a kitchen tap or drinking straws stuck to a piece of cardboard.

Soul Searcher: Low Tech FX

Planning VFX: Traditional Techniques

Over a month ago I wrote a post about the advantages of computer generated imagery over more traditional ways of creating visual effects. Apologies for the delay, but here at last is the flipside of that coin: the advantages of old-school technqiues.

Here’s an alternate ending from Blade (1998)….

It was ditched after test audiences responded poorly to it. They had invested in the film’s villain throughout the movie and they felt cheated to see him turn into a CGI blobby thing for the final battle. The filmmakers cut the scene and replaced it with a sword duel between Blade and the baddie in human form.

This highlights CGI’s chief difficulty – it’s unreality. There is something disappointing about being served up an image that has been created with ones and zeros. It feels like a cheat. And that can take an audience out of the story.

In contrast to CGI, model shots tend to look more realistic but move less realistically, due to the unavoidable physics involved. But there can often be a charm to this motion that allows us to forgive it. Indeed, I think the best reason to use traditional effects today is when you want things to look unreal in a very appealing way. Take for example Lemony Snicket’s A Series of Unfortunate Events, which used forced perspective and painted backdrops to create a beautiful fantasy world. Or The Life Aquatic’s stop motion marine creatures…. except that the animation was so good they looked real.

Some other advantages of traditional techniques over CGI:

  • Some techniques, like puppetry, can be achieved in camera, giving the actors something real to react to.
  • All the randomness of nature is automatically built in.
  • Effects like fire and water are theoretically easier, though in practice can be difficult to control and to scale correctly.
  • Today’s audiences are used to CGI and can generally recognise it, but model shots are perhaps more likely to fool them.

In writing this post I’ve realised how CGI has advanced even in the few years since I stopped actively developing The Dark Side of the Earth (an ambitious fantasy feature intended to include stop motion, puppetry, miniatures and matte paintings).

Almost no-one today is still shooting miniatures without enhancing them digitally. Savvy filmmakers like Peter Jackson, Duncan Jones and Sam Mendes combine models and CGI to get the best of both worlds. It seems traditional techniques alone can really only be used now as a deliberate stylistic choice. That saddens me. I’d be delighted if anyone can prove me wrong.

If anyone out there is contemplating using miniatures in their indie film, here are some tips…

Planning VFX: Traditional Techniques

Practical Rain Effect

How do you create nice, thick, artificial rain for a dramatic fight scene, with no budget to speak of? Here’s how we did it on Soul Searcher.

This is a clip from the feature-length documentary Going to Hell: The Making of Soul Searcher. You can rent the whole doc digitally from the Distrify player below for a small charge, and you can watch Soul Searcher itself for free at neiloseman.com/soulsearcher

The clip shows how we created a fake downpour for a fight between the outgoing Grim Reaper, Ezekiel (Jonny Lewis, doubled by Simon Wyndham), and his replacement, Joe (Ray Bullock Jnr.). Ironically it was actually raining for real, but not heavily enough to show up on camera with the impact we needed. We’d had some rain bars made (lengths of hosepipe with holes drilled in them, strapped to bamboo canes) but we found the water squirted out in unrealistic jets. Luckily the location – Westons Cider in Much Marcle, Herefordshire – had a high pressure hose and we found that by pointing it upwards the water back down looking like rain.

See last week’s post for how to add rain (and snow) onto scenes after the fact.

Practical Rain Effect

Falsification of Precipitation

Yesterday I had to shoot some fake snow. Ironic, I know, given the weather lately, but it had to be composited over a pre-existing shot. Various software plug-ins are available to add snow to a shot, but I’m of the school of thought that says it’s always better to use a real thing. Even if it’s a fake real thing.

A few years back, Col sent off for some free samples of artificial snow from a weather effects company called Snow Business. (Eternal winter in Narnia? That was them.) When Miguel pointed out that a snow-covered shot of Belper’s bandstand in Stop/Eject looked like a still photograph in the edit, I saw a way to make use of these samples to bring some movement into the frame.

From the box of samples we picked one that appeared to be made of shredded carrier bags, because it floated the most realistically as it fell. I suspect you could make some of this yourself with a lot of patience and a few trips to Tesco. I set up black drapes with a redhead poking over the top to ensure that the snowflakes would be backlit without any direct light falling on the drapes. Then we rolled the camera and started sprinkling.

Afterwards it was a simple case of using screen mode (or ‘Add’ in Final Cut Pro) to combine the footage with the background shot. This mode gives exactly the same results as double-exposing a traditional photograph would: the black areas naturally become transparent because they have no brightness.

Must resist temptation to use snow-based puns...
Must resist temptation to use snow-based puns…

Several years ago, Col and I did exactly the same thing with rain, filming water from a hosepipe in his back garden against a black night sky, then layering it on top of scenes from Soul Searcher.

Must also refrain from rain puns. Uh-oh, I said "refRAIN"...
Must also refrain from rain puns. Uh-oh, I said “refRAIN”…

We also shot one scene for Soul Searcher in “real” rain – real in so far as it was actually there falling on the actors, but not in so far as it actually came from clouds. Perhaps I’ll upload a behind-the-scenes clip of that for my next post.

Meanwhile, if you’re going out to shoot in real snow, check out the tips I posted a couple of weeks ago.

Falsification of Precipitation