Creator Harriet Sams and some of The First Musketeer cast presented a panel at ExiliCon, a gaming and genre convention, last weekend, and their discussion of the Fumel scenes brought back some memories of lighting it which I’d like to share. The Chateau de Fumel stood in for the musketeers’ barracks, appearing most prominently at the end of episode three from 8:32 onwards. (Click here for a playlist of the whole season.)

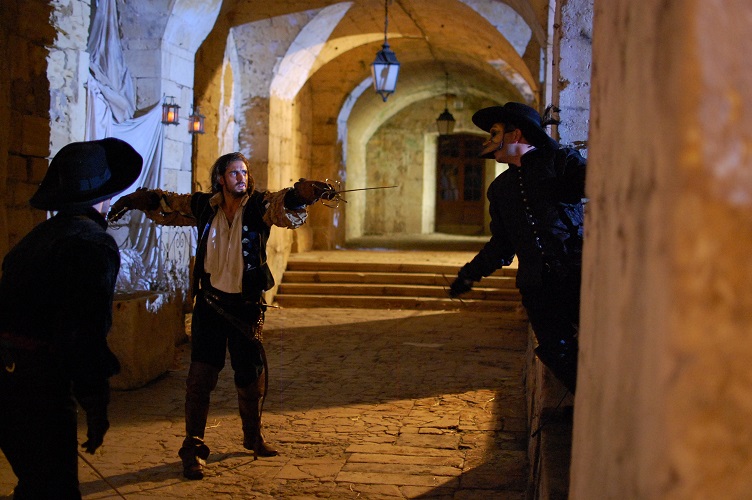
Set at night, like most of the show, the scene involved two major steadicam shots tracking up and down a covered walkway. This walkway was essentially a corridor which, save for pillars, was open along one side.
One of the steadicam shots was a walk-and-talk dialogue scene, the other an epic single shot fight scene. Tracking shots in corridors are always a pain to light because there’s never anywhere to put backlight without it coming into frame. Ideally you use practicals in the ceiling, but despite scratching our heads over it for a while, gaffer (and Steadicam op) Richard “Squish” Roberts and I couldn’t figure out any way to rig lights to the ceiling without damaging the historical building or getting some part of the rigging in shot.
In fact, the only possible place to hide lights – except behind camera, which would have made for a flat, boring image – was in the garden outside the walkway. So all the light would be side-light, broken up the pillars and the bushes between those pillars.
Here’s the lighting scheme I arrived at:

I decided to fire in “moonlight” from our 2.5K HMI, positioned on the far side of the garden. Shooting at a white balance of 3,200K, this would appear blue on camera. (We were shooting on Squish’s Blackmagic Cinema Camera, using a Tokina 11-16mm f2.8 zoom or a Sigma 20mm f1.8 for wide shots.)

Then I had Squish set up two or three 800W open-face tungsten lamps as 3/4 backlights, spaced evenly along the run. We gelled these with CTO so that they’d appear orange on camera, suggesting firelight sources of some kind. (The First Musketeer is full of implied firelight sources, because we were never able to have naked flames in the locations!)

The final touch was to light the far end of the corridor, to give the shot some deep background. We tucked a 2′ 4-bank Kinoflo (with tungsten tubes) into a little alcove and shone it at the back wall. To provide a third layer of colour to the image, while still staying within the palette of firelight, I gelled this with Straw. When the smoke catches the light, it gives a nice bright patch in the background which is great for the depth of the image.
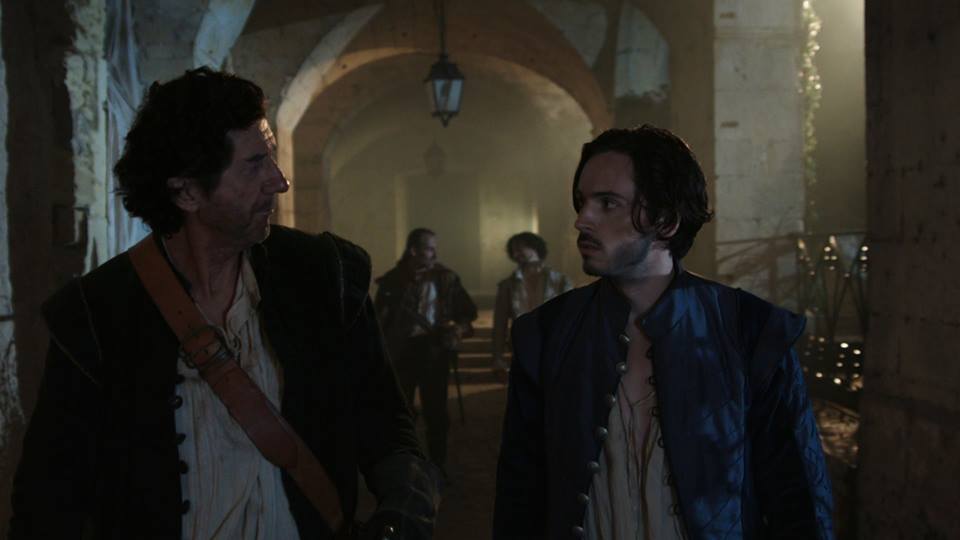

Later in the scene we moved out to the far side of the garden, shooting back towards the building as the Duke de Luynes thanks Athos and friends for their help.
The 2.5K stayed in the the same place, 3/4 backlighting the heroes, side-lighting the duke and 3/4 front-lighting the building. The 800s were moved inside the walkway and hidden behind pillars.
Another source was required to rake the heroes’ profiles and backlight the duke. This was another 800, gelled with half CTB for a vaguely starlight look, placed at the top of the steps. When I have stairs in a shot I always like to put a lamp at the top and fire it down so that it catches the top of every step, as it does here.
We were all set up and ready to turn over on this wide shot, when suddenly the building’s automatic floodlights came on. We hunted high and low, but couldn’t find the switch to turn them off. Instead, I placed a piece of CTO over each of the floodlights and assigned members of the crew to hold their hands over the lights, wiggling their fingers. The result is that the front of the building appears to be uplit by brazieres. It works beautifully and adds another layer of depth which we couldn’t have created otherwise, because all our film lamps were already in use.
You should always be ready to improvise like this when shoots throw you a curve ball.

Visit The First Musketeer’s YouTube channel to view the whole series for free. The show is © First Musketeer Ltd 2014.