20 Facts About the Cinematography of Mad Max: Fury Road

cars

The Australian Cinematographers’ Society has released a video of a two hour talk by Fury Road DP John Seale, ACS, ASC. It’s a fascinating watch, with lots of interesting info and some dry Aussie wit; more than once Seale talks about “taking to the drink” when things got tricky!

Watch the video here. (Embedding is disabled.)
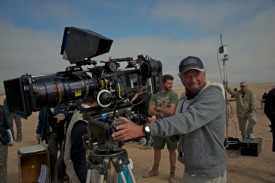
John Seale, ACS, ASC

Here are the most interesting points I took from it, with a few extra details added from American Cinematographer’s article on Fury Road:

  1. The team spent years developing a new 3D camera based on a sensor built for the US military. Director George Miller wanted something rugged enough to survive dusty desert work and small enough to fit into the truck cabs. Camera tests revealed it had only five stops of dynamic range, nowhere near enough to capture detail both outside and inside the cabs in the same frame.
  2. The film was ultimately shot on Arri Alexas (four Ms and six Pluses) and converted to 3D in post. Absolutely no consideration to the 3D format was given during shooting.
  3. When early footage failed to please DIT Marc Jason Maier and his meters, Seale agreed to downrate the Alexa from its published 800 ASA to 400 ASA. The subsequent footage was deemed technically correct by Maier and made Seale much more comfortable that he was recording what he thought he was recording in terms of exposure.
  4. Dailies were rendered with two different LUTs: the standard Rec 709 and a custom one designed to emulate a one-light celluloid work-print. This was for the benefit of Seale, for whom Fury Road was his first digital movie.
  5. Canon 5D Mark IIs with the Technicolor CineStyle profile were used as crash cams. Sky replacement had to be executed on many of the 5D shots to remove banding, presumably caused by the small colour space.
  6. Olympus and Nikon DSLRs were used a little as well.
  7. For close-ups of Max escaping the Citadel early in the film, a Blackmagic Cinema Camera with a Tokina 11-16mm zoom (a combination I used frequently on The First Musketeer!) was rigged on a Movi.
  8. The film was lensed predominantly on zooms, with a few Super Speed primes kept on standby for when the daylight was running out.
  9. Custom-built 15mm and 16mm primes were used inside the cab of the War Rig. The lenses’ hyperfocal distance had been adjusted so that everything from 0′ to 9′ (i.e. everything inside the cab) would be in focus.
  10. Lighting and camera rigs hung from the roofs of the vehicles had to be stripped back because of the shadows they cast. Instead, platforms were rigged on the sides of the trucks, and a track-and-pulley system was built into the War Rig’s cab’s ceiling from which cameras could be suspended.bts
  11. Scenes in the cab were shot at T5.6, with strips of LEDs mounted on the ceiling and on the pillars between the front and rear doors to bring up the actors inside.
  12. Day-for-night scenes were overexposed by two stops so that characters in the shadows could be lifted in the grade, if necessary, without noise.
  13. The film was storyboarded early on, but a script was only written when the studio demanded it!
  14. Miller wanted to shoot everything single-camera, including action, but Seale began sneaking in with extra cameras and soon convinced his director of the efficacy of this method.
  15. Much of the film was shot as Poor Man’s Process, or “Sim Trav” as Seale calls it.
  16. In post, Miller chose shots with camera shake that he liked and had that shake digitally applied to other shots.
  17. Miller decreed that the subject of the shot should always be framed centrally. This allowed him to edit faster, because time wouldn’t be lost on each cut as the viewer searched the width of the anamorphic frame for the subject.
  18. Extensive use was made of two Edge Arms. An evolutionary step up from Russian Arms, these are cameras mounted on robotic arms which are in turn mounted on pick-up trucks.
  19. Other vehicle rigs included custom-built buggies with Alexa Pluses mounted front and rear, and a “Ledge” mount which was a 30′ truss tower built on the back of a truck, allowing high angles without the need for drones or helicopters.
  20. Leaf blowers were used, via flexible pipes, to keep sand off the lenses in moving shots.

It’s interesting to hear how laid-back Seale is. He gave his focus puller a great degree of leeway in choosing the lens package, and let his DIT, gaffer and operator handle the technical side of recording and exposing the image. This level of trust in his team must give him tremendous capacity to focus (pardon the pun) on the creative side of his job without worrying about the details.

I’ll leave you with the EPK B-roll from Fury Road…
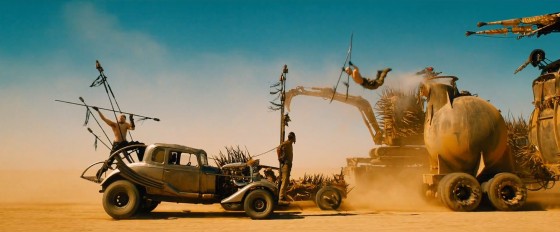
20 Facts About the Cinematography of Mad Max: Fury Road

How to Cut a Behind-the-Scenes Featurette

Cast&Crew_RAU_4273_20Sept_Unger copy copy
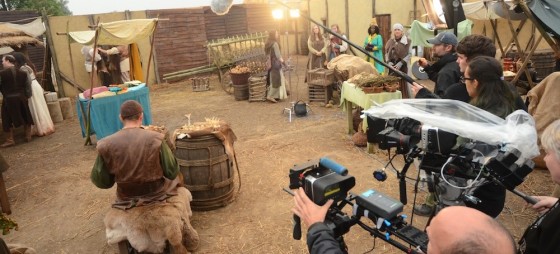
Cameras roll on the set of Kate Madison’s web series, Ren. Photo: Richard Unger

Despite my big plan to quit editing last year, I somehow ended up cutting nearly all the behind-the-scenes material for Ren, including a dozen YouTube videos and 30-odd exclusive set diaries which have just been released for sale. Guess I just have a fondness for BTS stuff.

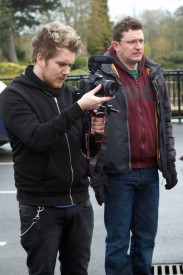
Brett Chapman shoots B roll on Stop/Eject as Hadrian Cawthorne looks on. Photo: Paul Bednall
Brett Chapman shoots B-roll on Stop/Eject as Hadrian Cawthorne looks on. Photo: Paul Bednall

So here are some tips for editing BTS videos for the web. Many of these apply equally to any talking-head-based documentary.

  • Plan for it before the shoot by lining up a competent BTS camera crew and being clear about the kind of material you need. Here are some tips for shooting B-roll.
  • Start the edit by creating a new timeline and putting in some text generators with category headings you think you’ll want to cover, e.g. “plot”, “characters”, “casting”, “action scenes”, “concluding remarks”.
  • Watch through all the interview material. Every time you hear something you think you can use, dump it on the timeline after the relevant text.
  • Play back your timeline. You’ll immediately see that some of the material you’ve included is dull or repetitious. Whittle down the material until your timeline is only a little longer than you intend the finished piece to be. (I suggest 2-3 minutes should be your target length for a web piece.)
  • Pay attention to your in and out points. Don’t cut while someone is drawing breath – cut before or after. Beware of breathing time if you’re hacking someone’s sentences around. If your editing makes a couple of words sound unnaturally close together, interpose a few frames of atmos or silence. If you cut someone off in the middle of a sentence, firstly be sure the intonation doesn’t make it sound cut off, then add in some silence or atmos before the next clip, and paper over the edit with B-roll as the interviewee’s face will often give away that they’re not finished speaking.
  • Speaking of papering over the talking heads with B-roll, it’s time to do that now. I often start with the obvious stuff. Clearly shots of the fight scenes being rehearsed need to go over the actors talking about fight scenes. Then I’ll move onto the less obvious stuff – an actor talking about their character might go with almost any shot of that actor on set, so I’ll see what’s left at the end.
  • Avoid cutting in the middle of quick movements – an arm going up, a head turning- unless that action will be continued in the next shot. This goes for the talking heads too – don’t cut on or close to a blink. Also avoid cutting on an emphasised or particularly loud syllable, because this too will jar.
  • Take out the text generators and replace them with a few seconds of B-roll that doesn’t have any interview sound under it. This gives you dividers between topics without blatantly signposting them, and allows the audience a breather. You could bring up the audio on the B-roll, or put in a bit of music. Usually it’s best for this B-roll to serve as an introduction to the topic that’s up next. For example, if the next topic is “what it was like working with the director”, kick it off with B-roll of the director explaining the next scene to the actors. After hearing him or her talk for a sentence or so, fade down the audio and bring in the interview sound.
  • Get some music from somewhere like incompetech.com, if your composer hasn’t started work yet, and cut opening and closing montages of B-roll to it.
  • Put in your lower thirds and opening and closing titles. If the video’s going on You Tube, it’s a good idea to allow for annotations linking viewers to other videos on your channel. Do not put in credits – sorry, but no-one cares who made this.
  • Watch the whole thing through and try to take out another 10-30 seconds. Remember, pace is everything. Do not give people the slightest excuse to stop watching.
  • Do a colour correction pass so everything matches.
  • Go through again balancing the audio. People start their sentences loudly and get quieter as their lungs deflate, so counter this by ramping the audio up over the course of the sentence. Use EQ filters if necessary to counter tinny or boomy sound, or reduce hiss or wind noise. See this Nofilmschool article for some handy audio tips. If any of the audio cuts are popping or clicking, put on a 1 frame cross fade. If you don’t have decent speakers, do this on every cut because you won’t know which ones are dodgy.
  • If any of the speech is still hard to make out – and remember that your viewers haven’t heard it a million times like you have – then subtitle it.
  • Watch it one last time to check everything’s smooth, then compress and upload it. You’re done!

If you’ve found this post useful, please consider supporting Ren by purchasing or sharing the trailer for the Daily Diary videos. Buyers get the first 7 videos now and the remaining 29 when the series is released this summer. They’re all different, some following the above pattern and others being much more candid, fly-on-the-wall affairs. There are plenty of bloopers, interviews and filmmaking tips to be enjoyed throughout. Or check out our free behind-the-scenes videos on YouTube.

How to Cut a Behind-the-Scenes Featurette

How to Make an Electronic Press Kit (EPK)

Lately I’ve been working on the electronic press kit for Kate Madison’s web series, Ren. An EPK is a collection of footage that a broadcaster can use to edit their own piece about your film or series. It should contain:

  • a trailer (optionally with versions without music and without dialogue, so it can be dubbed);
  • clips from the show (again, versions without dialogue are handy if you’re expecting foreign coverage);
  • interviews with the director and principal cast;
  • B-roll, i.e. behind-the-scenes footage.

You may also want to include a short (5 minutes max) ‘making of’ featurette.

The whole thing should be about 20-30 minutes long.

You need to think about your EPK in preproduction. Assign someone with camera and editing experience to film behind-the-scenes material on a few key days of the shoot. This post has lots of tips for shooting good B-roll.

Here’s some B-roll from the Avengers: Age of Ultron EPK.

Personally, I think that putting black slugs between every shot is excessive. With the Ren EPK I loosely edited half a dozen montages and titled them ‘Filming crowd scenes in the village’, ‘Filming fight scenes in Epping Forest’ and so on.

Here’s another example, this time from the Chappie EPK.

When shooting the interviews, encourage people to keep their answers brief. Answers of about 30-45 seconds are ideal. Remember that an EPK is not a finished product: you can’t have jump cuts or paper over edits with B-roll, which means you can’t cut stuff out of the middle of people’s answers; all you can do is trim the beginning and end.

Typical EPK questions are:

  • What’s the film about?
  • Who is your character?
  • What was it like working with the other actors and the director?
  • What was it like filming the action scenes / scary scenes / romantic scenes / scenes where you had to be painted blue from head to toe?
  • Why should people go and see this film?

Put a title card before each answer, giving the question (or a brief description of what the person talks about in their answer), the duration of the clip, and the person’s name and role.

Here’s an example, again from Age of Ultron.

See how the picture kicks in before the sound? That’s to give someone editing the clip into their show more flexibility – they could dissolve into the shot, for example.

Here’s another example, this one from Far from the Madding Crowd.

Once upon a time you would deliver an EPK on Beta SP, but clearly those days are gone. For Ren I’ll probably put the clips up on VHX, a VOD platform we’ve been using for our behind-the-scenes Kickstarter rewards. We can create a package of videos which people can be invited to, with a nice, slick interface, and the videos – one for each interview answer and B-roll segment – will all be downloadable by invitees as 1080P H.264 MP4 files. If anyone wants less compressed versions, they can contact us directly.

If you missed it, check out my post on lighting the Ren EPK interviews.

And for another perspective on making an EPK, you can read Sophie Black’s guest blog from 2012 in which she talks about making the one for Stop/Eject.

Find out more about Ren at rentheseries.com

How to Make an Electronic Press Kit (EPK)

Polymath: Behind the Scenes

I always enjoy a good behind-the-scenes video, and there’s often much to be learnt from them too. My friends at Polymathematics have just released a series of ‘making of’ videos for their recent music promos, all of which are exquisitely designed and shot (my own involvement in Droplets notwithstanding!). Check out Polymath’s Vimeo channel for more behind-the-scenes videos and of course the promos themselves.

Droplets

We Were Here

The Last Human / I Do (Come True)

Hands Up if You’re Lost

And here’s an equally fascinating look at a live puppetry project they did as part of the Olympic Torch Relay celebrations…


Polymath: Behind the Scenes

Pulling Strings – Behind the Scenes of “The One That Got Away”

Here’s a behind-the-scenes featurette looking at the making of my little puppet film.

This featurette was an experiment in shooting and editing entirely on my iPad, so please excuse the poor sound and clunky cutting.

Click here to watch The One That Got Away itself. Please help the film make the shortlist of the Virgin Media Shorts competition by visiting that link and using the tweet button underneath the video. The entry with the most tweets between now and July 28th will be shown in cinemas nationally.

Pulling Strings – Behind the Scenes of “The One That Got Away”

Practical Rain Effect

How do you create nice, thick, artificial rain for a dramatic fight scene, with no budget to speak of? Here’s how we did it on Soul Searcher.

This is a clip from the feature-length documentary Going to Hell: The Making of Soul Searcher. You can rent the whole doc digitally from the Distrify player below for a small charge, and you can watch Soul Searcher itself for free at neiloseman.com/soulsearcher

The clip shows how we created a fake downpour for a fight between the outgoing Grim Reaper, Ezekiel (Jonny Lewis, doubled by Simon Wyndham), and his replacement, Joe (Ray Bullock Jnr.). Ironically it was actually raining for real, but not heavily enough to show up on camera with the impact we needed. We’d had some rain bars made (lengths of hosepipe with holes drilled in them, strapped to bamboo canes) but we found the water squirted out in unrealistic jets. Luckily the location – Westons Cider in Much Marcle, Herefordshire – had a high pressure hose and we found that by pointing it upwards the water back down looking like rain.

See last week’s post for how to add rain (and snow) onto scenes after the fact.

Practical Rain Effect

Stop/Eject: December 2012

It’s high time for an update on the progress of Stop/Eject, my magical and moving fantasy-drama about a tape recorder that can stop and rewind time.

First up, thanks to the auctioning-off of a hat worn by lead actress Georgina Sherrington (The Worst Witch), our fundraising total has crossed the £1,200 mark. That means we’re over 80% of the way to our £1,500 target. It also means that the last in our series of behind-the-scenes podcasts from the set of Stop/Eject has been released.

Down in Hay-on-Wye, editor Miguel Ferros is hard at work cutting Stop/Eject itself. I went down there on Tuesday and had a sneak peek at the first few minutes, which is already streets ahead of the version I edited. A fresh pair of eyes is indeed a very valuable thing at this stage in a film’s creation.

Meanwhile, I’ve also been editing – editing Record & Play: The Making of Stop/Eject, a 30 minute documentary which will form the centrepiece of the DVD and Bluray’s bonus features. Several brand-new interviews have been filmed for this, including one with Georgina. At the same time we interviewed her on another subject, and we hope to be revealing this soon as an exciting new reward for sponsors.

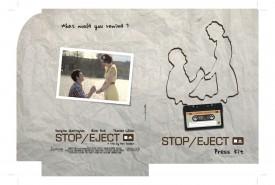
Press kit outside cover by Alain Bossuyt

Alain Bossuyt, who won our poster design competition earlier in the year, has adapted and expanded his eye-catching design into a folder for the press kits. Although it will probably be quite a while before these kits are needed, it’s always useful to have them around just in case. You can find out more about Alain and his work (with the help of Google Translate) at leplanb.fr

Another designer, Andy Roberts, who did all the graphics for the Worcestershire Film Festival, is busy laying out the illustrated script book for those sponsors who selected the Unit Publicist reward. I’m looking forward to seeing what he comes up; I’m sure it will be a fantastic souvenir. Andy’s website is at speakersfive.co.uk

Press kit inside cover by Alain Bossuyt

This afternoon I was interviewed by Toni McDonald on BBC Radio Hereford & Worcester. If you missed it, you can listen to it online. My part is about 2 hrs 45 mins into the programme.

And on Tuesday, Stop/Eject’s trailer will be screened at the Underwire networking event in Wolverhampton, along with the trailer for producer Sophie Black’s own short film, Ashes. Tickets can be bought online for £5.

Remember – apart from the hat, which was of course a one-off – all of the sponsor rewards mentioned above are still available. So if you want to secure yourself a copy of the DVD or Bluray, bag a ticket to the premiere or get one of the illustrated script books, head on over to stopejectmovie.com/donate and make your contribution.

Stop/Eject: December 2012

Stop/Eject: Shoot Day 2 Podcast

Day two of Stop/Eject‘s shoot and we move into the main location: the shop.

(We actually spent half of day two filming Dan’s death scene at the River Gardens in Belper, but sadly the B-roll from this was corrupt, possibly due to being recorded on a dodgy card.)

Thanks to a generous contribution from filmmaker Barend Kruger, Stop/Eject‘s post-production crowd-funding total has jumped up to £856, smashing through no less than three public reward targets. We’re going to stagger the release of these rewards over the next couple of weeks, but the above video was the first one.

In return for his contribution, I’ll be DPing Barend’s short film next month, a psychological thriller called Mary, Mary. I think this is a fantastic example of filmmakers collaborating to help each other’s projects succeed, and I’m really grateful to Barend for approaching me with the idea. I’m sure you’ll be hearing more about his film on this blog, and the trailer for it will ultimately feature on Stop/Eject’s DVD.

Stop/Eject: Shoot Day 2 Podcast

The Making of Stop/Eject

While we have been looking for an editor to refine Stop/Eject, I’ve made a start on the behind-the-scenes documentary for the DVD. I can now announce the title of this documentary: Record & Play. Do you see what I did there?

Here are some frame grabs from the bits I’ve edited so far. Click the thumbnails for larger images.

I’ll be presenting some clips from Record & Play and talking about the making of Stop/Eject and what I’ve learnt about crowd-funding at the Hay Festival of British Film next Saturday. Watch this space for more details during the week.

The Making of Stop/Eject