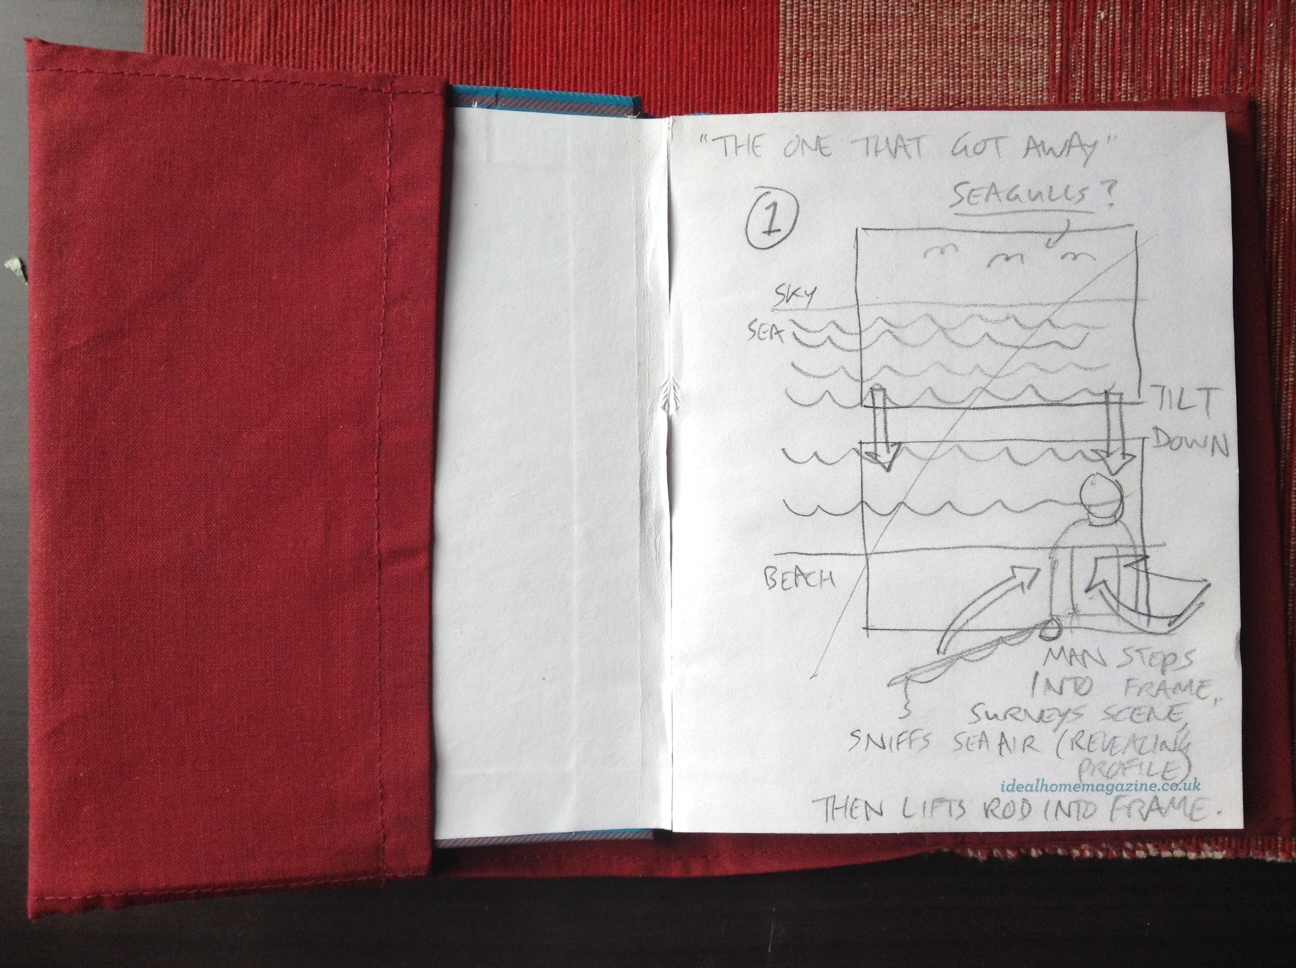
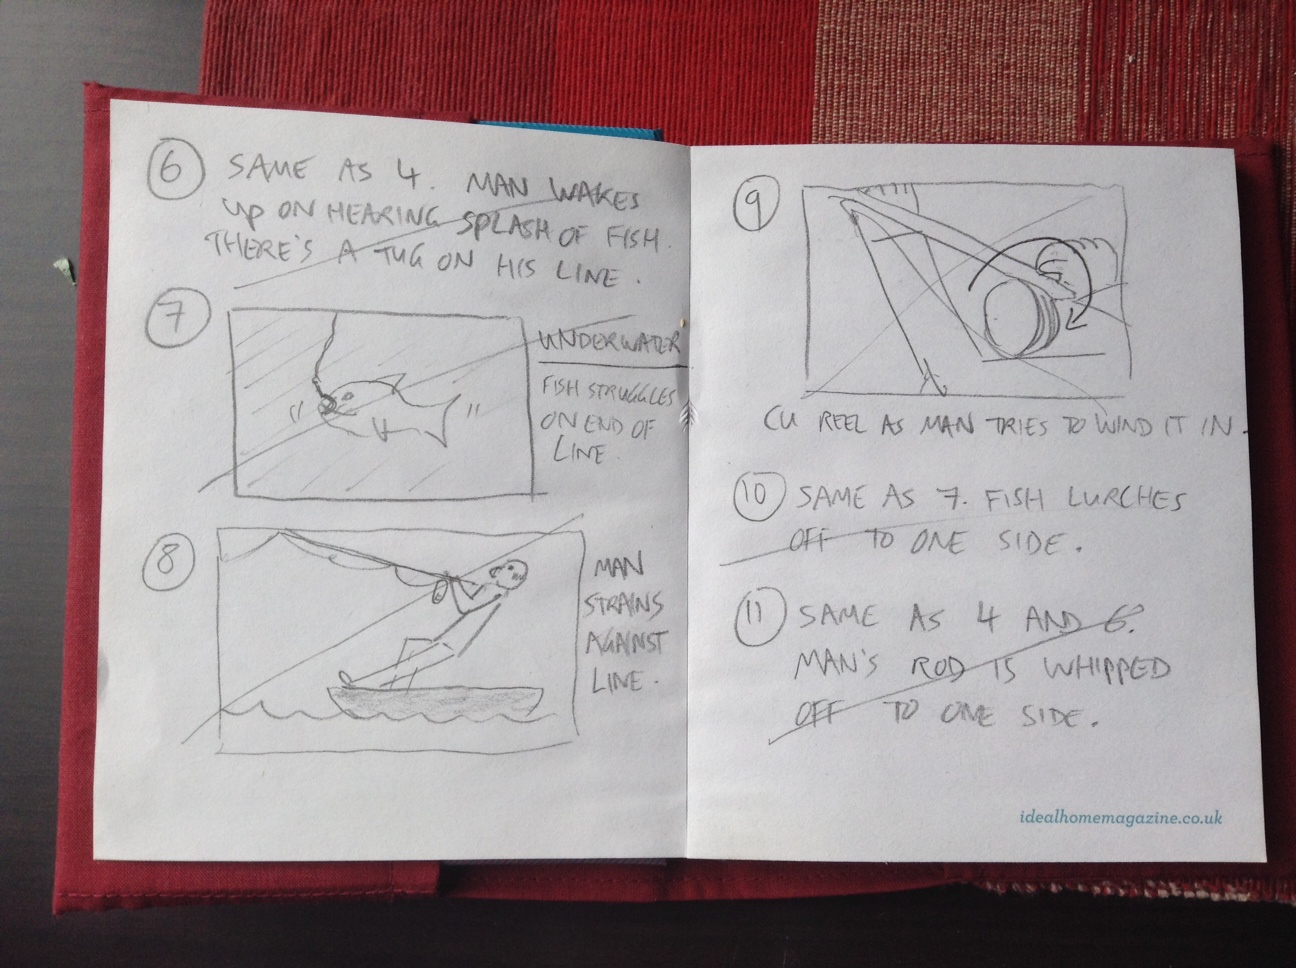
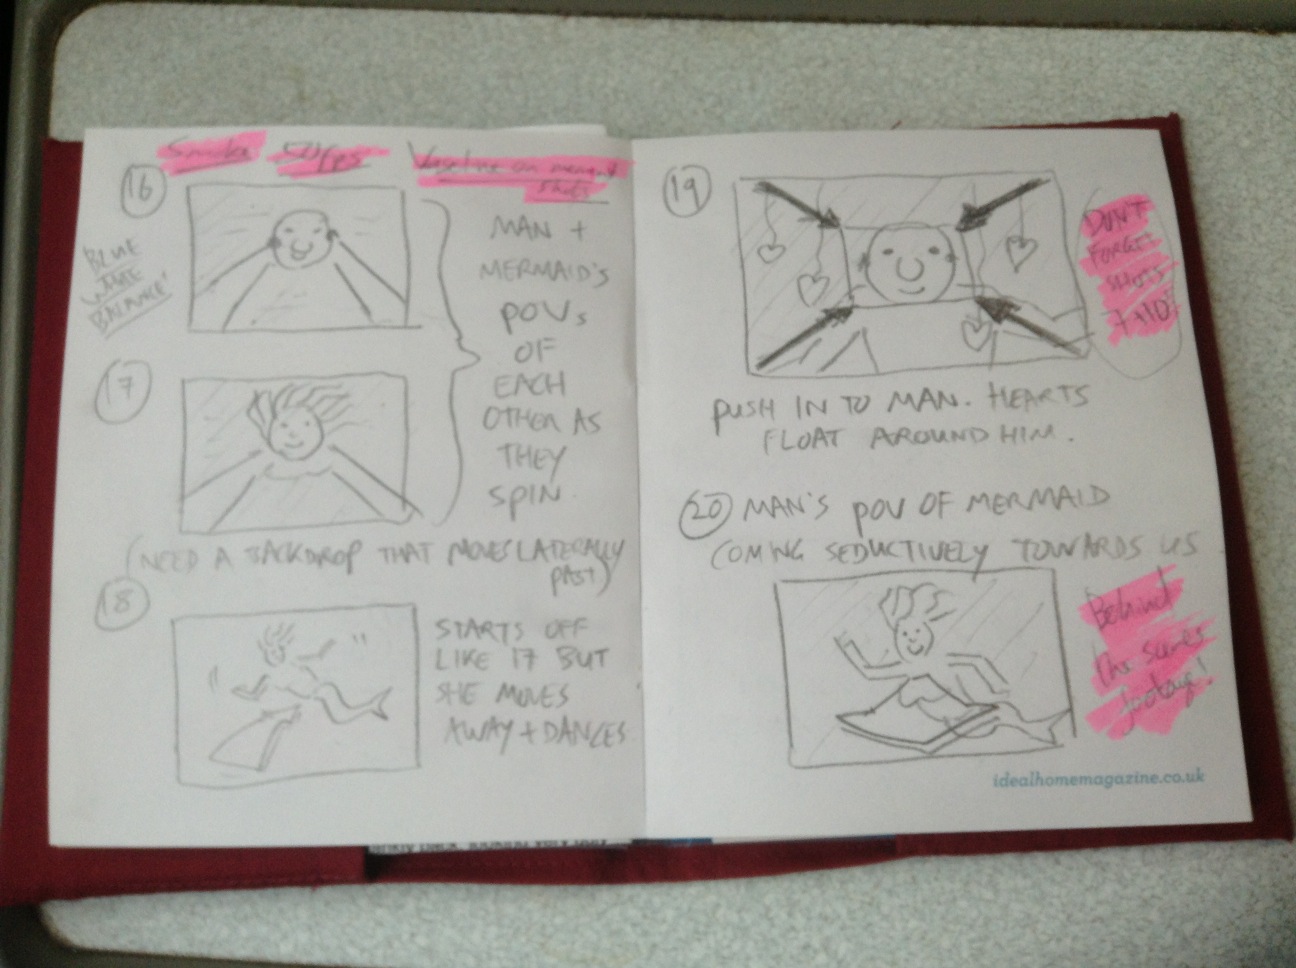
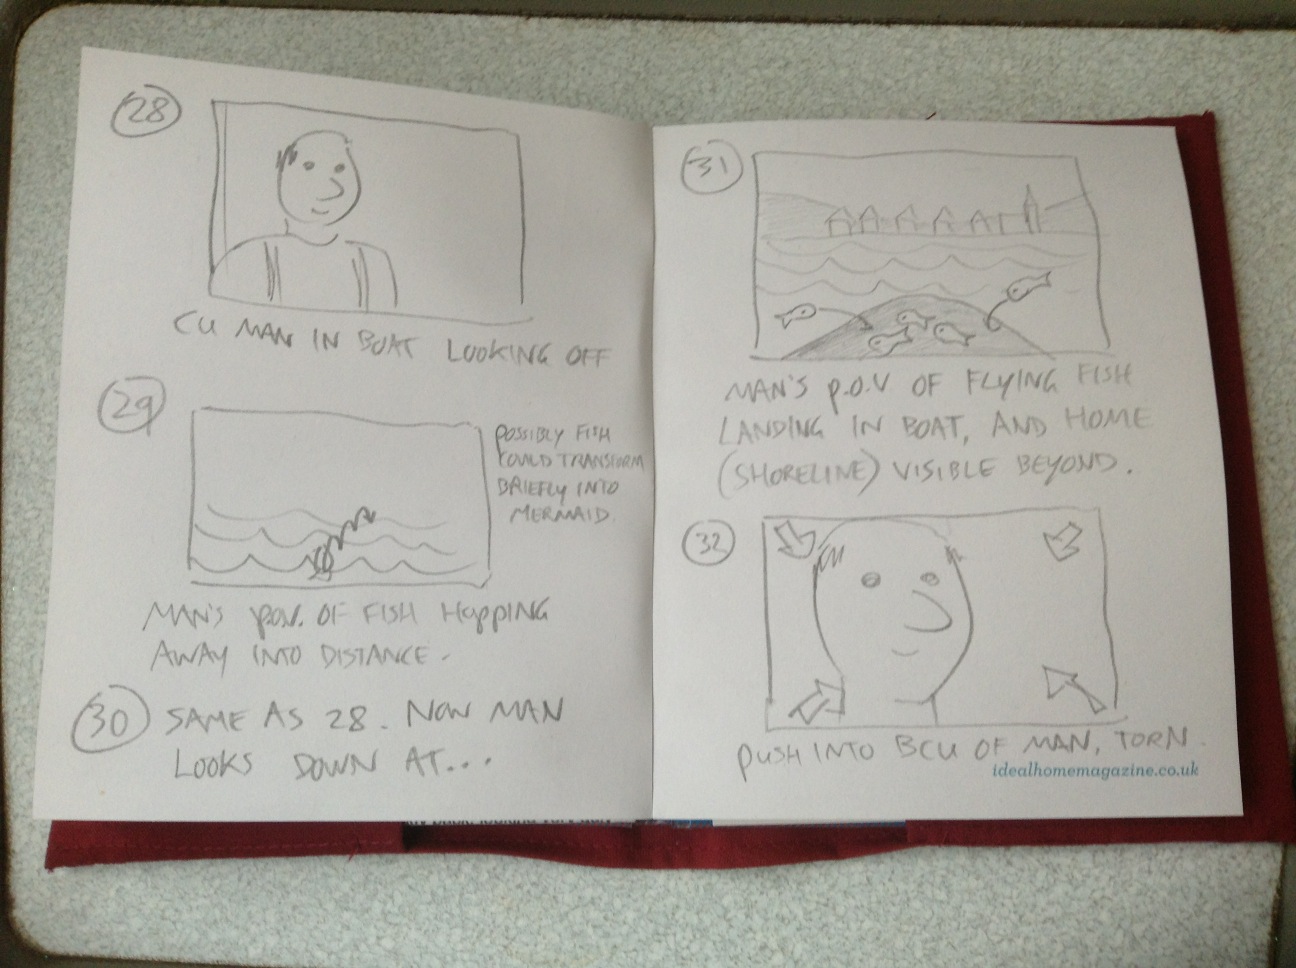
The One That Got Away, the puppet film I submitted to Virgin Media Shorts this year, didn’t have a script. Instead, I storyboarded it from a brief outline written by my wife Katie. Here are those storyboards.


The One That Got Away, the puppet film I submitted to Virgin Media Shorts this year, didn’t have a script. Instead, I storyboarded it from a brief outline written by my wife Katie. Here are those storyboards.

Here’s a breakdown of the lighting choices made on my little puppet film, The One That Got Away. You can watch the film over at the Virgin Media Shorts website. If you enjoy it, please use the tweet button to register your vote and help us get a place on the shortlist.
Conventional wisdom with marionettes is probably to go for very flat lighting with no backlight, to make it as difficult as possible to see the strings. But on TOTGA I wanted to embrace and celebrate the tactile, handmade look of the puppets and sets, so I chose a traditional three-point lighting scheme that imparted depth and made no effort to hide the strings.
Normally I shoot wide open – typically f1.8 – on my DSLR, but as the puppets were small the depth of field would have been ridiculously shallow at that aperture. Instead I lit the set very brightly (about 3KW of tungsten horsepower in our cramped living room – not very pleasant during a heatwave!) and stopped down to around f4.

For the daylight scenes I used my three open-face tungsten Arrilites: a 1K poking over the top of the backdrop for backlight, another 1K with tough-spun diffuser off camera left for key, and an 800W bouncing off the ceiling for fill. This last lamp was gelled blue to suggest ambient skylight.
I tried to simulate the camerawork that would have been used had this been shot at sea with real actors, so:

The underwater dream sequence was all shot dry-for-wet at 50fps for a watery slow motion. Using Magic Lantern I dialled in a cool white balance of around 2500K, and pumped in smoke to add diffusion and suggest currents. (I wished I’d use a lot more smoke, but we would have all choked to death.)
I used just two light sources: the 1K backlight, now gelled blue, and the other 1K, bounced off sheets of silver wrapping paper tacked loosely to the ceiling. This is exactly the same method I used for a scene in Ashes – flapping a piece of card at the wrapping paper makes the light ripple in a very watery way.

The underwater lighting scheme was a lot darker than the daylight one, so I opened up to around f2, giving a crazily shallow depth of field that worked nicely for this dream sequence. The mermaid’s close-ups were all shot through a CD case for an old-school soft-focus look.
I would have liked to have shot this sequence handheld, but a lack of crew meant I had to lock the camera off so I could operate the smoke machine, fan the wrapping paper and move little fish through frame.
When Henry awakens from his dream, the fish escapes and he gives chase. Orange gels and lens flare were used to suggest the sun getting lower in the sky, until finally Henry and his quarry are silhouetted against the solar disc itself. This is a domestic 100W tungsten bulb peeking over the back wave. The only other light source is a row of six more such bulbs under a sheet of orange gel, just behind and below the first one.

As the scene moves into twilight, the first bulb is removed and the orange gel over the other six is replaced with a purple one. The 1K backlight is turned back on (possibly it would have been more realistic without, but I’m just a sucker for backlight) and some pink fill is provided by placing a sheet of Minus Green gel on the other 1K and bouncing it off a reflector.

That’s all folks. Please do tweet about the film (being sure to include the title The One That Got Away and the hashtag #VMShortsVote for it to count as a vote) and click here to watch the behind-the-scenes featurette if you missed it.
Guest blogger Katie Lake tells the story of how Henry Otto, the marionette star of The One That Got Away, came into this world. Click here to watch the film and please tweet about it to help us make the competition shortlist.

It started as a whim, a crazy idea. I have wanted to do a puppet film with Neil for a while. But if I couldn’t make a puppet, there would be no puppet film. No pressure.
I started with his head. I wound newspaper around metal wire that would become his controls, then covered the newspaper ball with a layer of air-drying clay, shaping his head, and face. I did a test with lights to see if I liked the shape I got (1).

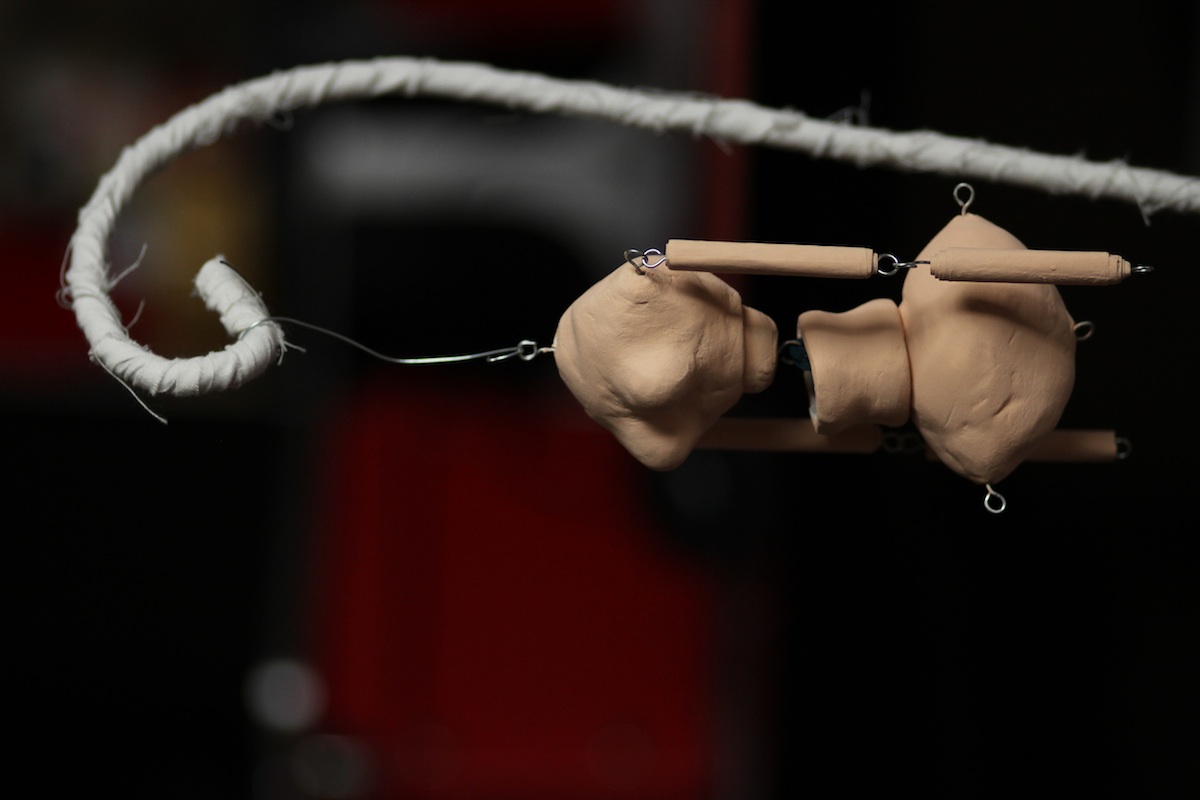
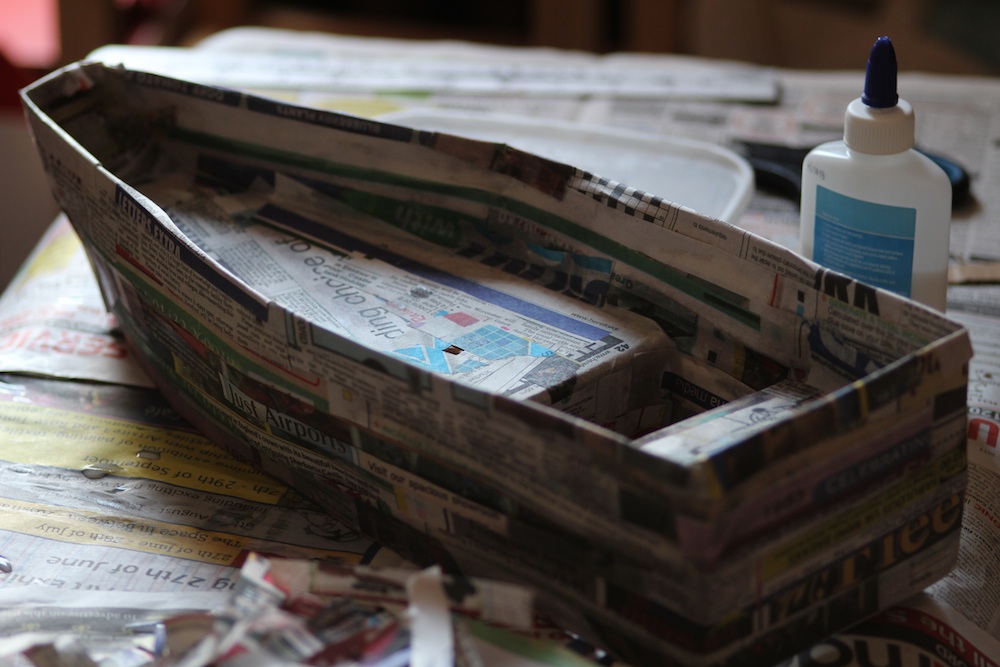
I then made his body. This started out as a toilet roll tube, covered in papier-mâché, and his arms and legs were rolled up newspaper “beads”. I then painted them beige, and sculpted hands using more clay over wire. I fit the legs and arms with wire, and before I put him together this was how he was looking (2). I liked the big head, spindly legs and long arms. So together he went.
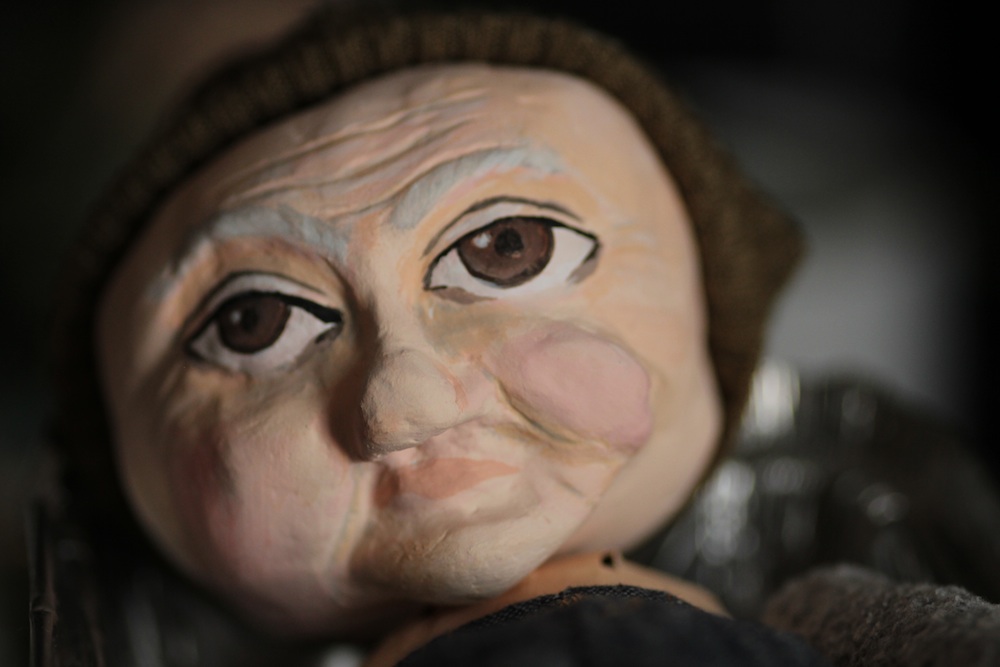
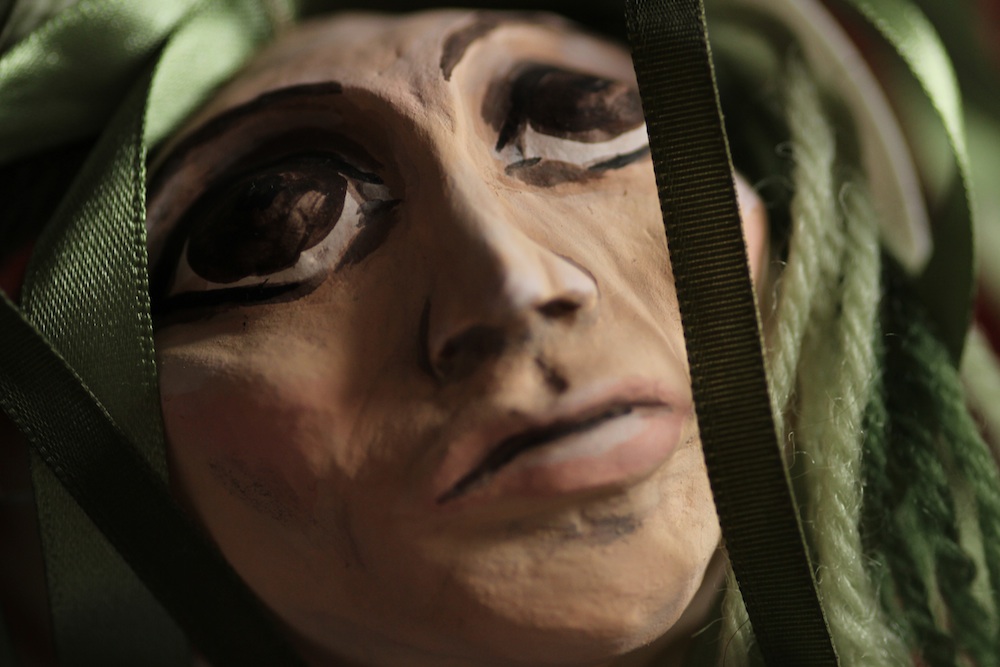
I made the start of a neck, and then painted his face. He now had an expression, a look, a character. I (hesitantly) fell in love with Henry when I first sculpted his head and face, but was really worried that I wouldn’t be able to do him justice with paint. Thankfully I was pleased with the results. And this is when I knew the name swirling around in my head, was the name he was going to be. There is something about him that reminds me of my maternal grandfather’s side of the family, so Henry is sort of an homage.

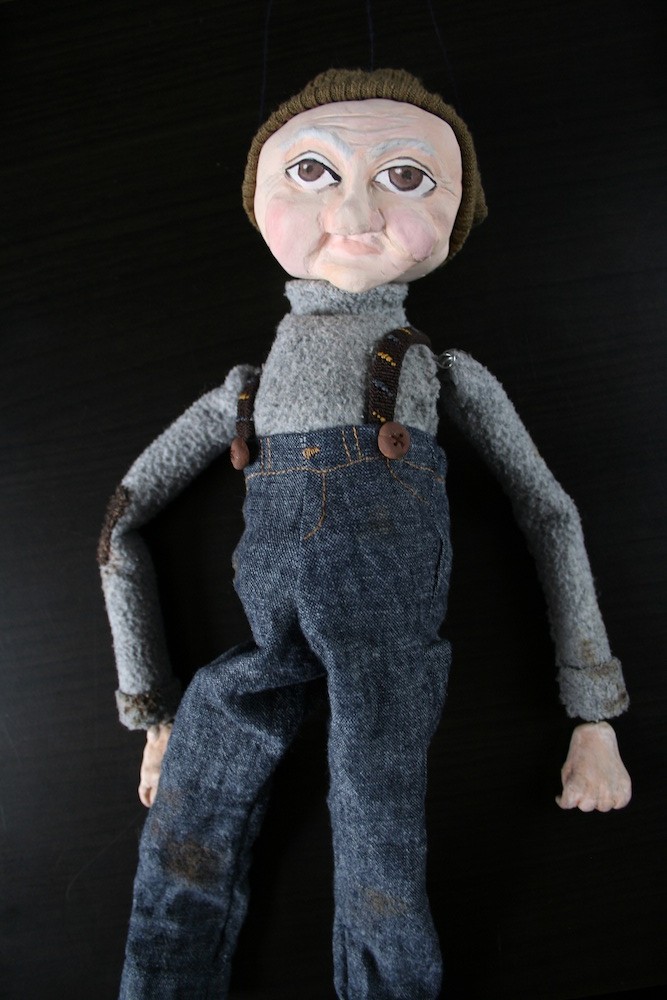
He then needed some clothes. Despite, or maybe because of my costume background, deciding what clothes to make for him was by far the hardest bit. In the end we decided jeans were a good place to start. I drafted a pattern in cloth, then altered it, and cut them out of an old charity shop skirt. I also gave him some hand stitched details around the waist. I temporarily strung him up, and tested out what we could get him to do. This was also his first camera test (3).

It was now that we realised he needed lateral head controls (one on either side of his head so we could make him look left and right). Oops. I attached lateral controls to the outside of his head as I didn’t want to risk drilling, so he now needed a hat or wisps of hair to hide the wire. He also needed a top, and boots.

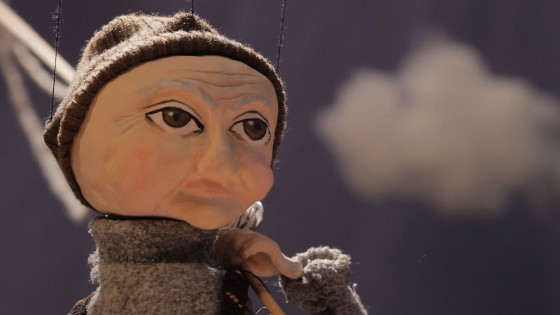
Enter Jo Henshaw, who kindly offered to come and help out. She helped finalize costume design decisions, and made him his cute beanie (out of an old sleeve) and started his sweater (out of an old sweater) (4).
I made boots (out of more toilet roll tubes cut and bent, glued into shape and then papier-mâchéd, and then painted black) (5). I should also mention stop-motion animator Emily Currie, another helpful volunteer, who used her expertise to ensure the lateral controls stayed put.
Henry’s sweater was then sewn onto him, covering the multiple pieces. I kept the arms separate for greater movement. I finished him off with braces made out of old shoe laces, made buttons out of clay which I painted brown, sewed a patch onto his arm from an old scrap and aged his costume with some brown and black paint.
Lastly I strung him up using extra strong navy thread. The T bar I made using a piece of flat doweling, some screw eyes (upcycled from old curtain rings) and nails to make the cross bars removable. And Henry was ready for his debut (6).
You can visit Katie’s blog at www.katiedidonline.com. To find out what Henry’s up to, why not befriend him on Facebook?
Tomorrow I’ll look at the camera and lighting techniques used to shoot the film.
Here’s a behind-the-scenes featurette looking at the making of my little puppet film.
This featurette was an experiment in shooting and editing entirely on my iPad, so please excuse the poor sound and clunky cutting.
Click here to watch The One That Got Away itself. Please help the film make the shortlist of the Virgin Media Shorts competition by visiting that link and using the tweet button underneath the video. The entry with the most tweets between now and July 28th will be shown in cinemas nationally.
My brand new short, a 2 minute puppet odyssey about an old fisherman who catches more than he bargained for, is now online to watch:
http://www.virginmediashorts.co.uk/film/4869/the-one-that-got-away#.Ue1bi5WAdGB
It’s an entry to Virgin Media Shorts, and you can help us make the shortlist by using the tweet button under the video. The film with the most tweets between now and Sunday (28th) gets a guaranteed place on the shortlist, meaning it will be shown nationally in cinemas and be in with a chance of winning the filmmakers £30,000 to fund their next project.
Please note that only the tweet button (not Facebook, Google+ or any of the others) can be used to register a vote. Alternatively you can write your own tweet, so long as it includes the name of the film – The One That Got Away – followed by the hashtag #VMShortsVote.
Thanks everyone. Stay tuned all week for The-One-That-Got-Away-related goodies, including a behind-the-scenes featurette tomorrow.
Film credits:
Written, designed, constructed and puppeteered by Katharine Lake
Assisted by Emily Currie, Sebastian Fuller, Jo Henshaw, John R. Mason and Ian Tomlinson
Sound design, music and mixing by Matt Katz
Directed, photographed and edited by Neil Oseman
Right now I’m in the middle of shooting The One That Got Away, a tale of an old man, the sea and a mermaid, told using marionettes. Puppets are a fairly new thing to me, my one prior brush with them being the seven-foot-tall Wooden Swordsman in The Dark Side of the Earth. Here are some things you might want to consider if you’re thinking of going all Thunderbirds yourself…

Here is a visual progress report on my Virgin Media Shorts entry for this year, The One That Got Away. Katie has been doing some great work, and thank you to Jo Henshaw and Emily Currie for helping out too.
Meet the star of my next film, a Virgin Media Shorts entry called The One That Got Away.
He’s being made by my wife Katie, on whose idea the film is based. As usual, you can follow the making of this project right here at neiloseman.com
Meanwhile Stop/Eject is within reaching distance of completion. All the music, sound and VFX are in place. This weekend the final credits roller will go on, and on Monday Jose Pereira and I will do the final 5.1 surround sound mix at Alchemea College near Islington.
Work is gathering pace on my next major production too, the title of which I’m still keeping secret. Currently the script is at fourth draft stage, and I hope to reveal some of the behind-the-scenes talent attached soon. Stay tuned.
You can now download the script for Ghost-trainspotting, my Virgin Media Shorts entry for this year.
As promised, here is the VFX breakdown for the main shot of the ghost train in my recent Virgin Media Shorts entry, showing how a crude model shot can work a treat, given the right compositing:
Due to the looming nature of the competition deadline, this was a pretty quick and dirty shot. Having said that, my VFX skills are pretty limited and I doubt I could have significantly improved it even if I’d had more time. It took a couple of hours to set up and shoot the miniature, and no more than an hour to do the compositing you see above. (I re-used smoke footage shot for Soul Searcher.)
As always, my approach was low-tech, avoiding any CG elements, and I did all the compositing work in Final Cut Pro. Soul Searcher had loads of shots that utilised this low-tech method, creating effects with everything from indoor sparklers to milk being poured into a fish tank. You can see a breakdown of all those effects as part of the Deluxe Package rental of Going to Hell: The Making of Soul Searcher. And remember, if you embed this video on your own site, you get a cut of any sales made through it.