Recently I photographed Self Control, a short film by writer-director Stanislava “Stacey” Buevich. Joanna Kate Rodgers plays Lily, a woman who struggles to control her violent urges when she’s befriended by an extremely annoying colleague.
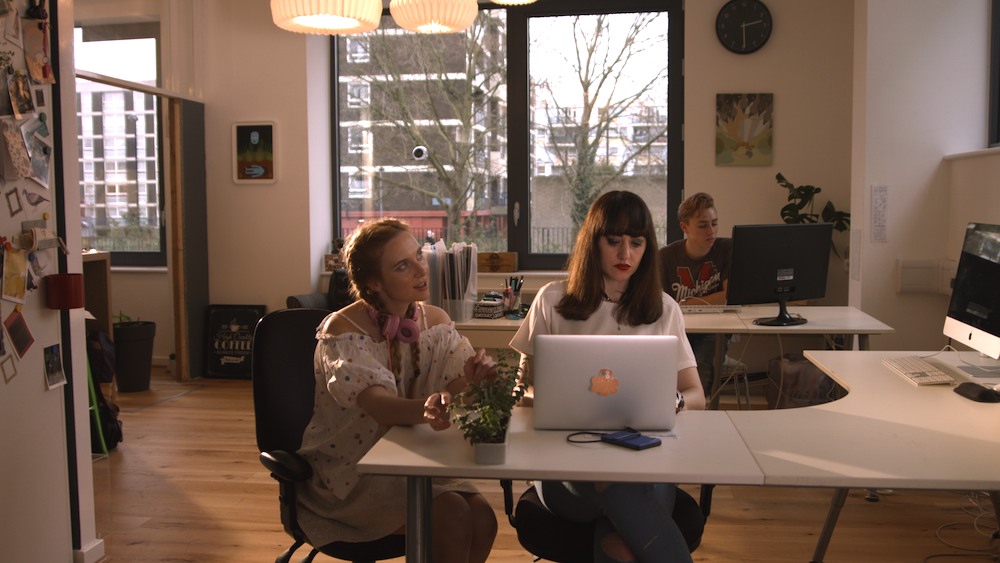
A read of Stacey’s shotlist revealed a clear Wes Anderson influence, which was great for me because I immediately knew the parameters: flat angles, formal composition, deliberate 90 degree pans and lateral tracks. Stacey also referenced Ida, which led to several wide shots with lots of headroom, like this one…
Creating interesting shadows by using a partition window at the location.
Lighting wise, it was a limited kit (two tungsten 2Ks and a Dedo kit with only two functioning lamps). Bin bags and some sheets of thin white packing foam were used to eliminate or reduce natural light coming through offscreen windows, to give shape and contrast to the images. For a scene in the office kitchen, I fired one of the 2Ks through a high partition window to create some shadows.
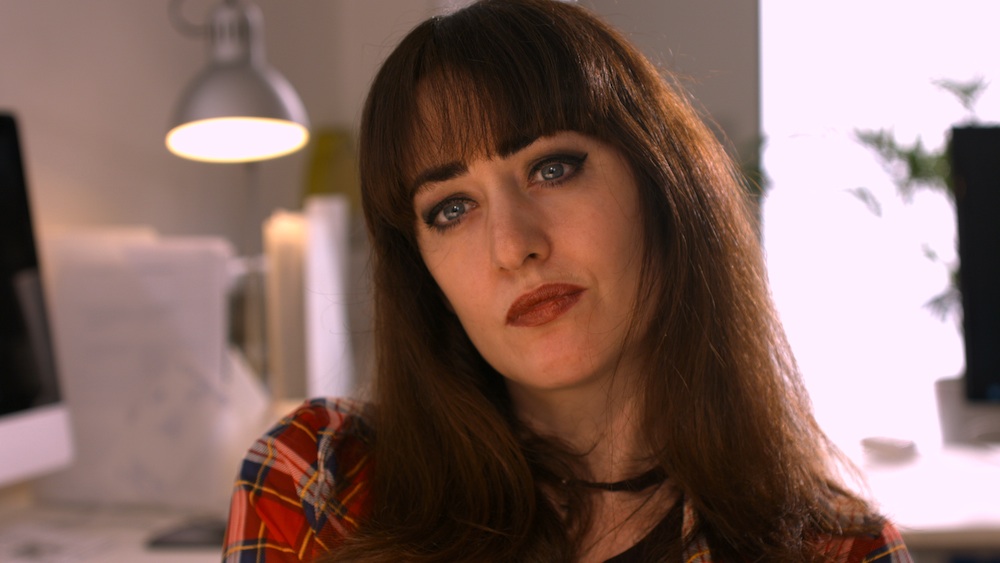
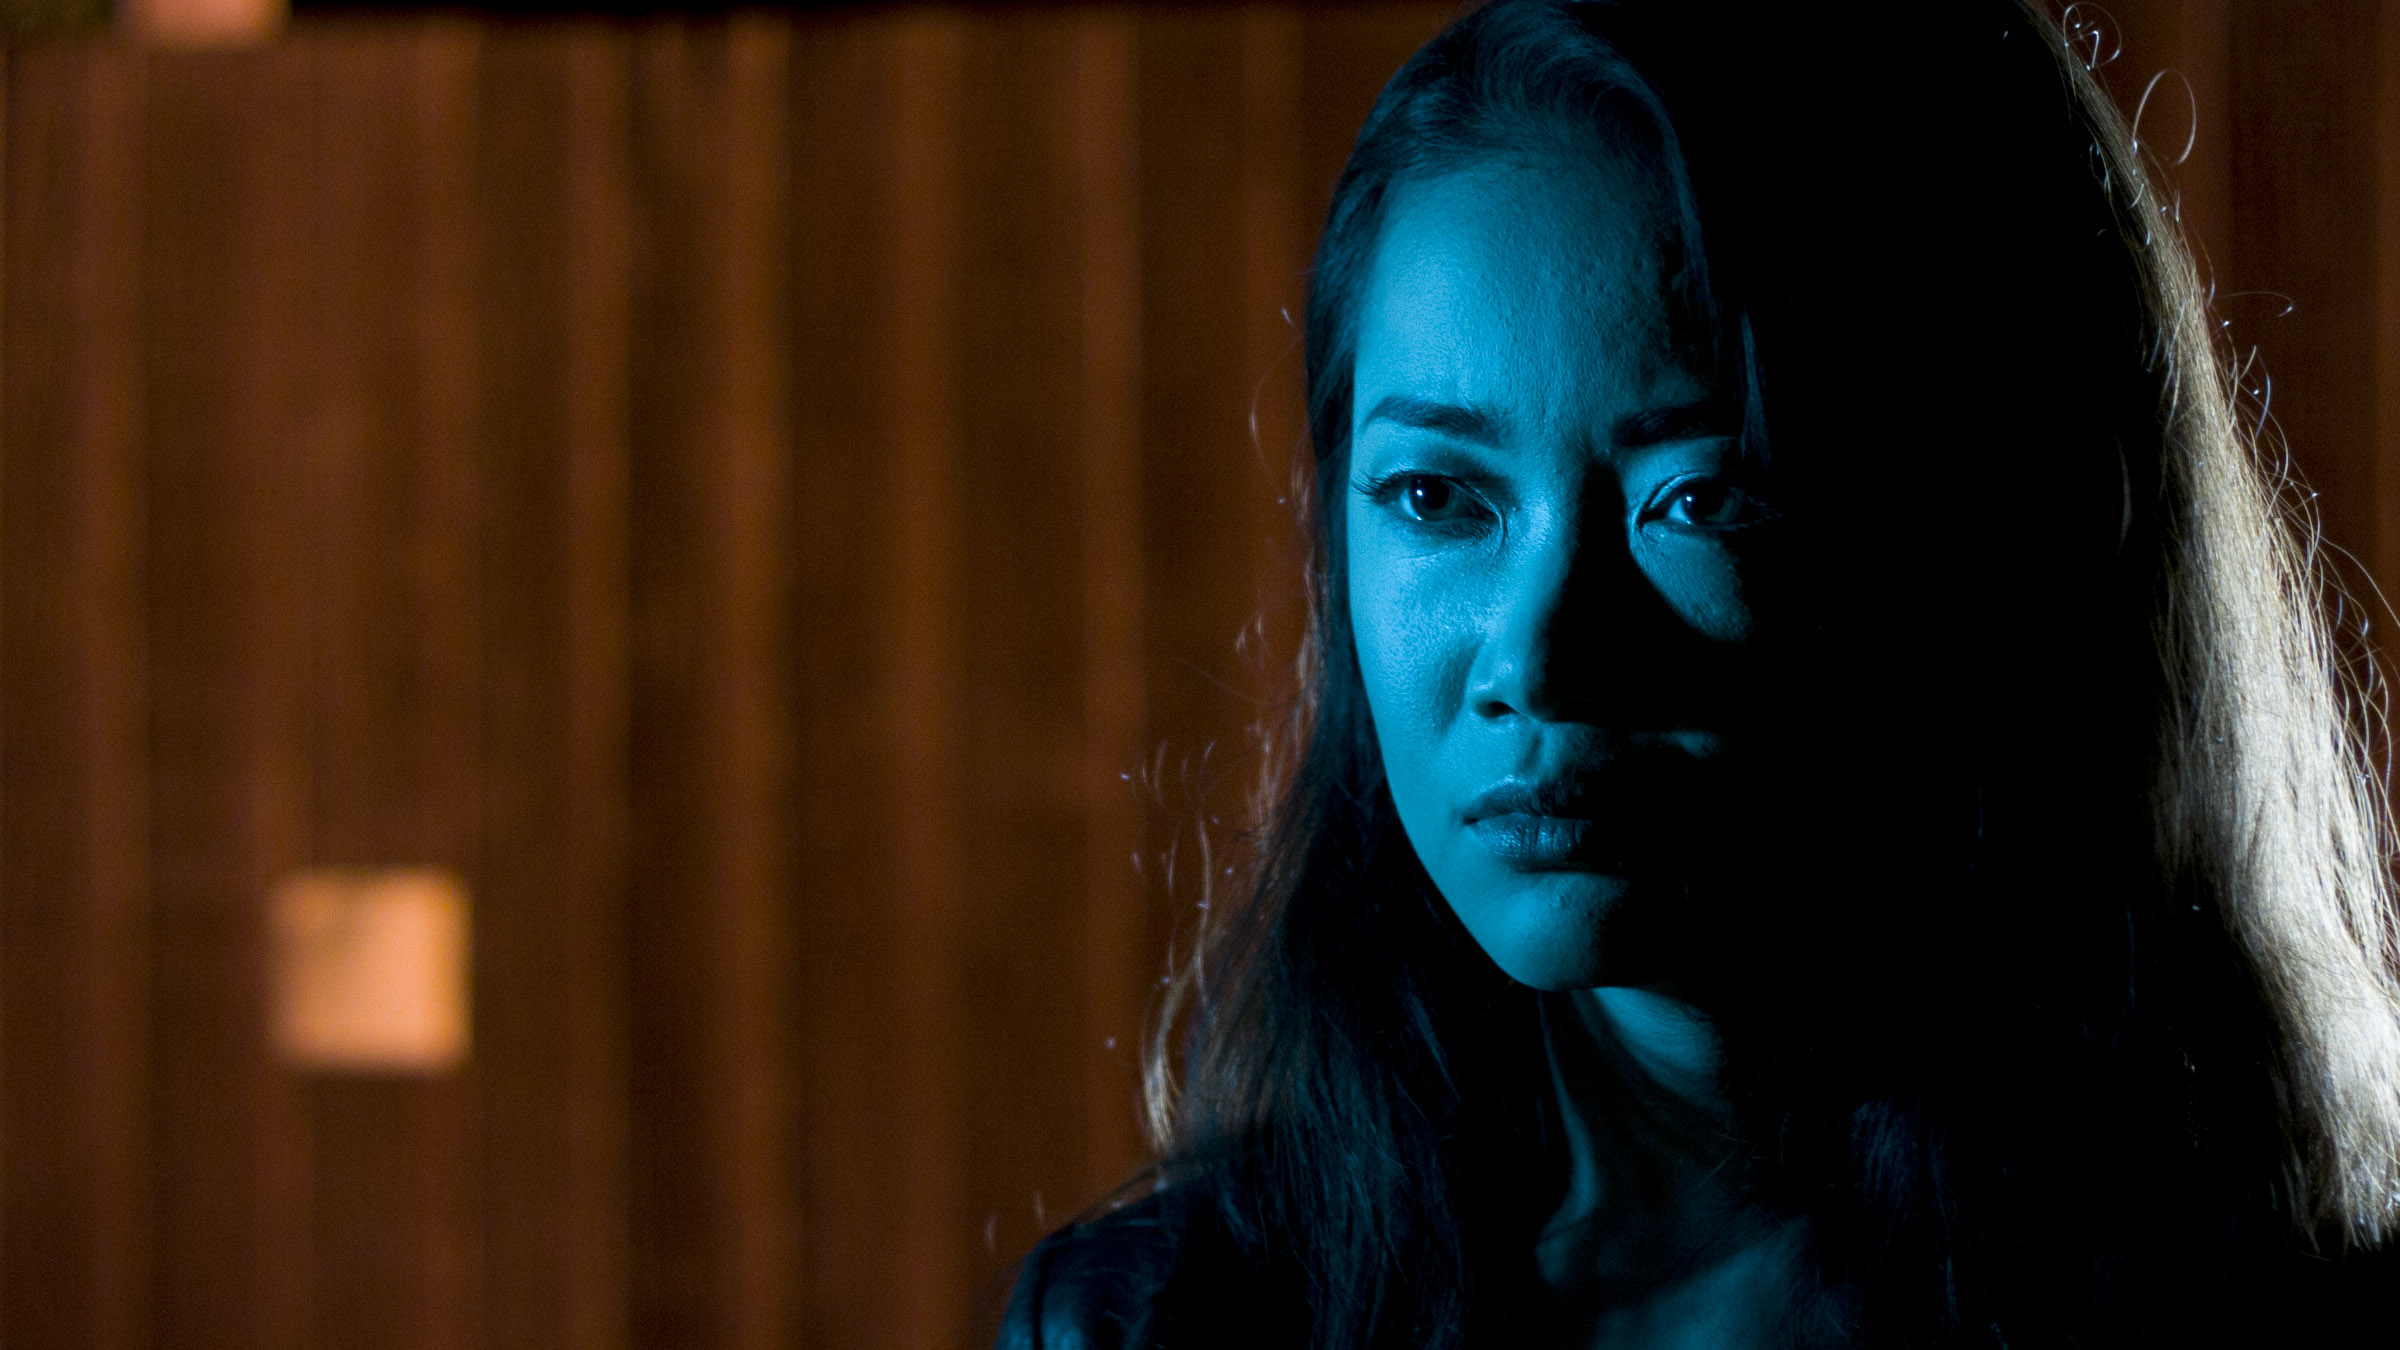
I knew that I wanted to do something with lighting to clue the audience into Lily’s true identity (she’s the devil in human form). By the end of the first morning I’d settled on lighting her from below whenever possible. In this CU from an office scene, a blue-gelled tungsten 2K was fired down onto a white desktop in front of Lily…
A 2K fires down onto a white desktop to uplight Lily (frame grab below).
For a yoga/relaxation scene on the second day, production designer Devon Barber conveniently dressed in a row of tealights on the floor in front of Lily, giving me a great excuse for satanic, fiery bottom-light. We set up a Dedo either side of camera, firing down into strips of kitchen foil so that the light would bounce back up onto Lily’s face. The Dedo dimmers were ridden by my ACs during takes to create a flickering effect.
Strips of tinfoil placed on the floor around the dolly track reflect two Dedolites (just out of frame either side) back up onto Lily’s face. A 2K hidden behind the wall on the right provides backlight.
To find out more about the work of Stacey and her producing partner Lara Myles, visit www.clockpunkfilms.com
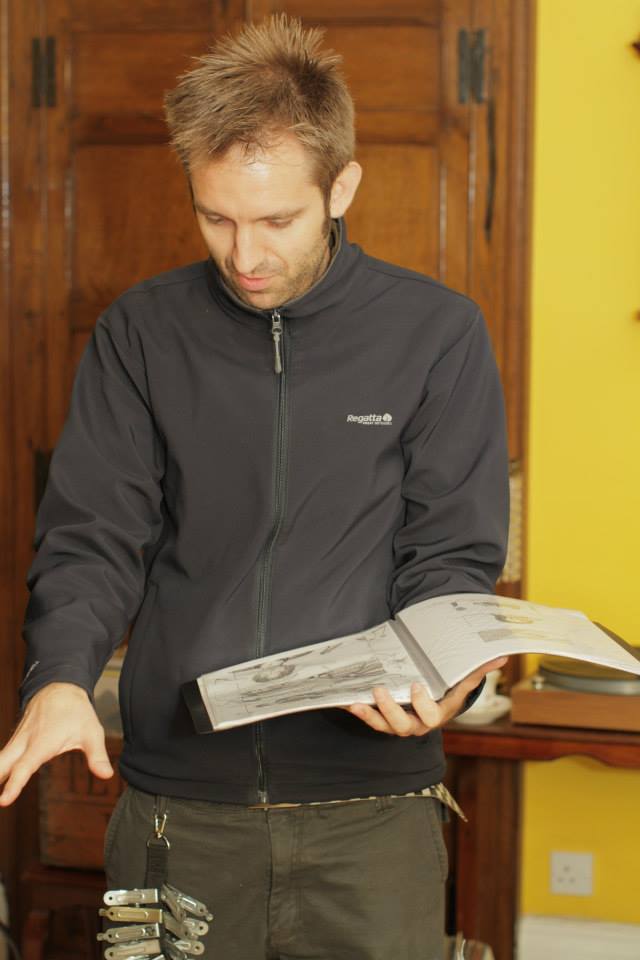
Consulting director Sophie Black’s storyboards on Night Owls. Photo: Dimitri Yiallourou
I thought it might be of interest to describe my typical working process as a director of photography on a shooting day. Different directors and ADs will run their sets different ways, so this is a generalisation.
I like to start the day by reading some of Stephen Murphy’s DOP Documents over breakfast. These elegantly-laid-out collections of screen grabs from top cinematographers are fantastic inspiration.
On some productions I’ve had long talks with the director, I’ve seen storyboards or shotlists and I’ve been on the location scouts or walked the sets already. On others I’m a last minute hire and I know nothing beyond what it says in the script. (And this should go without saying, but you need to read the script. Apparently some DPs don’t. WTF?)
Whenever I see the set for the first time, be that in preproduction or on the day, I start to think about light sources. If it’s outdoors, what is the sun orientation? If it’s indoors, where are the windows? If it’s night, what practical sources are there and do I need to add or remove some?
Ideally the next thing that happens is that the actors arrive, still in their street clothes, and the director blocks the scene with them. If I see anything that can be tweaked to orientate the talent better towards the light sources, or to provide more interesting framing, I’ll suggest it.
During the blocking I’ll wander around with Artemis (a virtual director’s viewfinder app on my iPad). If there’s a shotlist or storyboard, I’ll find the angles described and check they work. If not, I’ll find the angles I think will work well. I’ll screen-grab all of these and show them to the director when they’re done blocking. There may then be some give-and-take, perhaps adjusting the actors in situ through the viewfinder, until the director is happy.
Before the actors depart to get into costume and make-up, I’ll have my assistant put down marks for their key positions. Then the cast can leave and I can get down to the business of lighting the scene. Here’s broadly what I’m thinking about, in roughly the order I tend to think about it:
Realistically, where would light be coming from?
How should the scene be lit to create an appropriate mood?
How should the cast be lit to look their best and enhance their characters?
Aesthetically, what lighting will look the most pleasing?
Practically, where can I put lights with the grip equipment I have, without any of it coming into shot?
Lensing Three Blind Mice
Once I’ve taken a few minutes to figure that out, I’ll start issuing instructions to my gaffer. I might walk around planting lamps, or just stands, and let the gaffer finish the job by cabling them, or I may let him set some lamps up while I puzzle over whether I’ll need other lamps elsewhere. Meanwhile the camera is being set up with my chosen lens on, either by an assistant or me, if we’re short on crew. (Most directors leave lens choices to me.)
When most of the lamps are set, I’ll fire everything up and draft in whoever’s around to stand in for the actors so I can see if it’s working as planned. I don’t use a light meter, so everything is judged by eye on the monitor, perhaps with the aid of a histogram. Some tweaking usually ensues.
By this point hopefully the cast are back on set and we can start camera rehearsals. Although these are useful to the cast and director, they’re invaluable for me so that I can practice the camera move and see how the light works on the actual actors and costumes. Usually there’ll be a little more tweaking of lights before we shoot. With any luck this doesn’t hold up the director because they’re busy giving last minute direction to the cast.
After we shoot I’ll tell the director whether the take was any good from a camera and lighting standpoint. I generally don’t request retakes unless I’ve screwed something up pretty badly. Long experience has taught me that the editor will always choose the best take for performance, regardless of any minor camera wobbles or dodgy lighting, so I’m not going to waste time insisting on another take which won’t get used. The important thing is for the director to get the performance they want. Having said that, it’s my job to flag up any cinematography fluffs so that it’s the director’s decision whether to go again or not.
Once the first shot is in the can, lighting for the coverage should be fairly straightforward. I’ll have my assistant change the lens, then I’ll move the camera to the new position myself and see how the existing lighting works. Then I can tweak things accordingly.
And so it goes on until the scene is wrapped.
OK, enough from me for a minute. Want to see a legendary cinematographer’s process as he lights a scene? Check out this unique and fascinating video.
I’ll leave you with the latest Ren production diary, which asks (and fails to answer) the question: “What is a DoP anyway?”
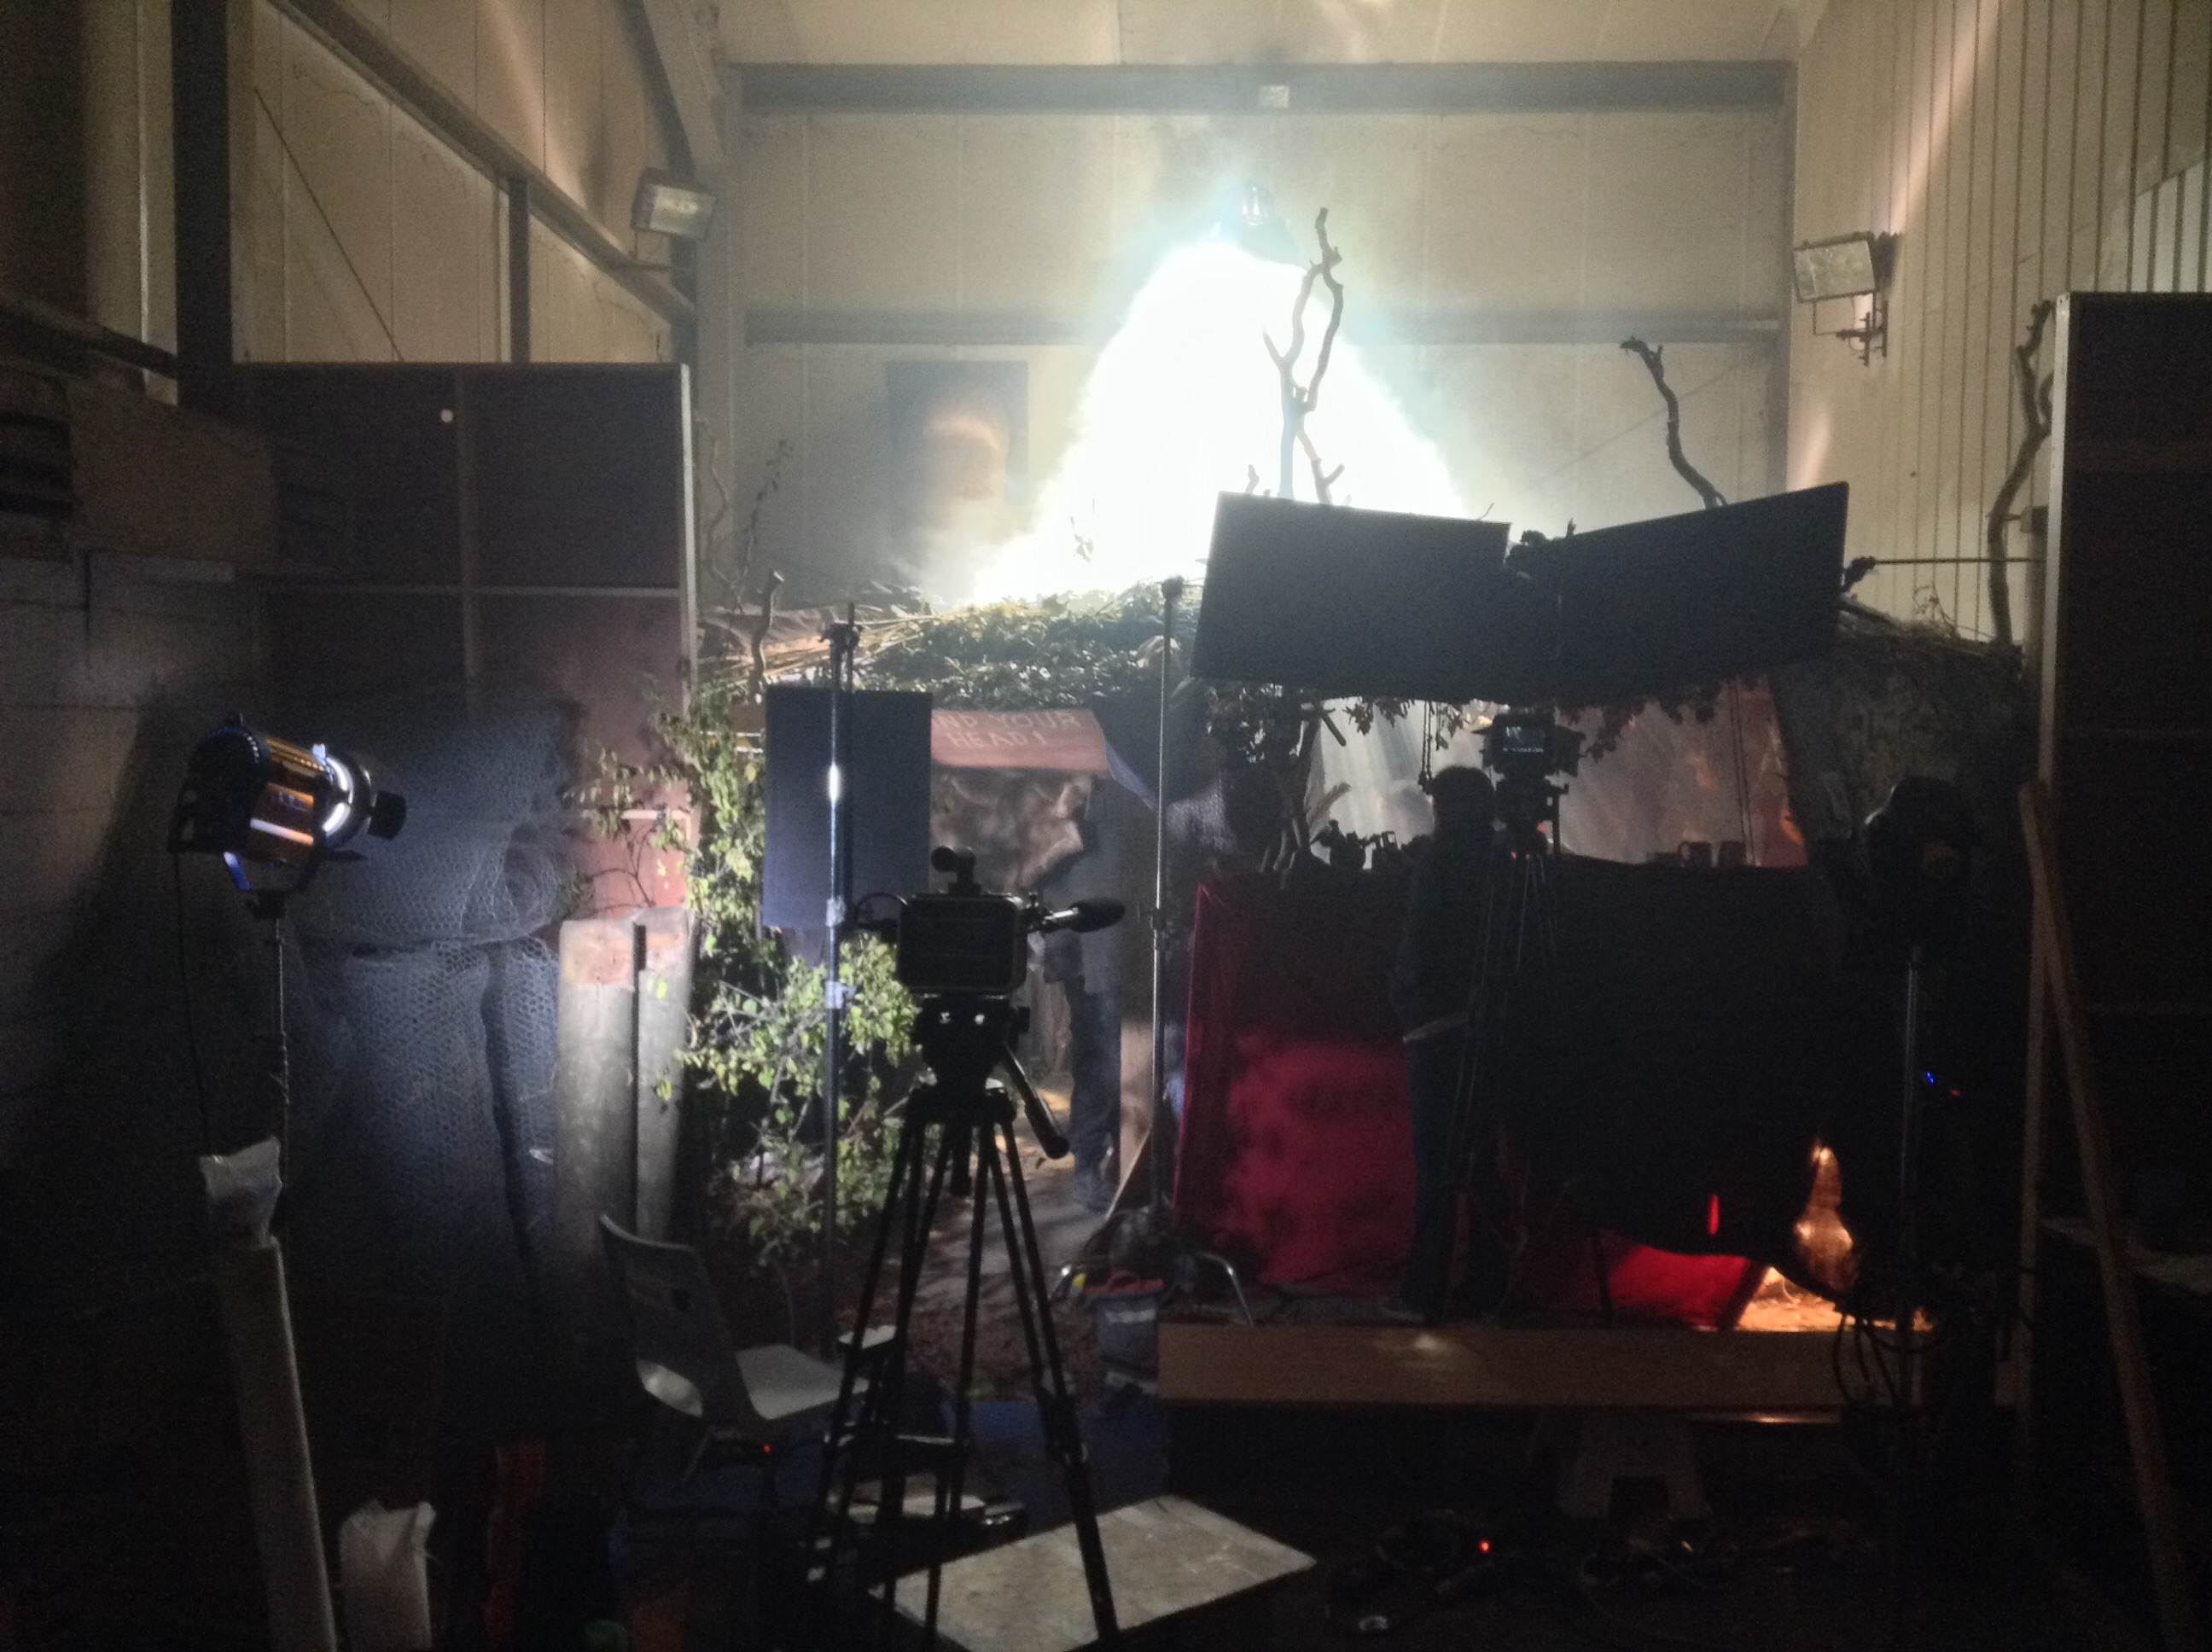
Karn’s house is an awesome set which I had been walking past at Ren Studios for six weeks before I finally got to light it. It didn’t disappoint.
Behind all that smoke at the top is the HMI
In the words of my camera assistant Andy Roughan, I had to John McClane it to get the HMI up on the metal tank behind the set. After climbing onto the tank via a stepladder, I had to shimmy around an incredibly dusty pipe to get to the spot where the lamp needed to be. Getting the lamphead, the low boy stand and sandbags up there was fun. At one point I lost my balance and fell backwards, towards the roof of the set. I shouted a naughty word at the top of my voice, thinking that not only was I going to injure myself quite badly, but I was going to destroy everyone’s favourite set before we’d shot a single thing on it. Fortunately it was so well-built that it took my weight, or at least the part of my weight that I was forced to put on it, and no harm was done. Except that me shouting the naughty word in such a tone of utter panic had given everyone within earshot a minor heart attack.
Squish’s cyclotron
Why was it so important to get light up behind the set, rather than shining it down through the roof from in front? The answer is smoke. You can’t really see smoke unless it’s backlit, so in order to get those magical shafts of light coming through the set, the HMI had to be at the back.
After shooting the video blog, Andy and gaffer Richard “Squish” Roberts finished building the cyclotron for the firelight effect. This consisted of three 100W bulbs behind a red gel, and two behind an orange gel. I don’t want to give away screengrabs yet, but you can see the fire effect at work on set dresser Amanda Stekly in this ropey iPad photo:
Set dresser Amanda Stekly, lit by the fake firelight
This fire effect served to light Ren (Sophie Skelton) in the foreground of the master shot very nicely, and separate her from the background through colour contrast. It rendered the 2ft kinoflo shown in the video blog unnecessary.
When we came in for the close-ups I continued to differentiate the characters of Ren and Karn (Christopher Dane) through light quality, as I had in Wales. I brought in an LED fresnel for Karn’s close-up, to get a hard sidelight, then for Ren’s close-up I used the 2ft kino to get a much softer look and from a less severe angle.
It’s a shame there was only one scene to film in this set; it would have been great to use it more. But it will certainly add a lot of production value to the opening episode of the series.
Ren is copyright 2014 Mythica Entertainment. Visit www.rentheseries.com to find out more.
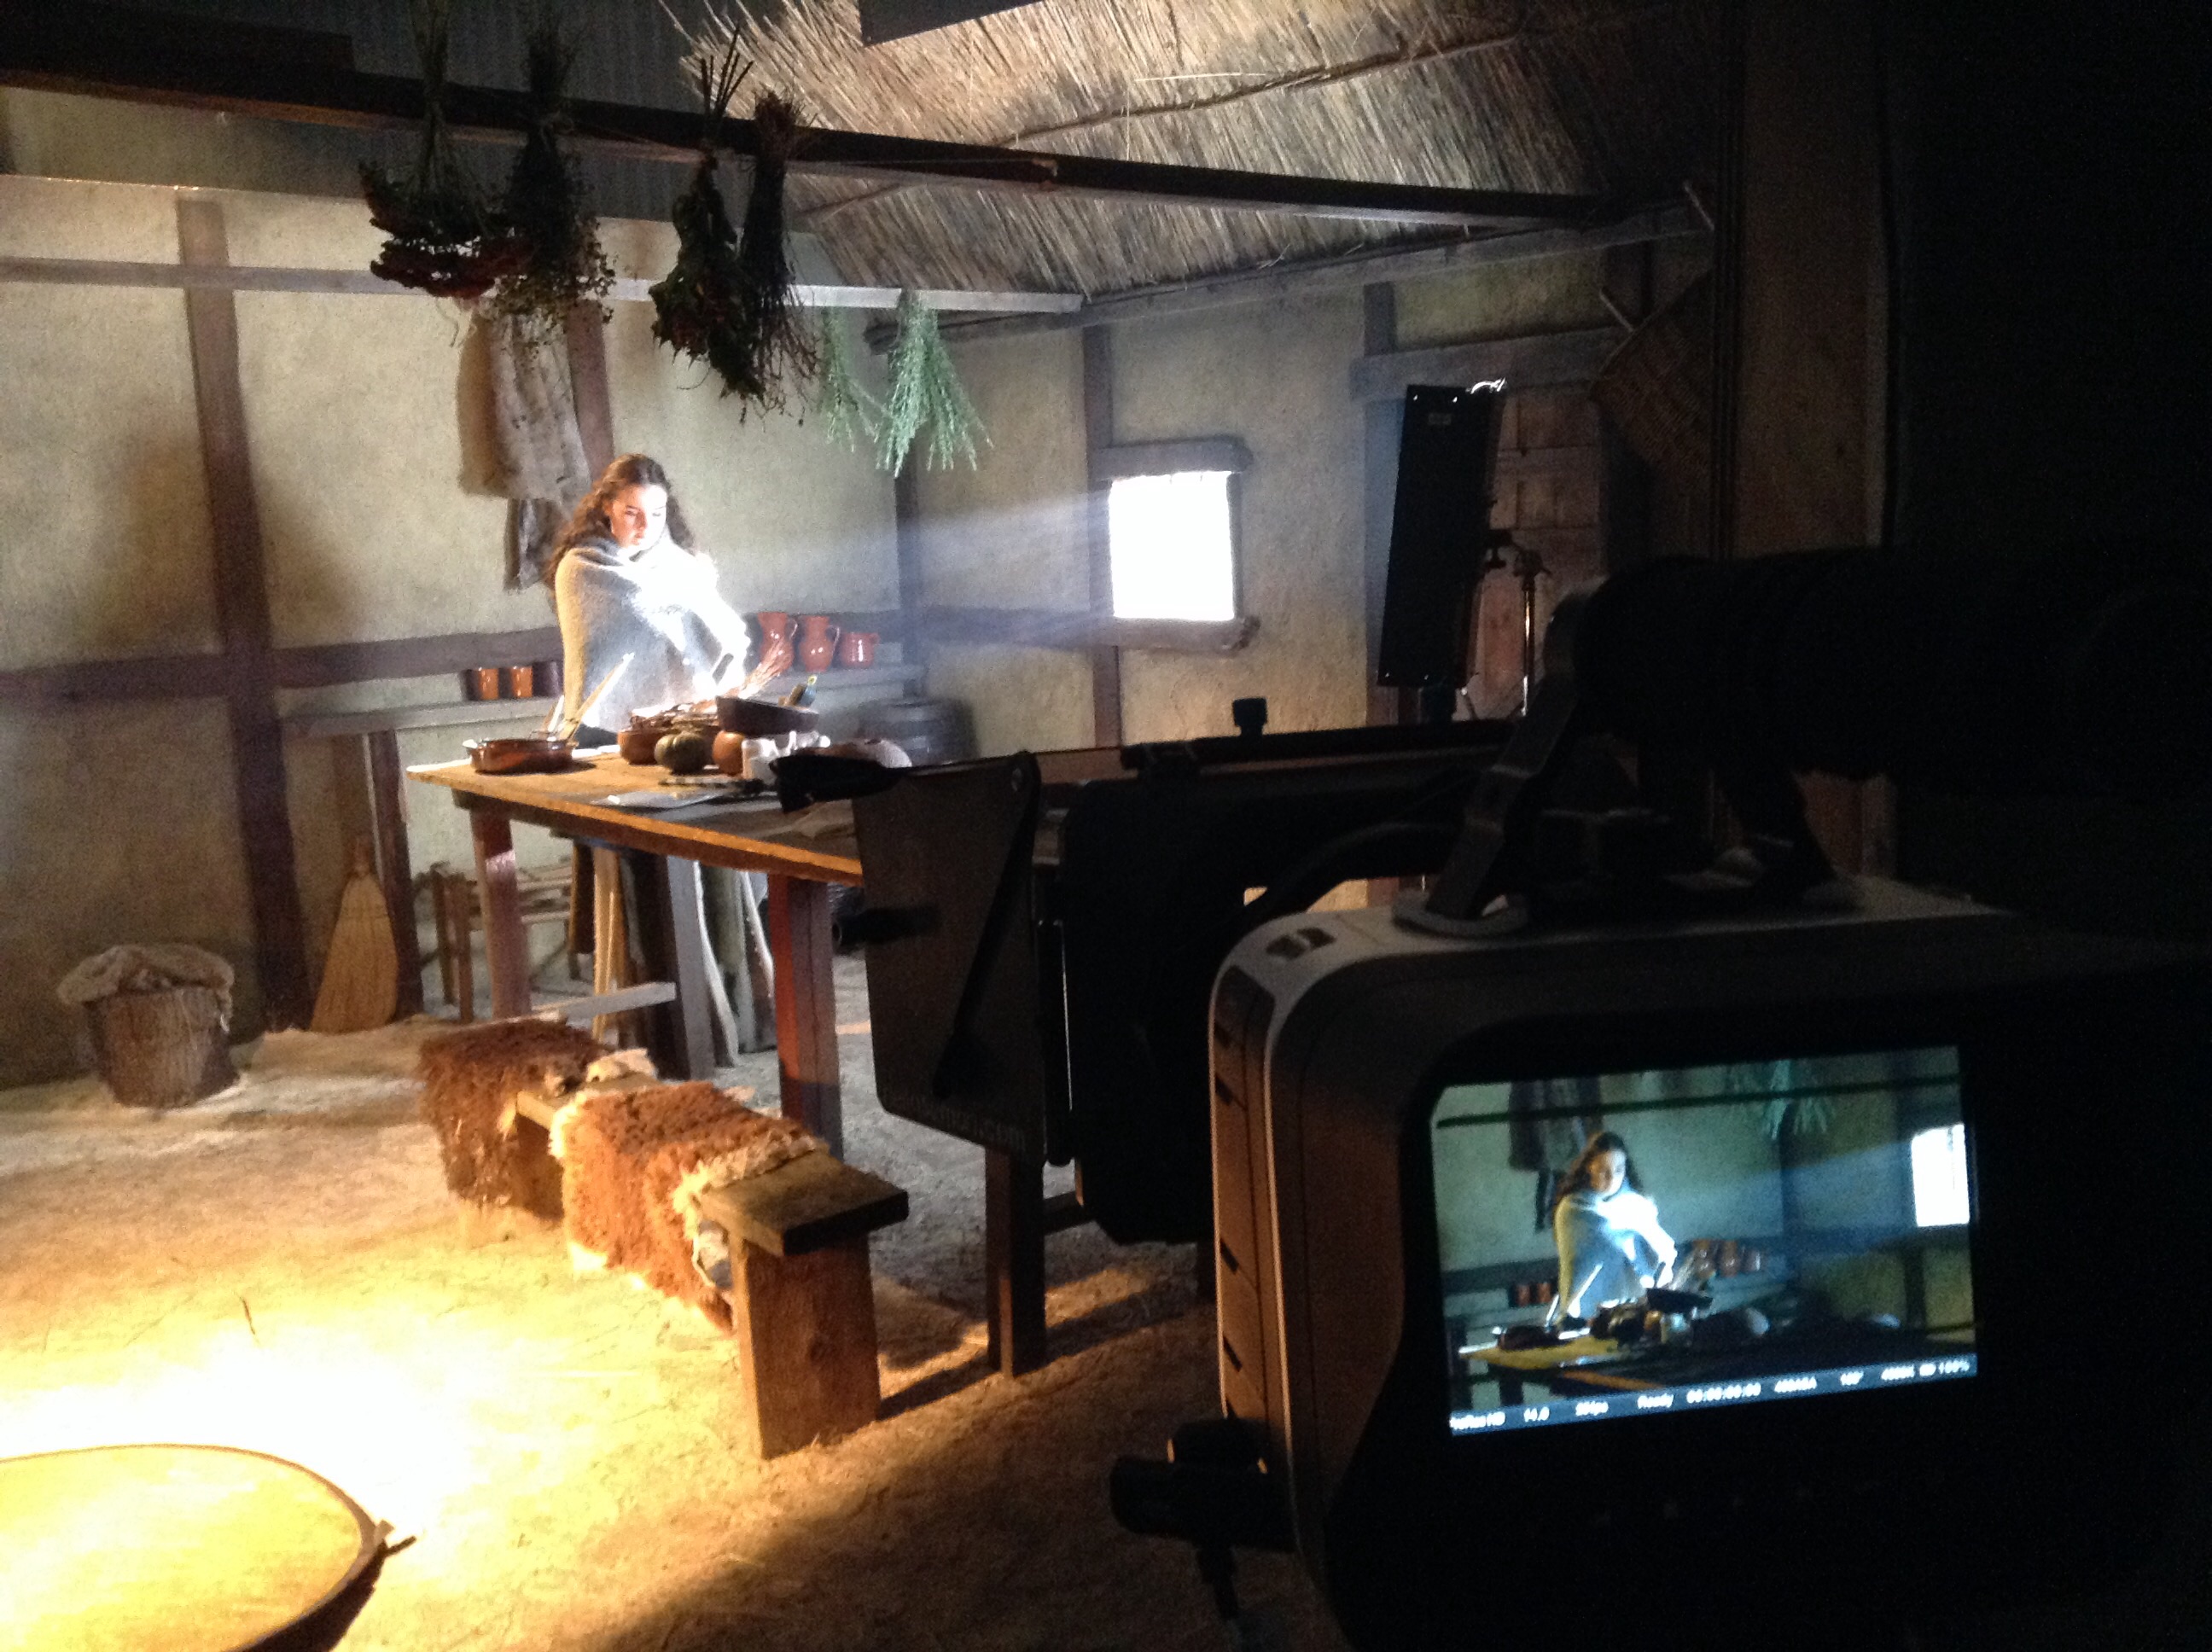
This is our big interiors week on Ren. The main set is the inside of Ren’s house, which was assembled in a mere three days by Chris Dane and his team, cannibalising the village exterior set. In this video blog I explain how I lit the set.
This set-up worked pretty much as-is for the first big scene in the house, shot on Monday. It was all handheld, so I needed the flexibility to move around with the camera and not worry about lamps on the floor getting in shot. The way I’d lit the set meant that the cast could stand pretty much anywhere and look good, especially since whoever was wiggling the “firelight” reflector could tweak the angle of it to follow any actor threatening to go a bit dark.
100W bulbs hidden behind the dresser for “candlelight”
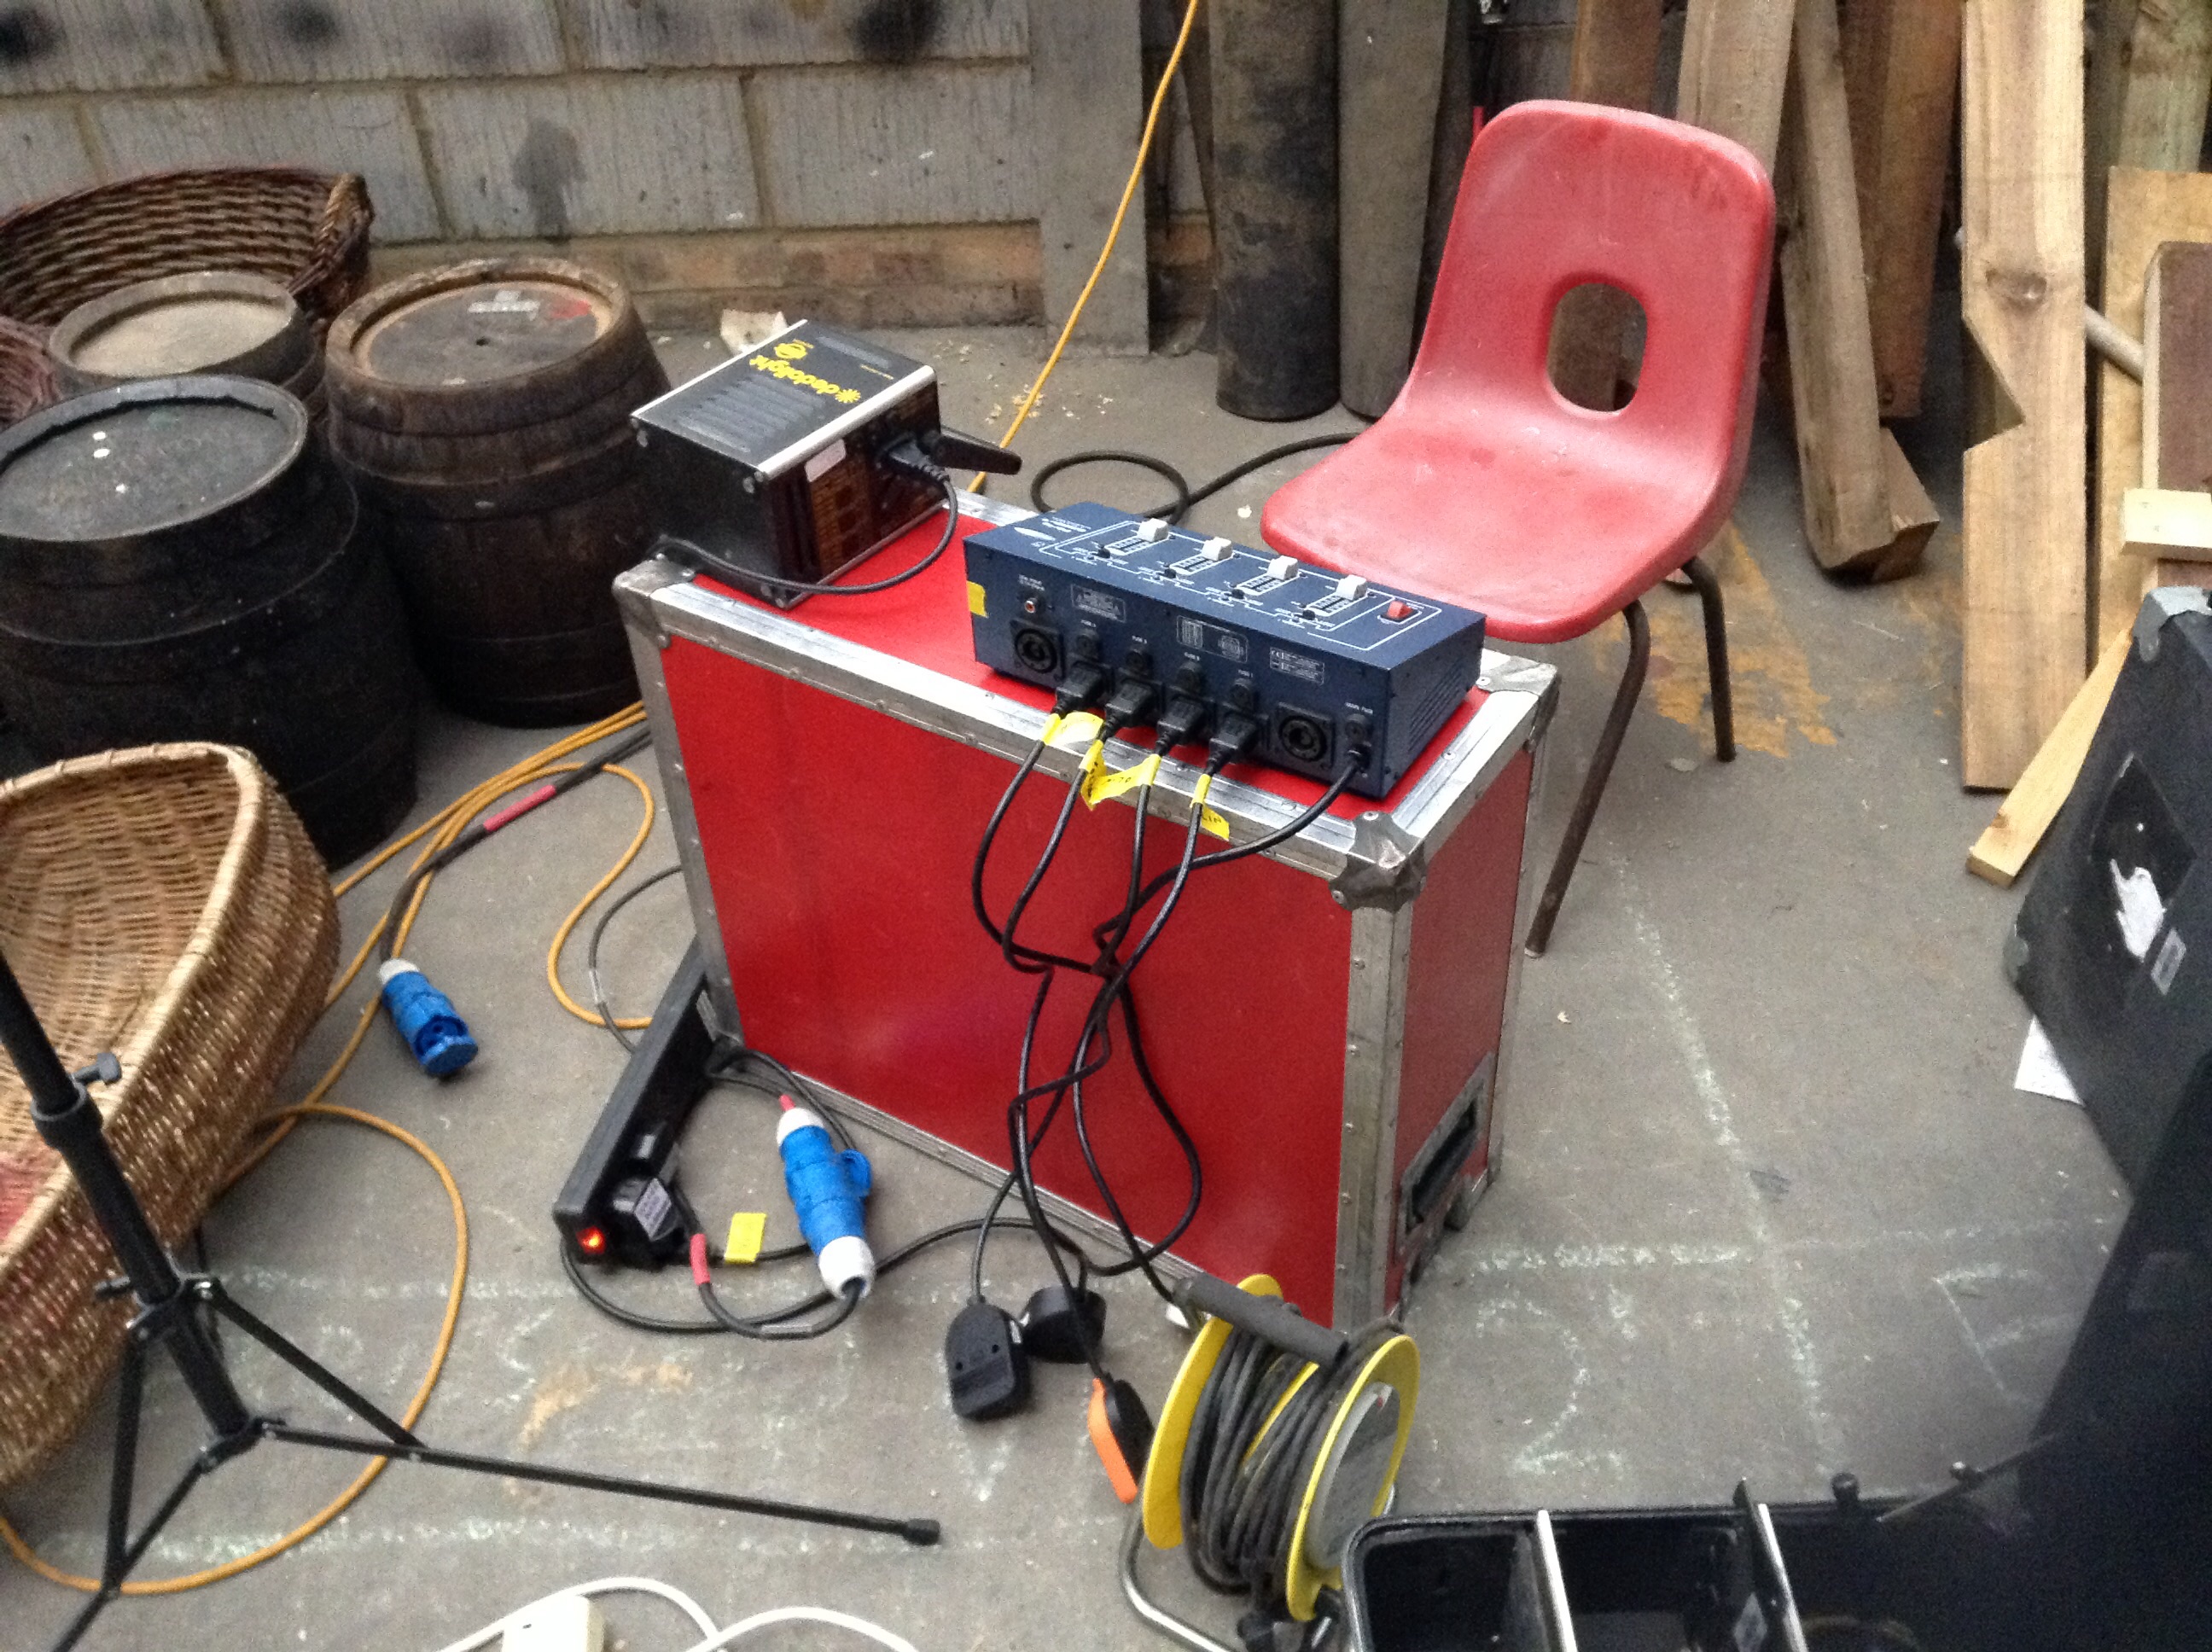
As the bedroom was visible in the background of many shots, I rigged a rough version of the candelight effect I knew I would be using when we got to the bedroom scenes proper. I clipped four 100W tungsten bulbs behind pieces of furniture and cabled them into two channels of the dimmer board Colin kindly lent us. These were then flickered to suggest flames.
The dimmer station
The dedo over the table proved to be superfluous. When I saw Claire making candles for the set, I asked her to double-wick them. I’d read in American Cinematographer that they’d done that on Pirates of the Caribbean to boost the light output, and sure enough, once those candles were lit, the dedo wasn’t needed.
The following day I played around with the lighting a bit more. When we came in for close-ups – this time on sticks – I turned off the overhead 4ft kino and brought in a 2ft kino on the floor for Window Wrap (Lighting Technique Number #3). That way the light got into the talent’s eye sockets and was generally more flattering.
The kinoflo on the right acts as Window Wrap
For another scene I decided the fire had gone out, allowing our bad guys to be bathed in cool daylight while the good guys stayed near the candlelight by the bedroom door. It’s nice when you have motivated colour contrast like this in a set and you can play around with which characters are in which colour of light. I look forward to shooting the remaining house scenes and developing some nice candlelight in the bedroom.
Here’s a little video blog about the challenges of shooting on the amazing medieval village set that Chris Dane and others have built for Ren.
I’ve been using the Artemis app a lot to test out lens choices and compositions for “seeing off the set” issues. That way if I’m set up for a shot and we’re waiting on costume or an actor, I can preview the next shot on Artemis and warn Chris that he’ll need to move a wall to hide the car park.
I spent last week in rural Sussex DPing Ted Duran’s 30 minute action-comedy, The Gong Fu Connection. It was a great shoot with a real community atmosphere, excellent food and beautiful weather. I’ve just been looking through the rushes and I’m blown away by the amazing images that my Blackmagic Production Camera has produced. They are very filmic with an incredible amount of detail, even though we only shot in 1080P.
Colin Smith operates the Canon C300 on his Steadicam Pilot
Not everything went to plan though. The aim was to capture the fights using fluid Steadicam photography, and since I hadn’t used a Blackmagic with Colin’s Steadicam Pilot before, he and I met up the weekend before to test the set-up.
The chief difficulty was that the rig’s built-in monitor accepts only a composite video input, while the Blackmagic outputs only an SDI signal. I searched online for a portable SDI to composite converter, but no such thing seemed to exist. I already had an SDI to HDMI converter, so the obvious solution was to buy an HDMI to composite converter. But the more links a chain has, the more opportunity for weakness.
I made the purchase and Colin sorted out power adapters so that both converters could run off the same battery as the Steadicam monitor. We tested it at my flat and it worked perfectly.
Flash-forward a week and we’re on set preparing the Steadicam for The Gong Fu Connection’s first martial arts sequence. All we’re getting on the Steadicam’s monitor are colour bars, which are output by the HDMI to composite converter when it’s receiving no input signal. The other converter, the SDI to HDMI one, has packed up.
Without a working monitor on the bottom of the rig, Colin can’t watch his step and frame the shot at the same time. The Steadicam is essentially useless.
There is a Canon C300 on set, being used for behind-the-scenes shooting. Although Ted and I are both keen to shoot the main film exclusively on the Blackmagic, to avoid severely disrupting the schedule we decide to shoot the day’s Steadicam material on the C300. (The C300 has SDI, HDMI and composite outputs. Blackmagic Design take note.)
DO NOT BUY THIS CONVERTER.
At lunchtime I get on the wifi and see if I can order a replacement SDI to HDMI converter. The only one that can be delivered the next day (a Sunday) is the same model as the one that packed up. Having little choice, I order it. Amazingly it is indeed delivered on the Sunday. Nice one, Amazon.
Unfortunately it doesn’t work. I was at least hoping for the paltry month of service I got from the previous one. But no, this one is dead on arrival.
By a process of elimination we check that the converter is indeed the piece at fault. We swap cables and cameras and the results are the same.
We continue to shoot the Steadicam material on the C300.
But I have one last desperate idea to get the Blackmagic working on the rig.
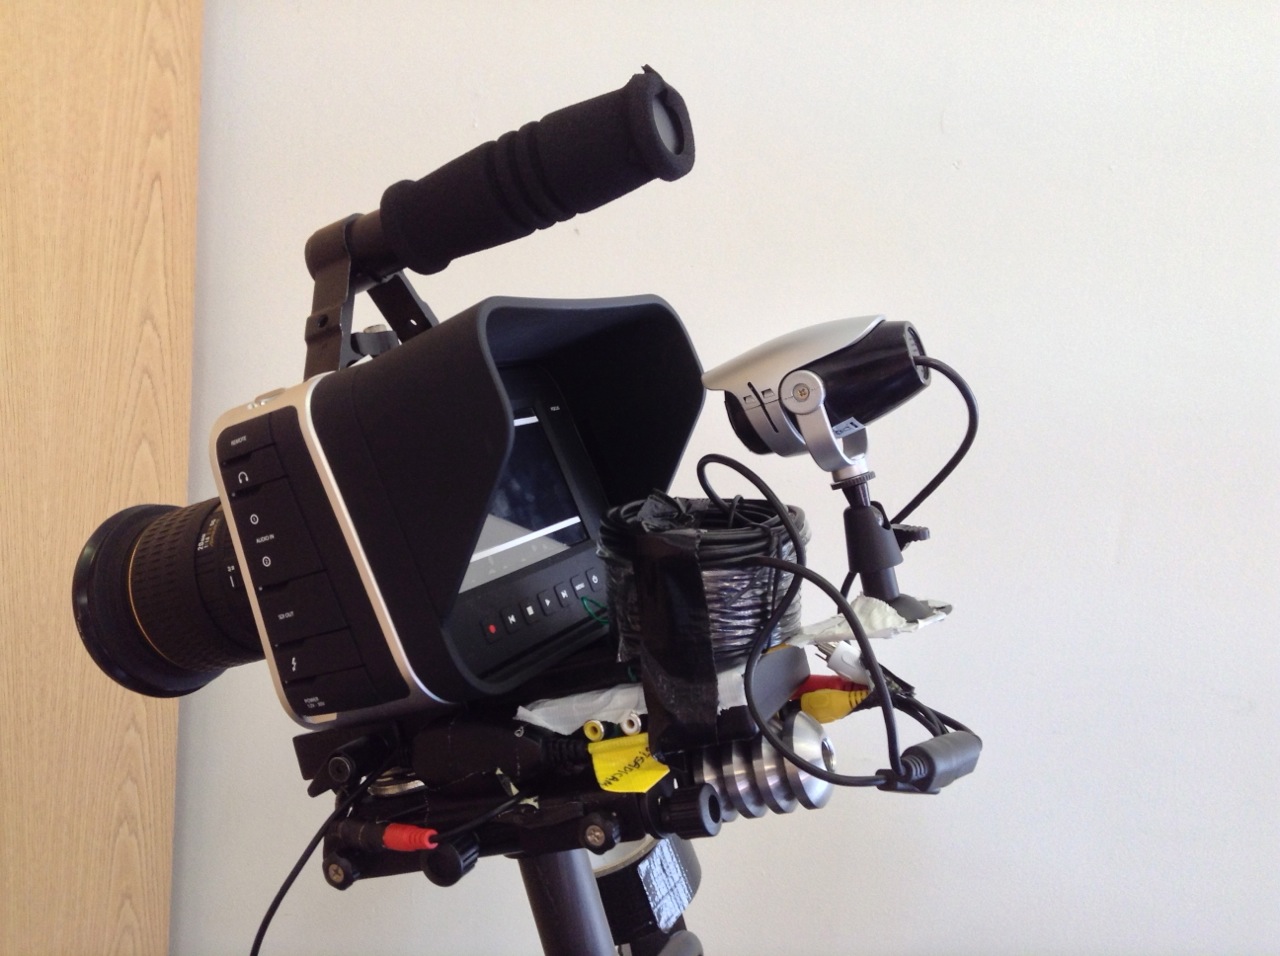
The CCTV camera, set up to film the Blackmagic’s screen
On Monday morning I send our driver, Lucky, to the nearest Maplin. I’ve given him instructions to buy a small CCTV camera. When he gets back with it I have Colin attach it to the rig behind the Blackmagic, filming the Blackmagic’s screen. The CCTV camera outputs a composite signal directly to the Steadicam’s monitor.
Incredibly, this works. But it does mean enclosing the Blackmagic and the CCTV camera in black wrap to eliminate reflections on the former’s screen. Which means we can’t get to the iris controls, and we’re relying on the distances marked on the lens barrel to focus. And to make matters worse, the Steadicam Pilot can’t take the weight of a V-lock battery, so the Blackmagic must run off its short-lived internal battery. Between takes we have to plug it into a handheld V-lock to top up the charge.
After capturing two or three successful set-ups with this ludicrous rig, we decide it’s slowing us down too much. I finally abandon all hope of using the Blackmagic on the Steadicam.
For those interested in how the C300 and Blackmagic stack up against each other, the Canon has a sharper, more video look compared with the Blackmagic’s filmic images. The Canon also has more compression artefacts due to its lower bitrate. But they seem to cut together alright once graded.
The lack of an HDMI output on the Blackmagic has been the one thing that’s really caused me problems since buying the camera. I’d be tempted to go for a Kinefinity mod if it wasn’t so expensive…
Of course, the camera is still incredible value for money. Personally I think the only competitors in terms of image quality are the Reds. (The Alexa and film are in a whole other league.) But it is strange that Blackmagic Design claim to have built the camera for people working in the low budget world, but apparently didn’t consider that such people rarely have access to SDI monitors.
Here’s a brief video blog from the set of Handmade Theatre‘s The Flying Machine, explaining how spacelights are used to create an even light for multi-camera shooting.
A clip from The First Musketeer has been released. Taken from episode three, it shows the first meeting between Athos and the mysterious Marion.
Rocamadour. Crazy, huh?
This was shot at Rocamadour, a medieval town carved into the side of a gorge. (Read director Harriet Sams’ blog for more on the locations of The First Musketeer.) And I think this may have been the night when gaffer Richard Roberts quite literally got a shock as the 1.2K HMI ballast packed up. His arm was numb for 20 minutes. Fortunately this happened after he had executed some nice steadicam work for the early part of this scene.
Come to think of it, it was probably also the night he knackered “the donkey”. Take a moment to come up with your own jokes. Done? Okay, so the donkey was his van. Yeah, not so funny, but at least I let you dream for a bit. Anyway, you can imagine how steep the road was to get down to this place. Now imagine it’s also incredibly narrow. And that the van is quite small but loaded full of generators and other heavy kit. Like I say, Richard knackered his donkey.
Richard avec le steadicam. Photo: Jessica Ozlo
My recollection is that this was our first big night exterior, and I remember being shocked at how long it took just to cable everything. Often we were throwing cables over balconies to someone else below – to avoid running the cable through shot. When it was unavoidable, the wonderful art department – Amy Nicholson and her assistant Denise Barry – would come in and hide the cables with straw. It really felt like 30% of the set-up time was planting the lights, and the other 70% was running the cables, hiding the cables, siting the generators, checking we weren’t overloading either of them, discovering we were even though the generators were rated a full kilowatt above what we were drawing, deciding to run some stuff off the mains, blowing a fuse because the electrics are old, failing to find the fusebox, etc, etc.
When lighting night exteriors, I tend to start from the back and work my way forwards. Backlight lets you see everything without really seeing it, and then you can add in pools of light from the sides when you need to see more. So for the wide shot at the start of the scene, the first lamp to go up was a 1.2K HMI (before it died), right at the back. There was some debate about whether we could site it there, because it was on some steps which were used occasionally during the night by the resident monks. Yep, monks. In the end we said “screw it” and put it there, leaving as much room as possible for the monks to get past it. Once smoke was pumped in, that HMI gave us the nice blue ambience in the background.
Nicole O’Neill as Marion De Lorme. Photo: Jessica Ozlo
Opposite the door of the tavern were a couple of Dedos creating pools of light around the candles – more on that in a future post. In the foreground I placed a Kinoflo on the floor to the left of frame, dimmed right down and diffused, just so characters wouldn’t be complete silhouettes going under the arch.
The conversation between Athos and Marion is backlit by a Dedo boomed over their heads, behind them (from the camera’s point of view). It wraps around Marion’s face enough to make out her profile, which is about all you want in a mysterious scene like this. There’s some bounce on Athos which I think was just coming off the surrounding stone. The only other lamp was a 2.5K HMI, lighting the background. For Marion’s close-up, I aimed the Dedo at Athos and let the bounce off his shirt and jacket light her face.
If you want me to rationalise it now, I’d have to say that this Dedo represents a particularly bright moon, and the HMI represents starlight. Frankly this was one of those cases where making it look good seemed more important than making it look realistic.
On the left, a real streetlight. On the right, a 650W Arrilite with Urban Sodium gel.
Saturday night saw the third and final day of production on Forever Alone. If you haven’t already, check out my blogs on day one and two of this sci-fi short by Jordan Morris. (I’ve gone back and added some frame grabs into the day two post.)
This time around, our lighting kit had grown just slightly with the addition of a 650W Arrilite. Without this it would have been near impossible to light the nighttime alley scenes that were scheduled. The alley in question was in a suburban area, conveniently adjacent to the producer’s house and thus a power source.
I knew going into this shoot that I would have to embrace the sodium vapour streetlamps. In the past I’ve always avoided or flagged them, because that grungy orange look gives away that you don’t have the budget to swap out the bulbs like they do in Hollywood. American film and TV nights are always steely blue; British film and TV nights are usually seedy orange. With only one flag and one C-stand in our kit, however, I had no choice.
The orange backlight on Faith (Haruka Abe) and the fence, although apparently from the streetlamp in the background, is actually from an Arrilite 650 out of frame right, gelled with Urban Sodium. A daylight-balanced LED panel, also out of frame right but closer to camera, keys Faith. A second panel hidden behind the end of the fence lights the white van and the grass in the background.
Fortunately there were no streetlamps close enough to spill light onto our character, Faith (Haruka Abe) – they were only creating pools of light in the background, which helped add depth. I used one in particular to motivate a strong backlight, in reality generated by the Arrilite, gelled of course with Urban Sodium (Lee no. 652).
For colour contrast, an LED panel set to 5,600K threw in a little “moonlight” from the side. The second panel, also set to daylight, was positioned to light the deep background. It was so handy, as I raced to rig our final set-up before wrap, to be able to slap a V-lock battery on one of these panels and move it across the street in seconds.
When Other Faith appears on the scene, she’s keyed by a Dedo covered with tough-spun diffuser and the characteristic Medium Blue/Green gel. My favourite shot of the night was her close-up:
Haruka Abe as Other Faith. Image courtesy of Jordan Morris
Emulating the beautiful contrasty look of the TV show Fringe, I eliminated all fill light to put one side of her face in crisp, black shadow. An LED panel backlights her hair, while the Urban Sodium-gelled Arrilite rakes across the fence in the background.
Eliminating the fill was unexpectedly difficult – a downside of using a sensitive camera. The slightest bit of bounce would contaminate the blacks, as did a faux period streetlamp in the adjacent garden. It’s hard to figure out where unwanted light is coming from when it’s so dim that your naked eye can barely perceive it.
Forever Alone is now wrapped, and Jordan’s beginning the processes of editing and adding extensive visual effects. Personally I’ve learnt a lot about how far a camera be pushed, specifically the Blackmagic Cinema Camera. Many of the wide shots I’ve reviewed are under-exposed (partly due to our widest lens being relatively slow) but the raw data allows the exposure to be bumped up in post without them looking nasty.
What’s the most you’ve ever had to push a camera?
In this splitscreen shot, the two Faiths are backlit by the 650 – this time without a gel, while an LED panel gelled with Urban Sodium lights the background. A second LED panel, daylight balanced, keys the downside of First Faith (left), while a Dedo gelled with Medium Blue/Green keys the downside of Other Faith (right).
Day two saw us shooting a big scene in the dining room. Since the location was only available to us during daylight hours, the windows had to be blacked out with bin bags. Ideally for night interiors, I would put an HMI outside to shine “moonlight” in through the windows, and perhaps use halogen floodlights to create depth and interest in the deep background. This can bother some directors, however, because it means leaving the curtains open – hardly realistic. I figured that if I could create an interesting night interior look on Forever Alone without the crux of open curtains and deep background, it would give me a lot of confidence in the future when working with those restrictions.
An LED panel hidden behind the wall that Charlotte is leaning on supplements the ceiling light from a more flattering angle. A CTB-gelled Kinoflo Divalite provides the blue wash in the foreground. Image courtesy of Jordan Morris
I began by turning on the ceiling light, something I almost never do. I’m not a big fan of toplight, but it seemed appropriate given the interrogative nature of the scene, and I knew I could add bounced light off the table-top if the look was too harsh. Also, the shadow of the lightshade added some interest to the room’s blank white walls. I used the 60W tungsten bulb, and placed black-wrap across the top of the shade to prevent bounce off the ceiling from raising the ambient light level.
Cardboard barn doors. This kind of DIY solution is so much easier with sources that don’t get hot.
I clamped the Dedo to the top of a mirror directly behind Faith, which allowed me to give her a dedicated backlight. I gelled this pink, foreshadowing her eyes glowing this colour at the end of the script.
Other Faith, a visual representation of the heroine’s darker side, was keyed by another dedicated source, this time gelled with Medium Blue/Green again. Ideally this source would have been a Dedo, to achieve fine control, but only an LED panel remained available. So to reduce the panel’s spill onto other characters, I fashioned makeshift barn doors out of a cardboard box.
To light the living room – visible in the background on reverses – I employed the Divalight. This was gelled blue to suggest moonlight and create some depth and separation – a proxy, I suppose, for those deep backgrounds I couldn’t have outside the windows.
Much has been made in recent years of the low-light sensitivity of modern digital cameras, and the attendant reduction in required lighting power. When competing with natural light, larger instruments are still necessary, but Forever Alone really helped me to see what can be achieved with minimal gear. This weekend I get to see how much I can push this in a night exterior scene, as we complete principal photography. Stay tuned.
Working from the foreground back, an LED panel to the right provides the key on Charlotte (centre), with fill supplied by the ceiling light. Other Faith (right) is keyed by a second panel, gelled with Medium Blue/Green. A Dedo provides backlight, while a blue-gelled Divalite illuminates the background. Image courtesy of Jordan Morris