Depth Cues in Cinematography

One of the most important jobs of a director of photography is to help the viewer’s brain decode the image. Just as a sound mixer must get the cleanest possible dialogue and ensure that ambience, music and effects don’t distract from it or drown it out, so a cinematographer must ensure the eye is drawn to the character and not distracted by the surroundings.

Depth is a key part of creating this clarity. Christopher Nolan once said: “95 percent of our depth cues come from occlusion, resolution, color and so forth, so the idea of calling a 2-D movie a ’2-D movie’ is a little misleading.”

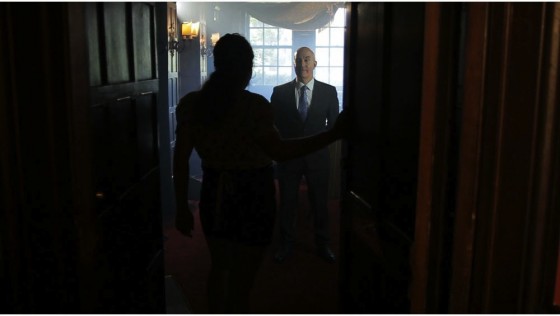
This week, on The Deaths of John Smith, I photographed a shot that used every trick in the book to create depth. Why? Because it was a one-shot scene, a flashback taken out of context, and the audience needed to “get it” quickly.

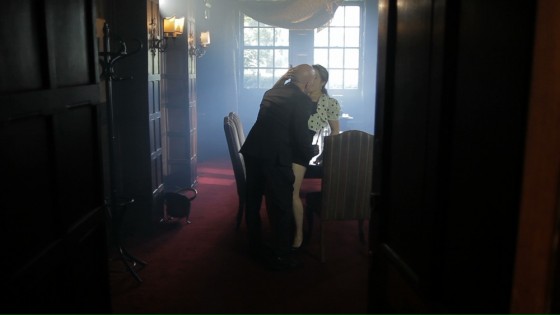
When I first set the camera up and we stood John (played by Roy Donoghue) in position, his dark suit melted into the dark wood panelling behind him, so there was clearly some work to do. Once lit, as you can see from these frame grabs, he stands out sharply.
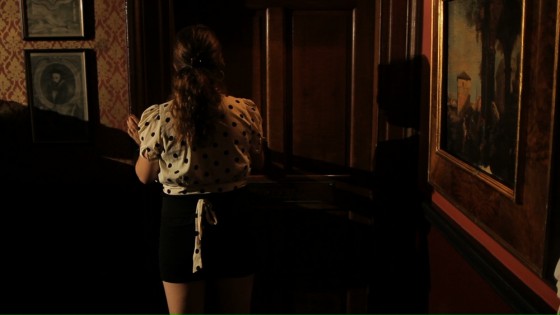
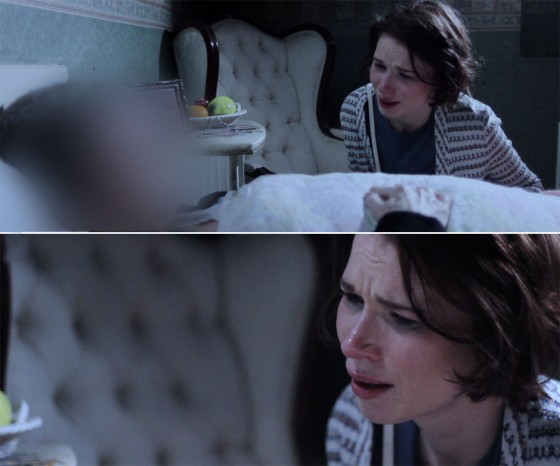
Kirsty Minchella-Storer (Sarah) and Roy Donoghue (John) in The Deaths of John Smith, directed by Roger Harding, copyright 2013 Two Hats Films
frame2 frame3 Kirsty Minchella-Storer (Sarah) and Roy Donoghue (John) in The Deaths of John Smith, directed by Roger Harding, copyright 2013 Two Hats Films

Let’s look at the depth cues going on here.

  1. DEPTH OF FIELD. Although I’m shooting at f1.8, on a 20mm lens nothing is massively out of focus, so that isn’t helping much.
  2. SMOKE. There is more smoke between the camera and a distant object than between the camera and a close object, and therefore smoke aids depth perception.
  3. CONTRAST. The foreground is darker than the background, helping the eye to distinguish between the various layers. In particular, the smoke picks up the light from the windows at the back of the room, creating a blue-white haze against which John’s dark suit stands out clearly, as does Sarah’s silhouette.
  4. COLOUR CONTRAST. The foreground is lit with warm orange, while the background is a cool blue, again enhancing the separation between the layers. (Imagine you’re standing on a hill and looking at another hill in the distance. That distant hill looks much bluer than the one you’re standing on, due to atmospheric haze. The smoke and colour contrast mimic this effect.) For most of this film I kept all the light sources within about 1,500K of each other, but in this scene I deliberately allowed more like 3,000K of difference between warm and cool sources to give the flashback a more stylised look.
  5. BACKLIGHT. John has a little edge-light on his righthand side, ostensibly from the wall sconces, but in reality from a hidden Dedo. This helps to cut him out from the background.
  6. FRAMING. The doorway frames the image, adding an extra layer of depth.
  7. PARALLAX. This is the optical phenomenon whereby, when you move your head (or a camera) things closer to you appear to move more than things further away. By dollying slightly into the room behind Sarah we create a dramatic parallax effect as the doorway grows on camera much more than John and the room behind him.

I’ll leave you with my (retrospective) lighting plan for this scene. Be sure to check out the film’s official website at www.thedeathsofjohnsmith.com
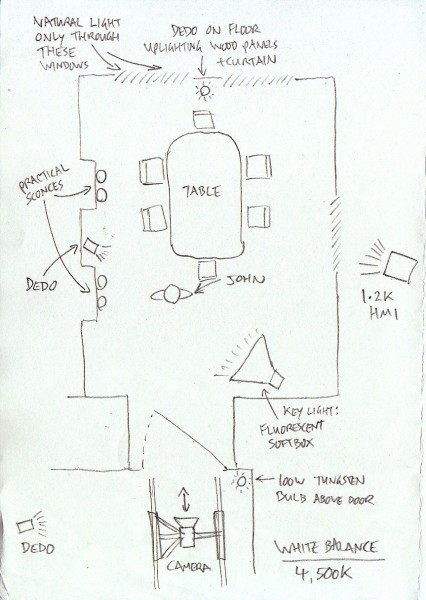
Lighting plan
Lighting plan
Depth Cues in Cinematography

How to Speed Up Your Shoot

Director under pressue. Photo: Paul Bednall

Tomorrow the film I’m currently DPing, The Deaths of John Smith, has an extremely packed schedule. This has got me thinking about how a filmmaker can keep themselves on schedule when faced with a seemingly impossible amount of material to get through.

The most effective action is of course to take out a big red pen and start cutting down the script. I know personally I find this very difficult, particularly if I’m both the writer and the director, because I’ve convinced myself by this point that everything in my shooting draft absolutely has to be there. Even though I know that, when I get to the edit, some scenes will inevitably get deleted and some dialogue will get trimmed. The challenge is to identify those trims now, on set, and save myself the trouble of shooting them.

Beware that simply cutting some dialogue is unlikely to have a signficant effect on your schedule, because most of your time on set is spent not shooting or even rehearsing, but setting up. Take a long, hard look at your shotlist or storyboards. Do you really need all that coverage?

Consider a Single Developing Shot (SDS). This means shooting an entire scene in just one set-up, with some camera movement and perhaps some dynamic blocking to maintain interest. The danger here is of doing a ridiculous number of takes of this one set-up because you know you have nothing to cut to if it’s not perfect (a trap I’ve fallen into more than once). I would advise qualifying your SDS with a cutaway or two to claw back a bit of flexibility in the edit and ease the pressure on the master shot.

A developing wide shot covers a large chunk of a scene from The Deaths of John Smith (copyright 2013 Two Hats Films). A safety cutaway (right) is shot to get the editor out of any tight spots.

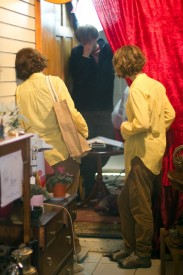
If you can’t see a way to reduce the number of shots you need, consider ways to make those shots quicker to film. The most time-consuming shots for a director of photography to light are reverses, where the camera flips around to shoot in the opposite direction to all the previous angles, meaning every light has to be moved, along with the video village and all the piles of idle equipment in the background. Can you get away without a reverse, by changing the blocking a little? That character who has their back to camera – could they cheat their profile towards us a bit? It’s cheesy and not very realistic, but TV shows often achieve this by having one character talk to another’s back.

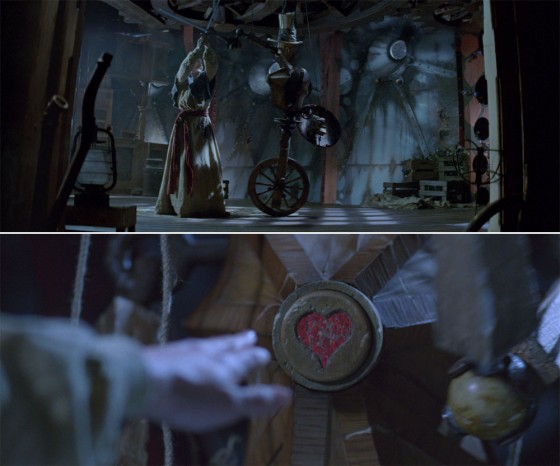
Ye olde person-talking-to-other-person's-back shot in Soul Searcher, obviating the need for a shot-reverse.
Ye olde person-talking-to-other-person’s-back shot in Soul Searcher, obviating the need for a shot-reverse.

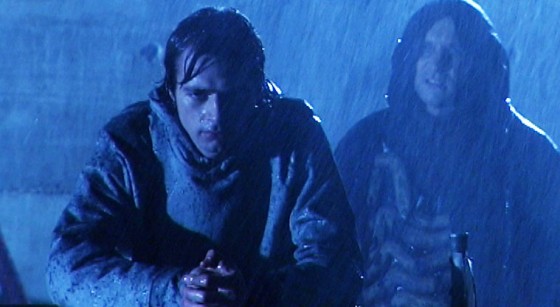
Down-the-line close-ups are also quick to do. This means that, after doing your wide, you leave the camera more or less where it is (and, crucially, the lights too) and put on a longer lens to get your close-ups. Watch your continuity carefully, because down-the-line cuts will really show up any errors.

An example of a down-the-line close-up from Stop/Eject

If all else fails, the wrap time is looming and you’ve still got half a dozen set-ups to get, it’s best if those set-ups are close-ups or even cutaways. Because you and a skeleton crew can come back another day, maybe to a different location, maybe with a stand-in for your lead actor, and shoot tight pick-ups. Clearly this isn’t going to work with a wide master shot, for which you would need your whole cast and crew back, and the same set/location.

In this scene from The Dark Side of the Earth, the insert shot was filmed in a pub function room with a skeleton crew, four months after principal photography.

Finally, when working as a DP I have occasionally been asked to speed up the shoot by not lighting it. It is usually at this point that I feign hearing problems. Yes, not lighting stuff will speed up the shoot enormously. But you’re no longer making a professional film; you’re making a home video with an expensive camera. Don’t ask your DP to do this – you’ll only offend them. Instead, perhaps ask what camera angle would require the least re-lighting.

What tricks and techniques have you used to speed up your shoots?

How to Speed Up Your Shoot

How to Light a Church

Roger Harding (left) and Jeremy Heynes in The Deaths of John Smith.
Roger Harding (left) and Jeremy Heynes in The Deaths of John Smith. A 1.2K HMI punches through the window on the right, while a fluorescent softbox illuiminates the arches on the left. Background light comes from two 500W halogen work-lights rigged to a dimmer, while fill (given that it was getting dark outside at this point) comes from a blue-gelled 1K Arrilite behind and to the left of camera.

This weekend shooting began on Roger Harding and Darren Scott’s feature-length comedy The Deaths of John Smith. As director of photography I was called on to light a beautiful rural church on a limited budget. Here are some tips for ecclesial cinematography:

  • Hire HMIs – powerful, daylight-balanced lamps. Without at least one you will never have enough light to illuminate anything but the tiniest of churches. As a backlight on a mezzanine level, a 2.5K HMI will illuminate most churches. Better still, put them outside the windows and create artificial sunbeams. (A blue-gelled blonde or redhead outside a stained glass window is pretty much useless; those windows cut out so much light.)
  • Use smoke. A £50 disco smoke machine is perfectly sufficient – use it to volumize the light and emphasise the depth and scale of the building. If you’re struggling to expose a bright enough image, smoke helps there too – because it catches the backlight and lightens up the shadows.
  • Candlelight is a good way to introduce colour contrast into your scene. Dedos are the best lamps to fake candelight with, as they can produce a small circular pool of light. Failing that, any tungsten source will do, ideally rigged to a dimmer board for a bit of flickering.
  • Assuming you’ve got your HMIs punching directly in through all the windows on one side of your church (that’s the side the “sun” is on), you now need soft light coming in through the opposite windows. Ideally these would be larger HMIs playing off bounce boards, but you might get away with soft boxes or bounced tungsten sources (gelled blue, of course) hidden behind pillars inside the building.
  • Sellotape together some old bits of coloured gel and rig them in front of a fresnel to simulate daylight through a stained glass window. Note that this doesn’t really work with unfocused lamps like redheads.
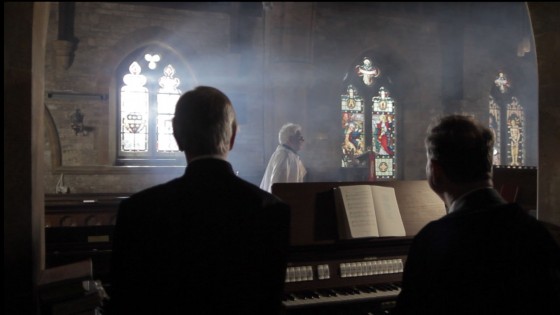
Left to right: David Draper, Bryan Ferriman and Adrian Moore.
Left to right: David Draper, Bryan Ferriman and Adrian Moore. Our single HMI shines through the lefthand window, suitably volumized with smoke, leaving natural light to deal with the other two. A blue-gelled 1K Arrilite off to the right of frame creates the edge-light on the righthand side of each character. An existing halogen spotlight over the organ was gelled with half CTB to cool it down a little. I chose to leave the nearside of the characters dark to contrast the foreground with the brighter background.

On The Deaths of John Smith I only had access to one HMI, so for every shot I needed to carefully choose which window to put it outside of for the maximum impact. I relied on natural light as well as blue-gelled redheads and fluorescent softboxes just out of frame for fill light. Nonetheless, I’m very pleased with the results. Next weekend we have to repeat the performance with a large congregation….

All images copyright 2013 Two Hats Films. Visit the Facebook page or the official website for more info on The Deaths of John Smith.

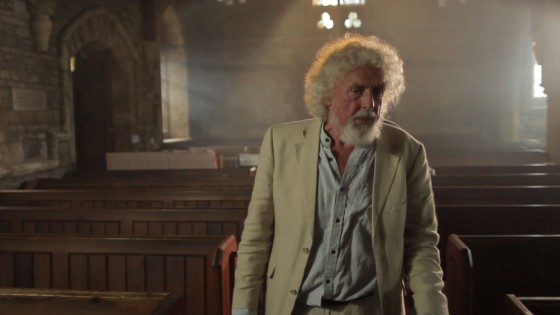
Here the "sun" (HMI) is outside of the lefthand background window.
Here the “sun” (HMI) is outside of the lefthand background window, but I couldn’t resist cheating a little and pushing a 1K Arrilite through a nice yellow stained glass window in the top centre background. Additional backlight comes from a blue-gelled Arrilite off frame right, while a softbox behind and to the left of camera illuminates the actor’s face.
How to Light a Church