Top Tips from Day Two of the Big League Cine Summit 2015

blcs-blue-on-whiteLast week I published the best tips I culled from day one of the 2015 Big League Cine Summit. To complete the set, here are the top tips from day two, starting with that legendary teacher of cinematography, Shane Hurlbut, ASC. Since Shane is so good at sharing his knowledge on the Hurlblog, I’ve only listed a few tips from him; I strongly recommend you check out his site for many, many more gems.

Shane Hurlbut – “Delivering Storytelling Impact with Light, Lens and Camera”

  • On the visual grammar of Crazy/Beautiful: controlled camera moves represent Jay’s controlling mother.
  • Shane likes to use the work of stills photographers as inspiration.
  • He added extra 400W sodium vapour fixtures to the existing 100W sodium vapour streetlights for night exteriors in Crazy/Beautiful.
  • He used a “damaged key” in Crazy/Beautiful to represent Kirsten Dunst’s flustered state. It’s messy, doesn’t quite reach both eyes.

David Vollrath – “Motivated Lighting”

  • “I don’t want to light their faces and bodies specifically. I like to light the space.” – Harris Savides
  • Stand where your subject will be to see what reflective objects are affecting your lighting.
  • Tabletops can be great bounce-boards for toplight. Maybe put muslim or paper on the table to enhance it.
  • Look for things to motivate light: windows, practicals, overhead fixtures, sconces, etc.
  • Once you’ve lit the space, it will become clearer how to light the faces.
  • Work with the art department in preproduction to make sure you get the practicals you need.
  • Flag your other sources off your practical so that excess light isn’t falling on them and washing them out.
  • You can use the reflection of a softbox to create a nice shine on a dark surface or even on a face.
  • A roll of duvetyne armed off a C-stand makes a fair stand-in for a 4×4 floppy flag.
  • “Beadboard” is just another name for polyboard. (I genuinely didn’t know that!)
  • Other bounceboards include foamcore and showcard.
  • Use Source 4 Leikos to fire into your bounce, because they’re easily cut and focused. They’re cheap to rent too.
  • It’s easier to rig a bounce card overhead than a softbox or a kinoflo.
  • Plus Green and Minus Green gels – to match or correct fluorescents – are useful in subtle 1/8th flavours.
  • “Lighting is in the gripping.” Taking away light can be more effective than adding it.
  • A “cocktail” is a layering of multiple gels.
  • A simple black card over a shiny piece of furniture can cut bounce and bring back contrast.
  • Hazers add great atmosphere, but they raise the fill level. To see shafts of light, use a dark background.

Caleb Pike – “Everything You Need to Know About Lenses”

  • A good set of primes will last you decades.
  • Lens choice affects: 1. Field of view, 2. Depth of field, 3. Compression (amount of perspective).
  • Use compression to isolate a subject, or to crop out equipment.
  • Use wide lenses to open up a space, exaggerate expressions or get the most out of camera moves.
  • Longer lenses are more flattering for close-ups. Short lenses can distort the face unpleasantly.
  • Don’t always shoot with your aperture wide open. Choose an appropriate depth of field for your story.
  • Generally it’s best to keep your aperture the same throughout a scene.
  • Avoid non-constant aperture zoom lenses for video work.
  • Primes (fixed focal length lenses) are generally faster, cheaper, lighter and sharper than zooms.
  • Cine lenses are heavier than stills lenses, do not breathe (zoom slightly when focusing), and have fixed filter rings.
  • Cine lenses have hard stops on the focus rings, so you can set focus marks on the lens.
  • Cine lenses have longer throws on the focus rings, so that follow focusing can be more precise.
  • Wide cine lenses have less distortion than their stills counterparts.
  • Passive lens adapters are cheap and simple; smart adapters maintain the electronic connection for autofocus etc.
  • Lens boosters can solve cropping problems caused by using a lens with a sensor size it’s not designed for.
  • Throttle adapters are passive adapters with neutral density fader filters built in.
  • Caleb’s budget lens recommendations:
    1. Nikon 35-70mm f3.5 macro
    2. Olympus 50mm zuiko f1.4 and 1.8 versions – sharp, with long focus throw – around $30
    3. Canon 40mm f2.8 pancake prime
    4. Nikon 100mm F2.8 E series – around $99
    5. Canon 28-80mm F2.8-4.0 L series – well built, very sharp – around $500

Matt Workman – “Camera Moves That Matter”

  • A camera “hand off” is a move that starts focused on one thing and then transitions to focus on another.
  • A classic establisher might start on a mysterious insert then pull back – “hand off” – to reveal the scene.
  • Spielberg, Scorsese, Luhrmann, Singer and Bay all use camera hand-offs frequently.
  • Camera moves increase production value and can cover multiple story beats in one shot.
  • Doing the same thing in cuts reduces your audience’s understanding of the scene’s geography.
  • Crane-ups give you a privileged view, a sense of power.
  • Write down the beats of the scene, then storyboard or previz. All departments can benefit from the previz.
  • Beware of boring bits in the middle of camera moves. Is it better to do it in cuts so you can speed it up?
  • Use Autodesk Maya for previz. Build a library of accurate grip equipment models.
  • Check out Matt’s other site which uses previz tools to illustrate other DPs’ set-ups.
Top Tips from Day Two of the Big League Cine Summit 2015

Top Tips from Day One of the Big League Cine Summit 2015

blcs-blue-on-whiteThis week the third annual Big League Cine Summit is taking place: two days of online masterclasses with top commercial, TV and feature film cinematographers. If you missed this educational and inspirational free event, here are the best tips I culled from day one’s sessions:

Frankie DeMarco – “Composition and Camera Operating for the Big Screen”

  • The advantage for a DP of working with a separate camera op is that you have a second opinion.
  • Try to think like an editor. What specific shots do you need to tell the story? Can you do it in a “oner”?
  • Lots of angles/coverage can kill performances and make the audience overly aware of the camera.
  • If you need to shift position for comfort, do it during a part of the take that the editor is unlikely to use.
  • You can sometimes get away with crossing the line if your singles are dirty.
  • Use clean singles to show that characters are not connecting with each other.
  • Single point perspective, a.k.a. formal composition (framing the subject centrally) can be very powerful.
  • Lighting for silhouette can make a simple moment highly evocative.
  • The best composition reflects character relationships, perhaps using layers and depth.
  • Good composition should draw the eye to the right part of the screen and not distract the audience.
  • Good cinematography should tap into the emotion of the scene and the character whose eyes we’re seeing it through.
  • When watching the blocking, think about the emotions. Let the scene tell you how it should be shot.
  • Let the lens talk to you. Try watching the blocking through different lenses and see what feels right.
  • A great static frame that the actor can move around in trumps panning around with the actor.
  • Use a dolly-in for an emotional moment, but a zoom-in to show a character having a thought or idea.
  • Check out Stanley Kubrick and William Friedkin films to see excellent use of zooms.
  • Use a long lens to disconnect your subject from their surroundings.
  • Play the first take safe, and then you can try tagging hand-props or pulling focus to background characters on later takes.
  • “When in doubt, turn it out.” i.e. beware of over-lighting!
  • Don’t be afraid of changing f-stops from angle to angle to maintain a consistent softness of background when your background is different distances away from different subjects.
  • Don’t worry about continuity too much. “The set is made of rubber.”
  • Try unusual compositions. Be willing to fail.

Kevin Shahinian – “Story Telling Techniques: Adding Massive Production Value”

  • In high-end events shooting, try to get the organisers to pick rooms that will work for sun orientation.
  • Use a long lens to create a potentially unsettling sense of voyeurism.
  • To build tension and unsettle the audience, short-side your subject and show lots of empty background.
  • In an over-the-shoulder shot, add power to the foreground character by having them dominate the frame.
  • With non-actors, shoot candid footage; you may capture genuinely great moments. Use action verbs to direct them, rather than talking in terms of emotions.

Rasmus Heise – “Extraordinary Cinematography with Minimal Lighting”

  • Design lighting that works from all directions, to minimise set-up times.
  • Use more than one colour to add depth.
  • Dot practicals around where possible, to give you sources that will work for different angles.
  • Focus on one key light source in a scene. Everything else is just a bonus.
  • Fluorescent tubes and sodium vapour lamps can be great low budget, low wattage solutions.
  • Philips makes fluorescent tubes with high CRI.
  • Wet down your exterior sets to add contrast and nice reflections.
  • Silhouette shots are quick, cheap and look great.

Matthew Santo – “Commercial Lighting: How to Light Fashion vs. Action”

  • Photographing commercials is all about heightened reality, perfect sunsets, perfect skin, etc.
  • It requires a lot of passive lighting: bounce cards, negative fill, contrast control.
  • On beauty and fashion commercials:
    • Your background can set a darker mood even if the talent has to be lit flatly for beauty.
    • Know your talent’s face in advance – e.g. do they have soft or hard features? Deep-set eyes?
    • What side is the talent’s hair parted on? This could affect your decision on which side to key from.
    • Try to make sure the make-up room’s lighting matches the colour of your lighting on set, so the MUA doesn’t get any nasty surprises on set.
    • Use Briese lights for beauty. They have hard- and softlight qualities.
    • Chimeras may be better for talent with less defined features.
    • Reduce skin texture by pushing fill through large frames or bounce, e.g. 12×12 frames.
    • Hard backlight looks great but beware of fly-away hair.
    • Combine hard and soft sources for backlight that has punch but wraps and doesn’t create shadow issues.
    • There’s a range of Cosmetic lighting gels that add a little warmth and diffusion.
    • Use a low overall light level for talent comfort and less squinting!
  • On sport and action commercials:
    • It’s about movement and body definition. Backlight and sidelight are most important.
    • Edgelight defines the talent’s body shape. Toplight adds muscle definition.
    • Lens flares add dynamism but reduce contrast, so light high-key.
    • Use higher light levels for highspeed shooting and to maintain focus as people move.

Stefan V. Borbely – “Deconstructing High End Car Commercials”

  • Rather than lighting the car, light the environment and the car will reflect that environment.
  • For exteriors, wait for dramatic skies because the car will reflect these.
  • Silver cars are the easiest to light.
  • Use long fluorescent tubes or long reflectors to make seamless long highlights on the bodywork.
  • Use Cinema 4D to test your lighting set-ups for reflections.
  • For night exteriors, take stills on the recce and note your exposure settings.
  • Bagolights are great for creating streaks of light on cars.
  • Fisherlights are a good substitute for the sky.
  • If you can’t afford Fisherlights overhead, put lamps on the floor and shoot them up into big polyboards.
  • Schedule your exterior shots for sunrise and sunset, and shoot inside the car in the middle of the day.

There is still time to get free access to the summit at bigleaguecinesummit.com Stay tuned to neiloseman.com for top tips from day two.


Top Tips from Day One of the Big League Cine Summit 2015

Cinematography: My Process

Consulting director Sophie Black's storyboards on Night Owls. Photo: Dimitri Yiallourou
Consulting director Sophie Black’s storyboards on Night Owls. Photo: Dimitri Yiallourou

I thought it might be of interest to describe my typical working process as a director of photography on a shooting day. Different directors and ADs will run their sets different ways, so this is a generalisation.

I like to start the day by reading some of Stephen Murphy’s DOP Documents over breakfast. These elegantly-laid-out collections of screen grabs from top cinematographers are fantastic inspiration.

On some productions I’ve had long talks with the director, I’ve seen storyboards or shotlists and I’ve been on the location scouts or walked the sets already. On others I’m a last minute hire and I know nothing beyond what it says in the script. (And this should go without saying, but you need to read the script. Apparently some DPs don’t. WTF?)

Whenever I see the set for the first time, be that in preproduction or on the day, I start to think about light sources. If it’s outdoors, what is the sun orientation? If it’s indoors, where are the windows? If it’s night, what practical sources are there and do I need to add or remove some?

Ideally the next thing that happens is that the actors arrive, still in their street clothes, and the director blocks the scene with them. If I see anything that can be tweaked to orientate the talent better towards the light sources, or to provide more interesting framing, I’ll suggest it.

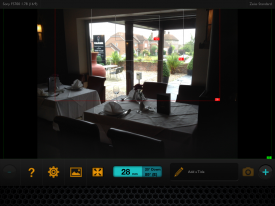
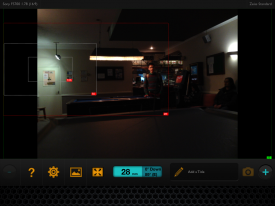
During the blocking I’ll wander around with Artemis (a virtual director’s viewfinder app on my iPad). If there’s a shotlist or storyboard, I’ll find the angles described and check they work. If not, I’ll find the angles I think will work well. I’ll screen-grab all of these and show them to the director when they’re done blocking. There may then be some give-and-take, perhaps adjusting the actors in situ through the viewfinder, until the director is happy.

Before the actors depart to get into costume and make-up, I’ll have my assistant put down marks for their key positions. Then the cast can leave and I can get down to the business of lighting the scene. Here’s broadly what I’m thinking about, in roughly the order I tend to think about it:

  1. Realistically, where would light be coming from?
  2. How should the scene be lit to create an appropriate mood?
  3. How should the cast be lit to look their best and enhance their characters?
  4. Aesthetically, what lighting will look the most pleasing?
  5. Practically, where can I put lights with the grip equipment I have, without any of it coming into shot?
Lensing Three Blind Mice

Once I’ve taken a few minutes to figure that out, I’ll start issuing instructions to my gaffer. I might walk around planting lamps, or just stands, and let the gaffer finish the job by cabling them, or I may let him set some lamps up while I puzzle over whether I’ll need other lamps elsewhere. Meanwhile the camera is being set up with my chosen lens on, either by an assistant or me, if we’re short on crew. (Most directors leave lens choices to me.)

When most of the lamps are set, I’ll fire everything up and draft in whoever’s around to stand in for the actors so I can see if it’s working as planned. I don’t use a light meter, so everything is judged by eye on the monitor, perhaps with the aid of a histogram. Some tweaking usually ensues.

By this point hopefully the cast are back on set and we can start camera rehearsals. Although these are useful to the cast and director, they’re invaluable for me so that I can practice the camera move and see how the light works on the actual actors and costumes. Usually there’ll be a little more tweaking of lights before we shoot. With any luck this doesn’t hold up the director because they’re busy giving last minute direction to the cast.

After we shoot I’ll tell the director whether the take was any good from a camera and lighting standpoint. I generally don’t request retakes unless I’ve screwed something up pretty badly. Long experience has taught me that the editor will always choose the best take for performance, regardless of any minor camera wobbles or dodgy lighting, so I’m not going to waste time insisting on another take which won’t get used. The important thing is for the director to get the performance they want. Having said that, it’s my job to flag up any cinematography fluffs so that it’s the director’s decision whether to go again or not.

Once the first shot is in the can, lighting for the coverage should be fairly straightforward. I’ll have my assistant change the lens, then I’ll move the camera to the new position myself and see how the existing lighting works. Then I can tweak things accordingly.

And so it goes on until the scene is wrapped.

OK, enough from me for a minute. Want to see a legendary cinematographer’s process as he lights a scene? Check out this unique and fascinating video.

I’ll leave you with the latest Ren production diary, which asks (and fails to answer) the question: “What is a DoP anyway?”

Cinematography: My Process

2.39:1 Composition

In the days of 4:3 cameras, many filmmakers chose to mask off their viewfinders and shoot in 16:9 widescreen. Now that 16:9 is ubiquitous, those of us wanting something more cinematic turn to the glorious 2.39:1, a.k.a. Scope. Choose your aspect ratio carefully though, not just because it “looks cooler”. 2.39 works well if you have lots of landscapes, lots of extras or a wide set. It’s not so great if one of your main sets is a tall, narrow booth, as I found out the hard way on Stop/Eject.

I love composing for the 2.39 ratio. You have so much flexibility on where to put your subject in the frame. The rule of thirds is obsolete here. You can put someone almost anywhere in the 2.39 frame and have it look good. They can be short-sided (placed on the “wrong” side of frame) but still have looking space. They can be just off centre, or they can be squeezed right to the edge. And if it’s a two-shot or a dirty single, you can illustrate the closeness of the characters’ relationship by choosing the distance between them in the frame – anywhere from overlapping (a couple madly in love?) to facing each other across the full width of the widescreen frame (enemies with no common ground?).

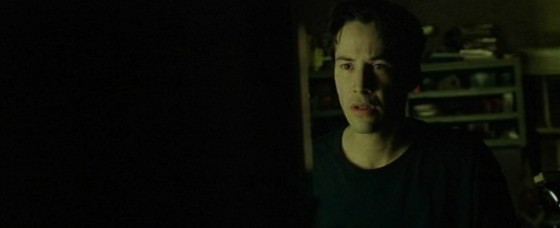
Here are some of my favourite examples of 2.39 composition. First up, The Matrix, lensed by Bill Bope. Look at how he uses black space to create a stark minimalism. One of the most powerful things you can do with all that horizontal space is to not use half of it!

Matrix-black1

Matrix-door

Matrix-Morpheus

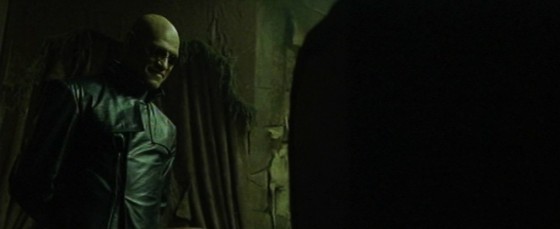
In this close-up (below), Morpheus starts off conventionally framed on the left, but leans forward at a key point, crossing the width of the frame to become short-sided, as pictured. It really makes it feel like he’s getting in your face.

Matrix-Morpheus-shortside

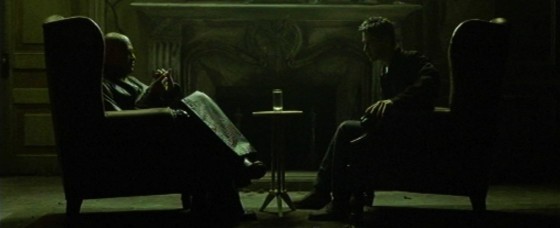
Symmetrical shots become more powerful in 2.39. These ones really help reinforce the rigid, computer-generated nature of the matrix.

Matrix-chairs-symmetry

Matrix-agents-symmetry

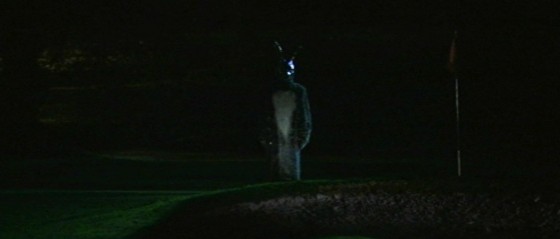
In Donnie Darko (DP: Steven Poster), formal composition (framing characters centrally) is used as a stylistic device in the dream sequences. Again, a powerful symmetry in this wide format.

Donnie1 Donnie2

I love the composition of this shot from Armaggedon (DP: John Schwartzman). He’s on the “wrong” side of frame and he’s barely off centre, but somehow it works beautifully. It almost looks like he’s surging forwards with the flag, rather than seeming dominated by it, like he would if he was on the right of frame.

Armageddon

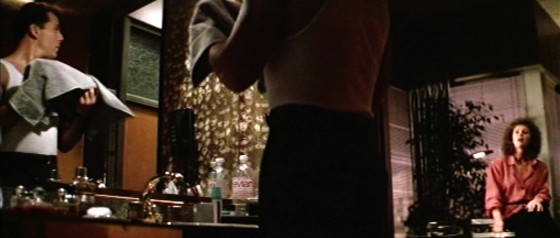
Jan de Bont’s cinematography in Die Hard is a masterclass in 2.39 composition. Check out the depth in these raking shots.

DieHard-Bonnie

DieHard-mirror

Below, De Bont uses the doorway as a symmetrical frame for the composition, which gives Willis license to be anywhere within it.

DieHard-CU-shortside

Here’s an interesting lesson in shooting over-the-shoulders in 2.39. Put the foreground actor on the edge of frame and you’ll find it very hard to keep a sense of depth if you put the background actor over on the other side of frame. You need them nearer so the perspective can continue off into the other side of frame, perhaps with other characters (or a statue, in this case) in the deep background or just the set.

DieHard-overshoulder

Here’s a nice bit of short-siding, balanced out by the car.

DieHard-shortside-ext

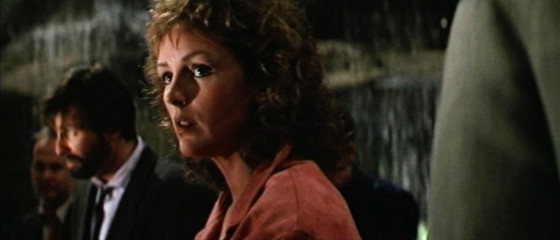
And finally, I utterly adore this shot/reverse from Alien (DP: Derek Vanlint). If ever a director tells you that shot/reverses have to match, show them this scene. Every rule in the book is broken. He’s shot from a low angle, she’s shot from head height. He’s in a mid, she’s in an MCU. His single is dirty, hers is clean. He’s on the left of frame, and so’s she! But isn’t it gorgeous? Both characters are given power through composition, but in different ways. His power comes from the low angle of the camera. Hers comes from her being placed towards the closer end of the horizontal lines in the set. If she’d been placed on the tapering end, on the right of frame, she would have no power in this scene at all, compositionally. I can’t say whether it’s intentional, but the fact that this compositional power – equal but different – matches the power the characters have in the dialogue and performance, is just exquisite.

Alien-HurtAlien-Weaver

What are your favourite 2.39 movies, and how do they use the frame to help tell the story?

2.39:1 Composition

The Script and the Cinematographer

cover pageWhen I read a script that I’m going to shoot, there are a number of things I’m looking out for. I want to identify the themes and the character arcs, so that I can come up with ways of reflecting these in the cinematography (see my previous blog post for examples). And on a more mundane practical level, I’m figuring out what equipment is required, and which scenes or sequences might be difficult photographically.

To demonstrate my thought process in planning a project, I thought I would share with you today the things I highlighted in a particular script and why. The script in question is The Gong Fu Connection, written by Ted Duran, and we start shooting it this Friday. It’s an action-comedy drama in which a young Chinese businessman learns a life lesson via his connection with an Englishman who has introduced Kung Fu in a farm community in Sussex. You can help us make the film by going to www.indiegogo.com/projects/the-gong-fu-connection and contributing, or by spreading the word on your social media networks.

Throughout the script I’ve highlighted the time of day in the slug lines. One of the first things I need to know as a DP is, “Are there are night scenes?” because that will have a big effect on the lighting equipment needed. Ted’s script is nice and specific, not just DAY or NIGHT, but DAWN, MORNING, AFTERNOON, EVENING and DUSK. This is a really helpful starting point in considering the light. In general I see that there are a lot of daylight exteriors, so bounce and negative fill are going to be my two chief weapons.

The very first slug line is:

1. INT. VICTORIA STATION – MORNING

Day or night?
Day or night?

Immediately I’m wondering, “Is this going to be a guerilla shoot or are we going to have permission?” Clearly we will never be allowed large lighting set-ups and we will always be working around the general public. Battery-powered LED panels will come in handy here.

A little lower down the page is:

3. INT. RESTAURANT – DAY

Straight away I’m thinking, “Should it be night instead?” Even though in summer you may go to a restaurant in daylight, somehow it feels like it wouldn’t look right on camera. I make a note to discuss this with Ted on the recce, and indeed we end up deciding to shoot it after dark.

The next scene features a phone conversation. I make a note to ask if the person on the other end of the line will be seen.

Another station scene contains the direction:

He gets on the train… The train whizzes past an urban landscape…

I highlight this, to remind myself that this is a hidden extra scene – on board the train, as opposed to at the station. Again I’m wondering what the extent of permissions will be and what restrictions there may be on equipment. I also highlight other hidden extra scenes later on – an interior bedroom scene in which a character sees another character outside through the window, and a montage set in a variety of different places and times.

I highlight the following in a café scene:

Time passes, we see the clock tick past… Half an hour and two coffees later…

Maybe there are jump cuts here to show the passing of time? I’ll want to adjust the keylight outside the window to simulate the progress of the sun.

A violent flashback takes place in an apartment. Although the script specifies DAY, the content makes me imagine the look a little differently. I write the following notes: “Dingy look? TV light? Maybe night. Rough, handheld fight. No finesse or control.” Ultimately Ted and I do decide to set the scene at night. The flickering TV set will be a key light source. The handheld look will contrast with the more slick steadicam and tripod work which will characterise the Kung Fu fights later on in the film.

A more pastoral scene features two characters walking and talking beside a lake. I write: “Watery reflections? Bounce M18 off surface of water?” I’m thinking to enhance the beauty of the setting by using the rippling water surface to bounce an ArriMax M18 onto the characters’ faces.

A direction later on reads, “He is lost in his own world.” I write “push in?” beside this as a shot suggestion. Then I read:

Startled, he turns around to see a man towering over him in his dressing gown with a long plaited beard, who looks at him with a frown on his face.

This character, Mandragor, clearly has a special signficance, a mystical presence. I write “special lighting for Mandragor?” next to this passage. This will probably be stronger backlight or perhaps an unusual eyelight of some kind. I highlight his other appearances in the film too.

A dark room in a grungy pub

A dawn scene specifies that “the sun has just risen”, which I highlight. If it’s a cloudy day, or we’re unable to shoot at dawn, I may need to fake this with an orange-gelled HMI.

Later on, a direction reads:

RICKY smiles, then looks at AERONA dreamily.

I highlight this and write “classic beauty shot” above. I won’t go as far as a soft-focus filter, but the lighting needs to be particularly flattering here to represent Ricky’s enamoured POV.

A flashback in a pub has a nice clear description which is a great springboard for the cinematography:

… Playing pool in a dark room in a grungy pub…

I’m immediately thinking smoke, shadows, pools of light from the over-table fixtures. I also highlight the word “laptop” since the screen will be a light source which I may want to use or beef up with a hidden LED panel perhaps.

Scenes in moving cars are always tricky

Later on I’ve highlighted a dialogue scene in a moving car. I need to talk to Ted about how he wants to shoot it, and to think about how the camera can be rigged to get those shots.

The only time a specific shot is mentioned in the script is here:

Ricky is running as fast as he can. We see a close up on his face as he thinks.

I highlight this, knowing that it will be tricky to accomplish and hoping that Colin Smith, our steadicam operator, will be up to the challenge!

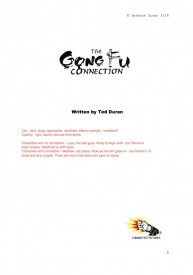
Having read the script a couple of times, I go back and make some notes on the cover page about the general photographic approach:

City – dark, dingy, oppressive, handheld, little/no eyelight – handheld?

Country – light, backlit, bounce-from-below

Characters with no connection – Lucia, the bad guys, Ricky to begin with – are framed in clean singles. Handheld or stiff tripod.

Characters with connection – Matthew, his posse, Ricky as the film goes on – are framed in 2- shots and dirty singles. There are more fluid shots with pans or tracks.

And that’s all. Some of these notes are just for me to think about, while others raised questions I needed to ask the director and producer about. Preparation is key in filmmaking, and in the heat and stress of the shoot I’ll be glad I gave some consideration to these issues in advance.

The Script and the Cinematographer

Camerawork and Character

Character isn't something that's only revealed in front of the lens
Character isn’t something that’s only revealed in front of the lens

Actors, costume designers, make-up artists and set dressers all work hard to enhance character through their work. Often cinematography is not considered part of this process, but there’s no reason it shouldn’t be.

Here are some examples of how I’ve used cinematography to enhance character:

  • In Soul Searcher, protagonist Joe has an unrequited love for waitress Heather. Whenever they talk to each other, her CUs are shot on sticks, while his CUs are shot handheld, reflecting his nervousness.
  • There is a similar situation in Someone Else’s Shoes, written and directed by Nick Fogg. We decided to use wide lenses for the man’s CUs, putting the audience right there with him, and long lenses for the woman’s CUs, suggesting she is being observed and loved from afar. You can watch Someone Else’s Shoes below.
  • I won’t reveal the name of this film, because it’s still in post and I don’t want to spoil the plot, but a project I worked on last year featured certain characters who were real and others who were imaginary or supernatural. I decided to give the unreal characters perfect haloes of backlight wherever they went, and make their faces flawless by surrounding them with reflectors.
  • In Ted Duran’s The Gong Fu Connection, which we start shooting next week, the theme of connecting with people is very important. Characters who have this connection will be shot in two-shots and dirty singles, while characters who don’t will be shot in clean singles or isolated in frame.
  • For Coffin Grabber, director Claire Alberie devised a visual grammer whereby the film’s young protagonist would be shot at his eye level with an engaing handheld camera, while adults would be shot in locked-off, isolating wides.

How could you use cinematography to reveal and enhance character in your films?

Camerawork and Character

Handheld Thoughts

In the new year I’ll be teaming up with Sophie Black once again to photograph her new short film, Night Owls, a tale of unexpected friendship with echoes of Juno and Lost in Translation. It’s early days yet, but we’ve already discussed a fluid, handheld feel as being the dominant look.

Conveniently I came across this video recently, thanks to nofilmschool.com, in which DP Sean Bobbitt delivers a masterclass in handheld camera operation. He covers it from all angles, from wearing the right clothes and stretching beforehand, to developing a rapport with the actors you’re dancing around.

There are many variations of handheld cinematography. Bobbitt talks about trying to keep the camera as stable as possible, to reduce the shake to the absolute minimum the human body can transmit to an object it’s holding. But, as he also mentions, sometimes directors ask for more energy in the camerawork – they want a lot of sway and “fidgeting”.

Halo Haynes and Mark Drake, the cast of Night Owls

A director may want you the operator to stay rooted to one spot, like a tripod with a bit of wobble, or they may want you to execute a carefully planned move – like a dolly or a steadicam with wobble. Or they might give you freedom to move around the action, framing one actor or another as you see fit. Crash zooms might be part of the agreed look, or they might be banned.

All this needs to be discussed in advance.

And if you’re going to do improvised movements, what does that mean for the lighting? It makes it more difficult. For an interior scene, which most of Night Owls is, it means relying heavily on practicals – light sources that are visible on camers, e.g. table lamps – and throwing light into the room from outside doors and windows. (Incidentally, I was lucky enough to attend a masterclass by DP Chris Menges last week and he spoke of his belief that lights should always be kept outside the room so as not to clutter up the actors’ space and eyelines with equipment.)

So these are some of the things that are swirling around in my head right now as I contemplate the Night Owls shoot on the horizon.

Now for the catch. That shoot can only happen if our crowd-funding campaign reaches its £2,000 total by January 2nd. Please check out Night Owls’ Kickstarter page and put a little bit of money in the pot if you can, or if you can’t, spread the word.

Thank you and merry Christmas!

Handheld Thoughts