In this second part of my Stop/Eject lighting breakdown, looking at the how, why and what-with of lighting a short film, I’ll focus on the scenes in Kate and Dan’s living room. If you missed part one, check it out first to see what equipment we had with us. You can also read production designer Sophie Black’s blog about decorating and dressing the living room over on her website.
Int. Living Room – Day
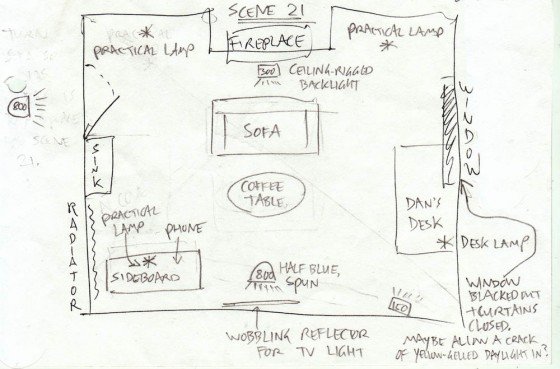
Here’s my lighting plan for the main scene in the living room:
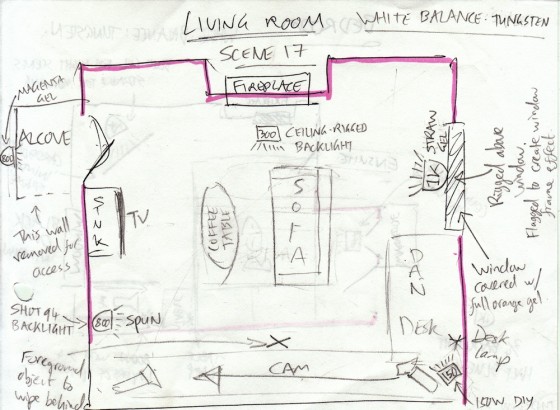
Along the bottom I’ve drawn in the tracks and camera for the master shot. I’m treating the location like a three-walled set, so this bottom wall will never be seen. (The pink highlight was to show Sophie which walls needed painting.)
The wide tracking shot had the potential to be difficult from a lighting stand-point, since it would show almost 270 degrees of the room. Putting the lights behind camera is never a good idea creatively; you end up with a depth-less image that looks like a photo taken with flash. But fortunately the location had a high ceiling, so Col was able to rig lamps overhead.
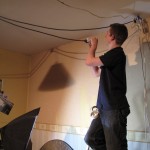
When you can’t afford to hire HMIs – which emit a 5,600K light, the same colour as sunlight – you have to make a difficult decision on your daytime interiors. You could put blue CTB “daylight” gels on your tungsten lights, but that immediately cuts out half their illumination, and they’re not very bright to start with. Or you could white-balance somewhere in between daylight and tungsten, letting one go slightly blue and the other slightly orange on camera, like I did in the shop.
Or you can cover the windows in CTO gel, tinting the incoming daylight orange to match your tungsten lamps. Typically this is only practical for rooms with small windows – and luckily our living room location was such a room. So once the window was gelled, I knew I could set my camera’s white balance to the tungsten preset (3,200K) and all the light would look white.
As daylight is liable to change – the sun moves across the sky, goes behind clouds – you’ll always want to reinforce it with an artificial light source for consistency. Besides which, I wanted it to look like the sun was out and shining straight in the window, which I clearly couldn’t rely on nature to do for me. Hence the 1KW Arrilite in the lighting plan (labelled simply “1K”), rigged above the window.
In discussions with Sophie and Katie, the costume designer, we had decided to make yellow the colour of happiness in Stop/Eject. So, since this scene is before Dan’s death, I chose to put straw gel on this 1K. In retrospect, this was a bit over the top, given that the walls were already painted yellow.
A 300W work-light was rigged from the ceiling just in front of the fireplace, to provide some backlight.
As in the shop, an 800W Arrilite with magenta gel was placed behind the alcove to represent the wall sconce.
A table lamp was placed on Dan’s desk to brighten up what could otherwise be quite a dark corner.
The other two lamps shown in the plan were ditched as unnecessary for the wide shot.
Finally, a little smoke was added to volumize the “sunlight” and generally diffuse the image.
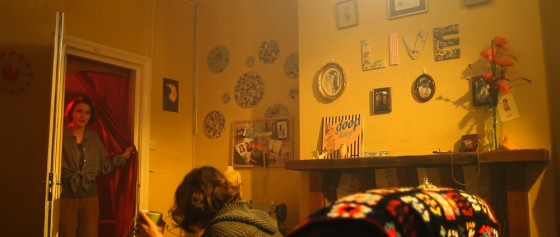
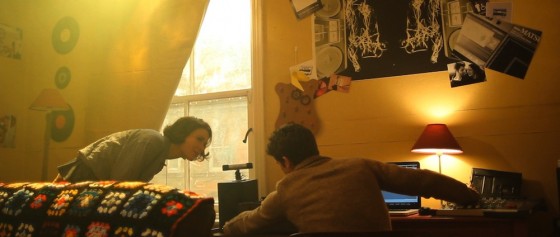
Here are some frames from the rushes of the wide shot:
Let’s look at a couple of other camera angles in this scene, and how the lighting set-up had to be tweaked for them.
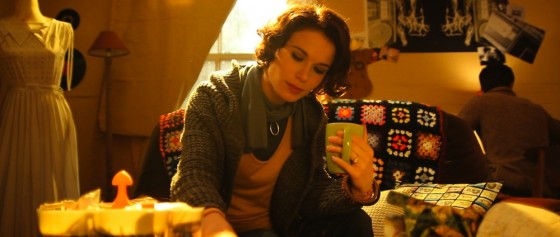
This mid-shot of Kate (Georgina Sherrington) was straightforward. The 1K “sun” provided lovely backlight, while the 300W work-light above the fireplace wraps this around the right side of her face a little. The only addition needed was a reflector next to camera for fill.
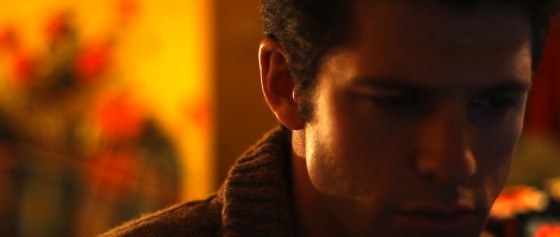
This angle starts as a single on Dan (Oliver Park). Kate is occasionally revealed in the background, and she was already well lit by the 1K “sun” and the 300W work-light.
I wanted some edge light on Dan to highlight his ear, because he’s listening closely to the audio he’s editing. This was a 100W clip-light off camera left at about the right height to suggest an unseen table lamp. As an added bonus, this light also supplied some fill on Kate as she crept up on Dan later in the shot:
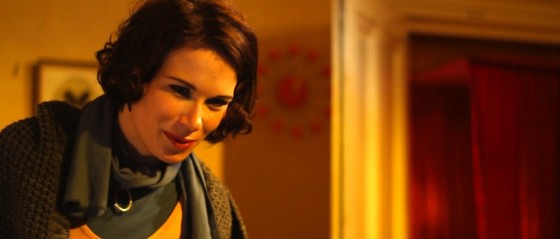
Once Kate is sat on Dan’s lap you can see the key light in action:
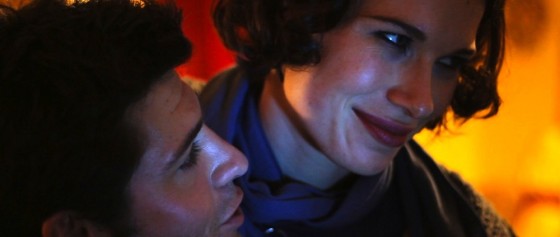
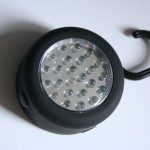
What was the key lamp? Having established the desk lamp in the wide, I could have used that – or something representing it – as the key. Instead I decided to add some colour contrast by using the blue light from the computer screen. The screen wasn’t bright enough to light him in reality, so this is where a £2 LED camping light came in handy – I simply hooked it over the top of the screen. (For more info on colour contrast, see this earlier post.)
For a later daylight scene in the living room, I totally cheated the lights. It’s easier to get away with cheating your lighting angles when a scene only has one shot and the audience can’t see too much of the geography.
I had Col rig a second straw-gelled 1K Arrilite close to the first, but pointed at right-angles so as to directly backlight Kate. Naturally reflected light was not giving Kate’s face the definition I wanted, so I put the 800W Arrilite out of the right of frame with several layers of tough spun diffuser on.
Here’s the result:
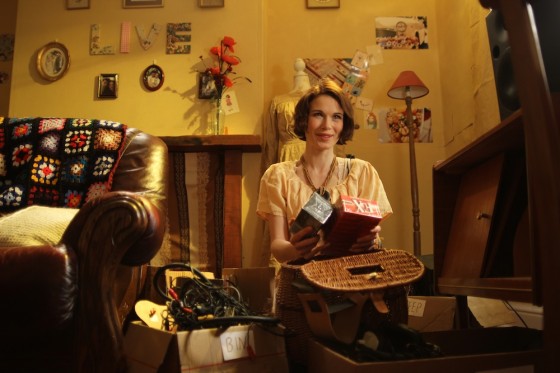
The light sources don’t stand up to much scrutiny, but it’s a brief scene so I think I’ll get away with it. Except that I just told everybody. D’oh.
Int. Living Room – Night
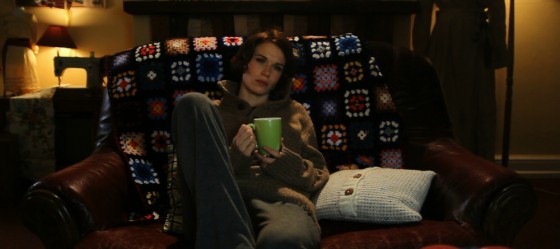
The single nighttime scene in this location was filmed in the early afternoon, so the crew blacked out the window. The 1K “sun” lamp was of course turned off, but the 300W work-light was left as a backlight for Kate on the sofa. A fluorescent-gelled 800W Arrilite was placed in the corridor to represent illumination from a strip light in the kitchen.
I wanted to trap Kate within a formal, symmetrical frame. Two practical lamps in the background, on either side of the wide shot, contributed to this effect.
Finally, she was meant to be watching TV, although the set would never be seen. Over the years I’ve tried several techniques for simulating TV illumination. I haven’t found a definitive one yet, but currently my favourite method is to bounce a day-light balanced lamp (in this case one of the fluorescent studio lamps, not an 800W Arri as the plan indicates) off a reflector that’s being wobbled by a crew member.
That’s your lot for today. Next time we’ll look at the bedroom scenes (minds out of the gutter, please).