Today I’m taking a look at Stop/Eject‘s three brief scenes in Kate’s bedroom. Each consisted of one shot only, but each required a different look. Here’s my lighting plan:
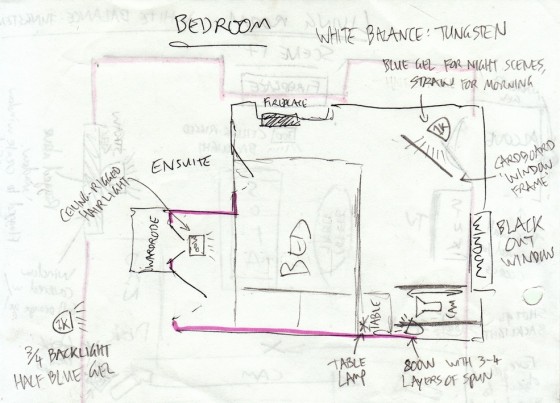
Much of the room, including the window, would never be seen. This allowed me to black it out and place my own fake window exactly where I wanted it.
If you imagine your subject (viewed from above) is at the centre of a clockface and they’re looking towards 12 o’clock, your key light should usually be at around 1:30 or 10:30. That’s enough of an angle to give their face some dimension and shadow, but not so much that you can’t get light into both eyes. That’s a rough rule of thumb, and of course it can vary according to the mood you want to create.
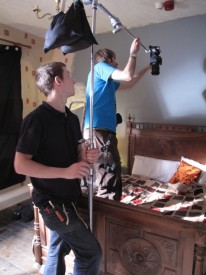
Knowing that Kate (Georgina Sherrington) was going to be facing more or less towards camera, I accordingly chose the corner of the room in the top right of the plan for the key. You can see I’ve drawn in a “cardboard window frame” gobo, but as it turned out there were some fold-up chairs kicking about, one of which threw a very window-like shadow when clamped to a C-stand in front of the 1K.
The first of the three scenes was set at night. Since Kate was exhausted, it was reasonable she would not bother turning on lights or closing the curtains, so the 1K – with blue gel for a moonlight effect – became the one and only light source for the scene.
To get a bird’s eye view of the bed, the camera was clamped to the cantilevered arm of a well-sandbagged C-stand.
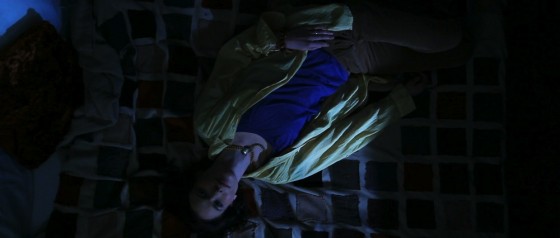
The next scene was the following morning. This was a piece of cake; I just swapped the blue gel on the 1K for orange for that sunrise look.
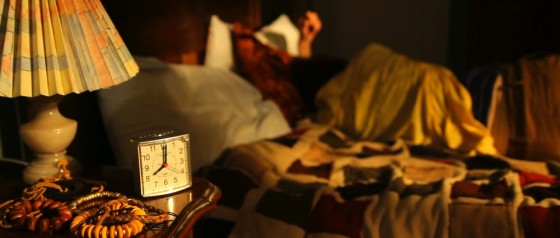
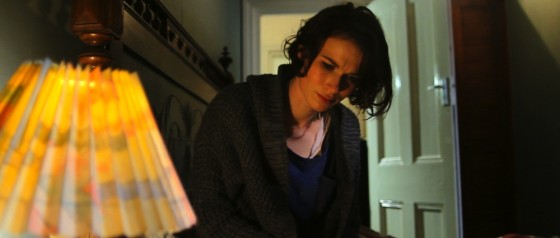
The third and final scene was night again, but this time with other light sources besides the window. Kate’s key was a practical table lamp, reinforced by a 100W clip-light just out of frame.
Col rigged a 300W backlight, or “hair light”, on top of the wardrobe, representing a ceiling light. As it turned out, once the door was opened it flagged this light off Kate. I didn’t mind because her dark hair stood out well against the light background anyway, and the 300W lamp still put a streak of light in the top right corner of the shot, which was a bit of added interest and helped frame the composition.
An Arrilite was set up in the corridor to create depth, and was gelled green to contrast chromatically with Kate’s orange skin tone.
So although brief, one-shot scenes like these might seem restrictive for a director of photography, they’re actually some of the most creative because you can experiment and create a variety of different looks relatively quickly.
If you’ve found this blog useful, please visit stopejectmovie.com and make a contribution, or if you’re not able to do that then share the link with as many people as possible and help spread the word.
And stay tuned for the fourth and final part of this breakdown, in which I’ll look at my least favourite scene (lighting-wise): the basement.