Candlelight

The First Musketeer – the period web series I DPed in France last September – is edging closer to completion. One of the biggest challenges of the shoot for me was simulating candlelight. Almost every scene had candles in it (albeit fake, yet very convincing, LED ones) and it was always a struggle to make them appear to be shedding authentic light.

A couple of years back I blogged about how I created candlelight for the Wasteland trailer, by hiding ordinary 100W tungsten bulbs behind the set-pieces the candles were standing on. I did this again on The First Musketeer, and it can be very effective.

The main tavern set was dotted with large barrels topped with candles, so it was quick and easy to gaffer-tape pendant fittings with 100W bulbs onto the backs of these barrels. (A piece of blackwrap was interposed to stop the bulbs singeing the barrels.) The advantage of a bare bulb over a fresnel or par fixture is that it sheds light in all directions, just like a candle. So when three people were stood around a barrel, as long as the two at the sides were cheated slightly back out of the barrel’s shadow, it lit them all up fairly convincingly.
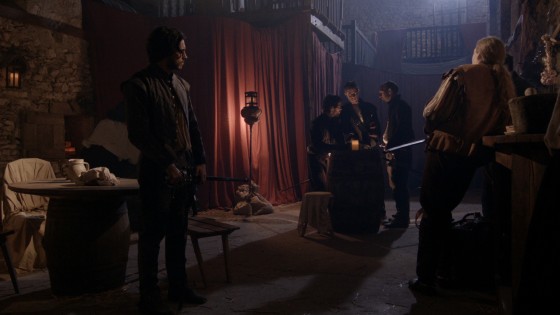
A single 100W bulb hidden behind the barrel lights the three Huguenots in the background. A blue-gelled HMI provides backlight.
A single 100W bulb hidden behind the barrel lights the three Huguenots in the background. A blue-gelled HMI provides backlight, while two dedos off the sides of frame cross-light the foreground characters.
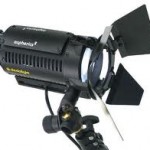
Dedo, de-e-edo. Dedo come and me want go home.
Dedo, de-e-edo. Dedo come and me want to go home.

This method doesn’t always work though, and it relies on the candle being sat on something a bulb can be hidden behind.
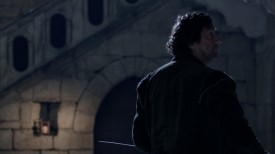
A dedo creates the pool of light around the background candle here.

Dedolights are great for creating circles of light to surround candles, and their built-in dimmers make it easy to flicker the light for added realism. But this method has serious drawbacks. Firstly, it lights the candle itself as well as the surroundings, often rendering the flame (or LEDs) almost invisible. Secondly, anyone passing between the dedo and the candle will pass through the beam of light, destroying the illusion. In an ideal world you would rig the dedo to the ceiling and set up a little thin flag to prevent the light hitting the candle itself, but in practice this would usually be difficult and time-consuming to set up.

More recently I’ve tackled the candelight problem again on Ren. The difference was that we were able to use real candles, often double-wicked for enhanced light output. Real candles take care of their own immediate pool of light, so then you only have to worry about beefing up the amount of lighting hitting the talent and the surrounding set.

Again, bare bulbs can be useful for this, but dedos are often best. It’s possible to cheat the dedo positions quite heavily and still get away with it, because they produce such a narrow, controllable beam of light.
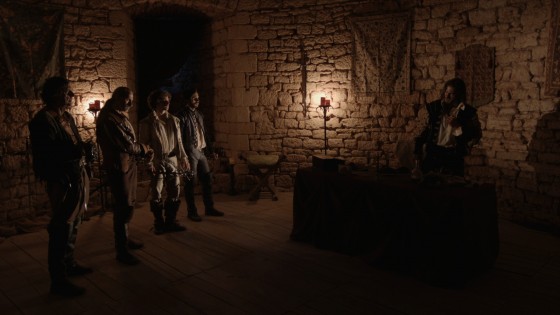
The two candle stands in the background have 100W bulbs hidden behind them. 40W bulbs would have been more suitable, but unfortunately we didn't have any. The light supposedly cast by these candles actually comes from two dedos. The first is at ceiling height off frame left, aimed at the Duke de Luyne (Toby Lorde) on frame right. The second is hidden behind the duke's desk and lights the heroes on frame left
The two candle stands in the background have 100W bulbs hidden behind them. 40W bulbs would have been more suitable, but unfortunately we didn’t have any. The light supposedly cast by these candles actually comes from two dedos. The first is at ceiling height off frame left, aimed at the Duke de Luyne (Toby Lord) on frame right. The second is hidden behind the duke’s desk and lights the heroes on frame left.

What methods have you used to simulate candlelight? Comment on Facebook or tweet me – I’m intrigued to hear.

All images copyright 2014 The First Musketeer. Find out more about the series at www.firstmusketeer.com

Candlelight

Goodbye to Ren

Some of the key cast and crew at the awesome wrap party. Photo by Allison Reid

Seasone one of Ren wrapped last week, and after a few days of tidying up and recovering, it was time for an epic wrap party – actually, two of them. And then came the heartbreaking process of saying goodbye to all the wonderful people I had lived and worked with for the past two months. We’d had all the time in the world and suddenly we had none.

What I said to those people as we parted seemed woefully inadequate as soon as they had walked out of the door. How could I put into words how unique and incredible this project, this experience had been? So to my Ren family, particularly that core group who were there day in, day out, here’s what I should have said…

Thank you. Thank you for the tea, the Thai curries, the Tech Biscuits and the jelly beans. Thank you for the joy of Tony the Phony Pony, for Spongebob Squarepants, for the movie quotes, the nonsense French and the inappropriate remarks. Thanks for the Nerf gun battles, the movie nights, the slumber parties and the Costa runs. Thanks for doing my laundry, for cleaning the toilets and for washing up.

Thank you for being so complimentary about my work, and for going the extra mile to make sure I had the kit I needed to do it. Thank you for your patience, for not compromising and for keeping cool when everything was broken. Thanks for waiting for the smoke.

Thank you for helping me grow as a DP and as a person. Thanks for not judging. Thanks for believing in me when I suggested outlandish things like the fake running shots. Thanks for listening, for being there for me and letting me be there for you.

Thanks for the BEST WRAP PARTY EVER. Thanks for sharing your karaoke with us, and doing it really well. Thanks for putting up with my playlist several times through, and helping me rediscover my love of music.

Thank you for the incredible hard work you put in before I even showed up. I have never met a kinder, more generous and more talented group of people. It has been the absolute highlight of my career to get up every morning and photograph the beautiful things you made. I am humbled to have earnt your respect and your friendship.

Thanks especially to Kate for bringing this amazing group together, and for setting the atmosphere that made this project unparalleled in my experience. Everything is awesome when you’re part of a team, and what a team to be part of. I love you all. I wish you every success and happiness in whatever you do next, and – if not before – I’ll see you all for season two.

Goodbye to Ren

Lighting Techniques #5: Smoke

Smoke looks cool, I think we can all agree, but why? What are we trying to achieve when we spray a set with smoke?

In the famous cinematography manual Painting with Light, John Alton says of the cinema experience: “We sit in the dark looking at a light screen; this gives a definite feeling of depth. In order to continue this depth on the screen, the progression from dark to light must be followed up. The spot which should appear to be the most distant should be the lightest, and vice versa…”

Smoke can help you accomplish this dark-to-light depth. Because it’s white, if you spray it in the background then the background will get lighter, while the foreground will remain crisp and contrasty. It’s like standing on top of a hill and looking at more hills receding into the distance. The more distant ones are lighter, less saturated, less contrasty because of the atmospheric haze.

Smoke helps darkly-clad characters stand out from a dark background in The Deaths of John Smith (dir. Roger Harding)
Smoke machine
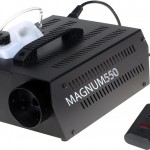
The Magnum 550: the most powerful smoke machine in the world. Are you feeling lucky, punk?

There are a number of ways to produce smoke. I own a Magnum 550, a small electric machine designed for DJs but perfectly useable on set. The smoke fluid is electrically heated until it turns to gas. On Ren we have an Artem smoke gun which uses propane gas cans to heat the smoke. This is handy on location because it doesn’t need a power supply, and it can produce thick clouds of smoke much more quickly than the Magnum.

An Artem smoke gun
An Artem smoke gun

You have to wait for both of these types of machine to heat up before you can use them. Ideally you need a dedicated crew member who is predicting when you might be ready to shoot and heating up the machine in readiness. If you’re outdoors, they also need to stay on top of the wind direction. You may think this would stay fairly constant, but trust me, it doesn’t.

Both types of machine produce wreaths of smoke which usually needs wafting in order to look like general atmosphere. And consistency is a challenge. It’s tricky not to have long takes that start with a lot of smoke and end with none. Both types of machine are too noisy to run during a take, though the sound recordist may agree to let you run an electric machine during pauses in dialogue, and an Artem can continue producing smoke for a little while after the gas is turned off.

A hazer
A hazer

If you’re indoors, a hazer may be more appropriate. This is an electric machine that uses compression rather than heat to vapourise the fluid, then blows it out continuously through a fan. The effect is much more subtle and constant than that produced by a smoke machine.

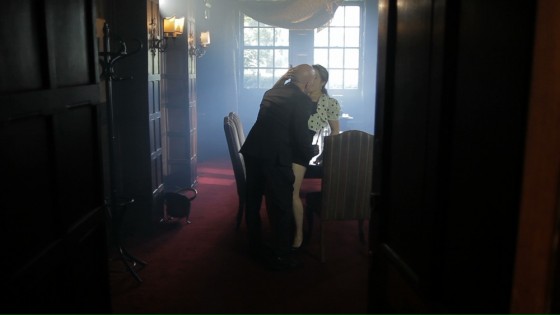
However you’re generating your smoke, remember to keep it in the background as much as possible. It’s all about making your subject stand out from the background.

You can find out more about smoke and why I use it in my Ren podcast at www.rentheseries.com/news/ren-podcasts.

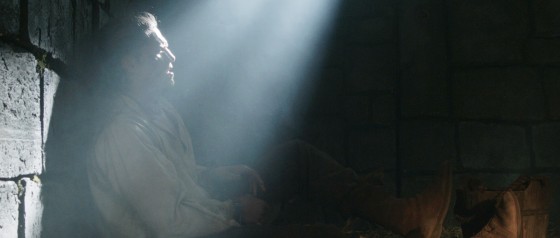
Smoke used to volumise a shaft of light in Ren (copyright 2014 Mythica Entertainment)
Lighting Techniques #5: Smoke

Ren: Lighting Karn’s House

Karn’s house is an awesome set which I had been walking past at Ren Studios for six weeks before I finally got to light it. It didn’t disappoint.

Behind all that smoke at the top is the HMI

In the words of my camera assistant Andy Roughan, I had to John McClane it to get the HMI up on the metal tank behind the set. After climbing onto the tank via a stepladder, I had to shimmy around an incredibly dusty pipe to get to the spot where the lamp needed to be. Getting the lamphead, the low boy stand and sandbags up there was fun. At one point I lost my balance and fell backwards, towards the roof of the set. I shouted a naughty word at the top of my voice, thinking that not only was I going to injure myself quite badly, but I was going to destroy everyone’s favourite set before we’d shot a single thing on it. Fortunately it was so well-built that it took my weight, or at least the part of my weight that I was forced to put on it, and no harm was done. Except that me shouting the naughty word in such a tone of utter panic had given everyone within earshot a minor heart attack.

Squish's cyclotron
Squish’s cyclotron

Why was it so important to get light up behind the set, rather than shining it down through the roof from in front? The answer is smoke. You can’t really see smoke unless it’s backlit, so in order to get those magical shafts of light coming through the set, the HMI had to be at the back.

After shooting the video blog, Andy and gaffer Richard “Squish” Roberts finished building the cyclotron for the firelight effect. This consisted of three 100W bulbs behind a red gel, and two behind an orange gel. I don’t want to give away screengrabs yet,  but you can see the fire effect at work on set dresser Amanda Stekly in this ropey iPad photo:

Set dresser Amanda Stekly, lit by the fake firelight

This fire effect served to light Ren (Sophie Skelton) in the foreground of the master shot very nicely, and separate her from the background through colour contrast. It rendered the 2ft kinoflo shown in the video blog unnecessary.

When we came in for the close-ups I continued to differentiate the characters of Ren and Karn (Christopher Dane) through light quality, as I had in Wales. I brought in an LED fresnel for Karn’s close-up, to get a hard sidelight, then for Ren’s close-up I used the 2ft kino to get a much softer look and from a less severe angle.

It’s a shame there was only one scene to film in this set; it would have been great to use it more. But it will certainly add a lot of production value to the opening episode of the series.

Ren is copyright 2014 Mythica Entertainment. Visit www.rentheseries.com to find out more.

Ren: Lighting Karn’s House