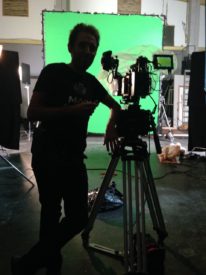
Green screen work is almost unavoidable for a modern cinematographer. In an age when even the most basic of corporates might use the technique, and big blockbusters might never leave the green screen stage, knowing how to light for it is essential. The following tips apply equally to blue screen work….
Or to put it another way, your screen should not be over- or under-exposed. If you use a light meter, you can hold it at various spots on the screen (taking care not to block any light with your body) and check that the reading always matches what the iris of your lens is set to. If your camera or monitor has a false colours option, you can use this to check the level and consistency of the exposure across the screen.
2. Use soft sources.
Bouncing tungsten lamps off polyboard is a cheap and effective way to spread soft light across a green screen. Typically you will want two sources, one to each side of the screen. They will need to be well flagged so that their light does not spill onto the subject.
On larger budgets, Kinoflo Image 85s or 87s are often used to illuminate green screens. They are 4ft 8-bank units which put out a large amount of soft light. Ask your hire company to supply them with spiked green tubes; designed especially for green screen work, these tubes help to increase the colour saturation of the screen. (Spiked blue tubes are also available.)
3. Control spill.
As far as possible, reflected green light from the screen should not fall on the subject. The main way to ensure this is to put as much distance as possible between the screen and the subject.
I learnt a great tip recently which also helps reduce spill: once the exact camera position is known, bring in 4×4 floppy flags slightly behind the subject, one either side, just out of frame.
Green spill will bleed most easily into the dark areas on your subject, especially if you’re shooting with a wide aperture. Clipped (or ‘crushed’) blacks are particularly undesirable. The solution is to use more fill light, even if this goes against the mood and contrast levels you’re using in non-VFX shots. If you use LUTs, you should consider creating a custom one for green screen work which pushes the contrast further to compensate for this flatter starting point. If not, you will have to work with the colourist in post to ensure that the shadows are restored to their usual levels once the VFX are complete.
5. Add tracking markers.
Camera movement against green screen isn’t the no-no that it used to be, with any VFX team worth their salt being able to deal with handheld shots, pans, tilts and push-ins. If there isn’t a VFX supervisor on set, you can help them out by taping crosses to a few points on the screen. There should always be at least one marker in shot throughout the camera move (more if it’s a multi-axis move), and they shouldn’t stay put behind any tricky edges (e.g. long hair) for long.

