Day 21 / Friday

Two and a half months on, and most of the team are back for three days of pick-ups on this comedy road movie. (Read my blog from principal photography here.) Director Leon Chambers showed me some of the rough cut last night, and it’s shaping up to be a really warm, charming film.
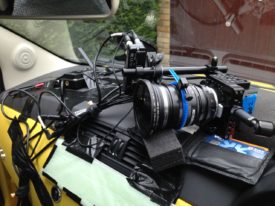
Principal was photographed on an Alexa Mini in Pro Res 4444, with Zeiss Ultra Primes and a half Soft FX to take off the digital edge. Since the pick-ups consist largely of scenes in a moving hatchback – the film’s signature Fiat 500 “Yellow Peril” – Leon has invested in a Blackmagic Micro Cinema Camera. Designed for remote applications like drone use, the BMMCC is less than 9cm (3.5″) square, meaning it can capture dashboard angles which no other camera can, except a Go Pro. Unlike a Go Pro, the BMMCC can record Cinema DNG raw files with a claimed 13 stops of dynamic range.
Leon has fitted the camera with a Metabones Speed Booster, converting the BMMCC’s Super 16 sensor to almost a Super 35 equivalent and increasing image brightness by one and two-thirds stops. The Speed Booster also allows us to mount Nikon-fit Zeiss stills lenses – a 50mm Planar, and 25mm and 35mm Distagons – to which I add a half Soft FX filter again. A disadvantage of the Speed Booster is the looseness it introduces between lens and camera; when the focus ring is turned, the whole lens shifts slightly.
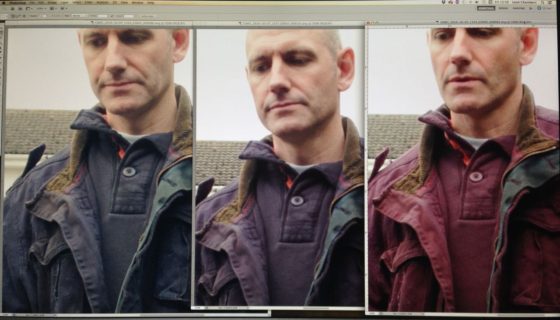
Filtration causes the first pick-ups hiccup when we realise that leading man Andy’s blue jacket is reading pink on camera. This turns out to be an effect of infra-red pollution coming through our .6 and 1.2 ND filters. Yes, whoops, we forgot to order IR NDs. Fortunately we also have a variable ND filter, which doesn’t suffer from IR issues, so we switch to that.

Lighting follows a similar pattern to principal, with a little bounce and negative fill outside the car, and Rosco 12″x3″ LitePads on the dashboard for eye light inside. On the move, Rupert and I monitor and pull focus wirelessly from a chase car. Referring to the false colours on an Atomos Ninja, I radio Leon to tweak the variable ND between takes when necessary. I miss the generous dynamic range of the Alexa Mini, which so rarely clipped the sky – and I do not buy the manufacturer claims that the BMMCC has only one stop less, but it still does an amazing job for its size and price.
Day 22 / Saturday
I start the day by reviewing some of yesterday’s footage side-by-side with Alexa Mini material from principal. They are very comparable indeed. The only differences I can detect are a slightly sharper, more “video” look from the BMMCC, and a nasty sort of blooming effect in the stills lenses’ focus roll-off, which reminds me of the cheap Canon f1.8/50mm “Nifty Fifty” I used to own.
A couple of quick shots at Leon’s, then we move to his friend Penny’s house, where a donkey and a horse look on as we set up around the Peril in Penny’s paddock. There are some inserts to do which must cut in with scenes where the car is moving, but since we don’t see any windows in these inserts, the car remains parked. Two people stand, one on either side of the car, each sweeping a 4’x4′ polyboard repeatedly over the windscreen and sunroof. With heavy cloud cover softening the shadows of these boards, the result is an effective illusion that the car is moving.
After lunch we have to capture additional angles for the traffic jam scene originally staged on day 14. By an amazing stroke of luck, the sun comes out, shining from almost exactly the same direction (relative to the car) as Colin bounced it in from with Celotex during principal. To begin with we are shooting through the windscreen, with a filter cocktail of half Soft FX, .6 ND and circular polariser. Since Andy is no longer wearing the blue jacket, I decided to risk the .6 ND rather than stacking multiple polarisers (the variable ND consists of two polarising filters). The next shot requires the camera to be rigged outside the driver’s window as the car drives away (pictured right).
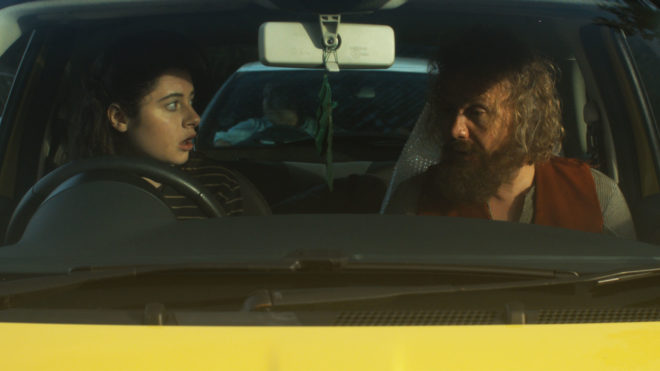
Then we set up for night scenes to cut with day 11, which, like the inserts earlier today, we achieve using Poor Man’s Process. Instead of polyboards, Gary sweeps a 1’x1′ LED panel gelled with Urban Sodium over the passenger side of the car to represent streetlights. Rueben walks past the driver’s side with another 1’x1′ panel, representing the headlights of a passing car. I’ve clamped a pair of Dedos to Rupert’s Magliner, and Andrew dollies this side-to-side behind the Peril, representing the headlights of a car behind; these develop and flare very nicely during the scene. For fill, the usual two 12″x3″ LitePads are taped to the dashboard and dimmed to 10%.
For a later stretch of road with no streetlamps or passing cars, I use a low level of static backlight, and a static sidelight with a branch being swept in front of it to suggest moonlight through trees.
Day 23 / Sunday
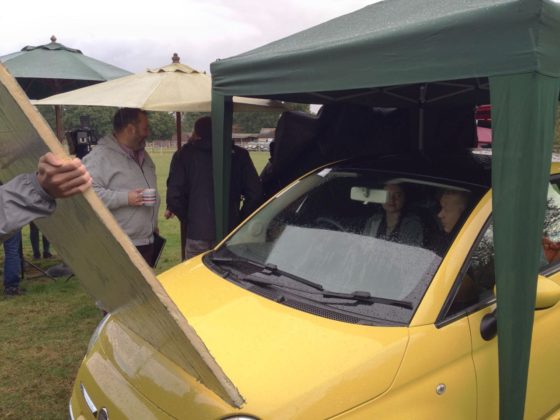
After a brief scene against a tiny little micro set, we have more scenes to shoot around the parked Peril – and it’s supposed to be parked this time, no movement to fake. Unfortunately it’s raining, which doesn’t work for continuity. Although I’m worried it will block too much light, the crew erect a gazebo over the car to keep the rain off, and in fact it really helps to shape the light. I even add a black drape to increase the effect. Basically, when shooting through the driver’s window, it looks best if most of the light is coming through the windscreen and the passenger’s window, and when we shoot through the windscreen it looks best if most of the light is coming through the side and rear windows; it’s the usual cinematographic principle of not lighting from the front.

After another driving scene using car rigs, we move to our final location, a designer bungalow near Seven Oaks. Here we are shooting day-for-dusk, though it’s more like dusk-for-dusk by the time the camera rolls. I set the white balance to 3,200K to add to the dusky feel, increasing it to 4,500K as the daylight gets bluer for real. The extra one and two-thirds stops which the Speed Booster provides are very useful, allowing us to capture all four steadicam shots before the light fades completely.
And with that we are wrapped for the second, but not final, time. Crucial scenes involving a yet-to-be-cast character remain for some future shoot.
Keep up to date with Above the Clouds on the official Facebook page or Instagram account.

