Goodbye to Ren

Some of the key cast and crew at the awesome wrap party. Photo by Allison Reid

Seasone one of Ren wrapped last week, and after a few days of tidying up and recovering, it was time for an epic wrap party – actually, two of them. And then came the heartbreaking process of saying goodbye to all the wonderful people I had lived and worked with for the past two months. We’d had all the time in the world and suddenly we had none.

What I said to those people as we parted seemed woefully inadequate as soon as they had walked out of the door. How could I put into words how unique and incredible this project, this experience had been? So to my Ren family, particularly that core group who were there day in, day out, here’s what I should have said…

Thank you. Thank you for the tea, the Thai curries, the Tech Biscuits and the jelly beans. Thank you for the joy of Tony the Phony Pony, for Spongebob Squarepants, for the movie quotes, the nonsense French and the inappropriate remarks. Thanks for the Nerf gun battles, the movie nights, the slumber parties and the Costa runs. Thanks for doing my laundry, for cleaning the toilets and for washing up.

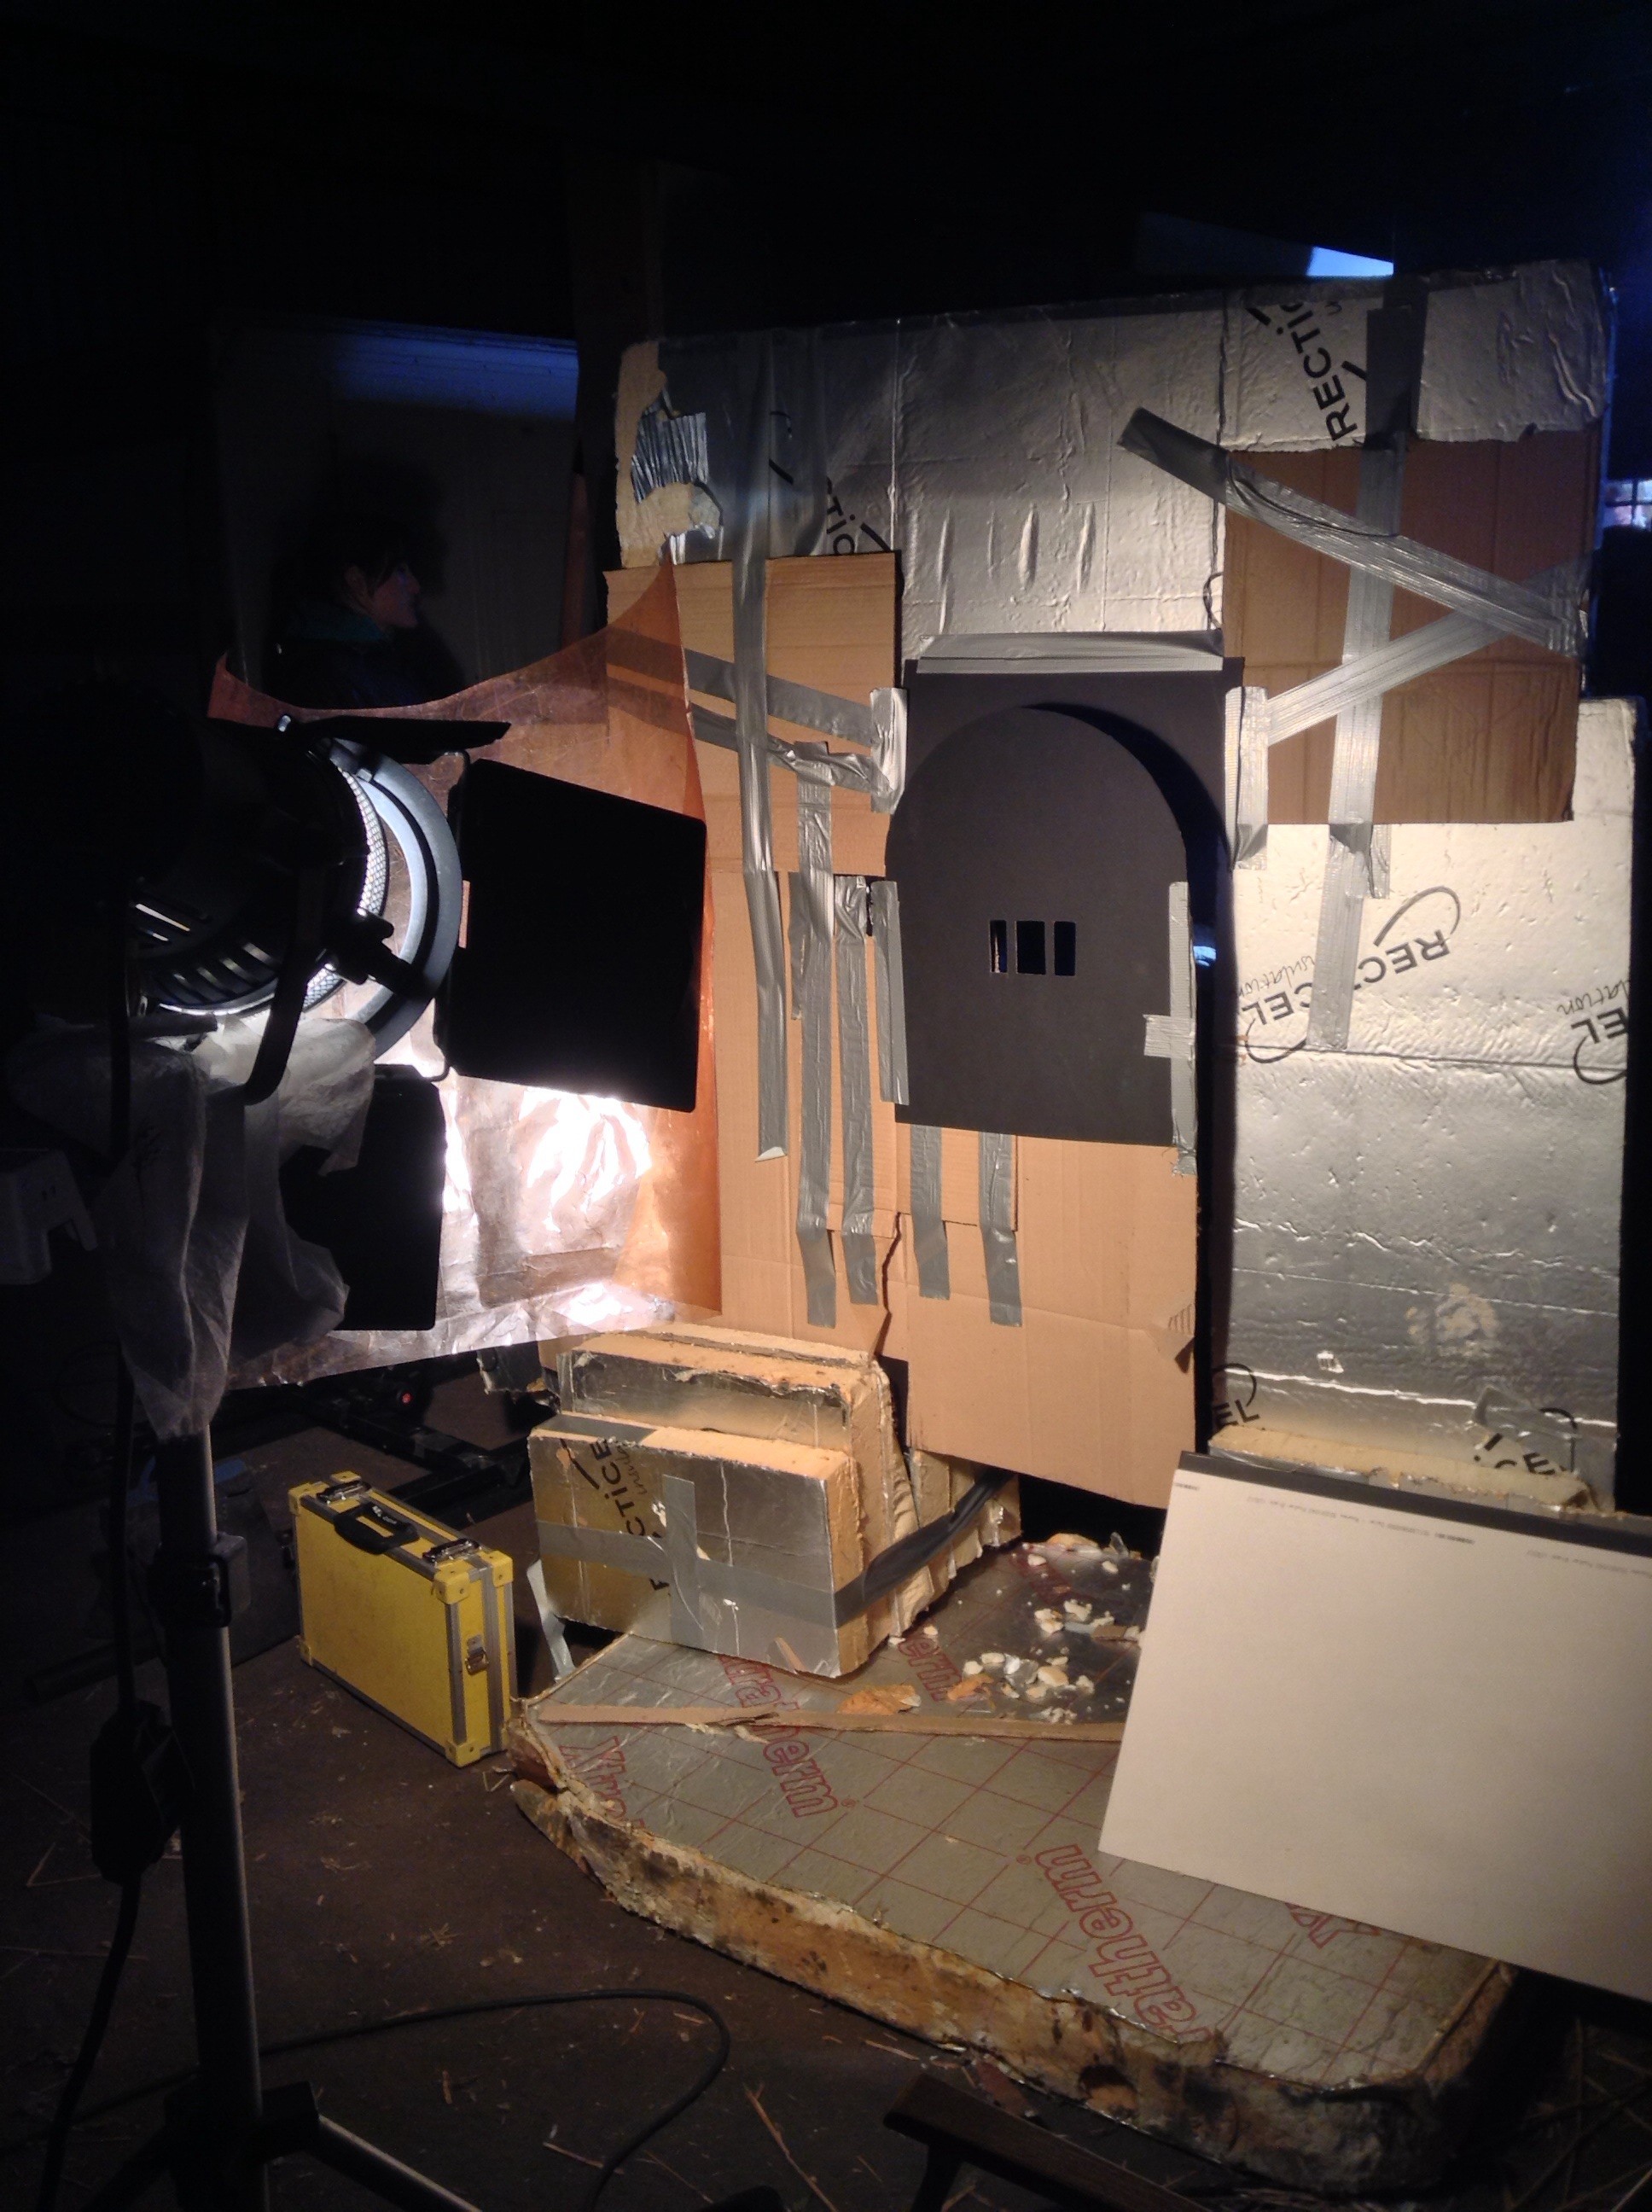
Thank you for being so complimentary about my work, and for going the extra mile to make sure I had the kit I needed to do it. Thank you for your patience, for not compromising and for keeping cool when everything was broken. Thanks for waiting for the smoke.

Thank you for helping me grow as a DP and as a person. Thanks for not judging. Thanks for believing in me when I suggested outlandish things like the fake running shots. Thanks for listening, for being there for me and letting me be there for you.

Thanks for the BEST WRAP PARTY EVER. Thanks for sharing your karaoke with us, and doing it really well. Thanks for putting up with my playlist several times through, and helping me rediscover my love of music.

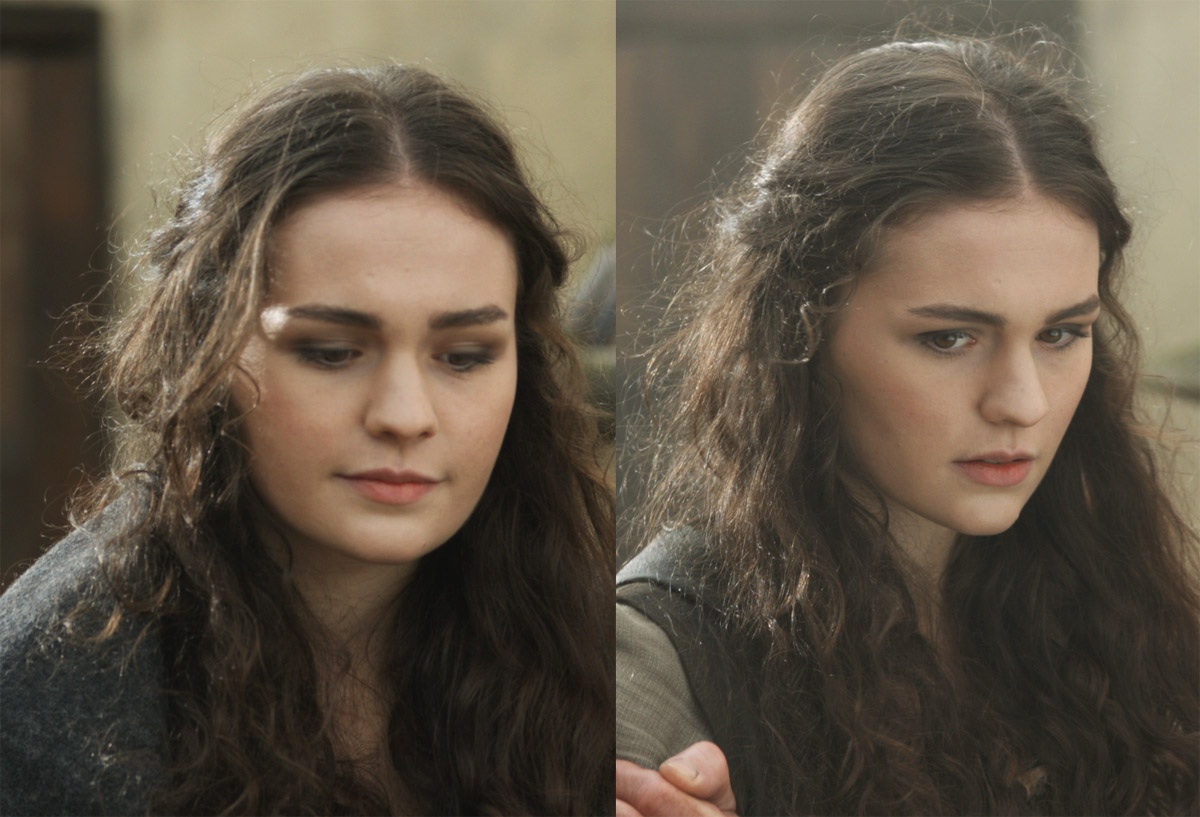
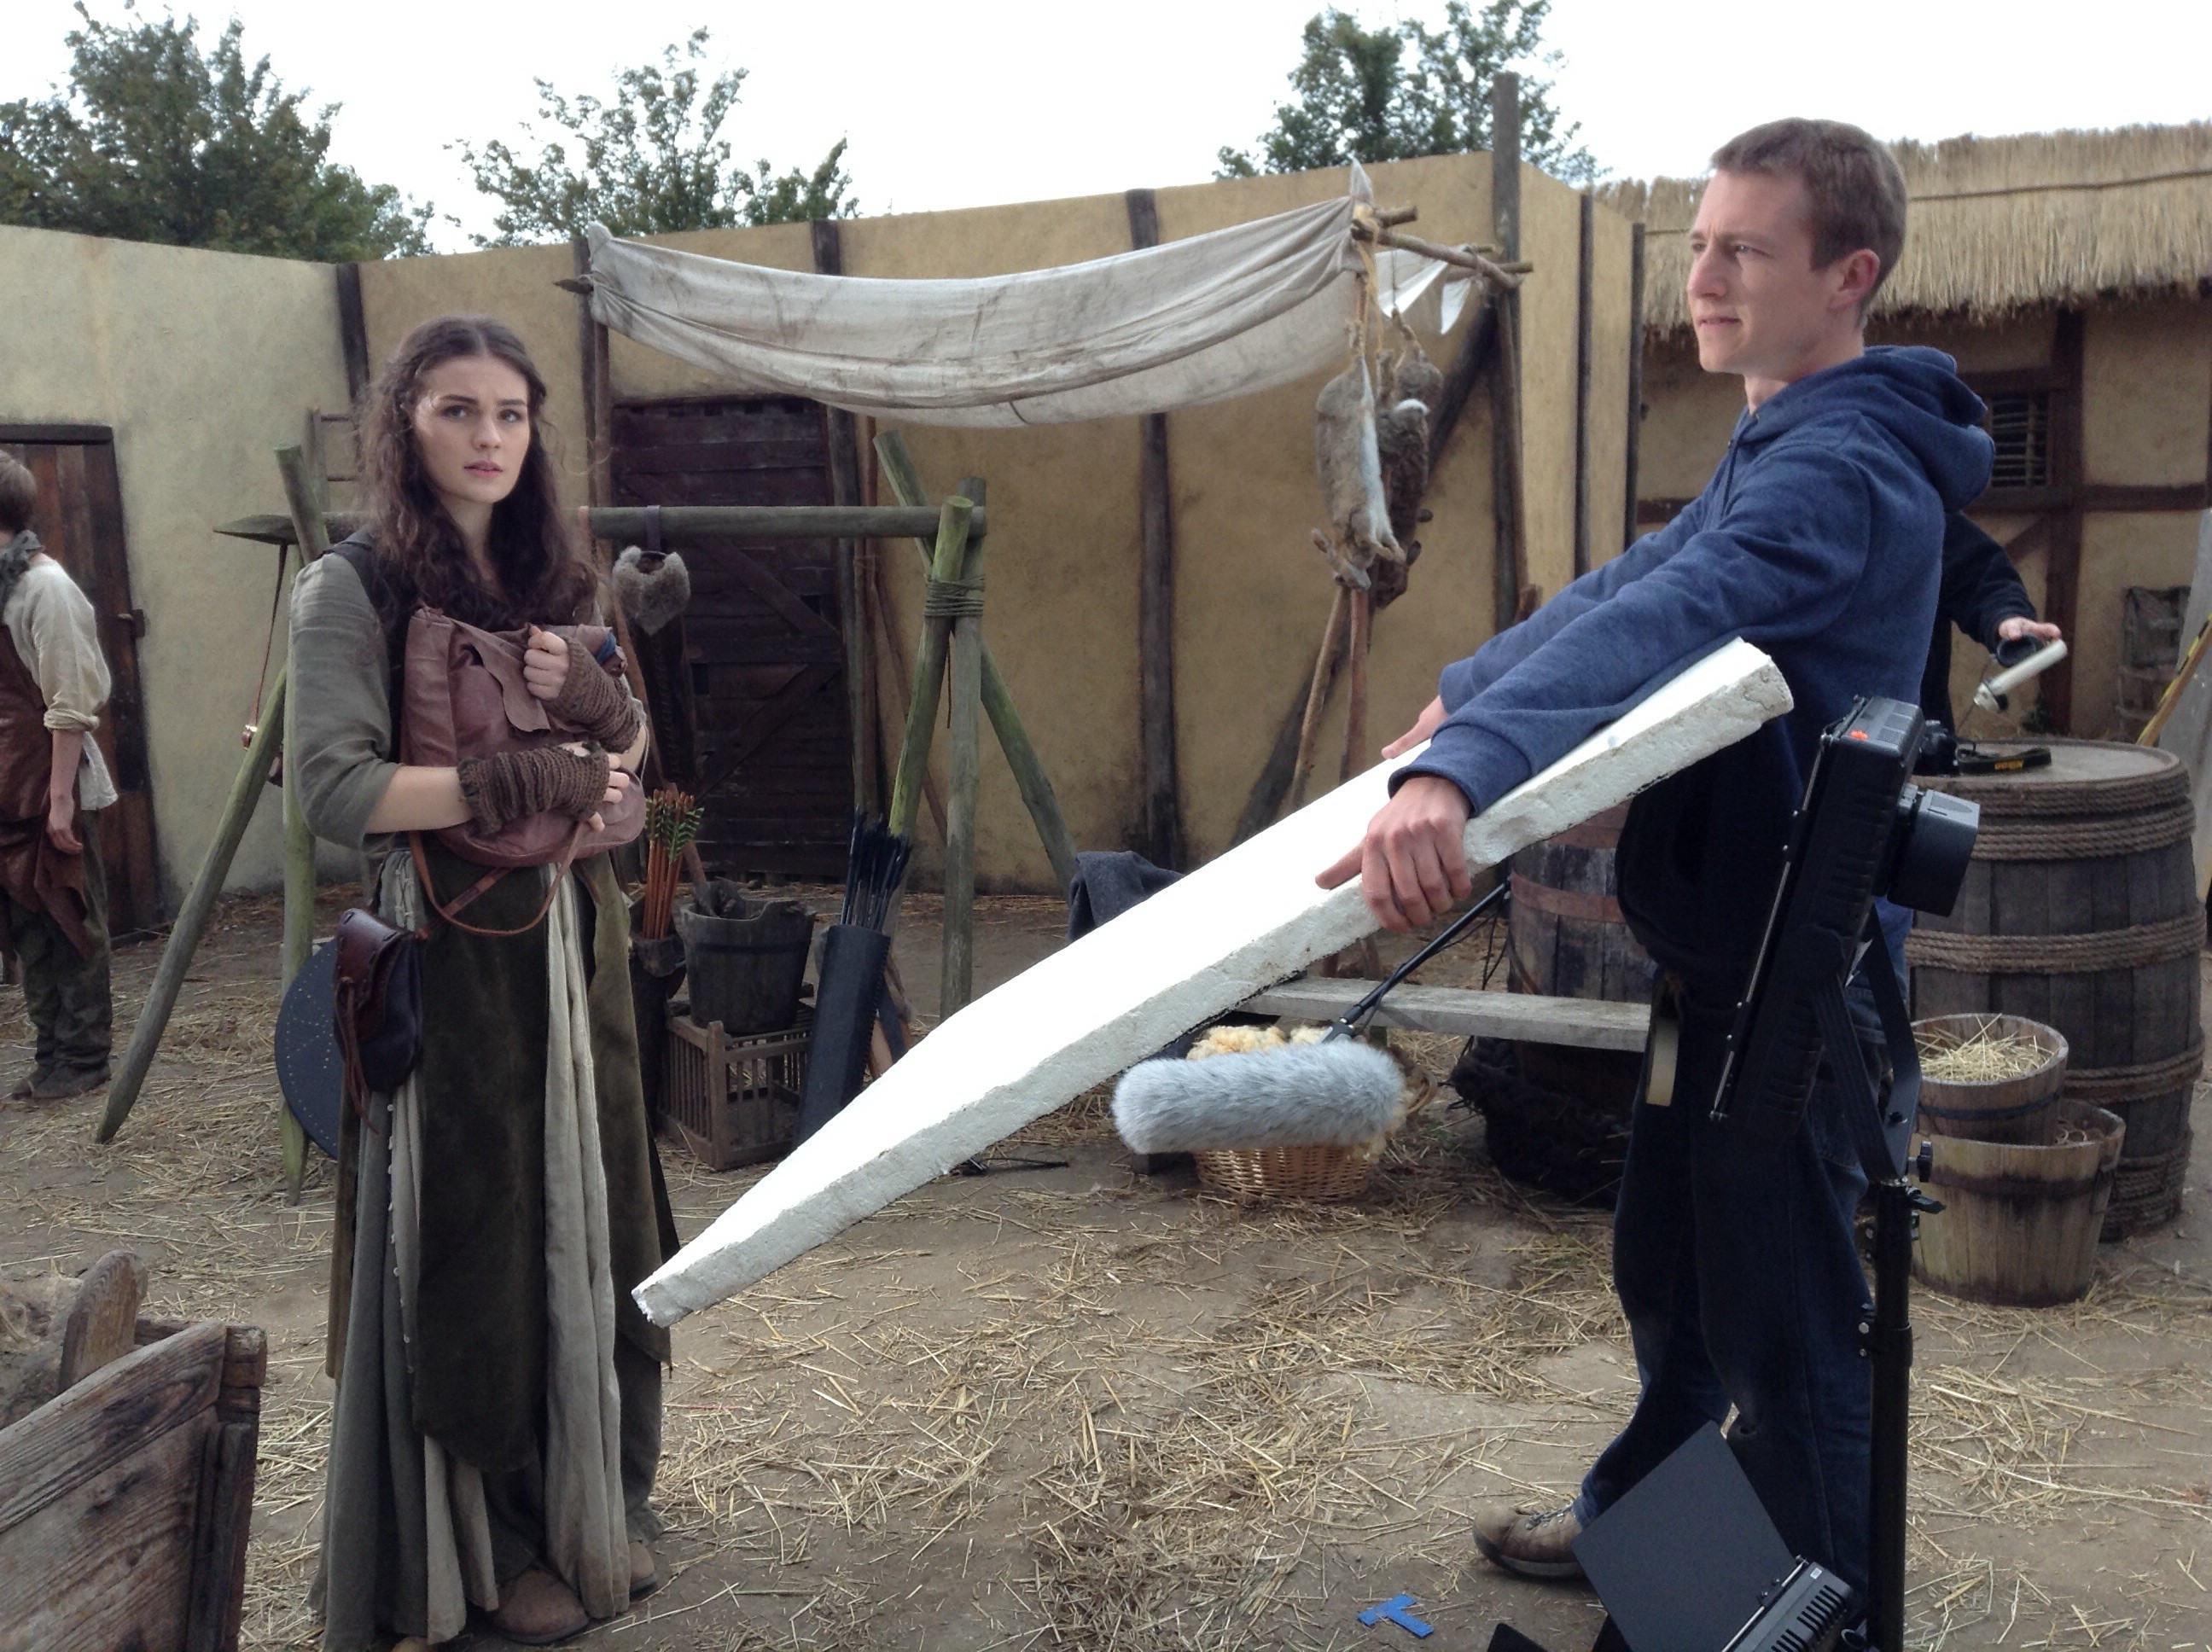
Thank you for the incredible hard work you put in before I even showed up. I have never met a kinder, more generous and more talented group of people. It has been the absolute highlight of my career to get up every morning and photograph the beautiful things you made. I am humbled to have earnt your respect and your friendship.

Thanks especially to Kate for bringing this amazing group together, and for setting the atmosphere that made this project unparalleled in my experience. Everything is awesome when you’re part of a team, and what a team to be part of. I love you all. I wish you every success and happiness in whatever you do next, and – if not before – I’ll see you all for season two.

Goodbye to Ren

Lighting Techniques #5: Smoke

Smoke looks cool, I think we can all agree, but why? What are we trying to achieve when we spray a set with smoke?

In the famous cinematography manual Painting with Light, John Alton says of the cinema experience: “We sit in the dark looking at a light screen; this gives a definite feeling of depth. In order to continue this depth on the screen, the progression from dark to light must be followed up. The spot which should appear to be the most distant should be the lightest, and vice versa…”

Smoke can help you accomplish this dark-to-light depth. Because it’s white, if you spray it in the background then the background will get lighter, while the foreground will remain crisp and contrasty. It’s like standing on top of a hill and looking at more hills receding into the distance. The more distant ones are lighter, less saturated, less contrasty because of the atmospheric haze.

Smoke helps darkly-clad characters stand out from a dark background in The Deaths of John Smith (dir. Roger Harding)
Smoke machine
The Magnum 550: the most powerful smoke machine in the world. Are you feeling lucky, punk?

There are a number of ways to produce smoke. I own a Magnum 550, a small electric machine designed for DJs but perfectly useable on set. The smoke fluid is electrically heated until it turns to gas. On Ren we have an Artem smoke gun which uses propane gas cans to heat the smoke. This is handy on location because it doesn’t need a power supply, and it can produce thick clouds of smoke much more quickly than the Magnum.

An Artem smoke gun
An Artem smoke gun

You have to wait for both of these types of machine to heat up before you can use them. Ideally you need a dedicated crew member who is predicting when you might be ready to shoot and heating up the machine in readiness. If you’re outdoors, they also need to stay on top of the wind direction. You may think this would stay fairly constant, but trust me, it doesn’t.

Both types of machine produce wreaths of smoke which usually needs wafting in order to look like general atmosphere. And consistency is a challenge. It’s tricky not to have long takes that start with a lot of smoke and end with none. Both types of machine are too noisy to run during a take, though the sound recordist may agree to let you run an electric machine during pauses in dialogue, and an Artem can continue producing smoke for a little while after the gas is turned off.

A hazer
A hazer

If you’re indoors, a hazer may be more appropriate. This is an electric machine that uses compression rather than heat to vapourise the fluid, then blows it out continuously through a fan. The effect is much more subtle and constant than that produced by a smoke machine.

However you’re generating your smoke, remember to keep it in the background as much as possible. It’s all about making your subject stand out from the background.

You can find out more about smoke and why I use it in my Ren podcast at www.rentheseries.com/news/ren-podcasts.

Smoke used to volumise a shaft of light in Ren (copyright 2014 Mythica Entertainment)
Lighting Techniques #5: Smoke

Ren: Lighting Karn’s House

Karn’s house is an awesome set which I had been walking past at Ren Studios for six weeks before I finally got to light it. It didn’t disappoint.

Behind all that smoke at the top is the HMI

In the words of my camera assistant Andy Roughan, I had to John McClane it to get the HMI up on the metal tank behind the set. After climbing onto the tank via a stepladder, I had to shimmy around an incredibly dusty pipe to get to the spot where the lamp needed to be. Getting the lamphead, the low boy stand and sandbags up there was fun. At one point I lost my balance and fell backwards, towards the roof of the set. I shouted a naughty word at the top of my voice, thinking that not only was I going to injure myself quite badly, but I was going to destroy everyone’s favourite set before we’d shot a single thing on it. Fortunately it was so well-built that it took my weight, or at least the part of my weight that I was forced to put on it, and no harm was done. Except that me shouting the naughty word in such a tone of utter panic had given everyone within earshot a minor heart attack.

Squish's cyclotron
Squish’s cyclotron

Why was it so important to get light up behind the set, rather than shining it down through the roof from in front? The answer is smoke. You can’t really see smoke unless it’s backlit, so in order to get those magical shafts of light coming through the set, the HMI had to be at the back.

After shooting the video blog, Andy and gaffer Richard “Squish” Roberts finished building the cyclotron for the firelight effect. This consisted of three 100W bulbs behind a red gel, and two behind an orange gel. I don’t want to give away screengrabs yet,  but you can see the fire effect at work on set dresser Amanda Stekly in this ropey iPad photo:

Set dresser Amanda Stekly, lit by the fake firelight

This fire effect served to light Ren (Sophie Skelton) in the foreground of the master shot very nicely, and separate her from the background through colour contrast. It rendered the 2ft kinoflo shown in the video blog unnecessary.

When we came in for the close-ups I continued to differentiate the characters of Ren and Karn (Christopher Dane) through light quality, as I had in Wales. I brought in an LED fresnel for Karn’s close-up, to get a hard sidelight, then for Ren’s close-up I used the 2ft kino to get a much softer look and from a less severe angle.

It’s a shame there was only one scene to film in this set; it would have been great to use it more. But it will certainly add a lot of production value to the opening episode of the series.

Ren is copyright 2014 Mythica Entertainment. Visit www.rentheseries.com to find out more.

Ren: Lighting Karn’s House

Ren: Lighting Dagron’s House

This is our big interiors week on Ren. The main set is the inside of Ren’s house, which was assembled in a mere three days by Chris Dane and his team, cannibalising the village exterior set. In this video blog I explain how I lit the set.

This set-up worked pretty much as-is for the first big scene in the house, shot on Monday. It was all handheld, so I needed the flexibility to move around with the camera and not worry about lamps on the floor getting in shot. The way I’d lit the set meant that the cast could stand pretty much anywhere and look good, especially since whoever was wiggling the “firelight” reflector could tweak the angle of it to follow any actor threatening to go a bit dark.

100W bulbs hidden behind the dresser for "candlelight"
100W bulbs hidden behind the dresser for “candlelight”

As the bedroom was visible in the background of many shots, I rigged a rough version of the candelight effect I knew I would be using when we got to the bedroom scenes proper. I clipped four 100W tungsten bulbs behind pieces of furniture and cabled them into two channels of the dimmer board Colin kindly lent us. These were then flickered to suggest flames.

image
The dimmer station

The dedo over the table proved to be superfluous. When I saw Claire making candles for the set, I asked her to double-wick them. I’d read in American Cinematographer that they’d done that on Pirates of the Caribbean to boost the light output, and sure enough, once those candles were lit, the dedo wasn’t needed.

The following day I played around with the lighting a bit more. When we came in for close-ups – this time on sticks – I turned off the overhead 4ft kino and brought in a 2ft kino on the floor for Window Wrap (Lighting Technique Number #3). That way the light got into the talent’s eye sockets and was generally more flattering.

The kinoflo on the right acts as Window Wrap

For another scene I decided the fire had gone out, allowing our bad guys to be bathed in cool daylight while the good guys stayed near the candlelight by the bedroom door. It’s nice when you have motivated colour contrast like this in a set and you can play around with which characters are in which colour of light. I look forward to shooting the remaining house scenes and developing some nice candlelight in the bedroom.

Find out more about Ren at www.rentheseries or on Facebook or Twitter.

Ren: Lighting Dagron’s House

Ren: Lighting the Prison Cell

After a month of shooting exteriors, yesterday we shot the first interior set for Ren. Which was just as well since a tropical storm was raging outside and blowing down parts of the exterior village set.

It was a classic prison cell scene, one of those shaft-of-light-through-the-barred-window jobbies. Amanda Stekly and her team did a great job of creating a two-walled set with moss, wet stone and even real snails. Outside the window was a platform to sell the illusion that the cell was below ground level.

Here are some frames from the scene:

prison1 prison2

2.5K HMI
2.5K HMI

If you’re going for this shaft-of-light-piercing-the-gloom look, you need three things. Firstly, a powerful, focusable light; I used a 2.5K HMI fresnel. Secondly, you need to accept over-exposure. The only way you will get any detail in the shadows is by exposing bright enough that the highlights – anyone standing in the direct beam of light – will clip. If you don’t like the highlight roll-off characteristics of your camera, stay away from this type of lighting. The cool thing about having a keylight this hot is that when a character moves around in the light, especially if they’re wearing light-coloured clothing, they bounce the light around in interesting and often unpredictable ways.

I shot the scene on Richard Roberts’ Blackmagic Cinema Camera, partly because of ongoing problems getting a monitor signal out of my Production Camera, and partly because of the extra stop of dynamic range the BMCC would give me to milk this high contrast lighting scenario.

The third and very important thing you need is a smoke machine to volumise the shaft of light. (More about using smoke in a future post.)

In this view of the platform behind the set, the fluorescent fixture providing indirect "daylight" can be seen on the left, gelled with Quarter Minus Green to remove the green spike in the lamp's output.
In this view from behind the set, the fluorescent fixture providing indirect “daylight” can be seen on the left, gelled with Quarter Minus Green to remove the green spike in the lamp’s output.

In order to give the sense of indirect “sky” light also coming in through the window, I placed a fluorescent outside the window so as to catch some of the side wall of the set. When I first tested the lighting set-up the previous night, I placed a second fluorescent fixture directly above the window to get some edging on the tops of the stones underneath. But I found that the more sources I set up, the less definition I got in the shaft of HMI light, so I dropped the toplight.

The door gobo
The door gobo

Although the script called for guards to drag Hunter (Duran Fulton Brown) into the cell and shut him in, the two-walled set had no door. So with help from the art department I constructed a ridiculous-looking door in roughly one-third scale, simply to cast the shadow of the door. Behind it I placed a redhead gelled with half CTO, which Richard wiggled during takes to suggest firelight.

The LED hidden behind the bucket

I set the camera to a white balance of 4,500K so that the “daylight” of the HMI would go a little cold and the “firelight” would go really warm.

Our first shot involved Hunter washing his face at a bucket of water, then slumping back into the “sunlight”. We positioned the bucket out of the “sunlight”, in the small patch of light coming through the window of our fake door. But Hunter was still too dark by the bucket. I didn’t want to flood the set with fill and ruin the mood, so I hid a small LED light behind the bucket and diffed it down. This lights Hunter’s face when he leans over it, and hopefully suggests a reflection off the water.

A fluorescent toplight rigged over the bucket for the face-washing close-up
A fluorescent toplight rigged over the bucket for the face-washing close-up. Note the black cloth hanging from one side to reduce spill.

When we moved to a close-up of Hunter washing his face (below), I rigged a fluorescent toplight, suggestive of indirect daylight from the window, and placed a circle of foil at the bottom of the bucket. The idea was that the toplight would reflect off the foil and the surface of the water and light Hunter’s face. It didn’t work, but the toplight itself really made the shot for me. The more you work with an actor, the more you learn the best ways to light them, and I’ve learnt that Duran looks great with toplight.

Foil in the bucket for added bounce

Screen grabs (C) 2014 Mythica Entertainment. Visit www.rentheseries.com for more info.

prison3


Ren: Lighting the Prison Cell

Ren Teaser Trailer Released

The first teaser trailer for Ren has been released today. This is the ambitious fantasy web series I’ve been photographing for the last four weeks. (I also cut this trailer.)

Michael Hudson has produced a series of behind-the-scenes podcasts about Ren. You can listen to me talking about the cinematography, along with all the other talented HoDs talking about the hard work and genius they have brought to bear, at http://www.rentheseries.com/news/ren-podcasts/

Ren Teaser Trailer Released

Ode to Ren

Setting up for one of the crowd scenes

A year after lensing season one of Harriet Sams’ ambitious period web series The First Musketeer, I’ve jumped on board Kate Madison’s equally epic series Ren. Coming from the woman who made Born of the Hope, the incredibly popular Lord of the Rings fan film, it’s no surprise that Ren is a fantasy of Jacksonian proportions. Marked by a powerful ancient spirit and feared by all who see her, the title character starts a journey and discovers that all she thought she knew may have been a lie.

I’ve already posted several blogs about lighting Ren, but now I want to talk more about the project as a whole and the unique experience I’m having on it. Ren is one of those landmark shoots which is so tough but so much fun, where the crew become like family and you hate the idea of it ever ending. As I write this I’m on a train which is taking me away from Cambridgeshire and the drafty studio I’ve come to think of as home, towards a far less exciting shoot. This weekend away on a paid job seems strange and wrong, and I can’t wait to get back to my Ren family on Sunday night.

The studio is an old factory, its workshops filled with sets, props and costumes. For the last three weeks I’ve been sleeping on an air bed in what was probably once a meeting room. Directly above that is the make-up room, and next to that is the production office from which Kate and associate producer Michelle Golder battle daily against a dwindling budget and scheduling headaches to keep this epic web series shooting.

Ronin Traynor choreographs a fight scene with Richard Zeman (left) and Duran Fulton Brown (right)
Ronin Traynor (left) choreographs a fight scene with Richard Zeman (centre) and Duran Fulton Brown (right)

And in the car park is the set, which you may have seen in my video blog. Chris Dane and a team of volunteers spent three months fashioning the medieval village. Miriam Spring Davies has spent countless hours crafting the costumes to beautifully clothe each of the principals, plus a village full of extras and fifteen imposing Kah’nath soldiers. Hans Goosen, who flew over from Germany (I think) to be involved in the project, lived and worked in the studio for weeks while making stunning hero props. And these are just a few of the ridiculously talented and dedicated people who are bringing Ren’s world to life.

Ever since a damp weekend in autumn 2008, which I spent holding an umbrella over a steadicam operator on Born of Hope, I’ve wanted to work properly with Kate. As a maker of ambitious fantasy projects myself, I feel she’s a kindred spirit. When I learnt she was looking for a DP for Ren, I gave her the hard sell, knowing that I couldn’t bear to let anyone else photograph this series. My experiences on The First Musketeer – which shares several cast and crew members with Ren – stood me in excellent stead to approach the fantasy period settings of Kate’s script. I learnt so much on Musketeer about creating texture to sell the period, ageing scenes with smoke, and simulating firelight.

Actor Duran Fulton Brown, director Kate Madison and gaffer Richard Roberts warm their hands over a prop braziere.

When Kate finally picked me, it was too late for me to rearrange other commitments that clashed with the first three days of shooting. I arrived at the studio on a Saturday night with my regular assistant Colin Smith. It was packed with crew and extras who were in the middle of a busy weekend of shooting crowd scenes. The next morning I was launched into Ren, and real life faded like a dream. That was three weeks ago.

Since then the crew has grown and shrunk (mostly shrunk!) with the passing days, as people give up what time they can and then return to their normal lives. For a project so unique and wonderful, we have struggled enormously to attract crew. By the second week I found myself regularly in the production office, gradually taking over scheduling and sometimes attempting to AD the shoot. Lately I’ve been cutting sizzle reels and teaser trailers to help Kate and Michelle sell the project to potential sponsors. It’s a far cry from the promises I made myself earlier this year not to do unpaid work any more, not to edit any more and not to work on anything where I don’t get a proper bed. But somehow Ren has gone beyond being a job, even beyond being an unpaid collaborative project. It’s my life now, and there’s nowhere else I’d rather be. So roll on Monday and the next day of adventure on this crazy, beautiful thing we call Ren: Season One.

Ode to Ren

Lighting Techniques #4: Health Bounce

This is a really simple technique but incredibly effective. All you do is put a reflector or a piece of polyboard under the talent’s face. Here’s an example frame from Ren starring Sophie Skelton. This was shot on an overcast day using a 2.5K HMI as backlight.

image

Sophie is very beautiful and the make-up (by Becca Youngs) is great, but the icing on the cake is a simple piece of polyboard out of the bottom of frame. It subtly lifts the shadows on her face and puts a ‘sparkle’ in her eye. That sparkle is actually the poly’s reflection, but it’s amazing how much life and energy that gives. I’m calling this technique the Health Bounce because it’s used a lot in ads for health and beauty products.

Here’s a side-by-side comparison without (left) and with (right) the poly.

image

The human brow has evolved to protect our eyes from sunlight, amongst other things. In an exterior scene, particularly on an overcast day, the light comes predominantly from above, rendering the forehead and the nose the brightest areas, and throwing the eye sockets into shadow. This is a challenge for cinematographers. So much of an actor’s performance is in the eyes – it’s essential to get light into the eye sockets to capture every nuance of that performance. A bounce board underneath the face helps do that.

Colin Smith holds the polyboard for the above shot of Sophie
Lighting Techniques #4: Health Bounce

Ren: Night for Day

The 2.5K HMI can be seen here in the lower right, and the fake sky on the top right.

It had to happen sooner or later. On an ambitious series like Ren, with a tight schedule, it was inevitable that we would at some point have to shoot a daylight shot after dark. So I’d given it some thought beforehand. It seemed to me like soft toplight, simulating sky, was what was needed. I figured that a 2.5K HMI fired into an overhead 6×6 silk would do the job, and that’s one of the reasons I pushed production to hire a 2.5 despite the very limited budget.

The moment came yesterday when we got into a time crunch with one of our lead actors (Duran Fulton Brown) and had to complete a scene despite the natural light running out. Fortunately the scene was scripted as evening and we had shot coverage at magic hour and in twilight with an HMI “sunset”. So we weren’t trying to match full-on daytime.

Colin (left) helps hold up the roof. Rich (right) does not. Duran Fulton Brown (centre) plays Hunter.

We used a redhead for the direct “setting sun” light. We had a silk but no sturdy stands to rig it on, so we built a quick roof out of poly and Celotex (matte silver bounce), holding it up with lightweight stands and crew members! We put the 2.5K on the floor in the corner and fired it into this ceiling. The final touch was to fire an LED panel at the back wall to fill in the black shadows that the redhead was casting.

Check out the final shot below. It looks a lot less convincing to me now than it did at the time, but I believe the concept was sound. We just needed more stands to rig the poly at a better angle to get the maximum bounce, including some behind Duran to give a general “sky” backlight. Lessons learnt for the next time!

image


Ren: Night for Day

Ren: Shooting the Exterior Set

Here’s a little video blog about the challenges of shooting on the amazing medieval village set that Chris Dane and others have built for Ren.

I’ve been using the Artemis app a lot to test out lens choices and compositions for “seeing off the set” issues. That way if I’m set up for a shot and we’re waiting on costume or an actor, I can preview the next shot on Artemis and warn Chris that he’ll need to move a wall to hide the car park.

More soon from the set of Ren.

image image


Ren: Shooting the Exterior Set