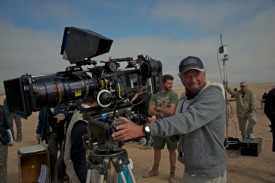
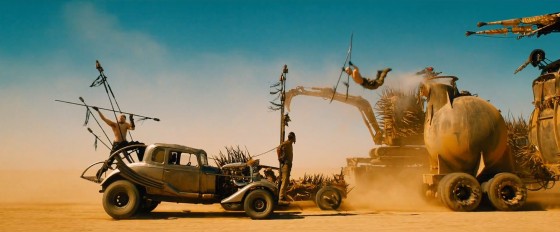
The Australian Cinematographers’ Society has released a video of a two hour talk by Fury Road DP John Seale, ACS, ASC. It’s a fascinating watch, with lots of interesting info and some dry Aussie wit; more than once Seale talks about “taking to the drink” when things got tricky!
Watch the video here. (Embedding is disabled.)

Here are the most interesting points I took from it, with a few extra details added from American Cinematographer’s article on Fury Road:
- The team spent years developing a new 3D camera based on a sensor built for the US military. Director George Miller wanted something rugged enough to survive dusty desert work and small enough to fit into the truck cabs. Camera tests revealed it had only five stops of dynamic range, nowhere near enough to capture detail both outside and inside the cabs in the same frame.
- The film was ultimately shot on Arri Alexas (four Ms and six Pluses) and converted to 3D in post. Absolutely no consideration to the 3D format was given during shooting.
- When early footage failed to please DIT Marc Jason Maier and his meters, Seale agreed to downrate the Alexa from its published 800 ASA to 400 ASA. The subsequent footage was deemed technically correct by Maier and made Seale much more comfortable that he was recording what he thought he was recording in terms of exposure.
- Dailies were rendered with two different LUTs: the standard Rec 709 and a custom one designed to emulate a one-light celluloid work-print. This was for the benefit of Seale, for whom Fury Road was his first digital movie.
- Canon 5D Mark IIs with the Technicolor CineStyle profile were used as crash cams. Sky replacement had to be executed on many of the 5D shots to remove banding, presumably caused by the small colour space.
- Olympus and Nikon DSLRs were used a little as well.
- For close-ups of Max escaping the Citadel early in the film, a Blackmagic Cinema Camera with a Tokina 11-16mm zoom (a combination I used frequently on The First Musketeer!) was rigged on a Movi.
- The film was lensed predominantly on zooms, with a few Super Speed primes kept on standby for when the daylight was running out.
- Custom-built 15mm and 16mm primes were used inside the cab of the War Rig. The lenses’ hyperfocal distance had been adjusted so that everything from 0′ to 9′ (i.e. everything inside the cab) would be in focus.
- Lighting and camera rigs hung from the roofs of the vehicles had to be stripped back because of the shadows they cast. Instead, platforms were rigged on the sides of the trucks, and a track-and-pulley system was built into the War Rig’s cab’s ceiling from which cameras could be suspended.

- Scenes in the cab were shot at T5.6, with strips of LEDs mounted on the ceiling and on the pillars between the front and rear doors to bring up the actors inside.
- Day-for-night scenes were overexposed by two stops so that characters in the shadows could be lifted in the grade, if necessary, without noise.
- The film was storyboarded early on, but a script was only written when the studio demanded it!
- Miller wanted to shoot everything single-camera, including action, but Seale began sneaking in with extra cameras and soon convinced his director of the efficacy of this method.
- Much of the film was shot as Poor Man’s Process, or “Sim Trav” as Seale calls it.
- In post, Miller chose shots with camera shake that he liked and had that shake digitally applied to other shots.
- Miller decreed that the subject of the shot should always be framed centrally. This allowed him to edit faster, because time wouldn’t be lost on each cut as the viewer searched the width of the anamorphic frame for the subject.
- Extensive use was made of two Edge Arms. An evolutionary step up from Russian Arms, these are cameras mounted on robotic arms which are in turn mounted on pick-up trucks.
- Other vehicle rigs included custom-built buggies with Alexa Pluses mounted front and rear, and a “Ledge” mount which was a 30′ truss tower built on the back of a truck, allowing high angles without the need for drones or helicopters.
- Leaf blowers were used, via flexible pipes, to keep sand off the lenses in moving shots.
It’s interesting to hear how laid-back Seale is. He gave his focus puller a great degree of leeway in choosing the lens package, and let his DIT, gaffer and operator handle the technical side of recording and exposing the image. This level of trust in his team must give him tremendous capacity to focus (pardon the pun) on the creative side of his job without worrying about the details.
I’ll leave you with the EPK B-roll from Fury Road…
