Creating “Stasis”

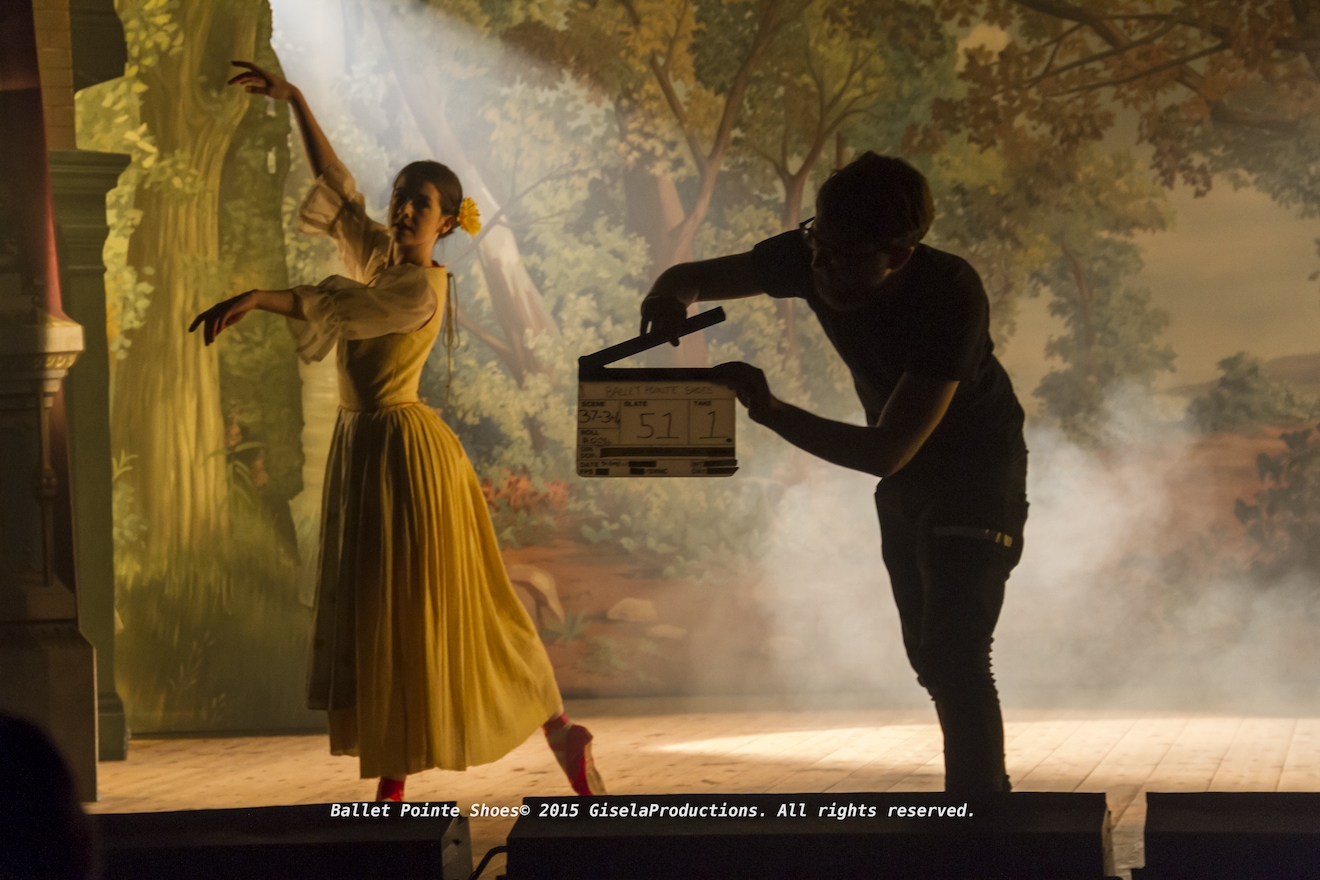
Stasis is a personal photography project about time and light. You can view all the images here, and in this post I’ll take you through the technical and creative process of making them.

I got into cinematography directly through a love of movies and filmmaking, rather than from a fine art background. To plug this gap, over the past few of years I’ve been trying to give myself an education in art by going to galleries, and reading art and photography books. I’ve previously written about how JMW Turner’s work captured my imagination, but another artist whose work stood out to me was Gerrit (a.k.a. Gerard) Dou. Whereas most of the Dutch 17th century masters painted daylight scenes, Dou often portrayed people lit by only a single candle.

“A Girl Watering Plants” by Gerrit Dou

At around the same time as I discovered Dou, I researched and wrote a blog post about Barry Lyndon‘s groundbreaking candlelit scenes. This got me fascinated by the idea that you can correctly expose an image without once looking at a light meter or digital monitor, because tables exist giving the appropriate stop, shutter and ISO for any given light level… as measured in foot-candles. (One foot-candle is the amount of light received from a standard candle that is one foot away.)

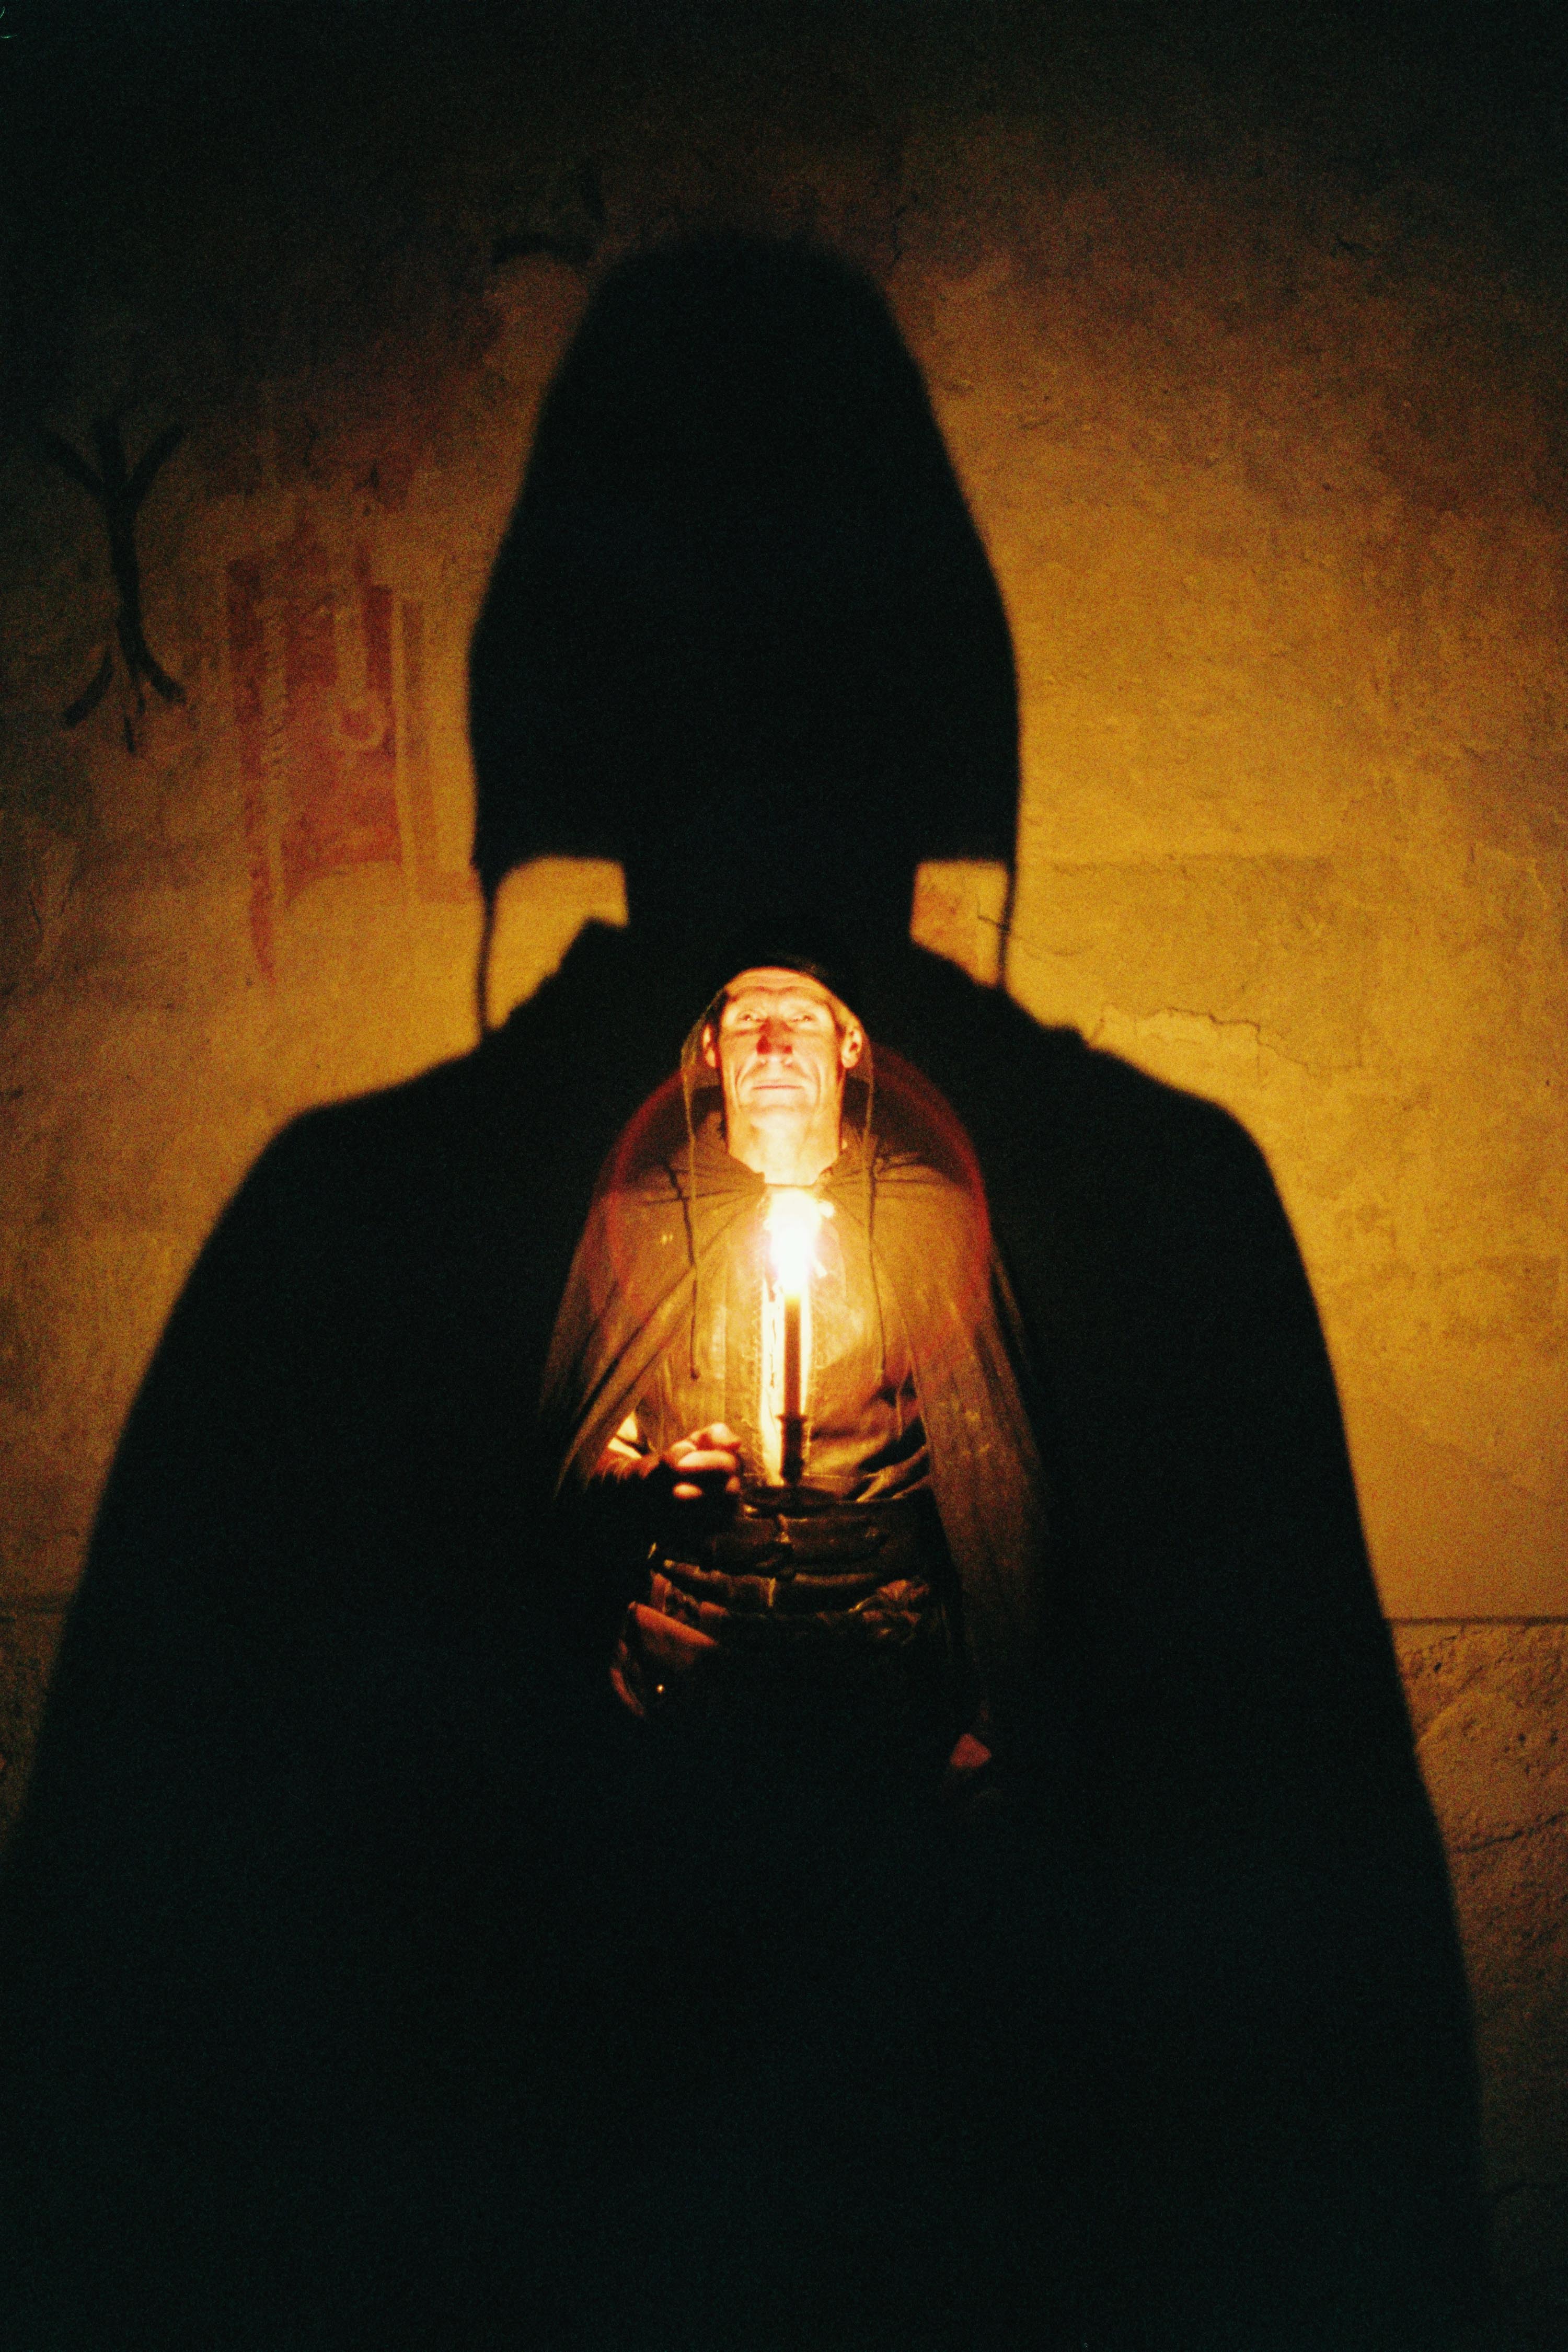
So when I bought a 35mm SLR (a Pentax P30T) last autumn, my first thought was to recreate some of Dou’s scenes. It would be primarily an exercise in exposure discipline, training me to judge light levels and fall-off without recourse to false colours, histograms or any of the other tools available to a modern DP.

I conducted tests with Kate Madison, who had also agreed to furnish period props and costumes from the large collection which she had built up while making Born of Hope and Ren: The Girl with the Mark. Both the tests and the final images were captured on Fujifilm Superia X-tra 400. Ideally I would have tested multiple stocks, but I must confess that the costs of buying and processing several rolls were off-putting. I’d previously shot some basic latitude tests with Superia, so I had some confidence about what it could and couldn’t do. (It can be over-exposed at least five stops and still look good, but more than a stop under and it falls apart.) I therefore confined myself to experimenting with candle-to-subject distances, exposure times and filtration.

The tests showed that the concept was going to work, and also confirmed that I would need to use an 80B filter to cool the “white balance” of the film from its native daylight to tungsten (3400K). (As far as I can tell, tungsten-balanced stills film is no longer on the market.) Candlelight has a colour temperature of about 1800K, so it still reads as orange through an 80B, but without the filter it’s an ugly red.

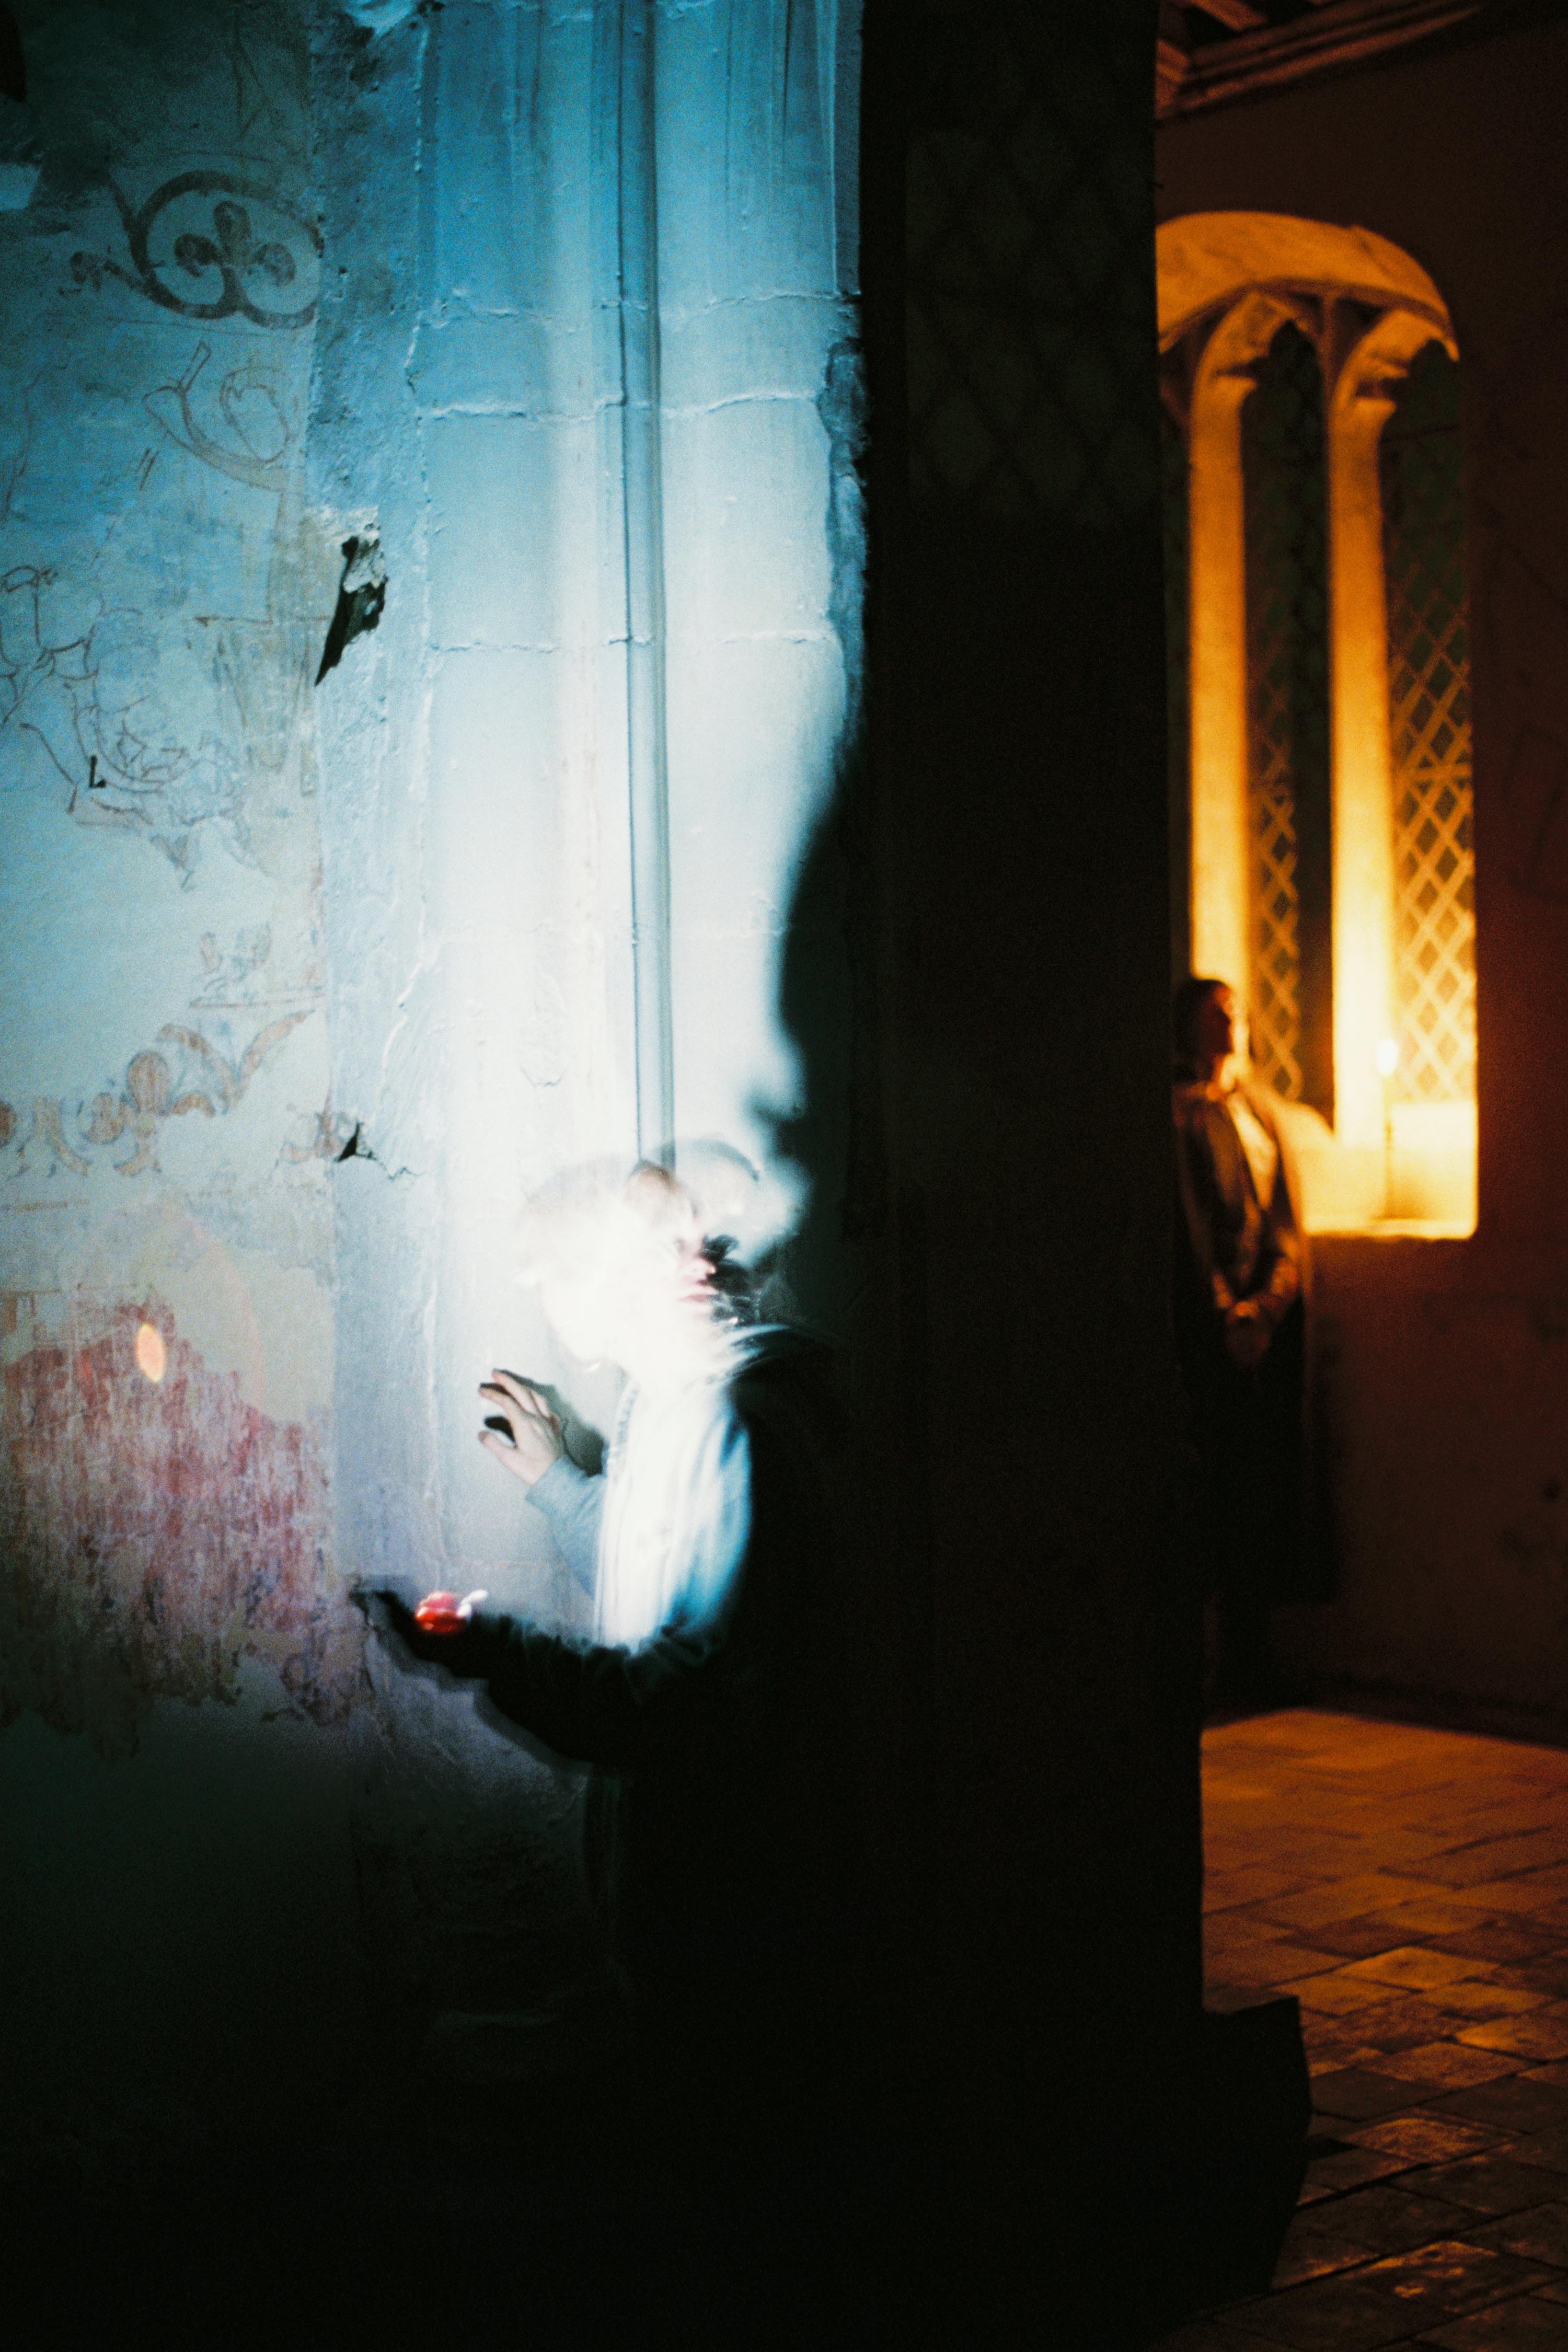
Meanwhile, the concept had developed beyond simply recreating Gerrit Dou’s scenes. I decided to add a second character, contrasting the historical man lit only by his candle with a modern girl lit only by her phone. Flames have a hypnotic power, tapping into our ancient attraction to light, and today’s smartphones have a similarly powerful draw.

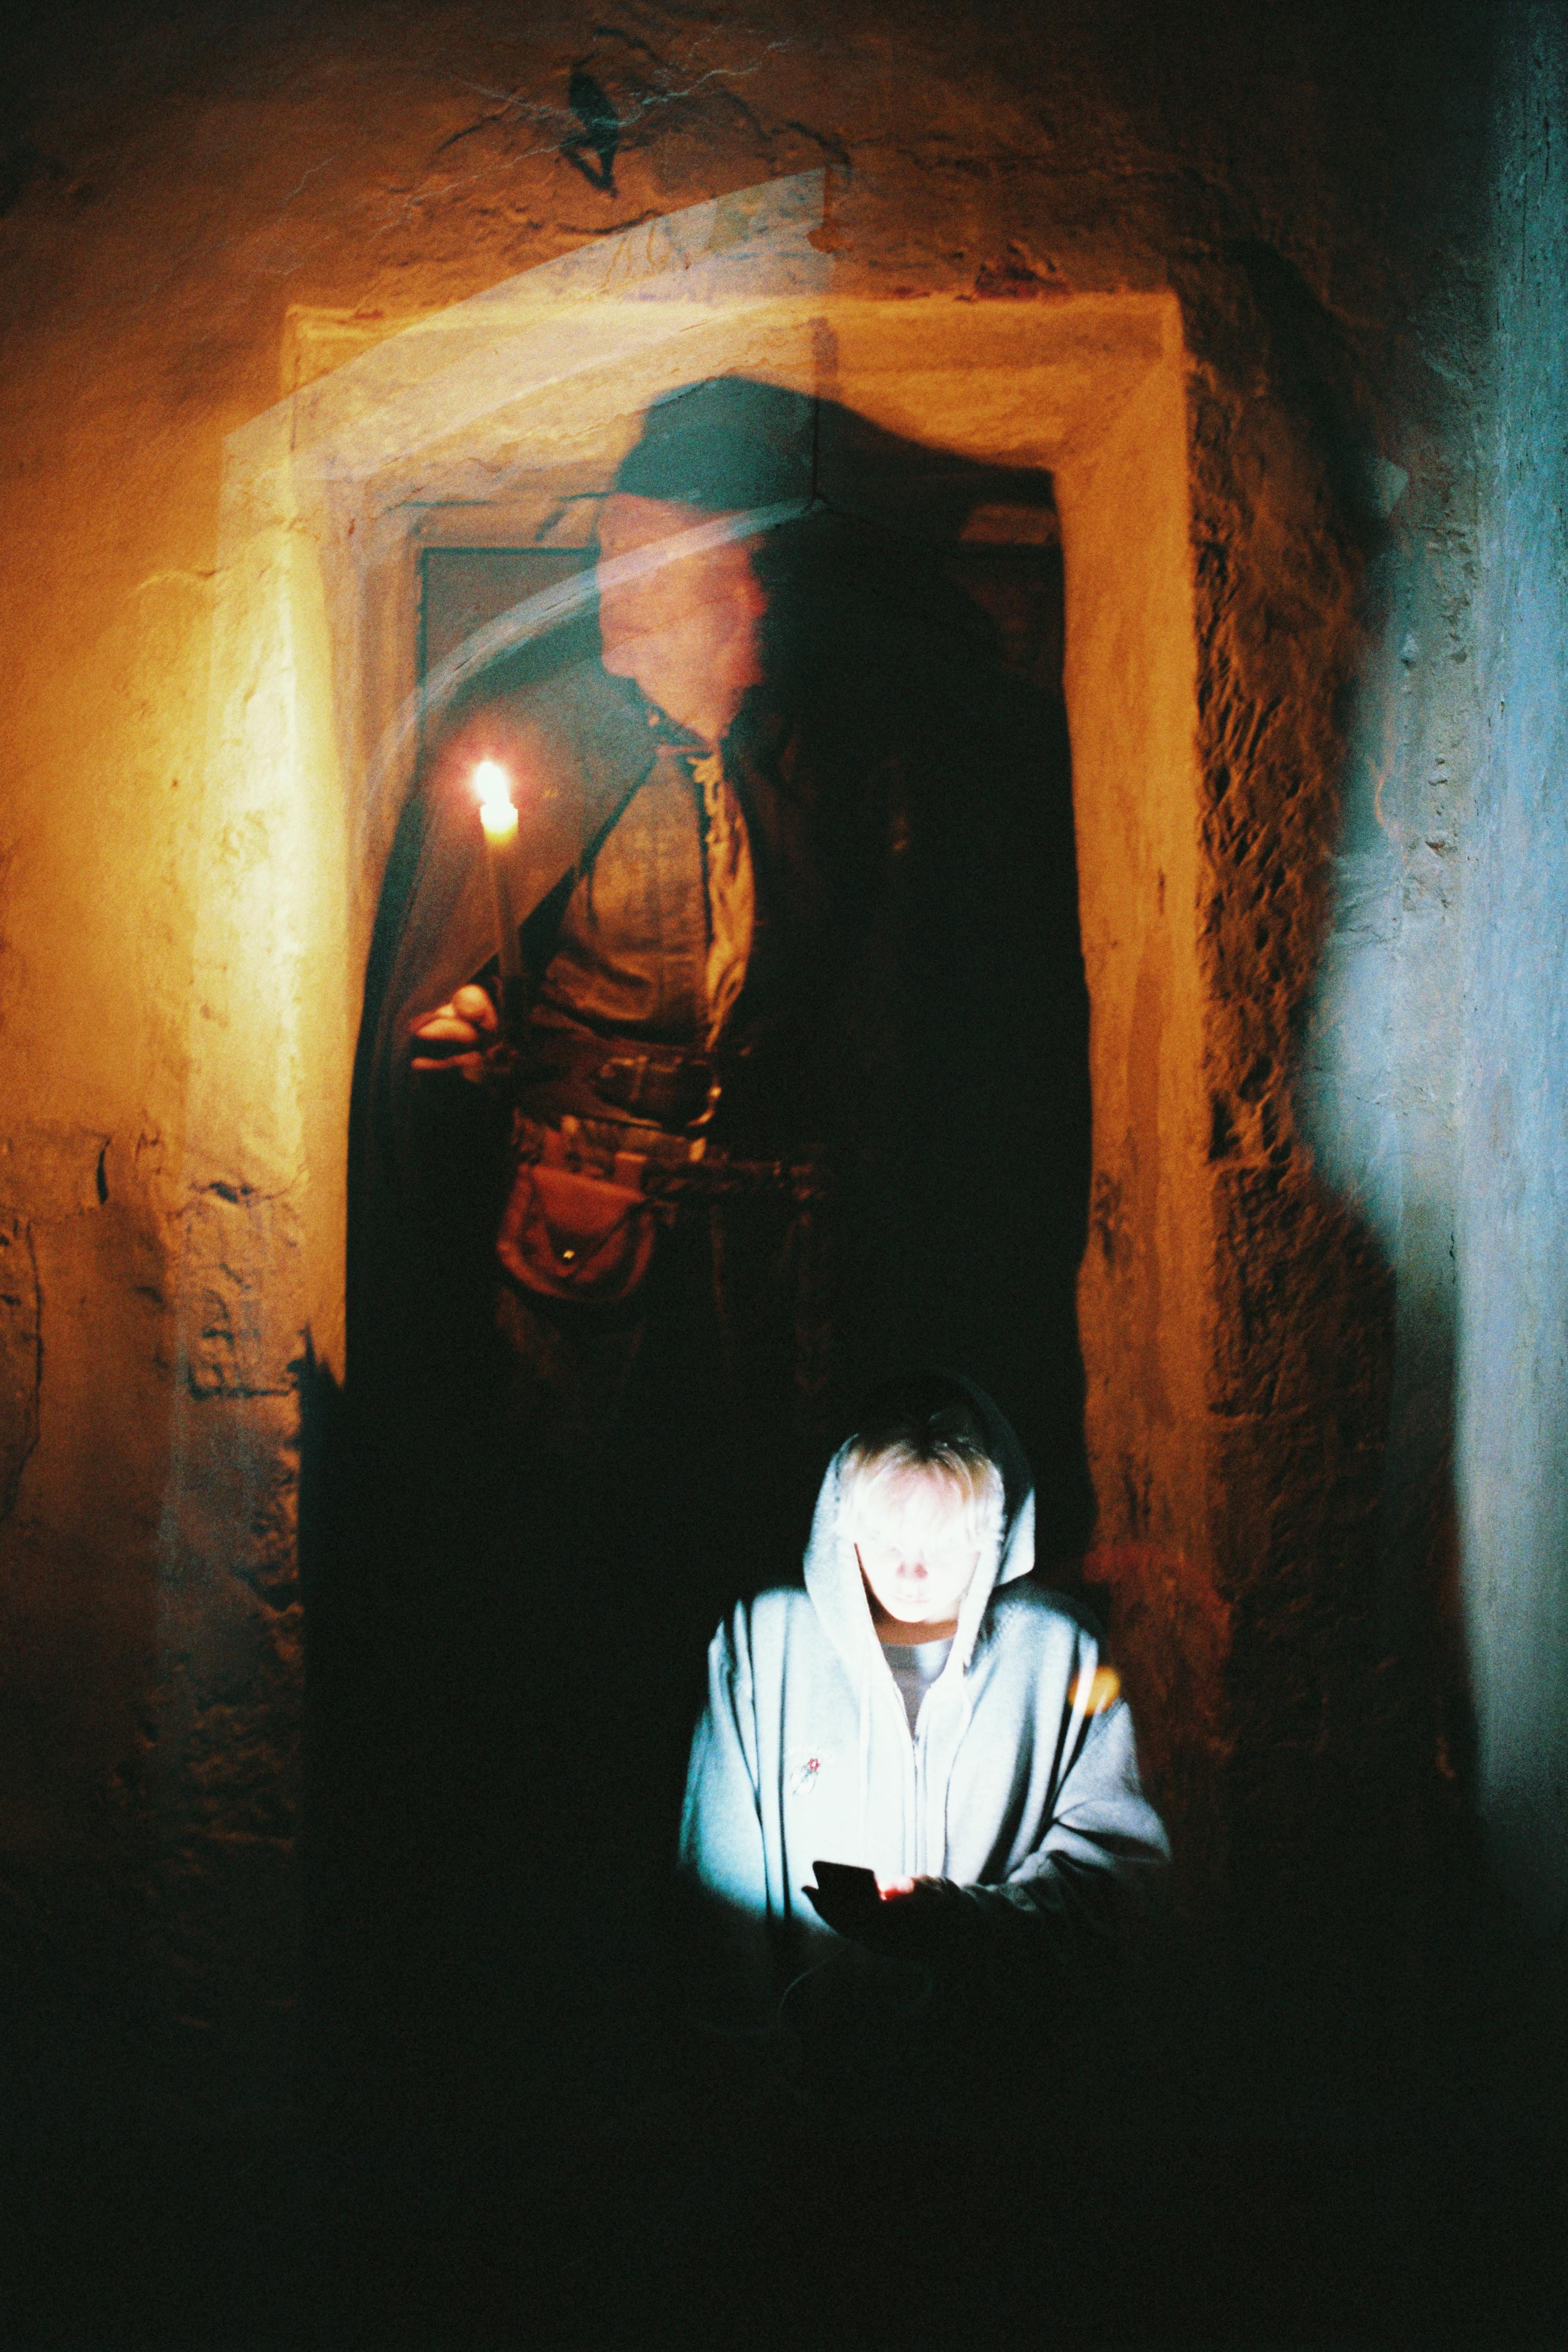
The candlelight was 1600K warmer than the filtered film, so I used an app called Colour Temp to set my iPhone to 5000K, making it 1600K cooler than the film; the phone would therefore look as blue as the candle looked orange. (Unfortunately my phone died quickly and I had trouble recharging it, so some of the last shots were done with Izzi’s non-white-balanced phone.) To match the respective colours of light, we dressed Ivan in earthy browns and Izzi in blues and greys.

Artemis recce image

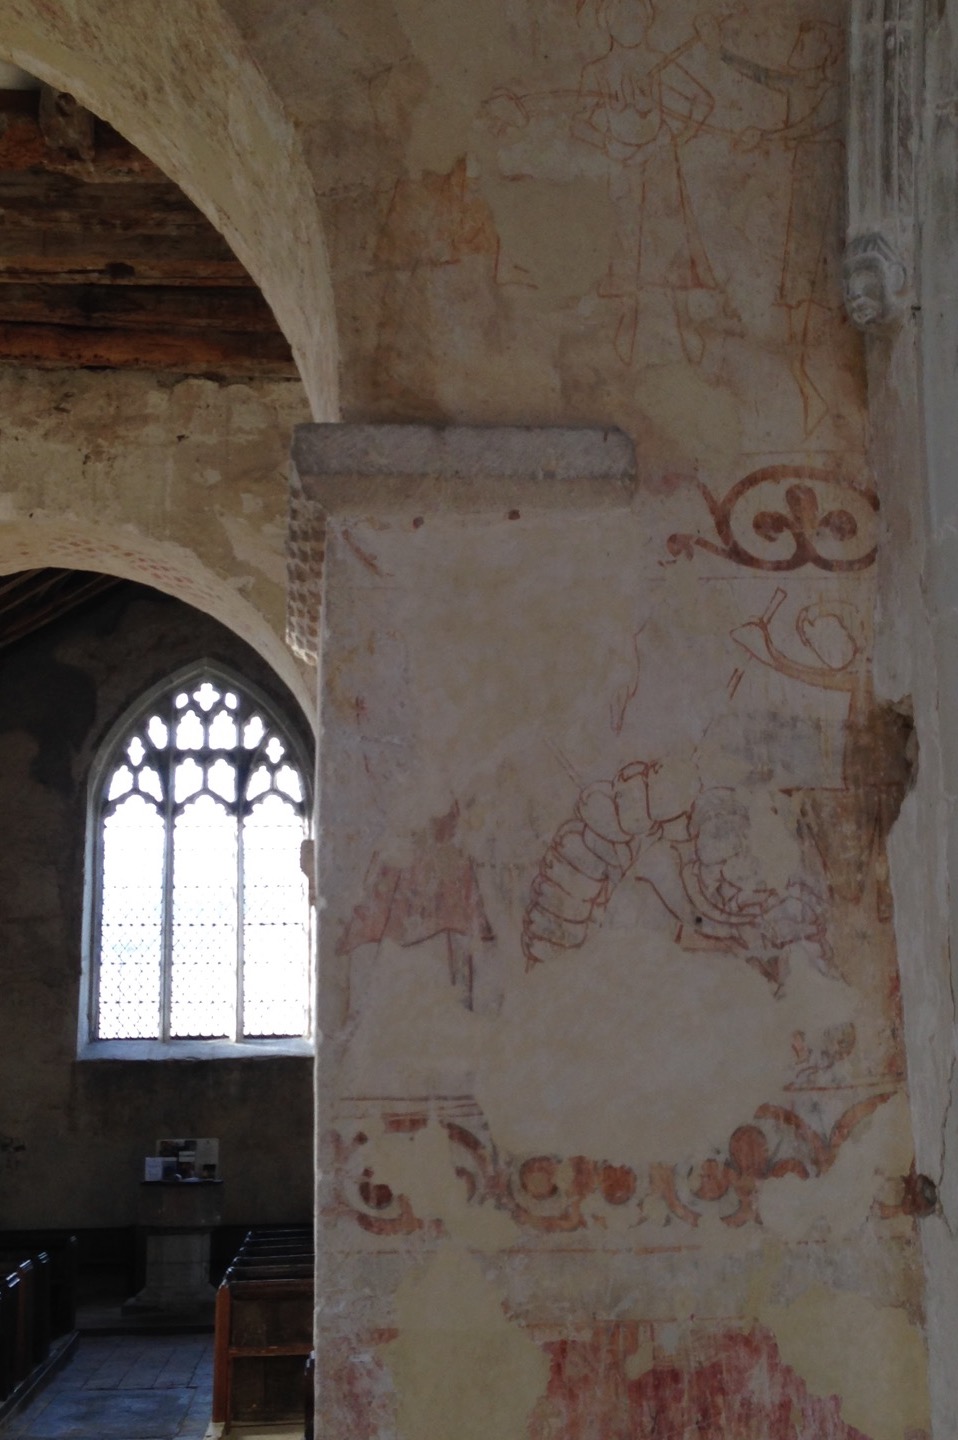
We shot in St. John’s Church in Duxford, Cambridgeshire, which hasn’t been used as a place of worship since the mid-1800s. Unique markings, paintings and graffiti from the middle ages up to the present give it simultaneously a history and a timelessness, making it a perfect match to the clash of eras represented by my two characters. It resonated with the feelings I’d had when I started learning about art and realised the continuity of techniques and aims from me in my cinematography back through time via all the great artists of the past to the earliest cave paintings.

I knew from the tests that long exposures would be needed. Extrapolating from the exposure table, one foot-candle would require a 1/8th of a second shutter with my f1.4 lens wide open and the Fujifilm’s ISO of 400. The 80B has a filter factor of three, meaning you need three times more light, or, to put it another way, it cuts 1 and 2/3rds of a stop. Accounting for this, and the fact that the candle would often be more than a foot away, or that I’d want to see further into the shadows, the exposures were all at least a second long.

As time had become very much the theme of the project, I decided to make the most of these long exposures by playing with motion blur. Not only does this allow a static image – paradoxically – to show a passage of time, but it recalls 19th century photography, when faces would often blur during the long exposures required by early emulsions. Thus the history of photography itself now played a part in this time-fluid project.

I decided to shoot everything in portrait, to make it as different as possible from my cinematography work. Heavily inspired by all the classical art I’d been discovering, I used eye-level framing, often flat-on and framed architecturally with generous headroom, and a normal lens (an Asahi SMC Pentax-M 50mm/f1.4) to provide a natural field of view.

I ended up using my light meter quite a lot, though not necessarily exposing as it indicated. It was all educated guesswork, based on what the meter said and the tests I’d conducted.

I was tempted more than once to tell a definite story with the images, and had to remind myself that I was not making a movie. In the end I opted for a very vague story which can be interpreted many ways. Which of the two characters is the ghost? Or is it both of them? Are we all just ghosts, as transient as motion blur? Do we unwittingly leave an intangible imprint on the universe, like the trails of light my characters produce, or must we consciously carve our mark upon the world, as Ivan does on the wall?

Models: Izzi Godley & Ivan Moy. Stylist: Kate Madison. Assistant: Ash Maharaj. Location courtesy of the Churches Conservation Trust. Film processing and scanning by Aperture, London.

Creating “Stasis”

5 Things I Learnt from Editing

I used to do a lot of editing work alongside DPing, and although those days are now behind me, their influence lives on. Every day that I work as a cinematographer, I use some of the knowledge I gained while slaving over a multi-coloured keyboard. Here are some of the most important things I learnt from editing.


1. Performance always wins.

The editor will always use the take with the best performance. What this means for the DP is that there is really no point requesting another take because of a missed focus pull, bumpy dolly move or dodgy pan, because inevitably the performance will not be as spontaneous and engaging as it was when you cocked up the camerawork, so the editor will use the first take.

Of course you need to make the director aware of any significant technical issues, and if they want to do another take, that’s absolutely their prerogative. But the editor will still use the first take. So get it right on the first take, even if that means pushing for another rehearsal.


2. Your darlings will die.

You know all your favourite shots? All the ones you’ve been mentally ear-marking for your showreel? The beautifully-lit wides, the fancy camera moves, that cool scene with the really interesting set? Yeah, half of those won’t make the final cut.

That wide shot is used for a single second before they cut into the meaty mid-shots. The camera move slowed the scene down too much so they chopped it up. That scene with the cool set looked great but didn’t advance the plot.

Two things to learn from this: 1. Do a great job, but don’t be a perfectionist, because you might be wasting everyone’s time on something that is destined for the cutting room floor. 2. If you want that shot for your showreel, grab it from the DIT, otherwise you might never see it again.


3. Bring ’em in, let ’em leave.

I can’t count the number of times, when shooting a close-up, I’ve advised the director to run the whole scene. They just wanted to pick up a few lines, but I convince them to let the talent walk in at the start and walk out at the end. That way the editor has much more flexibility on when to cut, a flexibility which I know that I appreciated when I was the one wrangling the timeline.

Any angle you shoot, push to cover the entire scene from it. In most cases it takes only slightly more time, and it’s easier for the actors because they get to do the whole emotional arc. And the editor will have many more options.


4. Spot the Missing Shot.

The ability to edit in your head is incredibly useful on set. If you can mentally assemble the coverage you’ve just shot, you can quickly identify anything that’s missing. Years of editing trained me to do this, and it’s saved annoying pick-ups several times. Officially this is the script supervisor’s job, but smaller productions may not always have someone in this capacity, and even when they do, another person keeping track can’t hurt.


5. Respect the slate.

On smaller productions, the clapperboard is often treated as an inconvenience. People sometimes chat over it, directors giving last-minute instructions, or actors finishing their showbiz anecdotes before getting into character, rendering the audio announcement unintelligible. On no- or micro-budget productions there might not be a 2nd AC, so the board gets passed to whoever’s handy at the time, who has no idea what the current slate or take number are, and the whole thing becomes a meaningless farce.

Which is fine for everyone except the poor bastard in the edit suite who’s got to figure out which audio clip goes with which video clip. It can add hours of extra work for them. I’ve been there, and it ain’t pretty. So, for the sanity of the (assistant) editor, please respect the slate.

5 Things I Learnt from Editing

Goodbye Final Cut Pro

Recently, having put it off for as long as possible, I upgraded to MacOS High Sierra, the first new OS to not support Final Cut Pro 7. It was a watershed moment for me. Editing used to comprise at least half of my work, and Final Cut had been there throughout my entire editing career.

I first heard of Final Cut in early 2000, when it was still on version one. The Rural Media Company in Hereford, which was my main client at the start of my freelance career, had purchased a copy to go with their shiny Mac G3. The problem was, no-one at the company knew how to use it.

Meanwhile, I was lobbying to get some time in the Avid edit suite (a much hallowed and expensive room) to cut behind-the-scenes footage from Integr8, a film course I’d taken part in the previous summer. The course and its funding were long finished, but since so much BTS footage had been shot, I felt it was a shame not to do something with it.

Being 19 and commensurately inexperienced, I was denied time on the Avid. Instead, the head of production suggested I use the G3 which was sitting idle and misunderstood in one of the offices. Disappointed but rising to the challenge, I borrowed the manual for Final Cut Pro, took it home and read it cover to cover. Then I came back in and set to work cutting the Integr8  footage.

Editing in 2000 was undergoing a huge (excuse the pun) transition. In the back of the equipment storeroom, Rural Media still had a tape-to-tape editing system, but it had already fallen almost completely out of use. Editing had gone non-linear.

In a room next to the kitchen was the Optima suite. This was a computer (I forget what type) fitted with a low resolution analogue video capture card and an off-line editing app called Optima. In this suite you would craft your programme from the low-rez clips, exporting an EDL (Edit Decision List) onto a floppy disc when you were done. This you took into the Avid suite to be on-lined – recapturing just the clips that were needed in full, glorious, standard definition. You could make a few fine adjustments and do a bit of grading before outputting the finished product back to tape.

It wasn’t practical to do the whole edit on the Avid because (a) hard drives big enough to store all the media for a film at full rez weren’t really available at that time, and (b) the Avid system was hellishly expensive and therefore time on it was charged at a premium rate.

As I edited the Integr8 BTS on Final Cut Pro, I believed I was using an off-line system similar to the Optima. The images displayed in the Viewer and Canvas were certainly blocky and posterised. But when I recorded the finished edit back to tape, I couldn’t quite believe what I was seeing. Peering through the viewfinder of the Mini-DV camera which I was using as a recording deck, I was astonished to see the programme playing at the exact same quality it had been shot at. This little G3 and the relatively affordable app on it were a complete, professional quality editing system.

I looked across the office to the sign on the Avid suite’s door. It might as well have read: “DINOSAUR”.

Within a few months I had invested in my own Mac – a G4, no less – and was using FCP regularly. The next year I used it to cut my first feature, The Beacon, and three more feature-length projects followed in the years after that, along with countless shorts and corporates. Using FCP became second nature to me, with the keyboard shortcuts hard-wired into my reflexes.

And it wasn’t just me. Final Cut became ubiquitous in the no-/low-budget sector. Did it have its flaws? Definitely. It crashed more often than Richard Hammond. I can think of no other piece of software I’ve screamed so much at (with the exception of a horrific early desktop publishing app which I masochistically used to create some Media Studies GCSE coursework).

And of course Apple shat all over themselves in 2011 when they released the much-reviled Final Cut X, causing many loyal users to jump ship. I stayed well away from the abomination, sticking with the old FCP 7 until I officially quit editing in 2014, and continuing to use it for personal projects long after that.

So it was quite a big deal for me to finally let it go. I’ve got DaVinci Resolve installed now, for the odd occasion when I need to recut my showreel. It’s not the same though.

Timelines aren’t my world any more, light is, but whenever I look back on my years as an editor, Final Cut Pro’s brushed-aluminium interface will always materialise in my mind’s eye.

Goodbye Final Cut Pro

If Camera was Sound and Sound was Camera

“Sound has the set,” calls the 1st AD, fishing a roll-up from her pocket and heading for the fire exit.

The production sound mixer strides into the middle of the set and strokes his Hipster beard thoughtfully.

“What are you thinking, boss?” asks the gaffer, scratching at the beer belly under his Yamaha t-shirt.

The mixer points to the skylight. “Let’s have some early morning ambience coming through here – the one with the distant traffic.” With a sweeping gesture he encompasses one side of the kitchen set. “I want it to explode off the floor and reverberate throughout this whole area.”

“Hundred watt woofer?” the gaffer suggests. The mixer nods, and a spark scuttles off to the truck for the required speaker.

“Is that practical?” the mixer wonders aloud. The gaffer follows his gaze to the kettle, nods, and flicks the switch. The mixer pulls a sound meter from the pocket of his leather jacket and holds it up to the boiling appliance. “6dB under.”

“We could hide a little tweeter behind it, bring the level up a bit,” the gaffer suggests. “I’ve got half a dozen different kettle effects on the truck.”

The mixer agrees, and proceeds to point out several other positions around the set, which is soon full of busy sparks running XLR cables, rigging speakers and shaping them with sound blankets. A cacophony grows as each one is fired up.

“Does this look about right?” asks the 1st AS, steadying the Sennheiser as the grips wheel its massive Technoboom to the previously agreed spot. She holds a pair of headphones out to the mixer.

He puts them on, and a reverent hush descends upon the set. He pans the mic left, then right, then up, then down, then left and right again. Finally he takes off the cans, clutching at his SQN baseball cap to stop it coming off too. “We need to go tighter,” he pronounces. He holds up his two hands, forming a circular aperture with his fingers, and cups them around his ear. His face a picture of concentration, he squats down and listens intently through the hole in his hands. He shuffles a little to the left. “This is it. We need to be right here on the 67.”

“Copy that,” the 1st AS replies. Her 2nd drags over a massive flight case and she begins unscrewing the ME66 from the power module.


“OK everyone, standby for a mic rehearsal.”

At last the camera operator – who had been somehow hiding in plain sight – puts down his coffee and heaves an Alexa onto his shoulder, checking the image as the cast go through the motions.

The director presses her headphones against her ears, frowning. She turns to the mixer. “I’m not getting enough sense of where they are,” she says. “Can we go wider?”

A few moments later the 1st AS is sighing as she unscrews the ME67 and remounts the ME66.

“It’s really quiet,” a producer complains, from his canvas chair in front of the amp at sound city. “Can we turn it up a bit?”

“We’ve got to have the mood,” the mixer insists. “What you can’t hear is more exciting than what you can.”

“I’m paying to hear it!” snaps the producer. “And why is there so much hiss? I can barely hear the dialogue over it.”

“It’s atmosphere!” the mixer protests, but he can see he’s not going to win this one. Reluctantly he signals a spark to turn down the white noise generator.


“Cut!” calls the director, smiling in satisfaction at the cast. She turns to the mixer. “How was that for you?”

“That sounded beautiful,” he replies ecstatically.

“OK, moving on,” says the AD, reaching for the clip-list.

“Hang on a minute.”

All eyes turn to the camera op.

“The caterer walked through the back of shot.”

“Did he?” asks the AD, looking around the crew for confirmation.

“I didn’t pick him up,” says the mixer.

The camera op stares at them in disbelief. “He sauntered right across the back of the set. He was there the whole take. It’s completely unusable.”

The AD sighs. “I guess we’d better go again.”

“Can we ask people not to walk through the frame? This lens will pick up literally anyone that walks in front of it.”

The director thinks about this. “Have you got a different lens you can use?”

“Can’t you put Go Pros on them?” asks the AD, gesturing to the cast.

“I’d rather not use Go Pros,” a new voice chimes in. Everyone turns with surprise to see the director of photography blinking in the light. She almost never moves from the shadowy corner where she sits with LiveGrade and a monitor which is rumoured to display mostly rugby matches.

“We can’t afford to lose any more takes because of camera,” says the AD. “What’s wrong with Go Pros anyway?”

“The image just isn’t as good. The dynamic range…”

But the AD cuts her short. “Well, it’s either that or AVR.”

“I just think if we took thirty seconds to find a new position for the Alexa…”

As the producer strides over to stick his oar in, the sound assistants exchange knowing looks: this could go on for a while. The pair lean on the Magliner and check their phones.

“Have you ever worked with a Nagra?” the 2nd AS asks, conversationally. “I still think they sound better than digital.”

If Camera was Sound and Sound was Camera