Lighting ‘X, Y & Z Rays’ by Revenge of Calculon

Stage-bound music promos can be an interesting challenge for a cinematographer. Often there is no set that has any basis in reality, no windows, no starting point for lighting. This should be very freeing but is actually pretty scary. Where to start?

This is X, Y & Z Rays by Revenge of Calculon, my latest music video for director Tom Walsh of Polymath Pictures

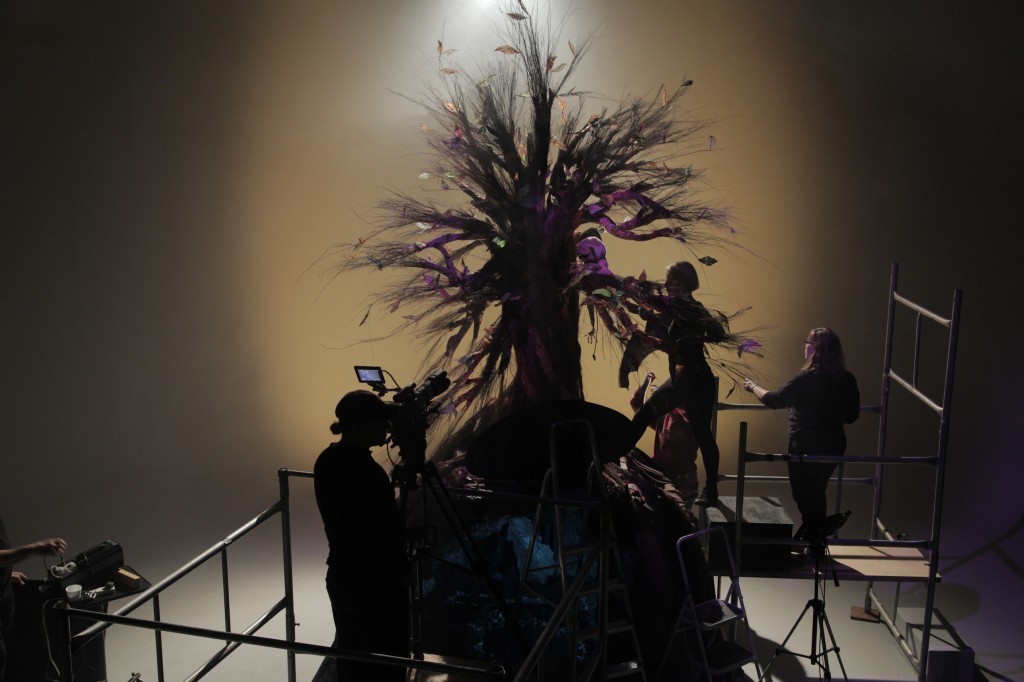
Nick Pylypiuk did an awesome job of building and programming the LED panels, and Amy Nicholson did a great job of dressing the gadgets and cables. How did I go about lighting it?

2 of the 800W tungsten Arrilites hidden behind the big LED panels
2 of the 800W tungsten lamps hidden behind the big LED panels

Well, cinematography isn’t just about mimicking natural light. It’s about depth and contrast, to name just two things. And depth was where I started. If I didn’t want the LEDs to float in a black background, then it was necessary to light the cyclorama to reveal it as a separate layer behind the LED panels. But leaving the cyc dark would give the image more contrast. I wanted to have my cake and eat it. So the lamps I lit the cyc with had to be dimmable so that they could be off at some points during the track and on at others.

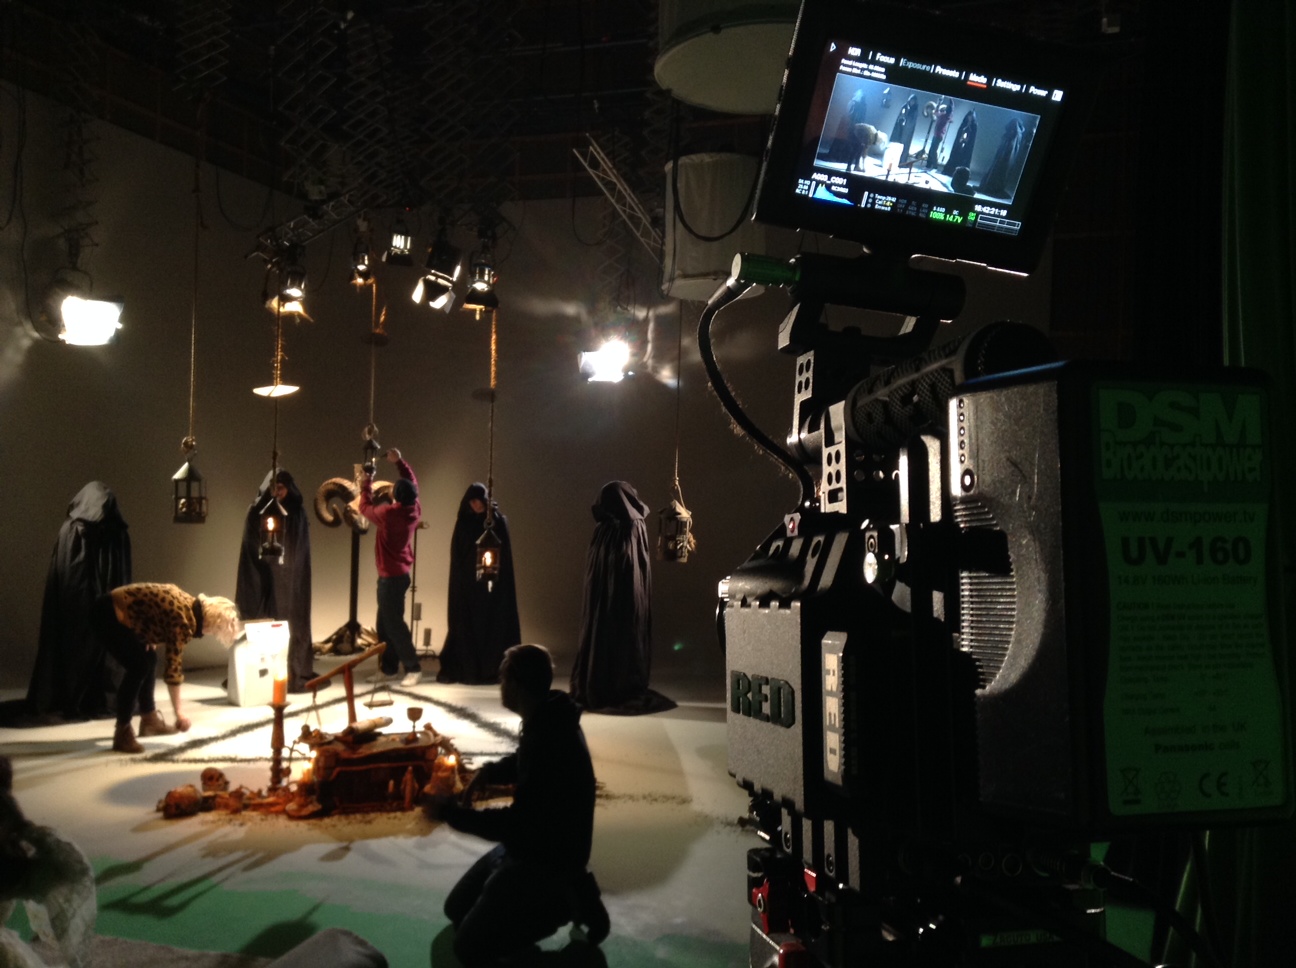
I placed 800W tungsten lamps on the floor behind the central and outermost LED panels, uplighting the cyc. Poor Emma, the art assistant and the smallest member of the crew, was assigned to hide behind one of the panels, pulsing the 800s on a dimmer board in time with the music.

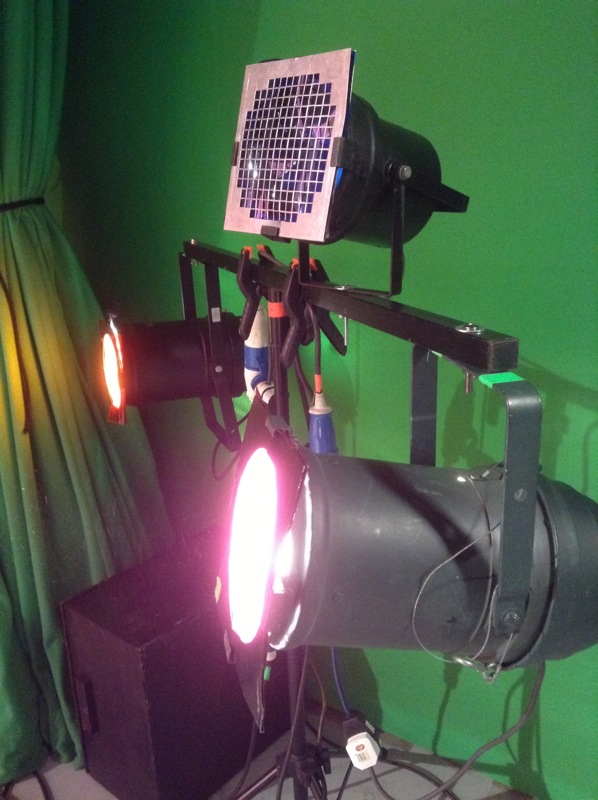
Next I needed to light the musicians. We didn’t have access to the studio grid, the LED panels were providing plenty of light from behind, and any light from the front would have polluted the panels, so my only option was to light from the sides. I placed a Dedolite off to each side, gelled with different varieties of blue/green gel to make this layer of the image stand out from the warm, ungelled tungsten of the 800s.

The 4 Dedolites can be seen here, gelled blue-green, blue-green, purple and yellow.

This was all very well, but it left a lot of the art department’s nice foreground dressing in complete darkness. So I set up a second Dedolite on each side, crosslighting the amps and other gubbins. I gelled one of these yellow and the other pinky-purple. Normally I prefer to use a narrower palette of colours, but since the patterns programmed into the LED panels used all the colours of the rainbow, I felt I had license to do the same.

After a couple of run-throughs, I decided on an alternating, pulsing pattern for the four Dedolites at half the speed of the 800s. My initial instinct had been towards something more sophisticated, but there was plenty going on on the LED panels without needing to make the foreground too manic.

Clockwise from top right: a blue-green-gelled LED panel, a tungsten-tubed Kinoflo and a daylight-tubed Kinoflo Divalite amongst the set dressing

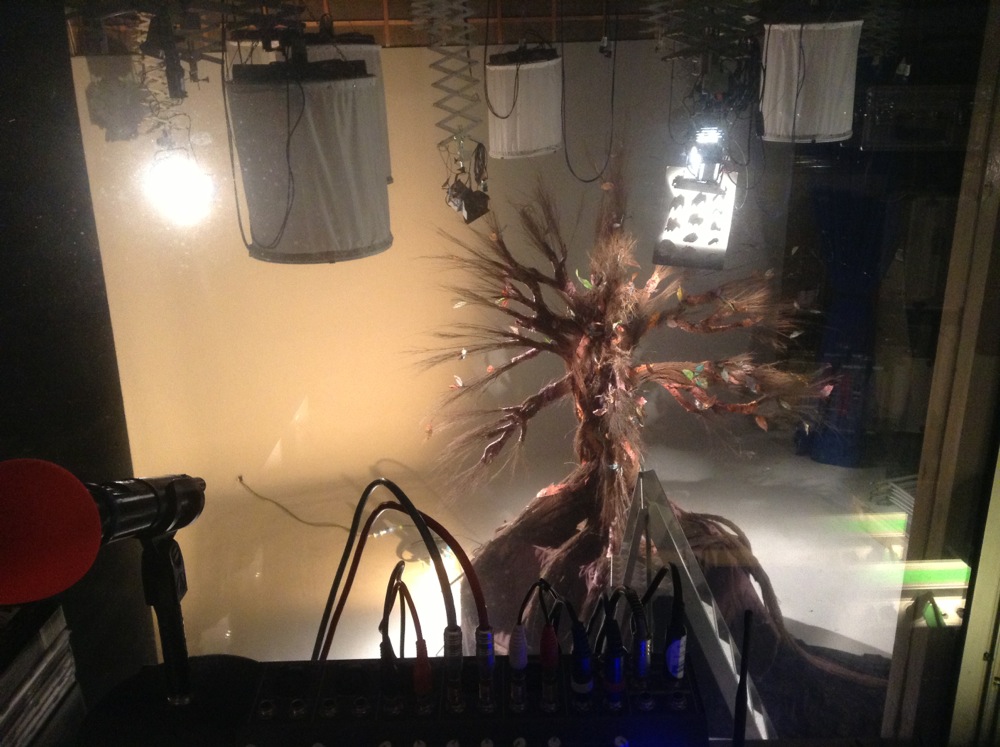
Amy was still looking to add to the set dressing, so I suggested putting our battered old Kinoflo into shot for a bit of extra interest. This left only a Kinoflo Divalite and a 1×1′ LED panel in my arsenal. “What the hell,” I thought, and hid them behind a couple of the amps to pick out some more of the set dressing.

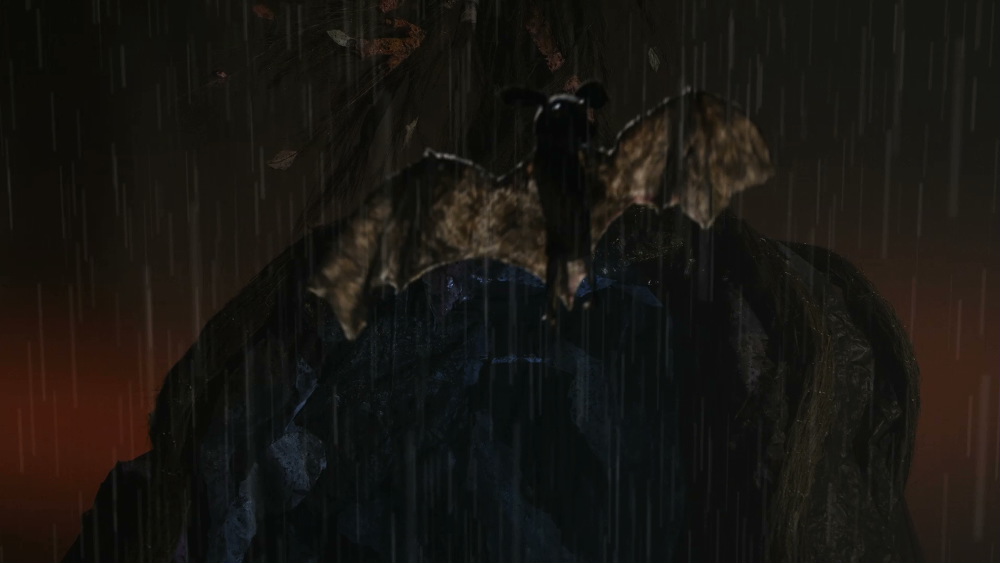
Despite all this, I still think the strongest bits of the video are those where all my lights are off, leaving just the patterns on the large LED panels. With a bit of dispersed smoke in the studio, the LEDs give off a lovely glow, and the dynamic wrapping backlight they shed on the performers is really beautiful.

And we quickly found that they looked great out of focus, and went with that for a few set-ups. In fact, much of the single day of shooting was spent experimenting and going with the flow. Tom trusted me to get interesting coverage while he helped operate the LED panels, and I found the electronic music guiding me into Wes Anderson-style camera moves: lateral tracks, and bold, simple pans and tilts.

Find out more about Polymath Pictures at www.polymathematics.co.uk.

Photo by Amy Nicholson


Lighting ‘X, Y & Z Rays’ by Revenge of Calculon

Hellblazer

A couple of weeks back, I served as director of photography on a music promo for heavy metal band Savage Messiah. Directed by Tom Walsh of Polymath Pictures, the video was released yesterday by Earache Records.

This shoot represented a number of firsts for me: first time operating a Red Epic, first time using a tilt-shift lens, and first time shooting more than 50 frames per second.

Red

While preparing for the shoot, I found this video tutorial from the oddly-named Embassies of Cinema was very helpful in demonstrating the basics of operating the Reds. As Tom said to me, a camera’s a camera, and if you know how to operate one then you can probably find your way around any other, but no-one wants to look like an idiot when they show up on set and start tentatively pressing buttons on an unfamiliar piece of kit.

If there’s one thing I learnt about the Red that I’d like to flag up to other first-time users, it’s the crop factors. The Epic has a Super-35mm sensor, but it only uses all of that sensor when in 5K mode. If you shoot at a lower resolution, the camera simply ignores the outer edges of the sensor, rather than scaling the image to that smaller size,. The result is that your lenses appear to get more telephoto as you decrease the resolution. So watch out for that.

phfx_RedScarletXResFOV

Tilt-shift

The tilt-shift lens
The tilt-shift lens

A tilt-shift lens is one which allows you to move the lens elements around relative to the focal plane. The shift mechanism is primarily of interest to stills photographers who want to capture skyscrapers without them appearing to taper towards the top. The tilt is the fun part.

A classic tilt-shift photograph

Normally, the glass elements in a lens are parallel to the focal plane (the camera’s sensor). Imagine a shot of three apples lined up next to each other on a table. They’re all the same distance away, so when you focus on one, the other two are in focus as well. But if you tilt the lens, only one apple might be in focus, and part of the background might be in focus too. This effect is often used to make cityscapes and landscapes look like miniatures, but it’s also useful for general weirdness. If you can’t afford to buy or hire a tilt-shift lens, a technique called “lens whacking” offers a low-tech alternative.

tilt_shift_flat

Highspeed Cinematography

Regarding highspeed photography, the only thing I have to say is, “Eh?” Can anyone out there explain why tungsten lights would flicker when shot at 300fps? Everything I’ve read says that only discharge lighting (HMIs, kinoflos) and very small tungsten bulbs should flicker at high frame rates. Surely the filament in a blonde shouldn’t be cooling enough between peaks in the AC power supply to register a flicker in a 600th of a second? I certainly can’t think of any other explanation.

You can see the flickering at around 2:24 in the video if you’re looking for it, but there’s enough dynamic lighting, smoke, lens flares and tilt-shifting that it all just seems part of the deliberate effect.

Setting up to shoot the narrative portions of the promo
Setting up to shoot the narrative portions of the promo. Director Tom Walsh kneels in midground.

Thanks to Tom and designer Amy Nicholson for another great shoot. I look forward to working with them again next week on A Cautionary Tale.

Hellblazer

Polymath: Behind the Scenes

I always enjoy a good behind-the-scenes video, and there’s often much to be learnt from them too. My friends at Polymathematics have just released a series of ‘making of’ videos for their recent music promos, all of which are exquisitely designed and shot (my own involvement in Droplets notwithstanding!). Check out Polymath’s Vimeo channel for more behind-the-scenes videos and of course the promos themselves.

Droplets

We Were Here

The Last Human / I Do (Come True)

Hands Up if You’re Lost

And here’s an equally fascinating look at a live puppetry project they did as part of the Olympic Torch Relay celebrations…


Polymath: Behind the Scenes

Lighting Droplets

The tarsier puppet in Droplets

Lighting in the controlled environment of a studio should theoretically be much easier than lighting a location, but I found recently that it doesn’t come without its challenges.

Last month I had the pleasure of working on a music promo for Droplets by Lewis Watson and Gabrielle Aplin. Directed by Tom Walsh and designed by First Musketeer veteran Amy Nicholson, this magical, handmade puppet fest was only the second or third studio-bound production of my career. Tom had secured the use of Giltbrook Studios, an impressively equipped 1,300 sq ft soundstage in Nottingham, complete with manager Andy Swain as gaffer.

Apart from the exclusion of pesky natural light, the biggest advantage offered by a stage over a location is the lighting grid; no more wondering if that polecat or K-clamp will take the paint off the wall, and no more compromising your backlight position to keep the stand out of frame. The downside of the grid is the time it takes to rig or adjust a light, particularly if the grid, like Giltbrook’s, has no catwalks, and every adjustment must be made by bringing in and scaling a huge ladder. In fact it may be impossible to rig or adjust lights once there is a finished set underneath. All of which means you’re going to need a pre-rig day.

Some of the ill-fated space lights can be seen here, as well as the cucoloris rigged beneath the 650W fresnel key light. At the top left is the 2K fresnel backlight.

In the case of Droplets, the pre-rig day was also used to assemble the set, a tree on top of a cave, which must have measured about fifteen feet in height. As soon as it had been erected we realised that the six space lights Andy had spent all morning rigging were going to be in frame, as the top of the tree reached above the bottoms of these lights. (A space light is a circular arrangement of six tungsten tubes inside a cylinder of white diffusion cloth. They’re typically used in large numbers to simulate daylight in a studio.)

Some of the par cans that supplied the colour wash on the backdrop.

In fact my options on where I could put lights were very narrow, because of the lack of space around the set, both vertically and horizontally. We shot against the studio’s white infinity cove, and Tom wanted colour washes over this to suggest various times of day. Andy achieved this with gelled par cans off to either side of the set, but then it was crucial that no other light spilled onto the backdrop or it would ruin the effect.

We rigged a 2K tungsten fresnel immediately behind and above the set, for backlight, but it was hard to put anything in from the sides or the front without contaminating the backdrop. The 650W key light had to be rigged almost directly above the set, and even then its shadow can be seen on the floor in the wide shots if you look carefully. We hung a cucoloris (sheet of wood with random shapes cut in it) below the 650 to created the dappled effect of woodland light, taking care that a patch of light fell on the tarsier puppet’s main position.

For fill I used an LED panel off to the right of the set, dimming it to find a balance between its light being barely visible on the backdrop while still lifting the set and the puppets enough. I placed a smaller LED panel inside the cave, with a turquoise gel to suggest phosphorescence.

The final day/sunset look. From each side an orange-gelled and a pink-gelled par can light the backdrop. A 2K tungsten fresnel provides backlight, while a 650W fresnel with a cucoloris provides dappled light on the tree and tarsier. An LED panel off right supplies fill, and a second panel is inside the cave with a turquoise gel.
For closer shots, a reflector below frame and/or a Dedolight behind camera were used to fill in unwanted shadows.

Another advantage of a studio is that you can easily run all the lamps into a dimmer board. This was very handy for Droplets because in addition to the day/sunset look, we had nighttime scenes and a storm to light for, and some on-screen transitions between the states. We were able to set these all up in advance and switch between them pretty much by just pushing a few sliders up and a few others down.

The night state involved a yellow-gelled redhead on the floor behind the cave, pointed straight at the backdrop. With its barn doors removed, this created a circle of light which reminded me strongly of the huge yellow moon in the posters for The Nightmare Before Christmas. I hadn’t been intending to create such a defined circle, but when I saw it I immediately loved its stylised look.

A second 650W fresnel was rigged, close to the first, and with ulcered black wrap in front of it to again created a dappled look, but with a purple gel on it. This took us away from the more traditional blue of nighttime scenes, adding to the stylised look again, and contrasting nicely in colour with the yellow “moon”.

The 2K backlight remained on for the night scenes, but the sunset colour wash on the backdrop was switched off, as was the fill.

Nighttime in puppet land: the 2K backlight remains on, a yellow-gelled redhead lights the backdrop from behind the set, and a purple-gelled 650W fresnel in the grid pushes through a cucoloris to highlight the tarsier.

For the storm scene we experimented with strobes, but they caused unpleasant rolling shutter artefacts. Instead I used the flash button on the 2K’s dimmer box to create lightning. Both 650W fresnels were turned off for this state, but the fill was turned back on. While the pink colour wash remained off, we brought up the orange wash just a little bit to suggest an angry sky in the background.

Stormy weather. The orange colour wash coming from the par cans, originally set up for the sunset look, is used here much more dimly to suggest an angry sky. The LED panel off right supplies fill while the 2K backlight is flashed periodically.

Copious smoke was used throughout (another advantage of studios – your smoke stays put!) to generate god rays as the backlight streamed through the tree. It also helped soften the backdrop and render the colour washes more convincing as a sky.

Watch the video here. Shot on a Red Epic operated by Chris Wetton. Big thanks to Andy and Giltbrook Studios for all their help. Visit www.polymathematics.co.uk to find out more about the amazing work of Tom Walsh and Amy Nicholson.

Lighting Droplets