Int. Car – Moving

Hama suction mount
Hama suction mount

Inside a moving car – an everyday setting, but amongst the more challenging ones for a film crew. You can tackle it with greenscreen, or with front projection, or with Poor Man’s Process. Or you can do it for real.

On The Gong Fu Connection we did it for real. If you’re going to attempt this you’ll need three things:

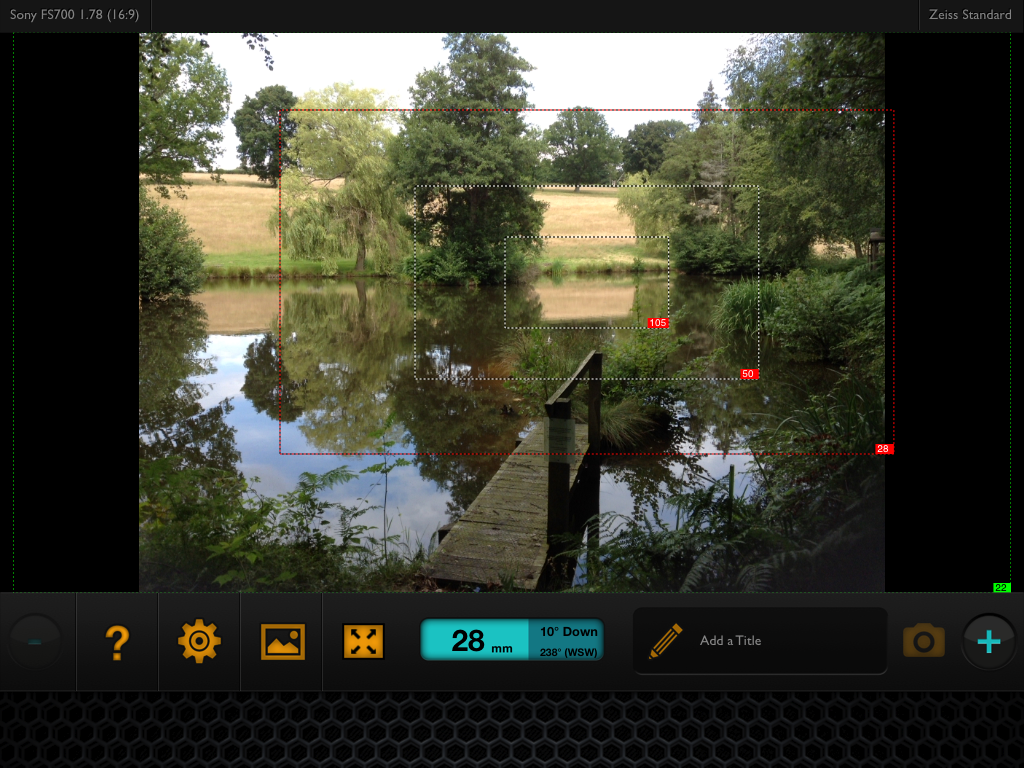
  1. A very wide lens, if you want to get both the driver and the front passenger in frame. I used the wide end of a Tokina 11-16mm zoom, kindly lent to us by DIT Rob McKenzie.
  2. An LED panel to ensure the cast are sufficiently illuminated when the vehicle passes through dark areas.
  3. Some kind of suction mount.

I still had a Hama car mount I’d bought back in 2000 to do car chases like this with my Canon XM1.

I can’t believe I used to rely entirely on that mount to hold the camera, with no safety rope. I’d never do that now.

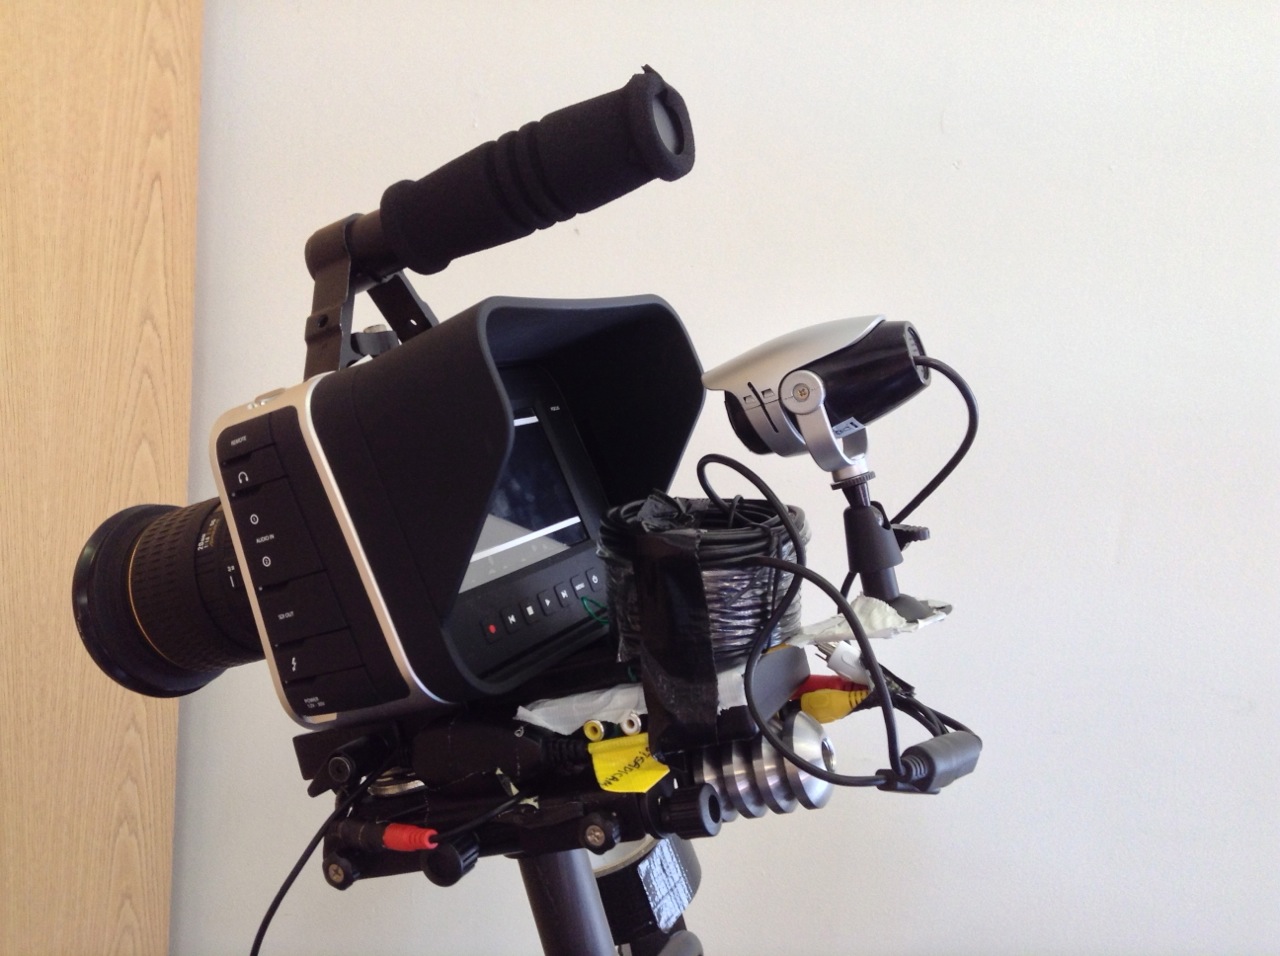
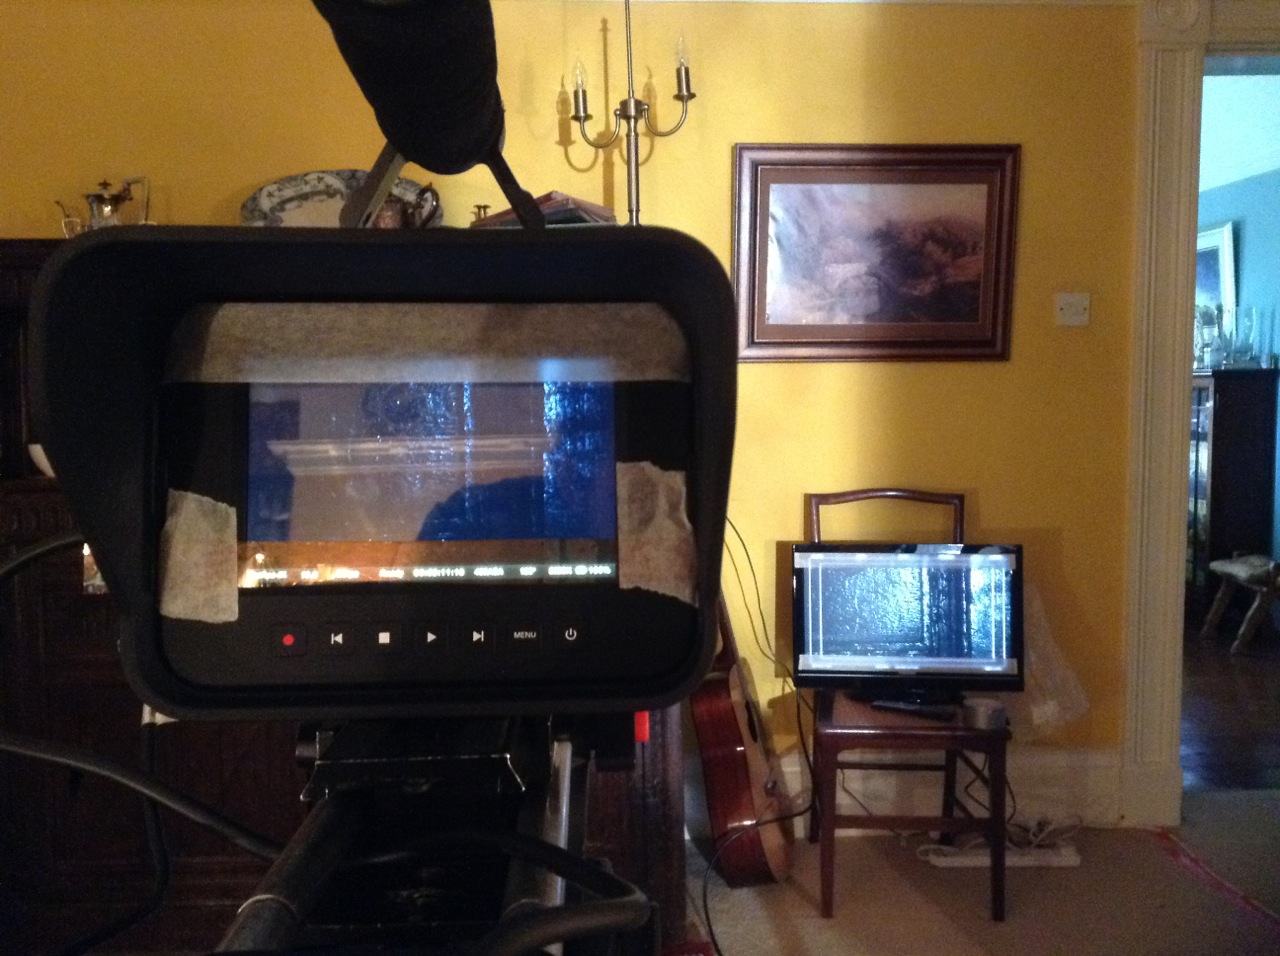
Of course, this mount wouldn’t support the weight of the Blackmagic. It was just to provide an extra anchor point. Most of the camera’s weight was actually rested on the dashboard, as you can see below. Cardboard and gaffer tape were used to secure it firmly, and the V-lock battery was placed in the open glove box underneath.

The Blackmagic, mounted on the dashboard with an old Hama suction mount, some cardboard, some gaffer tape, a wing and prayer

We ruled out mounting the camera on the bonnet partly for safety and partly because windscreen reflections can be a real nightmare. But we did mount the LED panel on the bonnet, or rather in the gap between the back end of the bonnet and the windscreen, nestled on the wipers. Its yoke rested against the windscreen, maintaining the panel at the right angle. Bungee cords and gaffer tape held it firmly and a bin bag protected it from the spitting rain.

Under the black bag is an LED panel to keep some consistency to the light on the actors as the car moves.

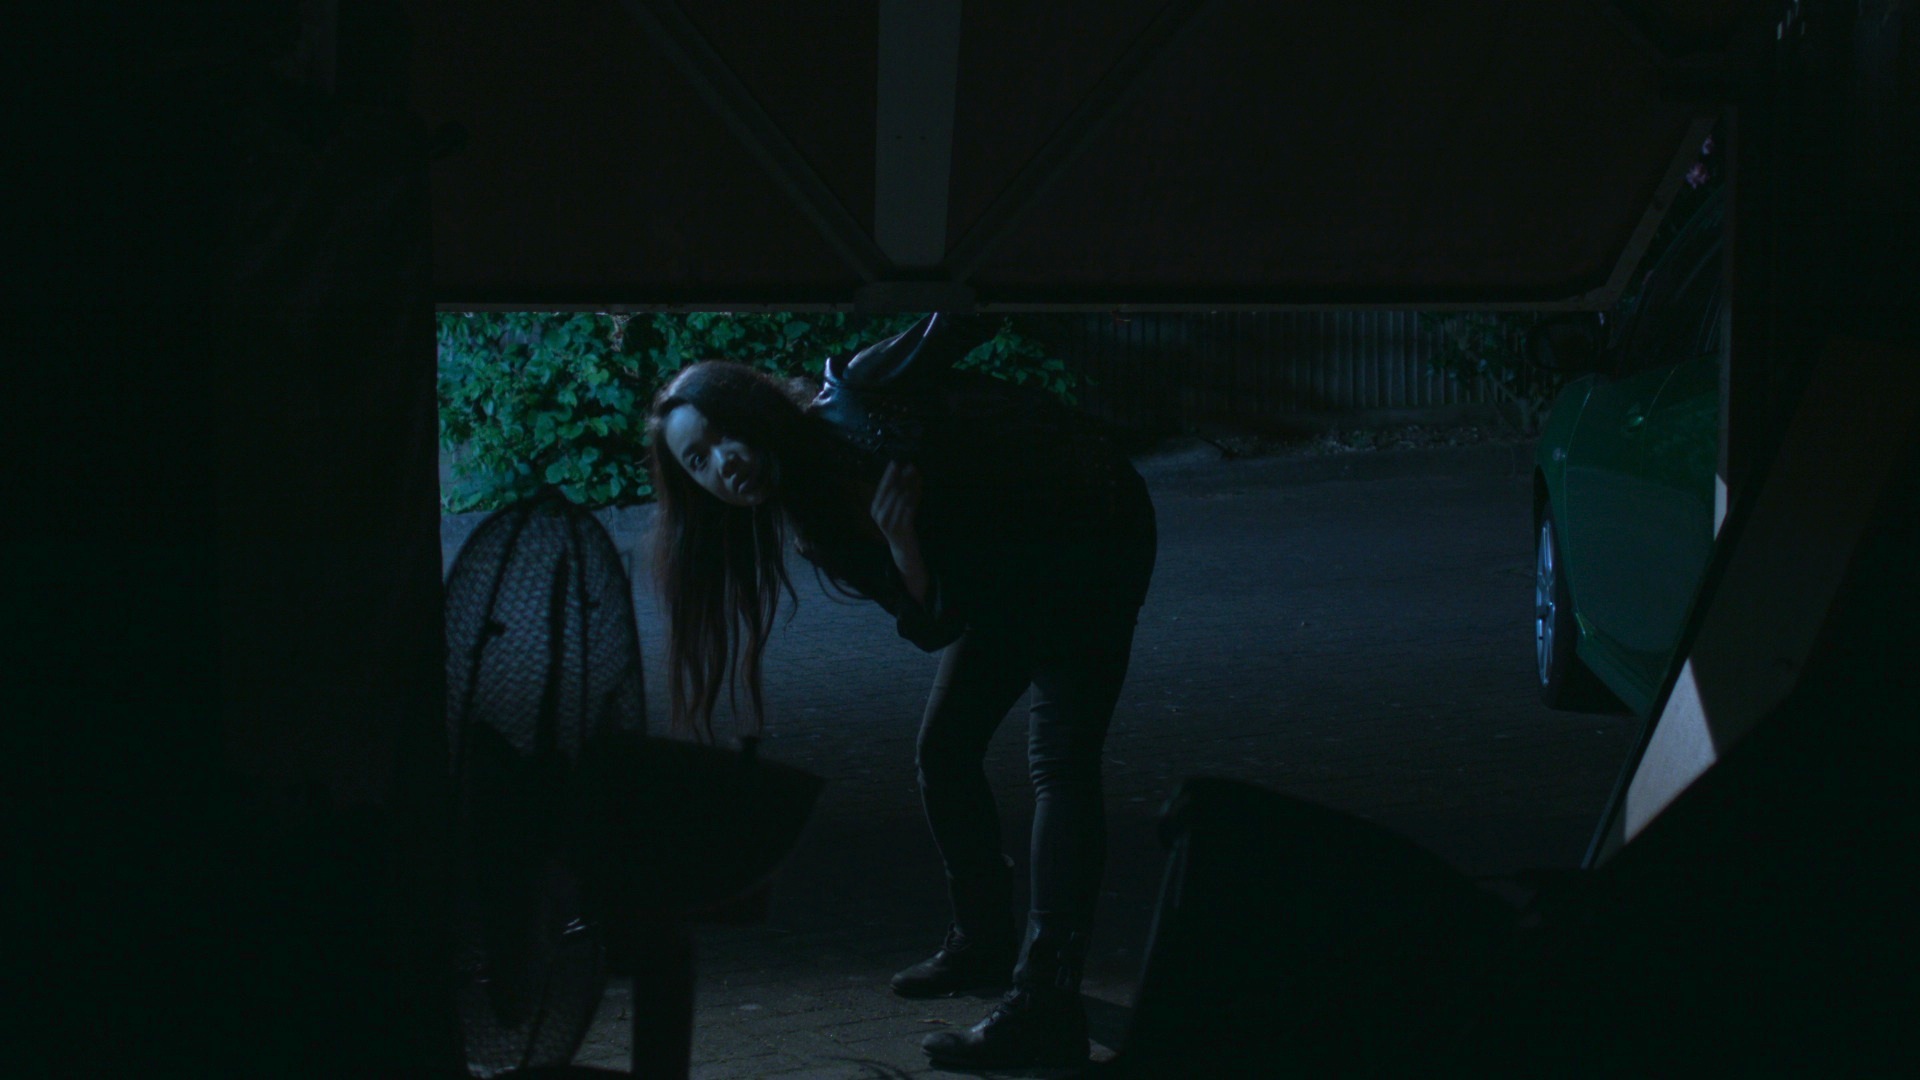
Baldur, the character in the front passenger seat, was supposed to have a laptop on his lap. Since it was out of frame, I gave him another LED panel instead to represent the light coming from the screen. With hindsight I wish I’d gelled it cooler, but never mind. I gaffer-taped over the brightness and colour temperature dials on the back of the panel to stop them getting accidentally knocked out of position.

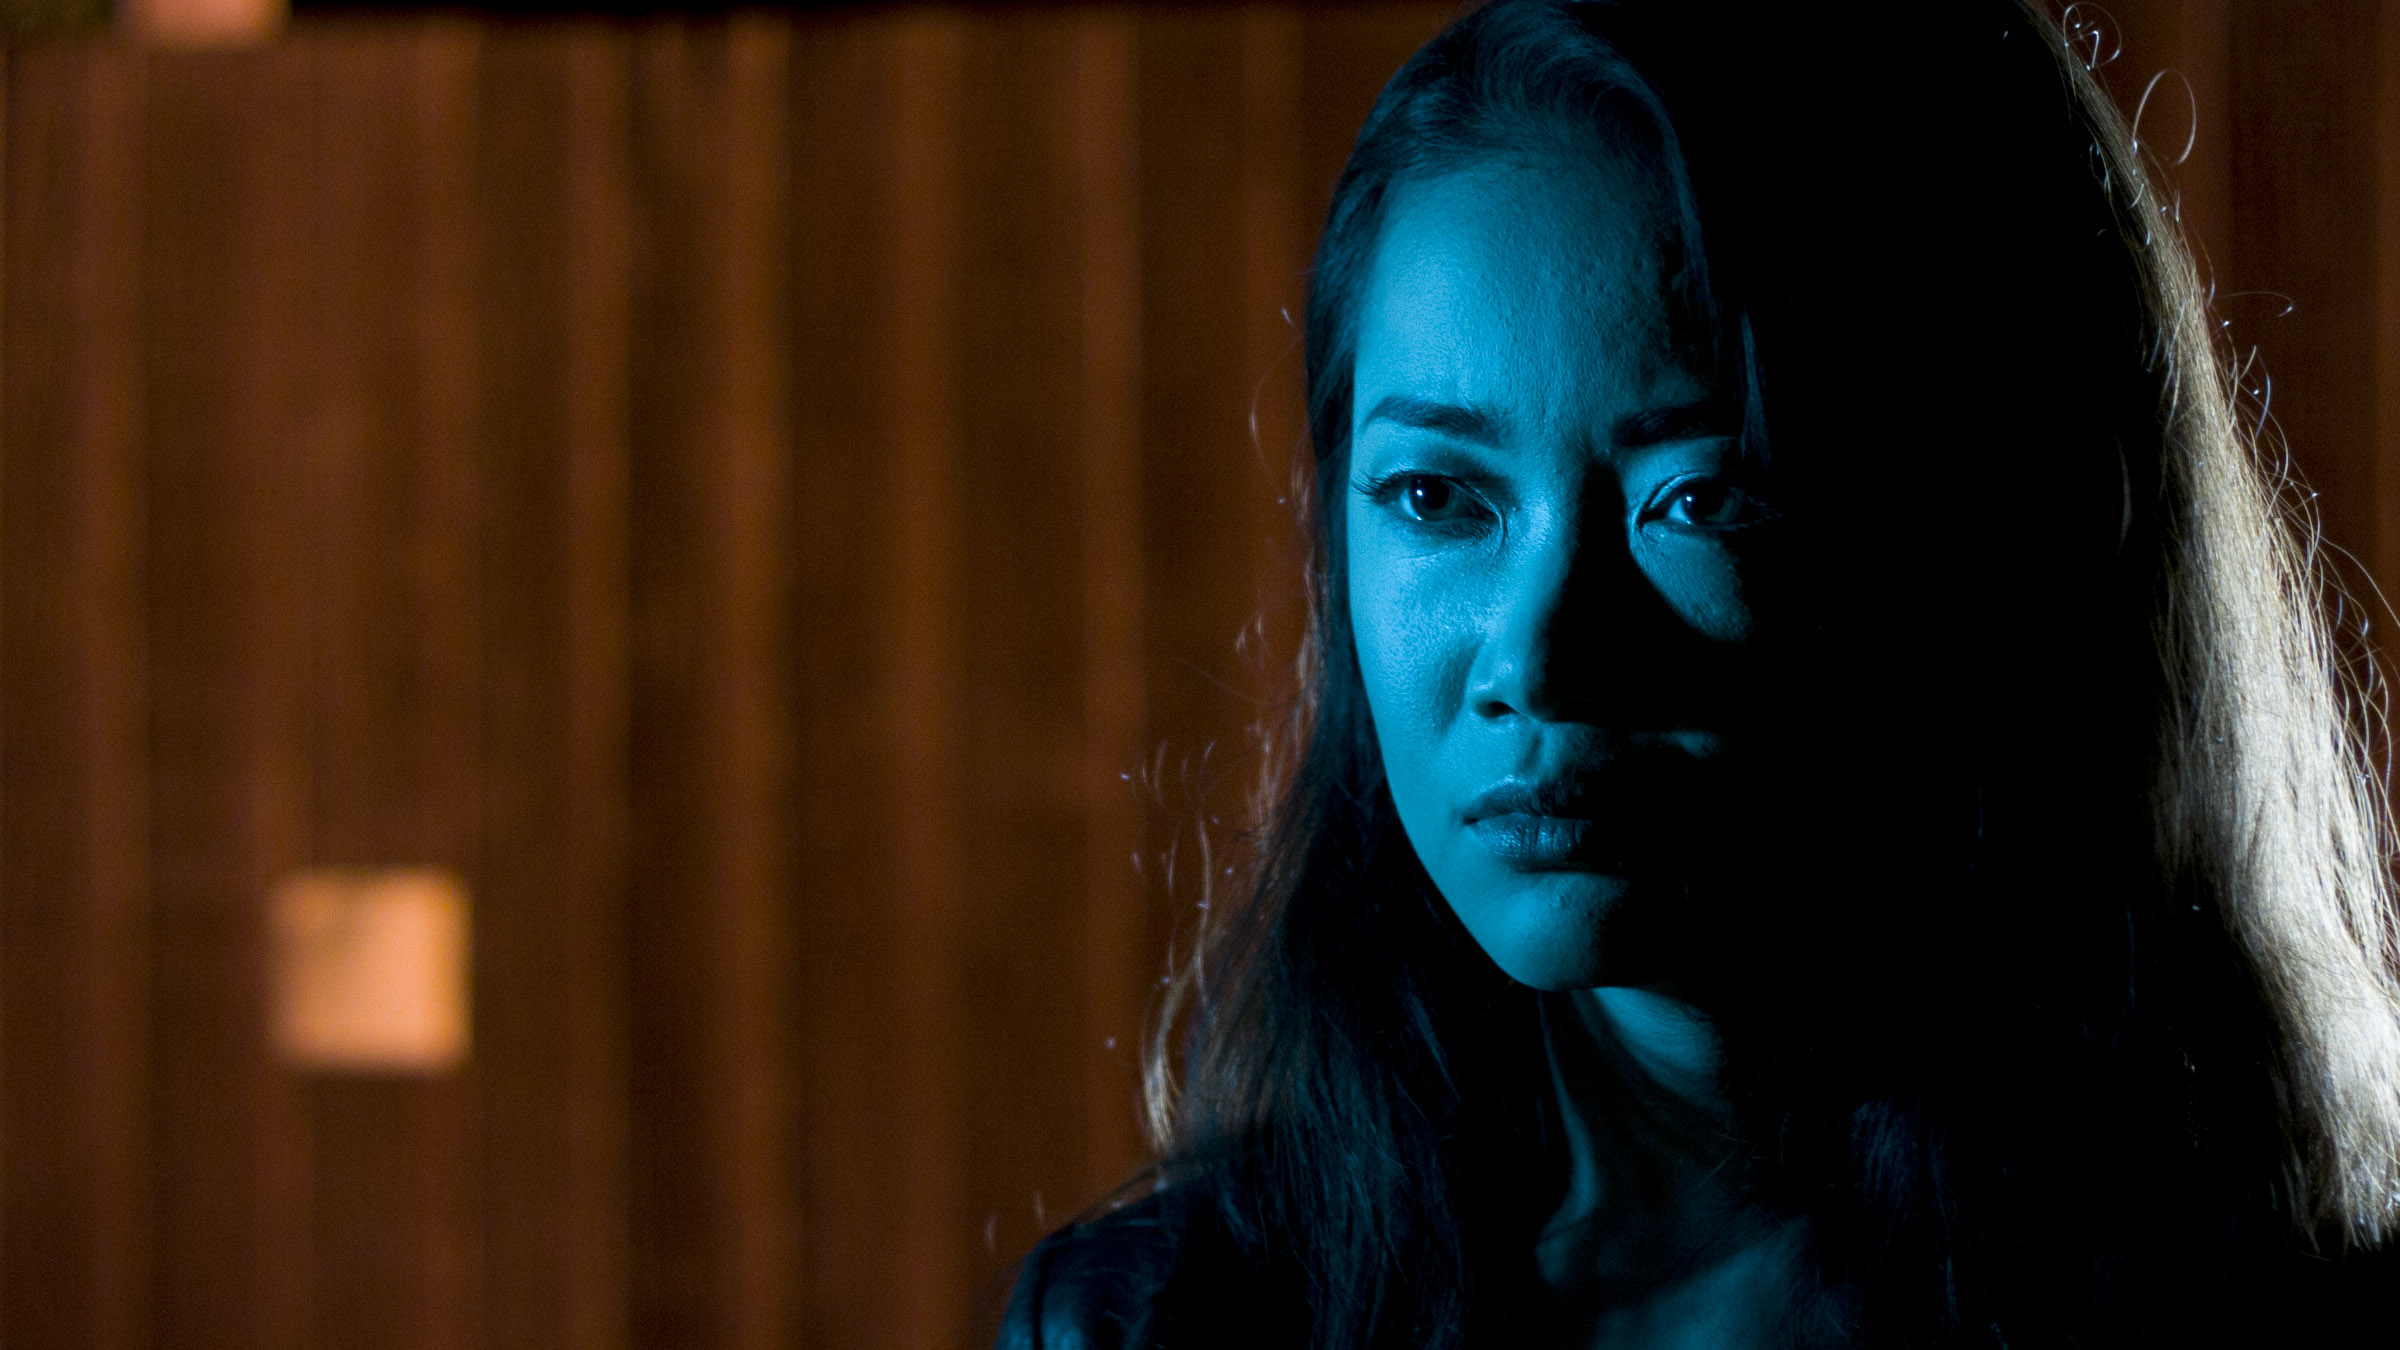
Exposing for these shots is tricky, particularly when you’re driving on country lanes where a dark, tree-lined avenue can suddenly give way to a bright, open field. If you turn up the LED panels too bright, the dark sections look fake, but if you don’t turn them up bright enough then the dark sections look too dark. I made a guess and it turned out to be pretty bang on.

When we shot, only the three actors and the sound recordist were able to be in the car. Before it drove off, I started the camera rolling and Colin popped in with the slate. Then it was all down to the actors. They did a series of takes and came back to show us the results. Everyone was happy, and that was that.

Support The Gong Fu Connection at www.indiegogo.com/projects/the-gong-fu-connection

Int. Car – Moving

The Steadicam, the Blackmagic and the Troublesome Converters

I spent last week in rural Sussex DPing Ted Duran’s 30 minute action-comedy, The Gong Fu Connection. It was a great shoot with a real community atmosphere, excellent food and beautiful weather. I’ve just been looking through the rushes and I’m blown away by the amazing images that my Blackmagic Production Camera has produced. They are very filmic with an incredible amount of detail, even though we only shot in 1080P.

Colin operates the Canon C300 on his Steadicam Pilot
Colin Smith operates the Canon C300 on his Steadicam Pilot

Not everything went to plan though. The aim was to capture the fights using fluid Steadicam photography, and since I hadn’t used a Blackmagic with Colin’s Steadicam Pilot before, he and I met up the weekend before to test the set-up.

The chief difficulty was that the rig’s built-in monitor accepts only a composite video input, while the Blackmagic outputs only an SDI signal. I searched online for a portable SDI to composite converter, but no such thing seemed to exist. I already had an SDI to HDMI converter, so the obvious solution was to buy an HDMI to composite converter. But the more links a chain has, the more opportunity for weakness.

I made the purchase and Colin sorted out power adapters so that both converters could run off the same battery as the Steadicam monitor. We tested it at my flat and it worked perfectly.

Flash-forward a week and we’re on set preparing the Steadicam for The Gong Fu Connection’s first martial arts sequence. All we’re getting on the Steadicam’s monitor are colour bars, which are output by the HDMI to composite converter when it’s receiving no input signal. The other converter, the SDI to HDMI one, has packed up.

Without a working monitor on the bottom of the rig, Colin can’t watch his step and frame the shot at the same time. The Steadicam is essentially useless.

There is a Canon C300 on set, being used for behind-the-scenes shooting. Although Ted and I are both keen to shoot the main film exclusively on the Blackmagic, to avoid severely disrupting the schedule we decide to shoot the day’s Steadicam material on the C300. (The C300 has SDI, HDMI and composite outputs. Blackmagic Design take note.)

DO NOT BUY THIS CONVERTER.

At lunchtime I get on the wifi and see if I can order a replacement SDI to HDMI converter. The only one that can be delivered the next day (a Sunday) is the same model as the one that packed up. Having little choice, I order it. Amazingly it is indeed delivered on the Sunday. Nice one, Amazon.

Unfortunately it doesn’t work. I was at least hoping for the paltry month of service I got from the previous one. But no, this one is dead on arrival.

By a process of elimination we check that the converter is indeed the piece at fault. We swap cables and cameras and the results are the same.

We continue to shoot the Steadicam material on the C300.

But I have one last desperate idea to get the Blackmagic working on the rig.

The CCTV camera set up to film the Blackmagic's screen
The CCTV camera, set up to film the Blackmagic’s screen

On Monday morning I send our driver, Lucky, to the nearest Maplin. I’ve given him instructions to buy a small CCTV camera. When he gets back with it I have Colin attach it to the rig behind the Blackmagic, filming the Blackmagic’s screen. The CCTV camera outputs a composite signal directly to the Steadicam’s monitor.

Incredibly, this works. But it does mean enclosing the Blackmagic and the CCTV camera in black wrap to eliminate reflections on the former’s screen. Which means we can’t get to the iris controls, and we’re relying on the distances marked on the lens barrel to focus. And to make matters worse, the Steadicam Pilot can’t take the weight of a V-lock battery, so the Blackmagic must run off its short-lived internal battery. Between takes we have to plug it into a handheld V-lock to top up the charge.

After capturing two or three successful set-ups with this ludicrous rig, we decide it’s slowing us down too much. I finally abandon all hope of using the Blackmagic on the Steadicam.

For those interested in how the C300 and Blackmagic stack up against each other, the Canon has a sharper, more video look compared with the Blackmagic’s filmic images. The Canon also has more compression artefacts due to its lower bitrate. But they seem to cut together alright once graded.

The lack of an HDMI output on the Blackmagic has been the one thing that’s really caused me problems since buying the camera. I’d be tempted to go for a Kinefinity mod if it wasn’t so expensive…

Of course, the camera is still incredible value for money. Personally I think the only competitors in terms of image quality are the Reds. (The Alexa and film are in a whole other league.) But it is strange that Blackmagic Design claim to have built the camera for people working in the low budget world, but apparently didn’t consider that such people rarely have access to SDI monitors.

Stay tuned for more on The Gong Fu Connection shoot. There is still time to contribute to the project’s crowdfunding campaign over at Indiegogo.

The Steadicam, the Blackmagic and the Troublesome Converters

The Script and the Cinematographer

cover pageWhen I read a script that I’m going to shoot, there are a number of things I’m looking out for. I want to identify the themes and the character arcs, so that I can come up with ways of reflecting these in the cinematography (see my previous blog post for examples). And on a more mundane practical level, I’m figuring out what equipment is required, and which scenes or sequences might be difficult photographically.

To demonstrate my thought process in planning a project, I thought I would share with you today the things I highlighted in a particular script and why. The script in question is The Gong Fu Connection, written by Ted Duran, and we start shooting it this Friday. It’s an action-comedy drama in which a young Chinese businessman learns a life lesson via his connection with an Englishman who has introduced Kung Fu in a farm community in Sussex. You can help us make the film by going to www.indiegogo.com/projects/the-gong-fu-connection and contributing, or by spreading the word on your social media networks.

Throughout the script I’ve highlighted the time of day in the slug lines. One of the first things I need to know as a DP is, “Are there are night scenes?” because that will have a big effect on the lighting equipment needed. Ted’s script is nice and specific, not just DAY or NIGHT, but DAWN, MORNING, AFTERNOON, EVENING and DUSK. This is a really helpful starting point in considering the light. In general I see that there are a lot of daylight exteriors, so bounce and negative fill are going to be my two chief weapons.

The very first slug line is:

1. INT. VICTORIA STATION – MORNING

Day or night?
Day or night?

Immediately I’m wondering, “Is this going to be a guerilla shoot or are we going to have permission?” Clearly we will never be allowed large lighting set-ups and we will always be working around the general public. Battery-powered LED panels will come in handy here.

A little lower down the page is:

3. INT. RESTAURANT – DAY

Straight away I’m thinking, “Should it be night instead?” Even though in summer you may go to a restaurant in daylight, somehow it feels like it wouldn’t look right on camera. I make a note to discuss this with Ted on the recce, and indeed we end up deciding to shoot it after dark.

The next scene features a phone conversation. I make a note to ask if the person on the other end of the line will be seen.

Another station scene contains the direction:

He gets on the train… The train whizzes past an urban landscape…

I highlight this, to remind myself that this is a hidden extra scene – on board the train, as opposed to at the station. Again I’m wondering what the extent of permissions will be and what restrictions there may be on equipment. I also highlight other hidden extra scenes later on – an interior bedroom scene in which a character sees another character outside through the window, and a montage set in a variety of different places and times.

I highlight the following in a café scene:

Time passes, we see the clock tick past… Half an hour and two coffees later…

Maybe there are jump cuts here to show the passing of time? I’ll want to adjust the keylight outside the window to simulate the progress of the sun.

A violent flashback takes place in an apartment. Although the script specifies DAY, the content makes me imagine the look a little differently. I write the following notes: “Dingy look? TV light? Maybe night. Rough, handheld fight. No finesse or control.” Ultimately Ted and I do decide to set the scene at night. The flickering TV set will be a key light source. The handheld look will contrast with the more slick steadicam and tripod work which will characterise the Kung Fu fights later on in the film.

A more pastoral scene features two characters walking and talking beside a lake. I write: “Watery reflections? Bounce M18 off surface of water?” I’m thinking to enhance the beauty of the setting by using the rippling water surface to bounce an ArriMax M18 onto the characters’ faces.

A direction later on reads, “He is lost in his own world.” I write “push in?” beside this as a shot suggestion. Then I read:

Startled, he turns around to see a man towering over him in his dressing gown with a long plaited beard, who looks at him with a frown on his face.

This character, Mandragor, clearly has a special signficance, a mystical presence. I write “special lighting for Mandragor?” next to this passage. This will probably be stronger backlight or perhaps an unusual eyelight of some kind. I highlight his other appearances in the film too.

A dark room in a grungy pub

A dawn scene specifies that “the sun has just risen”, which I highlight. If it’s a cloudy day, or we’re unable to shoot at dawn, I may need to fake this with an orange-gelled HMI.

Later on, a direction reads:

RICKY smiles, then looks at AERONA dreamily.

I highlight this and write “classic beauty shot” above. I won’t go as far as a soft-focus filter, but the lighting needs to be particularly flattering here to represent Ricky’s enamoured POV.

A flashback in a pub has a nice clear description which is a great springboard for the cinematography:

… Playing pool in a dark room in a grungy pub…

I’m immediately thinking smoke, shadows, pools of light from the over-table fixtures. I also highlight the word “laptop” since the screen will be a light source which I may want to use or beef up with a hidden LED panel perhaps.

Scenes in moving cars are always tricky

Later on I’ve highlighted a dialogue scene in a moving car. I need to talk to Ted about how he wants to shoot it, and to think about how the camera can be rigged to get those shots.

The only time a specific shot is mentioned in the script is here:

Ricky is running as fast as he can. We see a close up on his face as he thinks.

I highlight this, knowing that it will be tricky to accomplish and hoping that Colin Smith, our steadicam operator, will be up to the challenge!

Having read the script a couple of times, I go back and make some notes on the cover page about the general photographic approach:

City – dark, dingy, oppressive, handheld, little/no eyelight – handheld?

Country – light, backlit, bounce-from-below

Characters with no connection – Lucia, the bad guys, Ricky to begin with – are framed in clean singles. Handheld or stiff tripod.

Characters with connection – Matthew, his posse, Ricky as the film goes on – are framed in 2- shots and dirty singles. There are more fluid shots with pans or tracks.

And that’s all. Some of these notes are just for me to think about, while others raised questions I needed to ask the director and producer about. Preparation is key in filmmaking, and in the heat and stress of the shoot I’ll be glad I gave some consideration to these issues in advance.

The Script and the Cinematographer

Sun Paths

Checking my compass at the stone circle

I’ve spent the last three days in Sussex, scouting locations for a short film called The Gong Fu Connection. Written and directed by Ted Duran, the film follows a young man as he learns Kung Fu, not just the fighting but the whole lifestyle. Themes of sustainability and connection to nature are woven throughout.

The script is predominantly daylight exterior, with many picturesque rural settings including a number of farms. As director of photography, my main concern during the recce was to make the best use of the natural light. That meant checking the orientation of each location to the sun path.

Apps like Helios exist to show you the sun path on your iPhone or iPad wherever you are, but I find that for most locations such precision is unnecessary. A simple compass and a bit of guesswork based on the time of year can tell you what you need to know.

The best direction to shoot is usually towards the sun. This gives everything a lovely halo of backlight, while illuminating it softly from the front with “north light”. If north light isn’t enough, you can choose your reflectors at will – soft or hard, white or silver or gold – to mould the frontlight. For more on this, see my blog entry on moulding natural light. (One exception to this rule of thumb is establishing shots of buildings, which look best in crosslight.)

The shooting schedule is still in flux, so I was able to give the Gong Fu Connection’s production team my recommendations about when scenes should be shot for the best light.

An Artemis screengrab showing various focal lengths and the compass bearing at the lower centre

One app I did use extensively on the recce was Artemis, the virtual director’s viewfinder. Although Ted and I didn’t use it for picking lenses at this stage, it was useful to take screengrabs so I could get a sense of how the location would look with different focal lengths. Artemis also handily displays the compass bearing at the bottom of the screen – something I only noticed after I’d spent the whole three days photographing my pocket compass!

Of course there are plenty of other things to look out for on a location recce – check out my post on Ten Questions to Ask on a Recce. And if you’re scouting locations without your DP, read my earlier post about what you can look out for on their behalf.

Support The Gong Fu Connection and get access to exclusive rewards on Indiegogo.

Sun Paths

The First Musketeer: Athos and Marion

A clip from The First Musketeer has been released. Taken from episode three, it shows the first meeting between Athos and the mysterious Marion.

Rocamadour. Crazy, huh?

This was shot at Rocamadour, a medieval town carved into the side of a gorge. (Read director Harriet Sams’ blog for more on the locations of The First Musketeer.) And I think this may have been the night when gaffer Richard Roberts quite literally got a shock as the 1.2K HMI ballast packed up. His arm was numb for 20 minutes. Fortunately this happened after he had executed some nice steadicam work for the early part of this scene.

Come to think of it, it was probably also the night he knackered “the donkey”. Take a moment to come up with your own jokes. Done? Okay, so the donkey was his van. Yeah, not so funny, but at least I let you dream for a bit. Anyway, you can imagine how steep the road was to get down to this place. Now imagine it’s also incredibly narrow. And that the van is quite small but loaded full of generators and other heavy kit. Like I say, Richard knackered his donkey.

Richard avec le steadicam. Photograph de Jessica Ozlo
Richard avec le steadicam. Photo: Jessica Ozlo

My recollection is that this was our first big night exterior, and I remember being shocked at how long it took just to cable everything. Often we were throwing cables over balconies to someone else below – to avoid running the cable through shot. When it was unavoidable, the wonderful art department – Amy Nicholson and her assistant Denise Barry – would come in and hide the cables with straw. It really felt like 30% of the set-up time was planting the lights, and the other 70% was running the cables, hiding the cables, siting the generators, checking we weren’t overloading either of them, discovering we were even though the generators were rated a full kilowatt above what we were drawing, deciding to run some stuff off the mains, blowing a fuse because the electrics are old, failing to find the fusebox, etc, etc.

When lighting night exteriors, I tend to start from the back and work my way forwards. Backlight lets you see everything without really seeing it, and then you can add in pools of light from the sides when you need to see more. So for the wide shot at the start of the scene, the first lamp to go up was a 1.2K HMI (before it died), right at the back. There was some debate about whether we could site it there, because it was on some steps which were used occasionally during the night by the resident monks. Yep, monks. In the end we said “screw it” and put it there, leaving as much room as possible for the monks to get past it. Once smoke was pumped in, that HMI gave us the nice blue ambience in the background.

Nicole O'Neill as Marion De Lorme. Photo: Jessica Ozlo
Nicole O’Neill as Marion De Lorme. Photo: Jessica Ozlo

Opposite the door of the tavern were a couple of Dedos creating pools of light around the candles – more on that in a future post. In the foreground I placed a Kinoflo on the floor to the left of frame, dimmed right down and diffused, just so characters wouldn’t be complete silhouettes going under the arch.

The conversation between Athos and Marion is backlit by a Dedo boomed over their heads, behind them (from the camera’s point of view). It wraps around Marion’s face enough to make out her profile, which is about all you want in a mysterious scene like this. There’s some bounce on Athos which I think was just coming off the surrounding stone. The only other lamp was a 2.5K HMI, lighting the background. For Marion’s close-up, I aimed the Dedo at Athos and let the bounce off his shirt and jacket light her face.

If you want me to rationalise it now, I’d have to say that this Dedo represents a particularly bright moon, and the HMI represents starlight. Frankly this was one of those cases where making it look good seemed more important than making it look realistic.

Visit the firstmusketeer.com for all the latest news on the series. For more on the cinematography of the series see my on-set vlogs on the official website and my Period Cinematography blog from last year,  and stay tuned for more as the release approaches. Also check out the advertorial that Blackmagic Design did on the series recently.

The First Musketeer: Athos and Marion

Forever Alone: Day Three

On the left, a real streetlight. On the right, a 650W Arrilite with Urban Sodium gel.

Saturday night saw the third and final day of production on Forever Alone. If you haven’t already, check out my blogs on day one and two of this sci-fi short by Jordan Morris. (I’ve gone back and added some frame grabs into the day two post.)

This time around, our lighting kit had grown just slightly with the addition of a 650W Arrilite. Without this it would have been near impossible to light the nighttime alley scenes that were scheduled. The alley in question was in a suburban area, conveniently adjacent to the producer’s house and thus a power source.

I knew going into this shoot that I would have to embrace the sodium vapour streetlamps. In the past I’ve always avoided or flagged them, because that grungy orange look gives away that you don’t have the budget to swap out the bulbs like they do in Hollywood. American film and TV nights are always steely blue; British film and TV nights are usually seedy orange. With only one flag and one C-stand in our kit, however, I had no choice.

The orange backlight on Faith (Haruka Abe) and the fence, although apparently from the streetlamp in the background, is actually from an Arrilite 650 out of frame right, gelled with Urban Sodium. A daylight-balanced LED panel, also out of frame right but closer to camera, keys Faith. A second panel hidden behind the end of the fence lights the van and the rest of the deep background.
The orange backlight on Faith (Haruka Abe) and the fence, although apparently from the streetlamp in the background, is actually from an Arrilite 650 out of frame right, gelled with Urban Sodium. A daylight-balanced LED panel, also out of frame right but closer to camera, keys Faith. A second panel hidden behind the end of the fence lights the white van and the grass in the background.

Fortunately there were no streetlamps close enough to spill light onto our character, Faith (Haruka Abe) – they were only creating pools of light in the background, which helped add depth. I used one in particular to motivate a strong backlight, in reality generated by the Arrilite, gelled of course with Urban Sodium (Lee no. 652).

For colour contrast, an LED panel set to 5,600K threw in a little “moonlight” from the side. The second panel, also set to daylight, was positioned to light the deep background. It was so handy, as I raced to rig our final set-up before wrap, to be able to slap a V-lock battery on one of these panels and move it across the street in seconds.

When Other Faith appears on the scene, she’s keyed by a Dedo covered with tough-spun diffuser and the characteristic Medium Blue/Green gel. My favourite shot of the night was her close-up:

Haruka Abe as Other Faith. Image courtesy of Jordan Morris

Emulating the beautiful contrasty look of the TV show Fringe, I eliminated all fill light to put one side of her face in crisp, black shadow. An LED panel backlights her hair, while the Urban Sodium-gelled Arrilite rakes across the fence in the background.

Eliminating the fill was unexpectedly difficult – a downside of using a sensitive camera. The slightest bit of bounce would contaminate the blacks, as did a faux period streetlamp in the adjacent garden. It’s hard to figure out where unwanted light is coming from when it’s so dim that your naked eye can barely perceive it.

Forever Alone is now wrapped, and Jordan’s beginning the processes of editing and adding extensive visual effects. Personally I’ve learnt a lot about how far a camera be pushed, specifically the Blackmagic Cinema Camera. Many of the wide shots I’ve reviewed are under-exposed (partly due to our widest lens being relatively slow) but the raw data allows the exposure to be bumped up in post without them looking nasty.

What’s the most you’ve ever had to push a camera?

In this splitscreen shot, the two Faiths are backlit by the 650 - this time without a gel, while an LED panel gelled with Urban Sodium lights the background. A second LED panel, daylight balanced, keys the downside of First Faith (left), while a Dedo gelled with Medium Blue/Green keys the downside of Other Faith (right).
In this splitscreen shot, the two Faiths are backlit by the 650 – this time without a gel, while an LED panel gelled with Urban Sodium lights the background. A second LED panel, daylight balanced, keys the downside of First Faith (left), while a Dedo gelled with Medium Blue/Green keys the downside of Other Faith (right).
Forever Alone: Day Three

Forever Alone: Day Two

Stella Taylor as Charlotte in Forever Alone. Image courtesy of Jordan Morris

This is a continuation of my last post, a report from the set of Jordan Morris’s sci-fi short Forever Alone.

Black-wrapped ceiling light

Day two saw us shooting a big scene in the dining room. Since the location was only available to us during daylight hours, the windows had to be blacked out with bin bags. Ideally for night interiors, I would put an HMI outside to shine “moonlight” in through the windows, and perhaps use halogen floodlights to create depth and interest in the deep background. This can bother some directors, however, because it means leaving the curtains open – hardly realistic. I figured that if I could create an interesting night interior look on Forever Alone without the crux of open curtains and deep background, it would give me a lot of confidence in the future when working with those restrictions.

An LED panel hidden behind the wall that Charlotte (Stella Taylor) is leaning on supplements the ceiling light from a more flattering angle. A CTB-gelled Kinoflo Divalite provides the blue wash in the foreground.
An LED panel hidden behind the wall that Charlotte is leaning on supplements the ceiling light from a more flattering angle. A CTB-gelled Kinoflo Divalite provides the blue wash in the foreground. Image courtesy of Jordan Morris

I began by turning on the ceiling light, something I almost never do. I’m not a big fan of toplight, but it seemed appropriate given the interrogative nature of the scene, and I knew I could add bounced light off the table-top if the look was too harsh. Also, the shadow of the lightshade added some interest to the room’s blank white walls. I used the 60W tungsten bulb, and placed black-wrap across the top of the shade to prevent bounce off the ceiling from raising the ambient light level.

Cardboard barn doors. This kind of DIY solution is so much easier with sources that don't get hot.
Cardboard barn doors. This kind of DIY solution is so much easier with sources that don’t get hot.

I clamped the Dedo to the top of a mirror directly behind Faith, which allowed me to give her a dedicated backlight. I gelled this pink, foreshadowing her eyes glowing this colour at the end of the script.
Other Faith, a visual representation of the heroine’s darker side, was keyed by another dedicated source, this time gelled with Medium Blue/Green again. Ideally this source would have been a Dedo, to achieve fine control, but only an LED panel remained available. So to reduce the panel’s spill onto other characters, I fashioned makeshift barn doors out of a cardboard box.

To light the living room – visible in the background on reverses – I employed the Divalight. This was gelled blue to suggest moonlight and create some depth and separation – a proxy, I suppose, for those deep backgrounds I couldn’t have outside the windows.

Much has been made in recent years of the low-light sensitivity of modern digital cameras, and the attendant reduction in required lighting power. When competing with natural light, larger instruments are still necessary, but Forever Alone really helped me to see what can be achieved with minimal gear. This weekend I get to see how much I can push this in a night exterior scene, as we complete principal photography. Stay tuned.

Working from the foreground back, an LED panel to the right provides the key on Charlotte (centre), with fill supplied by the ceiling light. Faith (right) is keyed by a second panel, gelled with Medium Blue/Green. A Dedo provides backlight, while a blue-gelled Divalite illuminates the background. Image courtesy of Jordan Morris
Working from the foreground back, an LED panel to the right provides the key on Charlotte (centre), with fill supplied by the ceiling light. Other Faith (right) is keyed by a second panel, gelled with Medium Blue/Green. A Dedo provides backlight, while a blue-gelled Divalite illuminates the background. Image courtesy of Jordan Morris
Forever Alone: Day Two

Forever Alone: Day One

Haruka Abe as Faith in Forever Alone. She is side-lit by an LED panel and 3/4 backlit by a Dedo, while a Kinoflo Divalite illuminates the background. Image courtesy of Jordan Morris

When I was offered the role of DP on sci-fi short Forever Alone, I must confess that I had pause for thought. It was a student production, and the lighting package available from the university was much smaller than I’m used to. But I figured it would be a good challenge for me, to see if I could deliver a slick sci-fi look for a script set entirely at night, using only a handful of small instruments.

Creating darkness around the garage door meant making good use of the garage's random contents.
Creating darkness around the garage door meant making good use of the garage’s random contents.

The package consisted of a Dedo kit, a Kinoflo Divalite, two 12×12″ LED panels, a collapsible reflector, a single C-stand (with an arm but no knuckle) and one flag. And we quickly discovered that the Dedo kit contained only one in-tact bubble. On arriving at the house location, I checked out all the ceiling lights and, amongst the energy saver bulbs, found a single 60W tungsten globe. I immediately added that to my modest arsenal, along with my trusty £2 LED camping light which I’d brought along. Additionally, at my request, director Jordan Morris purchased a powerful LED torch for a key sequence. Dynamic practical lighting always looks good, and I thought it might help fill in any areas which our other sources couldn’t reach.

£2 LED camping light

We were shooting on the Blackmagic Cinema Camera with three Canon primes, the slowest of which was f2.8. Regular shots would be recorded in 1080P ProRes, while VFX plates would be captured in the 2.5K CinemaDNG Raw format. I feared I would be struggling to light to f2.8 without raising the camera’s ISO above its native 800, but in fact only one scene felt underexposed.

Interactive light, the low-tech way
Interactive light, the low-tech way: a 60W bulb on a stick

This scene took place in the garage, where the lead character, Faith, uses her superhuman abilities to generate a glowing light source above her head. To create the requisite interactive light, I borrowed the pendant fitting from the ceiling of the garage, removed the fluorescent bulb, put in the 60W tungsten globe and taped it to the end of a broomstick. I had chosen Medium Blue/Green as Faith’s “special powers” colour, but this is a very dark gel. With only a 60W bulb inside, even boomed above Faith’s head, it didn’t shed quite as much light as I wanted. Hopefully these shots, recorded in Raw, can be brought up in the VFX/grading process without too much noise creeping in.

Other sources used in the garage included the two LED panels, colour-balanced to 5600K so as to show up blue on the tungsten-balanced camera. These were positioned in the rafters at either end of the space and dimmed right down, to give a hint of backlight to scenes supposedly taking place in pitch blackness.

The garage’s ceiling light, turned on by the characters of Mitchell and Charlotte when they enter, was represented by our only functioning Dedo. I chose the Dedo for its focus; I didn’t want the room awash with light, just a pool of illumination that would still have shape and mysterious shadows.

Stella Taylor and Oliver Park, as Charlotte and Mitchell, are keyed here by a Dedo in the rafters. A foreground glow is created by an LED panel. Image courtesy of Jordan Morris

For several shots I used my LED camping light as a key, believe it or not, even going so far as to rig it on a stand for certain close-ups. The distances involved were small, so it was quite effective. In one shot (not the one pictured below) I bounced it off the floor AND covered it in tough-spun diffuser, to get an ultra-sublte eyelight.

Haruka Abe as Other Faith, keyed by an LED camping light (£1.50 from a charity shop). Image courtesy of Jordan Morris
Haruka Abe as Other Faith, keyed by the LED camping light shown above. Image courtesy of Jordan Morris

Stay tuned for my report from day two of the shoot.

Forever Alone: Day One

Blackmagic Production Camera Field Report

I was recently the cinematographer on Sophie Black’s Night Owls, my second shoot with my new Blackmagic Production Camera, and the first one to be shot in 4K. I’m loving the rich, detailed and organic images it’s producing. Click on this screen grab to see it at full 4K resolution and witness the crazy amount of detail the BMPC records…

Click on this screen grab to see it at full 4K resolution and witness the crazy amount of detail the BMPC records.
Jonny McPherson in Night Owls

Images from Night Owls courtesy of Triskelle Pictures, Stella Vision and Team Chameleon. Produced by Sophia Ramcharan and Lauren Parker. Starring Jonny McPherson and Holly Rushbrooke.

It’s been documented that the Blackmagics, in common with the early Red Ones, suffer from the CMOS sensor “black sun effect”. As the name suggests, this means that if you get the sun in shot, it’s so bright that it turns black on camera.

On Night Owls I discovered that this also happens with filaments in bulbs. This is unfortunate, since the film features a lot of practicals with bare bulbs.

The coil of the filament appears black on the BMPC's CMOS sensor
The coil of the filament appears purple on the BMPC’s CMOS sensor

The issue can be fixed in post – apparently Da Vinci Resolve’s tracker feature will do it, or failing that some Quickpainting in Shake would certainly get rid of it – but a firmware update from Blackmagic Design to address the issue in-camera would be very welcome. Since they’ve already issued a firmware fix for this problem on the Pocket Cinema Camera, I’m surprised they even started shipping the Production Camera without this fix.

And while we’re on the subject of firmware updates, how about an option to display 2.35:1 guides? Surely in this day and age I shouldn’t be having to do this…

Taping off the camera screen and monitor for a 2.35:1 aspect ratio
The HDMI convertor on the back of my shoulder rig, powered by the V-lock battery

Some issues with my accessories also became apparent during the shoot. Firstly, 2 x 120GB SSDs are not enough. They last about 21 minutes each at 4K. Since we were doing a lot of long takes, we occasionally found the shoot grinding to a halt because the second card card was full and the first card hadn’t finished copying to the DIT’s laptop. Yes, crazy as it sounds, it takes about three times longer to copy the contents of the card – by USB, at least –  than it does to record onto that card in the first place.

Secondly, I’ve purchased two different SDI to HDMI convertors from eBay – this one and this one – and I’ve found them both awful. They’re really designed for use in CCTV systems. The frame rate is jerky and the colours are so wildly inaccurate that I had to switch the monitor to black and white. It looks like I’ll have to buy an SDI monitor. If I can get one with 2.35:1 overlays, that will solve another of my problems at the same time.

So all of these problems can be fixed, either by investing in a little more kit, or by firmware updates which I hope Blackmagic Design will soon issue.

Finally, a word on the aftersales service: my camera turned out to have a faulty speaker; I sent it back and a week later a brand new one arrived. That’s pretty good service in my book.

Overall, I’m very happy that I bought the camera, and so is Sophie. The images look fantastic and I’m sure Night Owls will go far.

Jonny McPherson and Holly Rushbrooke in a screen grab from Night Owls
Blackmagic Production Camera Field Report