Designing Amelia’s Letter

Amy Nicholson
Amy Nicholson. Photo: Colin Smith

Production designer Amy Nicholson is no stranger to period settings and low budgets. I spent all of last September in France lighting her impressive work, so when I came to crew up Amelia’s Letter, she was the only person I considered to create the script’s four distinct periods. I’ve asked her to share her experiences of the design process on this demanding short film. 

I met Neil as a DOP on The First Musketeer, a rather intense but wonderful project. He instantly won my respect and acclaim with consistently superb lighting, a real appreciation for prop details and generally being a nice guy to work with. [Neil quietly slips Amy a tenner.] So when he approached me about designing Amelia’s Letter which he would be directing, I couldn’t help but say yes, despite a recent promise to myself not to take on any more freebies.    

Amelia (Georgia Winters) in 1903
The eponymous Amelia (Georgia Winters) and her equally eponymous letter, in 1903

The script filled me with a mix of excitement and dread. On the one hand it was my dream job with four different time periods (including my favourite, 1930s) and a gothic style, but on the other hand the level of art required to do this project was massive.

The original budget set by the production wouldn’t cover the acquisition of the named props let alone any effective dressing. Luckily for me they listened to my cause and agreed to increase the figure to a point my most optimistic budget might stretch to. This was fantastic but of course still set me up on my biggest challenge ever! 

Barbara (Tina Harris) in 1939

I was part of early conversations and visits to locations, and with Neil agreed what could work best.  This collaboration between a director and production designer is fantastic and really builds the strength and vision of a piece. The chosen location was a little semi derelict cottage at Newstead Abbey. The architecture was stunning and although the worn state and small size of the building would present big challenges, the opportunity to do whatever we wanted and really transform the main room for each time period was incredible. 

Charles (Francis Adams) in 1969

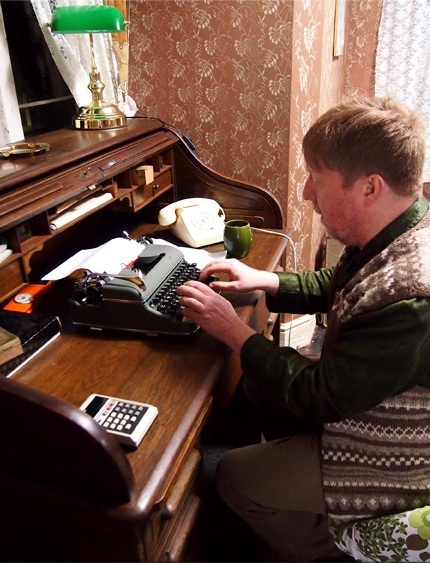
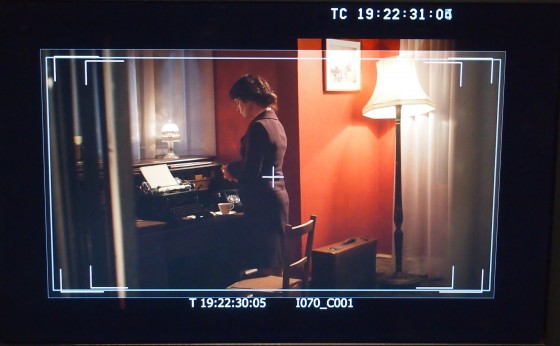
The main focus of the design and plot revolved around a period desk. Therefore it was important to get this piece right and plan all other design factors around this key item. I spent days searching for the right one, regularly sending images back and forth to Neil for an opinion. I wouldn’t normally bug a director in this way but the desk really had to support the action and shots effectively, so was crucial. I was pleased to learn that Neil was of the opinion that in this case the look of something was more important than the true accuracy of period, so this gave me a little flexibility. I eventually found the perfect piece, a 1909 roll top desk. The age and style was ever so slightly too modern but the detail and quality of wood far outweighed the five years of inaccuracy. Unfortunately the desk was 150 miles away and featured quite a bit of damage. So a road trip to collect the desk and some renovations by my dad ensued. Dad also constructed a bespoke locking drawer needed for the action. This proved a great deal of effort but worth it to get the right piece. 

There were a few other items I had to buy, including a 1930s radio, but on the whole I was able to source everything else from my personal prop store and generally doing a bit of beg, steal and borrow from friends, family and the crew. I also befriended a local antique shop and was able to hire many dressing items really cheaply. Having many sources in this way really makes a budget stretch but always involves a lot of time spent collecting, sorting and returning.

Choosing paint colours should have been quite easy but the best colours are always the most expensive and with four colours required in just three days it took careful consideration. Neil and I agreed a pallet of colours which would look good on camera and distinguish each period. He requested that the colours get bolder throughout to suit the narrative, but on a practical front this also ensured only a single coat was needed on the walls, saving time and money. I bought patterned rollers to achieve an easy wallpaper effect for both 1903 and 1969. This was a new toy for me and proved a fantastic effect that I will certainly be using again. 

Some of the present day set dressing

On set I had a superb team to support with all the redressing. It was like 60-minute makeover each time we transformed to a new period and I was so impressed and grateful that all the crew got involved at some point to help us out. Once each transformation was complete the cast and crew consistently let out a genuine ‘wow’ making the art team feel very proud. 

I was truly pleased with each of the sets and it was really special seeing them combined with some effective costume design by Sophie Black, impressive lighting by Alex Nevill and intense actor performances. I can’t wait to see the finished film, as I’m confident it will be something of beauty!

Visit Amy’s website at www.amynicholson.net.

For the latest updates on Amelia’s Letter, like the Facebook page. The film is produced by Sophia Ramcharan of Stella Vision Productions.

Designing Amelia’s Letter

Last Week of Preproduction on A Cautionary Tale

Amelia's dress, designed and made by Sophie Black
Amelia’s dress, designed and made by Sophie Black

We’re less than one week out from shooting A Cautionary Tale, with many aspects of the production coming together nicely, but others proving more challenging.

Regular readers may recall that after Stop/Eject, a project where the last few weeks of preproduction were marred by both lead actors and many crew pulling out, I vowed never again to make a film where people weren’t paid. (Puppet films excepted.) When I took on A Cautionary Tale, I figured this rule didn’t apply. After all, it wasn’t “my” film; I didn’t originate it, and I wasn’t producing it, so it wasn’t my call whether people were paid or not.

I was disappointed, but not surprised, when our lead actor pulled out about ten days ago, after being offered a lucrative alternative. Just like on Stop/Eject, it has proven very hard to find a suitable replacement, someone willing to travel way outside of London, for no money, for “just another” short film. And the search continues.

Another hiccup has been the cinematography. By mutual agreement, the DP who I originally selected left the project about a week ago. The lesson learned here is that, just like an actor, a DP must be right for the project. If you are working with limited resources, you need someone who relishes the challenge, rather than feeling restricted by it. Alex Nevill has stepped up to the plate, and I’m sure he’ll do a terrific job.

The knock-on effect has been that only today have we been able to start confirming equipment hires. For a while it looked like we might have to shoot on a DSLR, but Alex has been able to get us a great deal on a Red One MX.

Tomorrow our loyal band of runners and production assistants begins cleaning out the cottage at Newstead Abbey. On Tuesday, the art department led by Amy Nicholson will descend on the location and begin the huge task of painting and dressing it to become a writer’s study from 1903. Then, over the course of our three-day shoot, Amy’s team will have to redress it three times to bring it through the twentieth century to the present day.

Despite all the drama, I’m looking forward to the shoot. Many of the crew have worked with me before, including gaffer Colin Smith, costumer Sophie Black, sound mixer David Bekkevold, and of course Amy, and I know they’ll do me proud. And I’m sure there will be new great working relationships forged in the white heat (or more literally, freezing cold) of A Cautionary Tale’s shoot too. Stay tuned.

Last Week of Preproduction on A Cautionary Tale

Polymath: Behind the Scenes

I always enjoy a good behind-the-scenes video, and there’s often much to be learnt from them too. My friends at Polymathematics have just released a series of ‘making of’ videos for their recent music promos, all of which are exquisitely designed and shot (my own involvement in Droplets notwithstanding!). Check out Polymath’s Vimeo channel for more behind-the-scenes videos and of course the promos themselves.

Droplets

We Were Here

The Last Human / I Do (Come True)

Hands Up if You’re Lost

And here’s an equally fascinating look at a live puppetry project they did as part of the Olympic Torch Relay celebrations…


Polymath: Behind the Scenes

The Making of Henry

Guest blogger Katie Lake tells the story of how Henry Otto, the marionette star of The One That Got Away, came into this world. Click here to watch the film and please tweet about it to help us make the competition shortlist.

1. The head
1. The head

It started as a whim, a crazy idea. I have wanted to do a puppet film with Neil for a while. But if I couldn’t make a puppet, there would be no puppet film. No pressure.

I started with his head. I wound newspaper around metal wire that would become his controls, then covered the newspaper ball with a layer of air-drying clay, shaping his head, and face. I did a test with lights to see if I liked the shape I got (1). 

2. Body, hands, arms and legs

I then made his body. This started out as a toilet roll tube, covered in papier-mâché, and his arms and legs were rolled up newspaper “beads”. I then painted them beige, and sculpted hands using more clay over wire. I fit the legs and arms with wire, and before I put him together this was how he was looking (2). I liked the big head, spindly legs and long arms. So together he went. 

I made the start of a neck, and then painted his face. He now had an expression, a look, a character. I (hesitantly) fell in love with Henry when I first sculpted his head and face, but was really worried that I wouldn’t be able to do him justice with paint. Thankfully I was pleased with the results. And this is when I knew the name swirling around in my head, was the name he was going to be. There is something about him that reminds me of my maternal grandfather’s side of the family, so Henry is sort of an homage.

3. Strung up, with trousers

He then needed some clothes. Despite, or maybe because of my costume background, deciding what clothes to make for him was by far the hardest bit. In the end we decided jeans were a good place to start. I drafted a pattern in cloth, then altered it, and cut them out of an old charity shop skirt. I also gave him some hand stitched details around the waist. I temporarily strung him up, and tested out what we could get him to do. This was also his first camera test (3).

4. Hat
4. Hat and sweater

It was now that we realised he needed lateral head controls (one on either side of his head so we could make him look left and right). Oops. I attached lateral controls to the outside of his head as I didn’t want to risk drilling, so he now needed a hat or wisps of hair to hide the wire. He also needed a top, and boots.

4. Boots
5. Boots

Enter Jo Henshaw, who kindly offered to come and help out. She helped finalize costume design decisions, and made him his cute beanie (out of an old sleeve) and started his sweater (out of an old sweater) (4).

I made boots (out of more toilet roll tubes cut and bent, glued into shape and then papier-mâchéd, and then painted black) (5). I should also mention stop-motion animator Emily Currie, another helpful volunteer, who used her expertise to ensure the lateral controls stayed put.

6. The finished puppet

Henry’s sweater was then sewn onto him, covering the multiple pieces. I kept the arms separate for greater movement. I finished him off with braces made out of old shoe laces, made buttons out of clay which I painted brown, sewed a patch onto his arm from an old scrap and aged his costume with some brown and black paint.

Lastly I strung him up using extra strong navy thread. The T bar I made using a piece of flat doweling, some screw eyes (upcycled from old curtain rings) and nails to make the cross bars removable. And Henry was ready for his debut (6).

You can visit Katie’s blog at www.katiedidonline.com. To find out what Henry’s up to, why not befriend him on Facebook?

Tomorrow I’ll look at the camera and lighting techniques used to shoot the film.

The Making of Henry

Microwave Shot

Blue Peter microwave

Shot 104 on my Stop/Eject storyboards has been loitering for a long time. Originally slated for the last day of principal photography, it got dropped and has been bothering the back of my mind ever since. It’s a bird’s eye view of a ready meal turning slowly in a microwave… if the hypothetical bird flew into the microwave before Kate shut it, and survived long enough to look down on anything. (The shot is part of the circles theme that runs throughout the film, which I blogged about earlier in the year.)

Back in the autumn we bought an old microwave, my intention being to rip the top off for the shot. Even though I was clearly not planning to turn the thing on after dismembering it so, safety concerns were voiced and thoughts turned to mocking up a microwave interior.

I finally filmed the shot this morning, and I don’t think anyone – including me – expected it to be achieved in the incredibly low-tech fashion it was. I folded up a piece of old foam board and punched a hole in the middle of it, and gaffer-taped an allen key to the bottom of the circular plate so I could rotate it through the hole from underneath.

So that’s another shot ticked off the list.

Final shot
The final shot

If you’re in Hereford, come along to the test screening tomorrow (Wednesday June 20th) at 3pm. It’s in the downstairs lecture theatre at Hereford College of Art’s Media Centre on Bath Street. Non-students are welcome; just sign is as visiting Christabel Gingell. I need all the feedback I can get to finesse the edit.

Microwave Shot

Stop/Eject: Shoot Day 6 Podcast

A look at the unscheduled sixth day of principal photography on Stop/Eject

For Stop/Eject’s post-production crowd-funding campaign, we’ve introduced a new idea. As well as individual rewards for everyone who sponsors – anything from a ticket to the premiere to a voice role in the film, depending on how much you contribute – there are public rewards too. The way these work is that every time the total raised passes one of the hundred pound marks, we release a little treat online – like podcasts or special blog posts.

When the campaign was launched yesterday, we received an amazing £240 in just a few hours, smashing through the first two public reward targets.

Accordingly, Sophie has published a special, detailed blog breaking down the design and creation of the living room set, and a video podcast about the final day of shooting. Why the final day? Well, because the podcasts about the other days aren’t ready yet; we weren’t expecting the total to get past £200 so quickly!

Read Sophie’s blog here.

And you can watch the podcast above.

You can make your contribution to Stop/Eject at stopejectmovie.com and help us reach the next target, £300, for an in-depth breakdown of how I lit the shop scenes, what with and why.

Stop/Eject: Shoot Day 6 Podcast