Why You Shouldn’t Shoot the Rehearsal

We’ve all been there. Schedules are tight. Sooner or later the 1st AD, a producer or even the director is going to want to save time by “shooting the rehearsal”. I strongly disagree with this and here’s why.

No matter how great an actor is, they have only a finite amount of performance energy. They can only do so many takes before the results start to go downhill. In my experience, most actors deliver their best performance on take one or two.

So those first takes need to be useable. They need to be in focus. The timing of the camera movement needs to be right. The boom needs to be out of frame. The prop in the drawer that the talent has to take out halfway through the scene needs to be in position, not still in the standby props person’s hand because they didn’t realise we were going that far. The view out of the door that the talent opens at the very end needs to have been dressed and lit. What, you didn’t know they were opening the door because they skipped that in the block-through and you didn’t get a rehearsal? Bummer.

The purpose of a camera rehearsal is to find all these problems without burning the actors’ performance energy. If you roll the camera on the “rehearsal” – and I use quote marks because it isn’t a rehearsal any more – the cast have to deliver a full performance. Maybe a great, spontaneous performance that can’t be repeated. The last thing you want is for a boom shadow to be hovering over their forehead for half the scene.

Things like boom positions and focus pulling especially can only be properly rehearsed with the camera up and the cast moving through their actual positions. And you can talk about a scene all you want, but a moving picture is worth a million words. There’s no substitute for everyone watching the monitor during that rehearsal and seeing exactly what’s required.

Is a camera rehearsal always necessary on every set-up? No, especially if the scene has already been shot from several other angles, or if everyone’s confident that they know how it’s going to unfold, or if the scene demands little emotional commitment from the cast. But it should be the default practice.

Will a camera rehearsal always throw up problems? Of course not. And if it goes perfectly, people will curse that you didn’t roll, and start asking why we bother with camera rehearsals anyway. That’s life.

Why You Shouldn’t Shoot the Rehearsal

“Who Framed Roger Rabbit” Retrospective

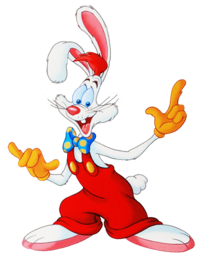
With the recent releases of Tom and Jerry and Space Jam: A New Legacy, it’s clear that there’s an appetite for traditional cartoon characters in live-action movies. While this mash-up of techniques goes back at least as far as 1964’s Mary Poppins, perhaps no film has done it quite as well as Who Framed Roger Rabbit.

The 1988 movie was loosely based on a Gary K. Wolf novel published seven years earlier, Who Censored Roger Rabbit? However, most of the plot was jettisoned, keeping only the central characters: Eddie Valiant, a private detective; his client, the titular Roger Rabbit; Roger’s wife and femme fatale Jessica; and Roger’s colleague, the libidinous, cigar-smoking Baby Herman. The original villain, a genie of the lamp, was replaced in early script drafts by the hunter who killed Bambi’s mother in the 1942 Disney classic, and finally by Christopher Lloyd’s pop-eyed Judge Doom.

Ditching the contemporary setting of its source material, Who Framed Roger Rabbit? takes place in Hollywood, 1947, where cartoon characters (“toons”) co-exist with humans. Bob Hoskins plays the toon-hating Valiant, who reluctantly teams up with Roger after the latter is implicated in the murder of Marvin Acme. The unlikely pair’s investigations lead them to Toontown, where they uncover a conspiracy to demolish this animated region and build a freeway in its place. Screenwriters Jeffrey Price and Peter S. Seaman found inspiration for this plot in Roman Polanski’s 1974 thriller Chinatown. Several film noirs of the 1940s were also referenced, with Hoskins modelling his character on Humphrey Bogart.

Numerous famous cartoon characters make cameos, including Mickey Mouse, Daffy Duck, Donald Duck, Tweetie Pie and Betty Boop, with executive producer Steven Spielberg pulling his weight behind the scenes to accomplish the historic meeting of competing studios’ properties.

Robert Zemeckis pitched to direct Roger Rabbit in 1982, but his films’ poor box office up to that point put him out of the running. Terry Gilliam was in the frame for a time, while the likes of Harrison Ford, Chevvy Chase and Bill Murray were considered for the lead. Spielberg’s Amblin Entertainment joined the project in 1985, but the projected budget of $50 million was deemed too big to green-light. Meanwhile, Zemeckis’s Back to the Future made him far more bankable with the result that he signed on to direct Roger Rabbit that same year, albeit with a reduced budget of $30 million. Ironically, the film would go over schedule and wind up costing just over its original price tag.

The animation was directed by Richard Williams, otherwise best known for his title sequences for the Pink Panther films. Williams refused to work in LA, forcing the production to shoot primarily in England. While Williams and his 326-strong team set up in Camden Town, Zemeckis and company filmed the interiors at Elstree, with warehouses and bus depots in Shepherd’s Bush standing in for exteriors of Hollywood studios and backlots.

Some of the sets, including the Ink & Paint Club where Jessica is memorably introduced, were raised 10ft off the floor to accommodate puppeteers. Although no puppets are seen in the finished film, whenever a toon had to hold a real object it was either mounted on a rod coming up through the floor, marionetted on wires from above, or manipulated by a robotic arm.

Rehearsals were conducted using a dummy of Roger, or with voice artist Charles Fleischer bedecked in a rabbit suit – standing in. Hoskins even studied his three-year-old daughter’s antics with an imaginary friend to prepare for the challenge of acting to nothing.

Creating the film’s 55 minutes of animation took two years. The live-action footage was printed as a series of enlarged black-and-white frames over which a cel (sheet of transparent acetate) could be placed for the animator to draw on. 82,080 frames were generated in this way, every single one by hand.

To better blend the animated characters with the live backgrounds, Industrial Light and Magic composited layers of shading and shadows. The sparkling sequins on Jessica’s dress were achieved by shining a light through a plastic bag which had holes scratched in it.

The finished film attracted a degree of controversy, not least from the top brass at Disney. It’s easy to see why the family-friendly company would object to the over-sexualisation of Jessica, or to Valiant’s constant drinking and even bumming a cigarette off children at one point. But Zemeckis’s deal gave him final cut, so the compromise was to release the unaltered film under Disney’s Touchstone label.

The result was the second highest grossing film of 1988 and critical acclaim, with an impressive 97% on Rotten Tomatoes and four Academy Awards.

Like many articles on my blog, this one first appeared on RedShark News.

“Who Framed Roger Rabbit” Retrospective

How to Shoot Drama with Two Cameras

Shooting on one camera, getting the lighting and framing perfect for just one angle at a time, used to be a hallmark of quality in film and television. Nowadays many drama DPs are expected to achieve comparable quality while photographing two or more angles simultaneously, with all the attendant problems of framing out booms, lights and other cameras.

So what is the best way to tackle multi-camera shooting? Let’s consider a few approaches.

Photo: Brooks Patrick Allen


1. Two sizes

The most straightforward use of a B camera is to put it close to the A camera and point it in the same direction, just with a different lens. One disadvantage is that you’re sacrificing the ability to massage the lighting for the closer shot, perhaps bringing in a bounce board or diffusion frame that would flatter the actor a little more, but which would encroach on the wider frame.

Another limitation is that the talent’s eye-line will necessarily be further off axis on one of the shots. Typically this will be the wider camera, perhaps on a mid-shot including the shoulder of the foreground actor, while the other camera is tighter in terms of both framing and eye-line, lensing a close-up through the gap between the shoulder and the first camera.

The sound department must also be considered, especially if one camera is very wide and another is tight. Can the boom get close enough to capture the kind of close-miked audio required for the tight shot without entering the wide frame?

Some TV series are solving this problem by routinely painting out the boom in the wider shots. This is usually easy enough in a lock-off, but camera movement will complicate things. It’s an approach that needs to be signed off by all the major players beforehand, otherwise you’re going to get some panicked calls from a producer viewing the dailies.


2. Cross-shooting

This means filming a shot-reverse simultaneously: over character A’s shoulder onto character B, and over character B’s shoulder onto character A. This approach is an editor’s delight because there is no danger that the performance energies will be different when they cut from one person to the other, nor that arm or head positions will throw up continuity errors.

Keeping the cameras out of each other’s frames is of course an issue, one usually handled by backing them off and choosing tighter lenses. (Long lenses are an unavoidable side effect of multi-camera cinematography.) Two booms are required, and keeping their shadows out is four times as difficult.

Lighting can take twice as long too, since you now have two cast members who need to look their best, and you need to maintain mood, shape and contrast in the light in both directions simultaneously. Softer and toppier light is usually called for.

The performances in certain types of scene – comedy with a degree of improvisation, for example – really benefit from cross-shooting, but it’s by far the most technically challenging approach.


3. Inserts

Grabbing inserts, like close-ups of people’s hands dealing with props, is a quick and simple way of getting some use out of a second camera. Lighting on such shots is often not so critical, they don’t need to be close-miked, and it’s no hassle to shoot them at the same time as a two-shot or single.

There is a limit to how many inserts a scene needs though, so sooner or later you’ll have to find something else to do with the camera before the producer starts wondering what they’re paying all that extra money for.


4. Splinter unit

The idea of sending B camera off to get something completely separate from what A camera is doing can often appeal. This is fine for GVs (general views), establishing shots of the outside of buildings, cutaways of sunsets and so on, but anything much more complicated is really getting into the realm of a second unit.

Does the set or location in front of camera need to be dressed? Then someone from the art department needs to be present. Is it a pick-up of an actor? Well, then you’re talking about hair, make-up, costume, continuity, sound…

Photo: Brooks Patrick Allen

With the extra problems that a second camera throws up, it’s a fallacy to think it will always speed up your shoot; the opposite can easily happen. An experienced crew and a clear plan worked out by the director, DP, operators and gaffer is definitely required. However, when it’s done well, it’s a great way to increase your coverage and give your editor more options.

How to Shoot Drama with Two Cameras

6 Tips for Virtual Production

Part of the volume at ARRI Rental in Uxbridge, with the ceiling panel temporarily lowered

Virtual production technically covers a number of things, but what people normally mean by it is shooting on an LED volume. This is a stage where the walls are giant LED screens displaying real-time backgrounds for photographing the talent in front of. The background may be a simple 2D plate shot from a moving vehicle, for a scene inside a car, or a more elaborate set of plates shot with a 360° rig.

The most advanced set-ups do not use filmed backgrounds at all, but instead use 3D virtual environments rendered in real time by a gaming engine like Unreal. A motion-tracking system monitors the position of the camera within the volume and ensures that the proper perspective and parallax is displayed on the screens. Furthermore, the screens are bright enough that they provide most or all of the illumination needed on the talent in a very realistic way.

I have never done any virtual production myself, but earlier this year I was fortunate enough to interview some DPs who have, for British Cinematographer article. Here are some tips about VP shooting which I learnt from these pioneers.


1. Shoot large format

An ARRI Alexa Mini LF rigged with Mo-Sys for tracking its position within the volume

To prevent a moiré effect from the LED pixels, the screens need to be out of focus. Choosing an LF camera, with their shallower depth of field, makes this easier to accomplish. The Alexa Mini LF seems to be a popular choice, but the Sony Venice evidently works well too.


2. Keep your distance

To maintain the illusion, neither the talent nor the camera should get too close to the screens. A rule of thumb is that the minimum distance in metres should be no less than the pixel pitch of the screens. (The pixel pitch is the distance in millimetres between the centre of one pixel and the centre of the next.) So for a screen of 2.3mm pixel pitch, keep everything at least 2.3m away.


3. Tie it all together

Several DPs have found that the real foreground and the virtual background fit together more seamlessly if haze or a diffusion filter are used. This makes sense because both soften the image, blending light from nearby elements of the frame together. Other in-camera effects like rain (if the screens are rated weatherproof) and lens flares would also help.


4. Surround yourself

The back of ARRI’s main screen, composed of ROE LED panels

The most convincing LED volumes have screens surrounding the talent, perhaps 270° worth, and an overhead screen as well. Although typically only one of these screens will be of a high enough resolution to shoot towards, the others are important because they shed interactive light on the talent, making them really seem like they’re in the correct environment.


5. Match the lighting

If you need to supplement the light, use a colour meter to measure the ambience coming from the screens, then dial that temperature into an LED fixture. If you don’t have a colour meter you should conduct tests beforehand, as what matches to the eye may not necessarily match on camera.


6. Avoid fast camera moves

Behind the scenes at the ARRI volume, built in partnership with Creative Technology

It takes a huge amount of processing power to render a virtual background in real time, so there will always be a lag. The Mandalorian works around this by shooting in a very classical style (which fits the Star Wars universe perfectly), with dolly moves and jibs rather than a lot of handheld shots. The faster the camera moves, the more the delay in the background will be noticeable. For the same reason, high frame rates are not recommended, but as processing power increases, these restrictions will undoubtedly fall away.

6 Tips for Virtual Production