Lighting Techniques #4: Health Bounce

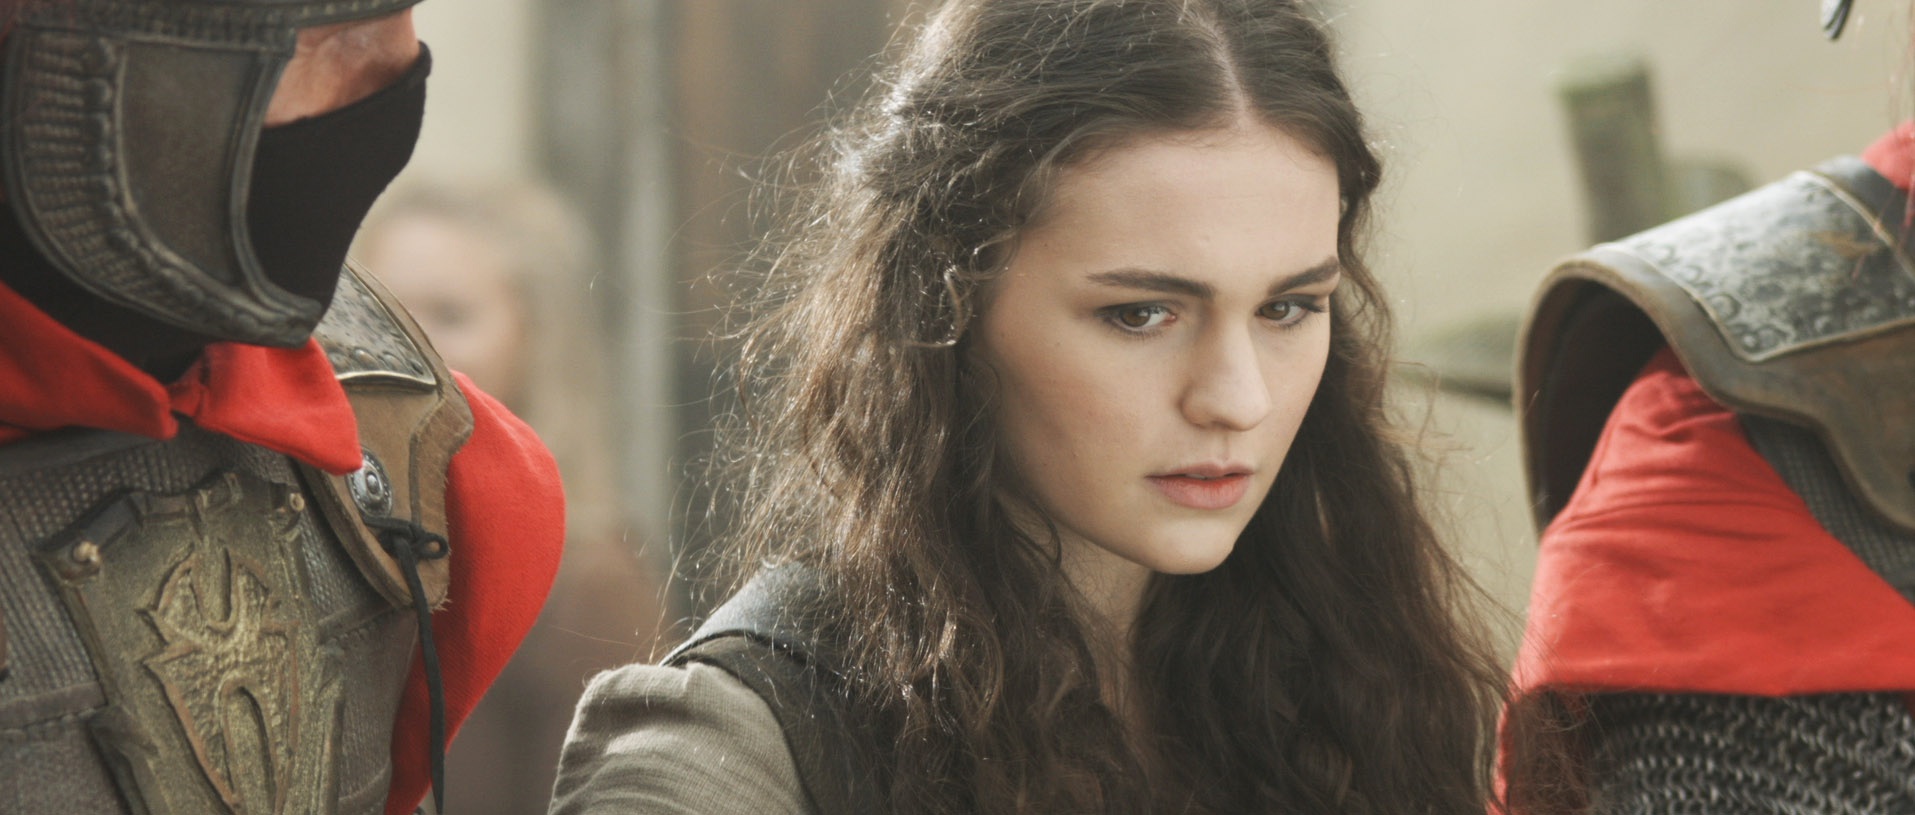
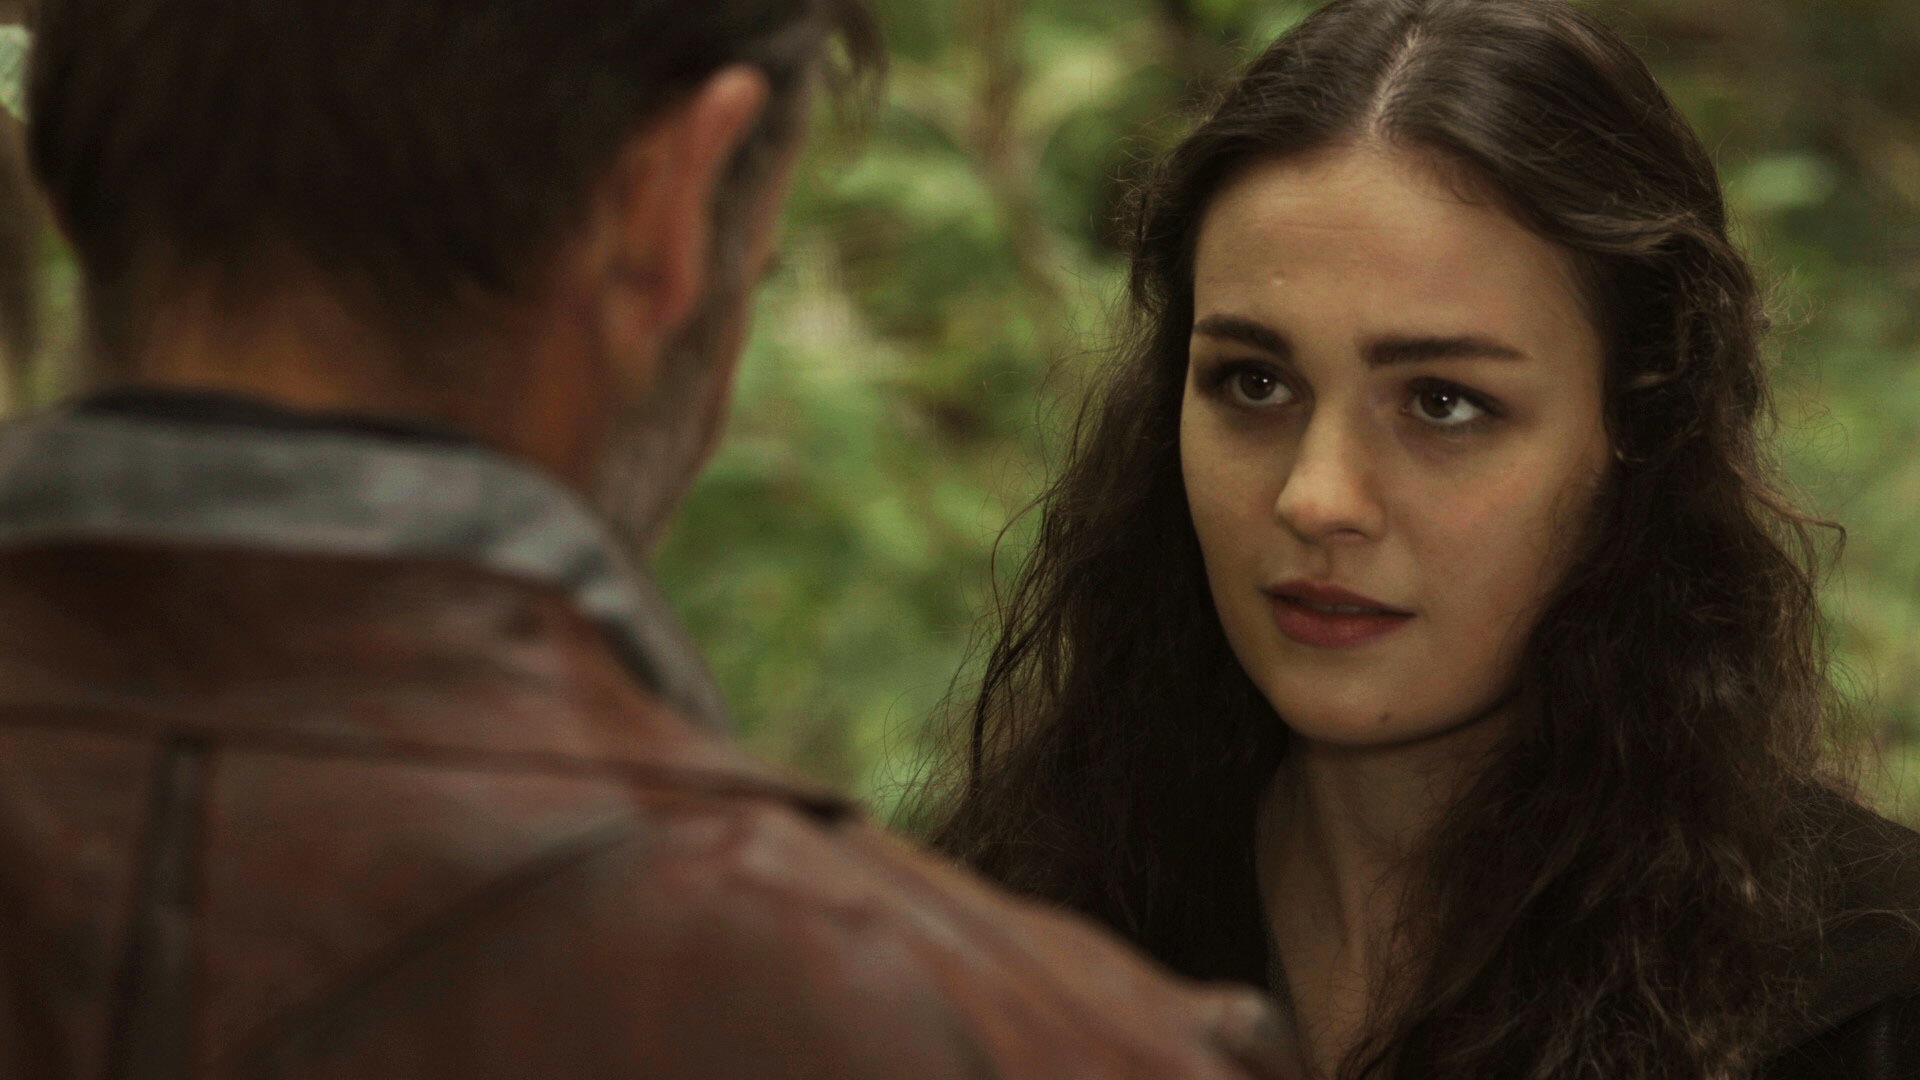
This is a really simple technique but incredibly effective. All you do is put a reflector or a piece of polyboard under the talent’s face. Here’s an example frame from Ren starring Sophie Skelton. This was shot on an overcast day using a 2.5K HMI as backlight.

image

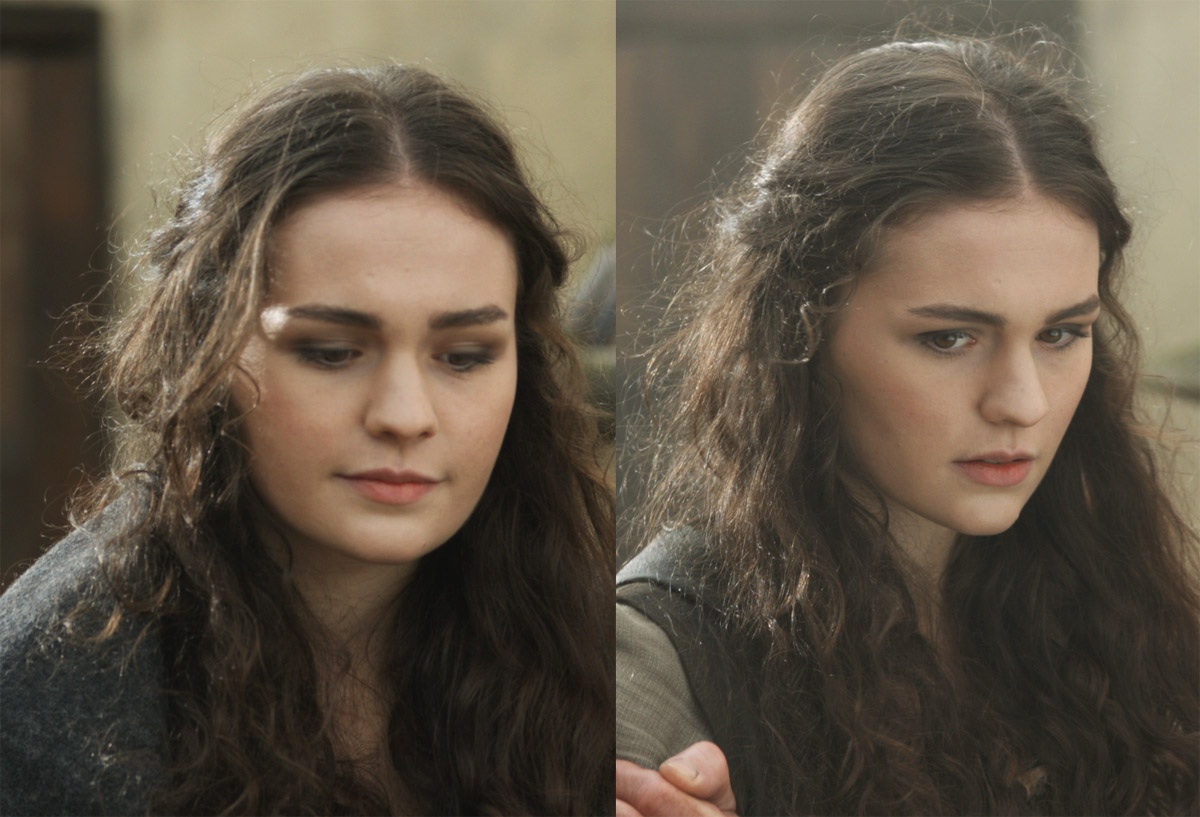
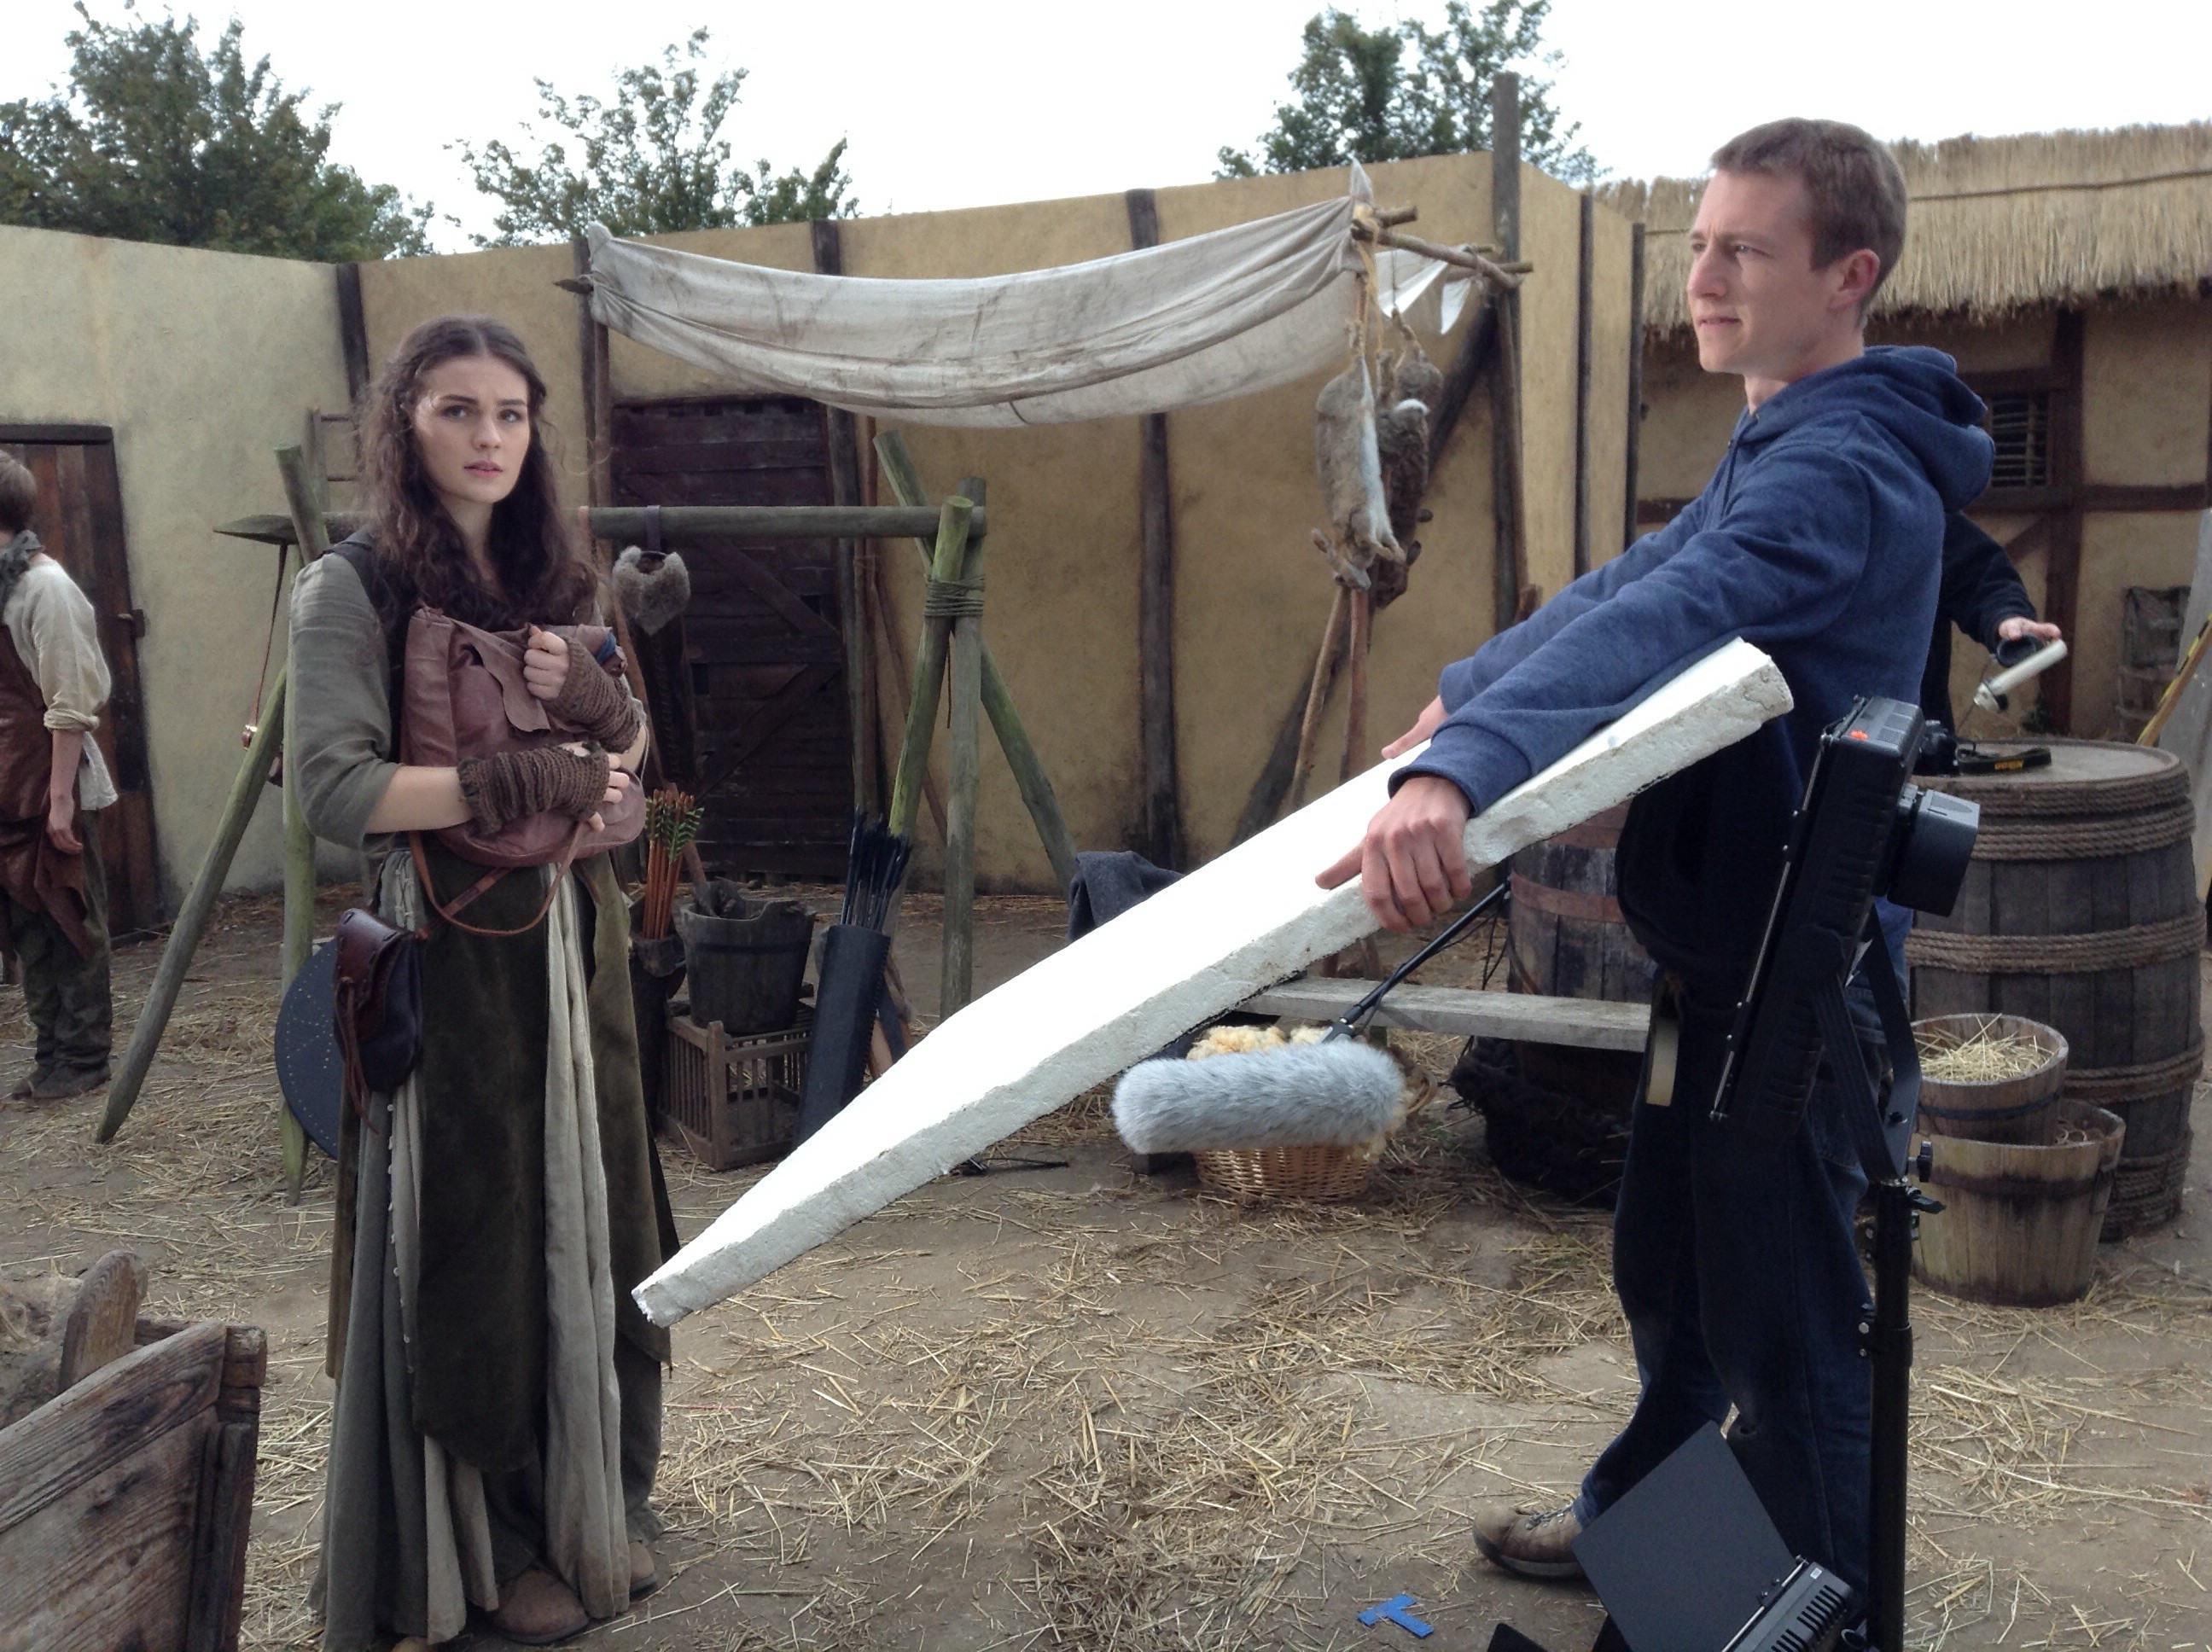
Sophie is very beautiful and the make-up (by Becca Youngs) is great, but the icing on the cake is a simple piece of polyboard out of the bottom of frame. It subtly lifts the shadows on her face and puts a ‘sparkle’ in her eye. That sparkle is actually the poly’s reflection, but it’s amazing how much life and energy that gives. I’m calling this technique the Health Bounce because it’s used a lot in ads for health and beauty products.

Here’s a side-by-side comparison without (left) and with (right) the poly.

image

The human brow has evolved to protect our eyes from sunlight, amongst other things. In an exterior scene, particularly on an overcast day, the light comes predominantly from above, rendering the forehead and the nose the brightest areas, and throwing the eye sockets into shadow. This is a challenge for cinematographers. So much of an actor’s performance is in the eyes – it’s essential to get light into the eye sockets to capture every nuance of that performance. A bounce board underneath the face helps do that.

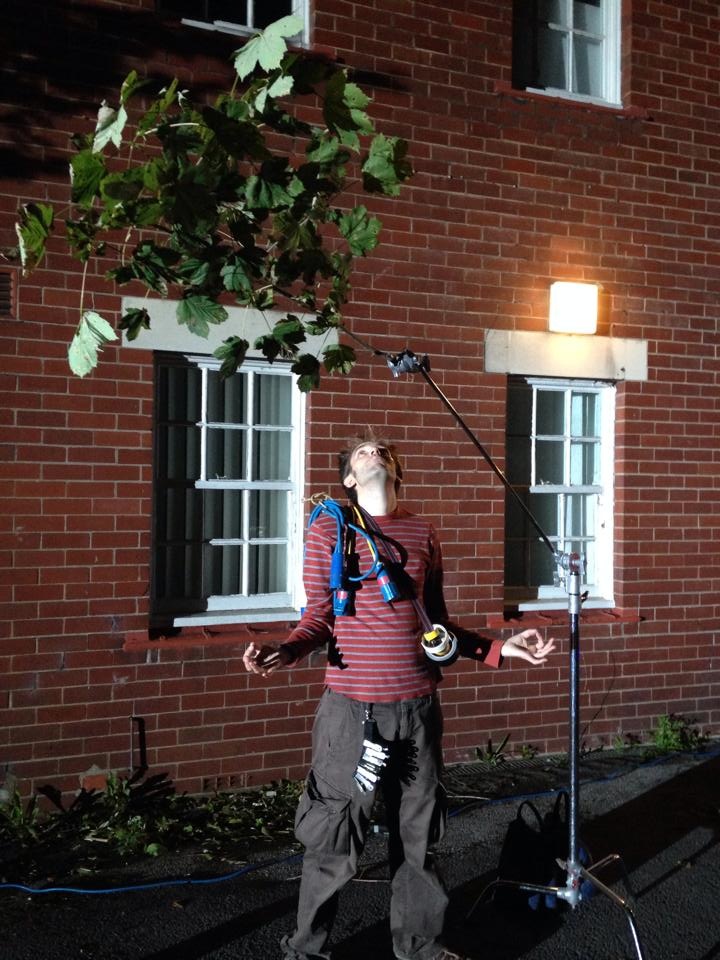
Colin Smith holds the polyboard for the above shot of Sophie
Lighting Techniques #4: Health Bounce

Ren: Night for Day

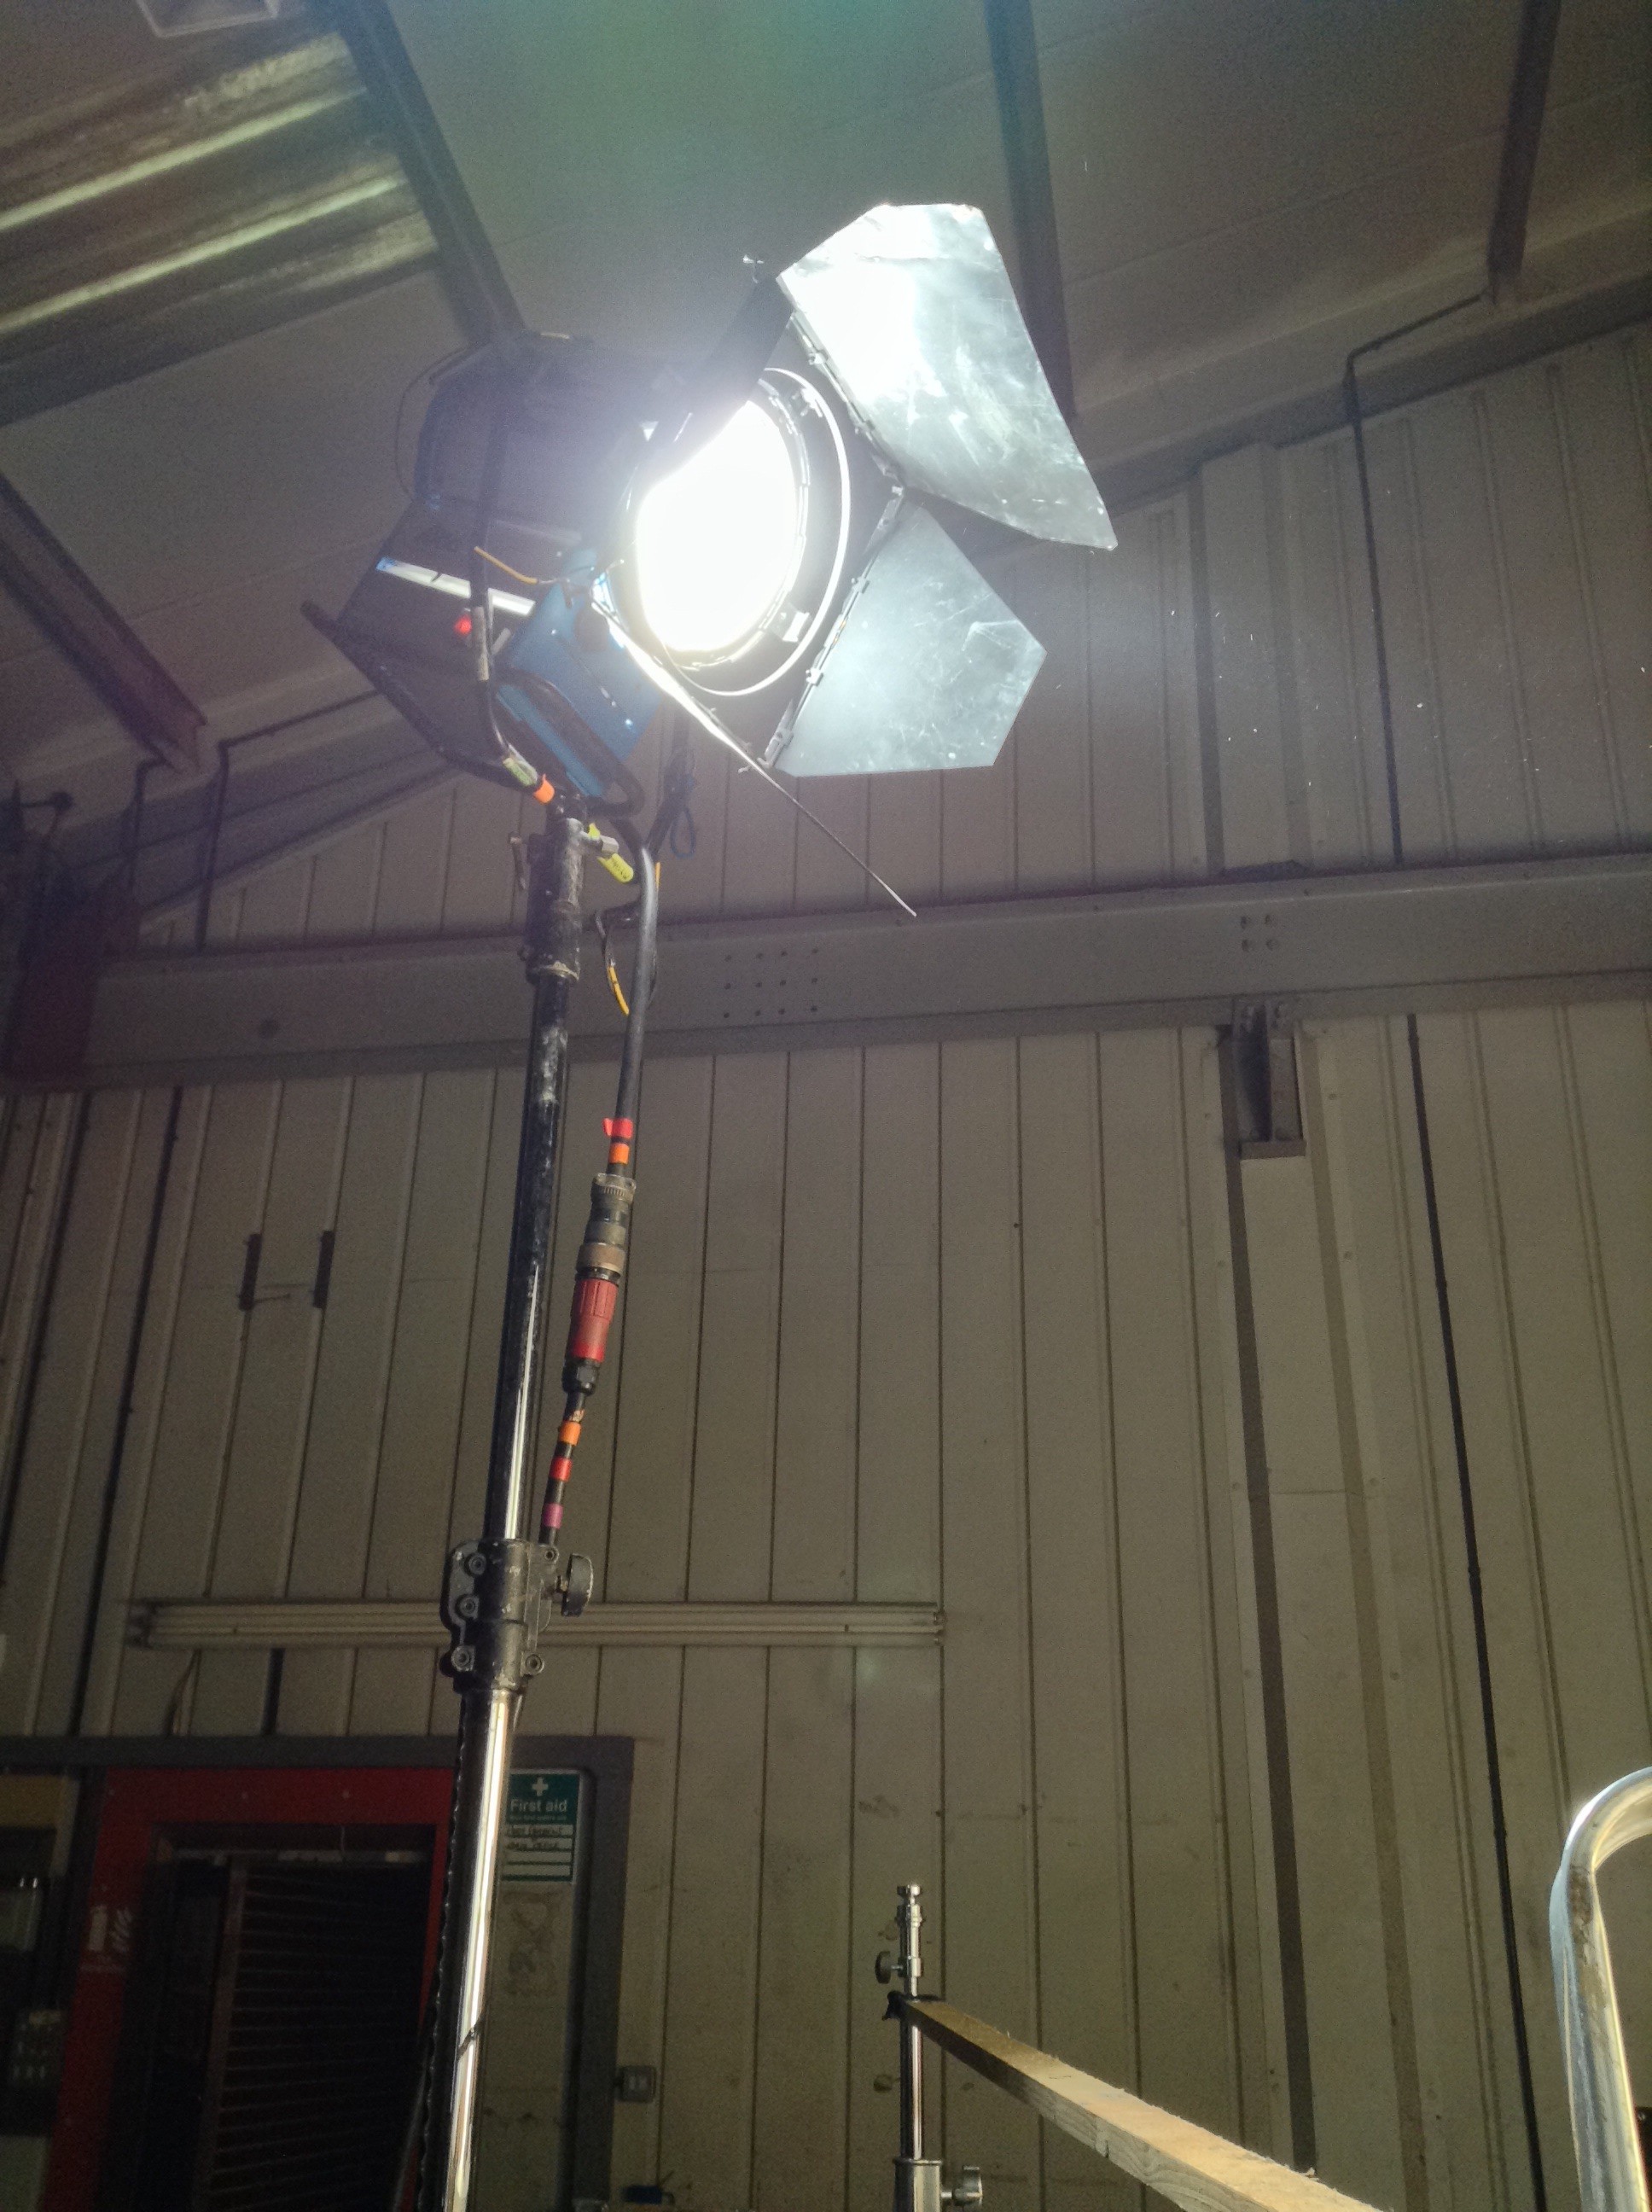
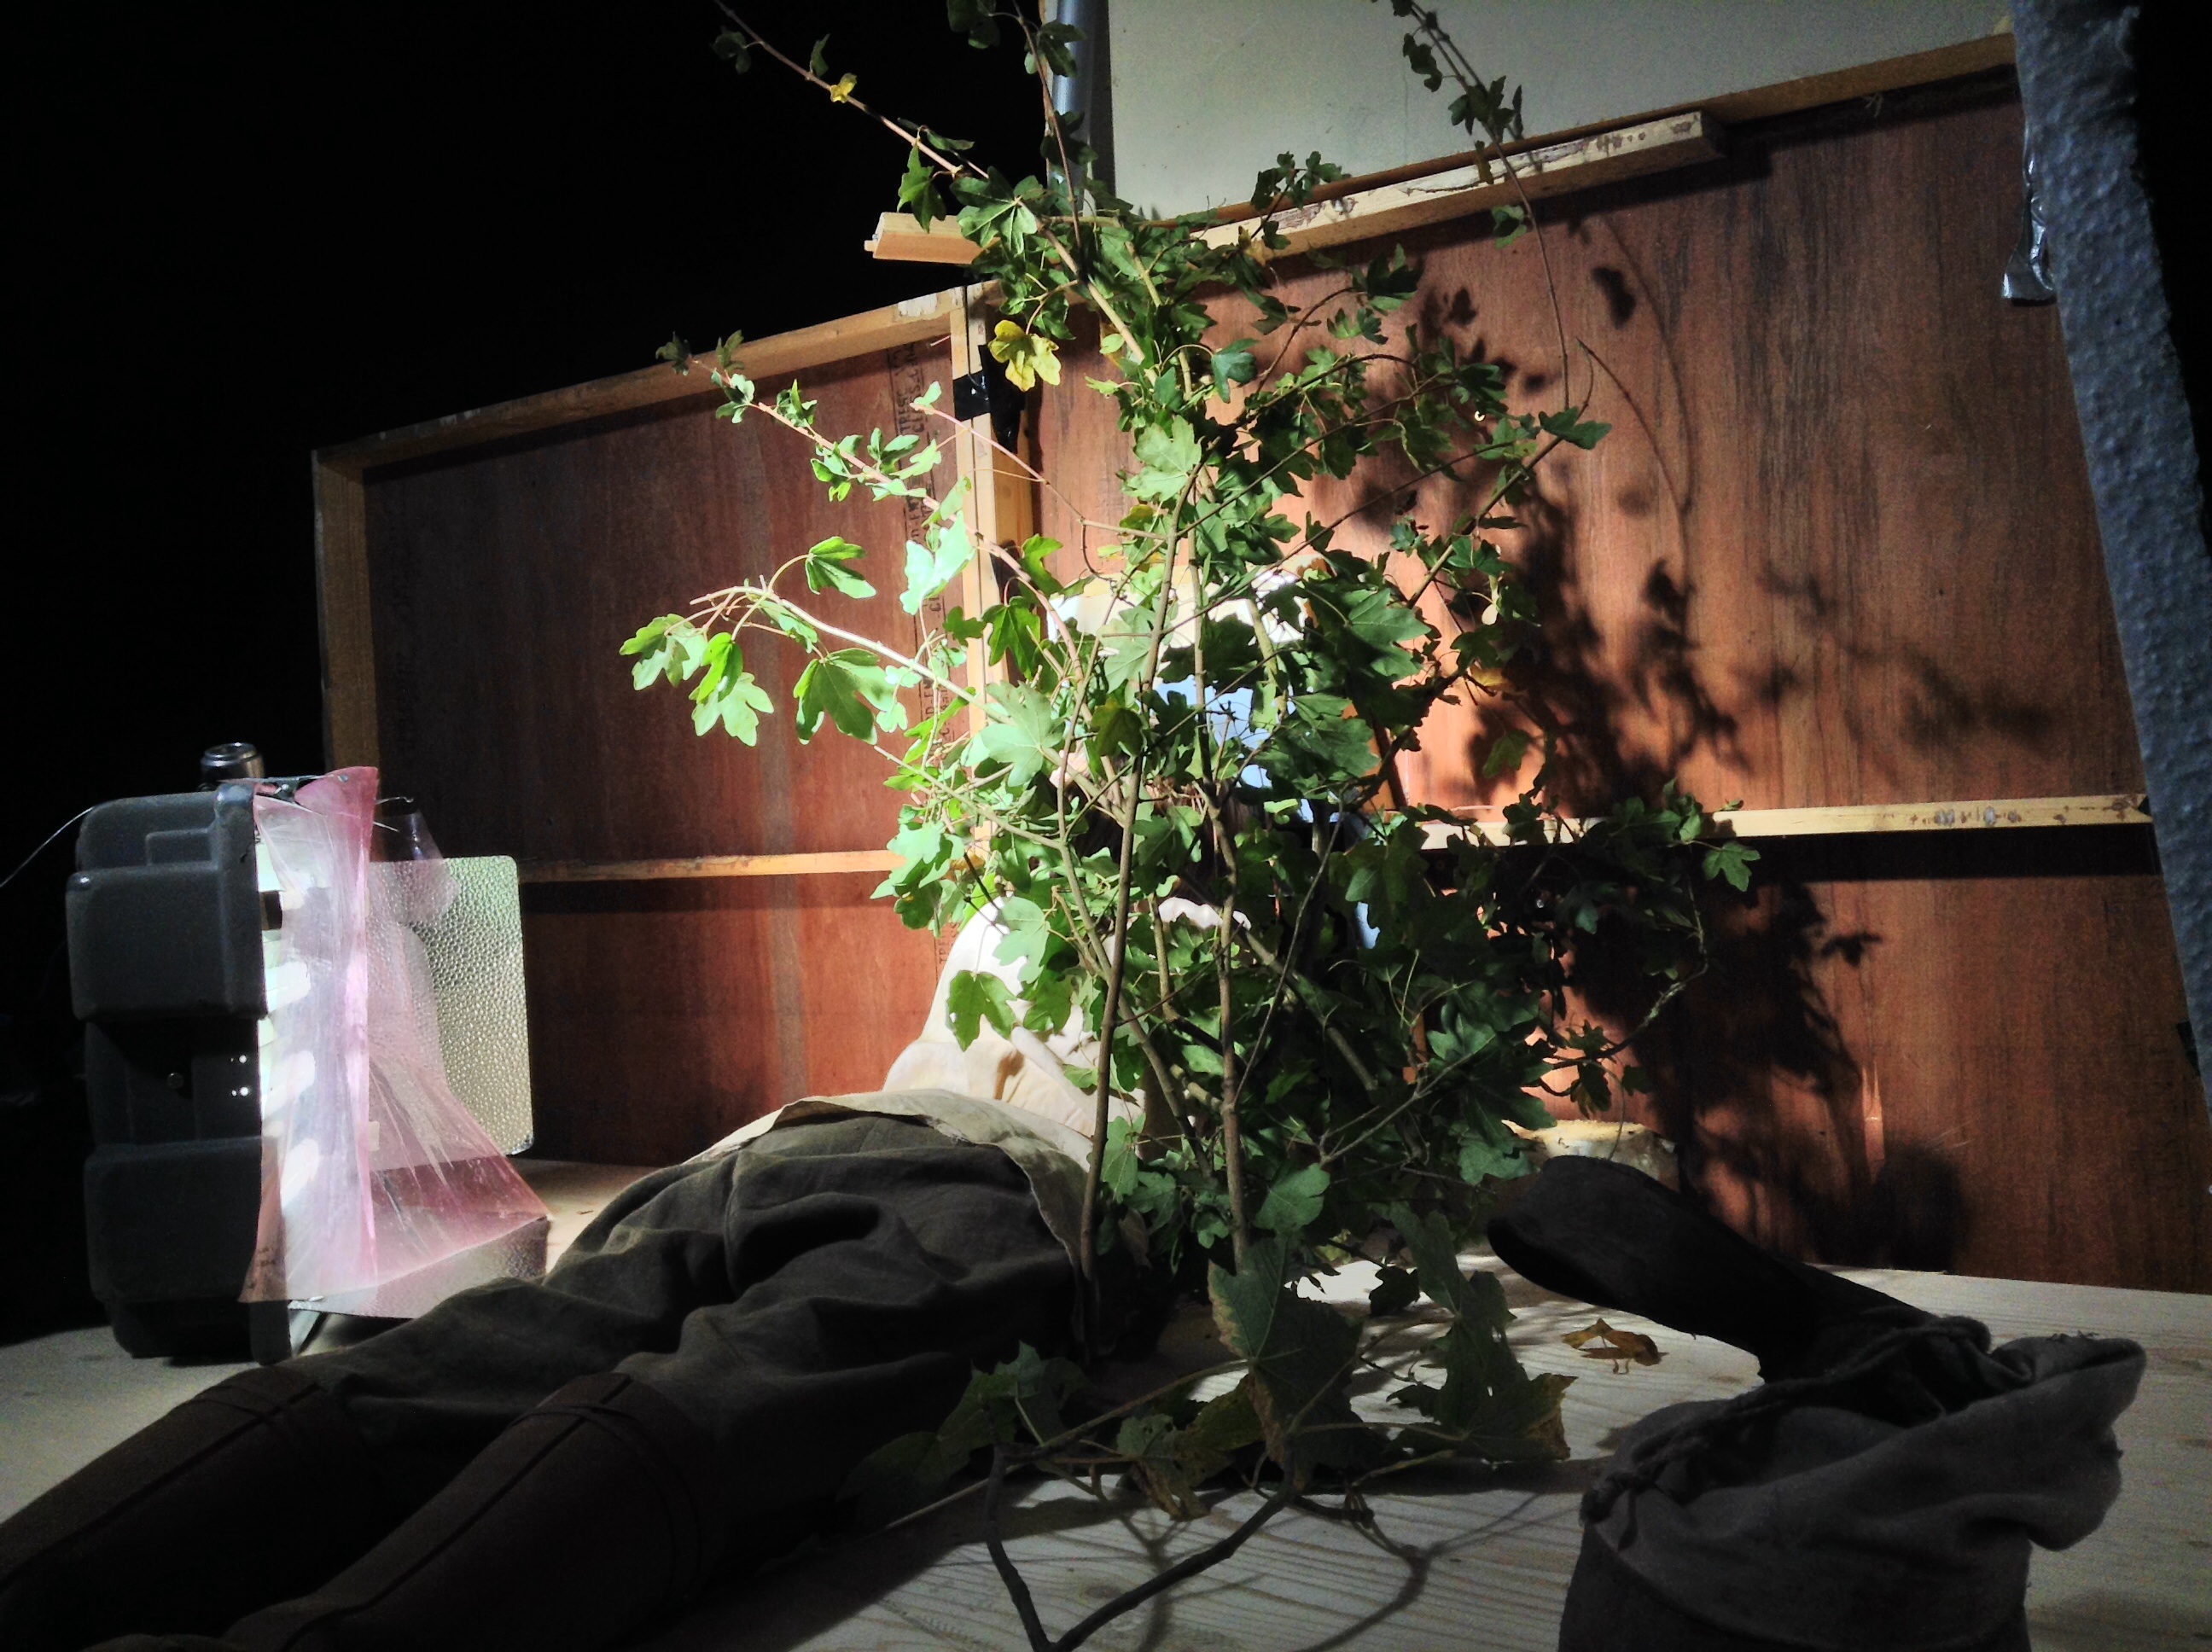
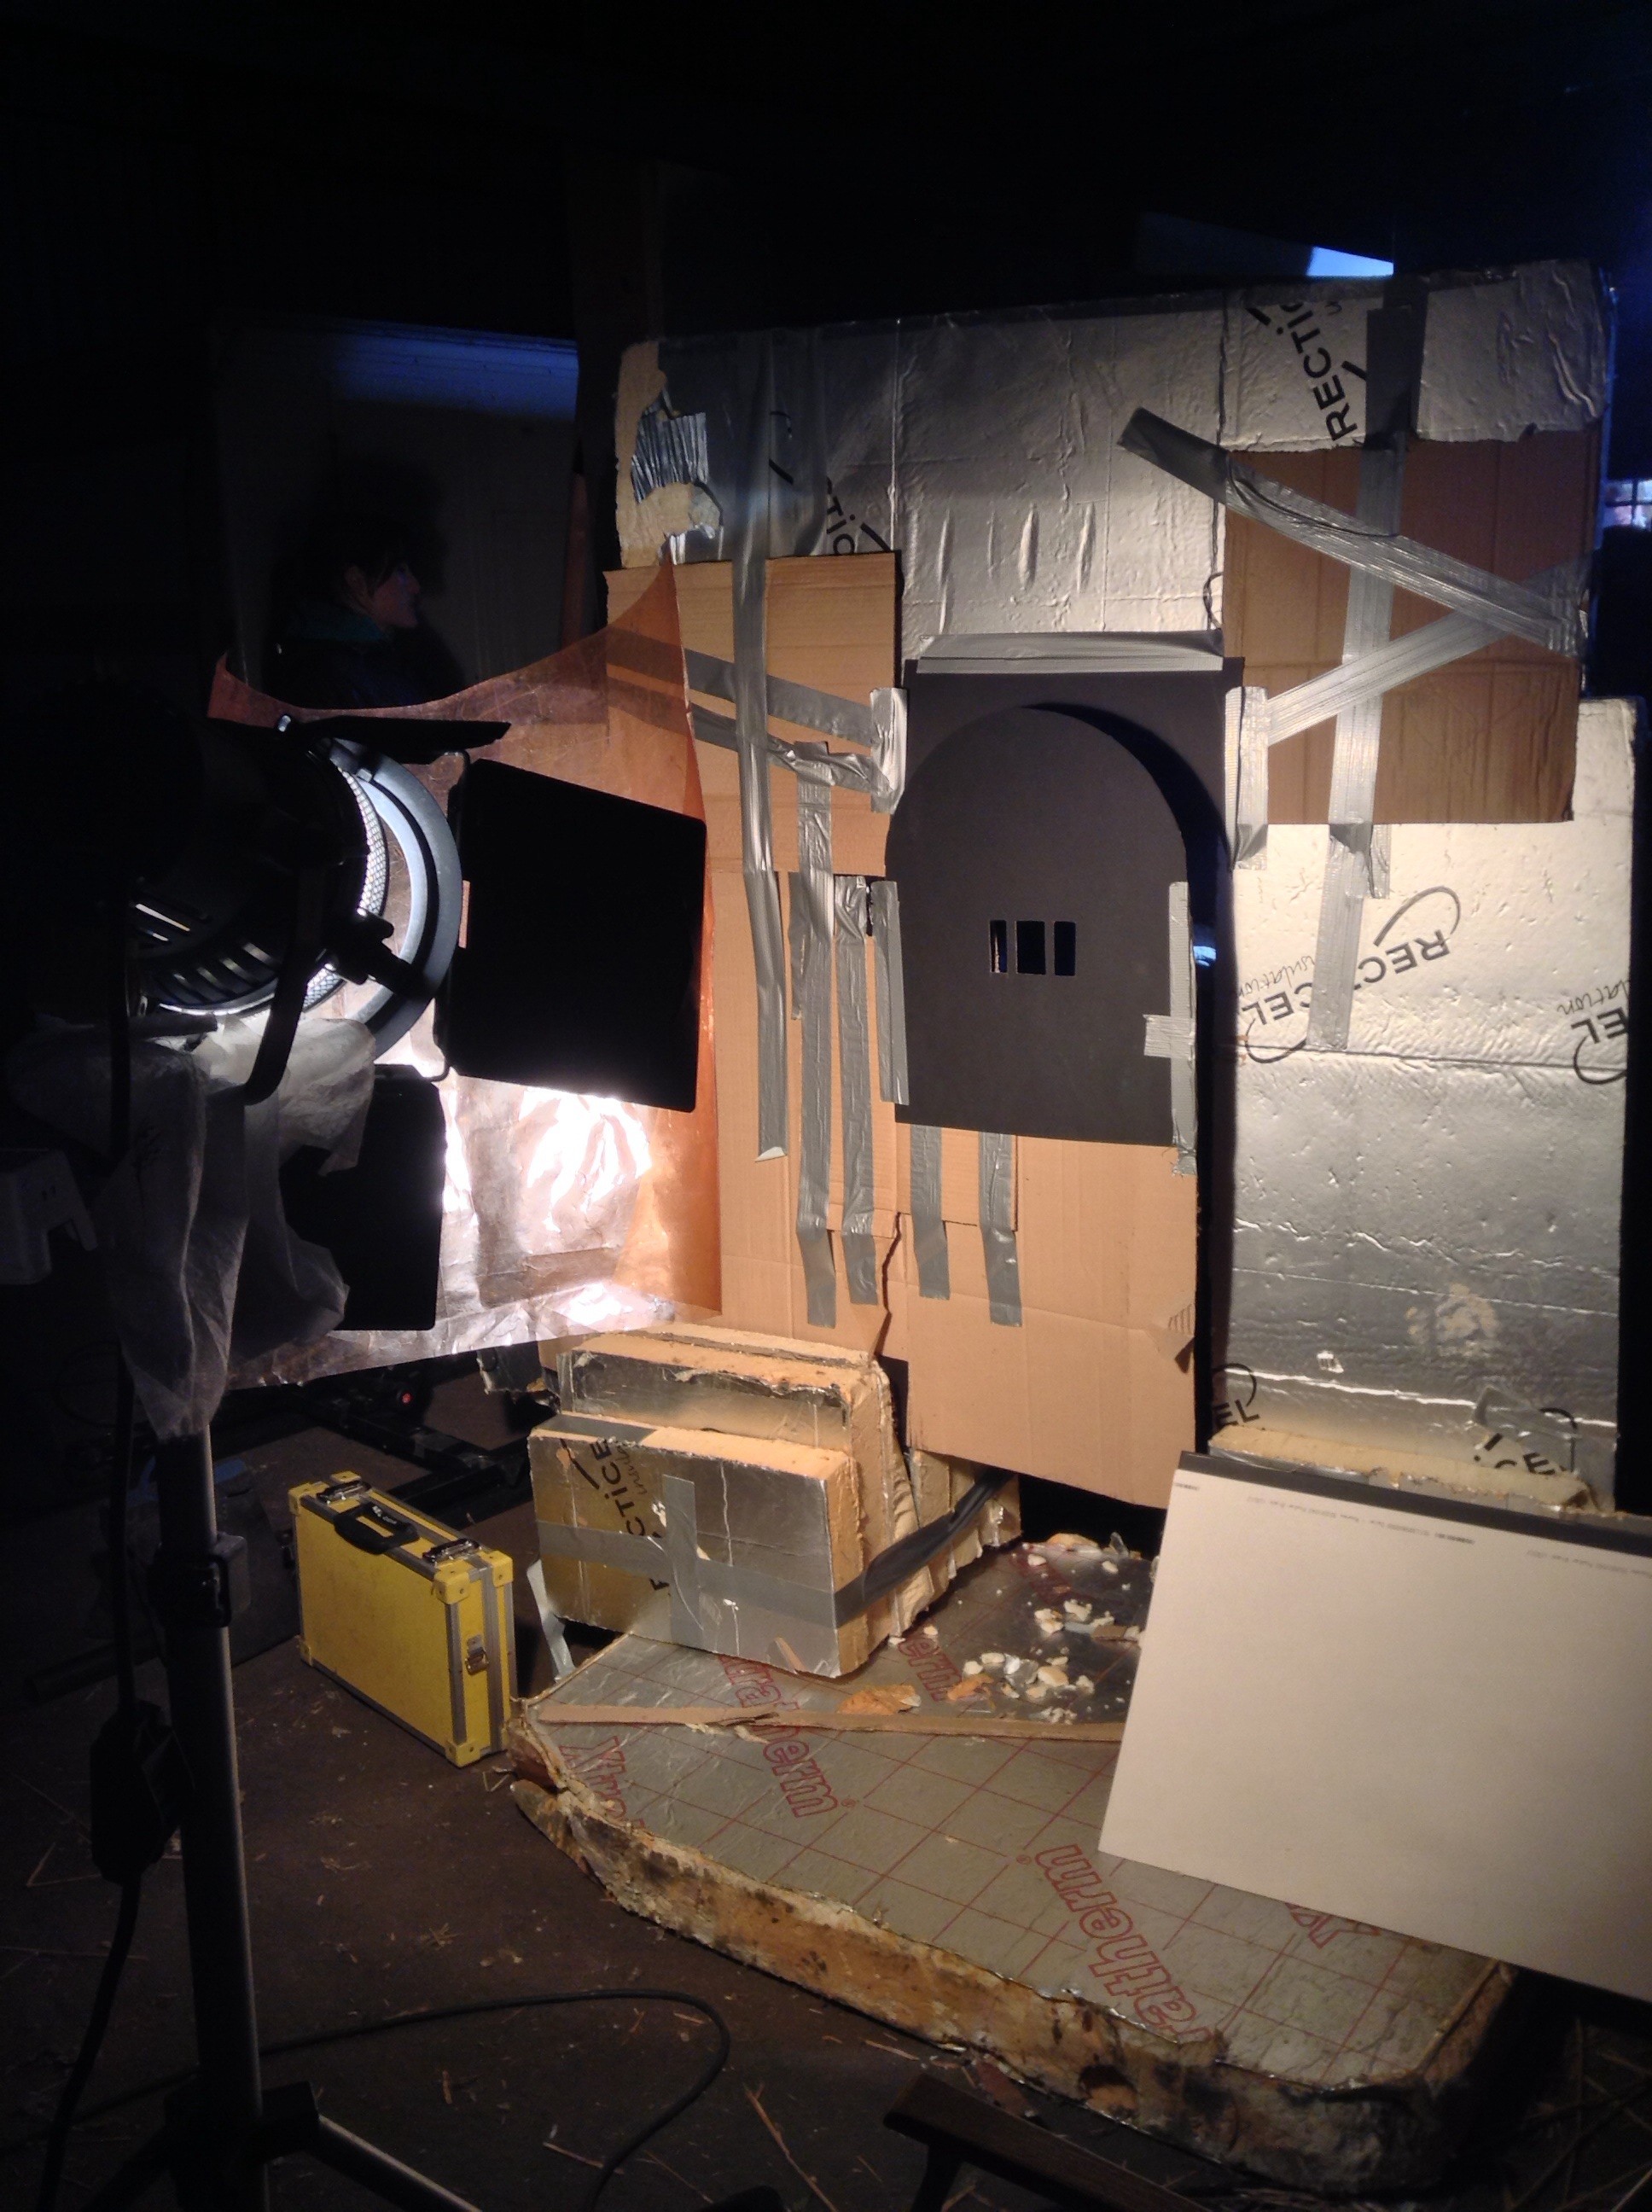
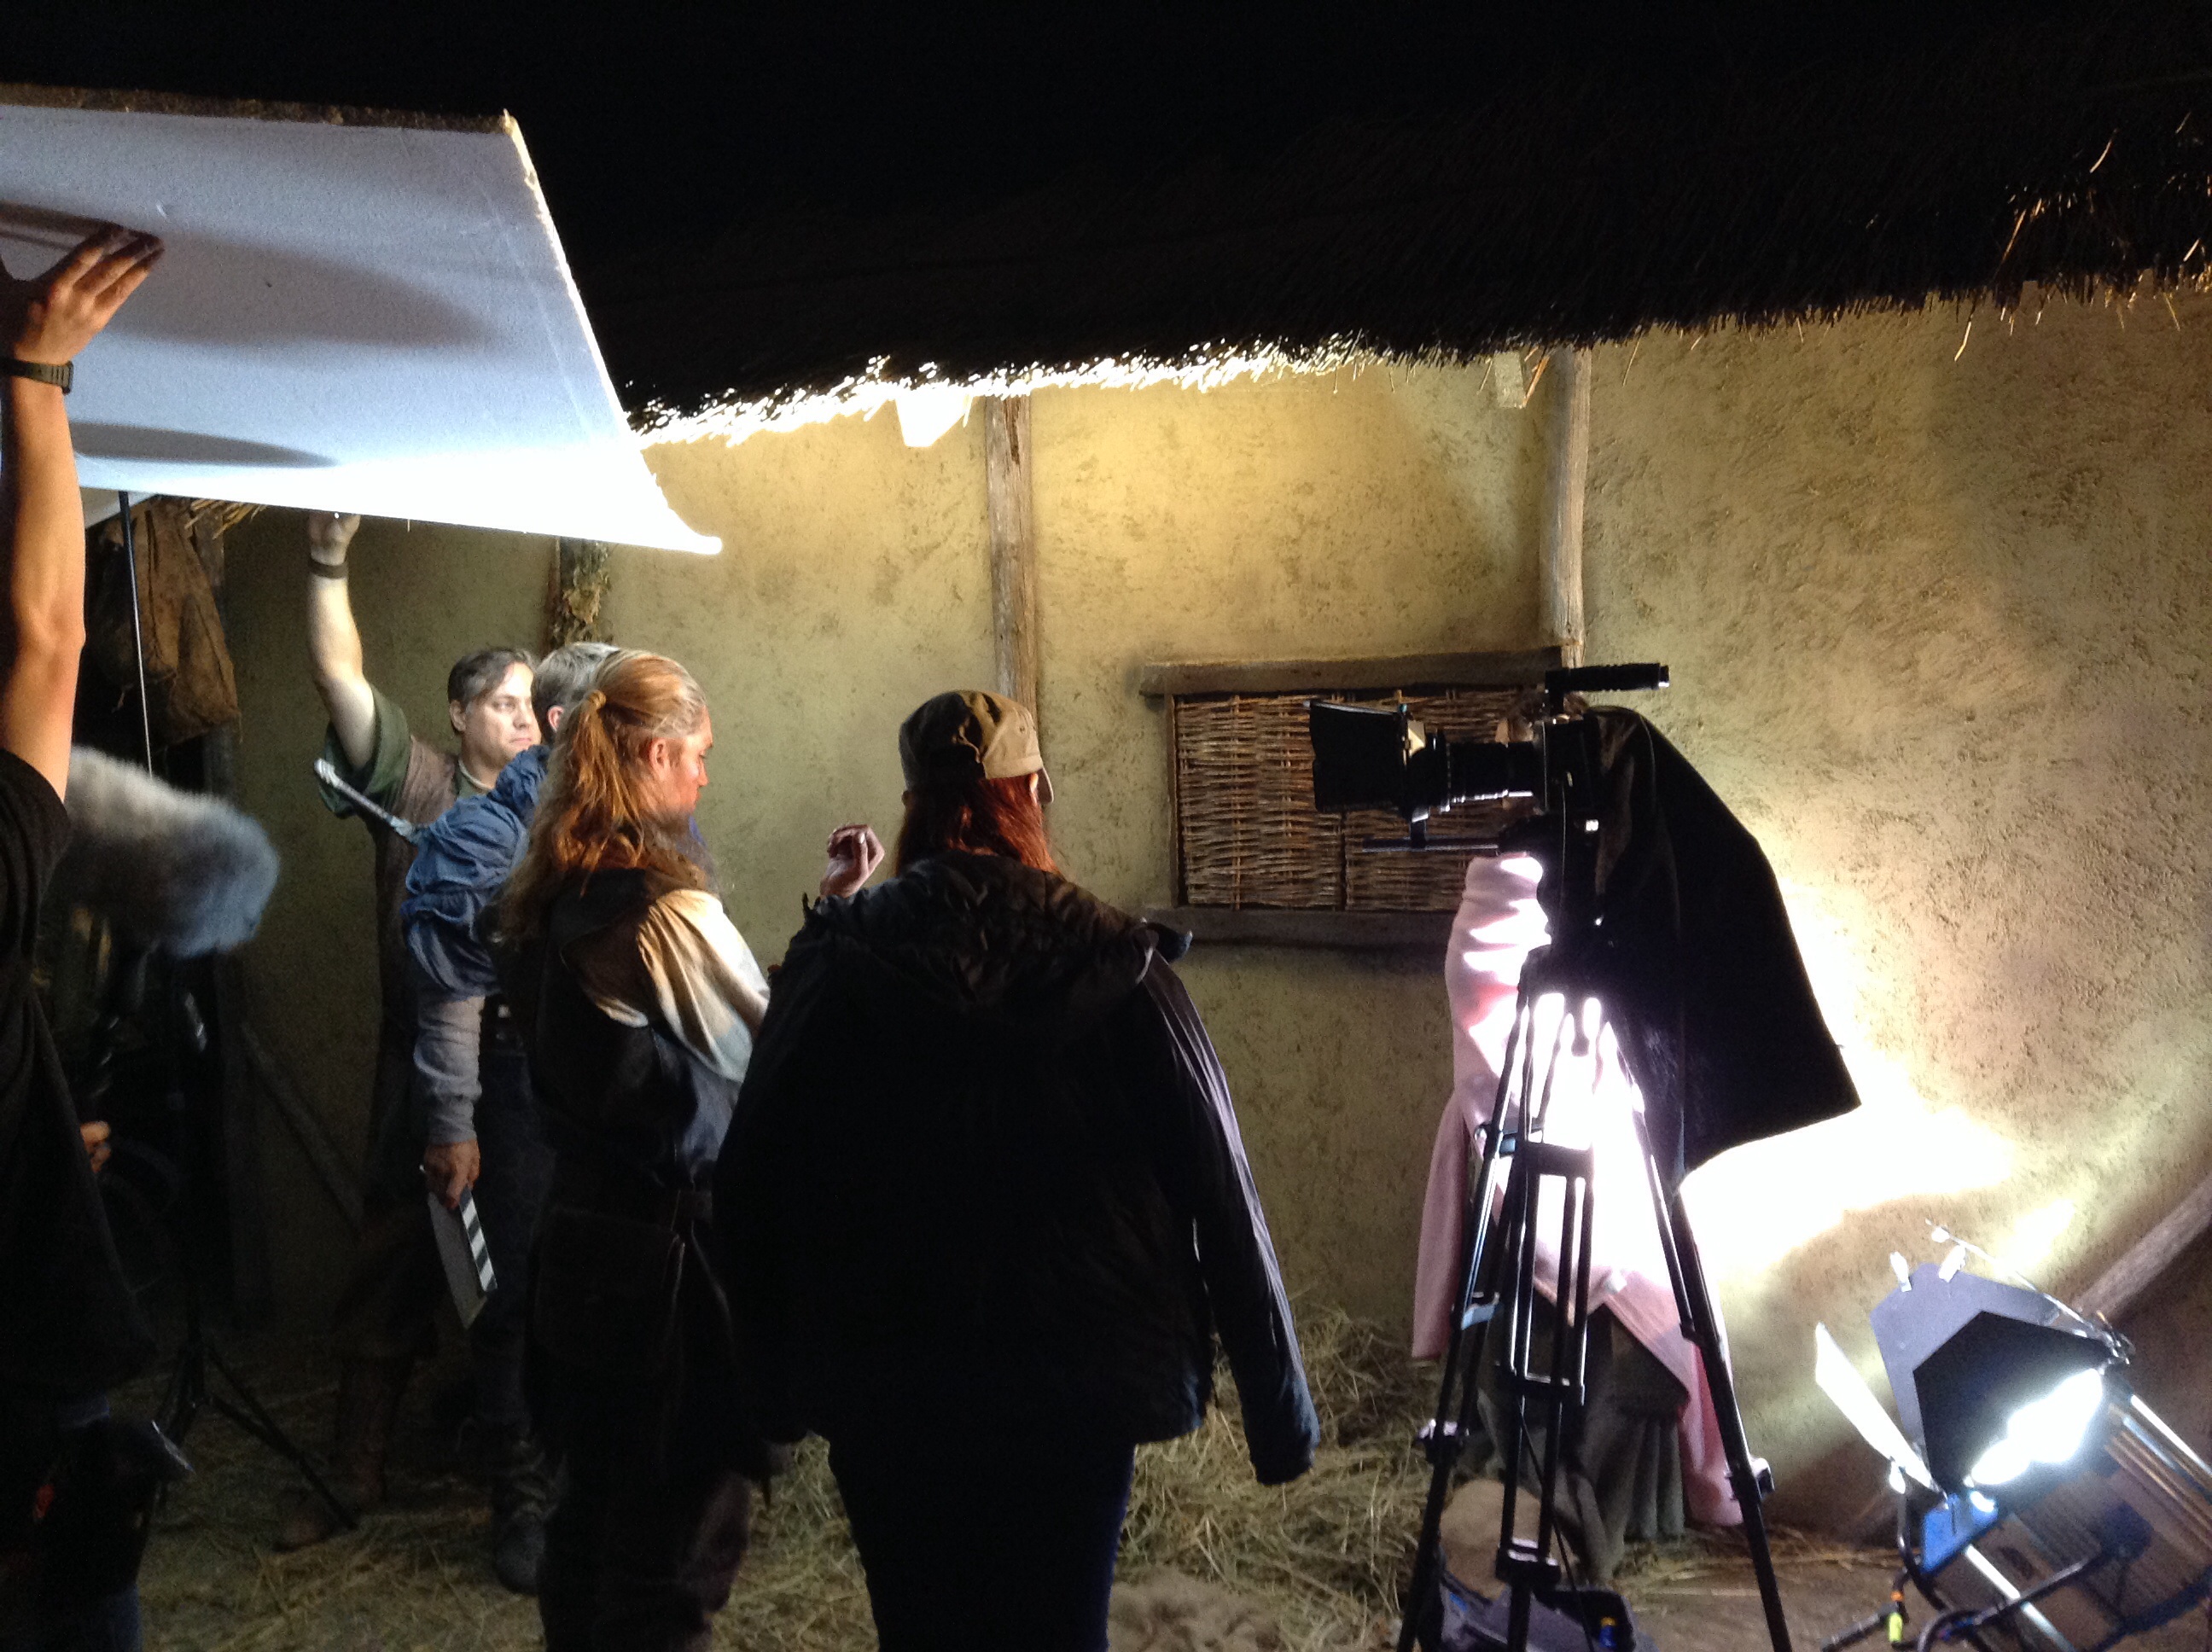
The 2.5K HMI can be seen here in the lower right, and the fake sky on the top right.

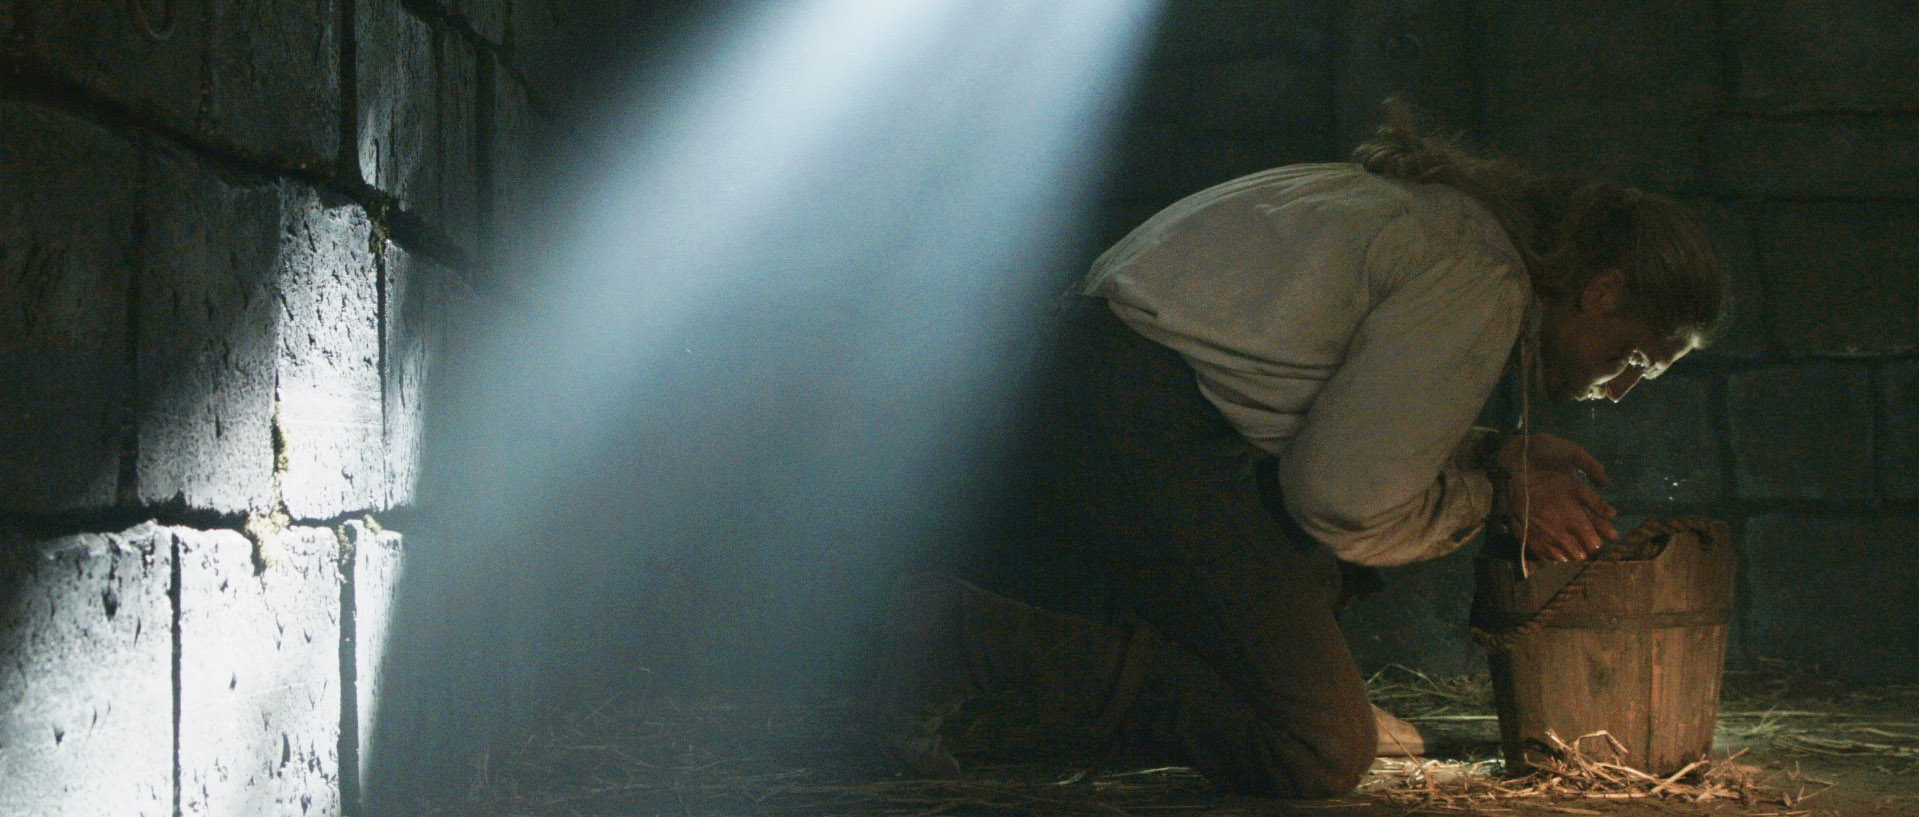
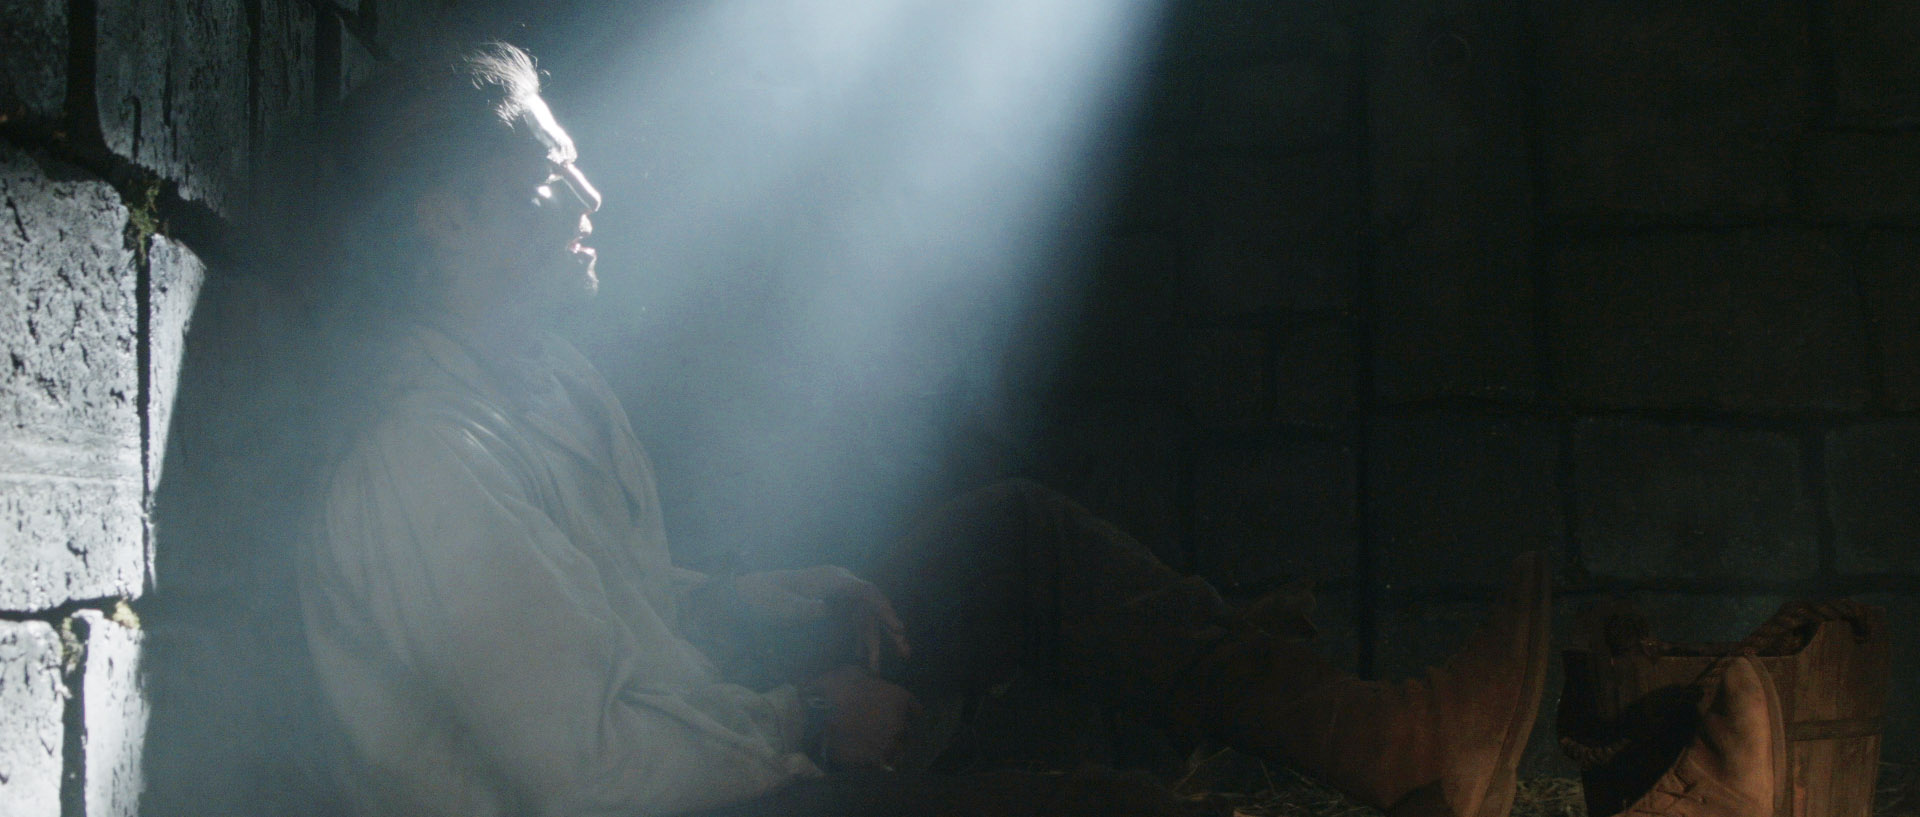
It had to happen sooner or later. On an ambitious series like Ren, with a tight schedule, it was inevitable that we would at some point have to shoot a daylight shot after dark. So I’d given it some thought beforehand. It seemed to me like soft toplight, simulating sky, was what was needed. I figured that a 2.5K HMI fired into an overhead 6×6 silk would do the job, and that’s one of the reasons I pushed production to hire a 2.5 despite the very limited budget.

The moment came yesterday when we got into a time crunch with one of our lead actors (Duran Fulton Brown) and had to complete a scene despite the natural light running out. Fortunately the scene was scripted as evening and we had shot coverage at magic hour and in twilight with an HMI “sunset”. So we weren’t trying to match full-on daytime.

Colin (left) helps hold up the roof. Rich (right) does not. Duran Fulton Brown (centre) plays Hunter.

We used a redhead for the direct “setting sun” light. We had a silk but no sturdy stands to rig it on, so we built a quick roof out of poly and Celotex (matte silver bounce), holding it up with lightweight stands and crew members! We put the 2.5K on the floor in the corner and fired it into this ceiling. The final touch was to fire an LED panel at the back wall to fill in the black shadows that the redhead was casting.

Check out the final shot below. It looks a lot less convincing to me now than it did at the time, but I believe the concept was sound. We just needed more stands to rig the poly at a better angle to get the maximum bounce, including some behind Duran to give a general “sky” backlight. Lessons learnt for the next time!

image


Ren: Night for Day

Ren: Shooting the Exterior Set

Here’s a little video blog about the challenges of shooting on the amazing medieval village set that Chris Dane and others have built for Ren.

I’ve been using the Artemis app a lot to test out lens choices and compositions for “seeing off the set” issues. That way if I’m set up for a shot and we’re waiting on costume or an actor, I can preview the next shot on Artemis and warn Chris that he’ll need to move a wall to hide the car park.

More soon from the set of Ren.

image image


Ren: Shooting the Exterior Set

Ren: Masculine & Feminine Lighting

A few days into my tenure as DP on Kate Madison’s ambitious fantasy series, Ren, we filmed a shot/reverse for one of the opening scenes. The scene introduced us to the eponymous Ren (Sophie Skelton) and her friend Karn (Christopher Dane).

Kate described Ren to me as “pure innonence”, while Karn is an older, more worldly character with a difficult past. It seemed to me like classic femine and masculine lighting were called for. Classic feminine lighting is designed to create a soft, flawless, often shadowless face. Classic masculine lighting enhances jaw definition, embraces lines and skin texture and generally creates a rugged look.

Clearly you have to start by casting actors with the right physical characteristics for these roles, which Kate had certainly done, and make-up plays a huge role. The DP is the third part of the triumvirate determining the look of the cast’s faces.

The shot/reverse in question took place under trees in a valley on a cloudy day, so the natural light was very top-lighty (rendering eye sockets dark), with a bit of green bounce here and there.

IMG_1059.JPG

We shot Ren’s close-up first. We had already established in the wide that she was looking towards the sun, albeit a very cloud-obscured one.

There are two ways to create the shadowless look of classic feminine lighting. One is to use a lot of bounce to fill in the shadows. The other is to put the key light directly above the lens, like a flash, so that the shadows are all hidden from the camera’s point of view. Since we’d established Ren was looking in the direction of the sun, I chose the latter method, rigging a small LED panel right above the lens.

Backlighting the hair is another common component of classic feminine lighting, so I had gaffer Richard Roberts hand-bash a second panel as a three-quarter backlight. We had to keep this very subtle since we had established that direct sunlight could not be coming from behind her.

image

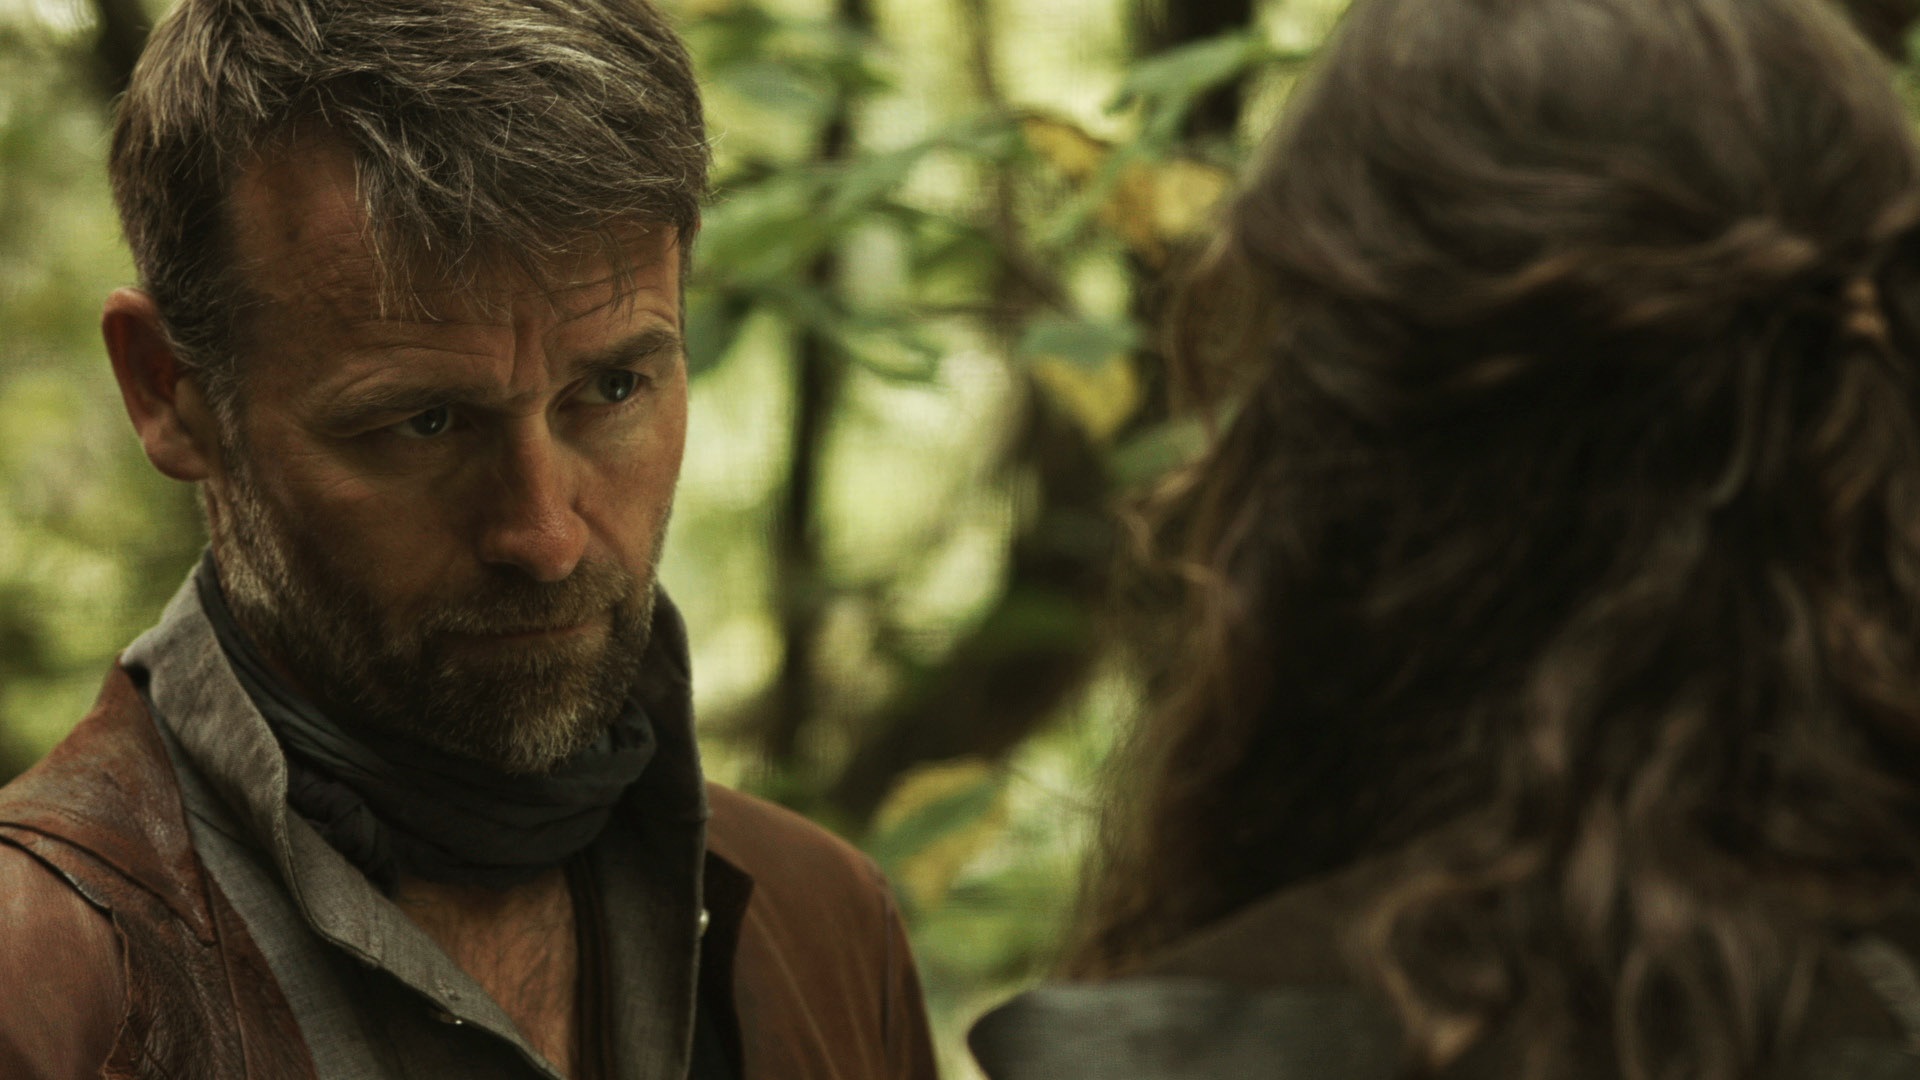
I lit Karn’s close-up very differently. His orientation to the sun justified a strong three-quarter backlight from an LED panel off frame left. This picks out Chris’s stubble and jawline nicely.

I decided that his key would be motivated as sunlight reflecting off the river (off camera right). This could jusifiably be coming in from the side, again adding texture and definition to his face. It was achieved by Richard holding a silver-sided collapsible reflector just out of frame. We initially tried wobbling it to suggest the movement of the water, but ended up shooting a safety take without the wobble in case it proved too distracting.

I know that this degree of manipulation and augmentation of natural light is not to every cinematographer’s taste, but I feel it fits perfectly with the show’s fantasy world. My view is that in this world where magic exists, the light is a little bit magical too. Hopefully it will subconsciously help the audience pick up on Ren and Karn’s essential characteristics in this, their first scene.

Find out more about Ren at facebook.com/rentheseries


Ren: Masculine & Feminine Lighting

Lighting Techniques #3: The Window Wrap

So, you’re shooting a daylight interior. You’ve got an HMI as your “sun” blasting in through the window, giving great backlight when characters are faced away from it, and casting some interesting windowframe shadows when they’re faced towards it. But what if they’re side on to the window?

One side of the actor’s face is hotly lit while the other is in complete shadow. Maybe it’s an edgy or scary scene and you want that look. Fine. But maybe not.

You could just use bounce to generally fill in the rest of the actor’s face. Sure, that will work. But The Window Wrap will look sexier.

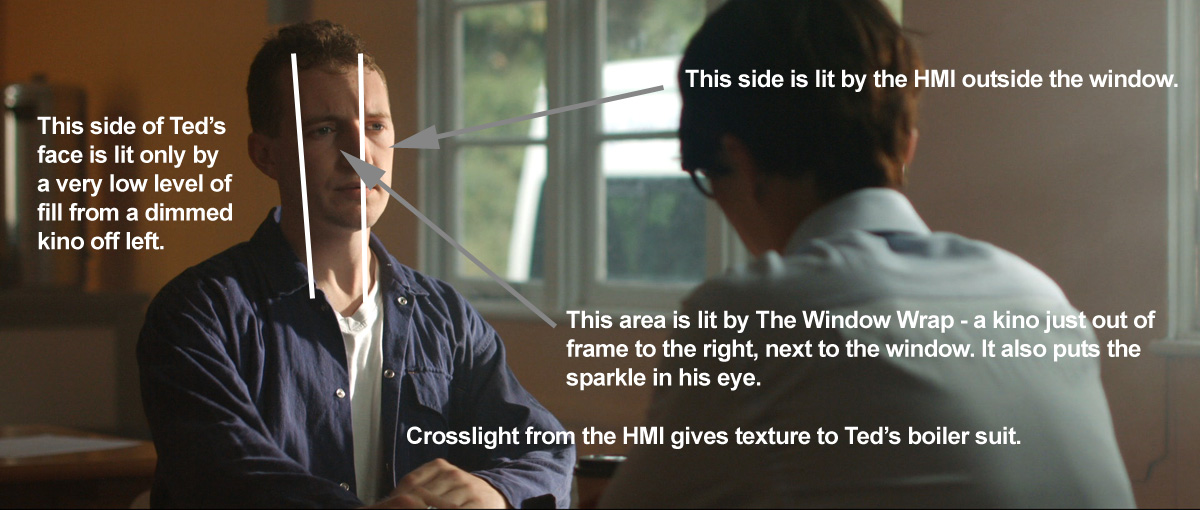
Take a Kinoflo and set it up inside the room near enough to the window that the audience can buy it as window light but far enough around that it seems to wrap the harsh HMI light softly around the talent’s face. Crucially, as long as the camera is on the opposite side of the actor’s eyeline to the window, you’re still lighting their downside; the nearest part of their face is still the darkest, but now it’s a smoother transition between the bright light of the downside and the darkness of the upside.

Here’s an example from The Gong Fu Connection with writer/director/actor Ted Duran:

original-shotannotated-shot

Sketch 2014-08-15 19_37_08

This technique was inspired by this lighting workshop video with Eric Kress, DP of The Girl with the Dragon Tattoo (original Swedish version).

Lighting Techniques #3: The Window Wrap

Gaffering Tips

I just spent a couple of weeks gaffering for DP Paul Dudbridge on a feature shoot in South Wales. It was pretty much my first time gaffering, and I certainly made some classic mistakes. Here are some tips I’ve compiled as a result of my recent experiences.

  • Make sure cables have slack so the DP can adjust the positions of lamps.
  • Take extra time running cables initially so they are least likely to be in shot and won’t have to be rerouted later.
  • Swap out batteries on LED panels during coffee breaks or other downtime so they don’t go off during takes.
  • Keep track of how much power you’re drawing off each circuit to avoid tripping breakers. See Gaffering Basics for more on this.
  • Make sure you have access to the consumer unit (fuse box) so you can reset a tripped breaker straight away.
  • If drawing a large load off a 13A socket, periodically check the plug isn’t getting too warm – occasionally they can melt.
  • Righty tighty, lefty loosy. Make sure the weight on a C-stand knuckle is pulling it clockwise, i.e. tightening it.
  • Bulbs are most fragile when they’re hot – i.e. when they’re on or have recently been on – so handle them with particular care.
  • Observe the minimum safe distances illustrated on the lampheads. The heat can crack a window or burn a flag if placed too close.
  • When bouncing tungsten lights off the ceiling, black-wrap them straight away to cut out direct spill.
  • Be sure to disable the building’s fire alarm or bag the smoke detectors before switching on a smoke machine.
  • Keep an eye on the smoke level in the room and top it up when necessary.
  • Stay within earshot of the DP so you can respond to requests.
  • Anticipate DP requests: if you look at the monitor and see that the backlight is flaring, get a flag ready; if a lamp looks too hot on camera, break in a dimmer.

IMG_1029-0.JPG
Photo by Sophie Wiggins

Gaffering Tips

Lighting Techniques #2: Cross-backlighting

A common scenario in filmmaking is that you have two characters standing talking to each other and you need to do a two-shot and an over-the-shoulder of each. A quick way to light this kind of scene is cross-lighting: you set up two lamps so that each lamp serves as one character’s backlight and the other’s keylight.

I practice what I like to call cross-backlighting. What I mean by this is that the lamps are both on the opposite side of the actors’ eyeline to the camera. The result is that the downsides of their faces are lit. (Check out this post on key angles if you’re not sure what I mean by downside.)

This old Soul Searcher lighting featurette covers cross-backlighting around the 5:30 mark.

Here’s a super-recent example of cross-backlighting in action, on the set of The Gong Fu Connection. I’ve complicated things a bit though here. I’ve decided I want the characters’ keylights to be softer and cooler in colour than their backlights.

2-shot

So there’s actually a dedo and an LED panel behind each actor. The camera is set to a white balance of 3,200K. Each dedo provides a strong, white backlight, narrowly focused so as not to spill onto the opposite actor’s face. The LED panels, positioned much closer to the talent, provide a slightly softer light with a dialled-in temperature of 4,500K.

Sketch 2014-08-15 07_29_38

Harry

For the close-ups I repurposed the LED panel that wasn’t being used as a background light, dialling it back to 3,200K to match with the location’s existing tungsten lighting that was already doing a lot of the work.

Carmina

When we got to Carmina’s close-up I decided the LED panel alone was still too harsh, so I bounced it off the silver side of a collapsible reflector. I adjusted the panel to an angle where just a little direct light was hitting the side of Carmina’s face, and this kind of blends with the bounced light to provide a gentle wrapping illumination.

Stay tuned for more lighting techniques.

Lighting Techniques #2: Cross-backlighting

Festival Screenings and DCPs

Stop-Eject poster 857x1200Last summer I completed two short films as director, the 17-minute fantasy-drama Stop/Eject and the two-minute  puppet fantasy The One That Got Away. After a year of entering them into festivals around the world without getting anywhere, I was beginning to give up hope of them ever getting selected. But I’m delighted to say that both have been recently accepted for festivals taking place this month.

Stop/Eject will get its world premiere at Raindance Film Festival in London. Raindance is amongst the UK’s most prestigious festivals, counting amongst its previous premieres Memento and The Blair Witch Project.

The One That Got Away will get its first overseas screening at Belo Horizonte International Short Film Festival in Brazil.

The welcome news of these festival selections had me scrambling into the archives of this blog for the post I wrote last year on making a DCP (digital cinema package). Since the decline of film as an exhibition format, DCPs are the new standard for delivering movies to a cinema.

I needed to transcode The One That Got Away’s 1080P ProRes 422 (HQ) master into a DCP. Belo Horizonte accept 25fps DCPs, so I skipped the frame rate conversion. I dropped the ProRes file into a new timeline in Final Cut Pro and set the sequence frame size to 1998×1080, the standard resolution for a non-Cinemascope 2K DCP. I then used the Motion tab to blow up the image slightly to fill the width of the frame, losing a little at the top and bottom of the image in the process.

The_One_That_Got_Away_ posterI used Final Cut Pro’s ‘Export using Quicktime conversion’ to export the ProRes file as two mono WAVs and an 8-bit TIFF sequence. (16-bit is preferable for DCPs, but the film had been edited in Final Cut 7, which only deals with 8-bit colour space.) I then followed OpenDCP‘s straightforward three-step interface to transcode to JPEG-2000, then MXF, then wrap it all up with the XML files. I didn’t need to worry about disc formatting, because the festival accepted an FTP upload of the files.

Before uploading The One That Got Away’s DCP to the festival, I decided to test it at home as best as I could, so I downloaded a free trial of EasyDCP which let me check the first 15 seconds. The colours were screwed up, but that’s normal. Home computers can’t handle the XYZ colour space of DCPs.

Stop/Eject’s DCP was created last year, as documented in the post mentioned above, Making a DCP. I purchased a 500GB Lacie Rugged USB hard drive to put it on, not knowing at the time how big the files would be. I now know that 2K DCPs at a reasonable quality are about 1GB per minute, so Stop/Eject’s is 17GB. A memory stick big enough to put that on would have been expensive last June, perhaps more expensive than the Lacie Rugged. But over a year later, a Corsair 32GB USB 3.0 stick is only £15.45 and there are even cheaper brands on the market too. Plus, of course, a stick is much easier to post to a festival than a hard drive, and far less likely to get damaged on the way.

So I bought the Corsair stick and booted up my Mac in Ubuntu, as detailed in last year’s post. I formatted the stick as EXT-2 rather than 3, as Raindance’s documentation seemed to favour the former. I copied the files across from the Lacie Rugged. Then it was just a case of packaging it up and sending it off with back-up copies on DVD and Blu-ray, and a press kit for good measure.

Incidentally, Stop/Eject’s DCP runs at 24fps for maximum compatibility, extending the running time of the film by about 45 seconds over the original 25fps version. I had wondered for some time if, when the film finally got into a festival, this longer running time would be an issue. After all, at nearly 17 minutes at 25fps, Stop/Eject is quite a long short already. I’m told that Raindance almost decided against selecting it because of its length. And the judging panel had been watching a 25fps screener. How would they feel about screening an even longer version? I contacted the festival, explaining the situation and offering to make a 25fps DCP if need be, but they were fine with it running at 24fps. Apparently they allow for runtime discrepancy when scheduling.

Well, that all got very dry and technical, didn’t it?

Hurray! My films got into festivals!

Festival Screenings and DCPs

Cinematography Learning Resources

Now is a great time to be learning or honing your craft as a director of photography. Today I want to flag up just three of the great resources that are out there at the moment.

418.peopleShane’s Inner Circle

Shane Hurlbut, cinematographer of Terminator: Salvation, Need for Speed and Act of Valour, has been publishing brilliantly informative blogs for a long time now. But for those who want even more, he’s recently launched Shane’s Inner Circle, which you can join for the bargain price of about £4 a month. As well as special blogs called ‘Power Posts’, each month you get two detailed reports called ‘On Set With Shane’. In these, Shane takes you through a day of shooting – currently on the Amanda Seyfried-starrer Fathers and Daughters – and breaks down every creative decision he made. Recce photos, frame grabs, lighting diagrams and links for all the equipment used make this an essential and unparalleled resource. You also get to join a Facebook page where you can discuss your cinematography issues with other members, and you can submit questions for Shane himself, which he answers in a monthly podcast. Incredible value for money from one of the most generous men in Hollywood.

ac_cover_med_201408@2xAmerican Cinematographer

From the American Society of Cinematographers, this magazine tells you how the DPs at the top of their game are doing their thing. Each month they interview the cinematographers behind three or four of the month’s biggest movie releases, discussing shooting format, stock and lens choices, visual grammar, and lighting. Many of the lighting diagrams boggle my mind, showing huge soundstages rigged with 60 space lights and 40 2Ks, or nighttime exteriors lit with mutiple 12Ks and massive cranes flying 40×40′ diffusion frames overhead. But despite the… shall we say… aspirational level of resources being used by these cinematographers, the principles are entirely scaleable. It’s also very heartening to discover that there’s never enough money, as top DPs speak of being forced into choosing digital over celluloid by penny-pinching studio execs. And it’s fascinating to learn of the range of cameras that are being used. Captain Philips, for example, used Super-16, 35mm and digital for various creative and practical reasons. Buying imports of American Cinematographer can get expensive, but you can get a year’s digital subscription plus two free issues for just £19.

biddle_samplepage02DOP Documents

Stephen Murphy is an accomplished cinematographer, whose work I first noticed in the beautifully shot feature pilot Mrs. Peppercorn’s Magical Reading Room. For the last couple of years he has been publishing occasional ‘DOP Documents’ – PDF scrapbooks showcasing the work of cinematographers Stephen admires. These documents are laid out with elegant simplicity, allowing the reader to admire the frame grabs, interspersed with relevant quotations from the DP in question. Light-meisters covered so far include Adrian Biddle (Aliens), Jan de Bont (Die Hard), Douglas Slocombe (Indiana Jones trilogy) and Alex Thompson (Legend), so there’s plenty of gorgeous eighties lighting on display, but not exclusively so. They would work beautifully as a big coffee table book, but for now we must be content with PDFs. Which are absolutely free. Stephen’s other blog posts, covering his lensing of various productions, and sharing results of stock and filter tests, are also well worth checking out.

Cinematography Learning Resources

Amelia’s Letter: The Edit Continues

Tristan, Steve and insufficient chairs.

A week after the test screening, I sat down with editor Tristan Ofield in a corner of Steve Deery’s book depot to take a final pass at Amelia’s Letter. Steve balanced on a pile of boxes beside us. Who says exec producers get all the luxury?

The main aim of the day was to make the film clearer. This became a fascinating exercise with notes from the test screening like, “I didn’t get that Barbara was a writer,” although she spends most of her screen-time sitting at a typewriter. How could we configure these images to more effectively tell the audience that Barbara is a writer, without the benefit of dialogue or ridiculous captions? And without showing her actually writing, because the whole crux of the film is that she’s suffering from writer’s block – and that needs to come across too. How? By really getting into the nuts and bolts of how motion picture editing tells a story, that’s how.

The previous evening I’d been watching 2 Reel Guys, a YouTube series about the creative filmmaking process. It’s incredibly cheesy, and a little bit soporific, but it does make some excellent points. Like how just two different shots can be edited together in three different ways for very different effects.

So how did we make it clearer that Barbara was a writer suffering from block? First, Tristan altered the scene to open on a shot of Barbara standing thoughtfully over the typewriter, with the machine dominant in frame. He held the shot for quite a while to let the audience take it all in. “A reminder of the power of not cutting,” he pointed out.

The Letter of Undue Importance

The second step was for us to really consider when to cut to the keyboard, or to the blank paper. The scene’s previous iteration had started on the blank paper, but I think that image failed to sink in for viewers, who were too busy trying to work out where they were and what was going on. Moving it later in the scene made it much more powerful.

It was also important not to cut to something else at the wrong time. There was a cutaway of a letter that had to be included somewhere for plot reasons, but I was convinced that if we showed that immediately before the typewriter CU then we would be telling the audience that Barbara was trying to compose a reply to the letter. Context is everything in editing. Put a different shot before or after a certain shot and you can completely change the meaning of that shot. By cutting to the letter as Barbara puts a teacup down next to it, Tristan was able to avoid it gaining undue importance.

Tristan's got one of those proper, colour-coded editing keyboards. Cool.
Tristan’s got one of those proper, colour-coded editing keyboards. Cool.

Another big lesson/reminder of the day was: less is more. I had been feeling for a while that Amelia’s Letter had one too many layers of supernatural mystery. Would the film be clearer if one was removed?

Steve was sceptical, and understandably so. No writer loves having chunks of their material hacked out. But to his credit, he let Tristan and I try it. After watching this revised version through, all three of us were convinced it was the right decision. Everything else in the film had become stronger because this one thread had been removed. Minor characters gained more importance because they weren’t competing with the removed element, and major characters’ challenges and emotions shone through more clearly. And the audience would have a much better chance of solving the film’s two remaining mysteries without scatching their heads over the third one too.

At the end of the day, we left greatly satisfied with what we had accomplished. Soon Amelia’s Letter will enter the next phase of postproduction: sound design, music composition, grading and visual effects. Stay tuned.

Amelia’s Letter is written by Steven Deery, directed by me and produced by Sophia Ramcharan of Stella Vision Productions. Visit the Amelia’s Letter Facebook page.

Amelia’s Letter: The Edit Continues