A common scenario in filmmaking is that you have two characters standing talking to each other and you need to do a two-shot and an over-the-shoulder of each. A quick way to light this kind of scene is cross-lighting: you set up two lamps so that each lamp serves as one character’s backlight and the other’s keylight.
I practice what I like to call cross-backlighting. What I mean by this is that the lamps are both on the opposite side of the actors’ eyeline to the camera. The result is that the downsides of their faces are lit. (Check out this post on key angles if you’re not sure what I mean by downside.)
This old Soul Searcher lighting featurette covers cross-backlighting around the 5:30 mark.
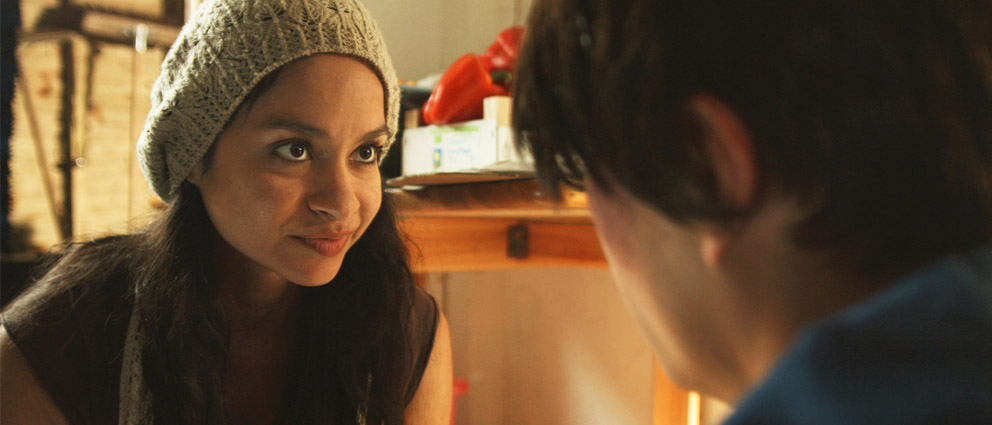
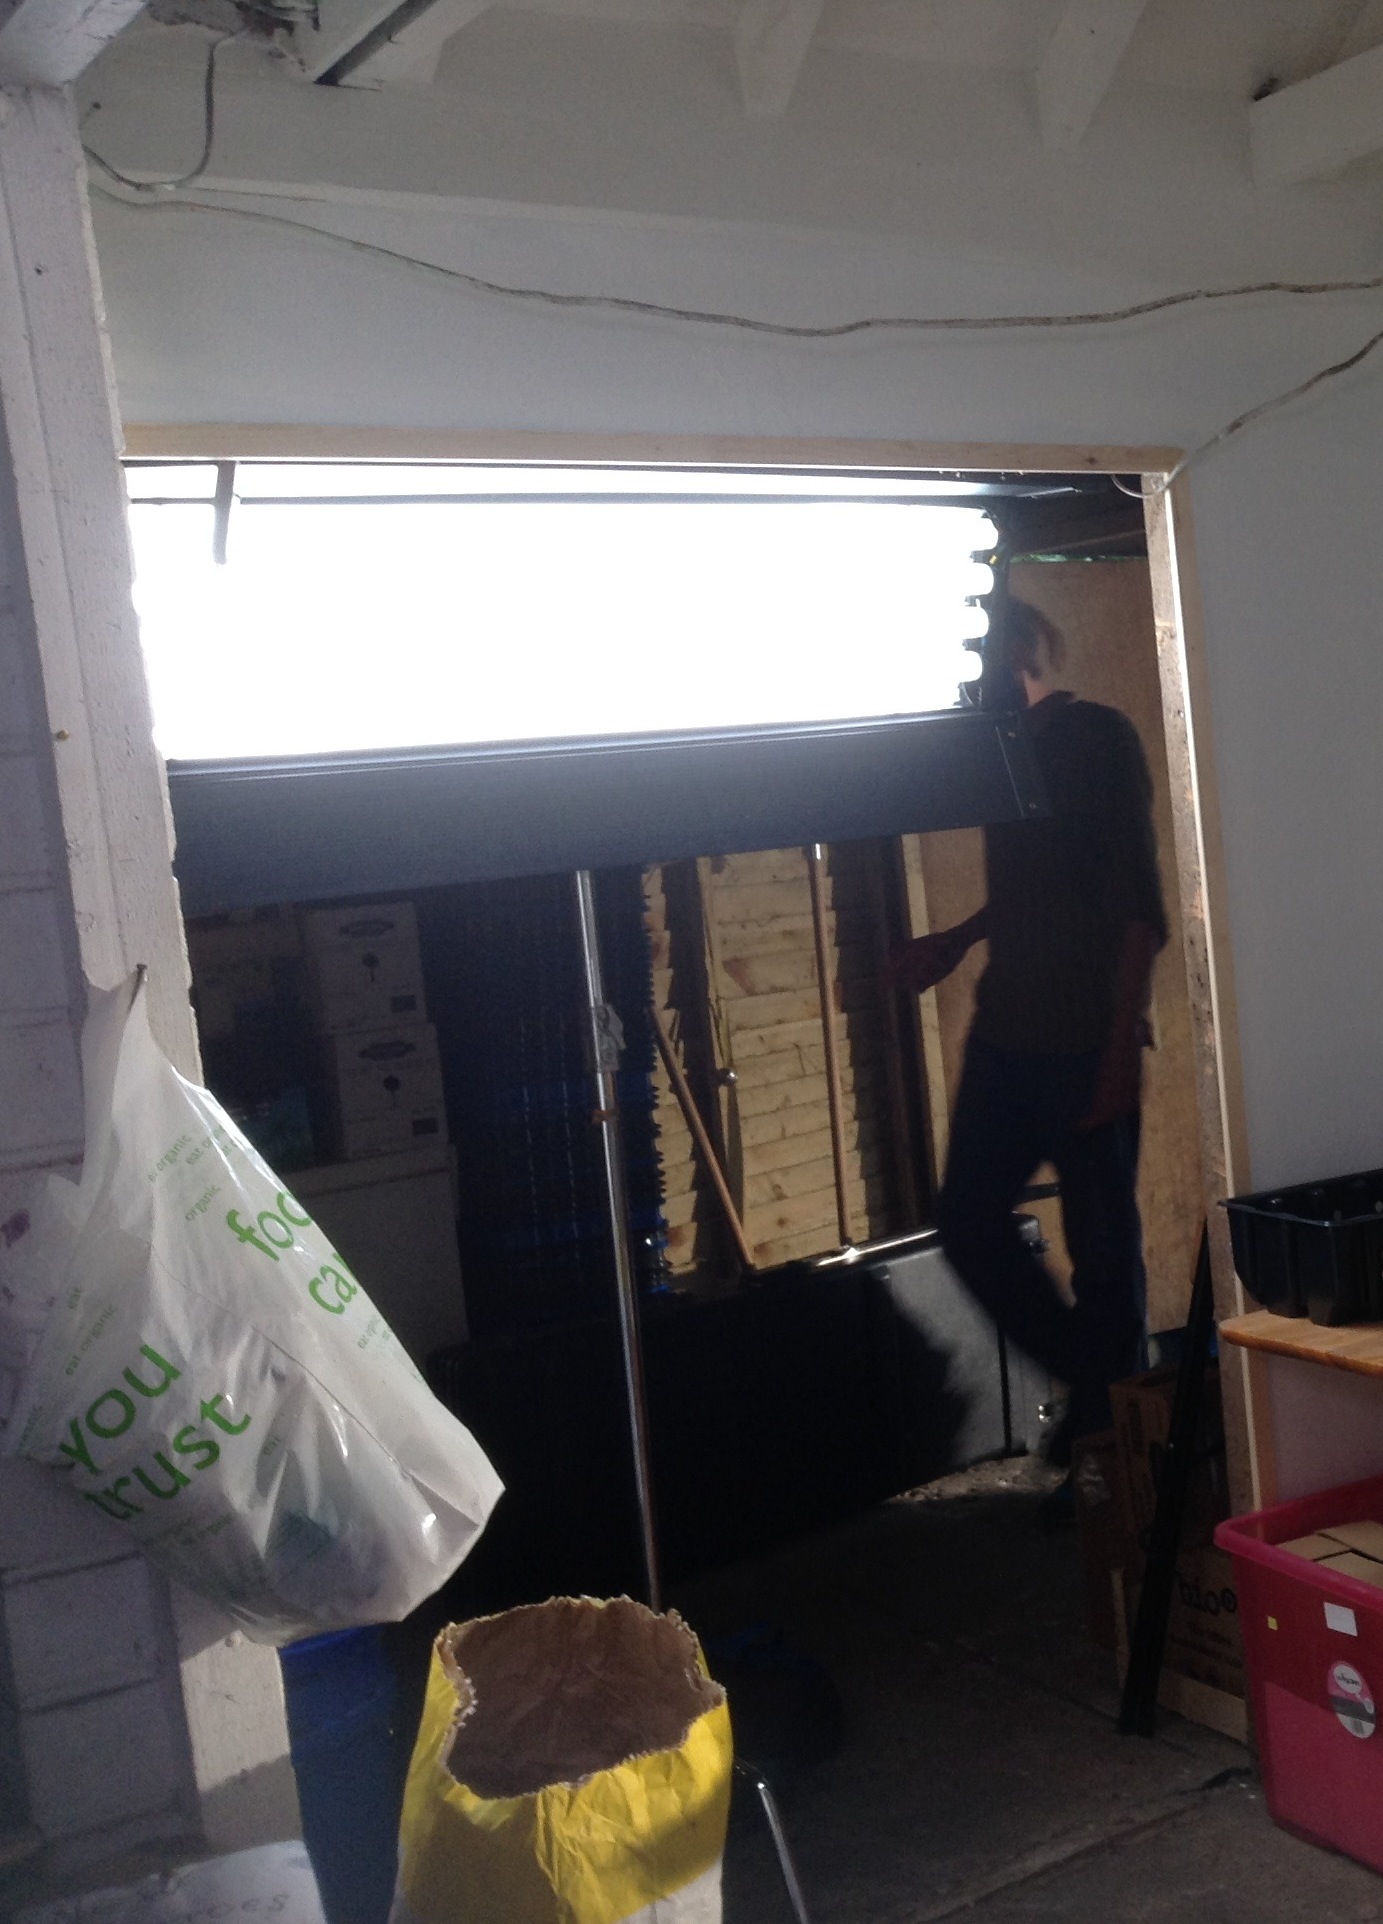
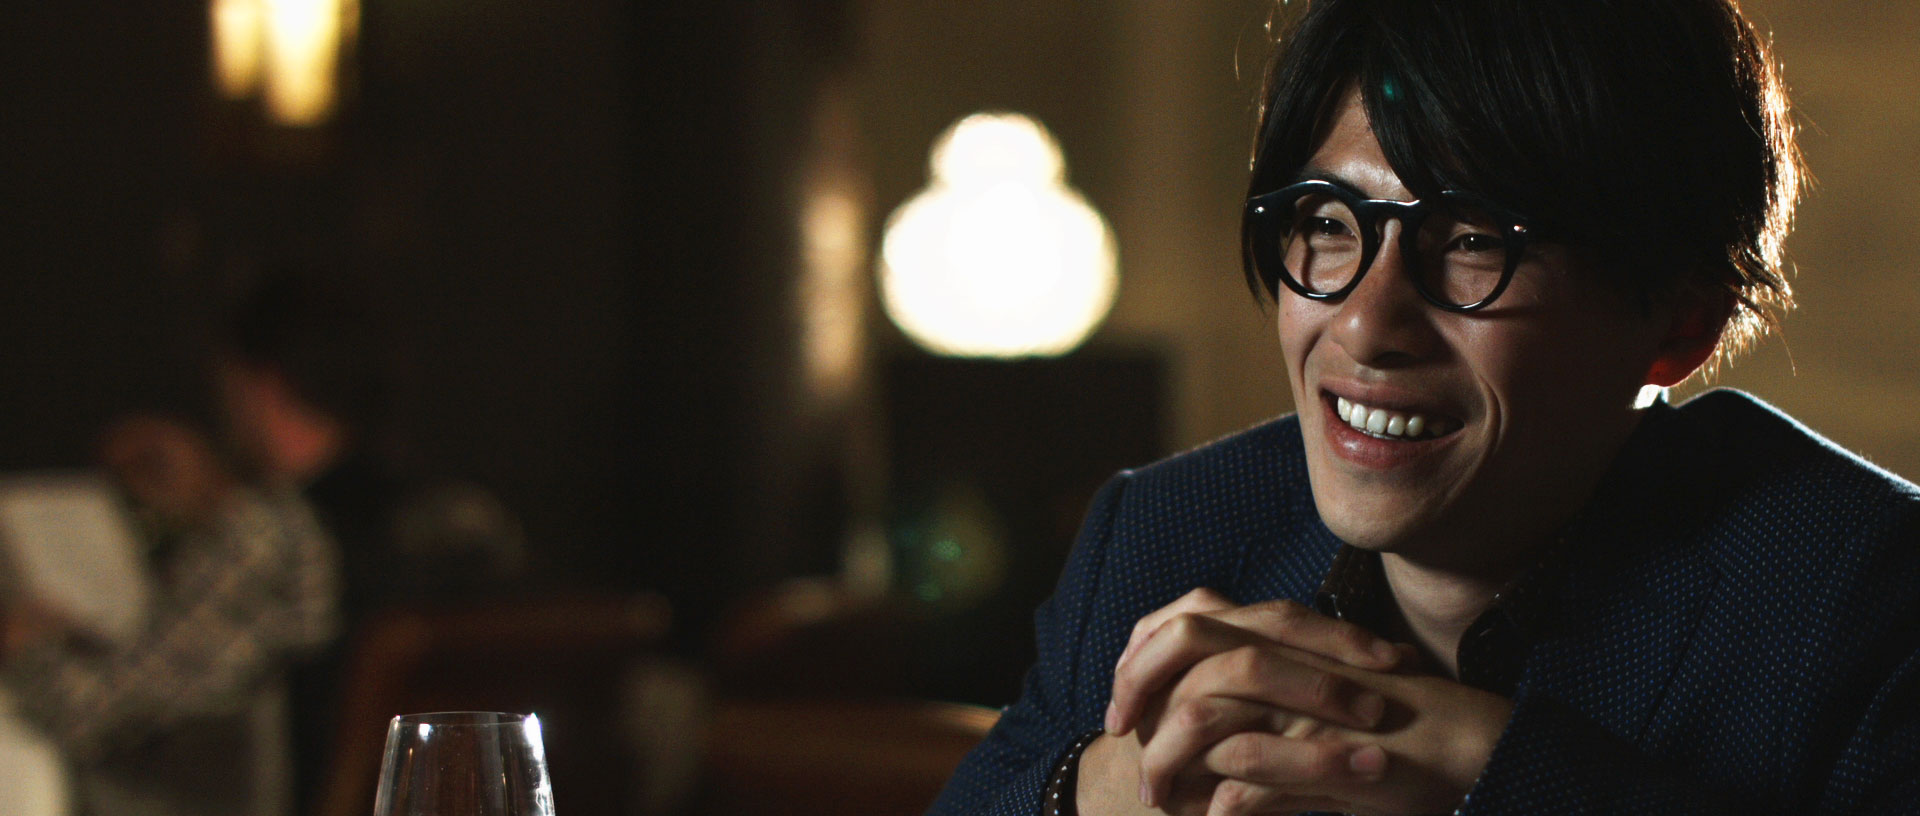
Here’s a super-recent example of cross-backlighting in action, on the set of The Gong Fu Connection. I’ve complicated things a bit though here. I’ve decided I want the characters’ keylights to be softer and cooler in colour than their backlights.
So there’s actually a dedo and an LED panel behind each actor. The camera is set to a white balance of 3,200K. Each dedo provides a strong, white backlight, narrowly focused so as not to spill onto the opposite actor’s face. The LED panels, positioned much closer to the talent, provide a slightly softer light with a dialled-in temperature of 4,500K.
For the close-ups I repurposed the LED panel that wasn’t being used as a background light, dialling it back to 3,200K to match with the location’s existing tungsten lighting that was already doing a lot of the work.
When we got to Carmina’s close-up I decided the LED panel alone was still too harsh, so I bounced it off the silver side of a collapsible reflector. I adjusted the panel to an angle where just a little direct light was hitting the side of Carmina’s face, and this kind of blends with the bounced light to provide a gentle wrapping illumination.
Last summer I completed two short films as director, the 17-minute fantasy-drama Stop/Eject and the two-minute puppet fantasy The One That Got Away. After a year of entering them into festivals around the world without getting anywhere, I was beginning to give up hope of them ever getting selected. But I’m delighted to say that both have been recently accepted for festivals taking place this month.
Stop/Eject will get its world premiere at Raindance Film Festival in London. Raindance is amongst the UK’s most prestigious festivals, counting amongst its previous premieres Memento and The Blair Witch Project.
The welcome news of these festival selections had me scrambling into the archives of this blog for the post I wrote last year on making a DCP (digital cinema package). Since the decline of film as an exhibition format, DCPs are the new standard for delivering movies to a cinema.
I needed to transcode The One That Got Away’s 1080P ProRes 422 (HQ) master into a DCP. Belo Horizonte accept 25fps DCPs, so I skipped the frame rate conversion. I dropped the ProRes file into a new timeline in Final Cut Pro and set the sequence frame size to 1998×1080, the standard resolution for a non-Cinemascope 2K DCP. I then used the Motion tab to blow up the image slightly to fill the width of the frame, losing a little at the top and bottom of the image in the process.
I used Final Cut Pro’s ‘Export using Quicktime conversion’ to export the ProRes file as two mono WAVs and an 8-bit TIFF sequence. (16-bit is preferable for DCPs, but the film had been edited in Final Cut 7, which only deals with 8-bit colour space.) I then followed OpenDCP‘s straightforward three-step interface to transcode to JPEG-2000, then MXF, then wrap it all up with the XML files. I didn’t need to worry about disc formatting, because the festival accepted an FTP upload of the files.
Before uploading The One That Got Away’s DCP to the festival, I decided to test it at home as best as I could, so I downloaded a free trial of EasyDCP which let me check the first 15 seconds. The colours were screwed up, but that’s normal. Home computers can’t handle the XYZ colour space of DCPs.
Stop/Eject’s DCP was created last year, as documented in the post mentioned above, Making a DCP. I purchased a 500GB Lacie Rugged USB hard drive to put it on, not knowing at the time how big the files would be. I now know that 2K DCPs at a reasonable quality are about 1GB per minute, so Stop/Eject’s is 17GB. A memory stick big enough to put that on would have been expensive last June, perhaps more expensive than the Lacie Rugged. But over a year later, a Corsair 32GB USB 3.0 stick is only £15.45 and there are even cheaper brands on the market too. Plus, of course, a stick is much easier to post to a festival than a hard drive, and far less likely to get damaged on the way.
So I bought the Corsair stick and booted up my Mac in Ubuntu, as detailed in last year’s post. I formatted the stick as EXT-2 rather than 3, as Raindance’s documentation seemed to favour the former. I copied the files across from the Lacie Rugged. Then it was just a case of packaging it up and sending it off with back-up copies on DVD and Blu-ray, and a press kit for good measure.
Incidentally, Stop/Eject’s DCP runs at 24fps for maximum compatibility, extending the running time of the film by about 45 seconds over the original 25fps version. I had wondered for some time if, when the film finally got into a festival, this longer running time would be an issue. After all, at nearly 17 minutes at 25fps, Stop/Eject is quite a long short already. I’m told that Raindance almost decided against selecting it because of its length. And the judging panel had been watching a 25fps screener. How would they feel about screening an even longer version? I contacted the festival, explaining the situation and offering to make a 25fps DCP if need be, but they were fine with it running at 24fps. Apparently they allow for runtime discrepancy when scheduling.
Well, that all got very dry and technical, didn’t it?
Now is a great time to be learning or honing your craft as a director of photography. Today I want to flag up just three of the great resources that are out there at the moment.
Shane Hurlbut, cinematographer of Terminator: Salvation, Need for Speed and Act of Valour, has been publishing brilliantly informative blogs for a long time now. But for those who want even more, he’s recently launched Shane’s Inner Circle, which you can join for the bargain price of about £4 a month. As well as special blogs called ‘Power Posts’, each month you get two detailed reports called ‘On Set With Shane’. In these, Shane takes you through a day of shooting – currently on the Amanda Seyfried-starrer Fathers and Daughters – and breaks down every creative decision he made. Recce photos, frame grabs, lighting diagrams and links for all the equipment used make this an essential and unparalleled resource. You also get to join a Facebook page where you can discuss your cinematography issues with other members, and you can submit questions for Shane himself, which he answers in a monthly podcast. Incredible value for money from one of the most generous men in Hollywood.
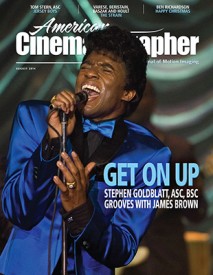
From the American Society of Cinematographers, this magazine tells you how the DPs at the top of their game are doing their thing. Each month they interview the cinematographers behind three or four of the month’s biggest movie releases, discussing shooting format, stock and lens choices, visual grammar, and lighting. Many of the lighting diagrams boggle my mind, showing huge soundstages rigged with 60 space lights and 40 2Ks, or nighttime exteriors lit with mutiple 12Ks and massive cranes flying 40×40′ diffusion frames overhead. But despite the… shall we say… aspirational level of resources being used by these cinematographers, the principles are entirely scaleable. It’s also very heartening to discover that there’s never enough money, as top DPs speak of being forced into choosing digital over celluloid by penny-pinching studio execs. And it’s fascinating to learn of the range of cameras that are being used. Captain Philips, for example, used Super-16, 35mm and digital for various creative and practical reasons. Buying imports of American Cinematographer can get expensive, but you can get a year’s digital subscription plus two free issues for just £19.
Stephen Murphy is an accomplished cinematographer, whose work I first noticed in the beautifully shot feature pilot Mrs. Peppercorn’s Magical Reading Room. For the last couple of years he has been publishing occasional ‘DOP Documents’ – PDF scrapbooks showcasing the work of cinematographers Stephen admires. These documents are laid out with elegant simplicity, allowing the reader to admire the frame grabs, interspersed with relevant quotations from the DP in question. Light-meisters covered so far include Adrian Biddle (Aliens), Jan de Bont (Die Hard), Douglas Slocombe (Indiana Jones trilogy) and Alex Thompson (Legend), so there’s plenty of gorgeous eighties lighting on display, but not exclusively so. They would work beautifully as a big coffee table book, but for now we must be content with PDFs. Which are absolutely free. Stephen’s other blog posts, covering his lensing of various productions, and sharing results of stock and filter tests, are also well worth checking out.
A week after the test screening, I sat down with editor Tristan Ofield in a corner of Steve Deery’s book depot to take a final pass at Amelia’s Letter. Steve balanced on a pile of boxes beside us. Who says exec producers get all the luxury?
The main aim of the day was to make the film clearer. This became a fascinating exercise with notes from the test screening like, “I didn’t get that Barbara was a writer,” although she spends most of her screen-time sitting at a typewriter. How could we configure these images to more effectively tell the audience that Barbara is a writer, without the benefit of dialogue or ridiculous captions? And without showing her actually writing, because the whole crux of the film is that she’s suffering from writer’s block – and that needs to come across too. How? By really getting into the nuts and bolts of how motion picture editing tells a story, that’s how.
The previous evening I’d been watching 2 Reel Guys, a YouTube series about the creative filmmaking process. It’s incredibly cheesy, and a little bit soporific, but it does make some excellent points. Like how just two different shots can be edited together in three different ways for very different effects.
So how did we make it clearer that Barbara was a writer suffering from block? First, Tristan altered the scene to open on a shot of Barbara standing thoughtfully over the typewriter, with the machine dominant in frame. He held the shot for quite a while to let the audience take it all in. “A reminder of the power of not cutting,” he pointed out.
The Letter of Undue Importance
The second step was for us to really consider when to cut to the keyboard, or to the blank paper. The scene’s previous iteration had started on the blank paper, but I think that image failed to sink in for viewers, who were too busy trying to work out where they were and what was going on. Moving it later in the scene made it much more powerful.
It was also important not to cut to something else at the wrong time. There was a cutaway of a letter that had to be included somewhere for plot reasons, but I was convinced that if we showed that immediately before the typewriter CU then we would be telling the audience that Barbara was trying to compose a reply to the letter. Context is everything in editing. Put a different shot before or after a certain shot and you can completely change the meaning of that shot. By cutting to the letter as Barbara puts a teacup down next to it, Tristan was able to avoid it gaining undue importance.
Tristan’s got one of those proper, colour-coded editing keyboards. Cool.
Another big lesson/reminder of the day was: less is more. I had been feeling for a while that Amelia’s Letter had one too many layers of supernatural mystery. Would the film be clearer if one was removed?
Steve was sceptical, and understandably so. No writer loves having chunks of their material hacked out. But to his credit, he let Tristan and I try it. After watching this revised version through, all three of us were convinced it was the right decision. Everything else in the film had become stronger because this one thread had been removed. Minor characters gained more importance because they weren’t competing with the removed element, and major characters’ challenges and emotions shone through more clearly. And the audience would have a much better chance of solving the film’s two remaining mysteries without scatching their heads over the third one too.
At the end of the day, we left greatly satisfied with what we had accomplished. Soon Amelia’s Letter will enter the next phase of postproduction: sound design, music composition, grading and visual effects. Stay tuned.
This is the first in what I plan to be an ongoing series of quick techniques you can apply to your own cinematography. The first few are going to be from The Gong Fu Connection. If you find this post useful, please consider supporting the film over at www.indiegogo.com/projects/the-gong-fu-connection or even just sharing the link.
Let’s start at the beginning with three point lighting. The idea is that you should light a person using three sources:
The KEY light models the face. What does that mean? Well, a face is a weird, lumpy object with lots of sticky-out bits and inny bits, and as a result it looks very different depending on where the main light is coming from. Light it from the front and it will seem flat – noses seem smaller, wrinkles and spots are reduced. Light it from the side and the nose will cast a huge shadow, as will every pimple. See my blog post on key light angles for more on this.
The FILL light prevents the shadows cast by the key light from being completely black. Ideally the fill should be a soft, directionless light so it doesn’t cast its own shadows. The dimmer the fill light (i.e. the greater the key-to-fill ratio), the moodier your scene will look. Sometimes I like to not use any fill at all.
The BACKLIGHT creates a rim of illumination around your subject, cutting them out from the background. It makes the whole image look slick and sparkly.
That’s all very well in theory, but here’s a practical example. This is a close-up of actress Marién Enid in The Gong Fu Connection.
Marién’s keylight is an Arrimax M18 – a super-efficient 1.8KW HMI. It has a Straw gel (Lee no. 103) to warm it up a bit. Why such a powerful lamp? I was using it as backlight on the wide. For this CU it needs to be much softer, so I intercept it a couple of metres from Marién with some tough-spun diffuser (no. 214). I have a roll of the stuff which I carry around. Frequently I slide it like a giant toilet roll onto a C-stand arm, unroll it to the desired length and peg the other end on another stand.
The Kinoflo Tegralite that provides the backlight
You can see that the keylight hits all of the lefthand side of her face (known as the downside, because it’s the side away from camera) but pretty much just her cheek on the righthand side. For my money, this is the optimal key position because it gives the most shape to the face.
The backlight comes from a Kinoflo Tegralite (a 4ft 4-bank kino with a built-in ballast) shining through the doorway behind her. Again, this is a source that had been previously established on the wide shot. You have to think through your set-ups before you set your lamps for your wide, so that they will work for your other angles without so much cheating that everything looks completely different.
Fill is provided by a silver reflector out the bottom left of frame, bouncing the kino back onto the upside of Marién’s face. The ungelled kino gives a nice bit of colour contrast with the straw-gelled M18.
Look out for more lighting techniques coming soon.
On Saturday morning, Broadway in Nottingham kindly gave us the use of their lounge to screen the present edit of Amelia’s Letter to a select audience. As is normal for a test screening, the film is still in a very rough state, but the aim was to identify the weak points, primarily in terms of pace and clarity.
The audience was attentive and gave very useful feedback, though there wasn’t so much of a consensus as there has been at my previous test screenings. I think this might be par for the course for a film based on mystery. Some people like not knowing what’s going on, and some people don’t.
Personally, I like clarity. When I used to make amateur films as a teenager with my friend Dave, I remember how much it galled me when he reported that his mum had watched our latest cinematic effort and couldn’t follow the storyline. So I think we will do what we can, with the footage we have, to make Amelia’s Letter a little clearer.
Some people wanted the film to be longer, to reveal more about the minor characters, while others felt it could be shorter. Since we can’t make it longer, we’ll try to nibble some more out of the first few minutes to get it moving more quickly.
Test screenings usually throw up some surprises too, and this one was no exception. Some people briefly thought that a middle-aged character was supposed to be a future version of a younger character. (This is why, like Chris Jones says in The Guerilla Filmmakers’ Handbook, you should avoid casting actors that physically resemble each other.) And more than one person failed to realise that some minor characters were supposed to be writers, despite these characters spending much of their screen-time sat at typewriters. Who would have seen that one coming?
There was plenty of positive feedback. Amongst the words and phrases people could tick to describe the film, almost everyone ticked “well acted”, with “emotional”, “involving” and “I want to see it again” coming in joint second.
All in all, a useful exercise. Hopefully it won’t be long now before we can get the edit locked and move onto music, grading and sound design.
Inside a moving car – an everyday setting, but amongst the more challenging ones for a film crew. You can tackle it with greenscreen, or with front projection, or with Poor Man’s Process. Or you can do it for real.
On The Gong Fu Connection we did it for real. If you’re going to attempt this you’ll need three things:
A very wide lens, if you want to get both the driver and the front passenger in frame. I used the wide end of a Tokina 11-16mm zoom, kindly lent to us by DIT Rob McKenzie.
An LED panel to ensure the cast are sufficiently illuminated when the vehicle passes through dark areas.
Some kind of suction mount.
I still had a Hama car mount I’d bought back in 2000 to do car chases like this with my Canon XM1.
I can’t believe I used to rely entirely on that mount to hold the camera, with no safety rope. I’d never do that now.
Of course, this mount wouldn’t support the weight of the Blackmagic. It was just to provide an extra anchor point. Most of the camera’s weight was actually rested on the dashboard, as you can see below. Cardboard and gaffer tape were used to secure it firmly, and the V-lock battery was placed in the open glove box underneath.
The Blackmagic, mounted on the dashboard with an old Hama suction mount, some cardboard, some gaffer tape, a wing and prayer
We ruled out mounting the camera on the bonnet partly for safety and partly because windscreen reflections can be a real nightmare. But we did mount the LED panel on the bonnet, or rather in the gap between the back end of the bonnet and the windscreen, nestled on the wipers. Its yoke rested against the windscreen, maintaining the panel at the right angle. Bungee cords and gaffer tape held it firmly and a bin bag protected it from the spitting rain.
Under the black bag is an LED panel to keep some consistency to the light on the actors as the car moves.
Baldur, the character in the front passenger seat, was supposed to have a laptop on his lap. Since it was out of frame, I gave him another LED panel instead to represent the light coming from the screen. With hindsight I wish I’d gelled it cooler, but never mind. I gaffer-taped over the brightness and colour temperature dials on the back of the panel to stop them getting accidentally knocked out of position.
Exposing for these shots is tricky, particularly when you’re driving on country lanes where a dark, tree-lined avenue can suddenly give way to a bright, open field. If you turn up the LED panels too bright, the dark sections look fake, but if you don’t turn them up bright enough then the dark sections look too dark. I made a guess and it turned out to be pretty bang on.
When we shot, only the three actors and the sound recordist were able to be in the car. Before it drove off, I started the camera rolling and Colin popped in with the slate. Then it was all down to the actors. They did a series of takes and came back to show us the results. Everyone was happy, and that was that.
I spent last week in rural Sussex DPing Ted Duran’s 30 minute action-comedy, The Gong Fu Connection. It was a great shoot with a real community atmosphere, excellent food and beautiful weather. I’ve just been looking through the rushes and I’m blown away by the amazing images that my Blackmagic Production Camera has produced. They are very filmic with an incredible amount of detail, even though we only shot in 1080P.
Colin Smith operates the Canon C300 on his Steadicam Pilot
Not everything went to plan though. The aim was to capture the fights using fluid Steadicam photography, and since I hadn’t used a Blackmagic with Colin’s Steadicam Pilot before, he and I met up the weekend before to test the set-up.
The chief difficulty was that the rig’s built-in monitor accepts only a composite video input, while the Blackmagic outputs only an SDI signal. I searched online for a portable SDI to composite converter, but no such thing seemed to exist. I already had an SDI to HDMI converter, so the obvious solution was to buy an HDMI to composite converter. But the more links a chain has, the more opportunity for weakness.
I made the purchase and Colin sorted out power adapters so that both converters could run off the same battery as the Steadicam monitor. We tested it at my flat and it worked perfectly.
Flash-forward a week and we’re on set preparing the Steadicam for The Gong Fu Connection’s first martial arts sequence. All we’re getting on the Steadicam’s monitor are colour bars, which are output by the HDMI to composite converter when it’s receiving no input signal. The other converter, the SDI to HDMI one, has packed up.
Without a working monitor on the bottom of the rig, Colin can’t watch his step and frame the shot at the same time. The Steadicam is essentially useless.
There is a Canon C300 on set, being used for behind-the-scenes shooting. Although Ted and I are both keen to shoot the main film exclusively on the Blackmagic, to avoid severely disrupting the schedule we decide to shoot the day’s Steadicam material on the C300. (The C300 has SDI, HDMI and composite outputs. Blackmagic Design take note.)
DO NOT BUY THIS CONVERTER.
At lunchtime I get on the wifi and see if I can order a replacement SDI to HDMI converter. The only one that can be delivered the next day (a Sunday) is the same model as the one that packed up. Having little choice, I order it. Amazingly it is indeed delivered on the Sunday. Nice one, Amazon.
Unfortunately it doesn’t work. I was at least hoping for the paltry month of service I got from the previous one. But no, this one is dead on arrival.
By a process of elimination we check that the converter is indeed the piece at fault. We swap cables and cameras and the results are the same.
We continue to shoot the Steadicam material on the C300.
But I have one last desperate idea to get the Blackmagic working on the rig.
The CCTV camera, set up to film the Blackmagic’s screen
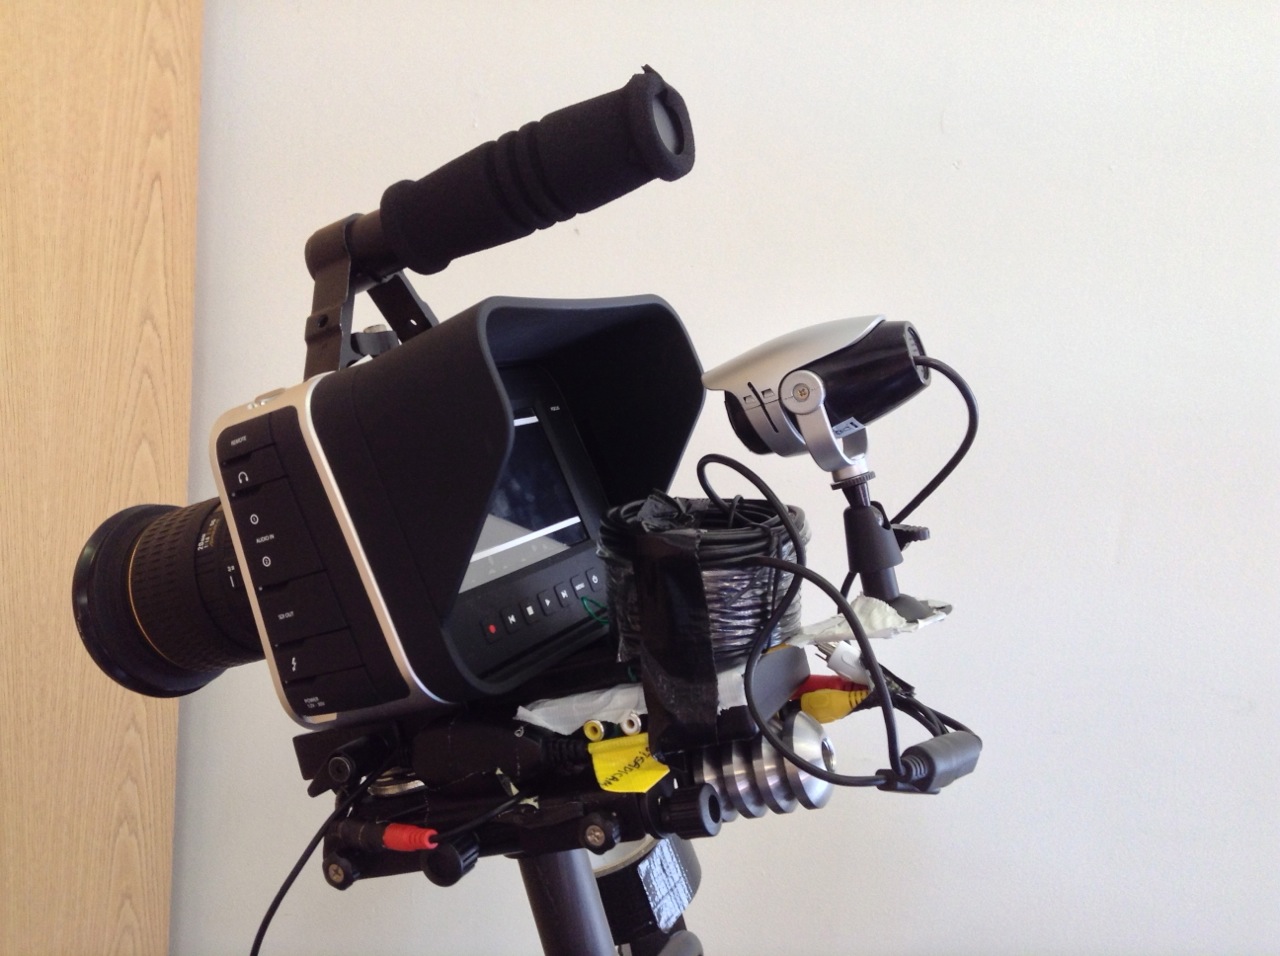
On Monday morning I send our driver, Lucky, to the nearest Maplin. I’ve given him instructions to buy a small CCTV camera. When he gets back with it I have Colin attach it to the rig behind the Blackmagic, filming the Blackmagic’s screen. The CCTV camera outputs a composite signal directly to the Steadicam’s monitor.
Incredibly, this works. But it does mean enclosing the Blackmagic and the CCTV camera in black wrap to eliminate reflections on the former’s screen. Which means we can’t get to the iris controls, and we’re relying on the distances marked on the lens barrel to focus. And to make matters worse, the Steadicam Pilot can’t take the weight of a V-lock battery, so the Blackmagic must run off its short-lived internal battery. Between takes we have to plug it into a handheld V-lock to top up the charge.
After capturing two or three successful set-ups with this ludicrous rig, we decide it’s slowing us down too much. I finally abandon all hope of using the Blackmagic on the Steadicam.
For those interested in how the C300 and Blackmagic stack up against each other, the Canon has a sharper, more video look compared with the Blackmagic’s filmic images. The Canon also has more compression artefacts due to its lower bitrate. But they seem to cut together alright once graded.
The lack of an HDMI output on the Blackmagic has been the one thing that’s really caused me problems since buying the camera. I’d be tempted to go for a Kinefinity mod if it wasn’t so expensive…
Of course, the camera is still incredible value for money. Personally I think the only competitors in terms of image quality are the Reds. (The Alexa and film are in a whole other league.) But it is strange that Blackmagic Design claim to have built the camera for people working in the low budget world, but apparently didn’t consider that such people rarely have access to SDI monitors.
Here’s a brief video blog from the set of Handmade Theatre‘s The Flying Machine, explaining how spacelights are used to create an even light for multi-camera shooting.
When I read a script that I’m going to shoot, there are a number of things I’m looking out for. I want to identify the themes and the character arcs, so that I can come up with ways of reflecting these in the cinematography (see my previous blog post for examples). And on a more mundane practical level, I’m figuring out what equipment is required, and which scenes or sequences might be difficult photographically.
To demonstrate my thought process in planning a project, I thought I would share with you today the things I highlighted in a particular script and why. The script in question is The Gong Fu Connection, written by Ted Duran, and we start shooting it this Friday. It’s an action-comedy drama in which a young Chinese businessman learns a life lesson via his connection with an Englishman who has introduced Kung Fu in a farm community in Sussex. You can help us make the film by going to www.indiegogo.com/projects/the-gong-fu-connection and contributing, or by spreading the word on your social media networks.
Throughout the script I’ve highlighted the time of day in the slug lines. One of the first things I need to know as a DP is, “Are there are night scenes?” because that will have a big effect on the lighting equipment needed. Ted’s script is nice and specific, not just DAY or NIGHT, but DAWN, MORNING, AFTERNOON, EVENING and DUSK. This is a really helpful starting point in considering the light. In general I see that there are a lot of daylight exteriors, so bounce and negative fill are going to be my two chief weapons.
The very first slug line is:
1. INT. VICTORIA STATION – MORNING
Day or night?
Immediately I’m wondering, “Is this going to be a guerilla shoot or are we going to have permission?” Clearly we will never be allowed large lighting set-ups and we will always be working around the general public. Battery-powered LED panels will come in handy here.
A little lower down the page is:
3. INT. RESTAURANT – DAY
Straight away I’m thinking, “Should it be night instead?” Even though in summer you may go to a restaurant in daylight, somehow it feels like it wouldn’t look right on camera. I make a note to discuss this with Ted on the recce, and indeed we end up deciding to shoot it after dark.
The next scene features a phone conversation. I make a note to ask if the person on the other end of the line will be seen.
Another station scene contains the direction:
He gets on the train… The train whizzes past an urban landscape…
I highlight this, to remind myself that this is a hidden extra scene – on board the train, as opposed to at the station. Again I’m wondering what the extent of permissions will be and what restrictions there may be on equipment. I also highlight other hidden extra scenes later on – an interior bedroom scene in which a character sees another character outside through the window, and a montage set in a variety of different places and times.
I highlight the following in a café scene:
Time passes, we see the clock tick past… Half an hour and two coffees later…
Maybe there are jump cuts here to show the passing of time? I’ll want to adjust the keylight outside the window to simulate the progress of the sun.
A violent flashback takes place in an apartment. Although the script specifies DAY, the content makes me imagine the look a little differently. I write the following notes: “Dingy look? TV light? Maybe night. Rough, handheld fight. No finesse or control.” Ultimately Ted and I do decide to set the scene at night. The flickering TV set will be a key light source. The handheld look will contrast with the more slick steadicam and tripod work which will characterise the Kung Fu fights later on in the film.
A more pastoral scene features two characters walking and talking beside a lake. I write: “Watery reflections? Bounce M18 off surface of water?” I’m thinking to enhance the beauty of the setting by using the rippling water surface to bounce an ArriMax M18 onto the characters’ faces.
A direction later on reads, “He is lost in his own world.” I write “push in?” beside this as a shot suggestion. Then I read:
Startled, he turns around to see a man towering over him in his dressing gown with a long plaited beard, who looks at him with a frown on his face.
This character, Mandragor, clearly has a special signficance, a mystical presence. I write “special lighting for Mandragor?” next to this passage. This will probably be stronger backlight or perhaps an unusual eyelight of some kind. I highlight his other appearances in the film too.
A dark room in a grungy pub
A dawn scene specifies that “the sun has just risen”, which I highlight. If it’s a cloudy day, or we’re unable to shoot at dawn, I may need to fake this with an orange-gelled HMI.
Later on, a direction reads:
RICKY smiles, then looks at AERONA dreamily.
I highlight this and write “classic beauty shot” above. I won’t go as far as a soft-focus filter, but the lighting needs to be particularly flattering here to represent Ricky’s enamoured POV.
A flashback in a pub has a nice clear description which is a great springboard for the cinematography:
… Playing pool in a dark room in a grungy pub…
I’m immediately thinking smoke, shadows, pools of light from the over-table fixtures. I also highlight the word “laptop” since the screen will be a light source which I may want to use or beef up with a hidden LED panel perhaps.
Scenes in moving cars are always tricky
Later on I’ve highlighted a dialogue scene in a moving car. I need to talk to Ted about how he wants to shoot it, and to think about how the camera can be rigged to get those shots.
The only time a specific shot is mentioned in the script is here:
Ricky is running as fast as he can. We see a close up on his face as he thinks.
I highlight this, knowing that it will be tricky to accomplish and hoping that Colin Smith, our steadicam operator, will be up to the challenge!
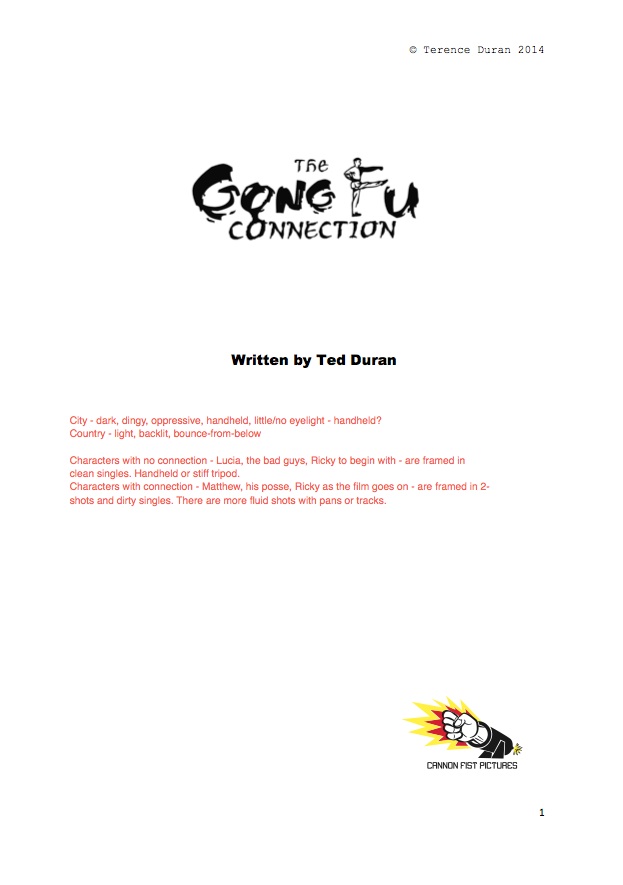
Having read the script a couple of times, I go back and make some notes on the cover page about the general photographic approach:
City – dark, dingy, oppressive, handheld, little/no eyelight – handheld?
Country – light, backlit, bounce-from-below
Characters with no connection – Lucia, the bad guys, Ricky to begin with – are framed in clean singles. Handheld or stiff tripod.
Characters with connection – Matthew, his posse, Ricky as the film goes on – are framed in 2- shots and dirty singles. There are more fluid shots with pans or tracks.
And that’s all. Some of these notes are just for me to think about, while others raised questions I needed to ask the director and producer about. Preparation is key in filmmaking, and in the heat and stress of the shoot I’ll be glad I gave some consideration to these issues in advance.




 Shane’s Inner Circle
 American Cinematographer
 DOP Documents