The 10 Greatest Movie Puppets of All Time

In today’s films, if a character is not human, chances are it will be created digitally. But in the latter half of the 20th century, as increasingly sophisticated audiences demanded more than a man in a suit, the art of puppetry blossomed in Hollywood. Artists like Stan Winston and Rob Bottin brought this art to its peak in the 80s and early 90s, before being usurped by computers. Today I’ve compiled a list of what I consider the ten greatest achievements of movie puppeteering. Some of them hold special places in my childhood memories; somehow, I can’t imagine that the digital creatures of today’s cinema will be cherished so fondly by the next generation.

10. E.T. (E.T. the Extra-terrestrial, 1982)
et-extra-terrestrial-behind-the-scenes

Evolved out of an abandoned sequel to Close Encounters of the Third Kind, E.T. was the highest-grossing film of all time until it was outdone by another Spielberg movie which can be found later on in this list. Like those in Close Encounters, E.T.’s alien was designed and built by Carlo Rambaldi, who also brought H. R. Giger’s eponymous Alien design to life for the 1979 sci-fi classic. Although he may appear to be a cross between a pretzel and a dog turd, the inexplicably cute E.T. was actually based on the faces of Albert Einstein and writers Ernest Hemingway and Carl Sandburg. While the head was animatronic, the body was generally occupied by one of two little people, or by Matthew DeMeritt, a twelve-year-old with no legs who walked around with his hands inside the creature’s feet. A miniature puppet was employed for at least one shot, as seen above being adjusted by ILM’s Dennis Muren.

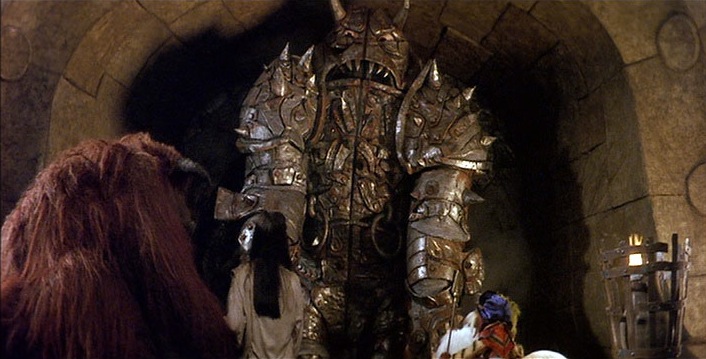
9. Humongous (Labyrinth, 1986)

goblingiant1

I don’t have enough fingers to count how many times I’ve seen this movie, and I love it every time. The imaginations of Brian Froud, Jim Henson and Terry Jones make for a potent combination of fantasy, wit, invention and silliness. Not to mention David Bowie in obscenely tight trousers, a treat for all the family. There are brilliant puppets throughout – the helpful worm, the brave canine Sir Didymus, the Wise Man’s mouthy hat, sundry goblins, and the mischievous Fireys (choreographed by Star Trek: TNG’s Gates McFadden and partly voiced by Red Dwarf’s Danny John-Jules, fact fans). But my favourite is Humongous. Having finally reached the Goblin City, Sarah (Jennifer Connelly) and her friends are faced by huge metal doors which slam together to form a hulking, axe-wielding, giant robot. Special effects supervisor George Gibbs designed a hydraulically actuated skeleton mounted on a boom arm on a dolly track hidden behind the creature. The limbs and head were operated by a single puppeteer in a telemetry rig that translated his movements to the puppet. A bit like Avatar, only the avatar in question was a real, 15ft tall character. James Cameron’s film seems pretty lame by comparison, huh?

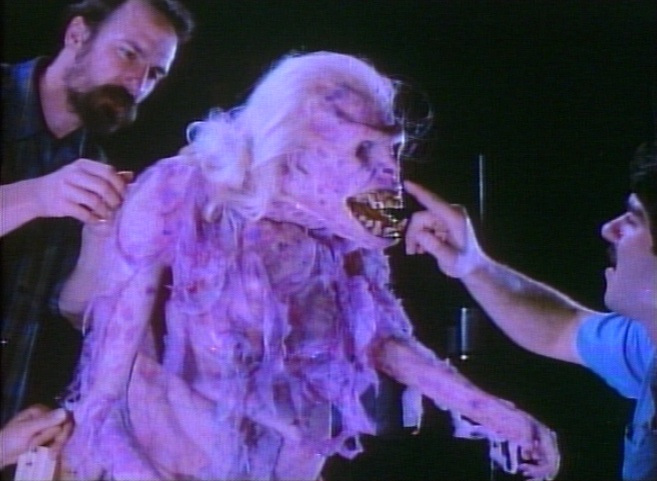
Ghostbusters198416_zps626ab9868. The library ghost (Ghostbusters, 1984)

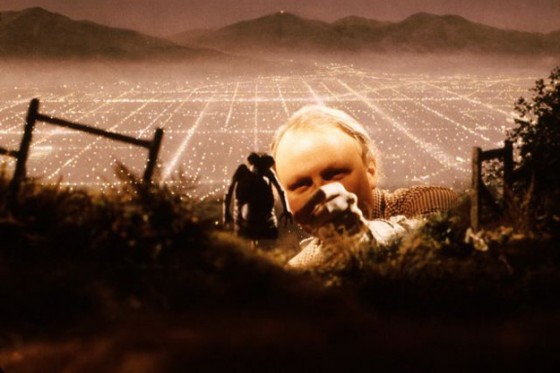
Despite only getting three seconds of screentime – the majority of the sequence using actress Ruth Oliver as the ghost – this puppet makes a big impact. As a kid I loved Ghostbusters for its sci-fi/horror elements; as an adult I love it equally for its comedy. The first act library sequence perfectly sets up both aspects, building up the suspense even amongst great lines like “You’re right. No human being would stack books like this.” Richard Edlund and his team at ILM built a waist-up puppet which could transform from a likeness of Oliver to a monstrously distorted apparition. It’s the movie’s first big scare and is quickly followed by one of its biggest laughs, as the proto-busters leg it unceremoniously. “That was your whole plan, ‘Get her’?”
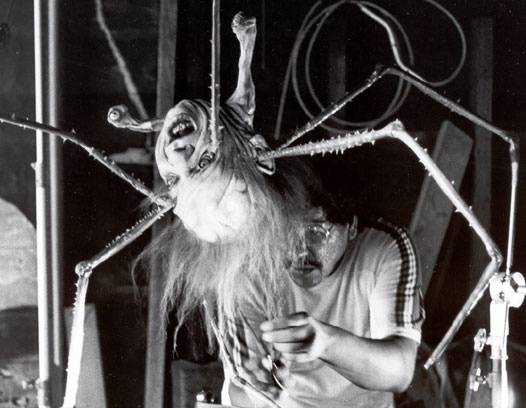
the-thing-prtical-effects7. Spider-head (The Thing, 1982)

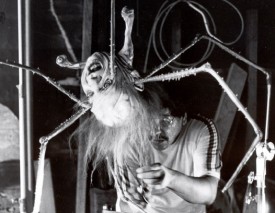
When making his sci-fi horror classic, John Carpenter was determined to avoid the “man in a suit” approach which had marred the movies of his childhood. To design and build the myriad puppets which would depict the titular thing in all its many guises, Carpenter hired Rob Bottin, who would go on to make the iconic Robocop suit and various exploding Arnold Schwarzeneggers for Paul Verhoeven. In The Thing’s most iconic – and most revolting – scene, the chameolonic alien is disguised as the prone form of Norris (Charles Hallahan). After munching off the arms of the doctor trying to revive him, the Norris creature’s head splits off from the body and falls to the floor. It then sprouts eight arachnid legs and two extra eyes on stalks and scuttles off across the room. In one of cinema’s great understatements, David Clennon’s Palmer deadpans, “You’ve got to be fucking kidding.”

6. The giant squid (20,000 Leagues Under the Sea, 1954)
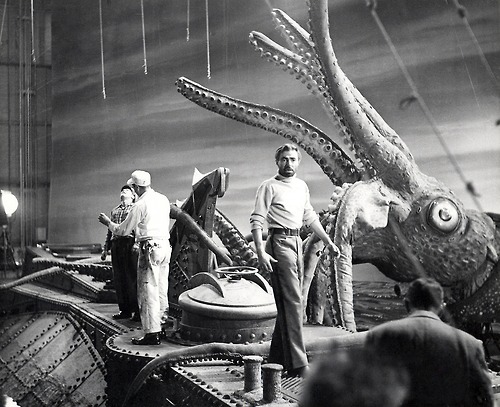
tumblr_mtfmpdEz5Z1r4r13xo1_500

20,000 Leagues Under the Sea is a much-loved Disney classic from that era when every Jules Verne adaptation seemed to star James Mason. Probably the largest puppet ever made for a film at the time, the giant squid still impresses today. Its climactic attack on the Nautilus was originally shot at sunset with a calm sea, but the wires holding up the tentacles were too obviously visible. Walt Disney himself allegedly suggested the reshoot in dark, stormy conditions and the result was a much more dramatic and convincing sequence.

5. The alien queen (Aliens, 1986)

Say what you like about James Cameron, his understanding of and invention in the field of special effects is remarkable. Above is the proof-of-concept footage for the alien queen in his all-out-action sequel. As per Cameron’s idea, two stuntmen are hung from a crane, each operating one extended outer arm and one vestigial inner arm. The legs are moved externally by rods and the head of the finished creature would be hydraulic, operated via steering wheels from a nearby operators’ station. Built by Stan Winston Studio, and also directed in second unit photography by Winston himself, the queen takes the Alien mythos to a whole new level. What blows my mind is how Cameron and Winston were able to hide or frame out the rods, rigs and cables in an era before digital wire removal. Certain wide shots, notably in the egg chamber and the climactic battle with Ripley’s power loader, were realised as quarter-scale miniatures. These were puppeteered by a combination of rods from beneath the model sets and cables running to a bank of levers off camera. (I also love the miniature alien puppet that was used in Alien 3 which moved beautifully but was ruined by terrible compositing.)

4. The T-rex (Jurassic Park, 1993)

Inspired by the 40ft hydraulic ape built for John Guillermin’s 1976 King Kong remake (which would probably be on this list if I’d ever seen the film), Steven Spielberg embarked on Jurassic Park hoping to use full-size animatronics to realise all of his dinosaur shots. This of course proved impractical, and we all know about the ground-breaking CGI that ultimately supplied the wide shots of the animals. But the majority of the dinosaur shots in the movie were indeed full-size animatronics built and operated by Stan Winston and co. The main T-rex puppet weighed over six tonnes and was mounted on a flight simulator-style platform that had to be anchored into the bedrock under the soundstage. Although its actions were occasionally preprogrammed, the prehistoric monster was generally puppeteered live. Winston and his crew built a three-foot T-rex armature packed with sensors; when this armature was moved, the full-size Rex would duplicate the movement in real time.

3. Yoda (The Empire Strikes Back, 1980)
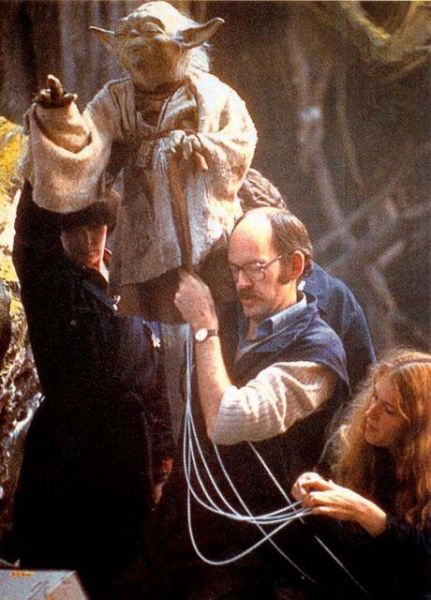
Yoda-PuppetRanks so highly in this list Yoda does, because of his cultural impact. Terrified that audiences would reject a muppet character in a live action film, George Lucas, producer Gary Kurtz and director Irvin Kershner were. Brave enough to try it had they not been, attempted The Dark Crystal and Labyrinth might never have been. (Go on to produce The Dark Crystal, Kurtz would, while exec produce Labyrinth, Lucas would.) Sculpted by makeup artist Stuart Freeborn, Yoda was, and bears a distinct resemblance to him, the puppet does. Help build the puppet, the Jim Henson Company did, around a cast of performer Frank Oz’s arm. The puppetry to accommodate, built four feet above the floor, the Dagobah set was. For voicing and performing Miss Piggy, most famous Frank Oz was. Intend to replace Oz’s voice Lucas did, but work so well with his puppetry it did, that remain Oz’s voice did.

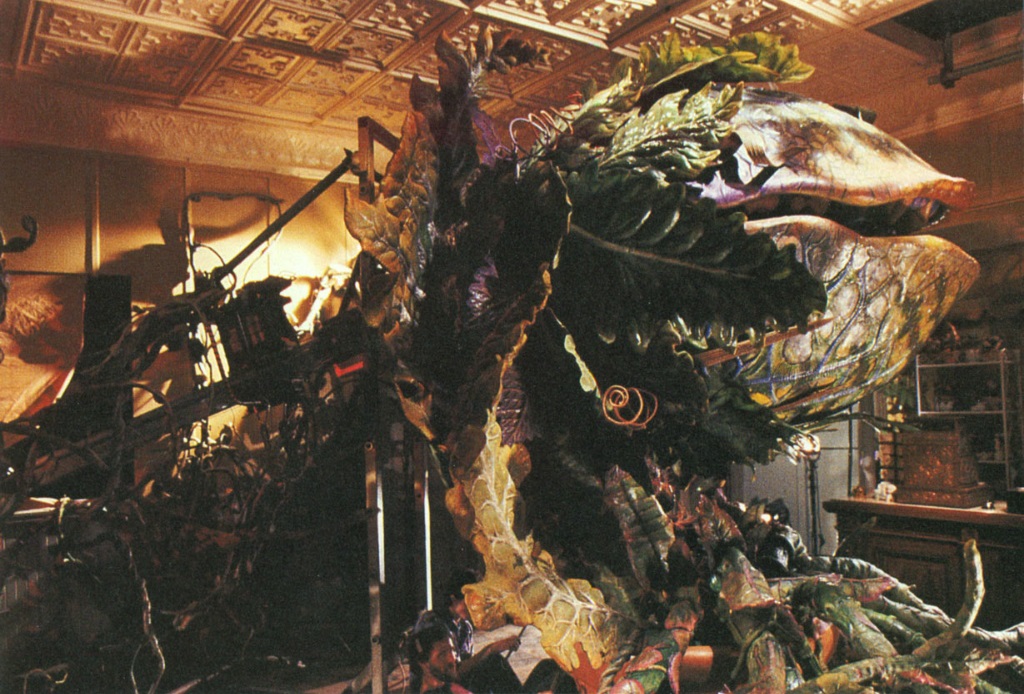
2. Audrey II (Little Shop of Horrors, 1986)
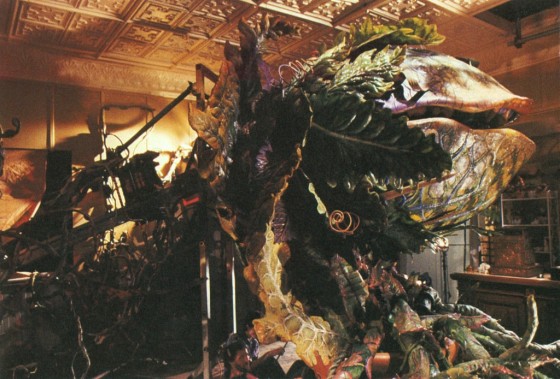
audreyiibackcontrol

Aside from E.T., Audrey II is the only puppet on this list that properly lip-syncs – not just flapping its jaw, but actually forming the correct mouth shapes for each syllable – a fiendishly difficult task for a puppet. Animatronics expert Lyle Conway, a veteran of The Dark Crystal and the Muppets franchise, came on board to design and build the five iterations of Audrey II, ranging in size from a few inches to over twelve feet. Conway then hired a trio of lip-sync puppeteers fresh from Return to Oz (another great puppet movie which narrowly missed this list) who rehearsed for three months. They were joined by additional crew – as many as 70 for the largest plant – to manipulate the vines and control the gross body movements. One of those puppeteers was concealed inside the head, but the rest worked via five-foot-tall levers hooked to cable controls in a sweaty space beneath the set that resembled a manic convention of railway signalmen. So exhausting was the operation of the larger puppets that a physical therapist was hired by the production, and only a few lines of a song could be shot each day. Check out the film’s awesome original ending below.

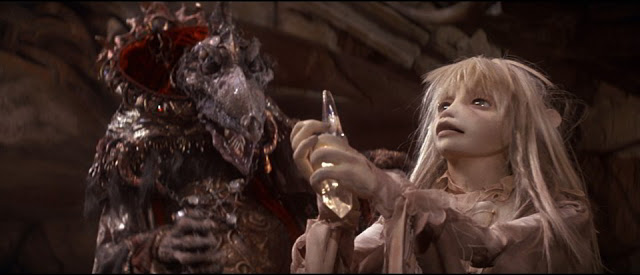
1. Everything (The Dark Crystal, 1982)
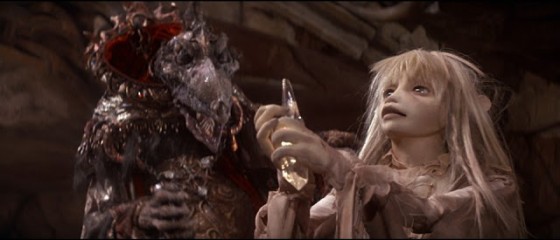
960_dark_crystal_blu-ray4x

For me, filmmaking is all about imagination, and by that measure The Dark Crystal must be the greatest film ever made. In recent years there have been horrifying rumours of a 3D sequel mixing puppets and CGI, but mercifully this abomination seems trapped in development hell. There is something so very satisfying about a world which has been realised entirely through hands-on, physical means – you can feel the blood, sweat and tears. The performers of the creepy Garthim, for example, had to be hung on racks to rest at regular intervals, so heavy were their costumes. Skesis puppeteers went around all day with one arm extended above their heads (inside the puppet head and neck) and video monitors strapped to their chests so they could see what they were doing. A Swiss mime was brought in to choreograph certain characters, and to train the team of performers before the shoot, building up the physical stamina they would need. Directed by the two greatest movie puppeteers in the world, Jim Henson and Frank Oz, The Dark Crystal is a monument to the art of puppetry and remains to this day one of the most unique films in cinematic history.

The 10 Greatest Movie Puppets of All Time

Locations and the Cinematographer

Lighting in from outside is crucial for a cinematographer
Lighting in from outside is crucial for a cinematographer. (Photo by Anneliese Cherrington from the set of The Deaths of John Smith)

On a low budget project there are extra challenges for everyone. As a cinematographer, the most common problem I come across, the one thing that most often foils my efforts to make the images look good, is not the lack of time, or money, or equipment, or crew. It’s the locations.

I understand that for many small projects, even just the travel expenses associated with the DP attending the recce can be prohibitive. If that’s the case, then here are a few things you can look out for yourself. Clearly there will always be compromise in low budget filmmaking, but if you can follow these tips ,where possible, you’ll enable the cinematographer to put the most production value on screen.

  1. Avoid locations with white or magnolia walls, particularly blank ones. They look cheap and nasty on camera and make it very hard to control the ambient light level.
  2. Ensure that permission is obtained to set up lights on the land outside the windows. Almost all cinematography for interior scenes is based heavily on lighting from outside in. Avoid locations where it’s physically impossible to put a light outside, such as rooms that aren’t on the ground floor, unless you can afford scaffolding, heavy-duty stands or a cherry picker.
  3. If there is a fire detection system, make sure the smoke alarms can be disabled. Many cinematographers use smoke or haze to bring a scene to life, but we don’t want to set the fire alarm off.
  4. If the scene is set at night, choose a location that will permit nighttime shooting. Blacking out windows to simulate night during daylight hours is time consuming. It also cuts off the DP’s main place to shine in lights, and it sacrifices depth in the images by denying the opportunity for a view out of the window.
  5. Choose locations that are appropriate for the lighting budget. It doesn’t matter what the camera’s native ISO is, no DP can properly light a classroom, or a village hall, or a car park without HMIs. If you can’t afford to hire big lights, you may well achieve better production values by choosing smaller locations.
Locations and the Cinematographer

The First Musketeer: Athos and Marion

A clip from The First Musketeer has been released. Taken from episode three, it shows the first meeting between Athos and the mysterious Marion.

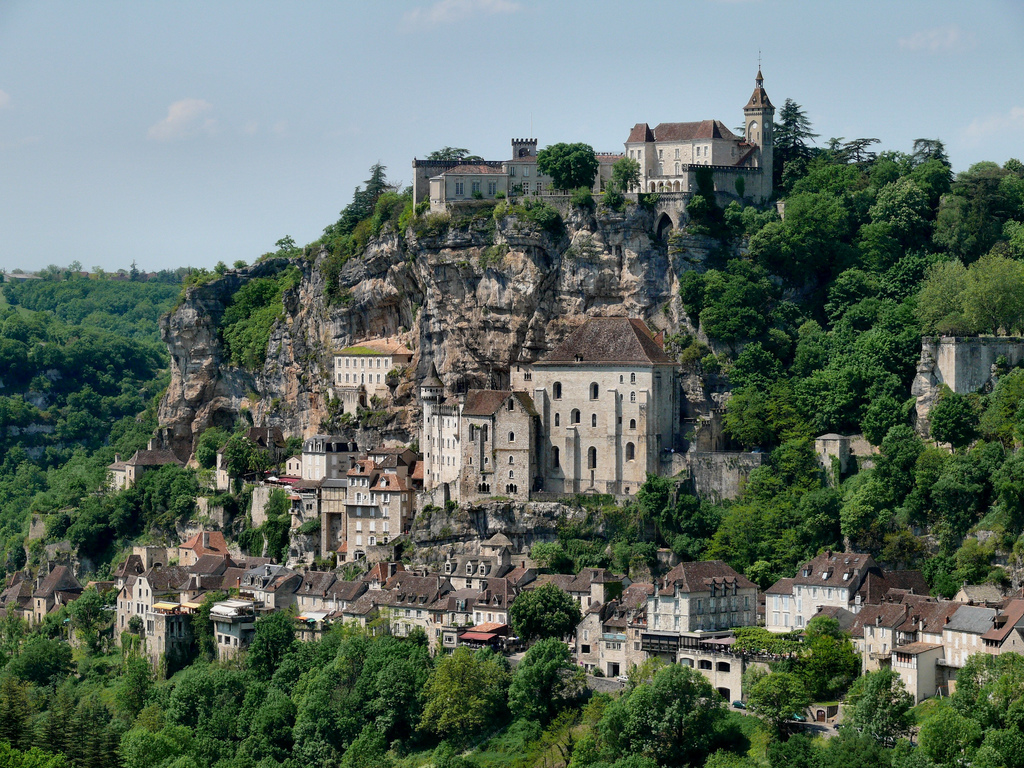
Rocamadour. Crazy, huh?

This was shot at Rocamadour, a medieval town carved into the side of a gorge. (Read director Harriet Sams’ blog for more on the locations of The First Musketeer.) And I think this may have been the night when gaffer Richard Roberts quite literally got a shock as the 1.2K HMI ballast packed up. His arm was numb for 20 minutes. Fortunately this happened after he had executed some nice steadicam work for the early part of this scene.

Come to think of it, it was probably also the night he knackered “the donkey”. Take a moment to come up with your own jokes. Done? Okay, so the donkey was his van. Yeah, not so funny, but at least I let you dream for a bit. Anyway, you can imagine how steep the road was to get down to this place. Now imagine it’s also incredibly narrow. And that the van is quite small but loaded full of generators and other heavy kit. Like I say, Richard knackered his donkey.

Richard avec le steadicam. Photograph de Jessica Ozlo
Richard avec le steadicam. Photo: Jessica Ozlo

My recollection is that this was our first big night exterior, and I remember being shocked at how long it took just to cable everything. Often we were throwing cables over balconies to someone else below – to avoid running the cable through shot. When it was unavoidable, the wonderful art department – Amy Nicholson and her assistant Denise Barry – would come in and hide the cables with straw. It really felt like 30% of the set-up time was planting the lights, and the other 70% was running the cables, hiding the cables, siting the generators, checking we weren’t overloading either of them, discovering we were even though the generators were rated a full kilowatt above what we were drawing, deciding to run some stuff off the mains, blowing a fuse because the electrics are old, failing to find the fusebox, etc, etc.

When lighting night exteriors, I tend to start from the back and work my way forwards. Backlight lets you see everything without really seeing it, and then you can add in pools of light from the sides when you need to see more. So for the wide shot at the start of the scene, the first lamp to go up was a 1.2K HMI (before it died), right at the back. There was some debate about whether we could site it there, because it was on some steps which were used occasionally during the night by the resident monks. Yep, monks. In the end we said “screw it” and put it there, leaving as much room as possible for the monks to get past it. Once smoke was pumped in, that HMI gave us the nice blue ambience in the background.

Nicole O'Neill as Marion De Lorme. Photo: Jessica Ozlo
Nicole O’Neill as Marion De Lorme. Photo: Jessica Ozlo

Opposite the door of the tavern were a couple of Dedos creating pools of light around the candles – more on that in a future post. In the foreground I placed a Kinoflo on the floor to the left of frame, dimmed right down and diffused, just so characters wouldn’t be complete silhouettes going under the arch.

The conversation between Athos and Marion is backlit by a Dedo boomed over their heads, behind them (from the camera’s point of view). It wraps around Marion’s face enough to make out her profile, which is about all you want in a mysterious scene like this. There’s some bounce on Athos which I think was just coming off the surrounding stone. The only other lamp was a 2.5K HMI, lighting the background. For Marion’s close-up, I aimed the Dedo at Athos and let the bounce off his shirt and jacket light her face.

If you want me to rationalise it now, I’d have to say that this Dedo represents a particularly bright moon, and the HMI represents starlight. Frankly this was one of those cases where making it look good seemed more important than making it look realistic.

Visit the firstmusketeer.com for all the latest news on the series. For more on the cinematography of the series see my on-set vlogs on the official website and my Period Cinematography blog from last year,  and stay tuned for more as the release approaches. Also check out the advertorial that Blackmagic Design did on the series recently.

The First Musketeer: Athos and Marion

Forever Alone: Day Three

On the left, a real streetlight. On the right, a 650W Arrilite with Urban Sodium gel.

Saturday night saw the third and final day of production on Forever Alone. If you haven’t already, check out my blogs on day one and two of this sci-fi short by Jordan Morris. (I’ve gone back and added some frame grabs into the day two post.)

This time around, our lighting kit had grown just slightly with the addition of a 650W Arrilite. Without this it would have been near impossible to light the nighttime alley scenes that were scheduled. The alley in question was in a suburban area, conveniently adjacent to the producer’s house and thus a power source.

I knew going into this shoot that I would have to embrace the sodium vapour streetlamps. In the past I’ve always avoided or flagged them, because that grungy orange look gives away that you don’t have the budget to swap out the bulbs like they do in Hollywood. American film and TV nights are always steely blue; British film and TV nights are usually seedy orange. With only one flag and one C-stand in our kit, however, I had no choice.

The orange backlight on Faith (Haruka Abe) and the fence, although apparently from the streetlamp in the background, is actually from an Arrilite 650 out of frame right, gelled with Urban Sodium. A daylight-balanced LED panel, also out of frame right but closer to camera, keys Faith. A second panel hidden behind the end of the fence lights the van and the rest of the deep background.
The orange backlight on Faith (Haruka Abe) and the fence, although apparently from the streetlamp in the background, is actually from an Arrilite 650 out of frame right, gelled with Urban Sodium. A daylight-balanced LED panel, also out of frame right but closer to camera, keys Faith. A second panel hidden behind the end of the fence lights the white van and the grass in the background.

Fortunately there were no streetlamps close enough to spill light onto our character, Faith (Haruka Abe) – they were only creating pools of light in the background, which helped add depth. I used one in particular to motivate a strong backlight, in reality generated by the Arrilite, gelled of course with Urban Sodium (Lee no. 652).

For colour contrast, an LED panel set to 5,600K threw in a little “moonlight” from the side. The second panel, also set to daylight, was positioned to light the deep background. It was so handy, as I raced to rig our final set-up before wrap, to be able to slap a V-lock battery on one of these panels and move it across the street in seconds.

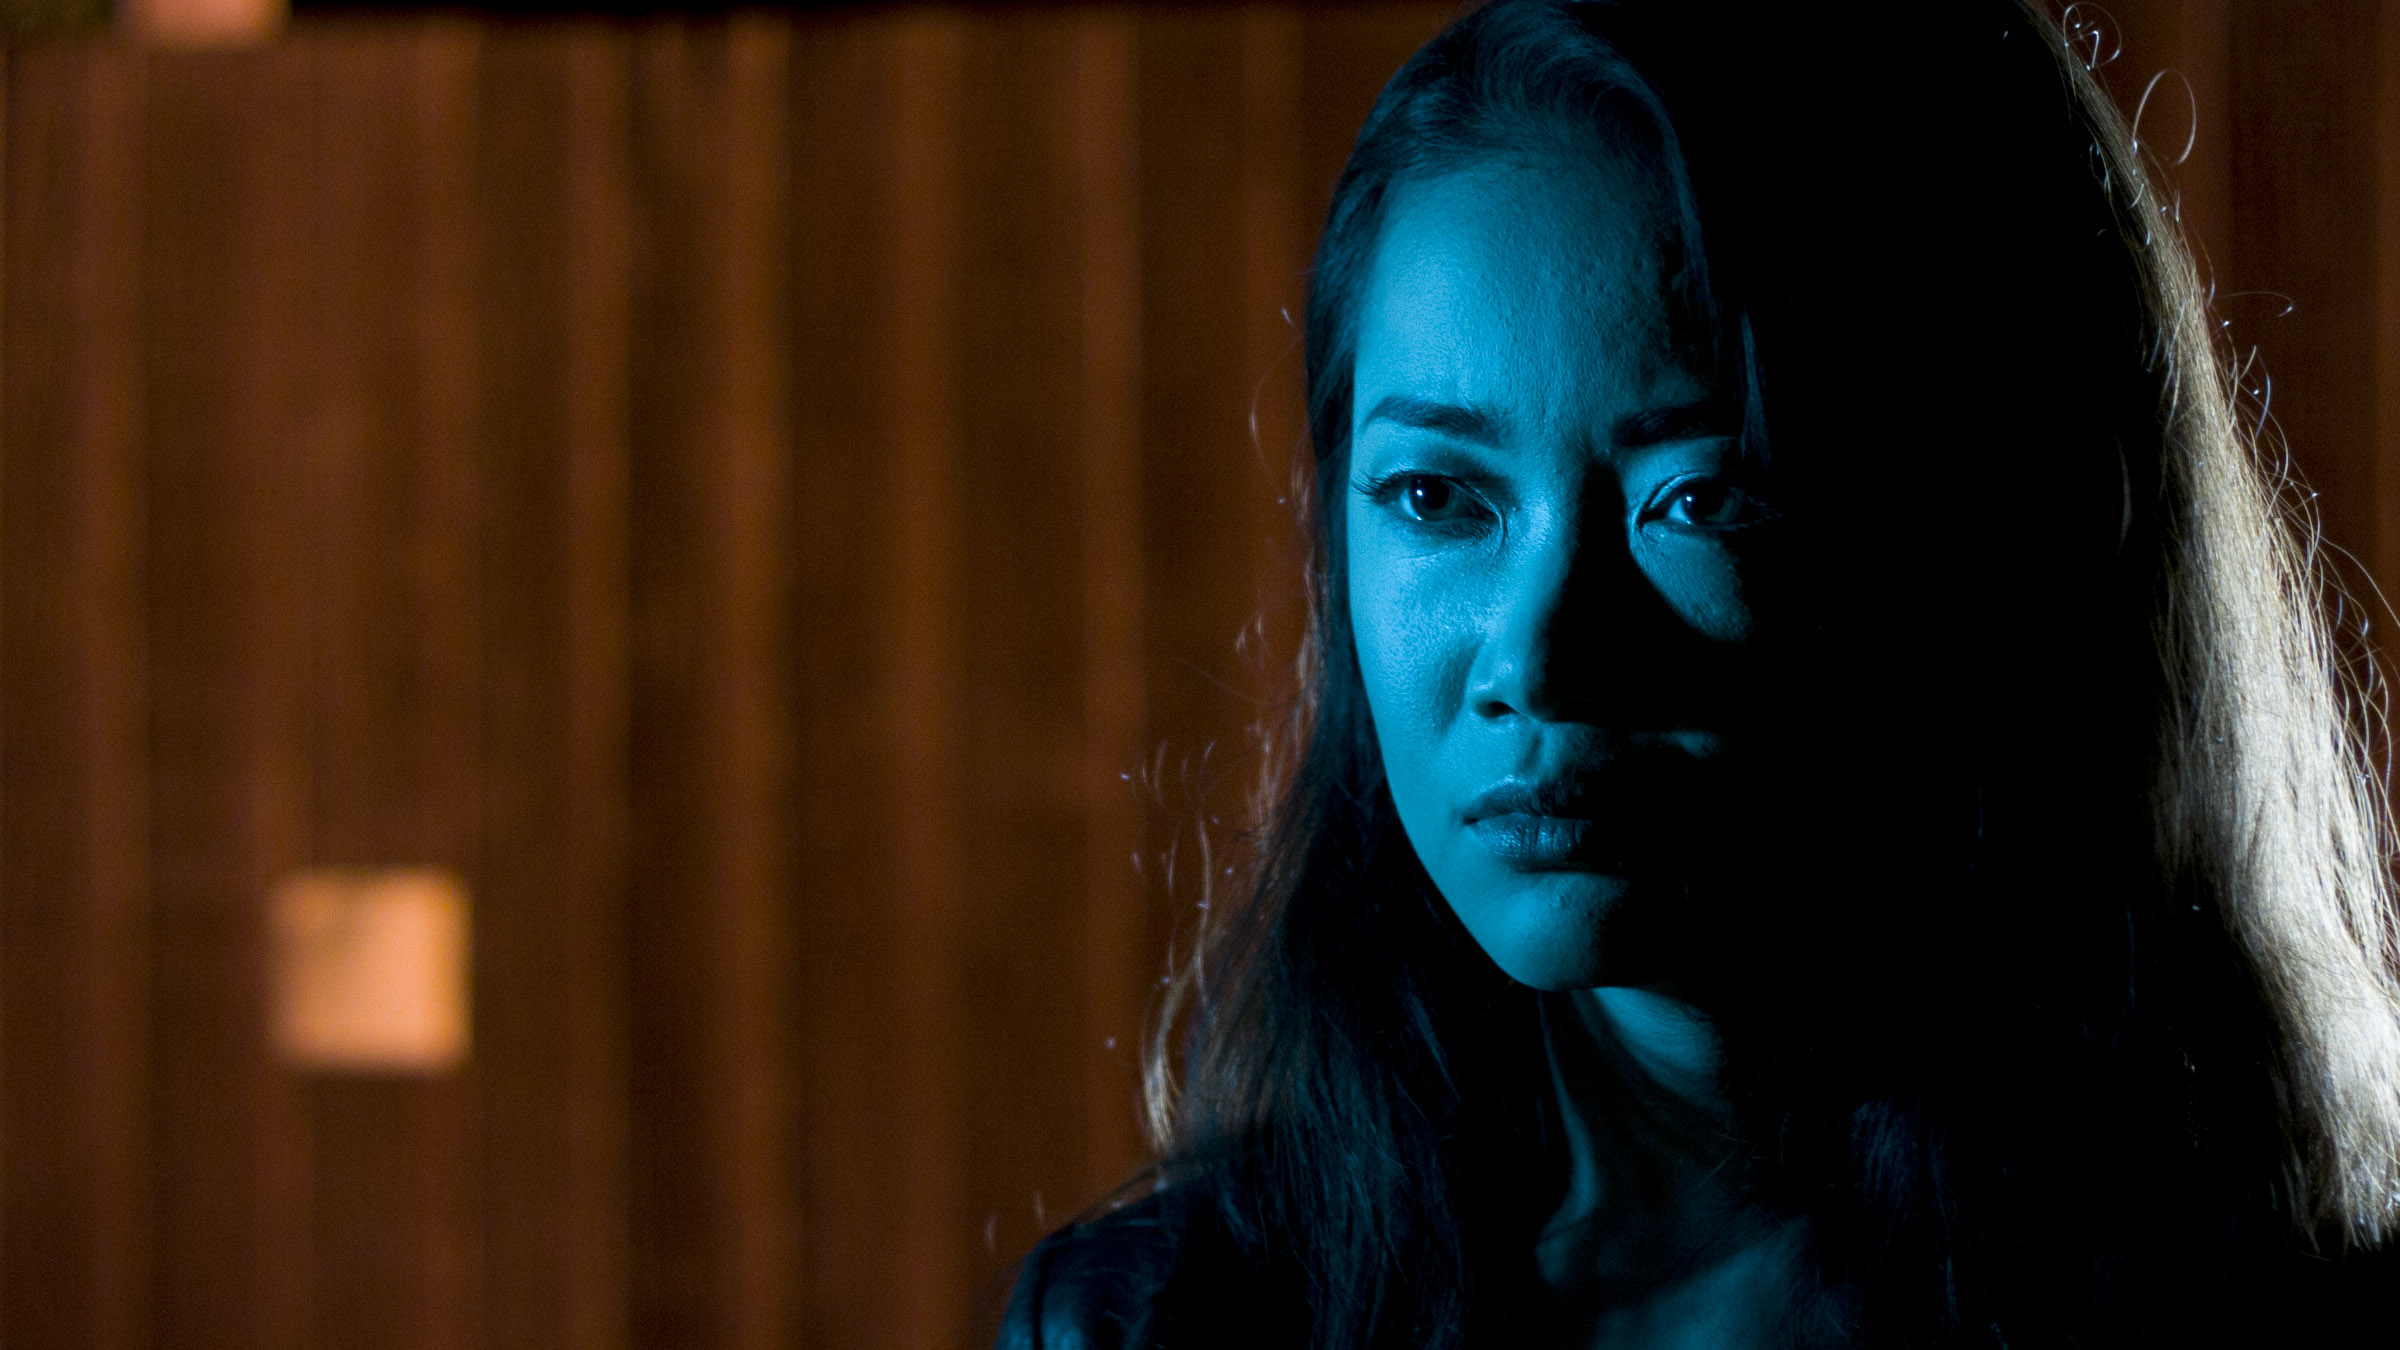
When Other Faith appears on the scene, she’s keyed by a Dedo covered with tough-spun diffuser and the characteristic Medium Blue/Green gel. My favourite shot of the night was her close-up:

Haruka Abe as Other Faith. Image courtesy of Jordan Morris

Emulating the beautiful contrasty look of the TV show Fringe, I eliminated all fill light to put one side of her face in crisp, black shadow. An LED panel backlights her hair, while the Urban Sodium-gelled Arrilite rakes across the fence in the background.

Eliminating the fill was unexpectedly difficult – a downside of using a sensitive camera. The slightest bit of bounce would contaminate the blacks, as did a faux period streetlamp in the adjacent garden. It’s hard to figure out where unwanted light is coming from when it’s so dim that your naked eye can barely perceive it.

Forever Alone is now wrapped, and Jordan’s beginning the processes of editing and adding extensive visual effects. Personally I’ve learnt a lot about how far a camera be pushed, specifically the Blackmagic Cinema Camera. Many of the wide shots I’ve reviewed are under-exposed (partly due to our widest lens being relatively slow) but the raw data allows the exposure to be bumped up in post without them looking nasty.

What’s the most you’ve ever had to push a camera?

In this splitscreen shot, the two Faiths are backlit by the 650 - this time without a gel, while an LED panel gelled with Urban Sodium lights the background. A second LED panel, daylight balanced, keys the downside of First Faith (left), while a Dedo gelled with Medium Blue/Green keys the downside of Other Faith (right).
In this splitscreen shot, the two Faiths are backlit by the 650 – this time without a gel, while an LED panel gelled with Urban Sodium lights the background. A second LED panel, daylight balanced, keys the downside of First Faith (left), while a Dedo gelled with Medium Blue/Green keys the downside of Other Faith (right).
Forever Alone: Day Three

Forever Alone: Day Two

Stella Taylor as Charlotte in Forever Alone. Image courtesy of Jordan Morris

This is a continuation of my last post, a report from the set of Jordan Morris’s sci-fi short Forever Alone.

Black-wrapped ceiling light

Day two saw us shooting a big scene in the dining room. Since the location was only available to us during daylight hours, the windows had to be blacked out with bin bags. Ideally for night interiors, I would put an HMI outside to shine “moonlight” in through the windows, and perhaps use halogen floodlights to create depth and interest in the deep background. This can bother some directors, however, because it means leaving the curtains open – hardly realistic. I figured that if I could create an interesting night interior look on Forever Alone without the crux of open curtains and deep background, it would give me a lot of confidence in the future when working with those restrictions.

An LED panel hidden behind the wall that Charlotte (Stella Taylor) is leaning on supplements the ceiling light from a more flattering angle. A CTB-gelled Kinoflo Divalite provides the blue wash in the foreground.
An LED panel hidden behind the wall that Charlotte is leaning on supplements the ceiling light from a more flattering angle. A CTB-gelled Kinoflo Divalite provides the blue wash in the foreground. Image courtesy of Jordan Morris

I began by turning on the ceiling light, something I almost never do. I’m not a big fan of toplight, but it seemed appropriate given the interrogative nature of the scene, and I knew I could add bounced light off the table-top if the look was too harsh. Also, the shadow of the lightshade added some interest to the room’s blank white walls. I used the 60W tungsten bulb, and placed black-wrap across the top of the shade to prevent bounce off the ceiling from raising the ambient light level.

Cardboard barn doors. This kind of DIY solution is so much easier with sources that don't get hot.
Cardboard barn doors. This kind of DIY solution is so much easier with sources that don’t get hot.

I clamped the Dedo to the top of a mirror directly behind Faith, which allowed me to give her a dedicated backlight. I gelled this pink, foreshadowing her eyes glowing this colour at the end of the script.
Other Faith, a visual representation of the heroine’s darker side, was keyed by another dedicated source, this time gelled with Medium Blue/Green again. Ideally this source would have been a Dedo, to achieve fine control, but only an LED panel remained available. So to reduce the panel’s spill onto other characters, I fashioned makeshift barn doors out of a cardboard box.

To light the living room – visible in the background on reverses – I employed the Divalight. This was gelled blue to suggest moonlight and create some depth and separation – a proxy, I suppose, for those deep backgrounds I couldn’t have outside the windows.

Much has been made in recent years of the low-light sensitivity of modern digital cameras, and the attendant reduction in required lighting power. When competing with natural light, larger instruments are still necessary, but Forever Alone really helped me to see what can be achieved with minimal gear. This weekend I get to see how much I can push this in a night exterior scene, as we complete principal photography. Stay tuned.

Working from the foreground back, an LED panel to the right provides the key on Charlotte (centre), with fill supplied by the ceiling light. Faith (right) is keyed by a second panel, gelled with Medium Blue/Green. A Dedo provides backlight, while a blue-gelled Divalite illuminates the background. Image courtesy of Jordan Morris
Working from the foreground back, an LED panel to the right provides the key on Charlotte (centre), with fill supplied by the ceiling light. Other Faith (right) is keyed by a second panel, gelled with Medium Blue/Green. A Dedo provides backlight, while a blue-gelled Divalite illuminates the background. Image courtesy of Jordan Morris
Forever Alone: Day Two

Forever Alone: Day One

Haruka Abe as Faith in Forever Alone. She is side-lit by an LED panel and 3/4 backlit by a Dedo, while a Kinoflo Divalite illuminates the background. Image courtesy of Jordan Morris

When I was offered the role of DP on sci-fi short Forever Alone, I must confess that I had pause for thought. It was a student production, and the lighting package available from the university was much smaller than I’m used to. But I figured it would be a good challenge for me, to see if I could deliver a slick sci-fi look for a script set entirely at night, using only a handful of small instruments.

Creating darkness around the garage door meant making good use of the garage's random contents.
Creating darkness around the garage door meant making good use of the garage’s random contents.

The package consisted of a Dedo kit, a Kinoflo Divalite, two 12×12″ LED panels, a collapsible reflector, a single C-stand (with an arm but no knuckle) and one flag. And we quickly discovered that the Dedo kit contained only one in-tact bubble. On arriving at the house location, I checked out all the ceiling lights and, amongst the energy saver bulbs, found a single 60W tungsten globe. I immediately added that to my modest arsenal, along with my trusty £2 LED camping light which I’d brought along. Additionally, at my request, director Jordan Morris purchased a powerful LED torch for a key sequence. Dynamic practical lighting always looks good, and I thought it might help fill in any areas which our other sources couldn’t reach.

£2 LED camping light

We were shooting on the Blackmagic Cinema Camera with three Canon primes, the slowest of which was f2.8. Regular shots would be recorded in 1080P ProRes, while VFX plates would be captured in the 2.5K CinemaDNG Raw format. I feared I would be struggling to light to f2.8 without raising the camera’s ISO above its native 800, but in fact only one scene felt underexposed.

Interactive light, the low-tech way
Interactive light, the low-tech way: a 60W bulb on a stick

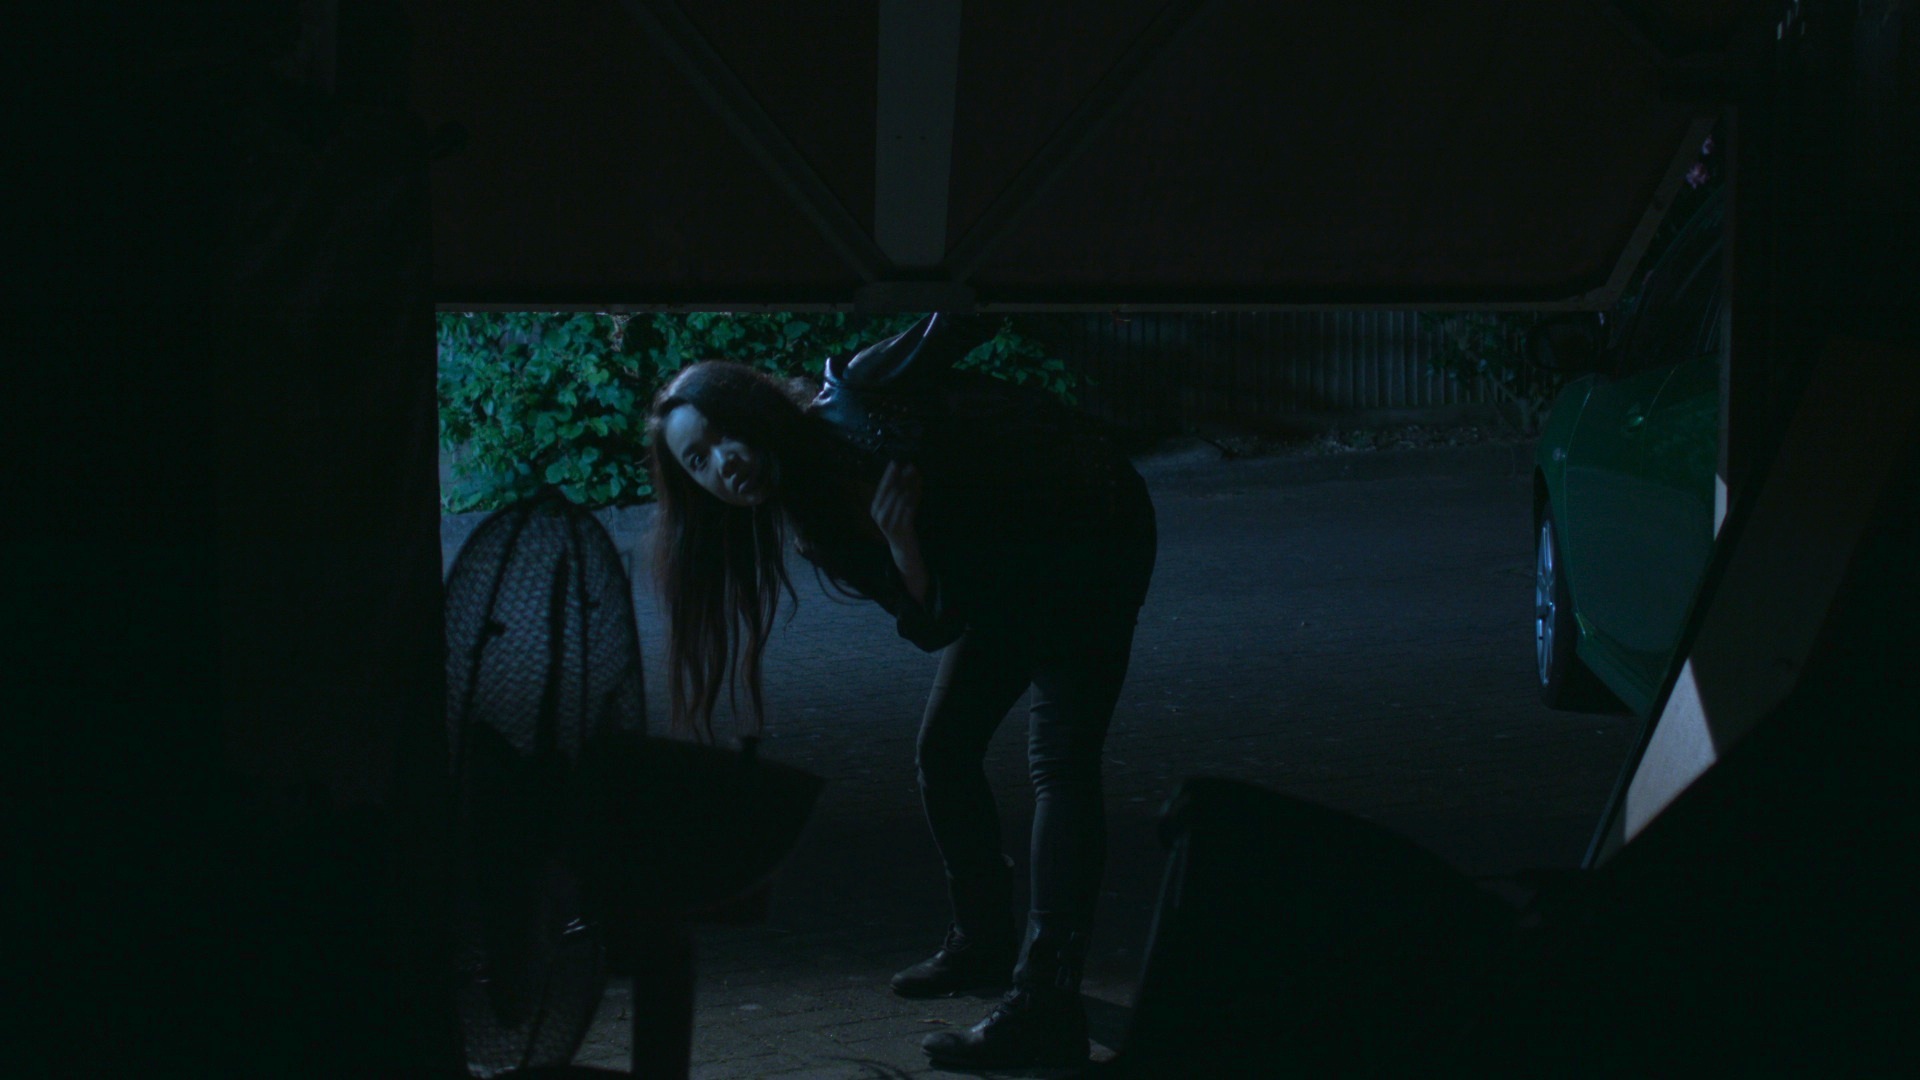
This scene took place in the garage, where the lead character, Faith, uses her superhuman abilities to generate a glowing light source above her head. To create the requisite interactive light, I borrowed the pendant fitting from the ceiling of the garage, removed the fluorescent bulb, put in the 60W tungsten globe and taped it to the end of a broomstick. I had chosen Medium Blue/Green as Faith’s “special powers” colour, but this is a very dark gel. With only a 60W bulb inside, even boomed above Faith’s head, it didn’t shed quite as much light as I wanted. Hopefully these shots, recorded in Raw, can be brought up in the VFX/grading process without too much noise creeping in.

Other sources used in the garage included the two LED panels, colour-balanced to 5600K so as to show up blue on the tungsten-balanced camera. These were positioned in the rafters at either end of the space and dimmed right down, to give a hint of backlight to scenes supposedly taking place in pitch blackness.

The garage’s ceiling light, turned on by the characters of Mitchell and Charlotte when they enter, was represented by our only functioning Dedo. I chose the Dedo for its focus; I didn’t want the room awash with light, just a pool of illumination that would still have shape and mysterious shadows.

Stella Taylor and Oliver Park, as Charlotte and Mitchell, are keyed here by a Dedo in the rafters. A foreground glow is created by an LED panel. Image courtesy of Jordan Morris

For several shots I used my LED camping light as a key, believe it or not, even going so far as to rig it on a stand for certain close-ups. The distances involved were small, so it was quite effective. In one shot (not the one pictured below) I bounced it off the floor AND covered it in tough-spun diffuser, to get an ultra-sublte eyelight.

Haruka Abe as Other Faith, keyed by an LED camping light (£1.50 from a charity shop). Image courtesy of Jordan Morris
Haruka Abe as Other Faith, keyed by the LED camping light shown above. Image courtesy of Jordan Morris

Stay tuned for my report from day two of the shoot.

Forever Alone: Day One

The Importance of Sound Design

Here’s a quick demonstration of the huge difference that sound design can make. This video contains a scene from the final cut of Soul Searcher, but still with the original production sound, followed by the same scene after the processes of sound editing, design and mixing were completed.

The music makes a big difference, of course, but putting that to one side, the sound effects have really brought the scene to life. And bear in mind that I did the sound design on this film. If a proper, experienced sound designer had done it, I’m sure it would be a hundred times better still.

First of all, the location, the villain’s lair, has been given a character through atmos tracks. The fluorescent hum is actually a combination of an electricity substation, recorded outside a local shopping centre here in Hereford late one night, and my own voice humming, layered up several times. The human element adds some randomness and makes the sound more alive.

There’s also an airy sound which is my mum’s gas oven, representing a Bunsen Burner that’s established in the room earlier in the film. This high frequency sound lightens everything up and gives it a sense of space.

The thick chains which Danté is carrying were ingeniously made by production designer Ian Tomlinson out of rolled-up newspaper. Clearly it was necessary to replace the light, crinkly noises this made on set with the heavy clanks of genuine metal chain. These were sourced from an online library called Sounddogs.

The smaller chain was real metal, but you’ll notice in the production audio that what little sound it makes is weak and off-mike. This is absolutely normal; your sound recordist’s job is to get the dialogue as clearly as possible; everything else can be re-recorded in post and therefore each element can be miked closely for the best possible sound. Using a length of the chain which I had kept from production, I recorded the sounds of it being handled and dragged over the lip of the chest using a coffee table in my living room.

The chains are the MacGuffin of the story, so giving them thick, clean, satisfying sounds is vital to cement them as key elements in the audience’s mind.

Ideally the chest used as a prop would have been more ancient-looking, but that was the best one we were able to get on our budget. However, adding the sound of a friend’s squeaky bathroom doorknob as Danté opens the lid helped to age prop the little.

Finally, once all these lovely clean sound effects were track-laid, they were all treated with reverb by mixer Neil Douek, to help them feel real, to tie them all together, and to convey the scale of Danté’s lair.

How have you used sound design in your own films to help tell the story?

The Importance of Sound Design

Video-8

Now online in full, for the first time: my 2011 comedy documentary Video-8. It’s the hilarious story of me and my old schoolmates reuniting to watch a terrible, terrible feature film we made when we were fifteen.

The full director’s journal I kept during the making of Dark Side of the Earth in 1995-96 can be read online, complete with irrevent present-day annotations, at www.darksideoftheearth.com/original

Video-8

How I Started Out

As regular readers will know, I make a living from shooting mostly corporates – training videos, promotional videos, educational videos and the like. Although I’d much rather pay the bills shooting drama, it’s better than working in an office. So how did I get to this point?

My Atari ST, circa 1996

When I was a teenager, I had an Atari ST computer with a piece of software called Deluxe Paint. Deluxe Paint had an animation feature which allowed me to make very crude, flipbook-style animations with a little bit of 2D tweening – a bit like simple Flash animation. When I was about thirteen my history teacher asked the class to prepare presentations for or against the building of the very first railway line from Manchester to Liverpool. With my friend Chris Jenkins, I formed ARGUMENT – the Association for the Railway Going Up to Manchester supporting Exciting New Trains – and I animated a campaign video in Deluxe Paint. I recorded this onto VHS – which was easily done because the ST had an RF monitor output – and Chris and I voiced it over using the VCR’s audio dub feature and a microphone from Tandy.

For a subsequent English presentation, I wanted to take things a step further, so I borrowed my grandad’s Video8 camcorder and filmed live action pieces-to-camera with Chris to intercut with more animations created in Deluxe Paint and others programmed in STOS BASIC. After I borrowed grandad’s camcorder several more times, he gave it to me as a fifteenth birthday present. Gradually the live action became more interesting to me than the animation, though almost every film I made featured visual effects created in Deluxe Paint and a credits roller generated by a program I wrote in BASIC.

My amateur filmmaking really kicked off when I discovered a fellow Quantum Leap fan in my friend David Abbott, and we teamed up to make our own series of episodes in which I played the leaper and David played the holographic observer. Here’s episode fifteen of the twenty we made:

In 1995, at the age of fifteen, I started making my first feature-length film, Dark Side of the Earth, an ambitious Star Wars rip-off shot in back gardens with props made of Lego and cardboard boxes. This was ostensibly my GCSE Media Studies coursework, and you can read my production diary – complete with irreverent latter-day annotations – here.

But I quickly found that the friends I roped into acting in these films were most willing when the subject matter was comedy. Bob the Barbarian and two sequels (40 minutes, 60 minutes and 90 minutes long respectively) drew their influences from Monty Python, The Young Ones, Bottom, Newman and Baddiel’s Rest in Pieces, The Naked Gun, and French and Saunders’ film spoofs.

My Sanyo Video8 camcorder

Throughout this time, I taught myself through trial and error. Back then there was no internet, no DVD extras. I was inspired by Don Shay and Jody Duncan’s book The Making of Jurassic Park, and I read Camcorder Monthly. Perhaps the most useful stuff I learnt was from a series of VHS tapes produced by the Burgess Video Group – available at a discount price with a voucher from Camcorder Monthly – in which a soft-spoken Welshman demonstrated such core concepts as The Line of Action and The Rule of Thirds. I was always ahead of the scarce nuggets of useful information which my media studies teacher could impart.

A lot of my editing was done in camera, rewinding the tape, painstakingly cueing it up and hitting record at just the right moment to produce a continuous scene on tape. Somehow I accumulated VCRs in my bedroom, always badgering Mum and Dad to buy a new one for the living room so I could have the old one. Scenes that couldn’t be edited in camera were done tape-to-tape between the camcorder and VCR or two VCRs, without an edit controller. I became an expert at judging the VCRs’ pre-roll times, hitting the record button exactly 21 frames before the point when I needed it to start recording. Music and sound effects were triggered by my ST or played in off cassette or CD and mixed live through a four channel disco mixer, again from Tandy.

By the time I was forced to quit amateur filmmaking at the age of seventeen, due to my repertoire of “actor” friends being sick of it, I had made well over 50 videos of varying length and quality. Okay, the quality didn’t vary that much. Between wrist-slashingly bad and merely quite poor.

In 1998, having finished Sixth Form with very respectable grades – the lowest, ironically, in Media Studies – I took a gap year and applied to various universities’ Film and TV Production courses. That autumn David Abbott showed me a cutting from the local newspaper which his mum had saved: The Rural Media Company in Hereford were inviting applications a to three week filmmaking course which would culminate in assisting professionals on a 16mm short film shoot. This course was my first contact with the film and TV industry, and still probably ranks amongst the five best shoots I’ve ever been on. The director of photography advised me against going to university, telling me that on-set experience was far more valuable in this industry.

The stunning animatronic robot I engineered for Dark Side of the Earth
The stunning animatronic robot I engineered for Dark Side of the Earth in 1995

I took his advice, cancelled my UCAS application, and began writing to TV companies looking for work as a camera assistant. And here’s where I think I might have made a mistake. Instead of pursuing this angle, moving to London and knocking on doors until I was gainfully employed in film and TV camera departments and could start working my way up the totem pole, I got diverted into the emerging arena of micro-budget DV filmmaking, which is where I’ve been stuck ever since.

On the way to the premiere of Lonesome Takeaway, the 16mm short, I got talking to Jane Jackson, the head of production from Rural Media. I mentioned to her that I’d recently appeared on Lee and Herring’s This Morning With Richard Not Judy on BBC 2, winning a competition to make the best cress advert, using the skills I’d taught myself doing those 50-odd amateur films. “We can always use people who can compose a shot,” Jane said. “Send us your reel.” I did, and she obviously saw something in those ropey amateur films of mine, because she soon started hiring me. Within a year I’d quit my office job and moved to Hereford because I was getting so much work from Rural Media.

The company had just bought Final Cut Pro, but no-one there knew how to use it. I took the manual home, read it cover to cover, came back and cut some footage that no-one else wanted to cut. That made me an asset to the company and they kept coming back to me.

My friend Matt Hodges and I pose with the Histor and Pliny puppets behind the scenes of Lee and Herring's This Morning With Richard Not Judy
My friend Matt Hodges and I pose with the Histor and Pliny puppets behind the scenes of Lee and Herring’s This Morning With Richard Not Judy

And a large proportion of the paid work I’ve done since then can be traced back to Rural Media in some way: I work regularly for Catcher Media, run by Rick Goldsmith, who freelanced alongside me at Rural Media in the early days; for many years I made training videos for Lessons Learned, who initially called Rural Media, having found them in the Yellow Pages, but were told that they didn’t do that kind of work but to call Neil Oseman instead; and regular clients Tim Kidson and Nelson Thornes got in touch with me through Catcher Media and Lessons Learned respectively.

Yes, I get the occasional (very occasional) paid gig through Shooting People or similar networks, and yes, a major client while I was living in London was a company that came to me via the sound mixer on my own feature film, Soul Searcher, but for the most part my ability to make a living with a camera is due to getting involved with a company that was at the hub of filmmaking in an area where the media community was very small and tight-knit. And it was just dumb luck that all this happened at the time of the Mini-DV revolution, when it suddenly became possible to make videos of a decent quality for far less money than previously, and lots of new companies were springing up and looking for people who could operate a camera and an NLE.

So that’s the story of how I got to where I am today. Of course I’m always striving to move forward, to keep learning, to do more drama, to work with bigger crews, bigger budgets and reach bigger audiences. The story goes on…

How I Started Out

Blackmagic Production Camera Field Report

I was recently the cinematographer on Sophie Black’s Night Owls, my second shoot with my new Blackmagic Production Camera, and the first one to be shot in 4K. I’m loving the rich, detailed and organic images it’s producing. Click on this screen grab to see it at full 4K resolution and witness the crazy amount of detail the BMPC records…

Click on this screen grab to see it at full 4K resolution and witness the crazy amount of detail the BMPC records.
Jonny McPherson in Night Owls

Images from Night Owls courtesy of Triskelle Pictures, Stella Vision and Team Chameleon. Produced by Sophia Ramcharan and Lauren Parker. Starring Jonny McPherson and Holly Rushbrooke.

It’s been documented that the Blackmagics, in common with the early Red Ones, suffer from the CMOS sensor “black sun effect”. As the name suggests, this means that if you get the sun in shot, it’s so bright that it turns black on camera.

On Night Owls I discovered that this also happens with filaments in bulbs. This is unfortunate, since the film features a lot of practicals with bare bulbs.

The coil of the filament appears black on the BMPC's CMOS sensor
The coil of the filament appears purple on the BMPC’s CMOS sensor

The issue can be fixed in post – apparently Da Vinci Resolve’s tracker feature will do it, or failing that some Quickpainting in Shake would certainly get rid of it – but a firmware update from Blackmagic Design to address the issue in-camera would be very welcome. Since they’ve already issued a firmware fix for this problem on the Pocket Cinema Camera, I’m surprised they even started shipping the Production Camera without this fix.

And while we’re on the subject of firmware updates, how about an option to display 2.35:1 guides? Surely in this day and age I shouldn’t be having to do this…

Taping off the camera screen and monitor for a 2.35:1 aspect ratio
The HDMI convertor on the back of my shoulder rig, powered by the V-lock battery

Some issues with my accessories also became apparent during the shoot. Firstly, 2 x 120GB SSDs are not enough. They last about 21 minutes each at 4K. Since we were doing a lot of long takes, we occasionally found the shoot grinding to a halt because the second card card was full and the first card hadn’t finished copying to the DIT’s laptop. Yes, crazy as it sounds, it takes about three times longer to copy the contents of the card – by USB, at least –  than it does to record onto that card in the first place.

Secondly, I’ve purchased two different SDI to HDMI convertors from eBay – this one and this one – and I’ve found them both awful. They’re really designed for use in CCTV systems. The frame rate is jerky and the colours are so wildly inaccurate that I had to switch the monitor to black and white. It looks like I’ll have to buy an SDI monitor. If I can get one with 2.35:1 overlays, that will solve another of my problems at the same time.

So all of these problems can be fixed, either by investing in a little more kit, or by firmware updates which I hope Blackmagic Design will soon issue.

Finally, a word on the aftersales service: my camera turned out to have a faulty speaker; I sent it back and a week later a brand new one arrived. That’s pretty good service in my book.

Overall, I’m very happy that I bought the camera, and so is Sophie. The images look fantastic and I’m sure Night Owls will go far.

Jonny McPherson and Holly Rushbrooke in a screen grab from Night Owls
Blackmagic Production Camera Field Report