My feature film Soul Searcher started shooting on October 20th 2003. To celebrate the tenth anniversary of the six week shoot, I’ll be releasing one of the DVD extras online every week starting this Sunday with the acclaimed feature-length documentary Going to Hell: The Making of Soul Searcher.
In subsequent weeks you can look forward to informative featurettes on lighting, props and martial arts choreography, a breakdown of the sound design of a key scene and a look at how some of the visual effects were created in incredibly low-tech ways using ordinary household items.
A director of photography should always be backed up by a good gaffer. They will ensure that all the lights are rigged safely and that the appropriate power supply is provided for each one. Here are some basics you need to know if you’re stepping into this role.
Redheads draw 800W each
P=IV
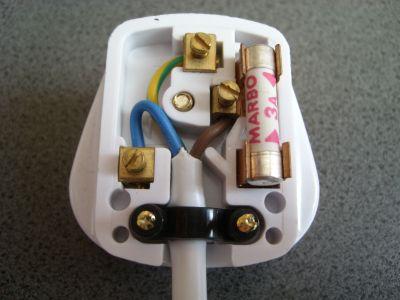
Remember that from GCSE Physics? Power = current x voltage, or watts = amps x volts. From this we can calculate that an ordinary 13 amp domestic socket on the 240V UK mains supply can provide up to 3,120W.
A redhead draws 800W, so we can run three off one socket (3 x 800 = 2,400W which is under the 3,120W limit) without blowing a fuse.
Most UK houses have two separate circuits (known as ring mains) for the sockets: one for upstairs and one for downstairs. Usually these are each on a 30 or 32 amp breaker. So although you can only draw 3,120W off one socket, you can draw 7,200W (30 amps x 240 volts) total off one floor’s sockets.
Always carry spare fuses
The first thing the gaffer should do on arriving at a location is to find the fusebox to check how many ring mains there are, where they are and what amperage of breaker they’re on. Beware that large commercial/industrial buildings may have multiple fuseboxes in different parts of the building. Make sure you have access to all of them so you can reset any circuit breakers you trip.
Also ensure you have a supply of fuses in case you blow any in the plugs of your lights or extension leads. When a bulb blows due to reaching the end of its natural life it will take the fuse with it.
Check the wound and unwound ratings of your extension reels
You need to make sure your cabling is appropriate for the load you’re drawing. Extension leads can melt if you try to run too much power through them. All extension reels will have two maximum wattages written on the front of them: one for when the reel is fully wound, and one for when it’s fully unwound. When the cable is wound up it can overheat very easily, so pay attention to those quoted limits.
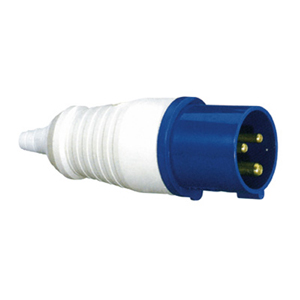
16 amp C form plug
Professional hired kit is often fitted with heavy duty cabling, signified by round blue “C form” plugs and sockets. C form outlets can be found in soundstages and factories, on generators and occasionally on exterior walls of houses. They are weather resistant, so much safer for use outdoors than domestic cabling.
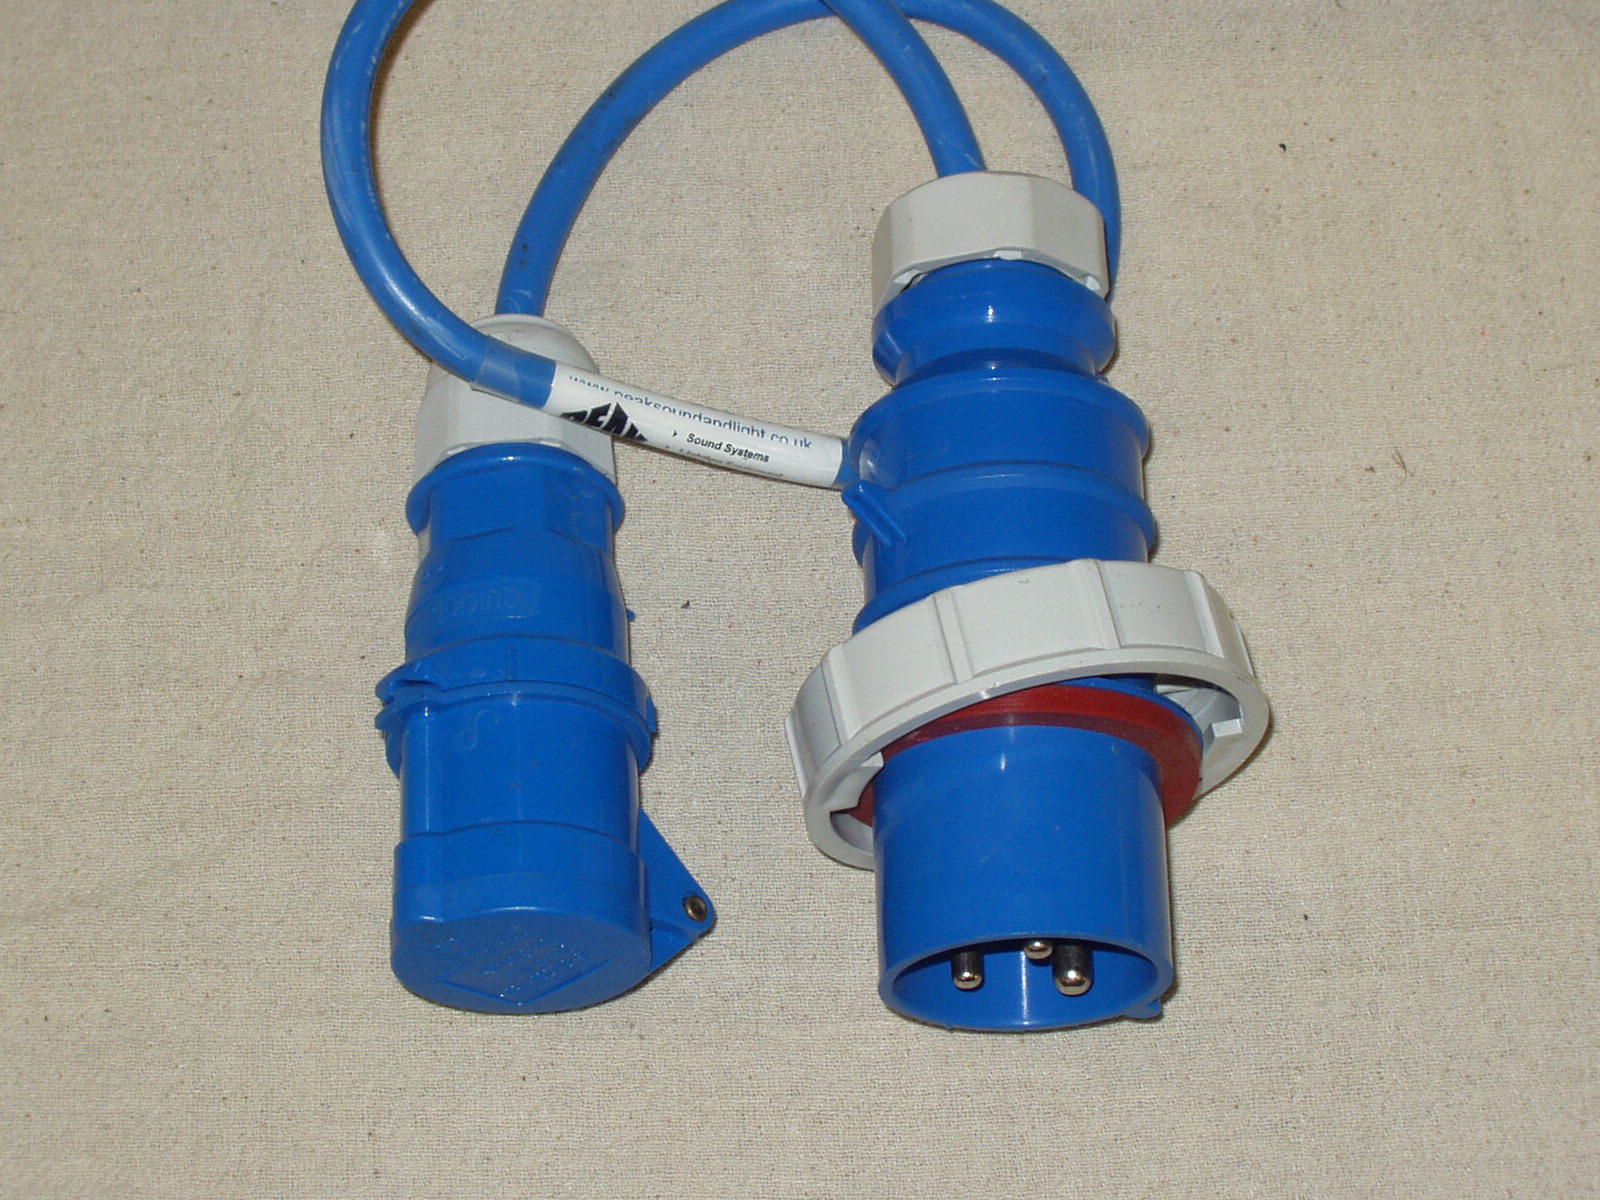
32 to 16 amp jumper
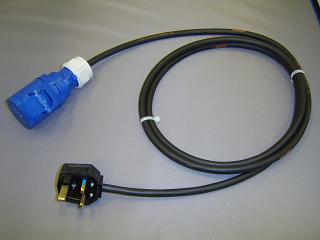
The associated cable comes in 16 amp and 32 amp flavours, the latter being thicker with larger plugs and sockets. A 13 to 16 amp jumper – a short adapter cable with an ordinary square UK plug on one end and a 16 amp C form socket on the other – will enable you to plug an appliance with a smaller C form plug into a standard domestic socket. Jumpers exist in every other possible direction and combination too, so it’s important you get the right ones.
13 to 16 amp jumper
Also remember that, although a 13 to 32 amp jumper will let you physically plug, say, a 4KW HMI into a domestic wall socket, that 13 amp plug will not support a 4KW load; you’ll blow the fuse. In fact if something has a 32 amp plug on it then the only way to run it safely off a house is to have a qualified electrician wire a 32 amp socket into the fusebox. Definitely don’t try to do that yourself.
In fact if you’re in any doubt about any of the above, consult an experienced gaffer or electrician. Be safe!
White “daylight” (a 2.5K HMI outside the window and a Kinolfo Barfly behind the actor) and warm “candlelight” (a Dedolight off camera right)
The First Musketeer was my first period production as DP. It’s a genre that brings its own set of challenges and opportunities, most obviously for sets and costumes, and also sound (we spent a lot of time waiting for cars and planes to pass by), but for cinematography too. The first thing that hit me was the restrictiveness of it. Back in the day there were only three sources of light: the sun, the moon and fire. And maybe, at a pinch, starlight.
Paul McMaster as Ghislain. Blue “moonlight” and orange “firelight” – in this case both created by gelled Dedolights
I kept colour temperatures simple by deciding that daylight would always appear white, moonlight would be +2,400K (blue) and firelight would be -2,400K (orange). In practice this meant that daylight scenes were white-balanced at 5,600K using natural light, HMIs and kinoflos, with ungelled redheads or dedos for candlelight, while night scenes were typically white-balanced at 3,200K which turned HMIs and kinos blue for moonlight/starlight, with redheads or dedos gelled with full CTO to turn them orange on camera.
This night exterior shot of Lazare (Tony Sams) and Athos (Edward Mitchell) was shot with a white balance of 3,200K, turning the HMI backlight blue, while the warm light around the tavern entrance was provided by CTO-gelled dedos and redheads.
Occasionally I used straw gels to give “firelight” more of a yellow hue than an orange one, and in one scene involving a church I introduced strongly yellow light and some pink backlight, the theory being that stained glass windows could be held accountable.
A 2.5K provides the frontal keylight here, while a redhead sporting Minus Green gel provides the pink backlight. A second redhead double-gelled with Light Straw uplights the figure of Christ on the back wall, and finally a 1.2K HMI at the rear of the building illuminates the stained glass window.
I think it’s very important to soften the images when shooting a period piece digitally. Initially we hoped to do this by using Cooke lenses, but they proved unobtainable on our budget. It was too late to look into filters by this point, so instead I relied on smoke in most scenes to diffuse and age the image.
Like everyone, I continue to learn with every project that I do. Reviewing the rushes towards the end of the shoot, I realised (a little too late) that texture was the key to making the period convincing. There was bags of it in front of me – in the stone walls of the locations, in the beautifully-aged costumes, in the detailed set dressing. It was an era before smooth surfaces. I can now see that my cinematography was most successful when the lighting brought the textures out.
A 1.2K HMI outside the door cross-lights the stonework, while smoke volumizes this light, resulting in a very satisfying depth and texture. The only other light sources are two Kinoflo Barflies hanging from polecats above the bench at the back of shot. This backlight is reflected back at the foreground characters by a sheet of silver foamcore beneath the camera.
Contrast the shot above with the one below. This location had equally nice stonework, but because I didn’t cross-light it it looks flat and artificial, like a cheap panto set.
A 2.5K HMI supplies the backlight here, while a blue-gelled redhead out of the top right of frame is aimed down the steps to pick out the characters as they descend. An orange-gelled Dedo creates a pool of light around the candle, and everything else is natural bounce off the surrounding walls. A second blue-gelled redhead at the foot of the stairs firing across the stonework would have made all the difference to the believability of the environment, but hindsight is 20/20.
So that’s an important lesson I’ve learnt to take forward to the next season. Next time around I also want to play more with different colours of daylight, using more straw, amber and pink gels to stretch out the colour palette and suggest different times of day.
And then there’s the whole candlelight thing – but I’ll save that for my next post.
All images copyright 2013 The First Musketeer. Find out more about the series at www.firstmusketeer.com
Throughout September I got a crash-course introduction to the Blackmagic Cinema Camera as I used it to shoot Harriet Sams’ period action adventure web series The First Musketeer. The camera was kindly lent to us by our gaffer, Richard Roberts. Part-way through the shoot I recorded my initial thoughts on the camera in this video blog:
Here’s a summary of the key differences between the Blackmagic and a Canon DSLR.
Canon DSLR
Blackmagic Cinema Camera
Rolling shutter (causes picture distortion during fast movement)
Rolling shutter (though not as bad as DSLRs)
Pixels thrown away to achieve downscaling to 1080P video resolution, results in distracting moiré patterns on fabrics, bricks walls and other grid-like patterns
Pixels smoothly downscaled from 2.5K to 1080P to eliminate moiré. Raw 2.5K recording also available
On-board screen shuts off when external monitor is connected
On-board screen remains on when external monitor is connected
Some models have flip-out screens which can be adjusted to any viewing angle and easily converted into viewfinders with a cheap loupe attachment
On-board screen is fixed and highly reflective so hard to see in all but the darkest of environments
Maximum frame rate: 60fps at 720P
Maximum frame rate: 30fps at 1080P
50mm lens is equivalent to 50mm (5D) or 72mm (other models) full-frame lens
50mm lens is equivalent to 115mm full-frame lens
10-11 stops of dynamic range
13 stops of dynamic range
Recording format: highly compressed H.264, although Magic Lantern now allows for limited raw recording
Recording format: uncompressed raw, ProRes or DNXHD
Battery life: about 2 hours from the 600D’s bundled battery in movie mode
Battery life: about 1 hour from the non-removable internal battery
Weight: 570g (600D)
Weight: 1,700g
Audio: stereo minijack input, no headphone socket
Audio: dual quarter-inch jacks for input, headphone socket
Having now come to the end of the project, I stand by the key message of my video blog above: if you already own a DSLR, it’s not worth upgrading to a Blackmagic. You’d just be swapping one set of problems (rolling shutter, external monitoring difficulties, aliasing) for another (hard-to-see on-board screen, weight, large depth of field).
The BMCC rigged with a lock-it box for timecode sync with the audio recorder, on a Cinecity Pro-Aim shoulder mount
The depth of field was really the killer for me. Having shot on the 600D for three years I’m used to its lovely shallow depth of field. With the Blackmagic’s smaller 16mm sensor it was much harder to throw backgrounds of focus, particularly on wide shots. At times I felt like some of the material I was shooting looked a bit “TV” as a result.
The small sensor also creates new demands on your set of lenses; they all become more telephoto than they used to be. A 50mm lens used on a crop-chip DSLR like the 600D is equivalent to about an 72mm lens on a full-frame camera like the 5D Mark III or a traditional 35mm SLR. That same 50mm lens used on the Blackmagic is equivalent to 115mm! It was lucky that data wrangler Rob McKenzie was able to lend us his Tokina 11-16mm f2.8 otherwise we would not have been able to get useful wide shots in some of the more cramped locations.
As for the Blackmagic’s ability to shoot raw, it sounds great, but will you use it? I suggest the images you get in ProRes mode are good enough for anything bar a theatrical release, and are of a far more manageable data size. You still get the high dynamic range in ProRes mode (although it’s optional), and that takes a little getting used to for everyone. More than once the director asked me to make stuff moodier, more shadowy; the answer was it is shadowy, you just won’t be able to see it like that until it’s graded.
The colour saturation is also very low, again to give maximum flexibility in the grade, but it makes it very hard for the crew huddled around the monitor to get a sense of what the finished thing is going to look like. As a cinematographer I pride myself on delivering images that looked graded before they actually are, but I couldn’t do that with the Blackmagic. But maybe that’s just a different workflow I’d need to adapt to.
The biggest plus to the BMCC is the lovely organic images it produces, as a result of both the down-sampling from 2.5K and the high dynamic range. This was well suited to The First Musketeer’s period setting. However, I think next season I’ll be pushing for a Canon C300 to get back the depth of field.
I’ll leave you with a few frame grabs from The First Musketeer.
Note: I have amended this post as I originally stated, incorrectly, that the BMCC has a global shutter. The new 4K Blackmagic Production Camera does have a global shutter though.
The calm before the storm of the last day of shooting
Eleven years ago, on returning home from a three week feature film shoot in New York, I wrote this on my blog: “Whenever you do a big shoot, you spend several weeks working intensively with a bunch of people who you end up utterly adoring, then the shoot ends and you NEVER see them again. Which is horrible, totally horrible.”
This week I’m going through the same depressing experience again, having returned home from the month-long French shoot for season one of The First Musketeer, a project which has knocked the New York feature off the top spot and now ranks as The Best Shoot I’ve Ever Been On.
It was a tough, tough shoot, make no mistake: lots of night shooting (for which I’m entirely to blame), long hours, rain, insufficient food, fatigue and – given the ambitious nature of the show – a miniscule budget and a tiny crew. Only one day off was scheduled, although two others emerged out of last-minute necessity.
But how often do you get to shoot in castles? At night? With sword-fighting actors in stunning period costumes? How often do you get to work with horses, or film in a medieval city carved into the cliff-face of a huge gorge? It was an awesome experience.
Art assistant Denise Barry’s photo of the cast and crew shortly after arriving in France
What really made it though was the people. I’ve never met such a lovely bunch or bonded so strongly with a group. We went into a bubble, seeing no-one else but our fellow cast and crew, day in day out, staying in the same chalets as them, enduring the same hardships, developing private jokes (Gerard Depardieu), rocking out to the same eighties tunes on RFM as we drove the long, windy roads to location, cooking for each other, drinking with each other, helping each other through the cold nights on set with chocolate, sweets, coffee and hugs. Departmental barriers quickly broke down, with the sound recordist driving the lighting-camera van, he and his boom op helping us every day with our lighting set-ups and our tear-downs, and all the tech crew pitching in to help the art department reinstate locations after wrapping.
I hope this time that I will see everyone again, not just for a wrap party but for further seasons of the show as well. I doubt we will ever recreate the magic of this year’s experience, but we’ll always have Gerard Depardieu.
The shoot here in France is very intense, so apologies for the lack of updates. Here are a couple of brief video blogs I shot on set showing how some scenes were lit and shot.
Whilst prepping for The First Musketeer here in the south of France I was able to record this video blog showing the lighting kit we’ll be using and what it all does. If you don’t know your kinos from your dedos, or can’t can understand why a 2.5K HMI is SO much better than a 2K blonde, this vlog will shed some light [groan].
The first week of the adventure is drawing to a close, although we only started shooting two days ago, the rest of the week having been taken up by travel and prep.
After picking up the lighting kit from Panalux and Filmscape on Monday, we set off in a convoy of five vehicles first thing on Tuesday morning from High Wycombe. After a noon crossing from Dover to Dunkirk we drove all afternoon and most of Wednesday to get to Puy L’eveque, the medieval town in which we’re based.
The main task on Wednesday was to test the workflow of the Black Magic Cinema Camera kindly lent to us by gaffer Richard. This is my first time working with the BMCC and I’ll share my thoughts on it in a forthcoming vlog.
Shooting began on Thursday, coinciding with a storm which broke the sweltering hot spell and has seen pretty much continuous rain become the dominant weather since then. There were challenges with horses, generators and (as ever) time, but as of this writing we’re on schedule and everyone seems to be very happy with the footage acquired.
I’m not sure how much I’m allowed to reveal about the series and the details of what we’ve been shooting, so I’ll leave it there. Stay tuned for more video blogs.
This week I’m off to France for a month to lens Harriet Sams’ ambitious web series The First Musketeer. The show is a prequel to the famous Alexandre Dumas novel, and as such features horses, candlelight and swordfights galore, all against a gorgeous backdrop of historical locations. As Athos arrives in Paris, on the run from his tragic past, a chain of events leads him to the other Musketeers, and into an adventure that will seal their fates as brothers and heroes for the rest of their lives.
A promotional image from the teaser shoot
I doubt I’ll have time while there to do much other than shoot and sleep, but I’ll try my best to do a few video blogs. Subscribe to my YouTube channel to make sure you don’t miss them, and for general updates on the project visit The First Musketeer’s Facebook page.
As I was writing my last entry, in which I mentioned the range of colour temperatures in a shot, it occurred to me that some readers might find an explanation of this concept useful. What is colour temperature and why are different light sources different colours?
The answer is more literal than you may expect. It’s based on the simple principal that the hotter something burns, the bluer the light it emits. (Remember from chemistry lessons how the tip of the blue flame was always the sweet spot of the Bunsen Burner?)
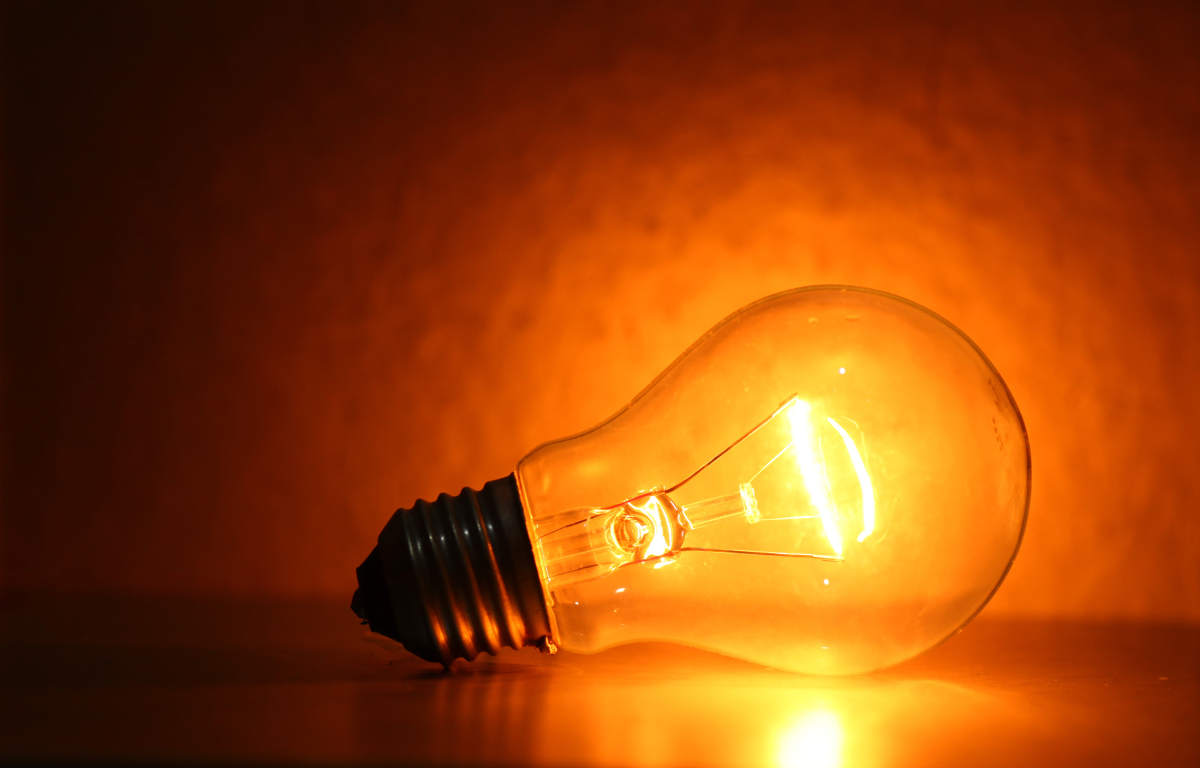
Tungsten bulbs emit an orange light – dim them down and it gets even more orangey.
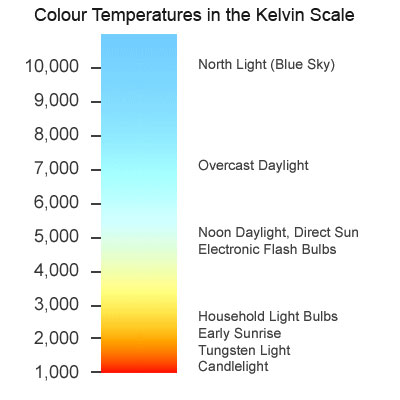
Colour temperature is measured in kelvins, a scale of temperature that begins at absolute zero (-273°C), the coldest temperature physically possible in the universe. To convert centigrade to kelvin, simply add 273. So the temperature here in Hereford right now is 296 kelvin (23°C).
The filament of a tungsten light bulb reaches a temperature of roughly 3,200K (2,927°C). This means that the light it emits is orange in colour. The surface of the sun is about 5,778K (5,505°C), so it gives us much bluer light.
Colour temperature isn’t necessarily the same as actual temperature. The atmosphere isn’t 7,100K hot, but the light from the sky (as opposed to the sun) is as blue as something burning at that temperature would be.
Digital cameras have a setting called “white balance” which compensates for these differing colour temperatures and makes them appear white. Typical settings include tungsten, daylight, shade and manual, which allows you to callibrate the white balance by holding a white piece of paper in front of the lens as a reference.
Colour temperature chart
Today there are many types of artificial light around other than tungsten – fluorescent and LED being the main two. In the film industry, both of these can be obtained in flavours that match daylight or tungsten, though outside of the industry (if you’re working with existing practical sources) the temperatures can range dramatically.
There is also the issue of how green/magenta the light is, the classic example being that fluorescent tubes – particularly older ones – can make people look green and unhealthy. If you’re buying fluorescent lamps to light a scene with, check the CRI (colour rendering index) on the packaging and get the one with the highest number you can find for the fullest spectrum of light output.
The Magic Lantern hacks for Canon DSLRs allow you not only to dial in the exact colour temperature you want, but also to adjust the green/magenta balance to compensate for fluorescent lighting. But if two light sources are giving out different temperatures and/or CRIs, no amount of white balancing can make them the same.
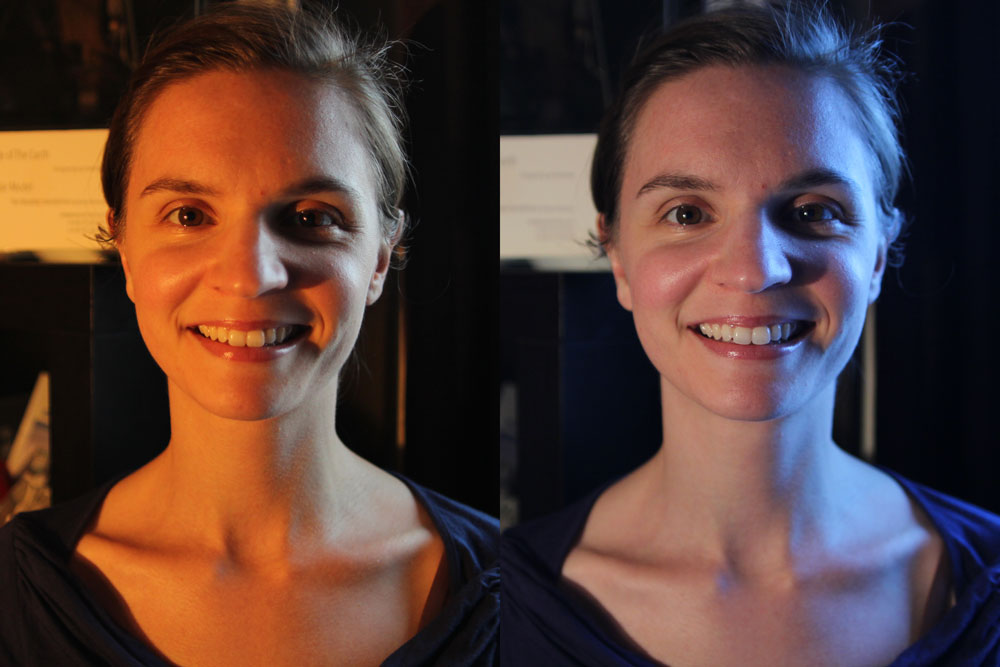
Left: daylight white balance preset (5,600K). Right: tungsten white balance preset (3,200K)
The classic practical example of all this is a person standing in a room with a window on one side of them and a table lamp on the other. Set your camera’s white balance to daylight and the window side of their face looks correct, but the other side looks a nasty orange (above left), or maybe yellowy-green if the lamp has an energy-saving bulb in it. Change the white balance to tungsten or fluorescent and you will correct that side of the subject’s face, but the daylight side will now look blue (above right) or magenta.
This is where gels come in, but that’s a topic for another day.
The beauty of modern digital cinematography is that you can see how it looks in the viewfinder and adjust as necessary. But the more you understand the kind of theory I’ve outlined above, the more you can get it right straight away and save time on set.
One of the most important jobs of a director of photography is to help the viewer’s brain decode the image. Just as a sound mixer must get the cleanest possible dialogue and ensure that ambience, music and effects don’t distract from it or drown it out, so a cinematographer must ensure the eye is drawn to the character and not distracted by the surroundings.
Depth is a key part of creating this clarity. Christopher Nolan once said: “95 percent of our depth cues come from occlusion, resolution, color and so forth, so the idea of calling a 2-D movie a ’2-D movie’ is a little misleading.”
This week, on The Deaths of John Smith, I photographed a shot that used every trick in the book to create depth. Why? Because it was a one-shot scene, a flashback taken out of context, and the audience needed to “get it” quickly.
When I first set the camera up and we stood John (played by Roy Donoghue) in position, his dark suit melted into the dark wood panelling behind him, so there was clearly some work to do. Once lit, as you can see from these frame grabs, he stands out sharply.
Kirsty Minchella-Storer (Sarah) and Roy Donoghue (John) in The Deaths of John Smith, directed by Roger Harding, copyright 2013 Two Hats Films
Let’s look at the depth cues going on here.
DEPTH OF FIELD. Although I’m shooting at f1.8, on a 20mm lens nothing is massively out of focus, so that isn’t helping much.
SMOKE. There is more smoke between the camera and a distant object than between the camera and a close object, and therefore smoke aids depth perception.
CONTRAST. The foreground is darker than the background, helping the eye to distinguish between the various layers. In particular, the smoke picks up the light from the windows at the back of the room, creating a blue-white haze against which John’s dark suit stands out clearly, as does Sarah’s silhouette.
COLOUR CONTRAST. The foreground is lit with warm orange, while the background is a cool blue, again enhancing the separation between the layers. (Imagine you’re standing on a hill and looking at another hill in the distance. That distant hill looks much bluer than the one you’re standing on, due to atmospheric haze. The smoke and colour contrast mimic this effect.) For most of this film I kept all the light sources within about 1,500K of each other, but in this scene I deliberately allowed more like 3,000K of difference between warm and cool sources to give the flashback a more stylised look.
BACKLIGHT. John has a little edge-light on his righthand side, ostensibly from the wall sconces, but in reality from a hidden Dedo. This helps to cut him out from the background.
FRAMING. The doorway frames the image, adding an extra layer of depth.
PARALLAX. This is the optical phenomenon whereby, when you move your head (or a camera) things closer to you appear to move more than things further away. By dollying slightly into the room behind Sarah we create a dramatic parallax effect as the doorway grows on camera much more than John and the room behind him.
I’ll leave you with my (retrospective) lighting plan for this scene. Be sure to check out the film’s official website at www.thedeathsofjohnsmith.com