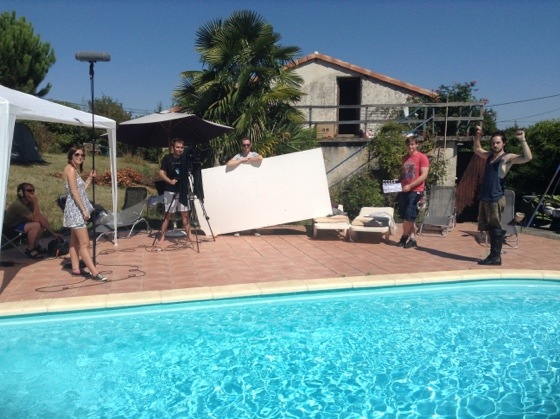
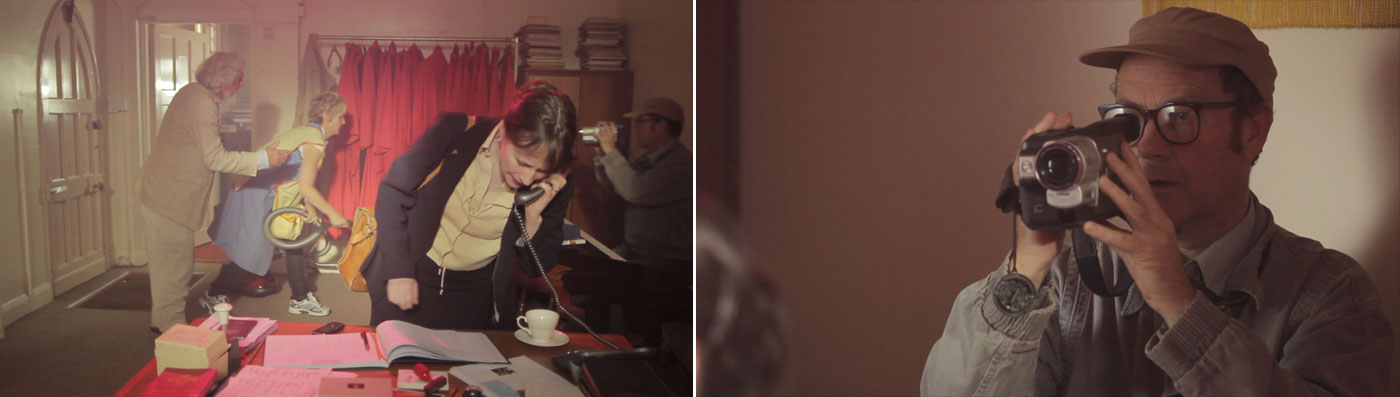
The shoot here in France is very intense, so apologies for the lack of updates. Here are a couple of brief video blogs I shot on set showing how some scenes were lit and shot.
cinematography
Know Your Lights
Whilst prepping for The First Musketeer here in the south of France I was able to record this video blog showing the lighting kit we’ll be using and what it all does. If you don’t know your kinos from your dedos, or can’t can understand why a 2.5K HMI is SO much better than a 2K blonde, this vlog will shed some light [groan].
The first week of the adventure is drawing to a close, although we only started shooting two days ago, the rest of the week having been taken up by travel and prep.
After picking up the lighting kit from Panalux and Filmscape on Monday, we set off in a convoy of five vehicles first thing on Tuesday morning from High Wycombe. After a noon crossing from Dover to Dunkirk we drove all afternoon and most of Wednesday to get to Puy L’eveque, the medieval town in which we’re based.
The main task on Wednesday was to test the workflow of the Black Magic Cinema Camera kindly lent to us by gaffer Richard. This is my first time working with the BMCC and I’ll share my thoughts on it in a forthcoming vlog.
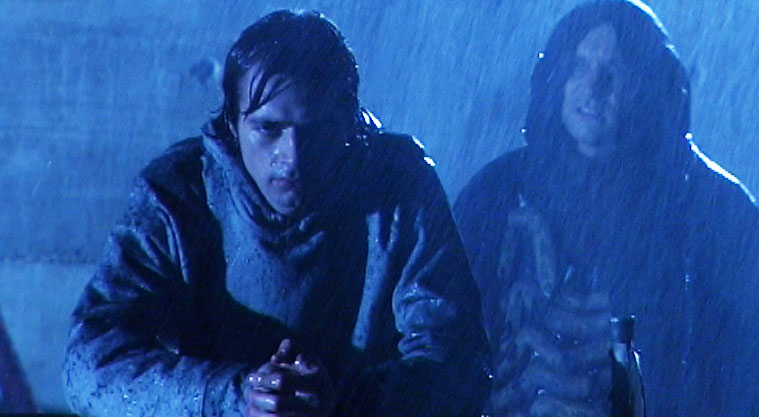
Shooting began on Thursday, coinciding with a storm which broke the sweltering hot spell and has seen pretty much continuous rain become the dominant weather since then. There were challenges with horses, generators and (as ever) time, but as of this writing we’re on schedule and everyone seems to be very happy with the footage acquired.
I’m not sure how much I’m allowed to reveal about the series and the details of what we’ve been shooting, so I’ll leave it there. Stay tuned for more video blogs.
Understanding Colour Temperature
An updated version of this article is available.
As I was writing my last entry, in which I mentioned the range of colour temperatures in a shot, it occurred to me that some readers might find an explanation of this concept useful. What is colour temperature and why are different light sources different colours?
The answer is more literal than you may expect. It’s based on the simple principal that the hotter something burns, the bluer the light it emits. (Remember from chemistry lessons how the tip of the blue flame was always the sweet spot of the Bunsen Burner?)
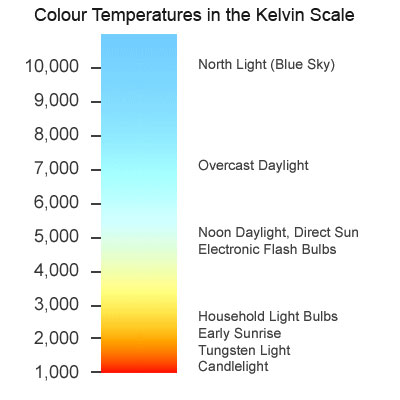
Colour temperature is measured in kelvins, a scale of temperature that begins at absolute zero (-273°C), the coldest temperature physically possible in the universe. To convert centigrade to kelvin, simply add 273. So the temperature here in Hereford right now is 296 kelvin (23°C).
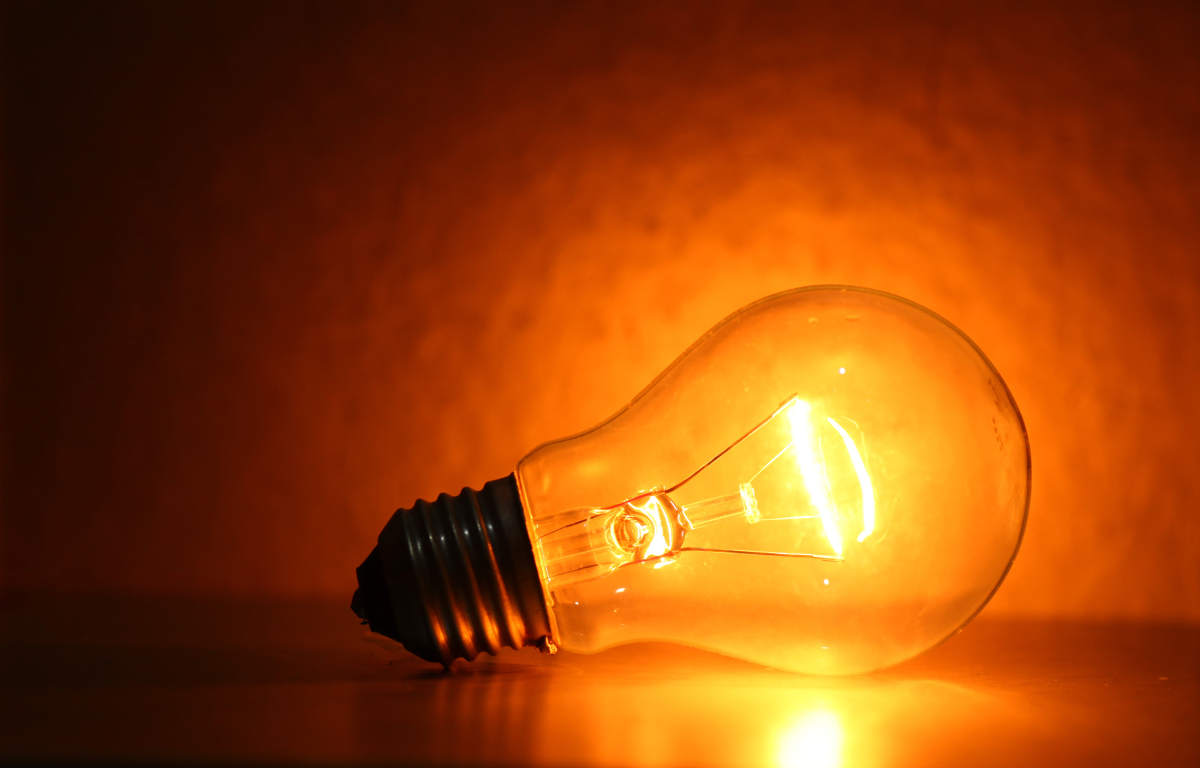
The filament of a tungsten light bulb reaches a temperature of roughly 3,200K (2,927°C). This means that the light it emits is orange in colour. The surface of the sun is about 5,778K (5,505°C), so it gives us much bluer light.
Colour temperature isn’t necessarily the same as actual temperature. The atmosphere isn’t 7,100K hot, but the light from the sky (as opposed to the sun) is as blue as something burning at that temperature would be.
Digital cameras have a setting called “white balance” which compensates for these differing colour temperatures and makes them appear white. Typical settings include tungsten, daylight, shade and manual, which allows you to callibrate the white balance by holding a white piece of paper in front of the lens as a reference.
Today there are many types of artificial light around other than tungsten – fluorescent and LED being the main two. In the film industry, both of these can be obtained in flavours that match daylight or tungsten, though outside of the industry (if you’re working with existing practical sources) the temperatures can range dramatically.
There is also the issue of how green/magenta the light is, the classic example being that fluorescent tubes – particularly older ones – can make people look green and unhealthy. If you’re buying fluorescent lamps to light a scene with, check the CRI (colour rendering index) on the packaging and get the one with the highest number you can find for the fullest spectrum of light output.
The Magic Lantern hacks for Canon DSLRs allow you not only to dial in the exact colour temperature you want, but also to adjust the green/magenta balance to compensate for fluorescent lighting. But if two light sources are giving out different temperatures and/or CRIs, no amount of white balancing can make them the same.
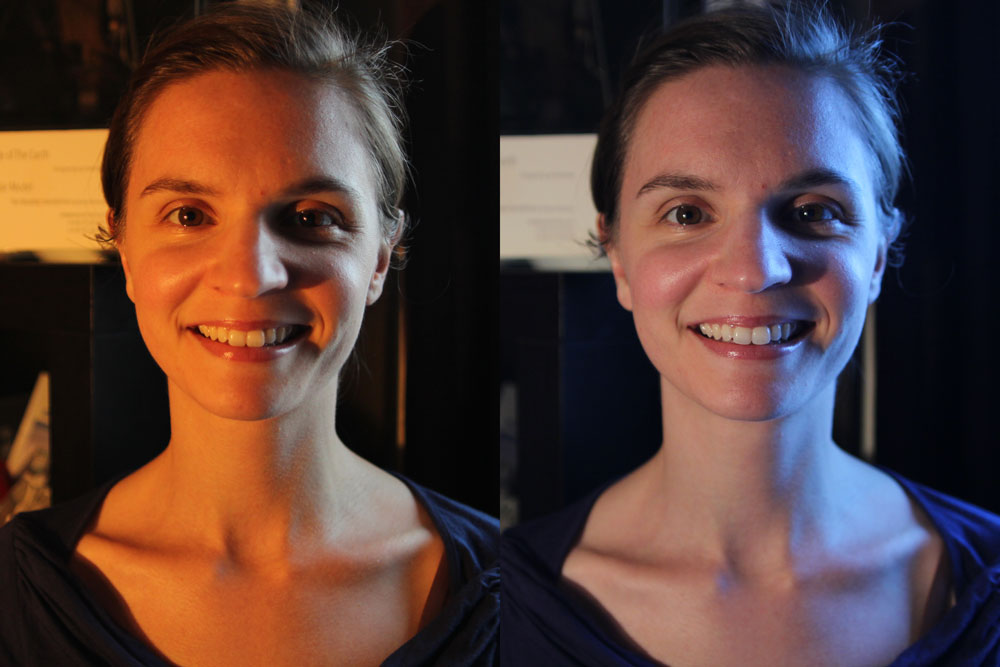
The classic practical example of all this is a person standing in a room with a window on one side of them and a table lamp on the other. Set your camera’s white balance to daylight and the window side of their face looks correct, but the other side looks a nasty orange (above left), or maybe yellowy-green if the lamp has an energy-saving bulb in it. Change the white balance to tungsten or fluorescent and you will correct that side of the subject’s face, but the daylight side will now look blue (above right) or magenta.
This is where gels come in, but that’s a topic for another day.
The beauty of modern digital cinematography is that you can see how it looks in the viewfinder and adjust as necessary. But the more you understand the kind of theory I’ve outlined above, the more you can get it right straight away and save time on set.
Depth Cues in Cinematography
One of the most important jobs of a director of photography is to help the viewer’s brain decode the image. Just as a sound mixer must get the cleanest possible dialogue and ensure that ambience, music and effects don’t distract from it or drown it out, so a cinematographer must ensure the eye is drawn to the character and not distracted by the surroundings.
Depth is a key part of creating this clarity. Christopher Nolan once said: “95 percent of our depth cues come from occlusion, resolution, color and so forth, so the idea of calling a 2-D movie a ’2-D movie’ is a little misleading.”
This week, on The Deaths of John Smith, I photographed a shot that used every trick in the book to create depth. Why? Because it was a one-shot scene, a flashback taken out of context, and the audience needed to “get it” quickly.
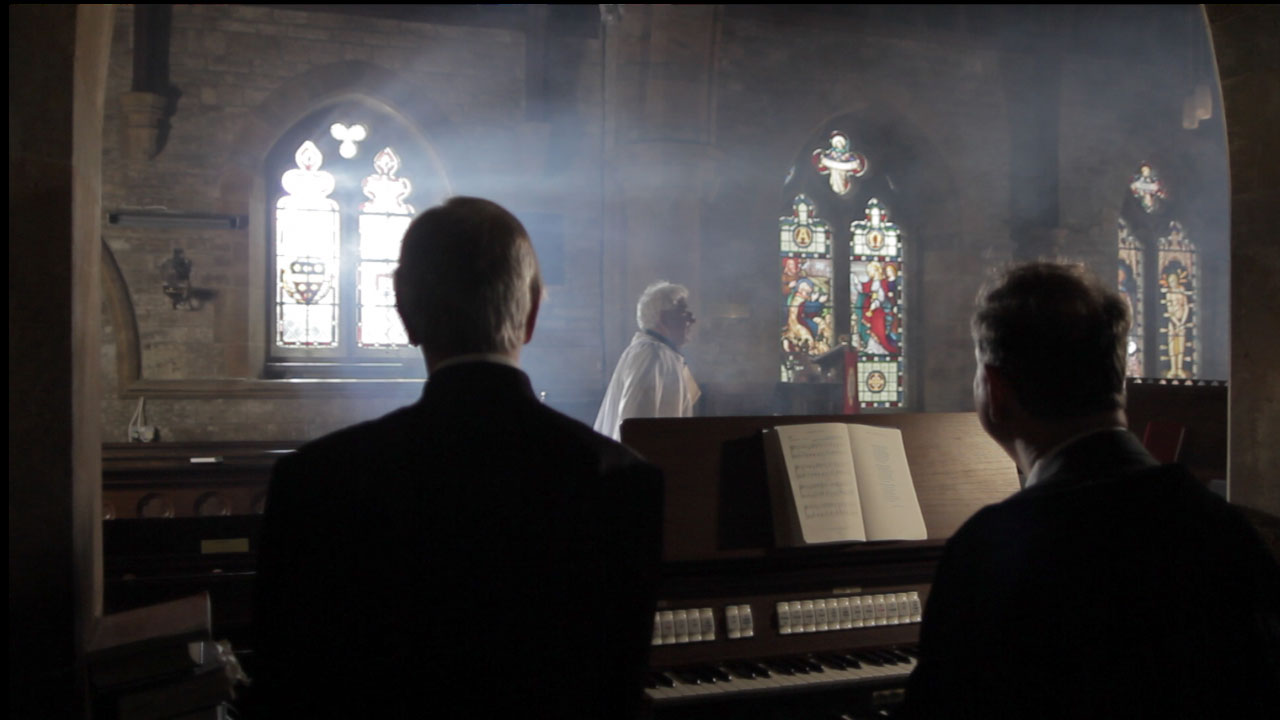
When I first set the camera up and we stood John (played by Roy Donoghue) in position, his dark suit melted into the dark wood panelling behind him, so there was clearly some work to do. Once lit, as you can see from these frame grabs, he stands out sharply.


 Kirsty Minchella-Storer (Sarah) and Roy Donoghue (John) in The Deaths of John Smith, directed by Roger Harding, copyright 2013 Two Hats Films
Let’s look at the depth cues going on here.
- DEPTH OF FIELD. Although I’m shooting at f1.8, on a 20mm lens nothing is massively out of focus, so that isn’t helping much.
- SMOKE. There is more smoke between the camera and a distant object than between the camera and a close object, and therefore smoke aids depth perception.
- CONTRAST. The foreground is darker than the background, helping the eye to distinguish between the various layers. In particular, the smoke picks up the light from the windows at the back of the room, creating a blue-white haze against which John’s dark suit stands out clearly, as does Sarah’s silhouette.
- COLOUR CONTRAST. The foreground is lit with warm orange, while the background is a cool blue, again enhancing the separation between the layers. (Imagine you’re standing on a hill and looking at another hill in the distance. That distant hill looks much bluer than the one you’re standing on, due to atmospheric haze. The smoke and colour contrast mimic this effect.) For most of this film I kept all the light sources within about 1,500K of each other, but in this scene I deliberately allowed more like 3,000K of difference between warm and cool sources to give the flashback a more stylised look.
- BACKLIGHT. John has a little edge-light on his righthand side, ostensibly from the wall sconces, but in reality from a hidden Dedo. This helps to cut him out from the background.
- FRAMING. The doorway frames the image, adding an extra layer of depth.
- PARALLAX. This is the optical phenomenon whereby, when you move your head (or a camera) things closer to you appear to move more than things further away. By dollying slightly into the room behind Sarah we create a dramatic parallax effect as the doorway grows on camera much more than John and the room behind him.
I’ll leave you with my (retrospective) lighting plan for this scene. Be sure to check out the film’s official website at www.thedeathsofjohnsmith.com

How to Speed Up Your Shoot

Tomorrow the film I’m currently DPing, The Deaths of John Smith, has an extremely packed schedule. This has got me thinking about how a filmmaker can keep themselves on schedule when faced with a seemingly impossible amount of material to get through.
The most effective action is of course to take out a big red pen and start cutting down the script. I know personally I find this very difficult, particularly if I’m both the writer and the director, because I’ve convinced myself by this point that everything in my shooting draft absolutely has to be there. Even though I know that, when I get to the edit, some scenes will inevitably get deleted and some dialogue will get trimmed. The challenge is to identify those trims now, on set, and save myself the trouble of shooting them.
Beware that simply cutting some dialogue is unlikely to have a signficant effect on your schedule, because most of your time on set is spent not shooting or even rehearsing, but setting up. Take a long, hard look at your shotlist or storyboards. Do you really need all that coverage?
Consider a Single Developing Shot (SDS). This means shooting an entire scene in just one set-up, with some camera movement and perhaps some dynamic blocking to maintain interest. The danger here is of doing a ridiculous number of takes of this one set-up because you know you have nothing to cut to if it’s not perfect (a trap I’ve fallen into more than once). I would advise qualifying your SDS with a cutaway or two to claw back a bit of flexibility in the edit and ease the pressure on the master shot.
If you can’t see a way to reduce the number of shots you need, consider ways to make those shots quicker to film. The most time-consuming shots for a director of photography to light are reverses, where the camera flips around to shoot in the opposite direction to all the previous angles, meaning every light has to be moved, along with the video village and all the piles of idle equipment in the background. Can you get away without a reverse, by changing the blocking a little? That character who has their back to camera – could they cheat their profile towards us a bit? It’s cheesy and not very realistic, but TV shows often achieve this by having one character talk to another’s back.
Down-the-line close-ups are also quick to do. This means that, after doing your wide, you leave the camera more or less where it is (and, crucially, the lights too) and put on a longer lens to get your close-ups. Watch your continuity carefully, because down-the-line cuts will really show up any errors.

If all else fails, the wrap time is looming and you’ve still got half a dozen set-ups to get, it’s best if those set-ups are close-ups or even cutaways. Because you and a skeleton crew can come back another day, maybe to a different location, maybe with a stand-in for your lead actor, and shoot tight pick-ups. Clearly this isn’t going to work with a wide master shot, for which you would need your whole cast and crew back, and the same set/location.
Finally, when working as a DP I have occasionally been asked to speed up the shoot by not lighting it. It is usually at this point that I feign hearing problems. Yes, not lighting stuff will speed up the shoot enormously. But you’re no longer making a professional film; you’re making a home video with an expensive camera. Don’t ask your DP to do this – you’ll only offend them. Instead, perhaps ask what camera angle would require the least re-lighting.
What tricks and techniques have you used to speed up your shoots?
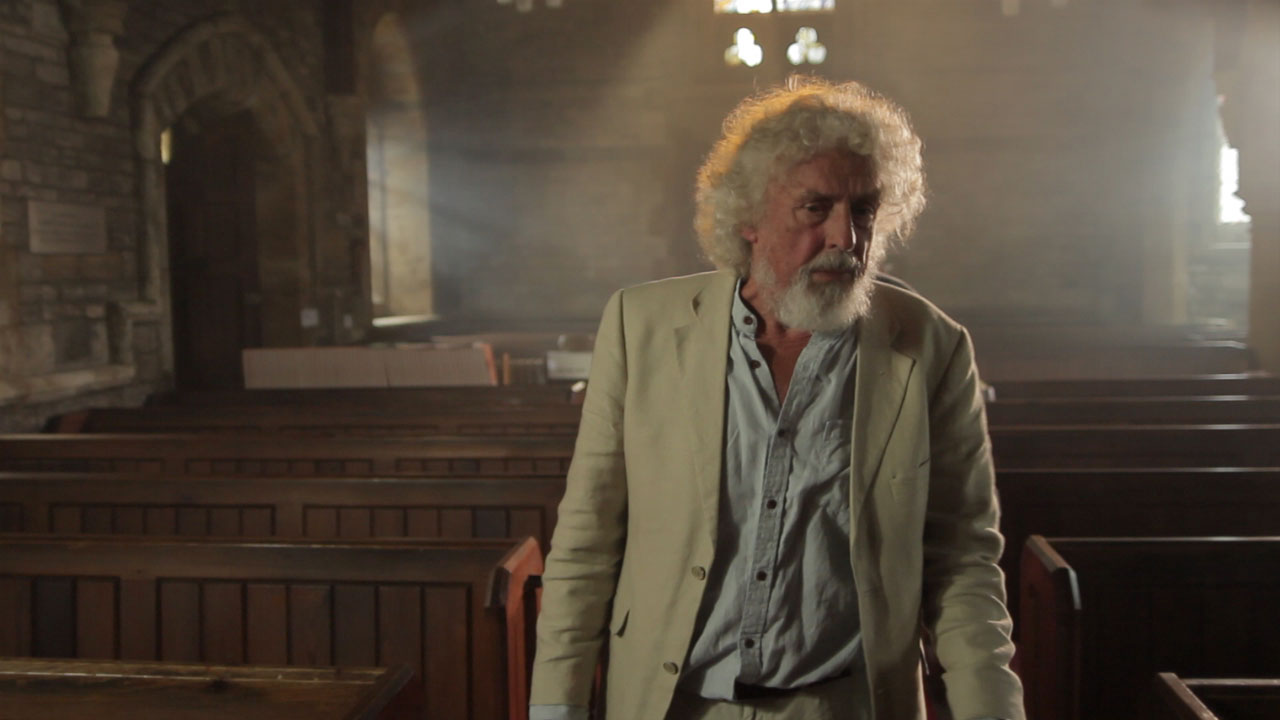
How to Light a Church
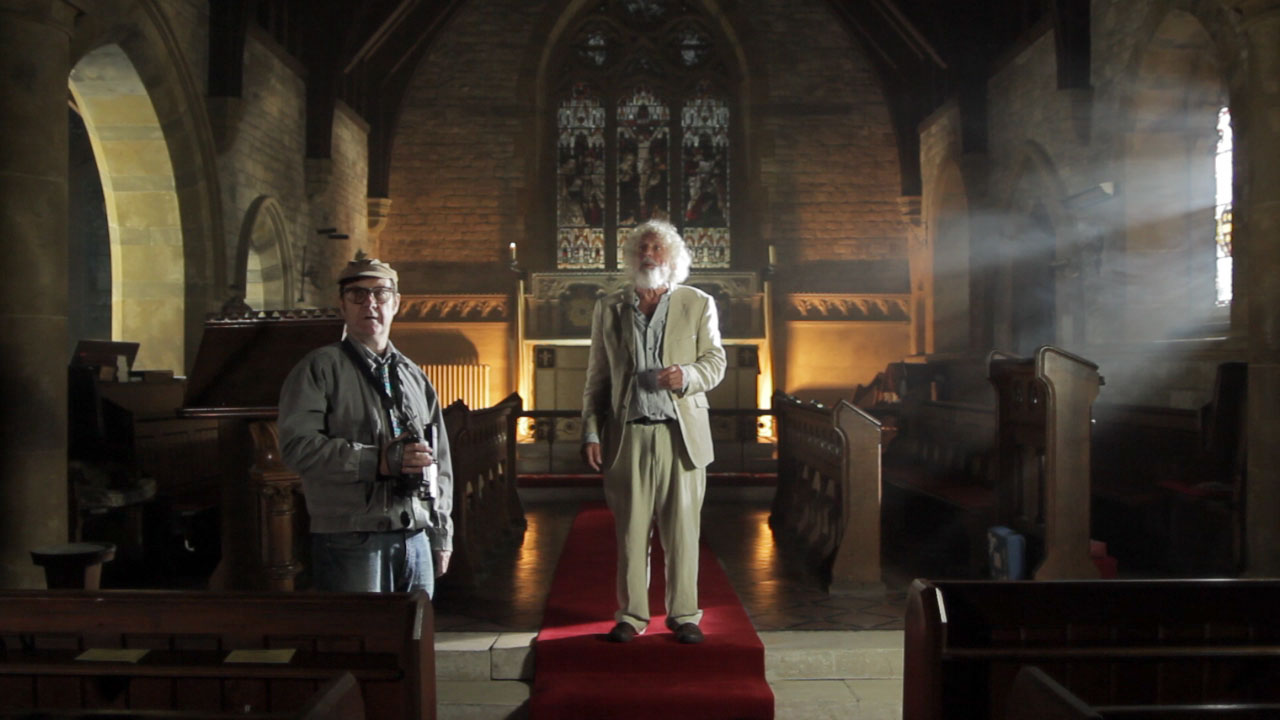
This weekend shooting began on Roger Harding and Darren Scott’s feature-length comedy The Deaths of John Smith. As director of photography I was called on to light a beautiful rural church on a limited budget. Here are some tips for ecclesial cinematography:
- Hire HMIs – powerful, daylight-balanced lamps. Without at least one you will never have enough light to illuminate anything but the tiniest of churches. As a backlight on a mezzanine level, a 2.5K HMI will illuminate most churches. Better still, put them outside the windows and create artificial sunbeams. (A blue-gelled blonde or redhead outside a stained glass window is pretty much useless; those windows cut out so much light.)
- Use smoke. A £50 disco smoke machine is perfectly sufficient – use it to volumize the light and emphasise the depth and scale of the building. If you’re struggling to expose a bright enough image, smoke helps there too – because it catches the backlight and lightens up the shadows.
- Candlelight is a good way to introduce colour contrast into your scene. Dedos are the best lamps to fake candelight with, as they can produce a small circular pool of light. Failing that, any tungsten source will do, ideally rigged to a dimmer board for a bit of flickering.
- Assuming you’ve got your HMIs punching directly in through all the windows on one side of your church (that’s the side the “sun” is on), you now need soft light coming in through the opposite windows. Ideally these would be larger HMIs playing off bounce boards, but you might get away with soft boxes or bounced tungsten sources (gelled blue, of course) hidden behind pillars inside the building.
- Sellotape together some old bits of coloured gel and rig them in front of a fresnel to simulate daylight through a stained glass window. Note that this doesn’t really work with unfocused lamps like redheads.
On The Deaths of John Smith I only had access to one HMI, so for every shot I needed to carefully choose which window to put it outside of for the maximum impact. I relied on natural light as well as blue-gelled redheads and fluorescent softboxes just out of frame for fill light. Nonetheless, I’m very pleased with the results. Next weekend we have to repeat the performance with a large congregation….
All images copyright 2013 Two Hats Films. Visit the Facebook page or the official website for more info on The Deaths of John Smith.
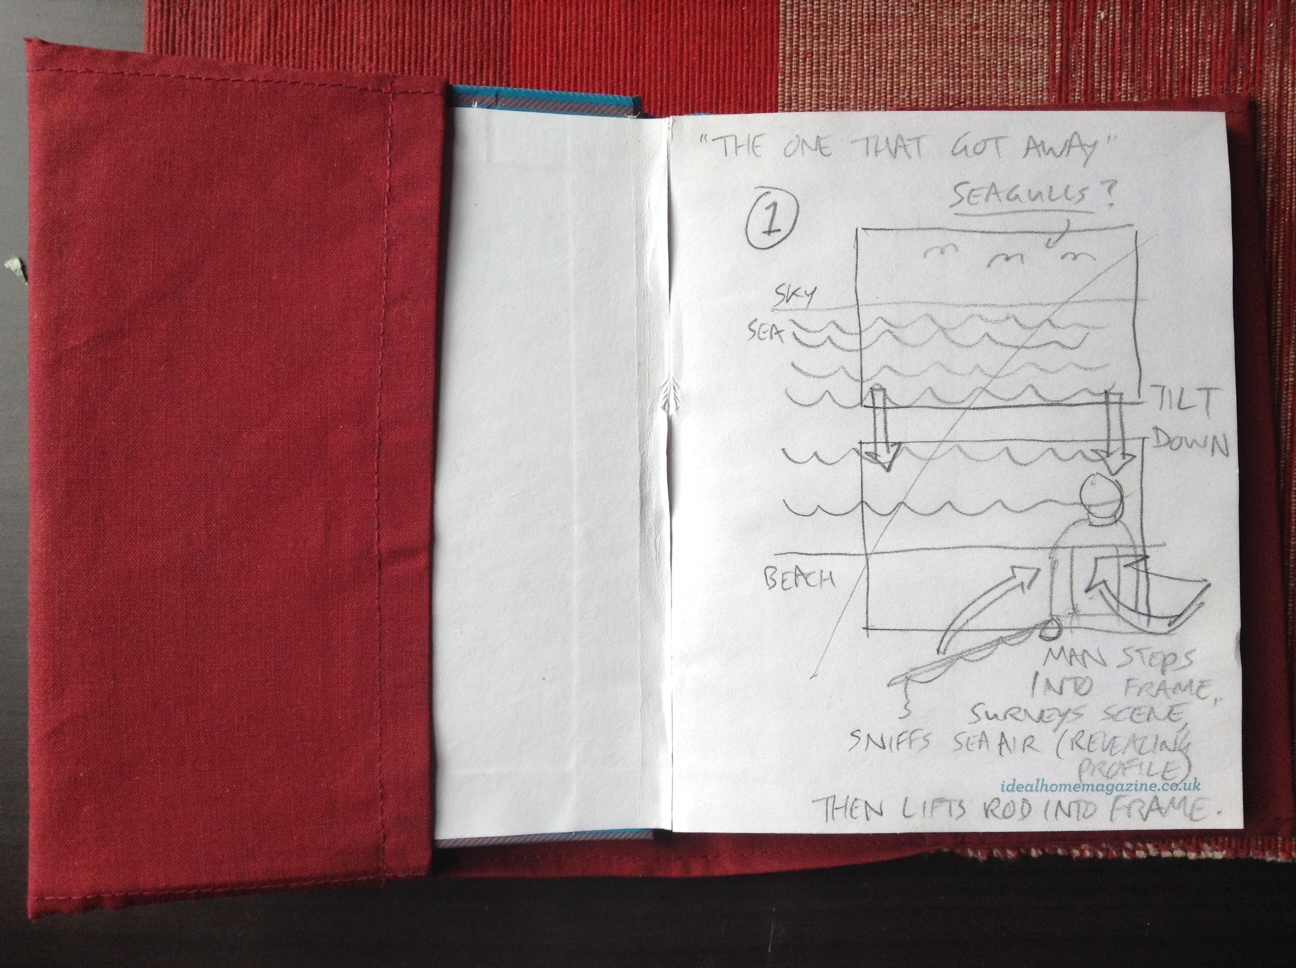
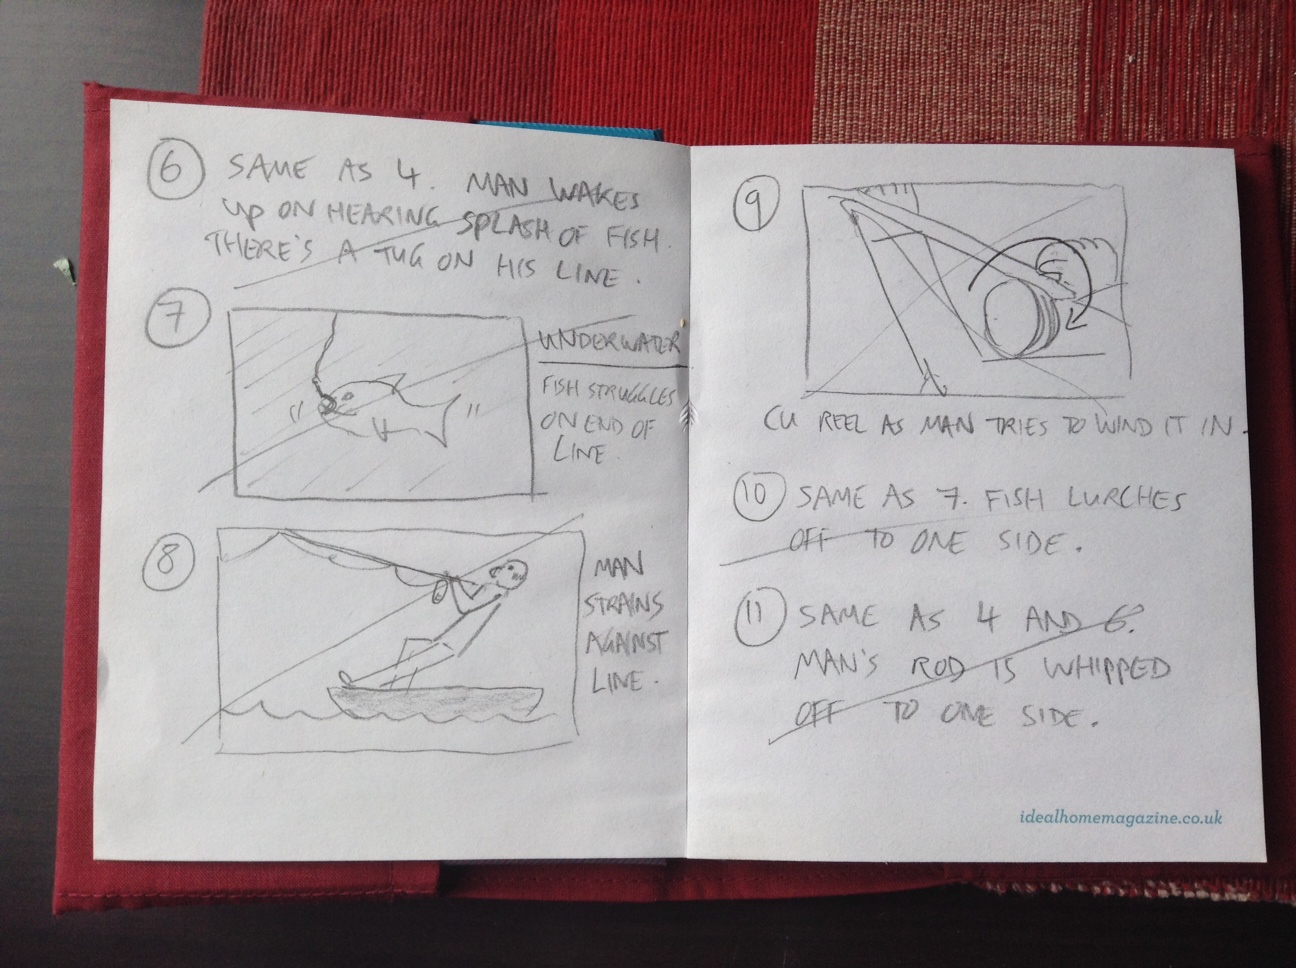
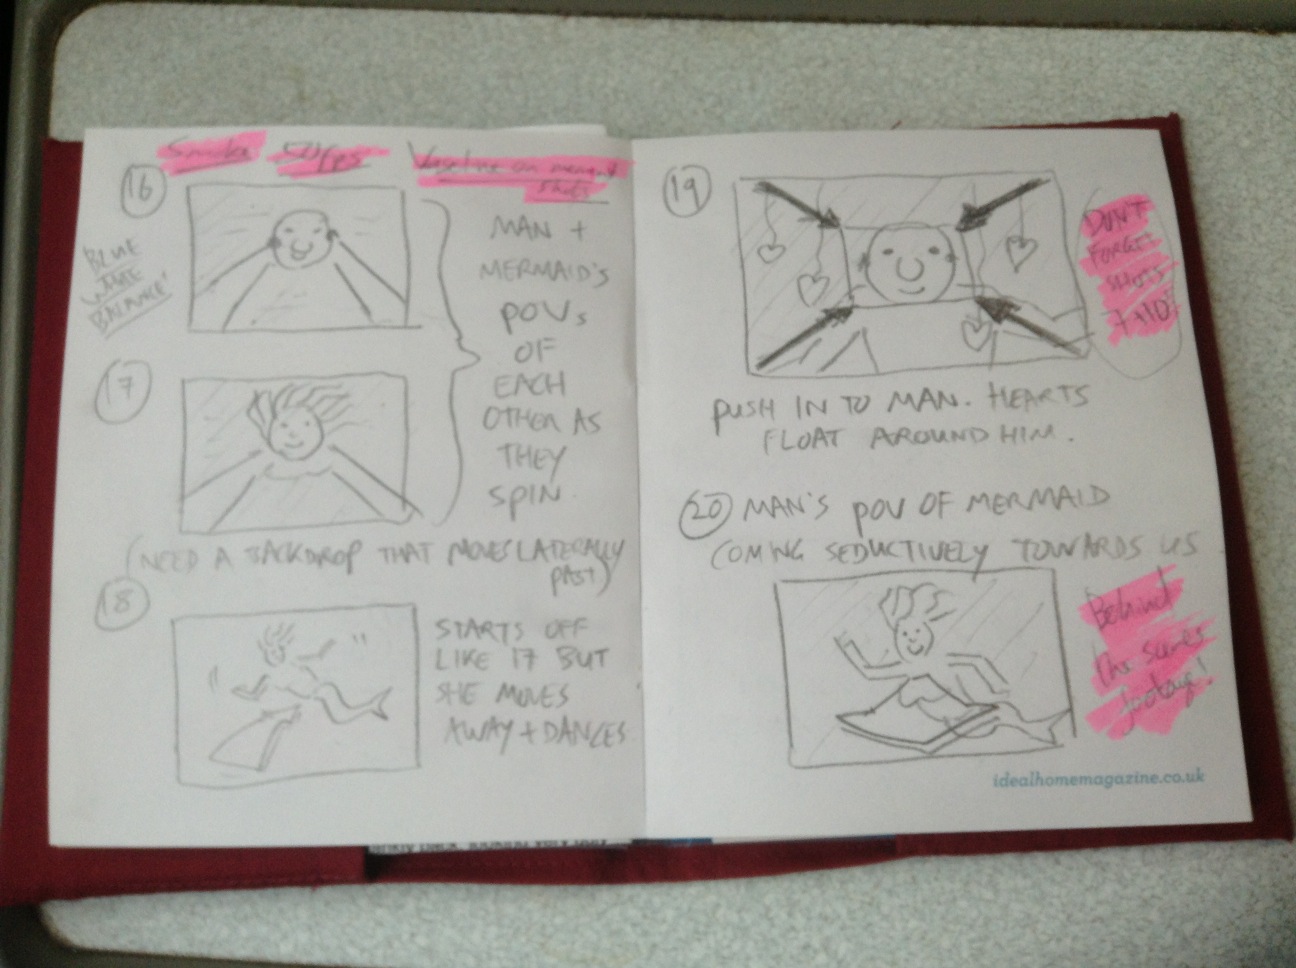
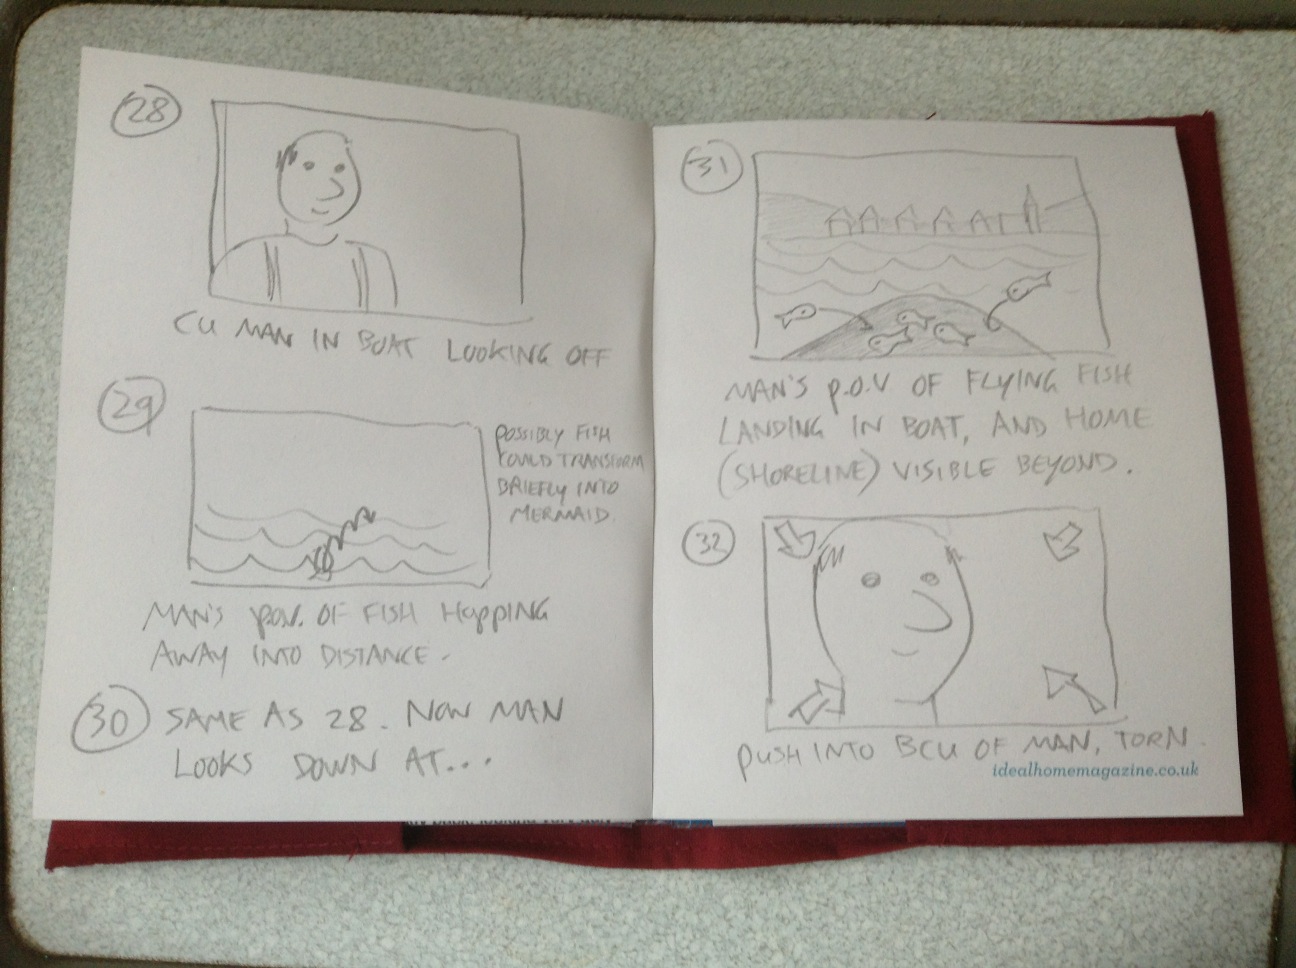
The One That Got Away: Storyboards
The One That Got Away, the puppet film I submitted to Virgin Media Shorts this year, didn’t have a script. Instead, I storyboarded it from a brief outline written by my wife Katie. Here are those storyboards.


Lighting The One That Got Away

Here’s a breakdown of the lighting choices made on my little puppet film, The One That Got Away. You can watch the film over at the Virgin Media Shorts website. If you enjoy it, please use the tweet button to register your vote and help us get a place on the shortlist.
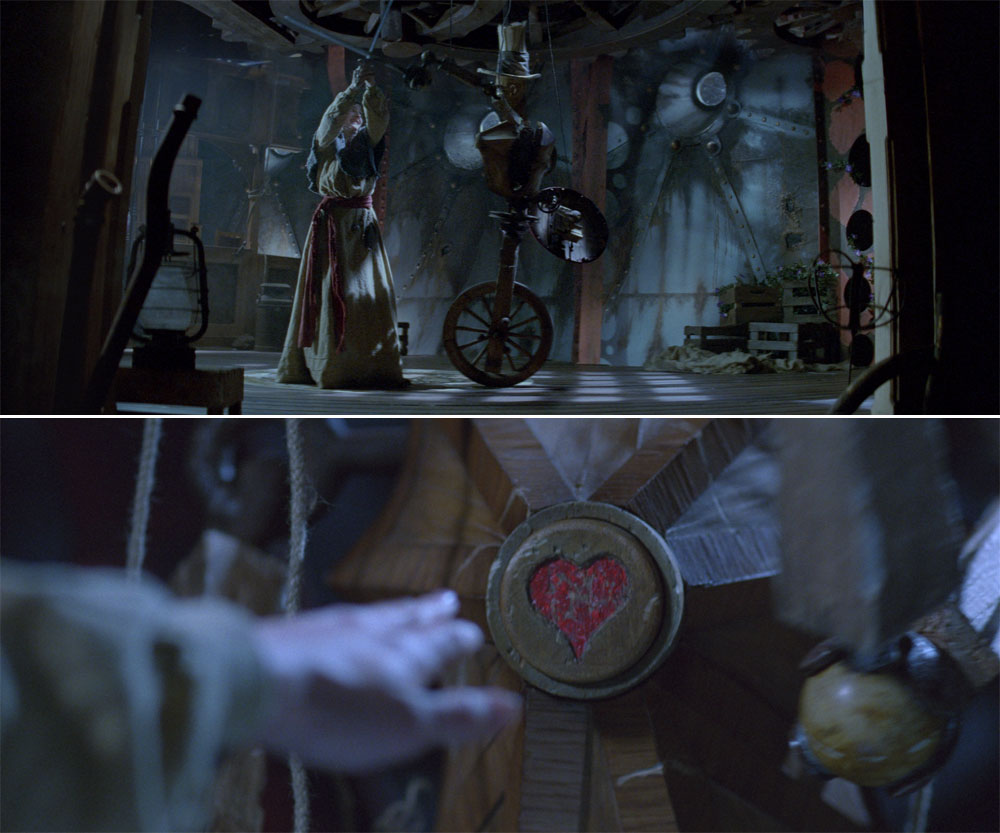
Conventional wisdom with marionettes is probably to go for very flat lighting with no backlight, to make it as difficult as possible to see the strings. But on TOTGA I wanted to embrace and celebrate the tactile, handmade look of the puppets and sets, so I chose a traditional three-point lighting scheme that imparted depth and made no effort to hide the strings.
Normally I shoot wide open – typically f1.8 – on my DSLR, but as the puppets were small the depth of field would have been ridiculously shallow at that aperture. Instead I lit the set very brightly (about 3KW of tungsten horsepower in our cramped living room – not very pleasant during a heatwave!) and stopped down to around f4.
Daylight

For the daylight scenes I used my three open-face tungsten Arrilites: a 1K poking over the top of the backdrop for backlight, another 1K with tough-spun diffuser off camera left for key, and an 800W bouncing off the ceiling for fill. This last lamp was gelled blue to suggest ambient skylight.
I tried to simulate the camerawork that would have been used had this been shot at sea with real actors, so:
- the camera bobs up and down in wide shots, as if Henry’s boat is being shot from another vessel;
- the camera and boat are fixed in close-ups, with the background bobbing up and down, as if we’re now shooting on a tripod in Henry’s boat.
Underwater

The underwater dream sequence was all shot dry-for-wet at 50fps for a watery slow motion. Using Magic Lantern I dialled in a cool white balance of around 2500K, and pumped in smoke to add diffusion and suggest currents. (I wished I’d use a lot more smoke, but we would have all choked to death.)
I used just two light sources: the 1K backlight, now gelled blue, and the other 1K, bounced off sheets of silver wrapping paper tacked loosely to the ceiling. This is exactly the same method I used for a scene in Ashes – flapping a piece of card at the wrapping paper makes the light ripple in a very watery way.

The underwater lighting scheme was a lot darker than the daylight one, so I opened up to around f2, giving a crazily shallow depth of field that worked nicely for this dream sequence. The mermaid’s close-ups were all shot through a CD case for an old-school soft-focus look.
I would have liked to have shot this sequence handheld, but a lack of crew meant I had to lock the camera off so I could operate the smoke machine, fan the wrapping paper and move little fish through frame.
Sunset
When Henry awakens from his dream, the fish escapes and he gives chase. Orange gels and lens flare were used to suggest the sun getting lower in the sky, until finally Henry and his quarry are silhouetted against the solar disc itself. This is a domestic 100W tungsten bulb peeking over the back wave. The only other light source is a row of six more such bulbs under a sheet of orange gel, just behind and below the first one.

As the scene moves into twilight, the first bulb is removed and the orange gel over the other six is replaced with a purple one. The 1K backlight is turned back on (possibly it would have been more realistic without, but I’m just a sucker for backlight) and some pink fill is provided by placing a sheet of Minus Green gel on the other 1K and bouncing it off a reflector.

That’s all folks. Please do tweet about the film (being sure to include the title The One That Got Away and the hashtag #VMShortsVote for it to count as a vote) and click here to watch the behind-the-scenes featurette if you missed it.
5 Things to Do with a 5-in-1 Reflector
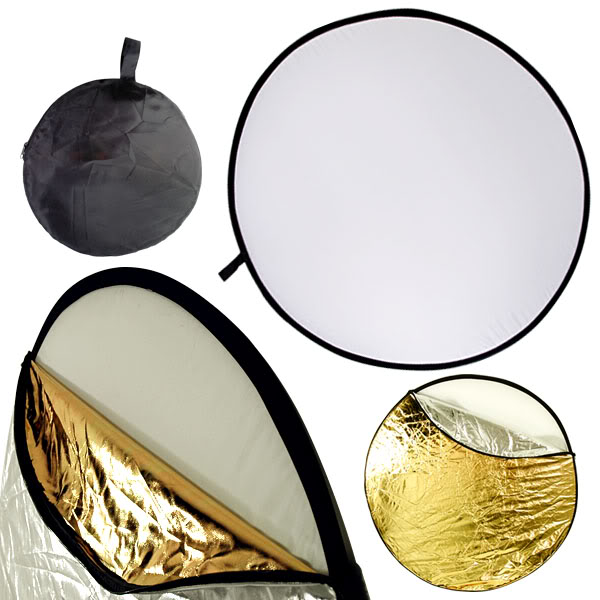
Reflectors are incredibly useful tools, whether you’re a one-man crew or a DP on a big set. And with a 5-in-1 reflector costing only around £10 on Amazon there’s really no excuse not to own one. Here are some of the things you can do with one of these:
- On a cloudy day, use the SILVER side to bounce light into the shadows on your subject’s face.
- On a sunny day, use the WHITE side for the same purpose (the silver side would be bright enough to make the subject squint) and to put a nice white reflection in the subject’s eyes.
- To simulate firelight, bounce a lamp off the GOLD side of the reflector and wobble it gently.
- Use the BLACK side for negative fill, useful when shooting in a room with white walls to get some shape and definition back into your subject’s face.
- Strip the reflector down to the TRANSLUCENT WHITE centre and rig it on a C-stand above the subject’s head to reduce and diffuse harsh sunlight.

Girl and a Scar: Using Lighting to Help Tell a Story Arc
Whatever position you occupy on a film crew, you are always a storyteller. Everyone is working to build and enhance the narrative and emotional threads which will engage the audience.
Cinematography is certainly no exception, and on the recent shoot for Dave Cave’s dark fantasy Girl and a Scar, my task was to take the lighting of an interior location on a journey which mirrored that of the titular Girl (Ileana Cardy), starting from a place of heightened realism, building to a crescendo of crazy and then finally returning to normality. It was a great visual script, describing candelight, daylight seeping in through cracks in boarded-up windows, wind and lightning, so there was plenty to get my creative juices flowing.
(Check out Girl and a Scar’s Facebook page. Lighting package courtesy of Dave Morgan.)

Above is the wide shot from the opening scene. I’ve used a classic cool/warm colour contrast between the moonlight and the candlelight. The windows of the house were supposed to be boarded up, so the barn doors of the 650W tungsten fresnel (gelled with full CTB) off camera right are fairly narrow to create the streak of light on the back wall. A second blue-gelled 650W fresnel is behind the frosted door on the left, providing a bit of depth and suggesting another window or hole in the roof.
The candlelight is provided by an orange-gelled 300W fresnel hidden behind the corner of the fireplace to the left of screen. The difficulty with candlelight is always matching the angle the light should be coming from, and in particular hiding the shadow of the candle itself, which in reality would not exist. We solved the problem in this instance by splattering dark wax over the shadow on the top of the cabinet. A dimmer was used to flicker the 300W appropriately.

Above is the third interior scene, and one of my favourite shots in the film. To kick up the stylisation a notch I’ve used flags to make the streak of light on the back wall a little harder-edged.
This shot is a good example of how effective side lighting can be. There are no light sources on the camera side of the subject at all; it’s all coming on from the side and slightly behind, leaving the camera side of her in darkness. We call this dark side of a subject the “down side”, and it’s always more interesting to have this side be the one facing camera.
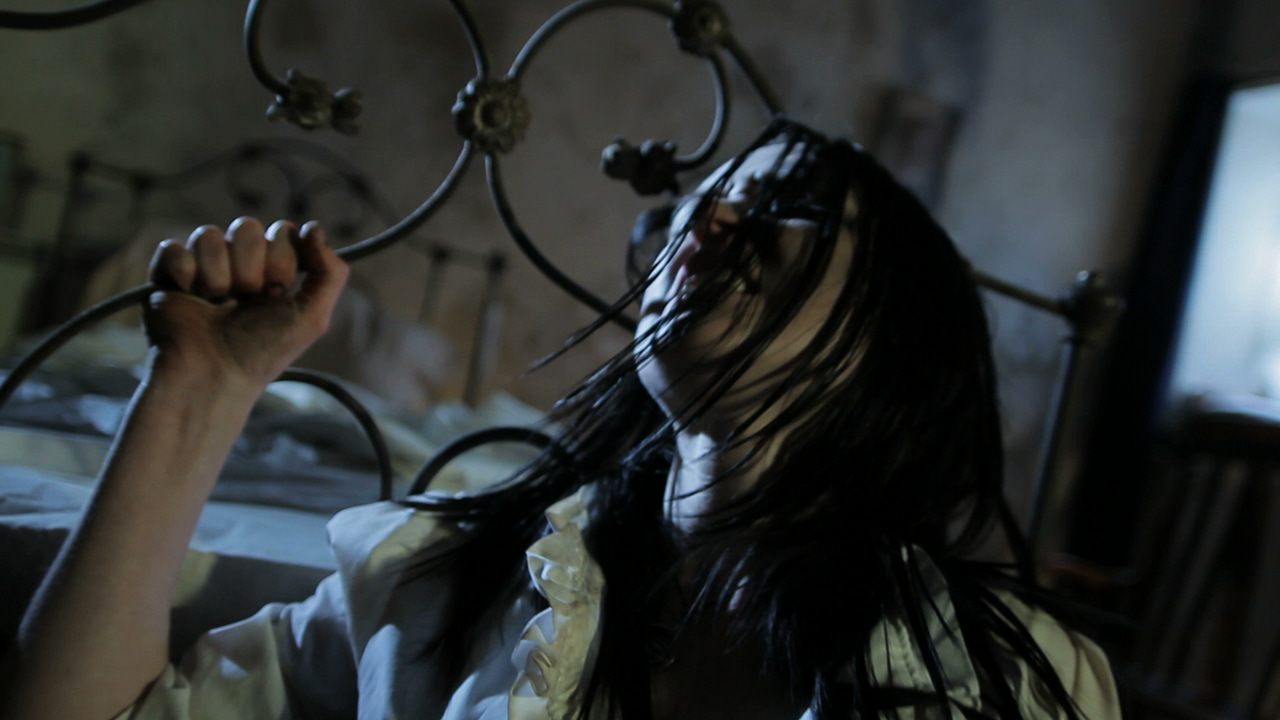
Above is the scene which represents the height of weirdness in the story. There are two things I’ve done to make the lighting more stylised. Firstly I’ve introduced some green light, motivated by an off-screen doorway. This combines with the make-up and a fantastic performance from the actress to enhance the character’s sickness. Secondly I’ve adjusted the blue-gelled 650W fresnel that was behind the frosted door in the first scene. It’s no longer bouncing off the wall in that back room – instead it’s pointed directly at the talent with the door now open. This creates a strong, steely backlight. Combined with a dutched handheld camera, the overall effect is suitably unsettling.

The scene ends with the curtains of the room’s main window opening to bathe the Girl in light as she comes out of the other side of her dark journey. To enhance the natural light that would come in when the curtains were opened, I bounced a fresnel off the ceiling and ran it through a dimmer board so it could be faded up as the curtains parted. Another 650W was placed outside the window, positioned exactly behind the talent’s head to give her a halo of light and create lens flares when she moved her head to reveal the light. (The lamp itself can’t be made out on camera because it’s so bright.)
So that’s an example of how cinematography can serve narrative and character. How have you used light to tell the story?