Distribution and the M&E (Music and Effects) Mix

The Japanese cover of Soul Searcher / Blade X

While in Japan recently, I was finally able to get hold of that country’s version of my 2005 feature film, Soul Searcher. I thought this would be a good opportunity to talk a little bit about international distribution and the mysterious M&E mix.

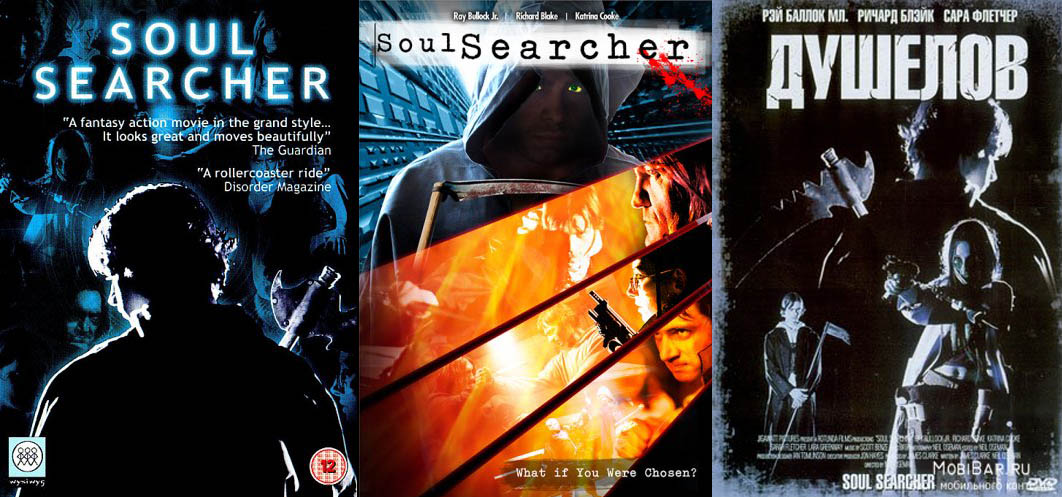
The story of an ordinary guy who gets trained to be the new Grim Reaper, Soul Searcher was picked up for distribution by a small UK company called Wysiwyg Films (now defunct). After releasing it on DVD in the UK, they sold all the foreign rights (much to my chagrin) to American sales agents Loose Cannon. Loose Cannon put out a US DVD, aiming to misleadingly tap the horror market by adding a splash of blood to the cover art, along with a stock photo of a random hooded guy with glowing eyes.

Loose Cannon then sub-sub-licensed the rights to five other territories: Benelux, Russia, Argentina, Thailand and Japan. Russian pirates hilariously dubbed the film into their own language (see some clips here), but the only territory to officially dub rather than subtitle the movie was Japan.

Presumably because of the film’s numerous martial arts fights, the Japanese distributors paid more for the film than any other country: $24,750. I know this from the Loose Cannon sales reports that were eventually forwarded to me by Wysiwyg. The only reason I know anything else about the Japanese release is from extensive googling (using the actors’ names as search terms proved most fruitful) which led me to the Amazon.jp page for the DVD a few years ago.

At first I thought I’d made a mistake. The cover art displayed on the page was completely new to me, showing an unfamiliar man holding a huge sword (a weapon never used by Soul Searcher’s hero). Beneath that was the title, in both Japanese and English: Blade X. It was only after Google Translating the page that the customer reviews confirmed this was indeed my very own Soul Searcher. Perhaps unsurprisingly, the reviews complained of the film’s lack of Wesley Snipes, the lack of correlation between the movie’s scythe-wielding hero and the cover’s sword-bearing imposter, plus many other flaws that are common to the English version!

Sadly, this is how low budget film sales work. The distributors know that the films are unlikely to generate much positive word of mouth, so they resort to tricking consumers into buying them with misleading covers and references to more successful films.

Left to right: the UK, US and Russian covers for Soul Searcher
Left to right: the UK, US and Russian covers for Soul Searcher. The Russian one is my favourite.

Anyway, when I saw that Amazon’s tech specs listed a Japanese audio track, I was desperate to get my hands on the DVD. But I could never find a seller who would import it for less than an eye-watering £40, so I waited, and in June this year I finally visited Japan and bought a copy.

But how does dubbing work? Well, amongst the delivery materials that a sales agent will require when you sell them your film will be an M&E mix – that’s Music and Effects. What this means is that you supply a version of the film which contains music, sound effects, foley, atmospheres, everything except the dialogue. This is one of the reasons for the existence of foley (footsteps, clothing rustles and other mundane sounds added to the film in postproduction); if you relied on the footsteps recorded along with the dialogue on set, those footsteps would disappear when you muted the dialogue tracks to produce the M&E mix.

Some of the buses in the Logic mix of Soul Searcher

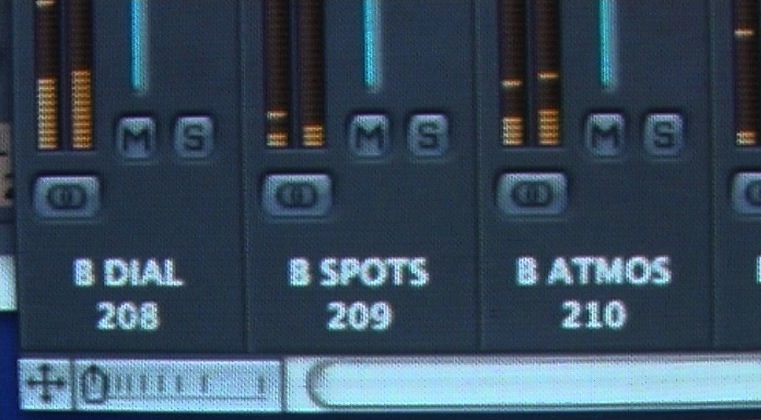
It’s always worth running off an M&E version when mixing a feature, whatever you feel its chances of achieving distribution are. Trying to create an M&E track after the fact, when the mixer has moved on to other projects, the source files may no longer exist, etc, etc, is likely to be a real headache. Instead, take five minutes in your mixing session to mute the dialogue tracks and bounce it out.

Along with the M&E mix, sales agents will require a dialogue list – essentially a transcription of the film, so it can be translated ready for dubbing or subtitling.

The following video compares some clips from Soul Searcher, showing the original English versions, followed by the M&E track, then the Japanese dub.

The Japanese distributors made a good job of dubbing Soul Searcher. As far as I can tell, the voice cast seem to give decent performances, and the mixer has blended everything carefully together. I wonder how much this dub cost them? Undoubtedly, factoring in the manufacturing and advertising costs, and the $24,750 they paid to Loose Cannon for the rights, they will have spent more on the film than my investors and I did in making it (£28,000).

If you want to know more about distribution contracts, check out my post on what to look for in one, and for the full story of Soul Searcher’s financing, expenditure, and distribution revenue, look no further than this exhaustive, no-holds-barred video…

Distribution and the M&E (Music and Effects) Mix

24fps or 25fps?

Menu

It’s a common dilemma in the UK for filmmakers: do you shoot at 24 or 25 frames per second? Until a couple of years ago, I would have said 25 every time, but with DCPs and Blu-rays now about, and most TVs capable of handling a range of frame rates, the answer is not so clear-cut. Unlike aspect ratio or shooting format, the decision has no discernible creative impact on your project, merely a technical one. And it’s so easy to convert between the two that it often feels like it makes no odds. Nonetheless, to help anyone on the horns on this dilemma, here’s my round-up of the respective advantages of each frame rate.

The Case for 25fps

  • If you need to record to any kind of tape format at any point in your process, 25fps is what you need.
  • The same goes for PAL DVDs.
  • If your film is going to be broadcast on UK TV, it will be transmitted at 25fps.
  • Since your camera’s running in sync with the UK mains supply’s alternating current, you don’t need flicker-free ballasts for your HMIs. Having said that, pretty much every time I’ve hired an HMI, it’s come with a flicker-free ballast as standard anyway.
  • If you’ve made a 25fps feature film that isn’t quite long enough for distributors to classify it as a feature, the extra running time you squeeze from exhibiting it at 24fps might make the difference.

The Case for 24fps

  • For maximum compatibility, Digital Cinema Packages should be authored at 24fps.
  • The same goes for Blu-rays. (Blu-rays do not technically support 25P, but they support 50i, which can contain progressive 25fps content. However, discs authored to the 50i spec apparently will not play on most US machines.)
  • If you shoot at 24fps and need to convert to 25fps for any reason, your film will become 4% shorter, making it that extra bit pacier and able to squeeze into a shorter slot at a film festival.
  • If shooting on film, your postproduction facilities will be much more comfortable with 24fps material. We really freaked out our lab on The Dark Side of the Earth by shooting 25.
  • Many traditional film projectors will only run at 24fps.

Can you think of any other factors that I’ve missed?

I’d say the balance has tipped in favour of 24fps. However, I think you’ll find that many people in the UK (outside of the celluloid world) are still more comfortable with 25…. for now.

24fps or 25fps?

Making a Digital Cinema Package

The finished Stop/Eject DCP. Not as cool as a roll of 35mm.

Now that huge reels of 35mm film are all but obsolete, Digital Cinema Packages (DCPs) are the new means of getting a film to a cinema. Many top film festivals will only screen off a DCP or 35mm print, and in terms of picture and sound quality and compatibility it is your best option for screening at theatrical venues in general. Much has been written about how you can make a DCP at home for nothing, but having just gone through the process myself for Stop/Eject I’m going to round up some of the best sources of information I came across and enlarge on the area of disc formatting which hasn’t been too well covered elsewhere.

To ensure maximum compatibility of your DCP you need to:

  • convert your film to 24fps if it isn’t already at that frame rate
  • use a standard 2K aspect ratio, 2048×1080 or 2048×858
  • put it on a disc that is EXT3 formatted
  • supply that disc in a Cru Dataport DX-115

I’ve spoken to filmmakers who have ignored many or all of the above and still run their DCPs successfully in cinemas, but I decided to play it safe and do all of the above, except the Cru Dataport, which was a little too expensive. Instead I bought a 500GB LaCie Rugged USB drive and put my DCP on there. Read Knut Erik Evensen’s excellent blog post on DCP delivery for more info on Dataports and USB compatibility.

The formatted drive as seen in Ubuntu, with the DCP files copied over
Step 5: the formatted drive as seen in Ubuntu, with the DCP files copied over

So, here is the process I went through. I was starting out with 25,409 uncompressed 16-bit TIFF files representing each individual frame of Stop/Eject, and six mono 24-bit linear PCM WAV files for the 5.1 surround soundtrack. The TIFFs were in 1080P (1920×1080) letterboxed to an aspect ratio of 2.35:1.

  1. First of all I used Photoshop to batch convert all the TIFFs to the 2048×858 aspect ratio. This is actually 2.39:1 rather than the 2.35:1, so it meant cropping a sliver of the actual picture off the top and bottom, not just the black bars, as well as enlarging the picture slightly. It took my poor iMac about 12 hours to convert the 25,409 frames. I’m sure there’s quicker batch conversion software out there than Photoshop if you hunt around though.
  2. Next I used a free piece of audio software called Audacity to slow down each of the six audio files by 4% so that they will match the images when they run at 24fps. (Stop/Eject was shot and edited at 25fps.) Thanks to Matt Cameron’s blog for this tip.
  3. Then I downloaded and ran OpenDCP, the brilliant free software that actually creates the Digital Cinema Package for you. It’s very simple to use, but check out the help Wiki and Danny Lacey’s seminal blog post to guide you through it. The end result was six files: four XML files and two MXF files, one for sound and one for picture. Encoding at the default bitrate of 125mb/s, which the Wiki says is more than good enough for 2K at 24fps, Stop/Eject’s DCP was just under 17GB, so about 1GB per minute.
  4. Now the tricky bit – copying those six files onto an EXT3 formatted drive. EXT3 is a Linux file system, and is not supported by MacOS. So I downloaded Ubuntu, a free operating system which does support it. (Choose the 64-bit download unless you have quite an old computer.) The downloaded file is a disc image (.ISO) which you can burn to DVD using Disk Utlity (found in the utilities sub-folder of MacOS’s Applications folder). Then restart your Mac, with the DVD still in the drive, and hold down C when you hear the chimes. This will boot up your Mac in the Ubuntu operating system. (You can release C when you see the black screen and Ubuntu logo.)
  5. Once Ubuntu was running, I right-clicked the LaCie Rugged in the list of drives in the lower left of the desktop and chose format from the contextual menu. To get more than the default options, I clicked Disk Utility in the dialogue box that came up. I could now select EXT3 as the file system (leaving the other settings at their default values). When I clicked format, Ubuntu didn’t seem to be doing anything, but after a few minutes the Disk Utility showed that the volume had been created. I could then close the Disk Utility, and drag and drop the six DCP files from another hard drive (MacOS formatted) onto my newly EXT3 formatted LaCie. Apparently you can put these files inside a folder if you want, but again to be extra safe I put them in the root directory.

After completing the DCP I took it to the Courtyard, my local arts centre, where head projectionist Simon Nicholls was kind enough to let me test it. To my very pleasant surprise it worked perfectly, uploading at about real time via the Doremi server’s USB 2 socket and playing shortly afterwards with superb sound and picture quality. Much as I love celluloid, the ease and cheapness of this process are breathtaking, the purchase of the hard drive being the only cost. I’ll let you know how I get on running it at other cinemas.

Making a Digital Cinema Package