20 Facts About the Cinematography of Mad Max: Fury Road

cars

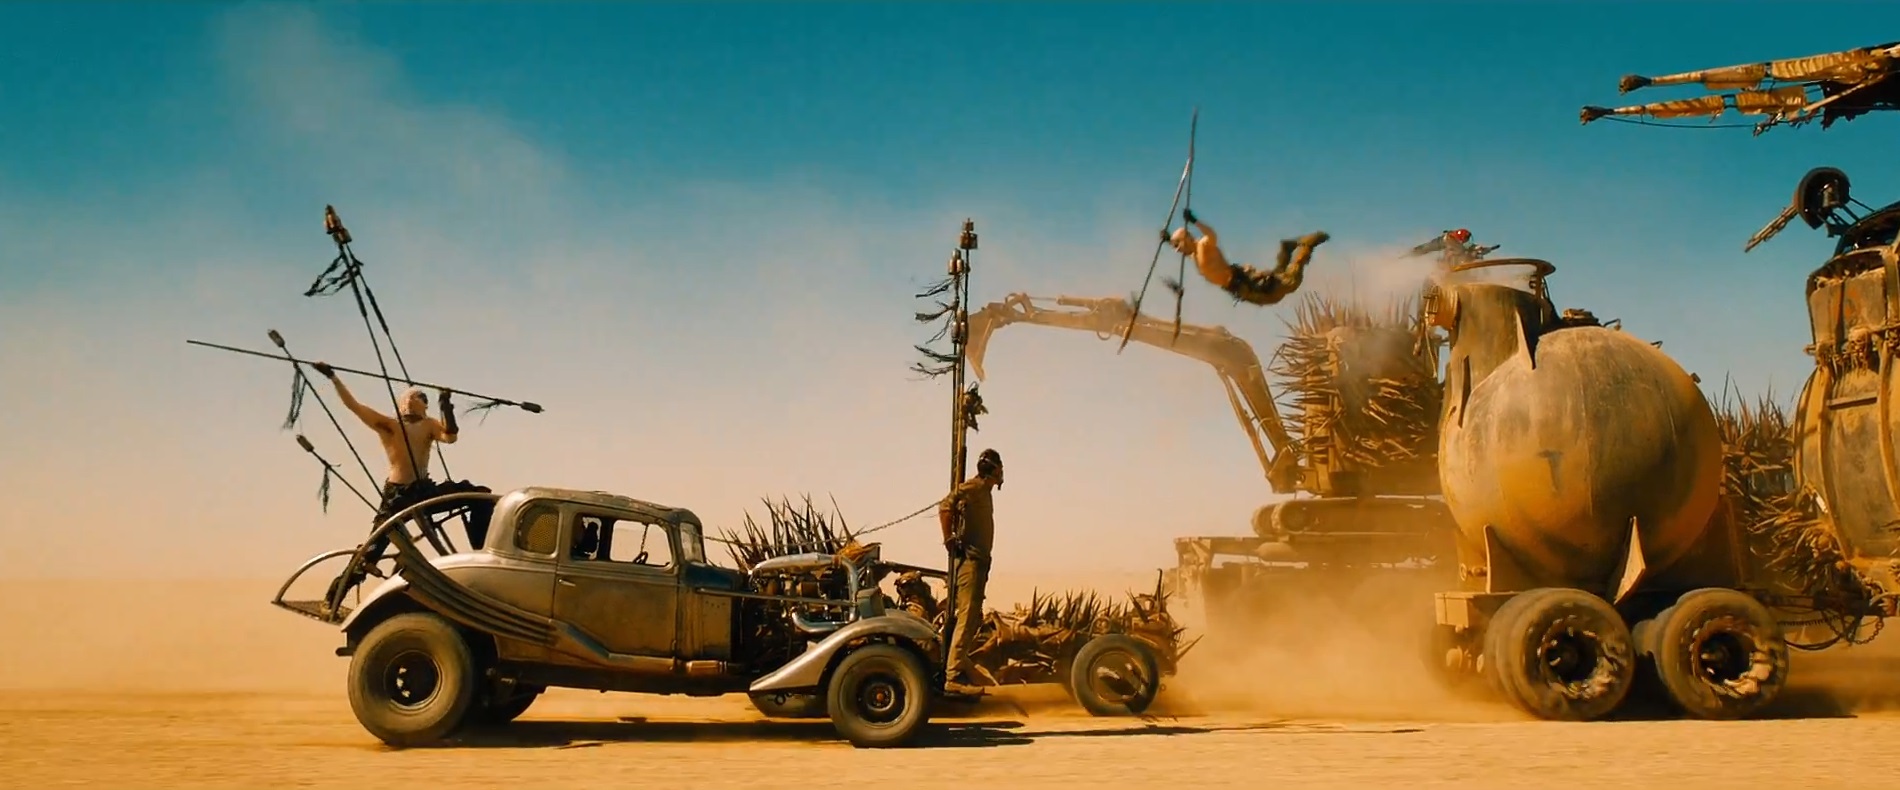
The Australian Cinematographers’ Society has released a video of a two hour talk by Fury Road DP John Seale, ACS, ASC. It’s a fascinating watch, with lots of interesting info and some dry Aussie wit; more than once Seale talks about “taking to the drink” when things got tricky!

Watch the video here. (Embedding is disabled.)

John Seale, ACS, ASC

Here are the most interesting points I took from it, with a few extra details added from American Cinematographer’s article on Fury Road:

  1. The team spent years developing a new 3D camera based on a sensor built for the US military. Director George Miller wanted something rugged enough to survive dusty desert work and small enough to fit into the truck cabs. Camera tests revealed it had only five stops of dynamic range, nowhere near enough to capture detail both outside and inside the cabs in the same frame.
  2. The film was ultimately shot on Arri Alexas (four Ms and six Pluses) and converted to 3D in post. Absolutely no consideration to the 3D format was given during shooting.
  3. When early footage failed to please DIT Marc Jason Maier and his meters, Seale agreed to downrate the Alexa from its published 800 ASA to 400 ASA. The subsequent footage was deemed technically correct by Maier and made Seale much more comfortable that he was recording what he thought he was recording in terms of exposure.
  4. Dailies were rendered with two different LUTs: the standard Rec 709 and a custom one designed to emulate a one-light celluloid work-print. This was for the benefit of Seale, for whom Fury Road was his first digital movie.
  5. Canon 5D Mark IIs with the Technicolor CineStyle profile were used as crash cams. Sky replacement had to be executed on many of the 5D shots to remove banding, presumably caused by the small colour space.
  6. Olympus and Nikon DSLRs were used a little as well.
  7. For close-ups of Max escaping the Citadel early in the film, a Blackmagic Cinema Camera with a Tokina 11-16mm zoom (a combination I used frequently on The First Musketeer!) was rigged on a Movi.
  8. The film was lensed predominantly on zooms, with a few Super Speed primes kept on standby for when the daylight was running out.
  9. Custom-built 15mm and 16mm primes were used inside the cab of the War Rig. The lenses’ hyperfocal distance had been adjusted so that everything from 0′ to 9′ (i.e. everything inside the cab) would be in focus.
  10. Lighting and camera rigs hung from the roofs of the vehicles had to be stripped back because of the shadows they cast. Instead, platforms were rigged on the sides of the trucks, and a track-and-pulley system was built into the War Rig’s cab’s ceiling from which cameras could be suspended.bts
  11. Scenes in the cab were shot at T5.6, with strips of LEDs mounted on the ceiling and on the pillars between the front and rear doors to bring up the actors inside.
  12. Day-for-night scenes were overexposed by two stops so that characters in the shadows could be lifted in the grade, if necessary, without noise.
  13. The film was storyboarded early on, but a script was only written when the studio demanded it!
  14. Miller wanted to shoot everything single-camera, including action, but Seale began sneaking in with extra cameras and soon convinced his director of the efficacy of this method.
  15. Much of the film was shot as Poor Man’s Process, or “Sim Trav” as Seale calls it.
  16. In post, Miller chose shots with camera shake that he liked and had that shake digitally applied to other shots.
  17. Miller decreed that the subject of the shot should always be framed centrally. This allowed him to edit faster, because time wouldn’t be lost on each cut as the viewer searched the width of the anamorphic frame for the subject.
  18. Extensive use was made of two Edge Arms. An evolutionary step up from Russian Arms, these are cameras mounted on robotic arms which are in turn mounted on pick-up trucks.
  19. Other vehicle rigs included custom-built buggies with Alexa Pluses mounted front and rear, and a “Ledge” mount which was a 30′ truss tower built on the back of a truck, allowing high angles without the need for drones or helicopters.
  20. Leaf blowers were used, via flexible pipes, to keep sand off the lenses in moving shots.

It’s interesting to hear how laid-back Seale is. He gave his focus puller a great degree of leeway in choosing the lens package, and let his DIT, gaffer and operator handle the technical side of recording and exposing the image. This level of trust in his team must give him tremendous capacity to focus (pardon the pun) on the creative side of his job without worrying about the details.

I’ll leave you with the EPK B-roll from Fury Road…

20 Facts About the Cinematography of Mad Max: Fury Road

Soft Wrapping Backlight on The Shepherds’ Play

The Second Shepherds’ Play, the medieval comedy which I lensed last week, had several scenes in “the Mak Shack”, the grotty home of the antagonists. The set posed an interesting problem in that – apart from the door, which wouldn’t always be open – it contained no light sources. No windows, no lamps, no candles. Given the wordy script and the tight schedule, I needed to light it in a way that would not need tweaking between set-ups, and which would work for one particular scene that director Doug Morse wanted to film as a single developing shot showing about 180º of the set.

One option would have been to posit a window in the off-screen 180º, but that would have resulted in very flat illumination, all lit from the front like a photo taken with flash.

I wanted to create a cross-backlighting set-up (Lighting Technique #2), but it was impossible to hang lamps above the rear of the set without damaging the location’s brickwork. So instead I had Colin rig two pieces of Celotex (matte silver bounce board) above the back two corners. Into these I fired Source Fours, peeking over the front walls of the set. These lamps, designed for theatre use, are relatively cheap to hire and have lenses and cutters which provide a great deal of control over where the light does and doesn’t go, meaning you can ensure it all goes onto a bounce board and nowhere else. Using Source Fours as sources for bounced light is a tip I picked up from David Vollrath‘s talk in the Big League Cine Summit in January.

Here you can see a Source Four Junior peeking over a wall at the front of the set to hit a bounceboard at the back.
Viewed from the back of the set, both Source Fours can be seen firing over the front walls.
Viewed from the back of the set, both Source Fours can be seen firing over the front walls. The lamps are high enough that their beams go completely over the heads of the talent.
This reverse angle shows the two bounce boards above the back corners of the set, which you'll have to trust me is directly underneath them in the darkness.
This reverse angle shows the two bounce boards above the back corners of the set, which you’ll have to trust me is directly underneath them in the darkness.

This set-up enabled me to execute the 180º handheld shot without casting any shadows myself, and without the actors casting hard shadows (which would have been inappropriate for a period piece), while still primarily lighting the downsides of their faces to give depth and shape to the image. It also provided backlight to ensure the actors stood out.

I’ll leave you with some frame grabs (courtesy of Grandfather Films) and a floor plan of the set-up. Visit Grandfather Films on Facebook for more on the Shepherds’ Play.

longtake2

longtake1a

longtake1

Diagram2

Soft Wrapping Backlight on The Shepherds’ Play

The First Musketeer: Join the Thunderclap

10947237_703907393062608_5512442058382461441_n

In September 2013 I was lucky enough to serve as the director of photography on The First Musketeer, an action-adventure web series based on the famous novels of Alexandre Dumas. Telling the story of how Athos, Porthos and Aramis first meet and become the heroes we know and love, the show was shot in castles and chateaus in the Lot and Dordogne regions of southern France.

On Monday June 1st, at 8pm BST, the series will be released free on YouTube at www.youtube.com/TheFirstMusketeerWeb

A web series, more than any other medium, lives and dies by its viewing figures. You can help the show succeed and go forward into future seasons by sharing that link or better still by joining our Thunderclap campaign. Thunderclap is a service which automatically posts a one-off message to your Facebook, Twitter and/or Tumblr accounts at a prearranged time, so at 8pm on June 1st a huge number of people will all hear about The First Musketeer simultaneously. Follow this link to join the Thunderclap.

The other exciting news is that both The First Musketeer and Ren will be part of the New British Web Series panel at London ComicCon tomorrow, Friday May 22nd. I’ll be joining actress Jessica Preddy on the panel to represent The First Musketeer. I hope to see some of you there!

The First Musketeer: Join the Thunderclap

Giving Yourself Somewhere to Go

On the recce for The Second Shepherd's Play. Photo: Douglas Morse
On the recce for The Second Shepherd’s Play. Photo: Douglas Morse

As a cinematographer, it can often be tempting to make your shots look as slick and beautiful as possible. But that’s not always right for the story. And sometimes it can leave you nowhere to go.

Currently I’m shooting The Second Shepherds’ Play, a medieval comedy adaptation, for director Douglas Morse. The story starts in the mud and drizzle of three shepherds’ daily drudge, and in a Python-esque twist ends up in the nativity. The titular trio develop from a base, selfish, almost animalistic state to something much more divine.

So, much as my instincts filming the opening scenes yesterday were to have a shallow depth of field and bounce boards everywhere to put a sparkle in the shepherds’ eyes, this wouldn’t have been right for this stage of the film. We had to have somewhere to go, so I shot at around f9 all day with unmodified natural, overcast light. As we get towards the end of the story – we’re shooting roughly in story order – I’ll start to use eyelight and more sculpted illumination and reduce the depth of field, as well as switching from handheld to sticks.

Grading episode one of Ren

Similarly, grading episode one of Ren the other day, it was important to keep things bright and cheerful, so that later episodes could be colder and darker by comparison when things go wrong for our heroes. And playing the long game, I lit Ren herself with soft, shadowless light for most of the first season, so that as she develops from innocence to more of an action heroine in later seasons, her lighting can get harder and moodier.

Like all heads of department on a production, DPs are storytellers, and it all comes down to doing what’s right for the story, and what’s right for that moment in the story.

Giving Yourself Somewhere to Go

How to Cut a Behind-the-Scenes Featurette

Cast&Crew_RAU_4273_20Sept_Unger copy copy
Cameras roll on the set of Kate Madison’s web series, Ren. Photo: Richard Unger

Despite my big plan to quit editing last year, I somehow ended up cutting nearly all the behind-the-scenes material for Ren, including a dozen YouTube videos and 30-odd exclusive set diaries which have just been released for sale. Guess I just have a fondness for BTS stuff.

Brett Chapman shoots B roll on Stop/Eject as Hadrian Cawthorne looks on. Photo: Paul Bednall
Brett Chapman shoots B-roll on Stop/Eject as Hadrian Cawthorne looks on. Photo: Paul Bednall

So here are some tips for editing BTS videos for the web. Many of these apply equally to any talking-head-based documentary.

  • Plan for it before the shoot by lining up a competent BTS camera crew and being clear about the kind of material you need. Here are some tips for shooting B-roll.
  • Start the edit by creating a new timeline and putting in some text generators with category headings you think you’ll want to cover, e.g. “plot”, “characters”, “casting”, “action scenes”, “concluding remarks”.
  • Watch through all the interview material. Every time you hear something you think you can use, dump it on the timeline after the relevant text.
  • Play back your timeline. You’ll immediately see that some of the material you’ve included is dull or repetitious. Whittle down the material until your timeline is only a little longer than you intend the finished piece to be. (I suggest 2-3 minutes should be your target length for a web piece.)
  • Pay attention to your in and out points. Don’t cut while someone is drawing breath – cut before or after. Beware of breathing time if you’re hacking someone’s sentences around. If your editing makes a couple of words sound unnaturally close together, interpose a few frames of atmos or silence. If you cut someone off in the middle of a sentence, firstly be sure the intonation doesn’t make it sound cut off, then add in some silence or atmos before the next clip, and paper over the edit with B-roll as the interviewee’s face will often give away that they’re not finished speaking.
  • Speaking of papering over the talking heads with B-roll, it’s time to do that now. I often start with the obvious stuff. Clearly shots of the fight scenes being rehearsed need to go over the actors talking about fight scenes. Then I’ll move onto the less obvious stuff – an actor talking about their character might go with almost any shot of that actor on set, so I’ll see what’s left at the end.
  • Avoid cutting in the middle of quick movements – an arm going up, a head turning- unless that action will be continued in the next shot. This goes for the talking heads too – don’t cut on or close to a blink. Also avoid cutting on an emphasised or particularly loud syllable, because this too will jar.
  • Take out the text generators and replace them with a few seconds of B-roll that doesn’t have any interview sound under it. This gives you dividers between topics without blatantly signposting them, and allows the audience a breather. You could bring up the audio on the B-roll, or put in a bit of music. Usually it’s best for this B-roll to serve as an introduction to the topic that’s up next. For example, if the next topic is “what it was like working with the director”, kick it off with B-roll of the director explaining the next scene to the actors. After hearing him or her talk for a sentence or so, fade down the audio and bring in the interview sound.
  • Get some music from somewhere like incompetech.com, if your composer hasn’t started work yet, and cut opening and closing montages of B-roll to it.
  • Put in your lower thirds and opening and closing titles. If the video’s going on You Tube, it’s a good idea to allow for annotations linking viewers to other videos on your channel. Do not put in credits – sorry, but no-one cares who made this.
  • Watch the whole thing through and try to take out another 10-30 seconds. Remember, pace is everything. Do not give people the slightest excuse to stop watching.
  • Do a colour correction pass so everything matches.
  • Go through again balancing the audio. People start their sentences loudly and get quieter as their lungs deflate, so counter this by ramping the audio up over the course of the sentence. Use EQ filters if necessary to counter tinny or boomy sound, or reduce hiss or wind noise. See this Nofilmschool article for some handy audio tips. If any of the audio cuts are popping or clicking, put on a 1 frame cross fade. If you don’t have decent speakers, do this on every cut because you won’t know which ones are dodgy.
  • If any of the speech is still hard to make out – and remember that your viewers haven’t heard it a million times like you have – then subtitle it.
  • Watch it one last time to check everything’s smooth, then compress and upload it. You’re done!

If you’ve found this post useful, please consider supporting Ren by purchasing or sharing the trailer for the Daily Diary videos. Buyers get the first 7 videos now and the remaining 29 when the series is released this summer. They’re all different, some following the above pattern and others being much more candid, fly-on-the-wall affairs. There are plenty of bloopers, interviews and filmmaking tips to be enjoyed throughout. Or check out our free behind-the-scenes videos on YouTube.

How to Cut a Behind-the-Scenes Featurette

How to Correct Cosmetic Issues with Lighting

Redheads draw 800W eachEvery cinematographer needs to make the cast look good. Here are some quick tips for minimising blemishes and undesirable physical attributes. To any readers who have been lit by me, please don’t get a complex! These techniques can also be used to make someone who’s already flawless look even more amazing. Conversely, if you have a bad guy, or a character who needs to look ill, or a prosthetic monster make-up, you might want to do the opposite of what I suggest below.

  • Thinning hair – Avoid toplight and strong backlight, which will show up the scalp under the hair.
  • Wrinkles, spots and scars – Avoid lighting that will throw shadows from these features, e.g. cross-light (meaning light from the side). Instead put the key light as close to the camera as possible. Ideally use a soft source. If you’re still seeing shadows, add more fill.
  • Double chins, bags under the eyes, general appearance of tiredness – Use Health Bounce – a reflector placed under the talent’s face to eliminate shadows cast from above.
  • Small or deep-set eyes – Again, use Health Bounce. It will help get light into the eye sockets and put a sparkle of reflection in the eyeballs.
  • Weak jawline – Use three-quarter backlight (a.k.a. “kicker”) to create a rim along the jawline on one side.
  • Shiny skin – This may be a make-up issue, but you can help by using bounced light. Kinoflos, though they are soft sources, are amongst the worst culprits for creating shine.
  • Big nose – Keep the key light close to the camera to minimise the shadow the nose casts.

To learn more about lighting, check out my post on key light angles and my series of lighting techniques.

How to Correct Cosmetic Issues with Lighting