In today’s films, if a character is not human, chances are it will be created digitally. But in the latter half of the 20th century, as increasingly sophisticated audiences demanded more than a man in a suit, the art of puppetry blossomed in Hollywood. Artists like Stan Winston and Rob Bottin brought this art to its peak in the 80s and early 90s, before being usurped by computers. Today I’ve compiled a list of what I consider the ten greatest achievements of movie puppeteering. Some of them hold special places in my childhood memories; somehow, I can’t imagine that the digital creatures of today’s cinema will be cherished so fondly by the next generation.
10. E.T. (E.T. the Extra-terrestrial, 1982)

Evolved out of an abandoned sequel to Close Encounters of the Third Kind, E.T. was the highest-grossing film of all time until it was outdone by another Spielberg movie which can be found later on in this list. Like those in Close Encounters, E.T.’s alien was designed and built by Carlo Rambaldi, who also brought H. R. Giger’s eponymous Alien design to life for the 1979 sci-fi classic. Although he may appear to be a cross between a pretzel and a dog turd, the inexplicably cute E.T. was actually based on the faces of Albert Einstein and writers Ernest Hemingway and Carl Sandburg. While the head was animatronic, the body was generally occupied by one of two little people, or by Matthew DeMeritt, a twelve-year-old with no legs who walked around with his hands inside the creature’s feet. A miniature puppet was employed for at least one shot, as seen above being adjusted by ILM’s Dennis Muren.
9. Humongous (Labyrinth, 1986)
I don’t have enough fingers to count how many times I’ve seen this movie, and I love it every time. The imaginations of Brian Froud, Jim Henson and Terry Jones make for a potent combination of fantasy, wit, invention and silliness. Not to mention David Bowie in obscenely tight trousers, a treat for all the family. There are brilliant puppets throughout – the helpful worm, the brave canine Sir Didymus, the Wise Man’s mouthy hat, sundry goblins, and the mischievous Fireys (choreographed by Star Trek: TNG’s Gates McFadden and partly voiced by Red Dwarf’s Danny John-Jules, fact fans). But my favourite is Humongous. Having finally reached the Goblin City, Sarah (Jennifer Connelly) and her friends are faced by huge metal doors which slam together to form a hulking, axe-wielding, giant robot. Special effects supervisor George Gibbs designed a hydraulically actuated skeleton mounted on a boom arm on a dolly track hidden behind the creature. The limbs and head were operated by a single puppeteer in a telemetry rig that translated his movements to the puppet. A bit like Avatar, only the avatar in question was a real, 15ft tall character. James Cameron’s film seems pretty lame by comparison, huh?
 8. The library ghost (Ghostbusters, 1984)
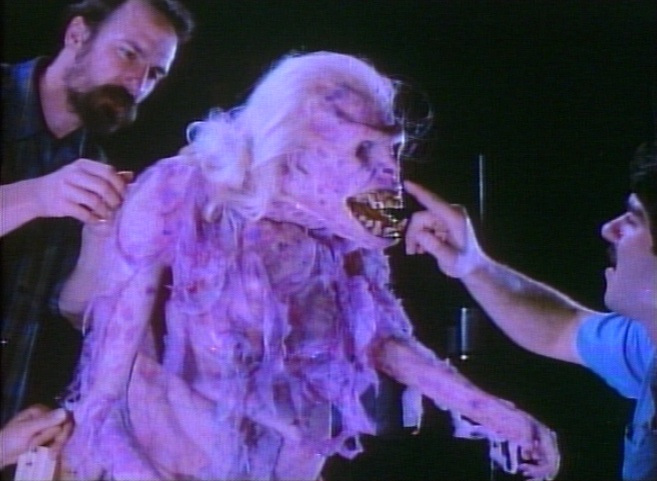
Despite only getting three seconds of screentime – the majority of the sequence using actress Ruth Oliver as the ghost – this puppet makes a big impact. As a kid I loved Ghostbusters for its sci-fi/horror elements; as an adult I love it equally for its comedy. The first act library sequence perfectly sets up both aspects, building up the suspense even amongst great lines like “You’re right. No human being would stack books like this.” Richard Edlund and his team at ILM built a waist-up puppet which could transform from a likeness of Oliver to a monstrously distorted apparition. It’s the movie’s first big scare and is quickly followed by one of its biggest laughs, as the proto-busters leg it unceremoniously. “That was your whole plan, ‘Get her’?”
 7. Spider-head (The Thing, 1982)
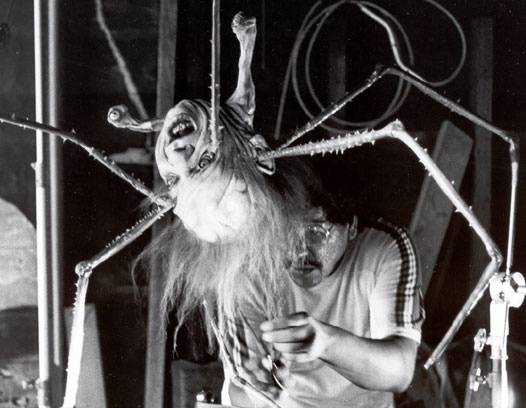
When making his sci-fi horror classic, John Carpenter was determined to avoid the “man in a suit” approach which had marred the movies of his childhood. To design and build the myriad puppets which would depict the titular thing in all its many guises, Carpenter hired Rob Bottin, who would go on to make the iconic Robocop suit and various exploding Arnold Schwarzeneggers for Paul Verhoeven. In The Thing’s most iconic – and most revolting – scene, the chameolonic alien is disguised as the prone form of Norris (Charles Hallahan). After munching off the arms of the doctor trying to revive him, the Norris creature’s head splits off from the body and falls to the floor. It then sprouts eight arachnid legs and two extra eyes on stalks and scuttles off across the room. In one of cinema’s great understatements, David Clennon’s Palmer deadpans, “You’ve got to be fucking kidding.”
6. The giant squid (20,000 Leagues Under the Sea, 1954)
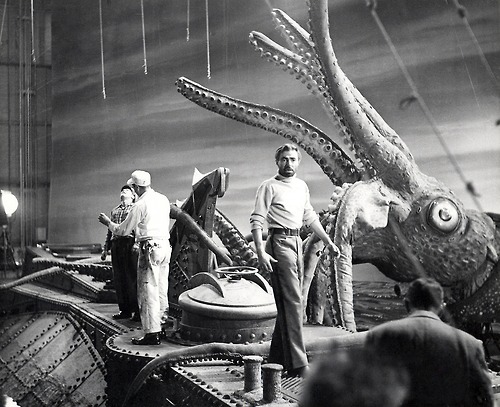
20,000 Leagues Under the Sea is a much-loved Disney classic from that era when every Jules Verne adaptation seemed to star James Mason. Probably the largest puppet ever made for a film at the time, the giant squid still impresses today. Its climactic attack on the Nautilus was originally shot at sunset with a calm sea, but the wires holding up the tentacles were too obviously visible. Walt Disney himself allegedly suggested the reshoot in dark, stormy conditions and the result was a much more dramatic and convincing sequence.
5. The alien queen (Aliens, 1986)
Say what you like about James Cameron, his understanding of and invention in the field of special effects is remarkable. Above is the proof-of-concept footage for the alien queen in his all-out-action sequel. As per Cameron’s idea, two stuntmen are hung from a crane, each operating one extended outer arm and one vestigial inner arm. The legs are moved externally by rods and the head of the finished creature would be hydraulic, operated via steering wheels from a nearby operators’ station. Built by Stan Winston Studio, and also directed in second unit photography by Winston himself, the queen takes the Alien mythos to a whole new level. What blows my mind is how Cameron and Winston were able to hide or frame out the rods, rigs and cables in an era before digital wire removal. Certain wide shots, notably in the egg chamber and the climactic battle with Ripley’s power loader, were realised as quarter-scale miniatures. These were puppeteered by a combination of rods from beneath the model sets and cables running to a bank of levers off camera. (I also love the miniature alien puppet that was used in Alien 3 which moved beautifully but was ruined by terrible compositing.)
4. The T-rex (Jurassic Park, 1993)
Inspired by the 40ft hydraulic ape built for John Guillermin’s 1976 King Kong remake (which would probably be on this list if I’d ever seen the film), Steven Spielberg embarked on Jurassic Park hoping to use full-size animatronics to realise all of his dinosaur shots. This of course proved impractical, and we all know about the ground-breaking CGI that ultimately supplied the wide shots of the animals. But the majority of the dinosaur shots in the movie were indeed full-size animatronics built and operated by Stan Winston and co. The main T-rex puppet weighed over six tonnes and was mounted on a flight simulator-style platform that had to be anchored into the bedrock under the soundstage. Although its actions were occasionally preprogrammed, the prehistoric monster was generally puppeteered live. Winston and his crew built a three-foot T-rex armature packed with sensors; when this armature was moved, the full-size Rex would duplicate the movement in real time.
3. Yoda (The Empire Strikes Back, 1980)
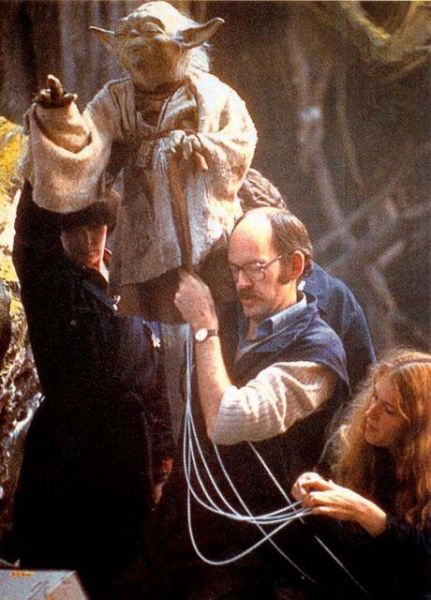 Ranks so highly in this list Yoda does, because of his cultural impact. Terrified that audiences would reject a muppet character in a live action film, George Lucas, producer Gary Kurtz and director Irvin Kershner were. Brave enough to try it had they not been, attempted The Dark Crystal and Labyrinth might never have been. (Go on to produce The Dark Crystal, Kurtz would, while exec produce Labyrinth, Lucas would.) Sculpted by makeup artist Stuart Freeborn, Yoda was, and bears a distinct resemblance to him, the puppet does. Help build the puppet, the Jim Henson Company did, around a cast of performer Frank Oz’s arm. The puppetry to accommodate, built four feet above the floor, the Dagobah set was. For voicing and performing Miss Piggy, most famous Frank Oz was. Intend to replace Oz’s voice Lucas did, but work so well with his puppetry it did, that remain Oz’s voice did.
2. Audrey II (Little Shop of Horrors, 1986)
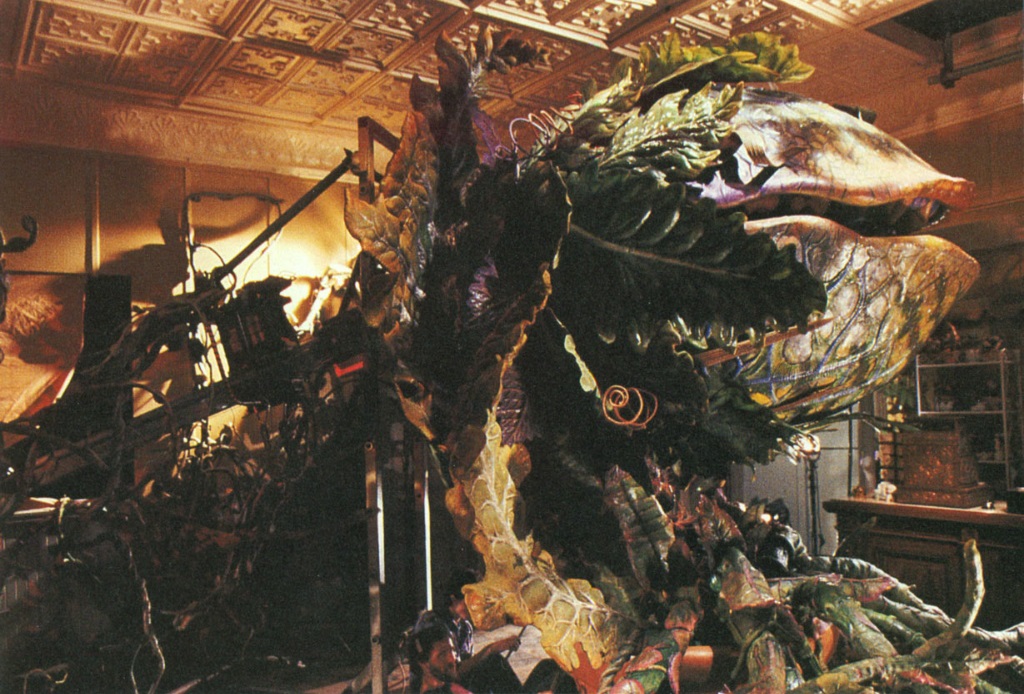
Aside from E.T., Audrey II is the only puppet on this list that properly lip-syncs – not just flapping its jaw, but actually forming the correct mouth shapes for each syllable – a fiendishly difficult task for a puppet. Animatronics expert Lyle Conway, a veteran of The Dark Crystal and the Muppets franchise, came on board to design and build the five iterations of Audrey II, ranging in size from a few inches to over twelve feet. Conway then hired a trio of lip-sync puppeteers fresh from Return to Oz (another great puppet movie which narrowly missed this list) who rehearsed for three months. They were joined by additional crew – as many as 70 for the largest plant – to manipulate the vines and control the gross body movements. One of those puppeteers was concealed inside the head, but the rest worked via five-foot-tall levers hooked to cable controls in a sweaty space beneath the set that resembled a manic convention of railway signalmen. So exhausting was the operation of the larger puppets that a physical therapist was hired by the production, and only a few lines of a song could be shot each day. Check out the film’s awesome original ending below.
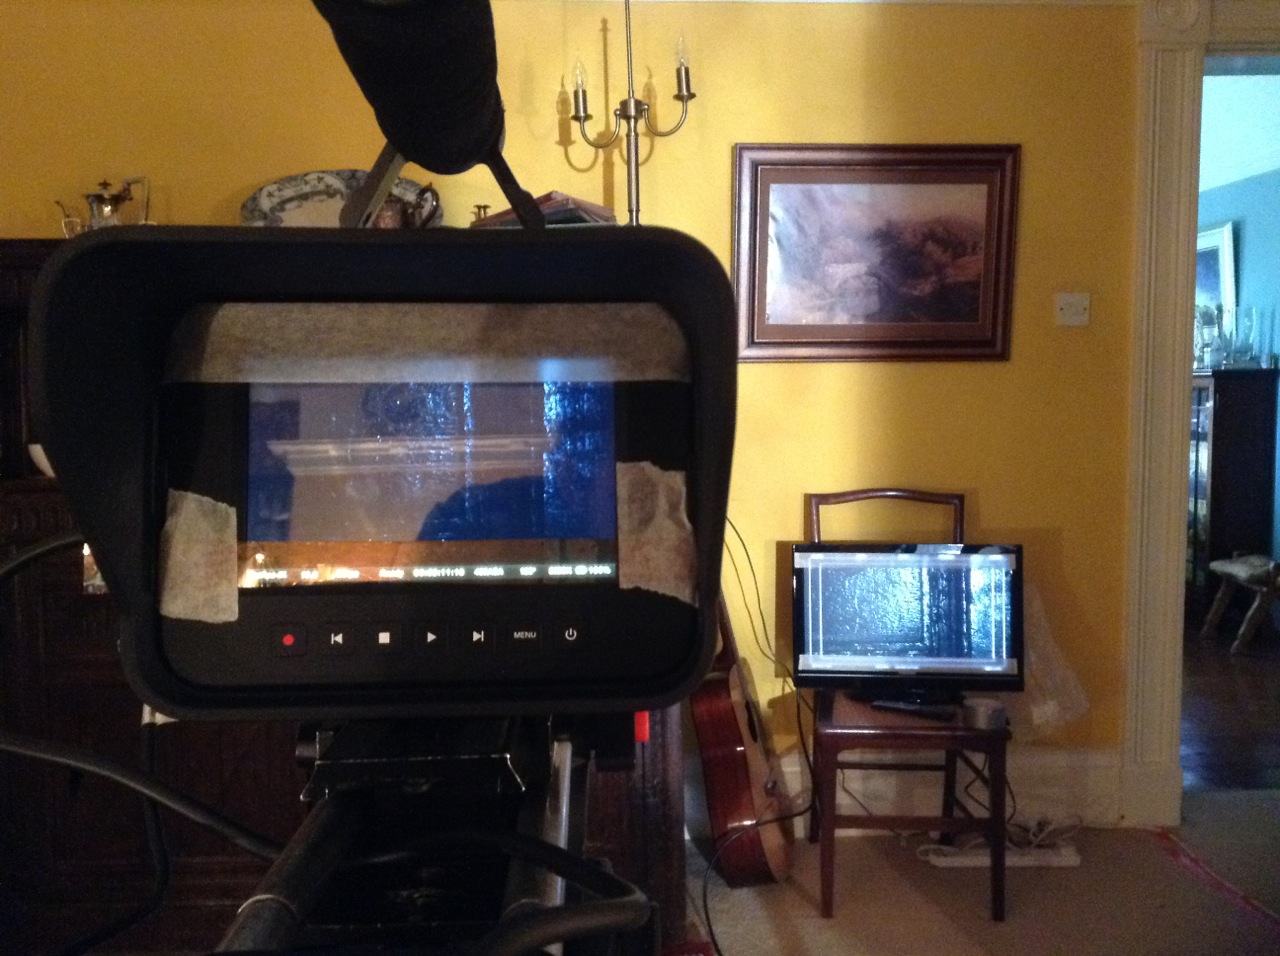
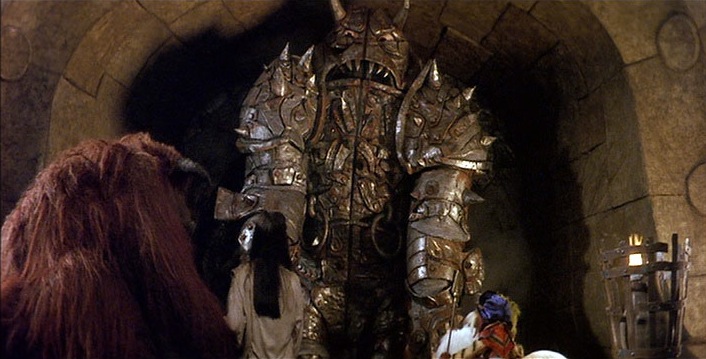
1. Everything (The Dark Crystal, 1982)
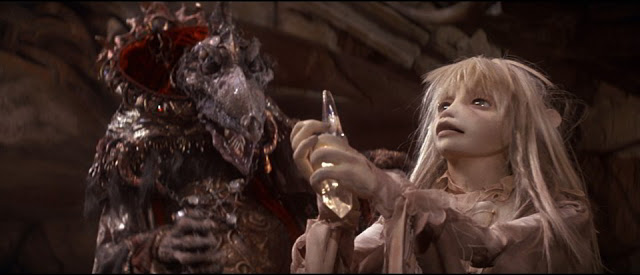
For me, filmmaking is all about imagination, and by that measure The Dark Crystal must be the greatest film ever made. In recent years there have been horrifying rumours of a 3D sequel mixing puppets and CGI, but mercifully this abomination seems trapped in development hell. There is something so very satisfying about a world which has been realised entirely through hands-on, physical means – you can feel the blood, sweat and tears. The performers of the creepy Garthim, for example, had to be hung on racks to rest at regular intervals, so heavy were their costumes. Skesis puppeteers went around all day with one arm extended above their heads (inside the puppet head and neck) and video monitors strapped to their chests so they could see what they were doing. A Swiss mime was brought in to choreograph certain characters, and to train the team of performers before the shoot, building up the physical stamina they would need. Directed by the two greatest movie puppeteers in the world, Jim Henson and Frank Oz, The Dark Crystal is a monument to the art of puppetry and remains to this day one of the most unique films in cinematic history.